recycled polar bear lantern - wwf · recycled polar bear lantern 1 hour all ages indoor fun what...
TRANSCRIPT
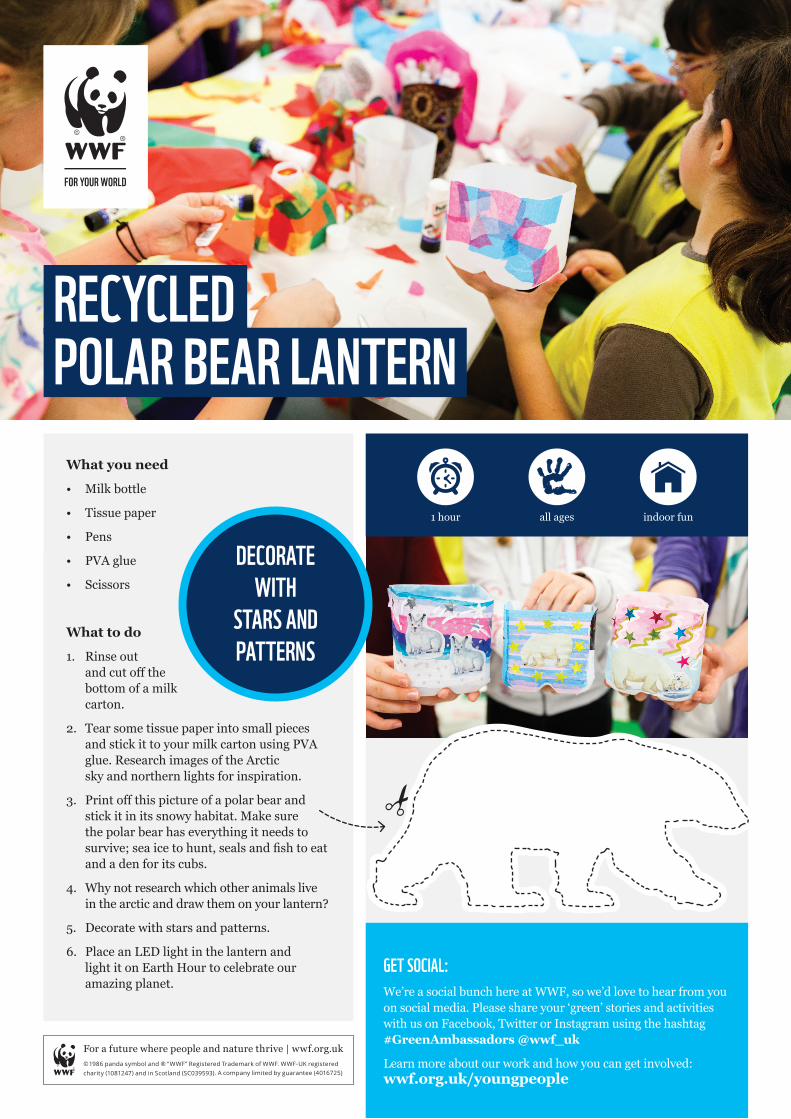
RECYCLED POLAR BEAR LANTERN
all ages1 hour indoor fun
What you need
• Milk bottle
• Tissue paper
• Pens
• PVA glue
• Scissors
What to do
1. Rinse out and cut off the bottom of a milk carton.
2. Tear some tissue paper into small pieces and stick it to your milk carton using PVA glue. Research images of the Arctic sky and northern lights for inspiration.
3. Print off this picture of a polar bear and stick it in its snowy habitat. Make sure the polar bear has everything it needs to survive; sea ice to hunt, seals and fish to eat and a den for its cubs.
4. Why not research which other animals live in the arctic and draw them on your lantern?
5. Decorate with stars and patterns.
6. Place an LED light in the lantern and light it on Earth Hour to celebrate our amazing planet.
DECORATE WITH
STARS AND PATTERNS
GET SOCIAL:We’re a social bunch here at WWF, so we’d love to hear from you on social media. Please share your ‘green’ stories and activities with us on Facebook, Twitter or Instagram using the hashtag #GreenAmbassadors @wwf_uk
Learn more about our work and how you can get involved: wwf.org.uk/youngpeople
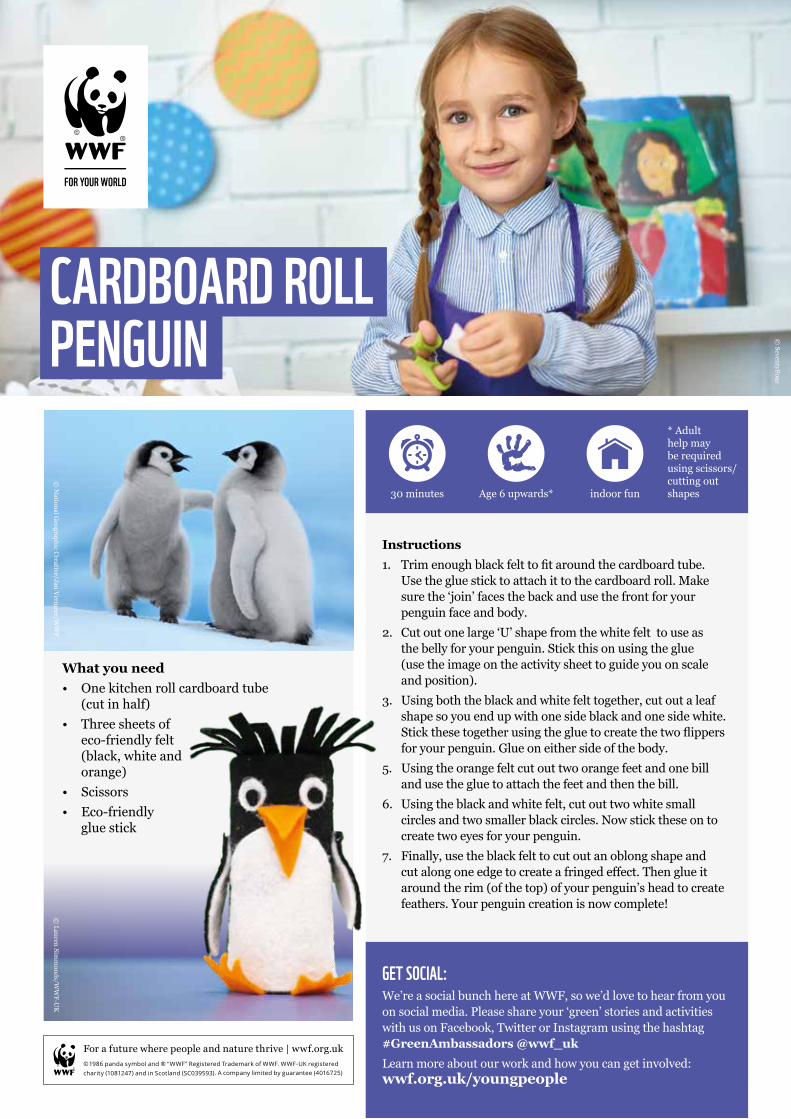
CARDBOARD ROLL PENGUIN ©
SeventyFour
* Adult help may be required using scissors/cutting out shapesAge 6 upwards* 30 minutes indoor fun
What you need • One kitchen roll cardboard tube
(cut in half)• Three sheets of
eco-friendly felt (black, white and orange)
• Scissors• Eco-friendly
glue stick
Instructions1. Trimenoughblackfelttofitaroundthecardboardtube.
Use the glue stick to attach it to the cardboard roll. Make sure the ‘join’ faces the back and use the front for your penguin face and body.
2. Cut out one large ‘U’ shape from the white felt to use as the belly for your penguin. Stick this on using the glue (use the image on the activity sheet to guide you on scale and position).
3. Using both the black and white felt together, cut out a leaf shape so you end up with one side black and one side white. Stickthesetogetherusingthegluetocreatethetwoflippersfor your penguin. Glue on either side of the body.
5. Using the orange felt cut out two orange feet and one bill and use the glue to attach the feet and then the bill.
6. Using the black and white felt, cut out two white small circles and two smaller black circles. Now stick these on to create two eyes for your penguin.
7. Finally, use the black felt to cut out an oblong shape and cutalongoneedgetocreateafringedeffect.Thenglueitaround the rim (of the top) of your penguin’s head to create feathers. Your penguin creation is now complete!
© Lauren Sim
monds/W
WF-U
K©
National G
eographic Creative/Jan Vermeer/W
WF
GET SOCIAL:We’re a social bunch here at WWF, so we’d love to hear from you on social media. Please share your ‘green’ stories and activities with us on Facebook, Twitter or Instagram using the hashtag #GreenAmbassadors @wwf_ukLearn more about our work and how you can get involved: wwf.org.uk/youngpeople

SHOW THE LOVE – GREEN HEART ANIMALS
Photo © Tristan Few
ings
This February, people across the country will show the love for all the things that are affected by climate change. Join The Climate Coalition and turn hearts green for valentine’s day. Create your own unique greenheart and wear or share to show you care about climate change.
What you need• Green felt, paper
or card • Scissors • Fabric glue • Buttons, sequins
and anything else you have in your craft box!
all ages3o minutes
What to do1. Cut out three large
green hearts. Panda1. Cut out 4 medium sized
dark green or black hearts for the panda’s ears and eye patches.
2. Cut a little heart for the nose.
3. Glue these to your first large green heart and add a smile and eyes.
4. DecorateLion 1. Cut into the edges of the
second large green heart or add wool or string to create a lion’s mane.
2. Cut a smaller heart and glue it, upside down onto the centre of the larger heart.
3. Add a heart nose then eyes.
4. Add a powerful message to show you care about climate change.
Fox 1. Cut out two sets of
hearts, one set for the eye markings and one set makes the ears.
2. Repeat but with the hearts slightly smaller.
3. Add eyes and a heart shaped nose.
4. Personalise!
indoor fun
WHAT OTHER ANIMALS COULD YOU MAKE USING HEART
SHAPES; HOW WOULD YOU MAKE A BUTTERFLY OR
A PENGUIN?
GET SOCIAL:We’re a social bunch here at WWF, so we’d love to hear from you on social media. Please share your ‘green’ stories and activities with us on Facebook, Twitter or Instagram using the hashtag #GreenAmbassadors @wwf_ukLearn more about our work and how you can get involved: wwf.org.uk/youngpeople