recoil pads
DESCRIPTION
An informative article regarding the selection and installation of recoil pads to fine rifles.TRANSCRIPT
7/17/2019 Recoil Pads
http://slidepdf.com/reader/full/recoil-pads 1/3
Often taken for granted by hunters as chunks
of rubber to cap off the wooden butt stocks oftheir guns, recoil pads can actually improve
success while also making shooting more
comfortable.
For the professional gunsmith, tting recoil pads is a fairly
common job, but sometimes guys will want to have a go at
tting a pad themselves. While the job requires some specialist
knowledge and equipment it is not an impossible task for a
skilled craftsman, but there are a few pitfalls for the uninitiated.
PAD SELECTIONThere are different pad designs for different applications.
Curved pads are used for trap shooting, at-faced pads for
skeet and sporting clays, and slightly contoured ‘eld-style’
pads are a more universal design for hunting or target use.
The composition of the rubber used is also a factor to
FROM THE GUNSMITH’S BENCH
Fitting Recoil Pads
TECH-TALK
By Dean Maisey
consider. Some people like the ultra-soft sorbathane-type
pads, but they do have some drawbacks. As well as being a bitlike bubble gum to grind to nal shape, I have found that on
hunting guns the sorbathane material can become damaged
more easily than other pads. I have also found that the rubbery
material on some new-age pads starts perishing after only six
or seven years. Remington had this problem with their original
R3 pads and has since changed to another pad supplier.
I use Pachmayr pads predominantly as they are a great
product and a long-time industry standard. They are ably
represented in New Zealand by James Pain from C. R. Pain Ltd,
who is also the agent for Lyman Products. Over the years I
have tted many different brands of pads but Pachmayr is my
favourite. They are what I stock and recommend.
Other things to consider are the colour and the sort of use
the gun is going to get, such as hard hunting/eld use or just
target use on the range or sporting clays circuit. You need to be
assured that the pad will be durable enough and suitable for the
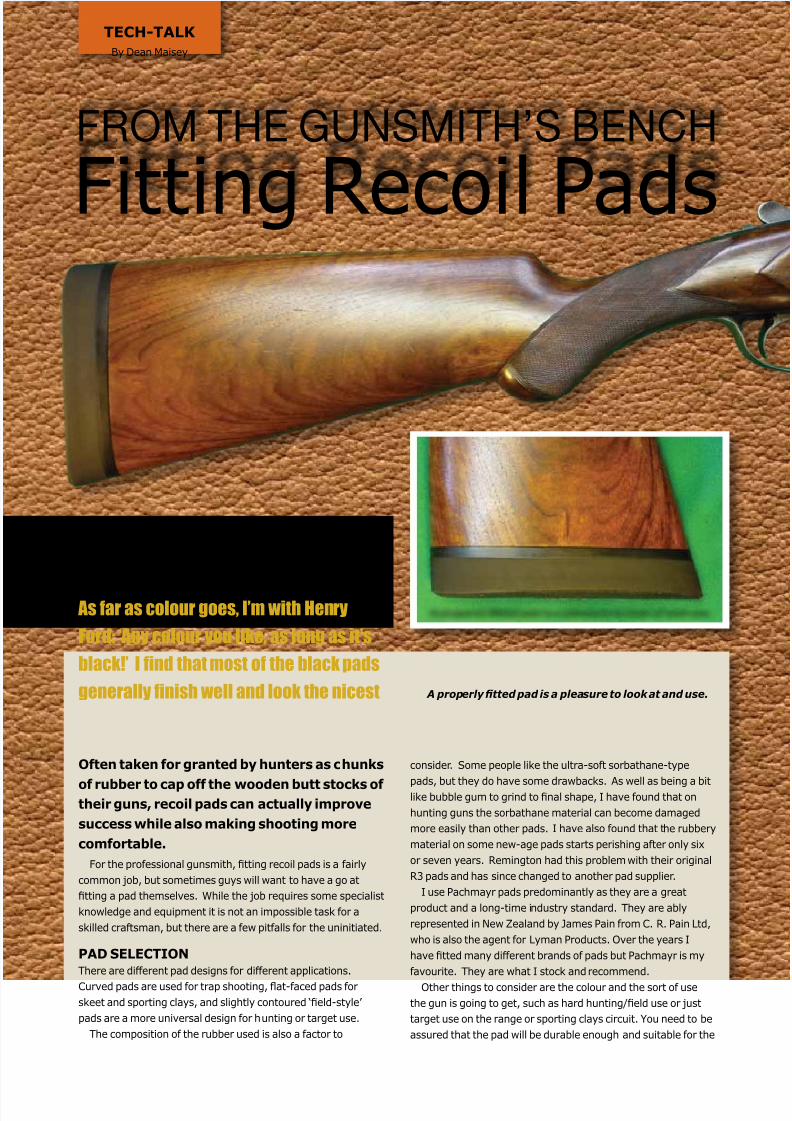
As far as colour goes, I’m with Henry
Ford: ‘Any colour you like, as long as it’s
black!’ I nd that most of the black pads
generally nish well and look the nicest A properly ftted pad is a pleasure to look at and use.
7/17/2019 Recoil Pads
http://slidepdf.com/reader/full/recoil-pads 2/3
gun’s main method of use. As far as colour goes, I’m with Henry
Ford: ‘Any colour you like, as long as it’s black!’ I nd that most
of the black pads generally nish well and look the nicest, but I
will t pads of other colours for customers if they want that. In
my opinion, any sort of rubber pad is superior to a hard plastic
or metal butt-plate. Have you ever leaned a shotgun up against
a wall expecting it to stay there and instead had the butt of the
gun slide out on the hard concrete or wooden oor, crashingthe gun to the ground? In most cases a rubber butt-pad would
prevent this – just one of the reasons to t a rubber pad.
TECHNIQUEThe workshop equipment you will need to perform a good
quality pad installation may be found in most wood-working
workshops. A ø300mm disc sander or 100mm-wide continuous
belt sander (with a suitable dust-extraction system) is the
major component. Various hand tools such as a scriber, drills,
screwdrivers and a bandsaw can also come in handy.
The grit size I use on the disc sander is 120, which produces a
nice nish. For mass production, most companies would rough-
shape the pad with 80 grit rst, for quicker material removal,
then switch to 120 or 150 grit to nish. The main trick with the
grinding operation is to keep the pad moving across the face
of the disc sander as you remove the material. Stopping even
momentarily will produce at spots on the surface of the rubber
pad, which are unacceptable. While these can be fairly easily
blended out and sanded smooth on the plastic base material,
it is just about impossible to hand-sand out at spots on the
rubber material on most pads. Some of the old-style or more
‘natural rubber’ pads can be a bit more forgiving in this regard.
Basically though, the goal is to get the nicest possible nish
straight off the grinder to minimise the hand-sanding required.Determining the nal ‘length of pull’ (LOP) is the rst thing
the gunsmith must do before performing the pad installation.
It is a waste of time and money tting a pad for a customer to
later nd out that the stock is now too long or too short for them
to use correctly. Usually this involves a one-on-one visit with
the gunsmith so that he can check you for basic gun-t. Where
this is not possible, giving the gunsmith some measurements
such as your height, forearm to nger pad length or the stock
length of other guns that you use successfully is another way
of determining that you are going to get the stock length about
right. While this article is not about gun-t, regardless, these
are some basic things that must be determined before tting
a new recoil pad. Often you only get one chance to get it right,
and an expensive pad can be ruined or become useless if you
grind off too much, make a hash of it, or nd out later that the
required LOP is actually too short to suit the intended user.
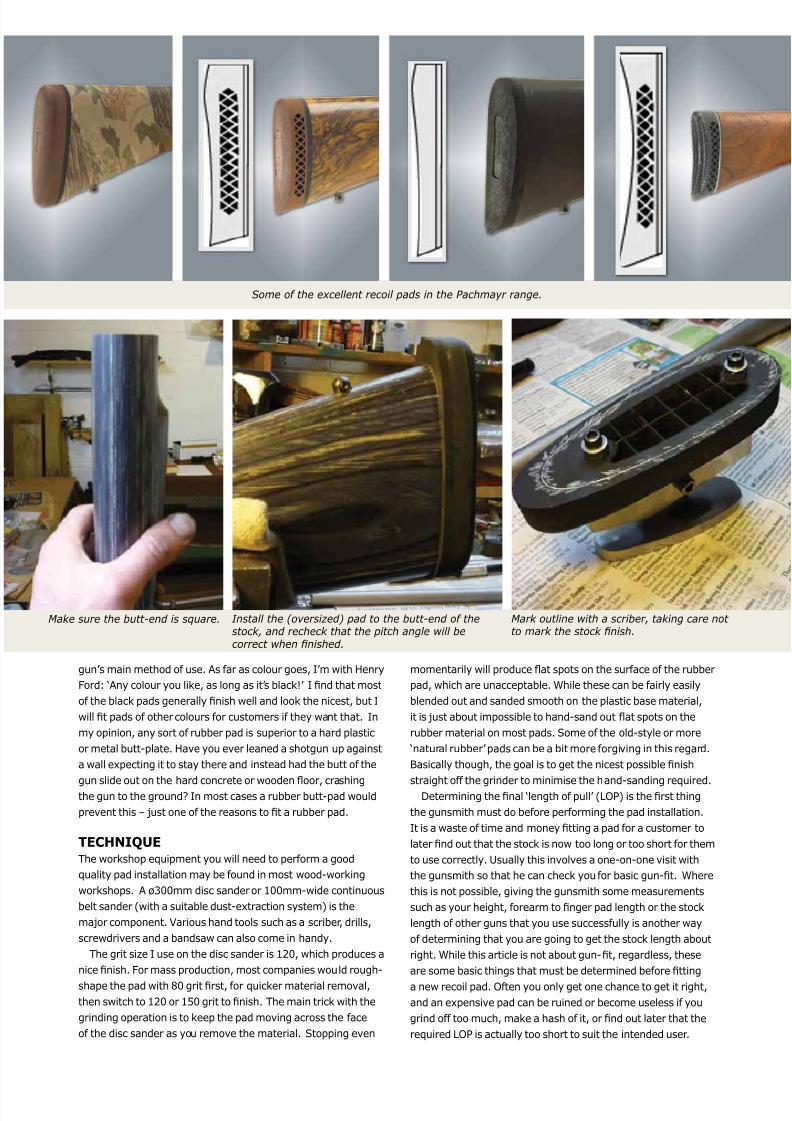
Some of the excellent recoil pads in the Pachmayr range.
Make sure the butt-end is square. Install the (oversized) pad to the butt-end of thestock, and recheck that the pitch angle will becorrect when fnished.
Mark outline with a scriber, taking care notto mark the stock fnish.
7/17/2019 Recoil Pads
http://slidepdf.com/reader/full/recoil-pads 3/3
Hopefully this gives you an insight at
least into some of the complexities of tting
recoil pads to a custom t and nish. Most
gunsmiths’ charges vary depending on the
time taken to do the job and how diligent theyare in getting as good a t and nish possible.
I should mention that many gunsmiths or
stock makers actually grind the oversize
pads down to size ‘on the stock’. That is, they
actually screw the pad onto the customers
stock, and in a free-hand motion they will
turn the stock and grind the pad down just
short of ush with the stock surface. I have
experimented with this method a few times
with dummy stocks but consider the risks of
marking a customer’s stock with just one little
slip to be far too great for my liking. Hence, for
liability reasons and peace of mind, I prefer to
stick with the tried-and-true ‘jig’ method.
After the nal LOP has been determined the procedureis as follows:1. Cut excess wood off the stock or add a spacer if required.
2. True up the butt-end on the disc sander so that it is square with the
central line of the butt stock and ensure the pitch angle of the pad will becorrect when tted. Usually this is about 2–3 degrees from the center-line
central axis of the barrel/bore.
3. True up the base of the new pad. Often the plastic pad bases are not
perfectly at and can leave unsightly gaps if not properly prepped.
4. Install the (oversized) pad to the butt-end of the stock, and recheck that
the pitch angle will be correct when nished. In some cases new holes for
the pad screws must be drilled rst and old holes plugged with wooden
dowel, or similar.
5. Carefully mark the outline with a scriber, taking care not to mark the stock
nish.
6. Remove the pad and set-it up on the special grinding jig. Set the angle of
the pad on the jig to match the corporal line and comb line of the stock.
When the pad is tted to the stock, these lines should ow continuously
along the pad for a custom t.
7. Carefully grind the material off just down to the scribed line, taking care
to move the pad across the face of the disc sander in gradual sweeps –
not by plunging it in or force-feeding it as the rubber will not grind nicely
if you do this. I usually try to leave at least 0.010” of material proud of the
stock surface to allow for hand-sanding to nal nish later.
8. On some installations it is a good idea to radius the heel and toe of the
pad slightly to minimise the chances of the pad catching or hanging up on
clothing.
9. Hand-sanding to nish is often overlooked or short-cut out of the process
by some. In my opinion, it produces a higher quality installation and a pad
surface that has less of a tendency to pick up dirt or look messy, especially
in the brown or red pads. The trick is to keep the pad lubricated or ‘wet’
as you sand it. I use kerosene and 400-grit wet/dry paper to perform this
task, with the pad set-up on an old dummy-stock, not the customer’s nice
one! After carefully sanding, wiping clean and inspecting until it is clear
that all the sanding disc marks have been removed the pad can be nally
cleaned down.
10. Apply coats of stock oil or stock wax to the exposed wood on the butt-end,
and wipe down the pad with a liberal coating of Armor All®. Leave both to
stand overnight.
11. Wipe off excess Armor All® and carefully install the pad to the butt stock,
aligning it correctly. I usually try to have a pad overlap to stock of about
0.005” to 0.010”, especially on newer wooden stock, to allow for possiblestock wood swelling that is a common thing with a lot of guns coming into
New Zealand from drier climates. A wooden stock that has swollen over
the outer edges of its pad is a bit of a cosmetic blight.
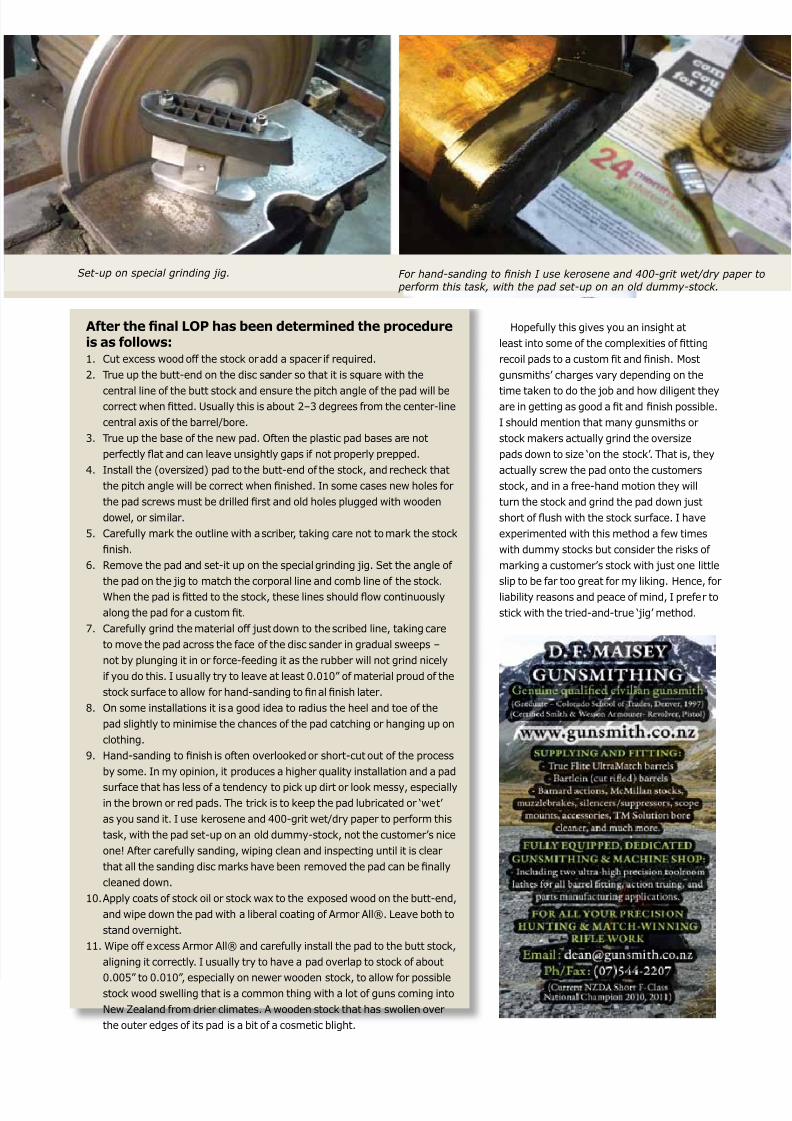
Set-up on special grinding jig. For hand-sanding to fnish I use kerosene and 400-grit wet/dry paper to perform this task, with the pad set-up on an old dummy-stock.