readyman composting by chad wade
DESCRIPTION
Chad's epic tome of how to compost organically. Because Operators DO compost.TRANSCRIPT
RM Tactical Gardening - SOIL/COMPOST The first part of the 10 part READYMAN Tactical Gardening series. We will start from the ground up when in comes to food production. What is soil, what is it made of, and how to amend your soil for crop maximization.
Here are a few selected clips from an array of collected sources.
What is topsoil? Topsoil is formed from tiny particles weathered or worn from their parent materials (rock, of various types). Both the chemical composition of the parent material and the average particle size help determine fundamental characteristics of soil — whether it is acid, alkaline or neutral; and whether it is sand (large particle size) or clay (extremely small particle size). But a layer of small rock particles is not “soil,” and it is not capable of growing a crop.
Healthy topsoil also consists of a complex community of living creatures, and each class of organisms has its own strategies for feeding itself, adapting to environmental conditions and coexisting with its neighbors. Any practice that destroys some or all of those classes of organisms is likely to reduce soil fertility.
The number of living organisms in healthy topsoil is enormous: It has been estimated, for example, that the total biomass of organisms in a prairie soil exceeds 15 tons per acre, with the weight of the bacteria alone — invisible to the eye — totaling 13 tons! A single teaspoon of that soil may contain 600 to 800 million individual bacteria from a possible 10,000 species; several miles of fungal hyphae; 10,000 individual protozoa; and 20 to 30 beneficial nematodes from a possible 100 species.
Living organisms in the soil include bacteria, fungi, protozoa (single-cell animals), nematodes (minuscule non-segmented worms), arthropods (insects, spiders, mites and centipedes from microscopic
to several inches long), earthworms, and larger organisms such as moles, voles and even gophers, which have their role to play in recycling nutrients and maintaining good soil structure.” (http://www.motherearthnews.com) The Role of Organic Matter Organic matter is constantly being produced in and over the topsoil — fallen leaves, dead plants and animals, roots shed by living plants, and droppings of passing animals. Different classes of soil organisms “specialize” in breaking down different sorts of organic matter in accordance with the natural principle that every creature’s “waste” is a priceless resource for another, and they pass their own wastes on to other members of the soil community.
The energy represented by the original organic material is passed from one level of the soil food web to another, rather than being lost from the system. The energy of sunlight is constantly being added at the other end of the equation through photosynthesis, so if all nutrients are re-captured by soil organisms, the result has to be added fertility.
For example, when fresh green material is added — say in the form of crop residues, or green cover crops cut and used as mulch — it is bacteria that take the lead in breaking them down. Nematodes, protozoa and tiny arthropods feed on the bacteria, and are fed on in turn by larger arthropods and nematodes. Earthworms feed on the bacteria, as well as leaves and other organic matter, converting it all to castings rich in minerals and other nutrients in forms easy for plant roots to take up, and conducive to good soil structure. In the meantime, soil fungi colonize and feed on the denser plant tissues such as stems and leaf veins, as well as other more carbon-dense organic materials such as leaf mulches.
Dead organic material is not the only source of food for soil-dwelling species. Roots of living plants form cooperative, mutually beneficial associations with various soil organisms. Some plants, including beets
and spinach, form such associations with bacteria; others, including tomatoes, potatoes and corn, with mychorrhizal fungi. In both cases, the plant creates complex sugars and other nutrients in its leaves, then releases them through its roots to feed its “buddies” in the soil. In exchange, the mychorrizae or bacteria provide nitrogen, enzymes, minerals and other nutrients to the roots in forms easy for them to absorb.
These are simple sketches of complex relationships and food exchange. The end result of the process is humus, the final residue of the parent organic materials, now visible only as a darkening of the soil. The microscopic humus particles are no longer a source of food for soil organisms, but they help with water retention, bond with nutrients in the soil and pass them on to plant roots, and bind carbon into the soil. Many soil organisms also help “glue” soil particles together into larger aggregate particles, increasing the size of pore spaces between particles, bringing more air to the soil (most soil organisms need oxygen to thrive) and increasing water flow down into the soil (reducing chance of runoff and erosion in heavy rains). Some soil organisms are pathogens, but with a diverse mix of species, they are usually controlled by other organisms in the system, which feed on the disease-causing organisms, out-compete them, or otherwise inhibit them. Simply put: Diversity of soil organisms is key to plant health.
Strategies for Managing Soil “Most of us have grown up thinking that soil fertility revolves around the question of what we need to buy and add to soil. We sometimes use soil tests to guide us in making the proper purchases. When we begin working with a piece of ground, especially if it has been abused, there may be additions we need to make. Be cautious about soil tests, however, because different laboratories use different procedures, report results differently and adopt different approaches to interpreting the results.

For example, I remember how confused I was by test results I used to get from my local extension service: They always noted that both phosphorus and potassium were “very high” — and then went on to recommend application of chemical fertilizers containing 10 percent of each. Later, I worked with a soil consultant (a student of pioneering soil scientist William Albrecht), who also noted the high levels of phosphorus and potassium, but recommended no fertilizer application.
Indeed, he pointed out that it would be easy for my soil to rise to dangerously excessive levels of phosphorus if I wasn’t careful with certain organic matter applications, such as manures. Since most soil analyses focus so much on crop needs for nitrogen, imagine my surprise when he also recommended no added nitrogen. When I asked about that, he replied dismissively, “Oh, with organic matter at the level you have, you don’t need any added nitrogen, except maybe a little for really heavy feeders like corn.”
By all means, find and work with a competent soil consultant if you feel your soil has serious deficiencies or special needs. But your main focus should not be what purchased inputs you need to add to your soil, but on strategies to maximize the diversity, health and population densities of soil organisms.”
(http://www.motherearthnews.com)
Three agricultural practices in particular are injurious to soil life: Monoculture. The growing of a single species on vast tracts reduces diversity of soil life.
Use of harsh chemicals. Many chemicals — whether intended to fertilize crops, suppress disease, or kill insects and weeds — also destroy populations of soil organisms.
Excessive tillage. Frequent tillage of soil disrupts soil life and robs it of its carbon (organic matter) reserves.
The alternative to such destructive practices is to imitate natural soil ecologies, which will:
Take advantage of the diversity and population densities of soil organisms. While homesteaders are unlikely to practice monoculture — to grow nothing but carrots, for example — we should constantly find ways to “mix it up” in how we manage our soil. Crops of different families should rotate over the available ground in succeeding seasons. Diverse sources of organic matter should be used — composts, mulches, cover crops, etc. Feed the soil using sources of fertility grown on the homestead or close by. Deep-rooted cover and fertility crops can “mine” minerals from the deep subsoil and make them available to more shallow-rooted plants. Nitrogen-fixing legumes (clovers, alfalfa, beans and peas) can boost nitrogen for heavier-feeding crops. Recycle autumn leaves and crop residues by composting or using them as mulches. Manures and mulching materials may be available from nearby farms. If a soil test does indicate the need to add minerals, use slow-release rock powders, such as greensand or colloidal rock phosphate, rather than highly soluble chemical fertilizers, which quickly leach into groundwater.
Protect and improve soil structure. Plant in wide beds and don’t compact the soil by walking in the growing spaces. Keep the soil constantly covered — by closely-planted crop plants, cover crops or mulches. Addition of lime to most clay soils can help “flocculate” the almost microscopic soil particles into aggregate clumps, resulting in a looser, more open soil structure with better air and water penetration. When tight soil must be loosened, do it with a broadfork rather than a power tiller or even a spading fork to avoid inverting soil layers.
The Long-Term Effects of Tillage Many farmers, gardeners and homesteaders avoid monoculture and harsh synthetic chemicals. However, many people committed to sustainable agriculture unknowingly till the soil in ways that inhibit long-term soil improvement.
Tillage of soil releases a flush of nutrients, which can give an impressive initial boost to crop growth. But this surge of available nutrients results mostly from the death of large numbers of soil organisms, whose biomass decomposes rapidly into the soil. These nutrients tend to be in soluble and volatile forms, and if not taken up immediately by plant roots, are leached to groundwater or outgassed to the atmosphere. In the meantime, life cycles of many soil species are disrupted — fungal threads are broken, and earthworm burrows are destroyed — and it can be some time before their populations recover. If the next tillage occurs before they have done so, we have started a cycle which degrades the health and diversity of the soil food web.
One of the worst effects of excess tillage is the loss of carbon bound in the soil in the form of humus. Oxygen is necessary to soil life, which is a major reason we work to improve aeration in soil through creation of looser, more open “pore structure.” Excessive exposure of the soil to oxygen, however, as occurs in heavy tillage, leads to oxidation of the carbon content and its loss to the atmosphere as carbon dioxide (CO2). Not only is fertility — which is so dependent on humus content — impaired, but high-tillage agriculture is a major, and growing, cause of accumulation of CO2, a greenhouse gas, in the atmosphere. The amounts of carbon involved are not trivial: Every 1 percent increase of carbon sequestered in a garden’s soil is estimated to be
equivalent to the weight of all the carbon in the atmosphere above that garden, right out to the vacuum of space. By reducing tillage while adding all the organic matter we can, we reverse CO2 emission: Carbon is bound up in soil in the form of humus. The solution to climate change begins in your back yard.
Life in the Soil It’s often said that organic material in soil consists of “the living, the recently dead and the very dead.” This is a helpful way to understand the processes that shape soil and make it fertile.
The living portion of soil is made up of plant roots, and of the numerous microbes and other living organisms that improve soil structure by breaking down organic material.
The recently dead components include deceased soil organisms, green plant material and fresh manures. They decompose readily, and release nutrients quickly.
The very dead portion is humus, the final residue of organic matter breakdown that’s important for soil structure and disease suppression.
For fertile soil, all three forms of organic matter should be present at all times.
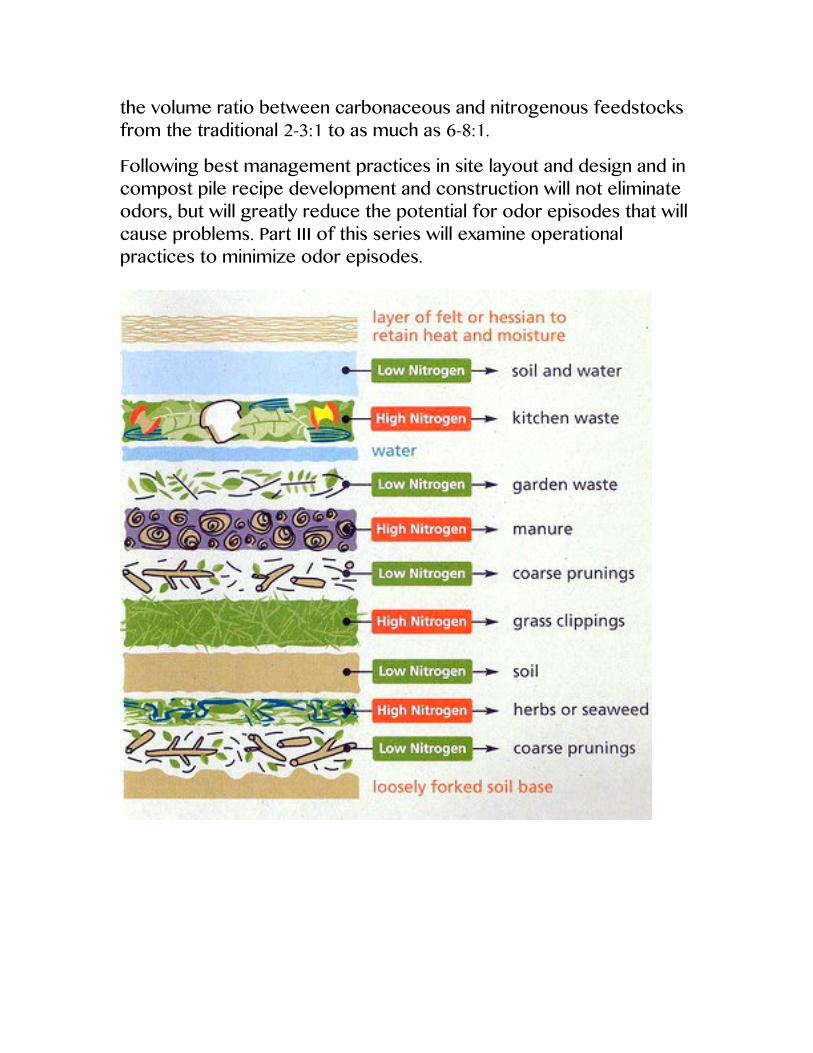
Start a Compost Pile “To build a compost pile, start by layering organic materials. Alternate more readily decomposable materials — fresh, high-nitrogen wastes, such as manures, crop residues, kitchen wastes and weeds — with less decomposable materials — drier, coarser and high-carbon wastes, such as autumn leaves, straw and corncobs. Microbes feed on all these materials and break them down into simpler, more stable compounds.
The microbes need water and oxygen, so keep the pile moist, but not sopping wet. As they break down the organic matter, the microbes generate heat. Make the pile large enough to retain heat, but not so large that oxygen cannot penetrate to the center, about 4 feet on each side is a good size. To encourage aeration, mix the coarser elements throughout the pile to ensure plenty of air space. When the pile cools, turn the heap — with the outer layers going to the inside and vice versa — to incorporate more oxygen and generate a new heating cycle. The compost pile may need to be turned more than once to complete the process.
Compost is one of nature’s best mulches and soil amendments, and you can use it instead of commercial fertilizers. Best of all, compost is cheap. You can make it without spending a cent. Using compost improves soil structure, texture, and aeration and increases the soil’s water-holding capacity.
Compost loosens clay soils and helps sandy soils retain water. Adding compost improves soil fertility and stimulates healthy root development in plants. The organic matter provided in compost provides food for microorganisms, which keeps the soil in a healthy, balanced condition. Nitrogen, potassium, and phosphorus will be produced naturally by the feeding of microorganisms, so few if any soil amendments will need to be added. Most gardeners have long understood the value of this rich, dark, earthy material in improving the soil and creating a healthful environment for plants. Understanding how to make and use compost is in the public interest, as the problem of waste disposal climbs toward a crisis level.
Landfills are brimming, and new sites are not likely to be easily found. For this reason there is an interest in conserving existing landfill space and in developing alternative methods of dealing with waste. Don’t throw away materials when you can use them to improve your lawn and garden! Start composting instead.
Our hands our being forced to deal creatively with our own yard
waste, as one by one, cities are refusing to haul off our leaves and grass clippings. About one third of the space in landfills is taken up with organic waste from our yards and kitchens, just the type of material that can be used in compost.
With a small investment in time, you can contribute to the solution to a community problem, while at the same time enriching the soil and improving the health of the plants on your property.” (http://eartheasy.com/grow_compost.html)
Benefits of Composting “Compost is organic material that can be used as a soil amendment or as a medium to grow plants. Mature compost is a stable material with a content called humus that is dark brown or black and has a soil-like, earthy smell. It is created by: combining organic wastes (e.g., yard trimmings, food wastes, manures) in proper ratios into piles, rows, or vessels; adding bulking agents (e.g., wood chips) as necessary to accelerate the breakdown of organic materials; and allowing the finished material to fully stabilize and mature through a curing process.
Natural composting, or biological decomposition, began with the first plants on earth and has been going on ever since. As vegetation falls to the ground, it slowly decays, providing minerals and nutrients needed for plants, animals, and microorganisms. Mature compost, however, includes the production of high temperatures to destroy pathogens and weed seeds that natural decomposition does not destroy.
Reduce or eliminate the need for chemical fertilizers. Promote higher yields of agricultural crops. Facilitate reforestation, wetlands restoration, and habitat revitalization
efforts by amending contaminated, compacted, and marginal soils. Cost-effectively remediate soils contaminated by hazardous waste. Remove solids, oil, grease, and heavy metals from stormwater runoff. Avoids Methane and leachate formulation in landfills. Capture and destroy 99.6 percent of industrial volatile organic chemicals (VOCs) in contaminated air. See Innovative Uses of Compost: Bioremediation and Pollution Prevention. Provide cost savings of at least 50 percent over conventional soil, water, and air pollution remediation technologies, where applicable. See Analysis of Composting as an Environmental Remediation Technology Reduces the need for water, fertilizers, and pesticides. Serves as a marketable commodity and is a low-cost alternative to standard landfill cover and artificial soil amendments. Extends municipal landfill life by diverting organic materials from landfills. The Composting Process One of the most important steps for evaluating composting options is to become familiar with how the composting process works. Before you begin composting or start a composting program, you should understand the five primary variables that must be “controlled” during composting. These include the following:
Feedstock and nutrient balance. Controlled decomposition requires a proper balance of “green” organic materials (e.g., grass clippings, food scraps, manure), which contain large amounts of nitrogen, and “brown” organic materials (e.g., dry leaves, wood chips, branches), which contain large amounts of carbon but little nitrogen. Obtaining the right nutrient mix requires experimentation and patience and is part of the art and science of composting.
Particle size. Grinding, chipping, and shredding materials increases the surface area on which the microorganism can feed. Smaller particles also produce a more homogeneous compost mixture and improve pile insulation to help maintain optimum temperatures (see
below). If the particles are too small, however, they might prevent air from flowing freely through the pile.
Moisture content. Microorganisms living in a compost pile need an adequate amount of moisture to survive. Water is the key element that helps transports substances within the compost pile and makes the nutrients in organic material accessible to the microbes. Organic material contains some moisture in varying amounts, but moisture also might come in the form of rainfall or intentional watering.
Oxygen flow. Turning the pile, placing the pile on a series of pipes, or including bulking agents such as wood chips and shredded newspaper all help aerate the pile. Aerating the pile allows decomposition to occur at a faster rate than anaerobic conditions. Care must be taken, however, not to provide too much oxygen, which can dry out the pile and impede the composting process.
Temperature. Microorganisms require a certain temperature range for optimal activity. Certain temperatures promote rapid composting and destroy pathogens and weed seeds. Microbial activity can raise the temperature of the pile’s core to at least 140° F. If the temperature does not increase, anaerobic conditions (i.e., rotting) occur. Controlling the previous four factors can bring about the proper temperature.
Backyard or onsite composting can be conducted by residents and other small-quantity generators of organic waste on their own property. By composting these materials onsite, homeowners and select businesses can significantly reduce the amount of waste that needs to be disposed of and thereby save money from avoided disposal costs. Learn how to create your own compost pile.
Types of Waste and Waste Generators: Backyard or onsite composting is suitable for converting yard trimmings and food scraps into compost that can be applied on site. This method should not be used to compost animal products or large quantities of food scraps. Households, commercial establishments, and institutions (e.g., universities, schools, hospitals) can leave grass clippings on the lawn-
known as “grasscycling”-where the cuttings will decompose naturally and return some nutrients back to the soil. Backyard or onsite composters also might keep leaves in piles for eventual use as mulch around trees and scrubs to retain moisture. Climate or Seasonal Considerations: Climate and seasonal variations do not present major challenges to backyard or onsite composting because this method typically involves small quantities of organic waste. When conditions change-for example, if a rainy season approaches-the process can be adjusted accordingly without many complications. Environmental Concerns: Improper management of food scraps can cause odors and also might attract unwanted attention from insects or animals. Requirements: Backyard or onsite composting requires very little time or equipment. Education is the most critical aspect of backyard or onsite composting. Local communities might hold composting demonstrations and seminars to encourage homeowners or businesses to compost on their own properties. Results: The conversion of organic material to compost can take up to two years, but manual turning can hasten the process considerably (e.g., 3 to 6 months). The resulting natural fertilizer can be applied to lawns and gardens to help condition the soil and replenish nutrients. Compost, however, should not be used as potting soil for houseplants because of the presence of weed and grass seeds. Top of Page Vermicomposting Through this method, red worms-not nightcrawlers or field worms found in gardens- are placed in bins with organic matter in order to break it down into a high-value compost called castings. Worm bins are easy to construct (they are also commercially available) and can be adapted to accommodate the volume of food scraps generated.
Types of Waste and Waste Generators: Worms will eat almost anything you would put in a typical compost pile (e.g., food scraps, paper, plants). Vermicomposting can be ideal for apartment dwellers or small offices that want to derive some of the benefits of composting and reduce solid waste. It is frequently used in schools to

teach children conservation and recycling. Climate or Seasonal Considerations: Worms are sensitive to variations in climate. Extreme temperatures and direct sunlight are not healthy for the worms. The optimal temperatures for vermicomposting range from 55° F to 77° F. In hot, arid areas, the bin should be placed under the shade. By vermicomposting indoors, however, one can avoid many of the problems posed by hot or cold climates. The primary responsibility is to keep the worms alive and healthy by providing the proper conditions and sufficient food. Requirements: Vermicomposting has only a few basic requirements, among them: worms, worm bedding (e.g., shredded newspaper, cardboard), and a bin to contain the worms and organic matter. Maintenance procedures include preparing bedding, burying garbage, and separating worms from their castings. Results: One pound of mature worms (approximately 800-1,000 worms) can eat up to half a pound of organic material per day. It typically takes three to four months for these worms to produce harvestable castings, which can be used as potting soil. Vermicomposting also produces compost or “worm” tea, a high-quality liquid fertilizer for house plants or gardens. Top of Page Aerated (Turned) Windrow Composting Organic waste is formed into rows of long piles called “windrows” and aerated by turning the pile periodically by either manual or mechanical means. The ideal pile height, which is between 4 and 8 feet, allows for a pile large enough to generate sufficient heat and maintain temperatures, yet small enough to allow oxygen to flow to the windrow's core. The ideal pile width is between 14 and 16 feet.
Types of Waste and Waste Generators: This method can accommodate large volumes of diverse wastes, including yard trimmings, grease, liquids, and animal byproducts (such as fish and poultry wastes), but only with frequent turning and careful monitoring. This method is suited for large quantities, such as that generated by entire communities and collected by local governments, and high volume food-processing businesses (e.g., restaurants, cafeterias, packing plants).
Climate or Seasonal Considerations: In a warm, arid climate, windrows are sometimes covered or placed under a shelter to prevent water from evaporating. In rainy seasons, the shapes of the pile can be adjusted so that water runs off the top of the pile rather than being absorbed into the pile. Also, windrow composting can work in cold climates. Often the outside of the pile might freeze, but in its core, a windrow can reach 140° F. Environmental Concerns: Leachate is liquid released during the composting process. This can contaminate local ground-water and surface-water supplies and should be collected and treated. In addition, windrow composting is a large scale operation and might be subject to regulatory enforcement. Samples of the compost should be tested in a laboratory for bacterial and heavy metal content. Odors also need to be controlled. The public should be informed of the operation and have a method to address any complaints about animals or bad odors. Other concerns might include zoning and siting requirements. Requirements: Windrow composting often requires large tracts of land, sturdy equipment, a continual supply of labor to maintain and operate the facility, and patience to experiment with various materials mixtures and turning frequencies. Results: This method will yield significant amounts of compost, which might require assistance to market the end-product. Alternatively, local governments can make the compost available to residents for a low or no cost. Top of Page Aerated Static Pile Composting In aerated static pile composting, organic waste is mixed together in one large pile instead of rows. To aerate the pile, layers of loosely piled bulking agents (e.g., wood chips, shredded newspaper) are added so that air can pass from the bottom to the top of the pile. The piles also can be placed over a network of pipes that deliver air into or draw air out of the pile. Air blowers might be activated by a timer or a temperature sensors.
Types of Waste and Waste Generators: Aerated static piles are suitable for a relatively homogenous mix of organic waste and work
well for larger quantity generators of yard trimmings and compostable municipal solid waste (e.g., food scraps, paper products), which might include local governments, landscapers, or farms. This method, however, does not work well for composting animal byproducts or grease from food processing industries. Climate or Seasonal Considerations: Like windrow composting, in a warm, arid climate, aerated static piles are sometimes covered or placed under a shelter to prevent water from evaporating. In the cold, the core of the pile will retain its warm temperature, but aeration might be more difficult in the cold because this method involves passive air flowing rather than active turning. Some aerated static piles are placed indoors with proper ventilation. Environmental Concerns: Since there is no physical turning, this method requires careful monitoring to ensure that the outside of the pile heats up as much as the core. One way to alleviate bad odors is to apply a thick layer of finished compost over the pile, which can help maintain high temperatures throughout the pile. Another way to deal with odor, provided that the air blower draws air out of the pile, is to filter this air through a biofilter made from finished compost. Requirements: This method typically requires equipment such as blowers, pipes, sensors, and fans, which might involve significant costs and technical assistance. Having a controlled supply of air enables construction of large piles, which require less land than the windrow method. Results: This method produces compost relatively quickly-within 3 to 6 months. Top of Page In-Vessel Composting Organic materials are fed into a drum, silo, concrete-lined trench, or similar equipment where the environmental conditions-including temperature, moisture, and aeration-are closely controlled. The apparatus usually has a mechanism to turn or agitate the material for proper aeration. In-vessel composters vary in size and capacity.
Types of Waste and Waste Generators: In-vessel composting can process large amounts of waste without taking up as much space as the windrow method. In addition, it can accommodate virtually any
type of organic waste (e.g., meat, animal manure, biosolids, food scraps). Some in-vessel composters can fit into a school or restaurant kitchen while others can be as large as a school bus to accommodate large food processing plants. Climate or Seasonal Considerations: In-vessel composting can be used year-round in virtually any climate because the environment is carefully controlled, often by electronic means. This method can even be used in extremely cold weather if th equipment is insulated or the processing takes place indoors. Environmental Concerns: In-vessel composting produces very little odor and minimal leachate. Requirements: In-vessel composters are expensive and might require technical assistance to operate properly, but this method uses much less land and manual labor than windrow composting. Results: Conversion of organic material to compost can take as little as a few weeks. Once the compost comes out of the vessel, however, it still requires a few more weeks or months for the microbial activity to stabilize and the pile to cool. (http://www.motherearthnews.com) Pick a Cover Crop “There’s a cover crop for every season, climate and gardening strategy. Here are a few options to consider.
Fast-growing grain grasses (rye, oats, wheat, barley) are a good choice in early spring.
Cold-hardy legumes, such as peas, can be started in late winter and allowed to grow two months or longer to precede a warm-weather, heavy-feeding crop, such as winter squash.
Warm-weather legumes, such as soybeans or cowpeas, can fertilize beds that will be planted to fall crops that need rich soil, such as broccoli or fall-planted garlic and shallots.
For a quick-growing “filler” between spring and fall crops, nothing beats buckwheat, the “instant cover crop” (30 days from seed to flower.)
For winter, a mix of hairy vetch and rye (cereal rye, the sort of rye used to make bread, not perennial rye or annual grass rye) is a top choice.
Another good winter cover is a mix of oats and “field pea” or “winter pea” (Pisum arvense, a close relative of P. sativum, the common garden pea). Both plants are cold-hardy, but reliably winterkill if the ground freezes in your area. You can leave them in place as mulch, and make spring transplants right into it.
Try undersowing to grow a food crop and a cover crop together. For example, you can put Dutch white clover in a bed where you are planting tall crops with a small “footprint” such as trellised tomatoes or pole beans. The clover comes up fast, establishing a tight cover that suppresses weeds and retains soil moisture. Since it is low-growing, it does not interfere with managing or harvesting the taller crops above it.
Soil is the key to health, both for ourselves and for the animals and plants we depend on. But soil “in good heart,” as farmers used to say, is not something we can take for granted. For gardeners and farmers, caring for the soil must always be our first priority, and the process of building soil fertility is vast and complex.
The best question to ask is not “What is the best soil care?” but “What is the best soil care for this particular piece of ground?” Over the seasons, the soil itself becomes our teacher and shows us which practices lead to beneficial changes.
Let’s begin with this intriguing question: Why is it that in natural soil ecologies, soil fertility tends to accumulate spontaneously over time, while human agriculture often leads to drastic declines in soil quality? Whether we look at prairies, bogs or forests, we find that topsoil tends to deepen and become more fertile over time. Why are humans more likely to destroy than to build soil quality, when natural systems operating on their own produce the opposite result?
One implication is obvious: The key to soil management is imitating natural systems. But perhaps the best answer to this riddle is that topsoil is alive, and any approach to agriculture that treats it as an inert substance is almost certain to be destructive.”
(http://www.motherearthnews.com)
The Art of Composting “The art of composting has been part of our global culture since ancient times. The basic principles are quite simple, and adhering to them will result in an efficient and successful outcome. Studies have shown that home composting can divert an average of 700 lbs. of material per household per year from the waste stream. Municipal composting carries a greater environmental cost, but not nearly as high as if leaf and yard waste are disposed of by conventional means. Composting is an excellent way to avoid both wasting useful, natural resources and creating environmental problems, while at the same time producing a high quality and inexpensive soil amendment.
Composting is the transformation of organic material (plant matter) through decomposition into a soil-like material called compost. Invertebrates (insects and earthworms), and microorganisms (bacteria and fungi) help in transforming the material into compost. Composting is a natural form of recycling, which continually occurs in nature. AAAn ancient practice, composting is mentioned in the Bible several times and can be traced to Marcus Cato, a farmer and scientist who lived in Rome 2,000 years ago. Cato viewed compost as

the fundamental soil enhancer, essential for maintaining fertile and productive agricultural land. He stated that all food and animal wastes should be composted before being added to the soil. By the 19th century in America, most farmers and agricultural writers knew about composting. AAToday there are several different reasons why composting remains an invaluable practice. Yard and food wastes make up approximately 30% of the waste stream in the United States. Composting most of these waste streams would reduce the amount of Municipal Solid Waste (MSW) requiring disposal by almost one fourth, while at the same time provide a nutrient-rich soil amendment. Compost added to gardens improves soil structure, texture, aeration, and water retention. When mixed with compost, clay soils are lightened, and sandy soils retain water better. Mixing compost with soil also contributes to erosion control, soil fertility, proper pH balance, and healthy root development in plants. AAThe standard means of disposal for most yard and food waste include landfilling and incineration. These practices are not as environmentally or economically sound as composting. Yard waste which is landfilled breaks down very slowly due to the lack of oxygen. As it decomposes, it produces methane gas and acidic leachate, which are both environmental problems AALandfilling organic wastes also takes up landfill space needed for other wastes. Incinerating moist organic waste is inefficient and results in poor combustion, which disrupts the energy generation of the facility and increases the pollutants that need to be removed by the pollution-control devices. Composting these wastes is a more effective and usually less expensive means of managing organic wastes. It can be done successfully on either a large or small scale, but the technique and equipment used differ.
Decomposition Decomposition occurs naturally anywhere plants grow. When a plant dies, its remains are attacked by microorganisms and invertebrates in the soil, and it is decomposed to humus. This is how nutrients are recycled in an ecosystem. This natural decomposition can be encouraged by creating ideal conditions. The microorganisms and
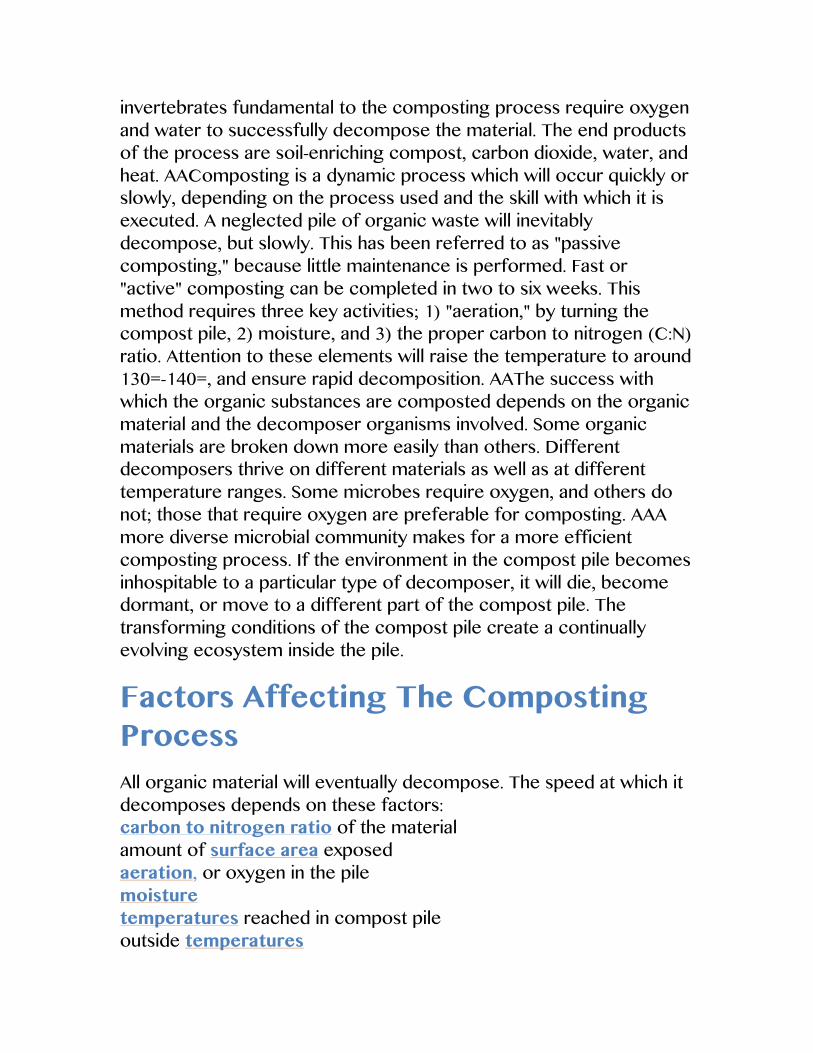
invertebrates fundamental to the composting process require oxygen and water to successfully decompose the material. The end products of the process are soil-enriching compost, carbon dioxide, water, and heat. AAComposting is a dynamic process which will occur quickly or slowly, depending on the process used and the skill with which it is executed. A neglected pile of organic waste will inevitably decompose, but slowly. This has been referred to as "passive composting," because little maintenance is performed. Fast or "active" composting can be completed in two to six weeks. This method requires three key activities; 1) "aeration," by turning the compost pile, 2) moisture, and 3) the proper carbon to nitrogen (C:N) ratio. Attention to these elements will raise the temperature to around 130=-140=, and ensure rapid decomposition. AAThe success with which the organic substances are composted depends on the organic material and the decomposer organisms involved. Some organic materials are broken down more easily than others. Different decomposers thrive on different materials as well as at different temperature ranges. Some microbes require oxygen, and others do not; those that require oxygen are preferable for composting. AAA more diverse microbial community makes for a more efficient composting process. If the environment in the compost pile becomes inhospitable to a particular type of decomposer, it will die, become dormant, or move to a different part of the compost pile. The transforming conditions of the compost pile create a continually evolving ecosystem inside the pile.
Factors Affecting The Composting Process All organic material will eventually decompose. The speed at which it decomposes depends on these factors: carbon to nitrogen ratio of the material amount of surface area exposed aeration, or oxygen in the pile moisture temperatures reached in compost pile outside temperatures
Carbon-to-Nitrogen Ratios
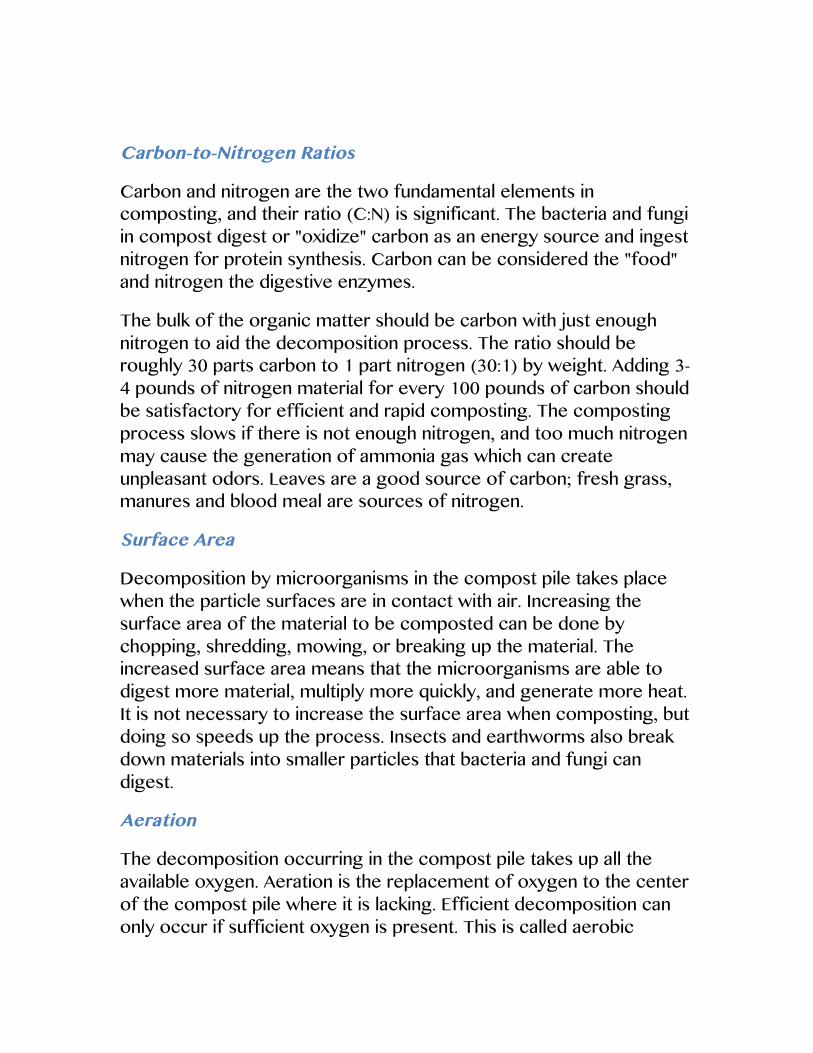
Carbon and nitrogen are the two fundamental elements in composting, and their ratio (C:N) is significant. The bacteria and fungi in compost digest or "oxidize" carbon as an energy source and ingest nitrogen for protein synthesis. Carbon can be considered the "food" and nitrogen the digestive enzymes.
The bulk of the organic matter should be carbon with just enough nitrogen to aid the decomposition process. The ratio should be roughly 30 parts carbon to 1 part nitrogen (30:1) by weight. Adding 3-4 pounds of nitrogen material for every 100 pounds of carbon should be satisfactory for efficient and rapid composting. The composting process slows if there is not enough nitrogen, and too much nitrogen may cause the generation of ammonia gas which can create unpleasant odors. Leaves are a good source of carbon; fresh grass, manures and blood meal are sources of nitrogen.
Surface Area
Decomposition by microorganisms in the compost pile takes place when the particle surfaces are in contact with air. Increasing the surface area of the material to be composted can be done by chopping, shredding, mowing, or breaking up the material. The increased surface area means that the microorganisms are able to digest more material, multiply more quickly, and generate more heat. It is not necessary to increase the surface area when composting, but doing so speeds up the process. Insects and earthworms also break down materials into smaller particles that bacteria and fungi can digest.
Aeration
The decomposition occurring in the compost pile takes up all the available oxygen. Aeration is the replacement of oxygen to the center of the compost pile where it is lacking. Efficient decomposition can only occur if sufficient oxygen is present. This is called aerobic
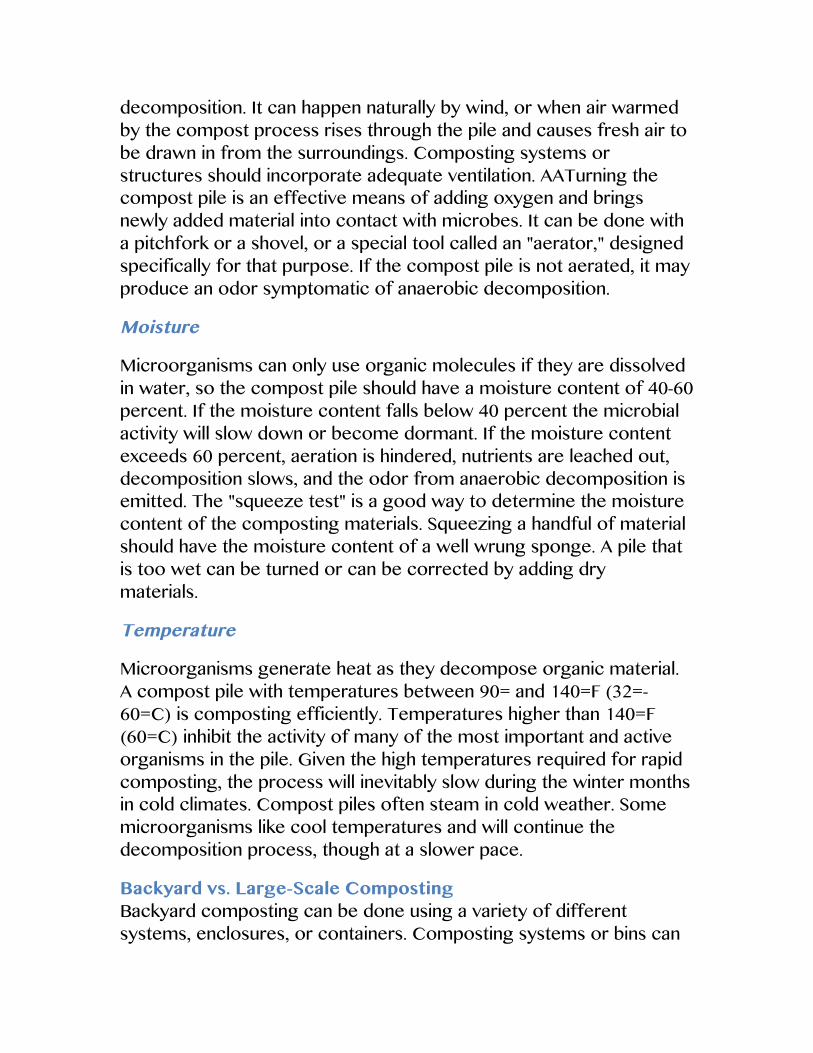
decomposition. It can happen naturally by wind, or when air warmed by the compost process rises through the pile and causes fresh air to be drawn in from the surroundings. Composting systems or structures should incorporate adequate ventilation. AATurning the compost pile is an effective means of adding oxygen and brings newly added material into contact with microbes. It can be done with a pitchfork or a shovel, or a special tool called an "aerator," designed specifically for that purpose. If the compost pile is not aerated, it may produce an odor symptomatic of anaerobic decomposition.
Moisture
Microorganisms can only use organic molecules if they are dissolved in water, so the compost pile should have a moisture content of 40-60 percent. If the moisture content falls below 40 percent the microbial activity will slow down or become dormant. If the moisture content exceeds 60 percent, aeration is hindered, nutrients are leached out, decomposition slows, and the odor from anaerobic decomposition is emitted. The "squeeze test" is a good way to determine the moisture content of the composting materials. Squeezing a handful of material should have the moisture content of a well wrung sponge. A pile that is too wet can be turned or can be corrected by adding dry materials.
Temperature
Microorganisms generate heat as they decompose organic material. A compost pile with temperatures between 90= and 140=F (32=-60=C) is composting efficiently. Temperatures higher than 140=F (60=C) inhibit the activity of many of the most important and active organisms in the pile. Given the high temperatures required for rapid composting, the process will inevitably slow during the winter months in cold climates. Compost piles often steam in cold weather. Some microorganisms like cool temperatures and will continue the decomposition process, though at a slower pace.
Backyard vs. Large-Scale Composting Backyard composting can be done using a variety of different systems, enclosures, or containers. Composting systems or bins can
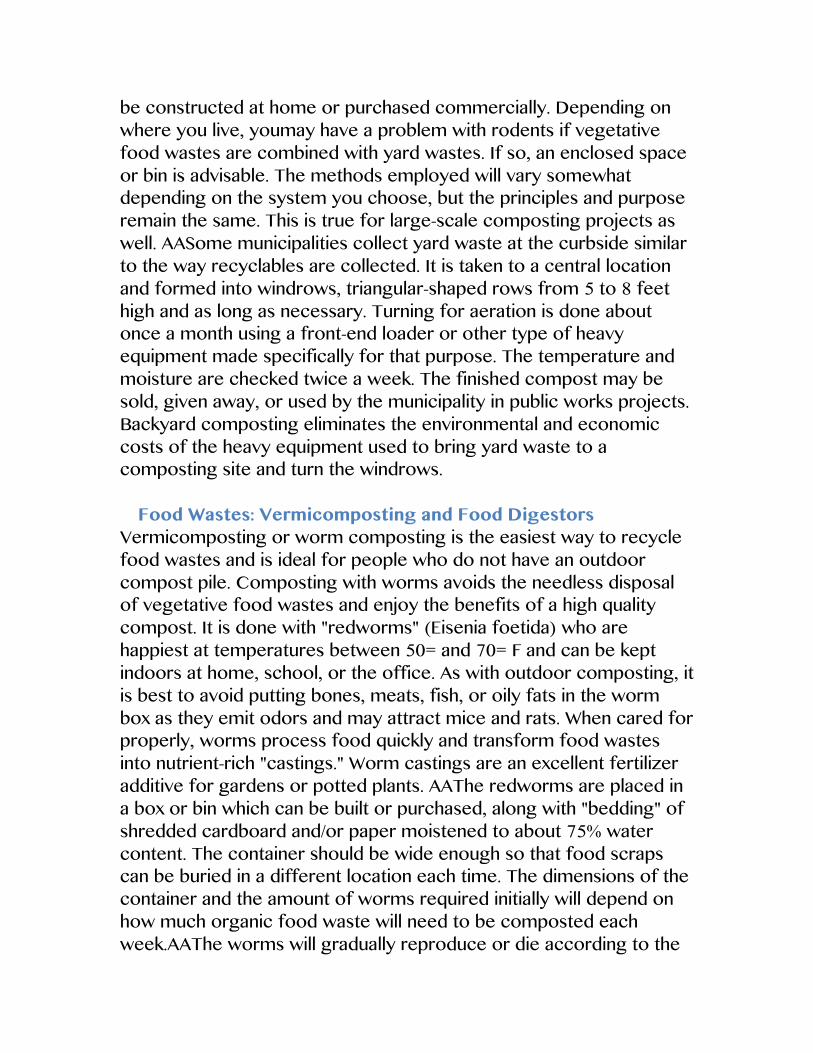
be constructed at home or purchased commercially. Depending on where you live, youmay have a problem with rodents if vegetative food wastes are combined with yard wastes. If so, an enclosed space or bin is advisable. The methods employed will vary somewhat depending on the system you choose, but the principles and purpose remain the same. This is true for large-scale composting projects as well. AASome municipalities collect yard waste at the curbside similar to the way recyclables are collected. It is taken to a central location and formed into windrows, triangular-shaped rows from 5 to 8 feet high and as long as necessary. Turning for aeration is done about once a month using a front-end loader or other type of heavy equipment made specifically for that purpose. The temperature and moisture are checked twice a week. The finished compost may be sold, given away, or used by the municipality in public works projects. Backyard composting eliminates the environmental and economic costs of the heavy equipment used to bring yard waste to a composting site and turn the windrows. Food Wastes: Vermicomposting and Food Digestors Vermicomposting or worm composting is the easiest way to recycle food wastes and is ideal for people who do not have an outdoor compost pile. Composting with worms avoids the needless disposal of vegetative food wastes and enjoy the benefits of a high quality compost. It is done with "redworms" (Eisenia foetida) who are happiest at temperatures between 50= and 70= F and can be kept indoors at home, school, or the office. As with outdoor composting, it is best to avoid putting bones, meats, fish, or oily fats in the worm box as they emit odors and may attract mice and rats. When cared for properly, worms process food quickly and transform food wastes into nutrient-rich "castings." Worm castings are an excellent fertilizer additive for gardens or potted plants. AAThe redworms are placed in a box or bin which can be built or purchased, along with "bedding" of shredded cardboard and/or paper moistened to about 75% water content. The container should be wide enough so that food scraps can be buried in a different location each time. The dimensions of the container and the amount of worms required initially will depend on how much organic food waste will need to be composted each week.AAThe worms will gradually reproduce or die according to the
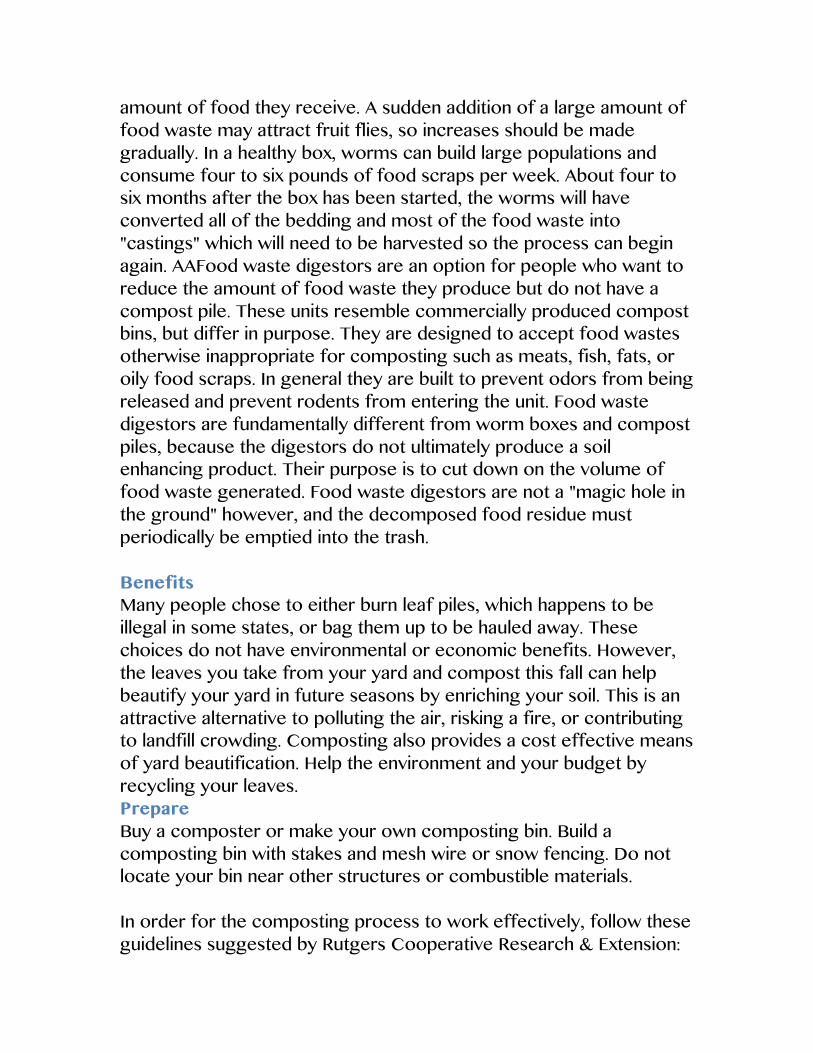
amount of food they receive. A sudden addition of a large amount of food waste may attract fruit flies, so increases should be made gradually. In a healthy box, worms can build large populations and consume four to six pounds of food scraps per week. About four to six months after the box has been started, the worms will have converted all of the bedding and most of the food waste into "castings" which will need to be harvested so the process can begin again. AAFood waste digestors are an option for people who want to reduce the amount of food waste they produce but do not have a compost pile. These units resemble commercially produced compost bins, but differ in purpose. They are designed to accept food wastes otherwise inappropriate for composting such as meats, fish, fats, or oily food scraps. In general they are built to prevent odors from being released and prevent rodents from entering the unit. Food waste digestors are fundamentally different from worm boxes and compost piles, because the digestors do not ultimately produce a soil enhancing product. Their purpose is to cut down on the volume of food waste generated. Food waste digestors are not a "magic hole in the ground" however, and the decomposed food residue must periodically be emptied into the trash. Benefits Many people chose to either burn leaf piles, which happens to be illegal in some states, or bag them up to be hauled away. These choices do not have environmental or economic benefits. However, the leaves you take from your yard and compost this fall can help beautify your yard in future seasons by enriching your soil. This is an attractive alternative to polluting the air, risking a fire, or contributing to landfill crowding. Composting also provides a cost effective means of yard beautification. Help the environment and your budget by recycling your leaves. Prepare Buy a composter or make your own composting bin. Build a composting bin with stakes and mesh wire or snow fencing. Do not locate your bin near other structures or combustible materials. In order for the composting process to work effectively, follow these guidelines suggested by Rutgers Cooperative Research & Extension:
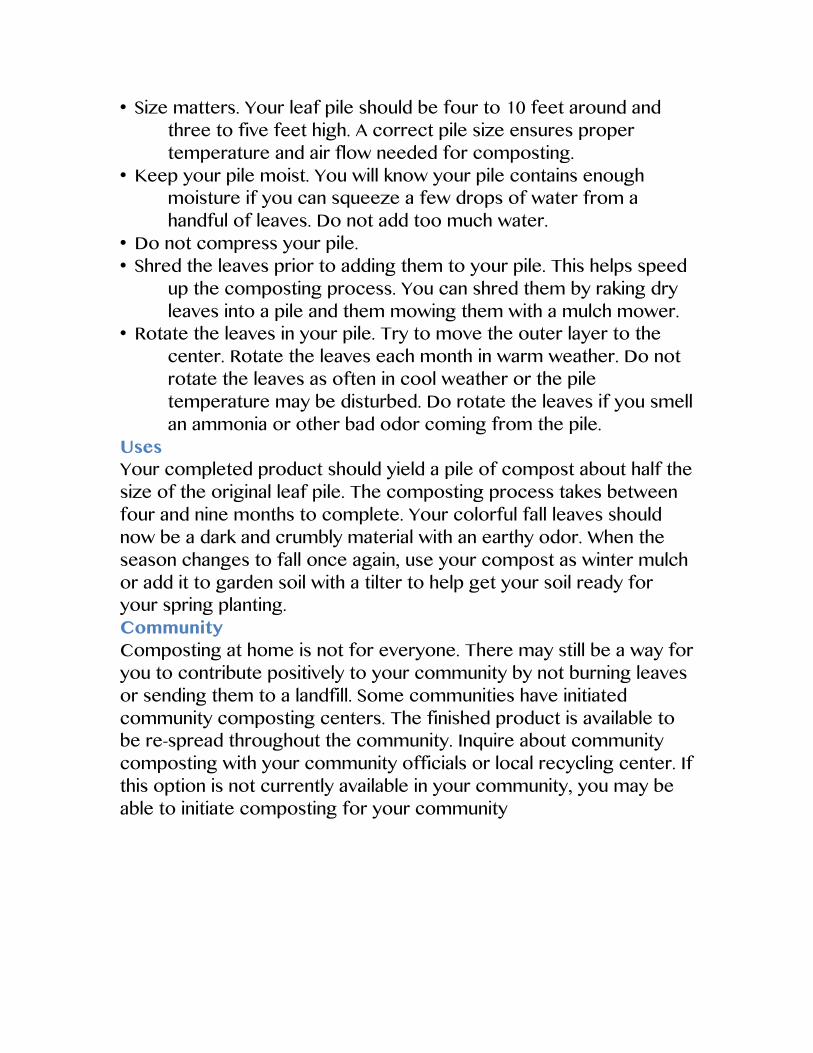
• Size matters. Your leaf pile should be four to 10 feet around and three to five feet high. A correct pile size ensures proper temperature and air flow needed for composting.
• Keep your pile moist. You will know your pile contains enough moisture if you can squeeze a few drops of water from a handful of leaves. Do not add too much water.
• Do not compress your pile. • Shred the leaves prior to adding them to your pile. This helps speed
up the composting process. You can shred them by raking dry leaves into a pile and them mowing them with a mulch mower.
• Rotate the leaves in your pile. Try to move the outer layer to the center. Rotate the leaves each month in warm weather. Do not rotate the leaves as often in cool weather or the pile temperature may be disturbed. Do rotate the leaves if you smell an ammonia or other bad odor coming from the pile.
Uses Your completed product should yield a pile of compost about half the size of the original leaf pile. The composting process takes between four and nine months to complete. Your colorful fall leaves should now be a dark and crumbly material with an earthy odor. When the season changes to fall once again, use your compost as winter mulch or add it to garden soil with a tilter to help get your soil ready for your spring planting. Community Composting at home is not for everyone. There may still be a way for you to contribute positively to your community by not burning leaves or sending them to a landfill. Some communities have initiated community composting centers. The finished product is available to be re-spread throughout the community. Inquire about community composting with your community officials or local recycling center. If this option is not currently available in your community, you may be able to initiate composting for your community
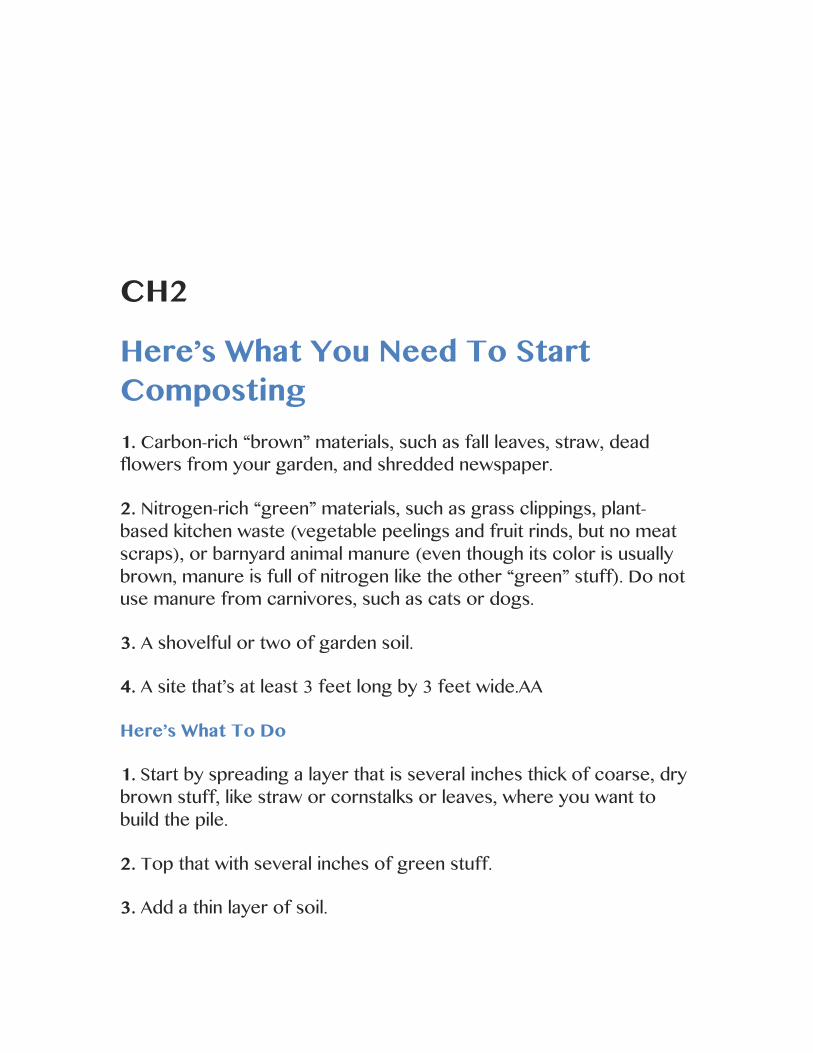
CH2 Here’s What You Need To Start Composting 1. Carbon-rich “brown” materials, such as fall leaves, straw, dead flowers from your garden, and shredded newspaper.
2. Nitrogen-rich “green” materials, such as grass clippings, plant-based kitchen waste (vegetable peelings and fruit rinds, but no meat scraps), or barnyard animal manure (even though its color is usually brown, manure is full of nitrogen like the other “green” stuff). Do not use manure from carnivores, such as cats or dogs.
3. A shovelful or two of garden soil.
4. A site that’s at least 3 feet long by 3 feet wide.AA
Here’s What To Do
1. Start by spreading a layer that is several inches thick of coarse, dry brown stuff, like straw or cornstalks or leaves, where you want to build the pile.
2. Top that with several inches of green stuff.
3. Add a thin layer of soil.
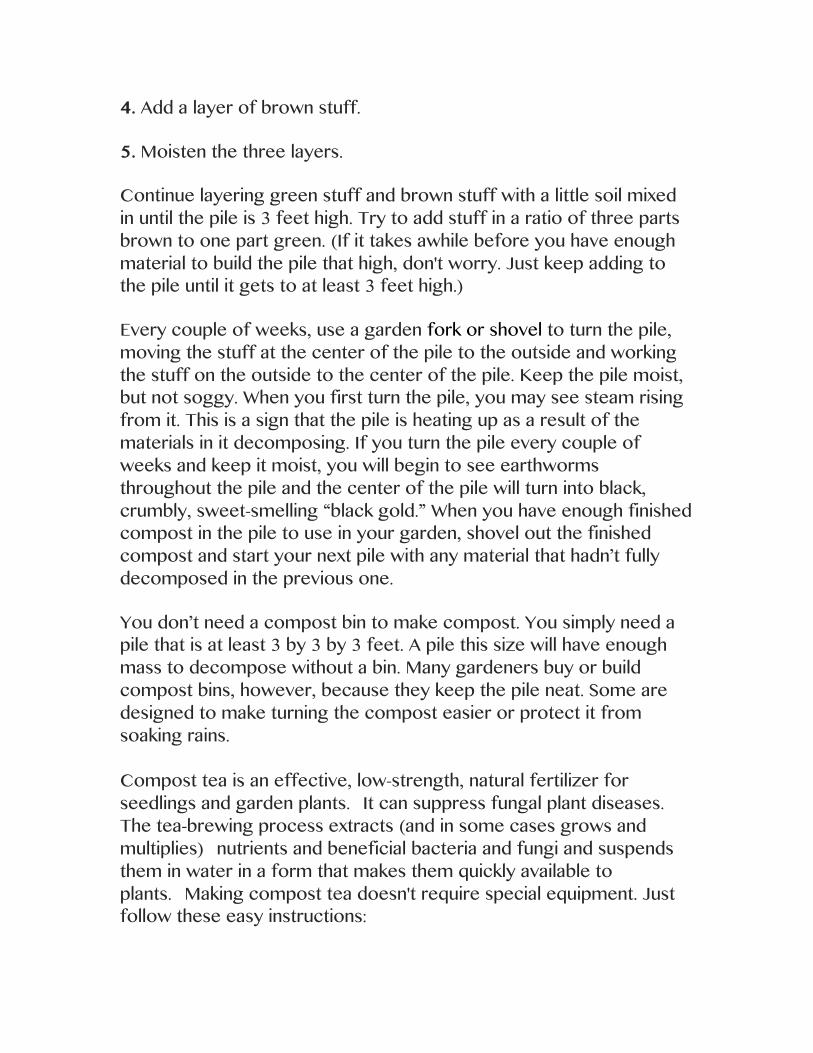
4. Add a layer of brown stuff.
5. Moisten the three layers.
Continue layering green stuff and brown stuff with a little soil mixed in until the pile is 3 feet high. Try to add stuff in a ratio of three parts brown to one part green. (If it takes awhile before you have enough material to build the pile that high, don't worry. Just keep adding to the pile until it gets to at least 3 feet high.)
Every couple of weeks, use a garden fork or shovel to turn the pile, moving the stuff at the center of the pile to the outside and working the stuff on the outside to the center of the pile. Keep the pile moist, but not soggy. When you first turn the pile, you may see steam rising from it. This is a sign that the pile is heating up as a result of the materials in it decomposing. If you turn the pile every couple of weeks and keep it moist, you will begin to see earthworms throughout the pile and the center of the pile will turn into black, crumbly, sweet-smelling “black gold.” When you have enough finished compost in the pile to use in your garden, shovel out the finished compost and start your next pile with any material that hadn’t fully decomposed in the previous one.
You don’t need a compost bin to make compost. You simply need a pile that is at least 3 by 3 by 3 feet. A pile this size will have enough mass to decompose without a bin. Many gardeners buy or build compost bins, however, because they keep the pile neat. Some are designed to make turning the compost easier or protect it from soaking rains. Compost tea is an effective, low-strength, natural fertilizer for seedlings and garden plants. It can suppress fungal plant diseases. The tea-brewing process extracts (and in some cases grows and multiplies) nutrients and beneficial bacteria and fungi and suspends them in water in a form that makes them quickly available to plants. Making compost tea doesn't require special equipment. Just follow these easy instructions:
1. Place compost and water (10 pounds mature compost for each 10 gallons of water) in a 40-gallon barrel. Protect the barrel from cold and heat.
2. Stir with a stick daily for a minimum of 5 days.
3. Strain the liquid from the compost using a cheesecloth or burlap. There should be no bubbling or off odors. Use it immediately, without further dilution.
When you brew compost tea, be sure to use mature, sweet, earthy-smelling compost. If your compost smells unpleasant, it could be anaerobic, and few beneficial microbes survive in this environment. One way to achieve tea-worthy compost is to sustain pile temperatures between 135 and 155 degrees for a week or more by turning the pile often. A well-built pile that has composted for at least a year will also produce tea-ready compost even if it did not heat up to the ideal temperature range.
Keep in mind that E. coli can be present in the raw ingredients of a compost pile. Minimize the risk by maintaining a hot compost pile or allowing it to fully mature. And most importantly: don't apply compost tea to any vegetable within 3 weeks of harvest Compost Tea Liquid Gold fertilizer for flowers, vegetables and houseplants. Compost Tea, in fact, is all the rave for gardeners who repeatedly attest to higher quality vegetables, flowers, and foliage. Very simply, it is a liquid, nutritionally rich, well-balanced, organic supplement made by steeping aged compost in water. But its value is amazing, for it acts as a very mild, organic liquid fertilizer when added at any time of the year. What is so wonderful about Compost Tea is that it can be made right at home from your own fresh, well-finished compost. The only requirement is that the compost you use is well broken-down into
minute particles. This usually means that the organic materials have decomposed over a period of time so that their appearance is very dark with the texture of course crumbly cornmeal. Oh, and the fragrance is like that of rich soil in a forest. Don't have such compost yet? Well, dig deep down inside your bin, near the bottom. This is where organic material will be most decomposed and fresh. All you need is a good shovelful for a 5-gallon bucket of Compost Tea. This page gives you some tips and instructions for "brewing" your Liquid Gold. COMPOST TEA MAKES YOUR GARDEN GREEN Leachate is actually a by-product of composting and worm composting. It is a liquid that forms in the bottom of most bins, most likely unseen by you (unless collected from a worm bin), but well-known by all the microbes and critters, including worms, who live at the bottom of your pile and in the soil. This stuff is like a fantastic smoothie or a good cup of espresso to them! A fairly new phenomenon to gardening is the deliberate creation of Liquid Gold: Compost Tea. Researchers have determined exacting and scientific ways to brew it. The result has been the creation and promotion of Compost Tea brewing equipment, available at fine garden centers or on the internet. Some garden centers, in fact, have begun "brewing" the tea in large batches so that customers can draw-off what they need by the gallon. The homeowner is not obligated to use exacting methods to get some very fine tea. On this website we offer a very simple, practical, and fast way to make up a batch. All you need is a couple of buckets, a shovelful of fresh finished compost, water and a straining cloth such as cheesecloth or burlap. Increases plant growth
It is chock full of nutrients and minerals that give greener leaves, bigger and brighter blooms, and increased size and yield of vegetables. Provides nutrients to plants and soil The fast-acting nutrients are quickly absorbed by plants through their leaves or the soil. When used as a foliar spray plant surfaces are occupied by beneficial microbes, leaving no room for pathogens to infect the plant. The plant will suffer little or no blight, mold, fungus or wilt.A Provides beneficial organisms The live microbes enhance the soil and the immune system of plants. Growth of beneficial soil bacteria results in healthier, more stress-tolerant plants. The tea's chelated micronutrients are easy for plants to absorb. Helps to suppress diseases A healthy balance is created between soil and plant, increasing the ability to ward off pests, diseases, fungus and the like. Its microbial functions include: competes with disease causing microbes; degrades toxic pesticides and other chemicals; produces plant growth hormones; mineralizes a plant's available nutrients; fixes nitrogen in the plant for optimal use. Replaces toxic garden chemicals Perhaps the greatest benefit is that compost tea rids your garden of poisons that harm insects, wildlife, plants, soil and humans. It replaces chemical-based fertilizers, pesticides and fungicides. And, it will never burn a plant's leaves or roots. Finally, you save money.A Makes you a "Green Planetary Citizen" Compost tea is just another way to feel good about respecting the earth in your own yard and garden. It allows you to be less a consumer of harmful products and more a resourceful gardener. TEA MAKING TIPS The following factors will determine the quality of the finished tea: Use well-aged, finished compost Unfinished compost may contain harmful pathogens and compost that is too old may be nutritionally deficient. COMPOST TEA and MANURE TEA ARE NOT THE SAME THING! Manure teas may be
made in the same way but are not generally recommended as foliar sprays and are not as nutritionally well-balanced.) Using well-made, high quality compost you can brew up a mild batch in as little as an hour or let it brew for a week or more for a super concentrate. A good median is to let the tea brew for 24-48 hours. When it begins to smell "yeasty" you can stop and apply it to your plants. Recent research indicates that using some kind of aeration and adding a sugar source (unsulphered molasses works well) results in an excellent product that extracts the maximum number of beneficial organisms. This aeration is crucial to the formation of benefical bacteria and the required fermentation process. For the simple bucket-brewing approach, simply stir the tea a few times during those hours or days it is brewing. You can add all kinds of supplements like fish emulsion or powdered seaweed This turns the tea into a balanced organic fertilizer. AS A ROOT DRENCHA Can be used unfiltered by applying directly to the soil area around a plant. The tea will seep down into the root system. Root feeding is not affected by rainy weather. Strain tea thru a fine mesh cloth (cheesecloth, burlap, even an old shirt). Then dilute it with dechloronated water, if possible, or good quality well water. Use a ratio of 10 parts water to 1 part tea. The color should be that like weak tea. Add 1/8 tsp vegetable oil or mild dish-washing liquid per gallon to help it adhere to leaves. A Method of application and weather - A pump sprayer or misting bottle works better than hose-end sprayers for large areas or for foliar feeding as they don't plug up as easily. The beneficial miroorganisms are somewhat fragile so it is important to note you should avoid very high presure sprayers for appliction. Re-application after rain is necessary and one should avoid applying to the leaves during the heat of the day. A successful composting facility
requires careful consideration of these factors (http://www.ncdc. noaa.gov/oa/ncdc.html) and a software package like WRPLOT (freeware from Lakes Environmental, http://www.weblakes.com/products/wrplot/index.htm). Use at least five years worth of data to create an accurate wind rose. Once the prevailing wind directions and speeds are known, the layout and operation of the site can consider potential impact of odors on receptors. A sensitive receptor can be defined as any place where members of the public may gather, such as a house, school, park, church or shopping area. For initial siting and site layout, locate waste management aspects of the facility (e.g., waste receiving, mixing and active composting) at least 1,000 feet (and preferably 1,500 feet) from any sensitive receptors in the predominantly downwind direction (south, south-southwest, and southwest in Figure 1). Plan on a thickly vegetated buffer of fully developed vegetation in that direction so that vegetative surfaces can intercept and filter particulate matter that may contain odorous compounds. Orient the site so that odor-producing activities are sheltered by trees, hills, buildings, walls and other features that break up the wind pattern to create turbulence. Turbulent wind patterns disperse odors faster than laminar, or smooth, wind patterns. Turbulent dispersal is important, as the odor detection and recognition thresholds of some compounds is extremely low. Other site planning and development steps that can reduce potential for odor problems include: leaving room for equipment to get to piles or windrows for implementing odor-related best management practices (BMPs) as needed (such as installing a compost cap or watering windrows prior to turning), and designing the site for rapid and effective runoff and drainage management to prevent odorous puddles from forming. note that the predominant wind speeds are less than 11 miles per hour, meaning there are significant blocks of time with very low wind speeds (i.e., less than 4 miles/hour) so there is little dispersal and dilution of odorants. During low wind speed events, activities that

might generate odors should be avoided as much as possible without unduly constraining operations. These activity restrictions might include delaying waste mixing, pile building, windrow turning, etc. until the wind picks up. Operational decisions and practices that can minimize the potential for odor episodes will be covered in a future article. Optimum Conditioning Composting is never odor-free. Even under optimum conditions for aerobic decomposition of organic matter, odors are going to form. However, failure to develop those optimum conditions is guaranteed to make odors worse, particularly those odorants that people find annoying or unpleasant. The more odors that are formed due to poor composting conditions, the more quantities of that odorant escape into the atmosphere, and it becomes much harder to disperse those quantities below the recognition thresholds. The detection threshold of an odor is the minimum concentration that the human nose can perceive something in the air but not identify it; the recognition threshold is the minimum concentration that a human receptor can identify the odorant. The recognition threshold of an odor is much higher than the detection threshold; for example, ammonia has a detection threshold of 0.037 ppm, but a recognition threshold of 47 ppm.
Figure 2. Optimum composting conditions Source: US Composting Council
Optimum conditions of a good compost pile or windrow are illustrated in Figure 2. The microbes live in that thin biofilm around each particle in the pile and draw their life-sustaining oxygen from the air flowing through the pore space in the pile. So the first step in controlling the microbial activity is a mix that adheres to the right nutrient balance between carbon and nitrogen (at least 25 parts of carbon for each part of nitrogen), adequate moisture to form and maintain the biofilm (around 50-55%) and enough structural porosity to ensure a free air space of at least 40 percent to keep oxygen levels above an 8 to 10 percent minimum. Free air space can be measured using a bucket test similar to the bucket test often used to measure bulk density (see sidebar). “It all starts with the mix,” says Tim O’Neill, President of Engineered Compost Systems. “You have to start as close as you can to this mix or odor control technology won’t help. I’ve worked with quite a few biosolids composting facilities that started out with a C:N ratio that was too low; they had not accounted for the fact that some of the carbon in an amendment is not available to the microbes.” O’Neill recommends that facilities have bench-scale reactors on-site (see box) to test different recipes before trying them in full-scale applications to learn more about the odors with each recipe. Controlling Microbial Activity No one practice influences odor generation potential more than another; rather it is a combination of smaller steps to be managed, including particle size, moisture content and air flow. Particle Size the effectiveness of microbial metabolism on the compost particle is defined, in part, by the surface area-to-volume (SAV) relationship of the particle. The SAV explains why finely-ground salt dissolves in water faster than coarsely-ground salt. If SAV is too high, the interior of that particle will take a very long time to compost. If it is too low, then the particles in the pile can’t support themselves and they collapse the free air space between them, reducing the ability of the pile to stay aerobic. Particle sizes should be in the 2- to 3-inch range. One way to manage this in the field is with bulk density (the ratio of
mass to volume of a specific material). A high bulk density means there are smaller particle sizes and narrower pore spaces; it also means there is more organic material to decompose in a given volume of mixed feedstocks. Initial compost mixes should have a mixed bulk density below 1,100 pounds per cubic yard (lbs/cy). Moisture Content The correct moisture content advances the rate of decomposition. There are three types of water in a compost pile: free (gravitational) water, which drains out by gravity (a soaked pile after a rainstorm); capillary water, which is cohesively- or adhesively-bound to the particle and forms the biofilm in which the microbes live; and intracellular water, which is contained inside the cells of plants and animal tissue. The capillary water is most important to good composting, but variations in moisture from release of intracellular water need to be considered. If the biofilm around the particles dries out, microbial activity will go dormant and composting will stop. As piles dry out, the concentration of potential odorants in the biofilm increases. This can cause a chemical equilibrium shift between soluble and volatile forms for odorants such as ammonia or the terpenes found in green wastes. As mentioned in Part 1, when a chemical volatilizes, it becomes a gas and migrates out of a compost pile by either passive or forced aeration. Conversely, if moisture is allowed to climb above 60 percent or so, the free air space channels between the particles clog with water. This thicker biofilm reduces the amount of oxygen available to the microorganisms on the surface of the particle as the rate of oxygen transfer in water is much slower than the rate of transfer in air. Material with an optimum moisture content of around 50 to 55 percent has the consistency of a wrung-out sponge that is wet but not freely dripping water. One of the challenges in composting food scraps containing large amounts of vegetable and fruit material is that the plant cell walls break open readily under the heat of initial decomposition, flooding the pile with water. Without adequate structural porosity to allow that flush to drain out, the pore spaces in the pile will fill with water and
risk formation of anaerobic conditions. Air Flow ATransfer of oxygen across the biofilm requires a steady flow of air through the pile. Whether by natural or passive means, or forced through a pile by a blower, aeration serves several critical functions in process management, including replenishment of oxygen, removal of carbon dioxide (and volatile odorants), and removal of heat. Compost piles and windrows have both macro aeration and micro aeration characteristics. Macro aeration refers to the overall uniformity of the structural porosity of a pile. A compost pile comprised of wet dairy manure mixed with sawdust has low macro aeration characteristics. A compost pile of chipped tree waste has good macro aeration characteristics. Good macro aeration characteristics are necessary where passive aeration is the primary means of oxygen transfer, like in windrows. Micro aeration characteristics refer to how well air moves inside the pile. Fine particles, such as those produced by processing woody wastes with a hammermill, can impede aeration rates and create air-starved sections in a pile. Piles with a lot of paper in them also can create poor micro aeration characteristics. “The agglomeration of the paper particles can clog air channels in the pile,” notes O’Neill. “Poor micro aeration in food scraps compost piles can depress pH, which leads to formation of volatile fatty acids that make that sickly sweet smell.” Release Of Odorants odorants are produced at various stages in the decomposition process and that there is a sequence of events in which the odorants generated by initial stage decomposition are degraded by microorganisms in the pile during composting. Forced aeration systems, particularly those with deliberately-elevated aeration rates, can strip odorants out of a pile before they have had time to decompose. This can be a problem if the fans strip odorants out of air-starved portions of the pile, putting pressure on the external odor control system (e.g., biofilter) to handle the load. This should be factored into the system design, e.g., gas (odorous air) retention time

should be more like 60 to 70 seconds instead of the minimum 45-second retention time. This requires a deeper biofilter (versus more area). In windrow systems that rely on the “chimney effect” of passive aeration, the high temperatures of early composting enhance the air flow through the windrow, potentially carrying off odorous compounds. That can be minimized by covering windrows with a 4-inch layer of unscreened compost to act as an in-situ biofilter. However, it is easy to overload a compost cap and suffocate the windrow. As feedstocks decompose, they provide nutrients to the microbes, which use them to sustain their metabolism. Excess nutrients are not processed and can accumulate. As the biological and chemical changes in a pile shift the equilibrium between soluble and volatile forms of a chemical, these nutrients can be volatilized and become an odorant. The most notable example of this is ammonia emissions from a pile with a C:N ratio below 20:1. Conversely, composting piles with high C:N ratios, like leaves and green waste, can emit odors from volatile carbon-based chemicals like hexanal (C6H12O), pentanal (C5H10O), acetone and methanol. Hexanal is the odor of fresh cut grass and pentanal has an acrid, pungent odor. Not all carbon is available for microbial metabolism. A chemical found in all plants, lignin, is very difficult for bacteria to decompose. Lignin is a phenolic polymer and fills the spaces in the cell wall between cellulose, hemicellulose and pectin components. Lignin is particularly abundant in paper and wood, where it can comprise 18 to 22 percent of hardwoods (on a dry weight basis) and 26 to 33 percent of softwoods. So, a compost pile with wood chips as a bulking agent will have a lower bioavailable C:N ratio than would be indicated by a laboratory analysis of Total Carbon and Total Nitrogen. This has the potential for odor episodes characteristic of a low C:N pile, such as the heavy, sour smell of a low C:N food scraps compost pile. Das (2000) presents a procedure for adjusting C:N ratios based on lignin content; one example calculation is shown in Table 1. Adjusting compost recipes for nonavailable carbon can significantly increase
the volume ratio between carbonaceous and nitrogenous feedstocks from the traditional 2-3:1 to as much as 6-8:1. Following best management practices in site layout and design and in compost pile recipe development and construction will not eliminate odors, but will greatly reduce the potential for odor episodes that will cause problems. Part III of this series will examine operational practices to minimize odor episodes.
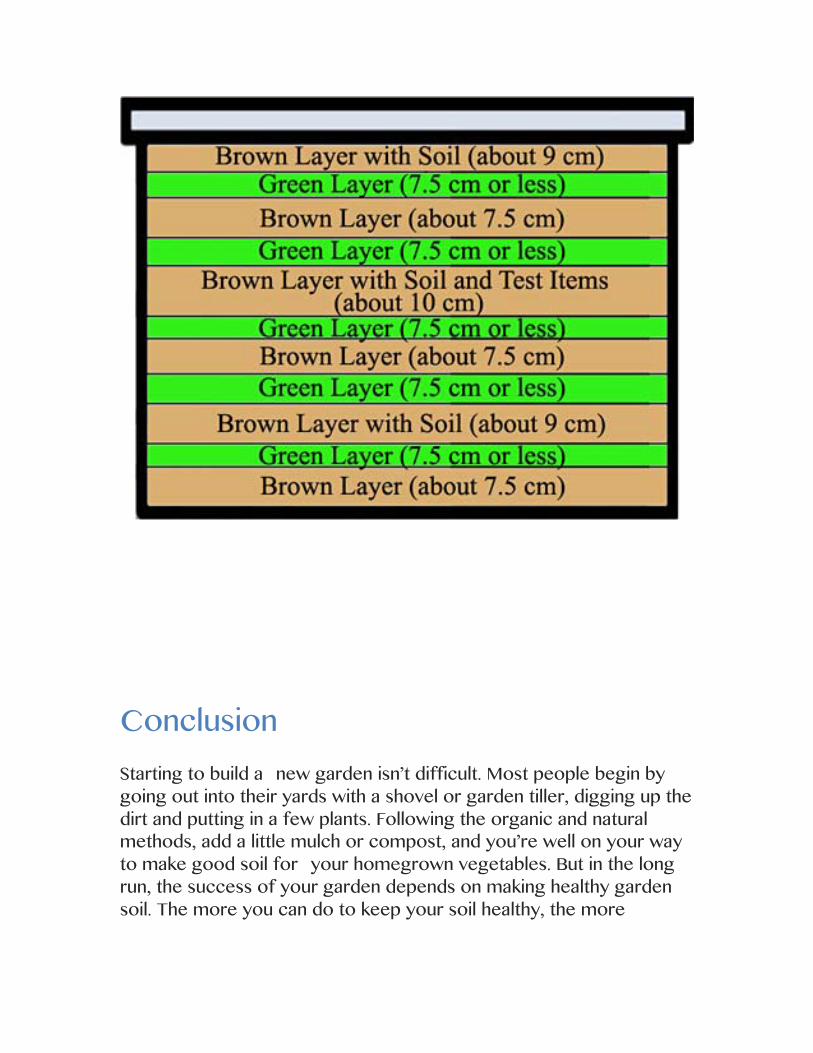
Conclusion Starting to build a new garden isn’t difficult. Most people begin by going out into their yards with a shovel or garden tiller, digging up the dirt and putting in a few plants. Following the organic and natural methods, add a little mulch or compost, and you’re well on your way to make good soil for your homegrown vegetables. But in the long run, the success of your garden depends on making healthy garden soil. The more you can do to keep your soil healthy, the more
productive your garden will be and the higher the quality of your crops. the value of soil care methods that imitate natural soil communities. These include protecting soil structure, feeding the soil with nutrients from natural and local sources, and increasing the diversity and numbers of the microbes and other organisms that live in the soil In this article, I’ll focus on specific ways to achieve these goals. There are many ways to do this, but they all revolve around two basic concepts: For more fertile soil, you need to increase organic matter and mineral availability, and whenever possible, you should avoid tilling the soil and leave its structure undisturbed. Add manures for nitrogen
All livestock manures can be valuable additions to soil — their nutrients are readily available to soil organisms and plants. In fact, manures make a greater contribution to soil aggregation than composts, which have already mostly decomposed.
You should apply manure with care. Although pathogens are less likely to be found in manures from homesteads and small farms than those from large confinement livestock operations, you should allow three months between application and harvest of root crops or leafy vegetables such as lettuce and spinach to guard against contamination. (Tall crops such as corn and trellised tomatoes shouldn’t be prone to contamination.)
However, because some nutrients from manures are so readily available, they are more likely to leach out of the soil (where they’re needed) into groundwater and streams (where they’re pollutants). Also, if manures are overused, they can provide excess amounts of some nutrients, especially phosphorus. Because of this, it may be best to restrict fresh manures to heavy feeding, fast-growing crops like corn, and process additional manure by composting.
When thinking of manure, it’s worth considering our own. Flushing “humanure” away disrupts aquatic ecosystems, and represents a net loss of potential fertility from agricultural soils. On the other hand, human manure requires cautious management to avoid spreading disease. I recommend Joe Jenkins’ The Humanure Handbook, the bible on this subject. Try composting. Composting is a means of recycling almost any organic wastes. It reduces the bulk of organic materials, stabilizes their more volatile and soluble nutrients, and speeds up the formation of soil humus. Regular applications of modest amounts of compost — one-quarter inch per season — will provide slow-release nutrients, which will dramatically improve your soil’s water retention and help suppress disease. Classic composting is relatively simple (for more about how to do it, see “Start a Compost Pile,” below), but it can be labor intensive if you try to do it on a large scale. The older I get, the more interested I am in an easier alternative. Fortunately, I’ve found two. One is “sheet composting.” In classic composting, you build tall piles in bins, alternating layers of fresh, high-nitrogen “greens,” such as grass clippings, with high-carbon, difficult to break down “browns,” such as dry leaves. Instead, you can keep these two compost materials separate, and apply them in two layers directly to the garden bed.
The moist, volatile, high-nitrogen “greens” go down first, in direct contact with the soil and the microbial populations ready to feed on them, while the drier, coarser, high-carbon “browns” are used as a cover to keep the first layer from drying out or losing its more volatile elements to the atmosphere.
The second alternative is vermicomposting: using earthworms to convert nutrient-dense materials, such as manures, food wastes and green crop residues, into forms usable by plants.
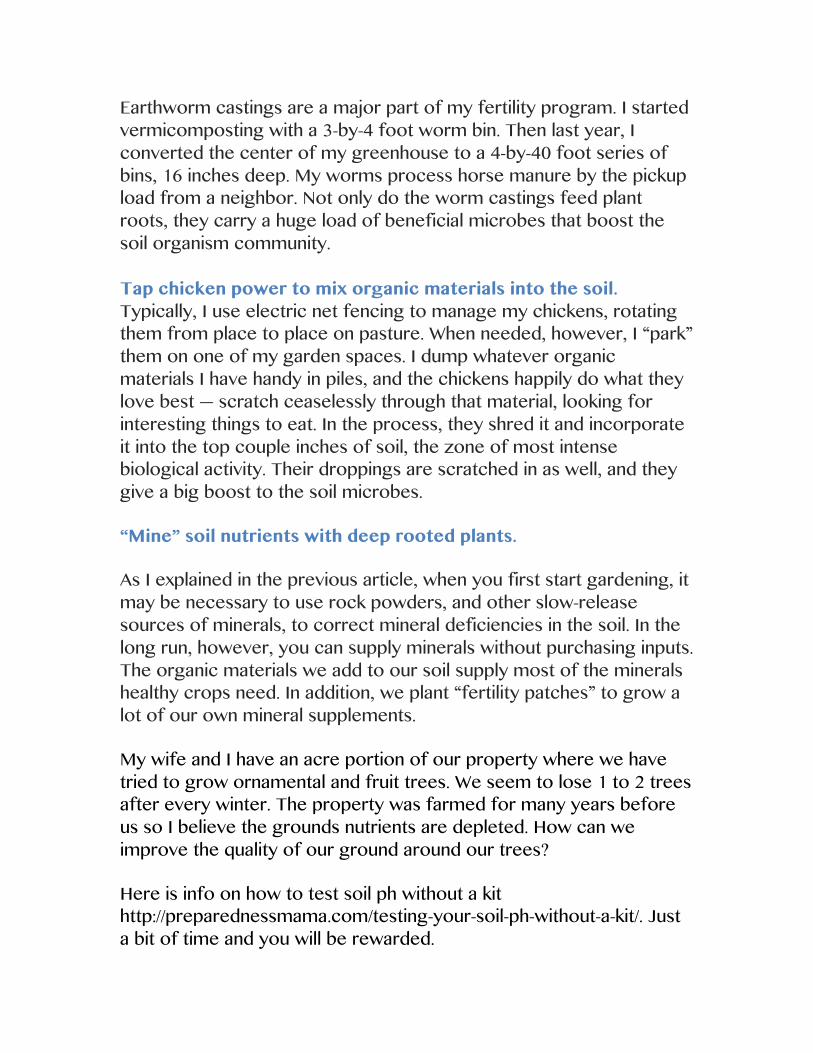
Earthworm castings are a major part of my fertility program. I started vermicomposting with a 3-by-4 foot worm bin. Then last year, I converted the center of my greenhouse to a 4-by-40 foot series of bins, 16 inches deep. My worms process horse manure by the pickup load from a neighbor. Not only do the worm castings feed plant roots, they carry a huge load of beneficial microbes that boost the soil organism community. Tap chicken power to mix organic materials into the soil. Typically, I use electric net fencing to manage my chickens, rotating them from place to place on pasture. When needed, however, I “park” them on one of my garden spaces. I dump whatever organic materials I have handy in piles, and the chickens happily do what they love best — scratch ceaselessly through that material, looking for interesting things to eat. In the process, they shred it and incorporate it into the top couple inches of soil, the zone of most intense biological activity. Their droppings are scratched in as well, and they give a big boost to the soil microbes.
“Mine” soil nutrients with deep rooted plants.
As I explained in the previous article, when you first start gardening, it may be necessary to use rock powders, and other slow-release sources of minerals, to correct mineral deficiencies in the soil. In the long run, however, you can supply minerals without purchasing inputs. The organic materials we add to our soil supply most of the minerals healthy crops need. In addition, we plant “fertility patches” to grow a lot of our own mineral supplements.
My wife and I have an acre portion of our property where we have tried to grow ornamental and fruit trees. We seem to lose 1 to 2 trees after every winter. The property was farmed for many years before us so I believe the grounds nutrients are depleted. How can we improve the quality of our ground around our trees?
Here is info on how to test soil ph without a kit http://preparednessmama.com/testing-your-soil-ph-without-a-kit/. Just a bit of time and you will be rewarded.
I got it from Larry Moore's; 20 X 30 Backyard Garden book. If your soil is clay gypsum takes several seasons (or more) to correct...the only way to do it fast is by tilling in a ton of peat and organic matter. I still use the gypsum though because I agree that over time it helps change soil from clay to loam. Dig deep!
I have poor soil. Its clay and sand. I try to add stuff to it every year but it still ends up hard during the summer.
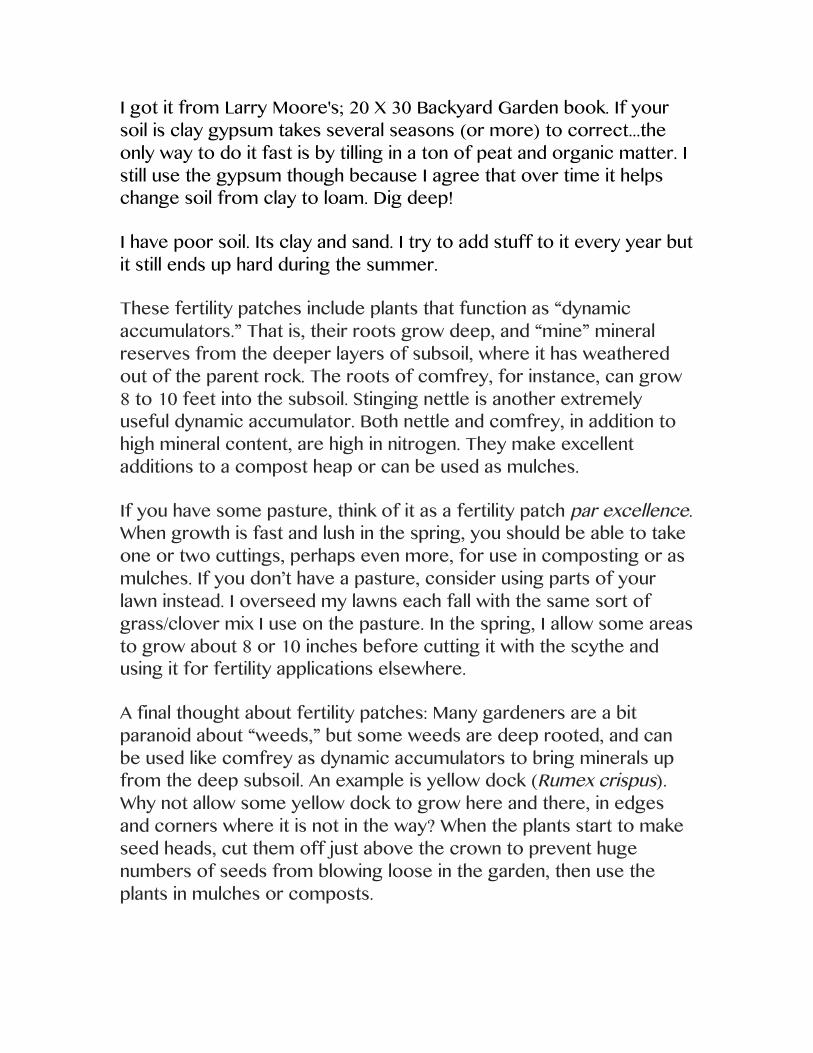
These fertility patches include plants that function as “dynamic accumulators.” That is, their roots grow deep, and “mine” mineral reserves from the deeper layers of subsoil, where it has weathered out of the parent rock. The roots of comfrey, for instance, can grow 8 to 10 feet into the subsoil. Stinging nettle is another extremely useful dynamic accumulator. Both nettle and comfrey, in addition to high mineral content, are high in nitrogen. They make excellent additions to a compost heap or can be used as mulches.
If you have some pasture, think of it as a fertility patch par excellence. When growth is fast and lush in the spring, you should be able to take one or two cuttings, perhaps even more, for use in composting or as mulches. If you don’t have a pasture, consider using parts of your lawn instead. I overseed my lawns each fall with the same sort of grass/clover mix I use on the pasture. In the spring, I allow some areas to grow about 8 or 10 inches before cutting it with the scythe and using it for fertility applications elsewhere.
A final thought about fertility patches: Many gardeners are a bit paranoid about “weeds,” but some weeds are deep rooted, and can be used like comfrey as dynamic accumulators to bring minerals up from the deep subsoil. An example is yellow dock (Rumex crispus). Why not allow some yellow dock to grow here and there, in edges and corners where it is not in the way? When the plants start to make seed heads, cut them off just above the crown to prevent huge numbers of seeds from blowing loose in the garden, then use the plants in mulches or composts.
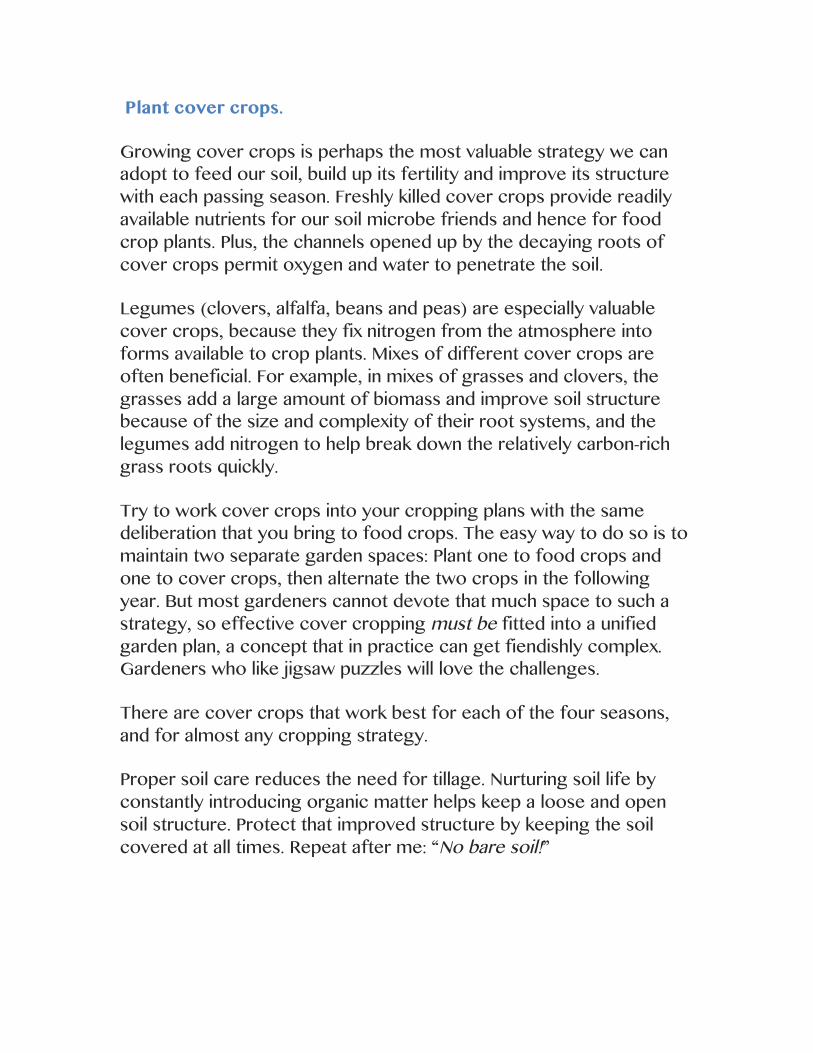
Plant cover crops.
Growing cover crops is perhaps the most valuable strategy we can adopt to feed our soil, build up its fertility and improve its structure with each passing season. Freshly killed cover crops provide readily available nutrients for our soil microbe friends and hence for food crop plants. Plus, the channels opened up by the decaying roots of cover crops permit oxygen and water to penetrate the soil.
Legumes (clovers, alfalfa, beans and peas) are especially valuable cover crops, because they fix nitrogen from the atmosphere into forms available to crop plants. Mixes of different cover crops are often beneficial. For example, in mixes of grasses and clovers, the grasses add a large amount of biomass and improve soil structure because of the size and complexity of their root systems, and the legumes add nitrogen to help break down the relatively carbon-rich grass roots quickly.
Try to work cover crops into your cropping plans with the same deliberation that you bring to food crops. The easy way to do so is to maintain two separate garden spaces: Plant one to food crops and one to cover crops, then alternate the two crops in the following year. But most gardeners cannot devote that much space to such a strategy, so effective cover cropping must be fitted into a unified garden plan, a concept that in practice can get fiendishly complex. Gardeners who like jigsaw puzzles will love the challenges.
There are cover crops that work best for each of the four seasons, and for almost any cropping strategy.
Proper soil care reduces the need for tillage. Nurturing soil life by constantly introducing organic matter helps keep a loose and open soil structure. Protect that improved structure by keeping the soil covered at all times. Repeat after me: “No bare soil!”
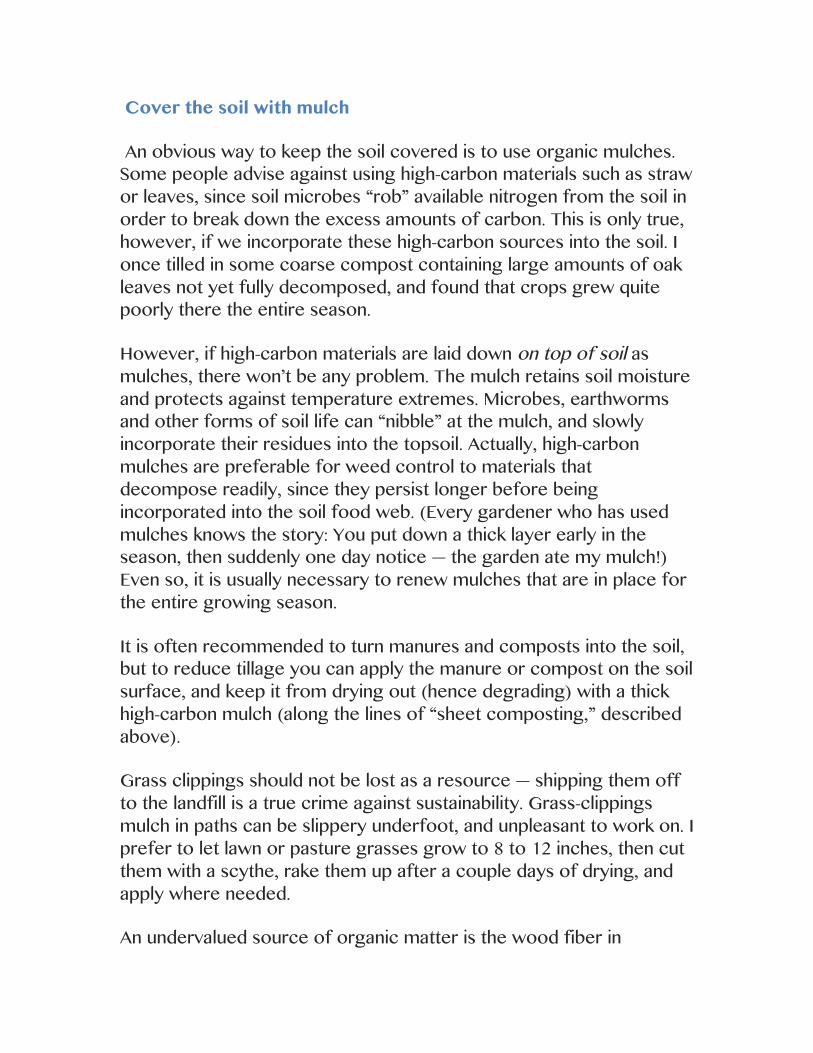
Cover the soil with mulch
An obvious way to keep the soil covered is to use organic mulches. Some people advise against using high-carbon materials such as straw or leaves, since soil microbes “rob” available nitrogen from the soil in order to break down the excess amounts of carbon. This is only true, however, if we incorporate these high-carbon sources into the soil. I once tilled in some coarse compost containing large amounts of oak leaves not yet fully decomposed, and found that crops grew quite poorly there the entire season.
However, if high-carbon materials are laid down on top of soil as mulches, there won’t be any problem. The mulch retains soil moisture and protects against temperature extremes. Microbes, earthworms and other forms of soil life can “nibble” at the mulch, and slowly incorporate their residues into the topsoil. Actually, high-carbon mulches are preferable for weed control to materials that decompose readily, since they persist longer before being incorporated into the soil food web. (Every gardener who has used mulches knows the story: You put down a thick layer early in the season, then suddenly one day notice — the garden ate my mulch!) Even so, it is usually necessary to renew mulches that are in place for the entire growing season.
It is often recommended to turn manures and composts into the soil, but to reduce tillage you can apply the manure or compost on the soil surface, and keep it from drying out (hence degrading) with a thick high-carbon mulch (along the lines of “sheet composting,” described above).
Grass clippings should not be lost as a resource — shipping them off to the landfill is a true crime against sustainability. Grass-clippings mulch in paths can be slippery underfoot, and unpleasant to work on. I prefer to let lawn or pasture grasses grow to 8 to 12 inches, then cut them with a scythe, rake them up after a couple days of drying, and apply where needed.
An undervalued source of organic matter is the wood fiber in
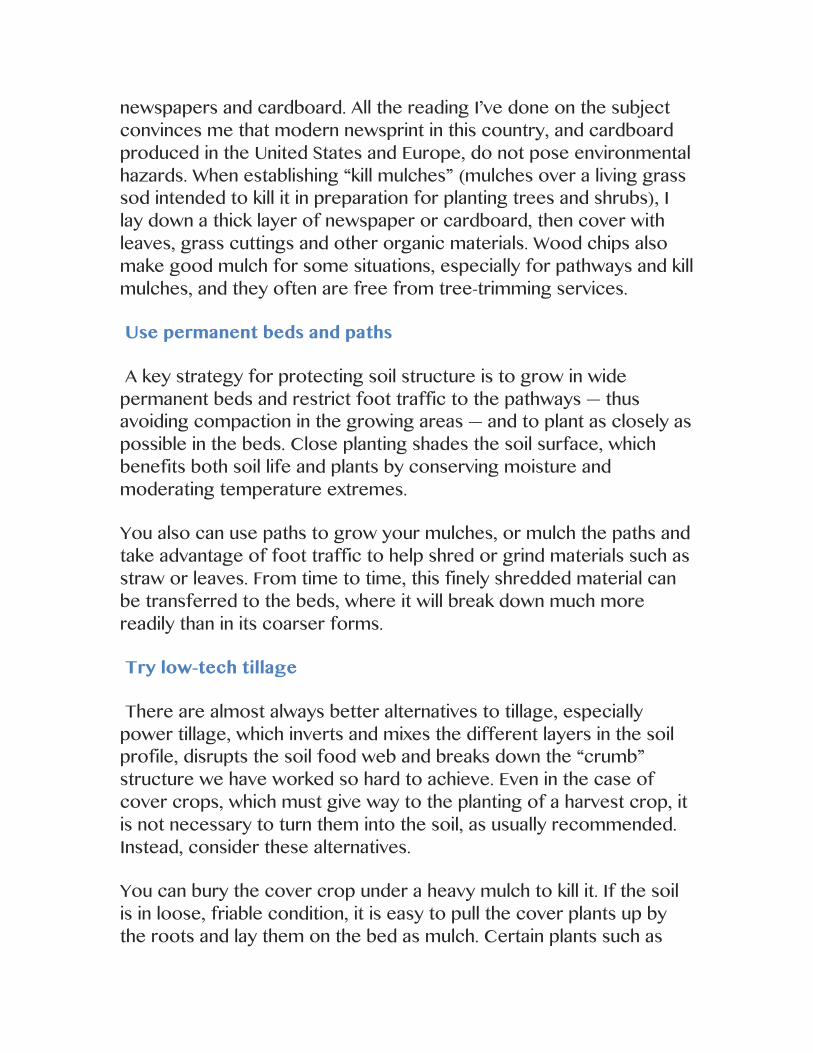
newspapers and cardboard. All the reading I’ve done on the subject convinces me that modern newsprint in this country, and cardboard produced in the United States and Europe, do not pose environmental hazards. When establishing “kill mulches” (mulches over a living grass sod intended to kill it in preparation for planting trees and shrubs), I lay down a thick layer of newspaper or cardboard, then cover with leaves, grass cuttings and other organic materials. Wood chips also make good mulch for some situations, especially for pathways and kill mulches, and they often are free from tree-trimming services.
Use permanent beds and paths
A key strategy for protecting soil structure is to grow in wide permanent beds and restrict foot traffic to the pathways — thus avoiding compaction in the growing areas — and to plant as closely as possible in the beds. Close planting shades the soil surface, which benefits both soil life and plants by conserving moisture and moderating temperature extremes.
You also can use paths to grow your mulches, or mulch the paths and take advantage of foot traffic to help shred or grind materials such as straw or leaves. From time to time, this finely shredded material can be transferred to the beds, where it will break down much more readily than in its coarser forms.
Try low-tech tillage
There are almost always better alternatives to tillage, especially power tillage, which inverts and mixes the different layers in the soil profile, disrupts the soil food web and breaks down the “crumb” structure we have worked so hard to achieve. Even in the case of cover crops, which must give way to the planting of a harvest crop, it is not necessary to turn them into the soil, as usually recommended. Instead, consider these alternatives.
You can bury the cover crop under a heavy mulch to kill it. If the soil is in loose, friable condition, it is easy to pull the cover plants up by the roots and lay them on the bed as mulch. Certain plants such as
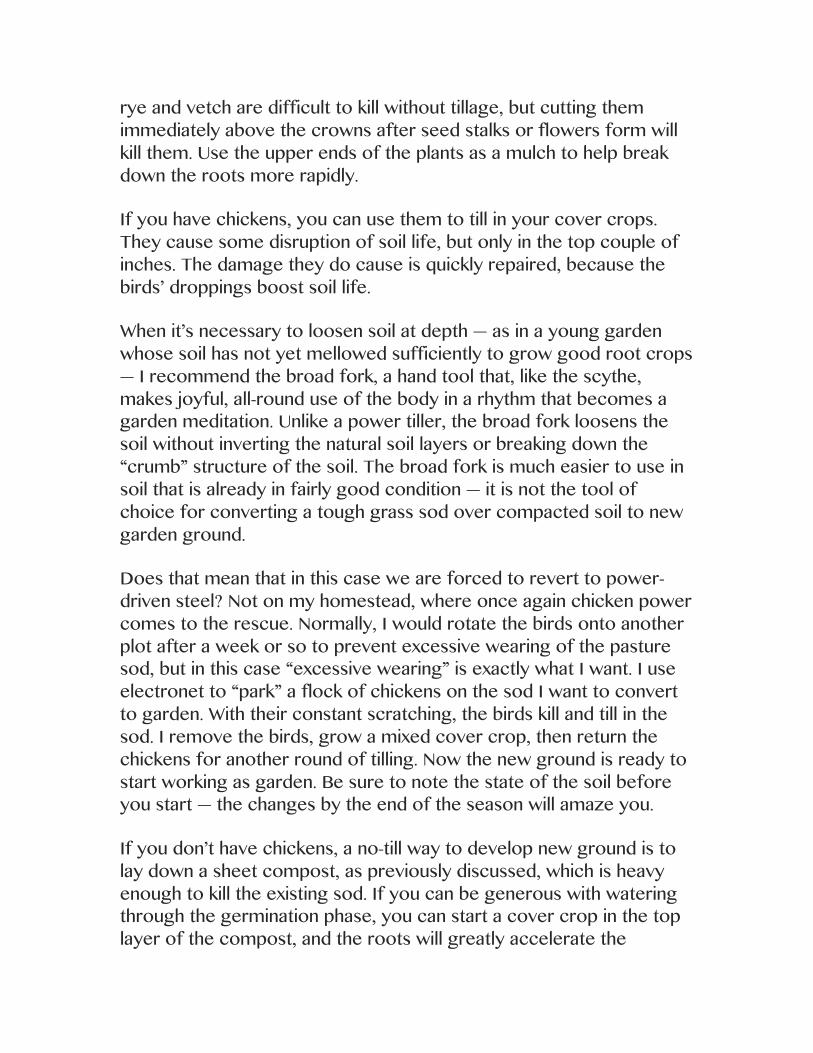
rye and vetch are difficult to kill without tillage, but cutting them immediately above the crowns after seed stalks or flowers form will kill them. Use the upper ends of the plants as a mulch to help break down the roots more rapidly.
If you have chickens, you can use them to till in your cover crops. They cause some disruption of soil life, but only in the top couple of inches. The damage they do cause is quickly repaired, because the birds’ droppings boost soil life.
When it’s necessary to loosen soil at depth — as in a young garden whose soil has not yet mellowed sufficiently to grow good root crops — I recommend the broad fork, a hand tool that, like the scythe, makes joyful, all-round use of the body in a rhythm that becomes a garden meditation. Unlike a power tiller, the broad fork loosens the soil without inverting the natural soil layers or breaking down the “crumb” structure of the soil. The broad fork is much easier to use in soil that is already in fairly good condition — it is not the tool of choice for converting a tough grass sod over compacted soil to new garden ground.
Does that mean that in this case we are forced to revert to power-driven steel? Not on my homestead, where once again chicken power comes to the rescue. Normally, I would rotate the birds onto another plot after a week or so to prevent excessive wearing of the pasture sod, but in this case “excessive wearing” is exactly what I want. I use electronet to “park” a flock of chickens on the sod I want to convert to garden. With their constant scratching, the birds kill and till in the sod. I remove the birds, grow a mixed cover crop, then return the chickens for another round of tilling. Now the new ground is ready to start working as garden. Be sure to note the state of the soil before you start — the changes by the end of the season will amaze you.
If you don’t have chickens, a no-till way to develop new ground is to lay down a sheet compost, as previously discussed, which is heavy enough to kill the existing sod. If you can be generous with watering through the germination phase, you can start a cover crop in the top layer of the compost, and the roots will greatly accelerate the
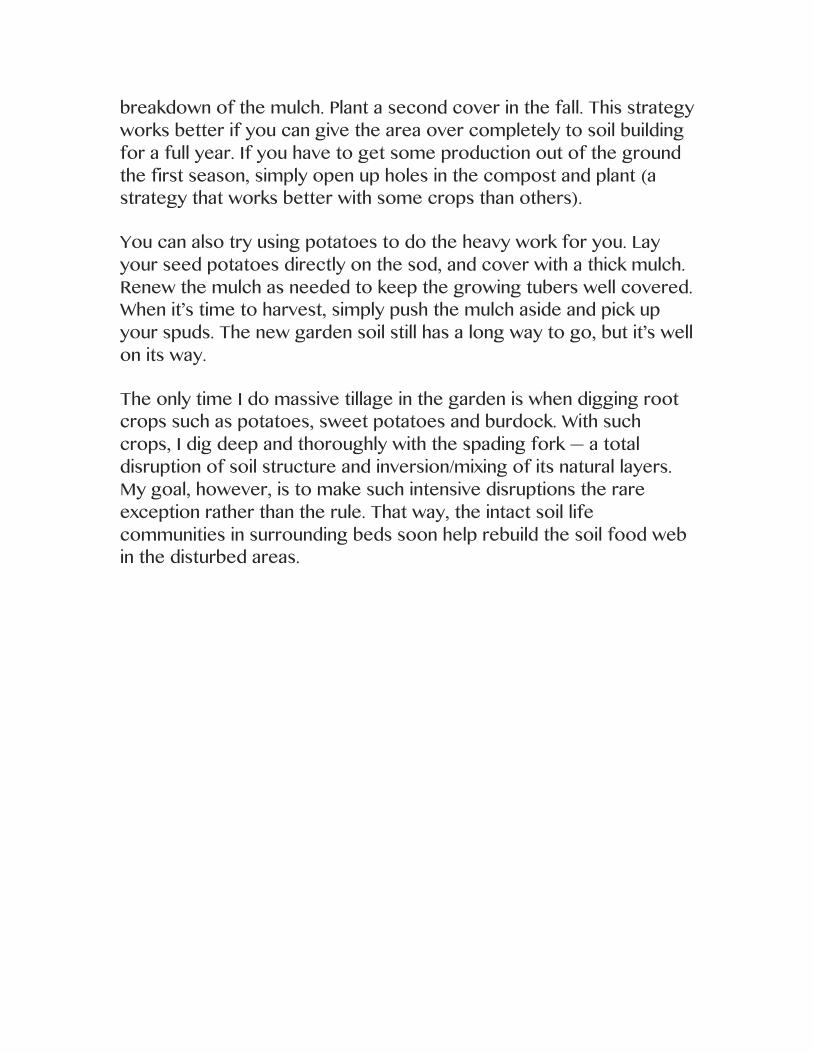
breakdown of the mulch. Plant a second cover in the fall. This strategy works better if you can give the area over completely to soil building for a full year. If you have to get some production out of the ground the first season, simply open up holes in the compost and plant (a strategy that works better with some crops than others).
You can also try using potatoes to do the heavy work for you. Lay your seed potatoes directly on the sod, and cover with a thick mulch. Renew the mulch as needed to keep the growing tubers well covered. When it’s time to harvest, simply push the mulch aside and pick up your spuds. The new garden soil still has a long way to go, but it’s well on its way.
The only time I do massive tillage in the garden is when digging root crops such as potatoes, sweet potatoes and burdock. With such crops, I dig deep and thoroughly with the spading fork — a total disruption of soil structure and inversion/mixing of its natural layers. My goal, however, is to make such intensive disruptions the rare exception rather than the rule. That way, the intact soil life communities in surrounding beds soon help rebuild the soil food web in the disturbed areas.