quickie cementation - lee sauder cementation.pdf · from here on out, you're just forging a...
TRANSCRIPT
Quickie Cementation
For some years I've tinkered, off and on, with trying to convert low carbon bloom iron to steel by simple
carburization in an open forge. Although this is commonly referred to in literature on the history of
metallurgy, I'm not aware of much actual experiment with this. Though the concept is simple, my early
attempts showed me it was pretty difficult to actually achieve.
Basically, I set out to see if I could convert iron to steel in the process of forging a knife from a bar of bloom
iron. Informed by my experience with other steelmaking methods like the Aristotle furnace or Ole Evenstad's
hearth melting method, I've finally come up with a pretty quick and easy method to convert a bar of iron to
steel in a typical charcoal forge.
At liquid and near-liquid temperatures, iron can pick up carbon very rapidly- this is how the hearth smelting
techniques mentioned above work. Most observant blacksmiths who have done much forge-welding,
especially with charcoal, have noticed that they occasionally get hard steely spots at their weld. This method is
just a practical way to harness that observation, without melting the iron into a bloom-like mass, or messing
with carbon-packed containers and enduring the long periods at lower temperatures that more conventional
cementation requires. This whole process takes 15 to 20 minutes to convert the iron to steel.
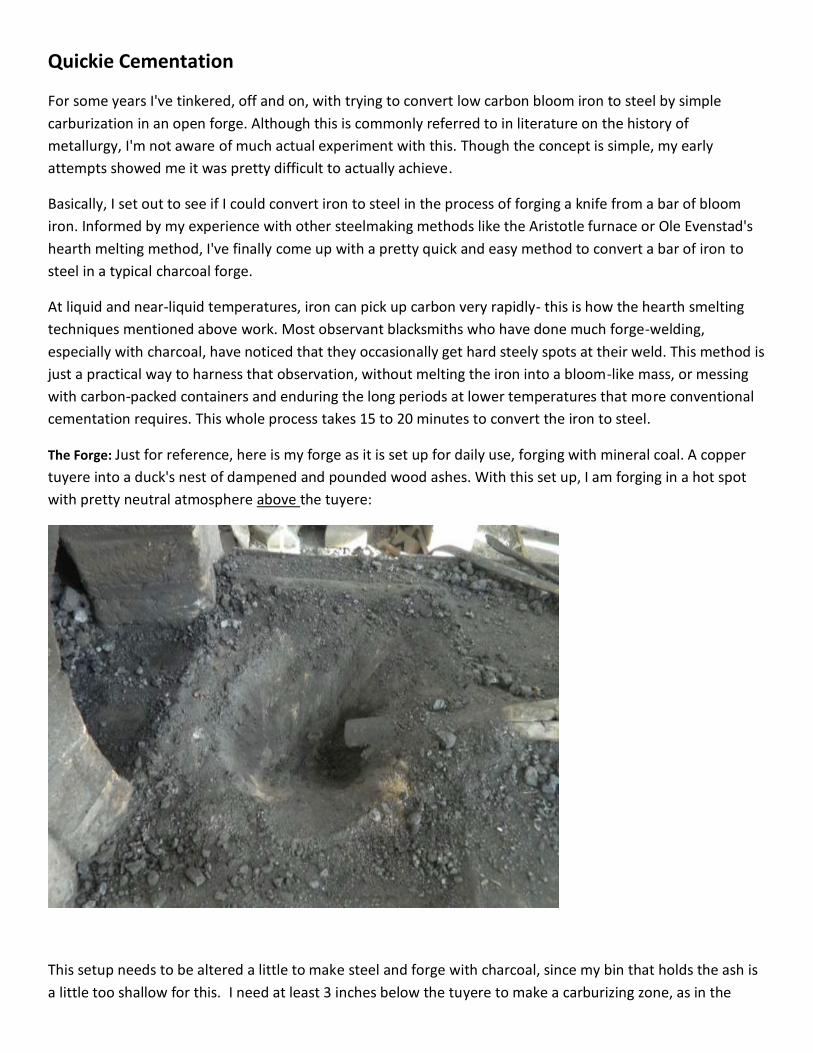
The Forge: Just for reference, here is my forge as it is set up for daily use, forging with mineral coal. A copper
tuyere into a duck's nest of dampened and pounded wood ashes. With this set up, I am forging in a hot spot
with pretty neutral atmosphere above the tuyere:
This setup needs to be altered a little to make steel and forge with charcoal, since my bin that holds the ash is
a little too shallow for this. I need at least 3 inches below the tuyere to make a carburizing zone, as in the
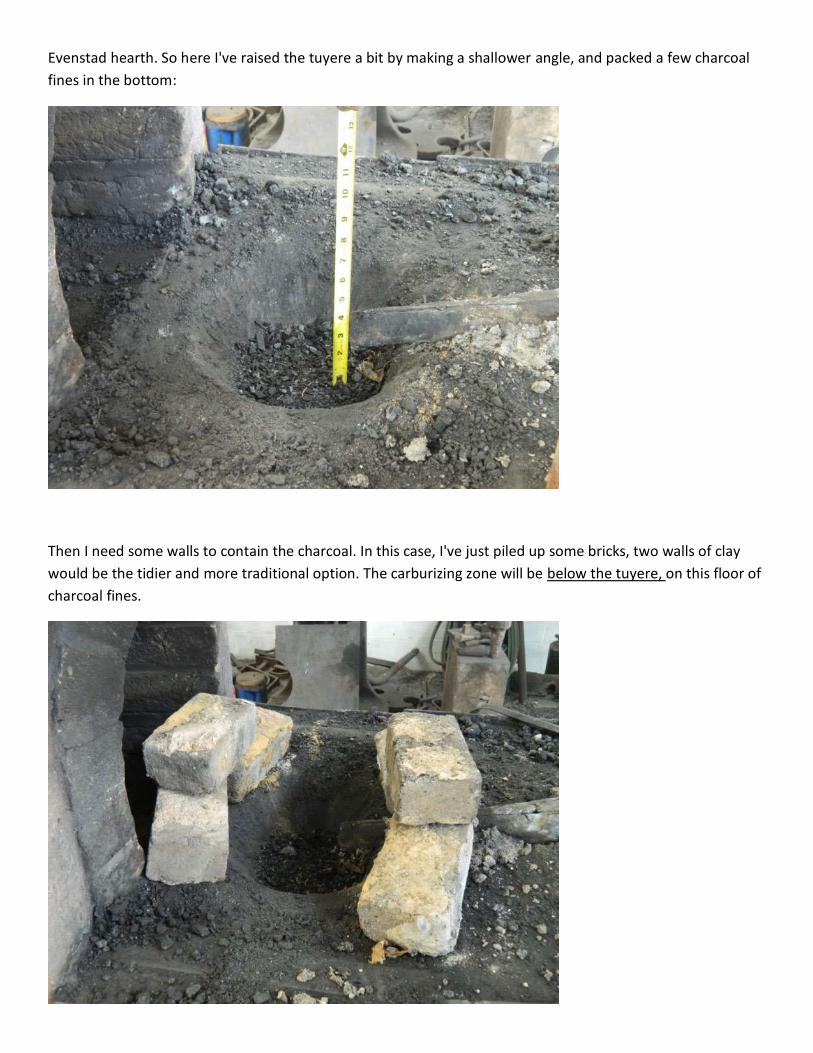
Evenstad hearth. So here I've raised the tuyere a bit by making a shallower angle, and packed a few charcoal
fines in the bottom:
Then I need some walls to contain the charcoal. In this case, I've just piled up some bricks, two walls of clay
would be the tidier and more traditional option. The carburizing zone will be below the tuyere, on this floor of
charcoal fines.

Here I've taken a billet of bloom iron that started at 1 ½ " square, and forged it down to a bar 3/16" by ½"by
18" long. The width may vary, and the length may vary, depending on your desired finished size, but the bar
needs to be thin to allow carburization throughout the bar. Up to this point, I'm forging conventionally above
the tuyere, and this forging has allowed the hearth to heat up nicely.
Here's a spark test of the bar- you can see it's dead low carbon, with a long spark and no bursts:
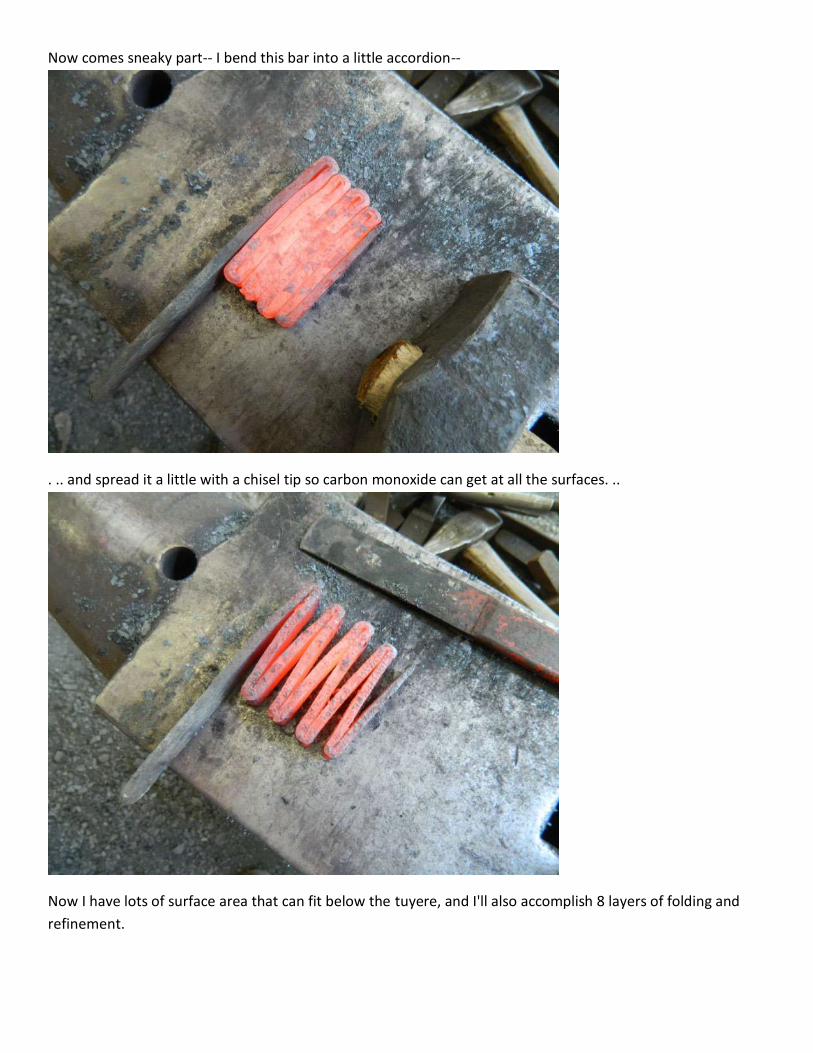
Now comes sneaky part-- I bend this bar into a little accordion--
. .. and spread it a little with a chisel tip so carbon monoxide can get at all the surfaces. ..
Now I have lots of surface area that can fit below the tuyere, and I'll also accomplish 8 layers of folding and
refinement.

Now I jam the zig-zag bar down in the bottom of the hearth, and bring it up to a nice slippery welding heat,
with a few sparks.
Cont'd…
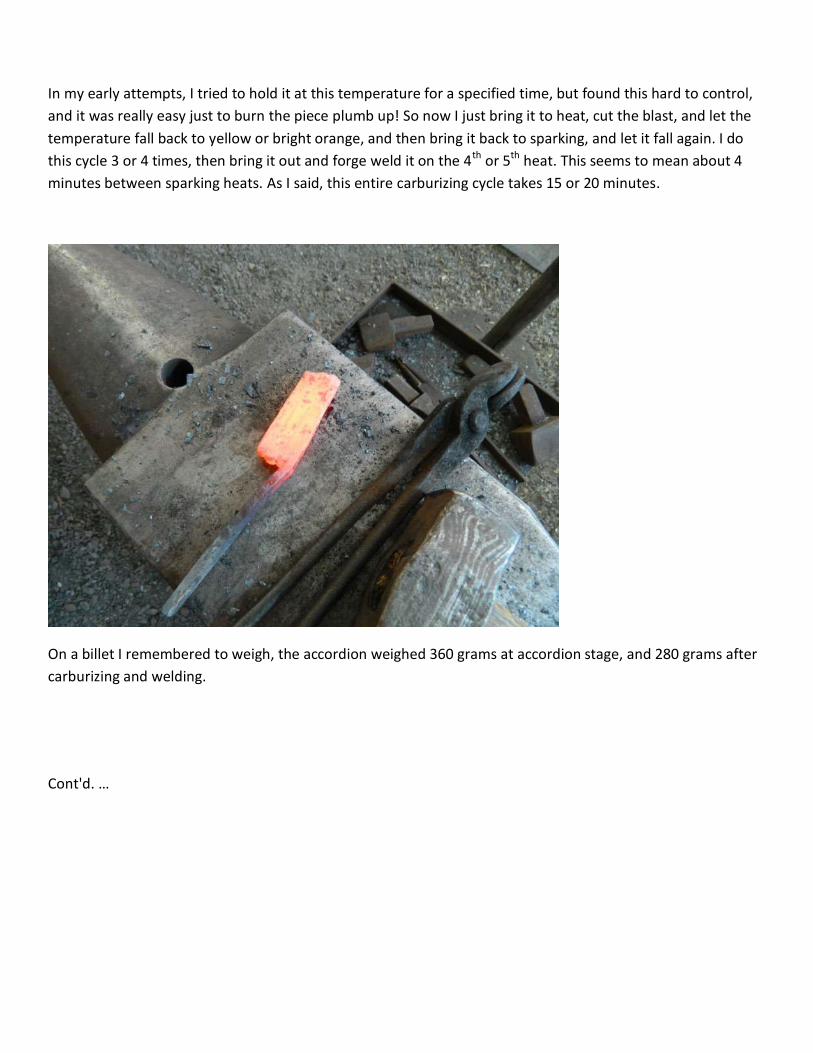
In my early attempts, I tried to hold it at this temperature for a specified time, but found this hard to control,
and it was really easy just to burn the piece plumb up! So now I just bring it to heat, cut the blast, and let the
temperature fall back to yellow or bright orange, and then bring it back to sparking, and let it fall again. I do
this cycle 3 or 4 times, then bring it out and forge weld it on the 4th or 5th heat. This seems to mean about 4
minutes between sparking heats. As I said, this entire carburizing cycle takes 15 or 20 minutes.
On a billet I remembered to weigh, the accordion weighed 360 grams at accordion stage, and 280 grams after
carburizing and welding.
Cont'd. …

Of course, the number of times you bring the billet to welding heat will determine your carbon content. You
can see the billet has picked up carbon- the spark is now short, with bursts.
From here on out, you're just forging a knife. In this blade, I forged perpendicular to the laminations, so I could
do a little etch and see the carbon distribution. You can see the carburization (dark etch) is pretty consistent,
with bright lines at the welds.

The blade hardened nicely, keeps a nice edge, and has been doing excellent service in my kitchen for several
weeks as of this writing. …
Of the ways I've made steel, I think this is the easiest way I've done it. The nicest thing about it is that the work
just happens in the forge and rolls right on into making the tool. I have not done this enough to push its limits
in either practical size or carbon content, so I hope you'll let me know what you learn in trying this!