quick start guide - vaporfi 2 will not fire: ... para prepararlo, primero debe quitar la boquilla de...
TRANSCRIPT
QUICK START GUIDE
ENGLISH

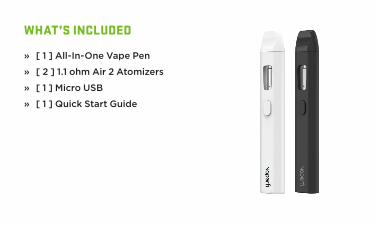
WHAT’S INCLUDED
» [ 1 ] All-In-One Vape Pen
» [ 2 ] 1.1 ohm Air 2 Atomizers
» [ 1 ] Micro USB
» [ 1 ] Quick Start Guide
USING DEVICE
PRIMING THE ATOMIZER
To turn on the VaporFi Air 2, Click the power button 5 times. You
will do the same to turn the device off. Hold the power button while
inhaling from the drip tip, releasing the power button once the
desired vapor production is achieved.
Priming your Atomizer is an important cost saving measure. To
prime, first you must remove the drip tip and unscrew the atomizer
base. Next, take the included VaporFi Air 2 1.1 Ohm Atomizer and
screw it into the bottom of the Atomizer base. Fill your tank with
e-liquid ensuring to not fill juice beyond the fill line. Next, you must
screw the Atomizer base into the built-in tank ensuring that the
atomizer is fully submerged in the e-liquid and is screwed in tightly.
Last, take short draws through the drip tip and allow the atomizer
to sit in the e-liquid for ten minutes. After ten minutes have elapsed
your device is ready to use. Press the fire button and enjoy your
favorite vape juice!
FILLING INTERNAL TANKTo fill your tank, remove the drip tip and atomizer base screwed into
the top of the built-in tank. Pour your e-liquid into the built-in tank
NOTE: We suggest using either side of the internal mouthpiece
to loosen and tighten the atomizer base. Using this mouthpiece as
a tightening tool will prevent leaking, and makes attaching your
atomizer easier.
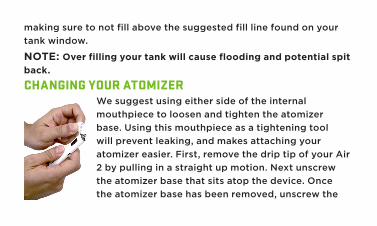
We suggest using either side of the internal
mouthpiece to loosen and tighten the atomizer
base. Using this mouthpiece as a tightening tool
will prevent leaking, and makes attaching your
atomizer easier. First, remove the drip tip of your Air
2 by pulling in a straight up motion. Next unscrew
the atomizer base that sits atop the device. Once
the atomizer base has been removed, unscrew the
CHANGING YOUR ATOMIZER
making sure to not fill above the suggested fill line found on your
tank window.
NOTE: Over filling your tank will cause flooding and potential spit
back.

CHARGING YOUR DEVICETo charge your device insert the included micro USB cable
into the USB port on the side of the device. While the device
is charging, you can still enjoy your favorite e-liquid. Keep in
mind, while it is possible to continue use during charging, it
drastically slows down the process.
NOTE: The Atomizers included in the Air 2 Kit are to
be used only with e-liquid and are not intended for oil
use.
bottom half, which is your atomizer. Throw out your
old atomizer, and follow priming instructions.

BATTERY LIFE INDICATORIf your battery is fully charged, the built-in tank light will be green
when the fire button is pressed. If your battery life falls below 15%
a yellow light will indicate your draw. If your battery falls below 5%,
the LED light will flash Red indicating a need for re-charge.
To clean the VaporFi Air 2, make sure that your Atomizer base is
completely removed from the built-in tank. Using a moist paper
CLEANING THE VAPORFI AIR 2
SAFETY PROTECTIONSShort Protection: If your Atomizer shorts out, the LED light will
flash. To troubleshoot this issue, ensure that your Atomizer is
screwed in tightly to both the Atomizer base and built-in tank.
TROUBLE SHOOTING YOUR VAPORFI AIR 2Flooding/Spit back: To prevent excessive spit back and flooding
make sure to fill your e-liquid to the suggested fill line. If e-liquid
is filled beyond the suggested fill line you may still save your tank
of e-liquid. Blow directly into the drip tip while holding the button.
Vapor will be produced and come out of the air flow holes. Listen
for a reduction in gurgle, once the gurgling has reduced your tank
will be ready to vape. If flooding and spit back persists, remove the
towel or napkin, clean the built in tank gently ensuring that your
juice has been removed from the tank. Using a cotton cloth, gently
wipe the exterior of the Air 2. To clean the MICRO USB port, simply
use a cotton swab and carefully wipe the exterior area of the USB
port.

Air 2 Will Not Fire: If your Air 2 does not produce vapor or activate,
it is likely that your device is not fully charged. Charge your device
fully ensuring that your battery is not the cause for malfunction.
If your battery is fully charged and your device is flashing a green
light, you must tighten your atomizer. Ensuring that your atomizer is
attached to the built-in tank, take a draw from the Drip tip and the
issue will be resolved.
drip tip and atomizer. Pour some of the e-liquid out of the built-
in tank and prime your Atomizer again briefly. This should clear
excessive flooding and prevent spit back.
WARNING
DISCLAIMER
Do not attempt to modify equipment; doing so can result in
permanent damage, overheating and/or explosion which may lead
to severe injuries or death.
For more information visit: vaporfi.com/how-it-works
VapoFi products are not smoking cessation products and have not been tested as such. The U.S. FDA has not approved these products for any use and they are not intended to diagnose, cure, mitigate, treat or prevent any disorder, disease, or physical or mental condition. Some Vaporfi products contain a chemical known to the State of California to cause cancer or birth defects or other reproductive harm. Nicotine is addictive and habit forming, and it is very toxic by inhalation, in contact with the skin, or if swallowed.

GUIA DE INICIO
ESPAÑOL
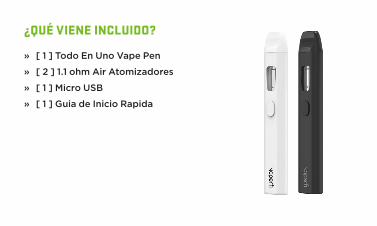
¿QUÉ VIENE INCLUIDO?
» [ 1 ] Todo En Uno Vape Pen
» [ 2 ] 1.1 ohm Air Atomizadores
» [ 1 ] Micro USB
» [ 1 ] Guia de Inicio Rapida

USO DEL DISPOSITIVOPara encender el VaporFi Air 2, haga clic en el botón de encendido 5 veces. Hará lo mismo para apagar el dispositivo. Mantenga pulsado el botón de encendido mientras inhala desde la boquilla de goteo, soltando el botón de encendido una vez que se alcance la producción de vapor deseada.
PREPARACIÓN DEL ATOMIZADORLa preparación de su atomizador es una medida importante para el ahorro de costos. Para prepararlo, primero debe quitar la boquilla de goteo y desenroscar la base del atomizador. A continuación, tome el atomizador de ohmio VaporFi Air 2 1.1 incluido y atorníllelo en la parte inferior de la base del atomizador. Llene su tanque con e-líquido asegurando que no llenarlo más allá de la línea de
LLENAR EL TANQUE INTERNOPara llenar su tanque, retire la boquilla de goteo y la base del atomizador atornillada en la parte superior del tanque integrado. Vierta su e-líquido en el tanque incorporado asegurándose de no llenar por encima de la línea de llenado sugerida que se encuentra en la ventana de su tanque.
llenado. A continuación, debe atornillar la base del atomizador en el tanque incorporado, asegurándose de que el atomizador está completamente sumergido en el e-líquido y atornillado firmemente. Por último, dé pequeños golpes a través de la boquilla de goteo para permitir que el atomizador sienta el e-líquido durante diez minutos. Transcurridos los diez minutos, su dispositivo está listo para su uso. ¡Presione el botón de inicio y disfrute de su jugo de vapor favorito!

NOTA: El llenado excesivo de su tanque causará inundación y posibles escupidas.
CAMBIAR EL ATOMIZADORSugerimos usar la boquilla de goteo como herramienta para apretar y/o aflojar la base de su atomizador. Usar la boquilla de goteo como herramienta ayuda a prevenir que el producto gotee. También ayuda a adjuntar más fácilmente el atomizador a su dispositivo. El primer paso es remover el gotero de su Air 2. Haga esto jalando el gotero de manera vertical. Su siguiente paso es destornilla la base del atomizador que se encuentra
en la parte de encima de su dispositivo. Después de haber quitado la base del atomizador, quita el atomizador en sí, destornillándolo.

NOTA: Los atomizadores incluidos en el Air 2 Kit son para uso exclusivo de e-liquido. No use con ningún otro tipo de aceites.
CÓMO CARGAR SU DISPOSITIVOPara cargar el dispositivo, inserte el cable micro USB incluido en el puerto USB que se encuentra en el lateral del dispositivo. Mientras el dispositivo se está cargando, puede
Deshágase de su atomizador usado y siga las indicaciones para cebado.
disfrutar de su e-líquido favorito. Tenga en cuenta, que es posible continuar el uso durante la carga, pero que drásticamente ralentiza el proceso.
INDICADOR DE DURACIÓN DE LA BATERÍA
LIMPIEZA DEL VAPORFI AIR 2
Sí la batería está completamente cargada, la luz incorporada del tanque estará verde cuando se presione el botón de inicio. Si la duración de la batería cae por debajo del 15%, una luz amarilla brillará. Si la batería cae por debajo del 5%, la luz LED parpadeará rojo indicando la necesidad de recargar.
Para limpiar el VaporFi Air 2, asegúrese de que la base del
PROTECCIONES DE SEGURIDADProtección de corto: Si el atomizador entra en cortocircuito, la luz LED parpadeará. Para solucionar este problema, asegúrese de que su atomizador esté atornillado firmemente tanto a la base del atomizador como al tanque incorporado.
atomizador esté completamente removida del tanque incorporado. Utilizando una toalla de papel húmeda o una servilleta, limpie el tanque incorporado suavemente, asegurando que su jugo haya sido removido del tanque. Con un paño de algodón, limpie suavemente el exterior del Air 2. Para limpiar el puerto MICRO USB, simplemente use un hisopo de algodón y limpie cuidadosamente el área exterior del puerto USB.
SOLUCIÓN DE PROBLEMAS DE SU VAPORFI AIR 2Inundación/escupir: para evitar el exceso para que no escupa y las inundaciones asegúrese de llenar su e-líquido hastaa la línea de llenado sugerido. Si el e-líquido está lleno con encima de la línea de llenado sugerida, aun así puede guardar su tanque de e-líquido. Sople directamente en la boquilla de goteo mientras mantiene pulsado el botón. Se producirá vapor y saldrá de los orificios de

flujo de aire. Escuche una reducción en gorgoteo, una vez que el gorgoteo se haya reducido, su tanque estará listo para el vapor. Si persiste la inundación y las escupidas, retire la boquilla de goteo y el atomizador. Vierta parte del e-líquido fuera del tanque incorporado y prepare su atomizador nuevamente en breve. Esto debe despejar las inundaciones excesivas y evitar que vuelva a escupir.
El Air 2 no arranca: si su Air 2 no produce vapor ni se activa, es probable que el dispositivo no esté completamente cargado. Cargue completamente su dispositivo asegurándose de que la batería no sea la causa de un mal funcionamiento. Si su batería está completamente cargada y su dispositivo está parpadeando una luz verde, debe apretar el atomizador. Asegúrese de que su atomizador está conectado al tanque integrado, tome un drenaje desde la boquilla de goteo y el problema se resolverá.
ADVERTENCIANo intente modificar el equipo; hacerlo puede resultar en daño permanente, sobrecalentamiento y/o una explosión que puede provocar lesiones graves o la muerte.
Por más información visite: vaporfi.com/how-it-works

EXENCIÓN DE RESPONSABILIDADLos productos VaporFi no son productos para dejar de fumar ni se han probado como tales. La FDA de los EE .UU. no ha aprobado estos productos para ningún uso ni están indicados para diagnosticar, curar, mitigar, tratar o prevenir cualquier trastorno, enfermedad, o condición física o mental. Algunos productos de Vaporfi contienen una sustancia química que el Estado de California considera causante de cancer o de defectos congénitos y otros daños reproductivos. La nicotina es adictiva y puede crear hábito. Asi mismo, resulta muy tóxica por inhalación, contacto con la piel o por ingestión.


VAPORFI.COM