quick installation guide - honeywell · pdf filequick installation guide 1) ... 4 for optimal...
TRANSCRIPT

Quick Installation Guide
RTH2310Programmable Thermostat
69-2214EF-04
Quick Installation Guide
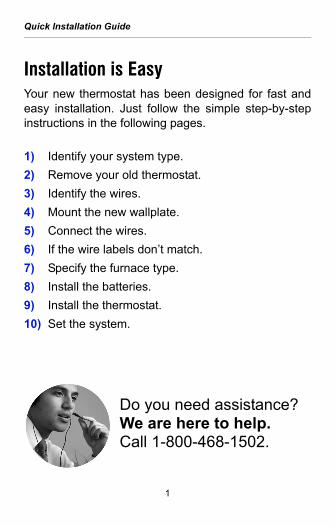
Installation is EasyYour new thermostat has been designed for fast andeasy installation. Just follow the simple step-by-stepinstructions in the following pages.
1) Identify your system type.
2) Remove your old thermostat.
3) Identify the wires.
4) Mount the new wallplate.
5) Connect the wires.
6) If the wire labels don’t match.
7) Specify the furnace type.
8) Install the batteries.
9) Install the thermostat.
10) Set the system.
Do you need assistance?We are here to help.Call 1-800-468-1502.
1

RTH2310 Programmable Thermostat
This thermostat is compatible with the followingsystems:
• Gas, oil or electric furnace
• Central air conditioner
• a hot water system with or without pump
• a millivolt system
• a central heating and cooling system
If you are not sure of your system type or if you haveany other questions, call us toll-free at 1-800-468-1502.
1 Identify System Type1.
This thermostat is not compatible with heat pumps or multi-stage systems.
2

Quick Installation Guide
1) Turn power off at the heating/cooling system.
2) Remove old thermostat, but leave wallplate with wires attached.
MERCURY NOTICE: Do not put your oldthermostat in the trash if it contains mercury in asealed tube. Contact your local wastemanagement authority for instructions regardingrecycling and proper disposal.
2 Remove Old Thermostat2.
Do not remove wallplate yet.
3

RTH2310 Programmable Thermostat
If any wires are not attached to your old thermostat or areattached to a terminal marked C or C1, they will not beconnected to your new thermostat. Wrap the bare metal endof each of these wires with electrical tape, so it cannot touchand short other wires.
Disconnect wires and remove the old wallplate onlyafter all wires are labeled. Wrap the wires arounda pencil to prevent them from falling though thewall opening.
3 Identify Wires3.
Do not use non-connected wires.
Do not use C or C1 wires
Identify and label each wire.
IGNORE WIRE COLORS: Use terminal screw designations to identify wires.
4

Quick Installation Guide
1) Remove coverplate.
2) Loosen screw (the screw remains captive on wallplate).
3) Remove thermostat.
4) Mark and drill appropriate mounting holes (or use existing holes). Insert plastic anchors. Pass wires through opening of wallplate and secure wallplate to the wall using provided screws.
4 Mount New Wallplate4.
5

RTH2310 Programmable Thermostat
1) Match each labeled wire with the terminal having the same letter.
2) Loosen the terminal screws using a screwdriver, insert the wires, then tighten the screws.
3) Push any excess wire back into the wall opening.
5 Connect Wires (typical wiring)5.
Remove jumper if you have both R and Rc wires.
Labels don’t match?If a wire does not match any terminal on the thermostat,see next page.
6

Quick Installation Guide
If a labeled wire does not match any terminaldesignation, see diagram below.
Do not use C, X or B. Wrap bare end of wirewith electrical tape.
If wires are connected to both Rh and Rcterminals, remove jumper (see previouspage).
6 Connect Wires (less common wiring)
7

RTH2310 Programmable Thermostat
Set the Jumper J2, on the back of the thermostat, ifyou have connected a wire to the G terminal.
7 Specify Furnace Type6.
HG Leave the jumper in this factory-set position if you have a gas or oil furnace.
HE Place the jumper to this position if you have an electric furnace.
J2 jumper
8

Quick Installation Guide
1) Pull out the battery cover.
2) Install the batteries as shown. Observe the polarity.
3) Reinstall the battery cover. You will hear a clicking sound.
After the batteries are installed, the thermostat per-forms a series of tests for approximately 5 seconds.
Afterwards, the screen displays the actual tempera-ture. It is normal that the displayed temperature behigher than the ambient temperature if you are holdingthe thermostat. The thermostat will display the ambienttemperature once it is installed on the wall. By default,the setpoint is 70 °F (21 °C).
8 Install Batteries7.
9

RTH2310 Programmable Thermostat
1) Mount the thermostat on the wallplate.
2) Tighten the screw and install the coverplate.
3) Turn power back on at the heating/cooling system.
9 Install thermostat8.
10

Quick Installation Guide
1) Press both and buttons simultaneously for 3 seconds to enter or exit the setup menu.
2) To advance to the next function, briefly press both and buttons simultaneously.
3) To change the setting, press the or button.
10 System Setup9.
DISPLAY DESCRIPTION OPTIONS 1
Temperature display °C or °F
Time display 12 h or 24 h
Early Start 2 On or Off
Heating cycles per hour 3 2, 3, 4, 5 or 6 4
Cooling cycles per hour 3 2, 3, 4, 5 or 6 5
1 Default settings are shown in bold and underlined.2 See page 3 of Operating Manual.3 Use the system switch to switch between the two parameters.4 For optimal heating control, use the setting that matches your sys-tem as follows: 2=30 min (steam, gravity), 3=20 min (hot water, 90%+ high-efficiency furnace), 4=15 min (gas or oil), 5=12 min (alternate setting for gas or oil), 6=10 min (electric).5 The corresponding cooling cycle lengths are as follows: 2=30 min, 3=20 min, 4=15 min, 5=12 min, 6=10 min
69-2214EF—04 M.S. Rev. 03-11Printed in U.S.A.

Guide d’installation rapide
RTH2310Thermostat programmable
69-2214EF-04
Guide d’installation rapide
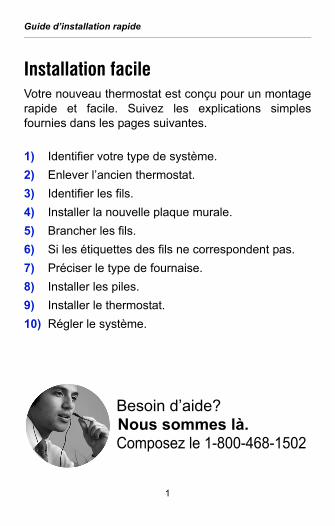
Installation facileVotre nouveau thermostat est conçu pour un montagerapide et facile. Suivez les explications simplesfournies dans les pages suivantes.
1) Identifier votre type de système.
2) Enlever l’ancien thermostat.
3) Identifier les fils.
4) Installer la nouvelle plaque murale.
5) Brancher les fils.
6) Si les étiquettes des fils ne correspondent pas.
7) Préciser le type de fournaise.
8) Installer les piles.
9) Installer le thermostat.
10) Régler le système.
Besoin d’aide?Nous sommes là.Composez le 1-800-468-1502
1

Thermostat programmable RTH2310
Ce thermostat est compatible avec les systèmessuivants :
• fournaise électrique, au gaz ou au mazout
• climatiseur central
• système de chauffage à eau chaude avec ousans pompe
• système millivolt
• système de chauffage et de climatisation central
Si vous n’êtes pas certain quel type de système vousavez ou pour toutes autre questions, veuillez-nousjoindre sans-frais au 1-800-468-1502.
1 Identifier le type de système1.
Ce thermostat n’est pas compatible avec les thermopompes ou les systèmes multi-étages.
2
Guide d’installation rapide
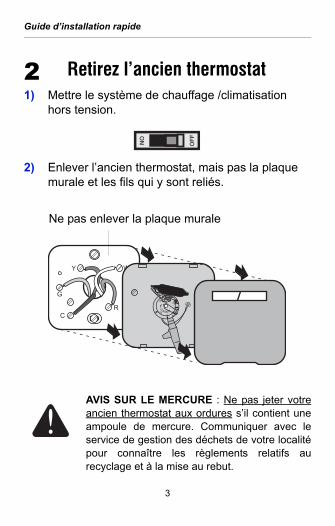
1) Mettre le système de chauffage /climatisation hors tension.
2) Enlever l’ancien thermostat, mais pas la plaque murale et les fils qui y sont reliés.
AVIS SUR LE MERCURE : Ne pas jeter votreancien thermostat aux ordures s’il contient uneampoule de mercure. Communiquer avec leservice de gestion des déchets de votre localitépour connaître les règlements relatifs aurecyclage et à la mise au rebut.
2 Retirez l’ancien thermostat2.
Ne pas enlever la plaque murale
3

Thermostat programmable RTH2310
Si des fils ne sont pas branchés aux bornes de l’ancien thermostatou sont branchés à une borne marquée C ou C1, ils ne seront pasbranchés au nouveau thermostat. Recouvrir le bout dénudé dechaque fil non utilisé de ruban isolant, pour éviter qu’ils setouchent et causent des court-circuits avec les autres fils.
Ne pas débrancher les fils et ne pas enleverl’ancienne plaque murale seulement qu’après quetous les fils soient étiquetés. Enrouler les filsautour d'un crayon pour les empêcher deglisser dans l’ouverture du mur.
3 Identifier les fils3.
Les fils débranchés ne sont pas utilisés
Le fil C ou C1 n’est pas utilisé
Identifier et étiqueter chaque fil.
NE PAS TENIR COMPTE DES COULEURS DES FILS : Identifier chaque type de fil par la lettre de la borne correspondante.
4

Guide d’installation rapide
1) Retirer le couvercle.
2) Dévisser la vis de fixation (elle reste captive sur la plaque murale).
3) Retirer le thermostat.
4) Marquer et percer des trous de fixation (ou utiliser les trous existant). Insérer les chevilles d'ancrage. Passer les fils par l'ouverture de la plaque murale et fixer la plaque au mur au moyen des vis fournies.
4 Installer la nouvelle plaque murale4.
5

Thermostat programmable RTH2310
1) Associer chaque fil étiqueté à la borne ayant la même lettre.
2) Dévisser les vis des bornes avec un tournevis, insérer les fils et resserrer les vis.
3) Repousser les fils en trop dans le mur.
5 Branchement (typique)5.
Enlever le cavalier si vous avez les fils R et Rc.
Les étiquettes ne correspondent pas ?Si un fil ne correspond pas à aucune borne sur lethermostat, voir la page suivante.
6

Guide d’installation rapide
Si un fil étiqueté ne correspond pas à aucune borne,voir le diagramme ci-dessous.
Ne pas utiliser C, X ou B. Enrouler le boutdénudé du fil avec du ruban isolant.
Si des fils sont reliés aux bornes Rh et Rc,enlever le cavalier (voir la page précédente).
6 Branchement (moins commun)
7

Thermostat programmable RTH2310
La position du cavalier J2, à l'endos du thermostat, estimportant si vous avez branché un fil à la borne G.
7 Préciser le type de fournaise6.
HG Laisser le cavalier dans cette position si vous avez une fournaise à gaz ou au mazout.
HE Placer le cavalier dans cette position si vous avez une fournaise électrique.
Cavalier J2
8

Guide d’installation rapide
1) Retirer le couvercle du compartiment à piles.
2) Installer les piles tel qu'illustré. Observer la polarité.
3) Remettre le couvercle en place. Un déclic se fera entendre.
Une fois les piles installées, le thermostat effectue unesérie de tests, qui dure environ 5 secondes.
Par la suite, l'écran affiche la température mesurée. Ilest normal que la température affichée soit supérieureà la température ambiante si le thermostat est dansvos mains. Le thermostat affichera la températureambiante lorsqu'il sera installé au mur. Par défaut, latempérature réglée est à 70 °F (21 °C).
8 Installer les piles7.
9

Thermostat programmable RTH2310
1) Placer le thermostat sur la plaque murale.
2) Serrer la vis et placer le couvercle.
3) Mettre le système de chauffage/climatisation sous tension.
9 Installer le thermostat8.
10

Guide d’installation rapide
1) Appuyer simultanément sur les boutons et buttons pendant 3 secondes pour entrer dans le menu ou en sortir.
2) Pour passer à la fonction suivante, appuyer simultanément et brièvement sur les boutons et .
3) Pour modifier le réglage, appuyer sur le bouton ou .
10 Réglage du système9.
AFFICHAGE DESCRIPTION OPTIONS 1
Affichage de la température °C ou °F
Affichage de l'heure 12 h ou 24 h
Démarrage anticipé 2On (activé) ou
Off (désactivé)
Nombre de cycles de
chauffage à l'heure 3 2, 3, 4, 5 ou 6 4
Nombre de cycles de
climatisation à l'heure 3 2, 3, 4, 5 ou 6 5
1 Les réglages par défaut sont en caractères gras et soulignés.2 Voir la page 3 du mode d’emploi.3 Utiliser le sélecteur du mode de fonctionnement du système pour alter-ner entre les deux paramètres.4 Pour un contrôle optimal du chauffage, choisir le réglage qui corres-pond à votre système : 2=30 min (vapeur, gravité), 3=20 min (eau chaude, 90%+ haute efficacité), 4=15 min (gaz ou mazout), 5=12 min (gaz ou mazout), 6=10 min (électrique).5 Les durées de cycle de climatisation correspondantes sont : 2 = 30 min, 3 = 20 min, 4 = 15 min, 5 = 12 min, 6 = 10 min.
69-2214EF—04 M.S. Rev. 03-11Printed in U.S.A.