quick heal tablet security
TRANSCRIPT

Quick Heal Tablet Security for Android
User Guide
Quick Heal Technologies Ltd. http://www.quickheal.com

Copyright Information
i
Copyright Information
Copyright © 2016 Quick Heal Technologies Limited (Formerly Known as Quick Heal Technologies Pvt.
Ltd.). All Rights Reserved.
All rights are reserved by Quick Heal Technologies Ltd.
No part of this software may be reproduced, duplicated or modified in any form or incorporated into any information retrieval system, electronic or any other or transmitted in any form without prior permission of Quick Heal Technologies Limited, Marvel Edge, Office No. 7010 C & D, 7th Floor, Viman Nagar, Pune 411014.
Marketing, distribution or use by anyone barring the people authorized by Quick Heal Technologies Ltd. is liable to legal prosecution.
Trademarks
Quick Heal and DNA Scan are registered trademarks of Quick Heal Technologies Ltd.

End-User License Agreement
ii
End-User License Agreement
QUICK HEAL TABLET SECURITY FOR TABLET END-USER LICENSE AGREEMENT
IMPORTANT
PLEASE READ THIS Quick Heal Tablet Security (for Android OS) End User License Agreement (hereinafter referred to as the “Agreement”) CAREFULLY BEFORE USING OR TRYING TO ATTEMPT TO USE THIS QUICK HEAL TABLET SECURITY SOFTWARE (for Android OS) (hereinafter referred to as the “Software”).
BY USING THIS SOFTWARE OR BY CLICKING THE "I AGREE" BUTTON OR ATTEMPTING TO LOAD THE SOFTWARE IN ANY WAY, (SUCH ACTION WILLL CONSTITUTE A SYMBOL OF YOUR SIGNATURE), YOU ACKNOWLEDGE AND ADMIT THAT YOU HAVE READ, UNDERSTOOD AND AGREED TO ALL THE TERMS AND CONDITIONS OF THIS AGREEMENT. THIS AGREEMENT ONCE ACCEPTED BY “YOU”[ as an individual (assuming you are above 18 years and/or having legal capacity to enter into an agreement ), or the Company or any legal entity that will be using the software (hereinafter referred to as 'You' or 'Your' for the sake of brevity)] SHALL BE A LEGALLY ENFORCEABLE AGREEMENT BETWEEN YOU AND QUICK HEAL TECHNOLOGIES LIMITED (FORMERLY KNOWN AS QUICK HEAL TECHNOLOGIES PVT. LTD.)., PUNE, INDIA (hereinafterreferred to as “Quick Heal”) AND YOU SHALL HAVE THE RIGHT TO USE THE SOFTWARE SUBJECT TO THE TERMS AND CONDITIONS MENTIONED IN THIS AGREEMENT OR AS AMENDED BY Quick Heal FROM TIME TO TIME. IF YOU DO NOT AGREE TO ALL THE TERMS AND CONDITIONS BELOW, DO NOT USE THIS SOFTWARE IN ANY WAY AND PROMPTLY RETURN IT OR DELETE ALL THE COPIES OF THIS SOFTWARE IN YOUR POSSESSION. In consideration of payment of the License Fee, which is a part of the price, evidenced by theReceipt, Quick Heal grants You, the Licensee, a non-exclusive and non-transferable right to use the Software during the License Period in order to assist in protecting Your Tablet on which the Software is installed and activated, from the threats described in the User Manual, according to the technical requirements described in the User Manual and which is subject to the terms and conditions of this Agreement.
Quick Heal reserves all rights not expressly granted, and retains title and ownership of the Software, including all subsequent copies in any media. This Software and the accompanying written materials are the property of Quick Heal and are copyrighted. Copying of the Software or the written material is expressly forbidden.
1. DEFINITIONS
A. “Distributors” means the authorized distributors, agents, sub-distributors of Quick Heal,selling Quick Heal range of products, including sales through Internet.
End-User License Agreement
iii
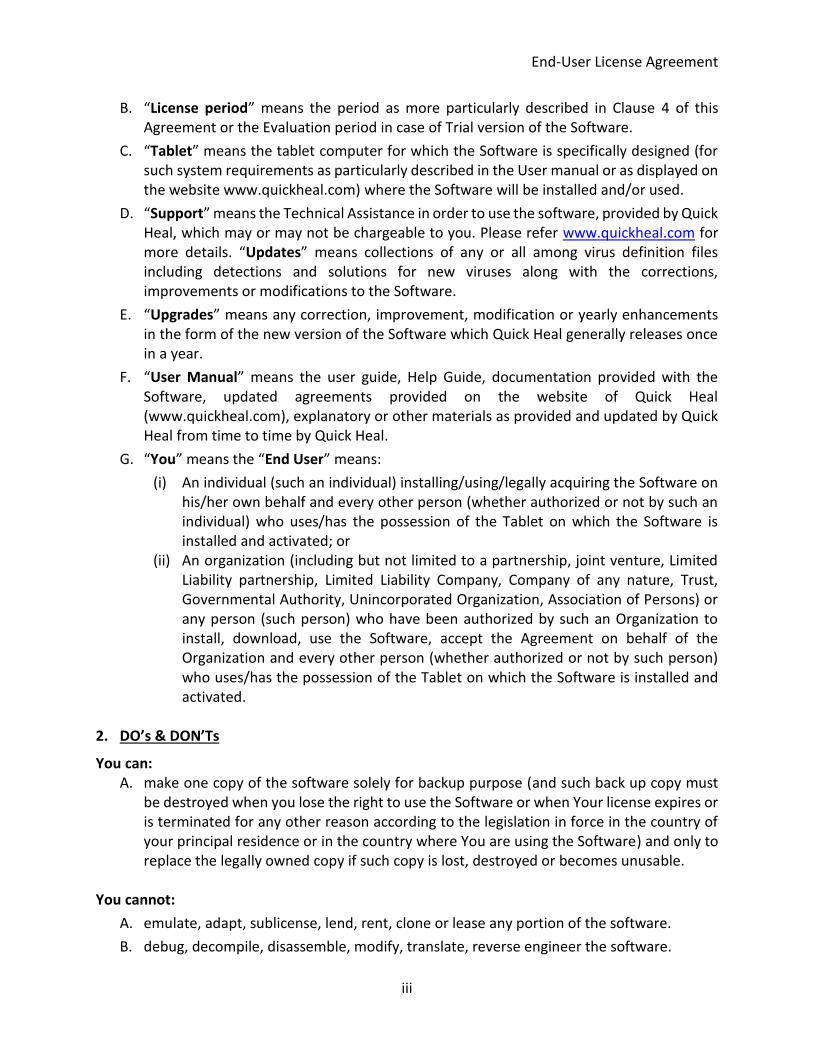
B. “License period” means the period as more particularly described in Clause 4 of this Agreement or the Evaluation period in case of Trial version of the Software.
C. “Tablet” means the tablet computer for which the Software is specifically designed (for such system requirements as particularly described in the User manual or as displayed on the website www.quickheal.com) where the Software will be installed and/or used.
D. “Support” means the Technical Assistance in order to use the software, provided by Quick Heal, which may or may not be chargeable to you. Please refer www.quickheal.com for more details. “Updates” means collections of any or all among virus definition files including detections and solutions for new viruses along with the corrections, improvements or modifications to the Software.
E. “Upgrades” means any correction, improvement, modification or yearly enhancements in the form of the new version of the Software which Quick Heal generally releases once in a year.
F. “User Manual” means the user guide, Help Guide, documentation provided with the Software, updated agreements provided on the website of Quick Heal (www.quickheal.com), explanatory or other materials as provided and updated by Quick Heal from time to time by Quick Heal.
G. “You” means the “End User” means:
(i) An individual (such an individual) installing/using/legally acquiring the Software on his/her own behalf and every other person (whether authorized or not by such an individual) who uses/has the possession of the Tablet on which the Software is installed and activated; or
(ii) An organization (including but not limited to a partnership, joint venture, Limited Liability partnership, Limited Liability Company, Company of any nature, Trust, Governmental Authority, Unincorporated Organization, Association of Persons) or any person (such person) who have been authorized by such an Organization to install, download, use the Software, accept the Agreement on behalf of the Organization and every other person (whether authorized or not by such person) who uses/has the possession of the Tablet on which the Software is installed and activated.
2. DO’s & DON’Ts
You can: A. make one copy of the software solely for backup purpose (and such back up copy must
be destroyed when you lose the right to use the Software or when Your license expires or is terminated for any other reason according to the legislation in force in the country of your principal residence or in the country where You are using the Software) and only to replace the legally owned copy if such copy is lost, destroyed or becomes unusable.
You cannot:
A. emulate, adapt, sublicense, lend, rent, clone or lease any portion of the software.
B. debug, decompile, disassemble, modify, translate, reverse engineer the software.

End-User License Agreement
iv
C. try making an attempt to reveal/discover the source code of the software.
D. create derivative works based on the Software or any portion thereof with sole exception of a non-waivable right granted to You by any applicable legislation.
E. transfer the licensed software or any part thereof
F. remove or alter any copyright notices or other proprietary notices on any copies of the Software.
G. reduce any part of the software to human readable form.
H. use the Software in the creation of data or software used for detection, blocking or treating threats described in the User Manual.
I. use for unlicensed and illegal purpose.
J. remove your user account from Quick Heal RDM service once registered.
K. retrieve deleted location entries and back up data from the user account on the Quick Heal RDM service.
L. attempt to gain unauthorized access to Quick Heal RDM networks.
3. ACTIVATION
A. Quick Heal warns you that in the process of installation of the software, the other security products/software installed on your Tablet device may be uninstalled or disabled if the same are not compatible with Quick Heal software. Quick Heal expressly disclaims any loss of data, loss of profits during such installation. If you modify your Tablet or make alterations/modifications to other vendors’ software installed on it, you may be required to repeat activation of the software or installation of license key file or in case contact Quick Heal Support. Quick Heal reserves the right to verify the validity/legality of license and software.
B. Activation/Reactivation using Short Message Service (SMS) for SIM supported Tablet for activation/reactivation made in India only. The activation/reactivation of the Software can be done in two ways, i) using Internet services on Tablet Device or ii) using Short Message Service (SMS). In case Internet based activation, usage of Internet bandwidth will be chargeable as per your telecom service provider charges, if using GPRS. In case of Wi-Fi Internet, the bandwidth usage will be chargeable as per the Internet Service Provider charges. In case of SMS based activation/reactivation, Quick Heal software sends two SMS from your Tablet Device to Quick Heal’s activation server. These two SMS’s are text based and you will be charged for two outgoing SMS’s as per your plan with your telecom service provider.
C. Short Message Service (SMS) Usage for SIM supported Tablet You acknowledge and understand that usage of certain services may be provided in India only which includes but not limited to Activation, Reactivation, Remote Tablet Lock, Remote Data wipe and Tablet Tracking, wherein Quick Heal makes use of Short Text Message Service (SMS). These SMS’s will be charged to your regular phone bill by your Telecom Service Provider as per your bill plan.
End-User License Agreement
v
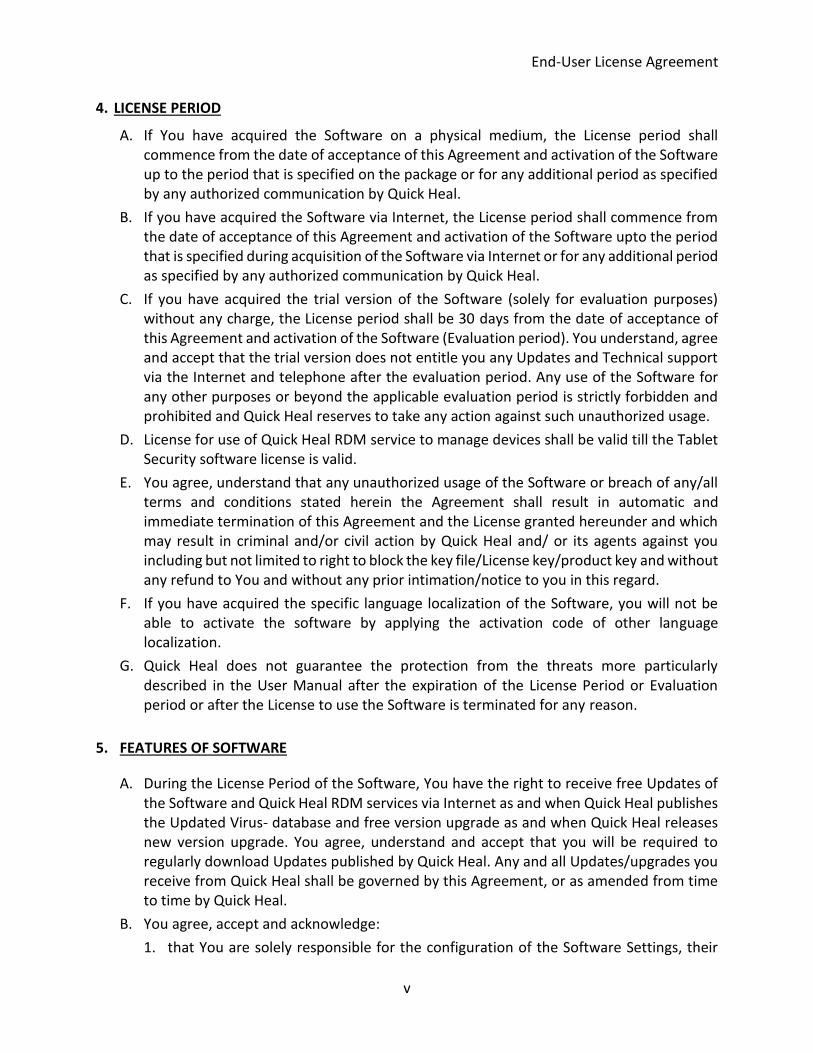
4. LICENSE PERIOD
A. If You have acquired the Software on a physical medium, the License period shall commence from the date of acceptance of this Agreement and activation of the Software up to the period that is specified on the package or for any additional period as specified by any authorized communication by Quick Heal.
B. If you have acquired the Software via Internet, the License period shall commence from the date of acceptance of this Agreement and activation of the Software upto the period that is specified during acquisition of the Software via Internet or for any additional period as specified by any authorized communication by Quick Heal.
C. If you have acquired the trial version of the Software (solely for evaluation purposes) without any charge, the License period shall be 30 days from the date of acceptance of this Agreement and activation of the Software (Evaluation period). You understand, agree and accept that the trial version does not entitle you any Updates and Technical support via the Internet and telephone after the evaluation period. Any use of the Software for any other purposes or beyond the applicable evaluation period is strictly forbidden and prohibited and Quick Heal reserves to take any action against such unauthorized usage.
D. License for use of Quick Heal RDM service to manage devices shall be valid till the Tablet Security software license is valid.
E. You agree, understand that any unauthorized usage of the Software or breach of any/all terms and conditions stated herein the Agreement shall result in automatic and immediate termination of this Agreement and the License granted hereunder and which may result in criminal and/or civil action by Quick Heal and/ or its agents against you including but not limited to right to block the key file/License key/product key and without any refund to You and without any prior intimation/notice to you in this regard.
F. If you have acquired the specific language localization of the Software, you will not be able to activate the software by applying the activation code of other language localization.
G. Quick Heal does not guarantee the protection from the threats more particularly described in the User Manual after the expiration of the License Period or Evaluation period or after the License to use the Software is terminated for any reason.
5. FEATURES OF SOFTWARE
A. During the License Period of the Software, You have the right to receive free Updates of the Software and Quick Heal RDM services via Internet as and when Quick Heal publishes the Updated Virus- database and free version upgrade as and when Quick Heal releases new version upgrade. You agree, understand and accept that you will be required to regularly download Updates published by Quick Heal. Any and all Updates/upgrades you receive from Quick Heal shall be governed by this Agreement, or as amended from time to time by Quick Heal.
B. You agree, accept and acknowledge:
1. that You are solely responsible for the configuration of the Software Settings, their

End-User License Agreement
vi
usage and/or inability to use the software and the results, actions, inactions initiated due to the same and Quick Heal assumes no liability/responsibility in any case and the Clause No. 10 of Indemnification shall be applicable.
2. that Quick Heal assumes no liability/responsibility for any data deletion, including but not limited to any deletion/loss of personal and/or confidential data, specifically authorized by You or occurs due to the actions, inactions (whether intentional or not) by You or any third party whom You have authorized to use, handle your Tablet.
3. that to avail/use certain features of the Software, you may be required to incur some cost and that Quick Heal does not warrant that the usage of certain features of the Software are free of cost and that Quick Heal shall not entertain and expressly disclaims, any claim for reimbursement of any expenses including but not limited to any direct or incidental expenses arising out of Your usage of such features of the Software.
4. that you be solely responsible and shall comply all applicable laws, regulations of India and any foreign laws including without limitation, privacy, obscenity, confidentiality, copyright laws for using any report, data, information derived as a result of using the Software and Quick Heal RDM service.
5. that while using the Software, Quick Heal suggests some actions to be initiated by You in your sole benefit, for example “Quick Heal software may suggest You to uninstall infected applications”, however such actions are suggestive and Quick Heal takes no responsibility/liability if you perform such suggestive actions or not and Quick Heal assumes no responsibility/liability for any liability arising out of such actions/inactions.
6. that before expiry of the license period You shall take the backup of the data stored in your Tablet. You understand and accept that you will not be able to restore the data after 15 days from the expiry of License period unless you renew your Quick Heal license within 15 days from the expiry of License period. Quick Heal reserves the right to delete/purge backup from our server after 15 days from the expiry of the license period.
7. that the Software is equipped with mechanism to block malicious websites. The Software may block access to any web page which is found to be infected with malicious contents. Quick Heal shall not be responsible for any loss or damage including but not limited to financial, notional, loss of business if you are abstained from accessing any particular webpage or URL.
8. that if the SIM Support is not available for your Tablet then some of the SIM related functions like Call Block, SMS Block etc. will not be visible to You.
9. that the software does not warrant that the data usage report provided by the Network Monitor feature of the software will accurately match with the data usage report of your telecom service provider. Hence Quick Heal assumes no responsibility/liability in case of any discrepancies/deviations in the data usage report provided by the software and your Telecom service provider.
10. that Quick Heal shall not be responsible or liable for data deletion authorized by You

End-User License Agreement
vii
whether intentionally or unintentionally. The mentioned data may include any personal or confidential information.
6. SUPPORT
Quick Heal offers support features during usage of this software i.e., Live Chat with technical support team and/ or the technical support team may, at your discretion, take remote access. The availing of this support will be solely at your discretion and you are solely responsible to take back up of the existing data/software/programs in your Tablet before availing such a support. Quick Heal will not be held responsible for any loss of data, any kind of direct/ indirect/ consequential loss or damage to data/ property arising during this entire process. If at any point of time the Technical Support team is of the opinion that it is beyond their scope, it will be the sole discretion of Quick Heal to suspend, cease, terminate or refuse such support as Quick Heal does not claim any warranty and/or guarantee of any kind in providing the support feature. 7. EMAIL/ELECTRONIC COMMUNICATION
Once you register the software by activating the software, Quick Heal may communicate with you on the contact information submitted during the registration process through email or any other electronic communication device. The communication can be for the purpose of product renewal or product verification for your convenience. 8. QUICK HEAL STATUS UPDATE
Upon every update of licensed copy, Quick Heal Update module will send current product status information to Quick Heal Internet Center. The information that will be sent to the Internet Center includes the Quick Heal protection health status like, which monitoring service is in what state in the system. The information collected does not contain any files or personal data. The information will be used to provide quick and better technical support for legitimate customers. 9. COLLECTION OF INFORMATION
Quick Heal software and Quick Heal RDM service may collect the following information which may / may not contain any personally identifiable information either with or without your discretion/permission, solely for statistical purpose or enhancing and evaluating the ability, effectiveness and performance of Quick Heal's product/software in identifying and/or detecting the malicious behavioral pattern, inherently fraudulent websites and other Internet security threats/ risks. This information will not be correlated with any personally identifiable information except as herein stated and shall include, but not limited to:
A. Any type of Executable files which the Software may identify having a potentially malware behavioral pattern.
B. Any type of information relating to the status of the software that whether there occurred any error while installing the Software or the installation was successful.
C. Any type of URLs of websites visited that the Software deems inherently and potentially

End-User License Agreement
viii
fraudulent.
D. Any type of information that Software deems potentially fraudulent, posing security risks/ threats.
E. Any type of information for identifying the Media Access Control (MAC) address of the Tablet Device, Global Positioning System (GPS), International Mobile Equipment Identity (IMEI), Subscriber Identity Module Number (SIM) on which the Software has been installed.
F. Any type of information for identifying the Internet Protocol (IP) Address and information required for effective license administration and enhancing product functionality and usability.
G. You admit that the information/data as collected above can be used for analyzing, preventing and detecting the potential internet security risks, publishing any type of data/ reports/ presentations on the trends collected, sharing the data to create awareness with any organizations, vendors.
10. INDEMNIFICATION
A. You expressly understand, admit and warrant that in no event shall Quick Heal and/or any of its directors, employees, agents, partners, distributors be liable from any and against all claims, expenses, suits, costs, demands, judgments whatsoever made by you and/ or any third party for any direct, indirect, incidental, special, punitive, consequential and/or exemplary damages including, but not limited to damages for loss of business/profits, damages for loss of confidential/other information, failure to meet any statutory duty/duty of reasonable care/duty in good faith, economic/notional loss, loss for business interruption, goodwill, damage and loss of data or programs, or other intangible losses (even if Quick Heal has been advised of the possibility of such damages), to the fullest extent permissible by law:
(i) arising due to your usage of Software and Quick Heal RDM service; (ii) your negligence or inability of using the Software, Quick Heal RDM service, or
support; (iii) any dispute between you and third party with respect to availing the Software and
Quick Heal RDM service; (iv) your violation of any rights of any other individual and/or entity; (v) your breach of the Agreement; (vi) your violation of any provisions under any acts in India or abroad; (vii) the failure of Quick Heal to provide Support Service or any other
service/information.
B. This limitation will apply to all causes of action whether arise in equity or tort, including but not limited to breach of contract, breach of warranty, negligence, strict liability, misrepresentations and hereby release Quick Heal and/or its directors, employees, agents, distributors from any and all obligations, liabilities in excess of the limitation stated herein.
C. In the event, Quick Heal and/or its directors, agents, employees, distributors are found

End-User License Agreement
ix
liable, You Understand and accept that the liability of Quick Heal and/or its directors, agents, employees, distributors shall be limited only upto and not exceed in any case the License fees incurred by You in acquiring the software from Quick Heal or its distributors/agents. This Clause shall survive the termination of this Agreement.
11. LIMITED WARRANTY AND DISCLAIMERS
A. The software provided by Quick Heal is “AS IS” and “AS AVAILABLE” without warranty of any kind, expressed or implied, including but not limited to the implied warranties of merchantability, fitness, usage, performance, satisfactory quality, integration, applicability for a particular use and any other warranties are disclaimed to the fullest extent permissible pursuant to the applicable law.
B. Quick Heal does not warrant, make any representations that the software and the Quick Heal RDM service will work uninterrupted, timely, secure or error-free or shall meet any or all your requirements whether disclosed to Quick Heal or any of its directors, agents, distributors and employees. The entire risks, faults as to performance of the software, the responsibility for selecting the software and Quick Heal RDM service to achieve your intended results, the results obtained from the Software and Quick Heal RDM shall be assumed by you.
C. You understand and accept that the Software and Quick Heal RDM will substantially perform according to the specifications, descriptions stated in the User Manual, as updated from time to time, subject to the following and Quick Heal expressly disclaims any and all liabilities arising from the following circumstances:
i. incompatibility caused by any software and/or hardware components installed on your Tablet Device;
ii. Any actions initiated by You or by third parties which were beyond the reasonable control of Quick Heal;
iii. Any failures, malfunctions, defects resulting from abuse, improper installation, theft, misuse, accident, operation or maintenance, acts of God, alteration, power failures, casualty, repairs made by any other party than Quick Heal, alterations, neglect, non-permitted modifications, acts of terrorism, vandalism;
iv. The deficiencies, defects in Your Tablet Device and related infringements; v. Your violations of the terms and conditions described in the User manual or in this
Agreement. 12. INTELLECTUAL PROPERTY
The software, source code, activation code, license keys, documentation, systems, ideas, information, content, design and other matters related to the software, Quick Heal RDM service, trademarks are the sole proprietary and Intellectual Property rights of Quick Heal protected under the Intellectual property Laws and belongs to Quick Heal. Nothing contained in this Agreement grant to You any rights, title, interest to intellectual property, including without limitation any error corrections, enhancements, updates or modifications to the Software and Quick Heal RDM service whether made by Quick Heal or any third party. You understand and

End-User License Agreement
x
acknowledge that you are provided with a License to use the software subject to the terms and conditions of this Agreement. 13. If you are availing Quick Heal RDM services, you are agreeing for End User License Agreement and Privacy Policy for the Quick Heal RDM services. To read and accept End User License Agreement and Privacy Policy, please visit https://mydevice.quickheal.com/locale/en/privacyPolicy.html https://mydevice.quickheal.com/locale/en/licenseAgreement.html
14. GENERAL
A. Force Majeure. Quick Heal will not be liable for any delay or failure to fulfill its obligations hereunder that results from an act of God, war, civil disturbance, government policies, or other cause/s beyond its control. Provided that Quick Heal shall endeavor to complete the task within a reasonable period after happening of any event as covered under such force majeure.
B. Legal Jurisdiction. This agreement and any matter relating thereto shall be subject only to jurisdiction of Courts at Pune, India and shall be interpreted as per the terms of the law/s for the time being in force in India. Any dispute which may arise out of this Agreement, breach of terms and conditions under this Agreement, shall be settled by direct negotiations between You and Quick Heal. In the case of failure to resolve the dispute in the manner set out above within 30 days from the date when the dispute arose, the dispute shall be referred to a panel of three arbitrators, with Quick Heal appointing one arbitrator, You appointing one arbitrator and the arbitrators so appointed jointly nominating a third presiding arbitrator. The venue of arbitration shall be Pune. The arbitration proceedings shall be governed by the Arbitration and Conciliation Act, 1996 and Indian Laws and shall be conducted in the English language. The arbitrators shall also decide on the costs of the arbitration proceedings. To the extent possible, after the commencement of any arbitral proceedings the Parties shall continue to perform their respective obligations under this Agreement. The provisions of this Clause shall survive termination of this Agreement. Subject to the provisions of this Clause, the Courts in Pune, India shall have exclusive jurisdiction and the parties may pursue any remedy available to them at law or equity.
C. Complete Agreement. This Agreement comprises the entire agreement between the parties regarding the subject matter, and supersedes any proposals, communications or advertising, oral or written, with respect to the Software or subject matter of this Agreement. You shall be bound by any and all clauses of the Agreement updated and displayed by Quick Heal on www.quickheal.com (the website) from time to time and the Agreement displayed on the website (from time to time) will be the finally concluded and binding Agreement between You and Quick Heal for all legal purposes. In case of any dispute/queries arising out of any translated versions of this Agreement, Quick Heal hereby expressly specifies and confirms that the English version as displayed on the website will be final for interpretation and the terms used, meaning conveyed in the

End-User License Agreement
xi
English version will be authoritative and binding. Any waiver by either party of any violation of any provision of this agreement by the other party will not be deemed to waive any other violation of the same or any other provision.
D. Severability. If any of the provisions contained in this Agreement is found by a court of competent jurisdiction to be invalid, illegal or unenforceable in any respect, the validity, legality or enforceability of the remaining provisions contained herein shall not be in any way affected or impaired thereby and the balance of the Agreement will continue in full force and effect to the maximum extent permitted by law or equity while preserving, to the fullest extent possible, its original intent.
E. Survival. The Clauses in this Agreement including not limited to rights to License fees receivable, “Indemnification”, “Limited Warranties & Disclaimers” and “Intellectual Property” shall survive expiration or termination of this Agreement.
F. You cannot assign your rights or delegate duties or obligations under this Agreement. The failure to exercise or delay i3n exercising a right or remedy by Quick Heal under this Agreement shall not constitute a waiver of the right or remedy or a waiver of any prior, concurrent or subsequent right or remedy.
G. The Section numbers a3nd headings are included merely for the convenience of the parties and are not to be construed in interpreting this Agreement.
H. Quick Heal reserves the right to co-operate with any legal process and may provide documents, information related to your usage of the Software and your general usage of the Tablet.
About the Document
xii
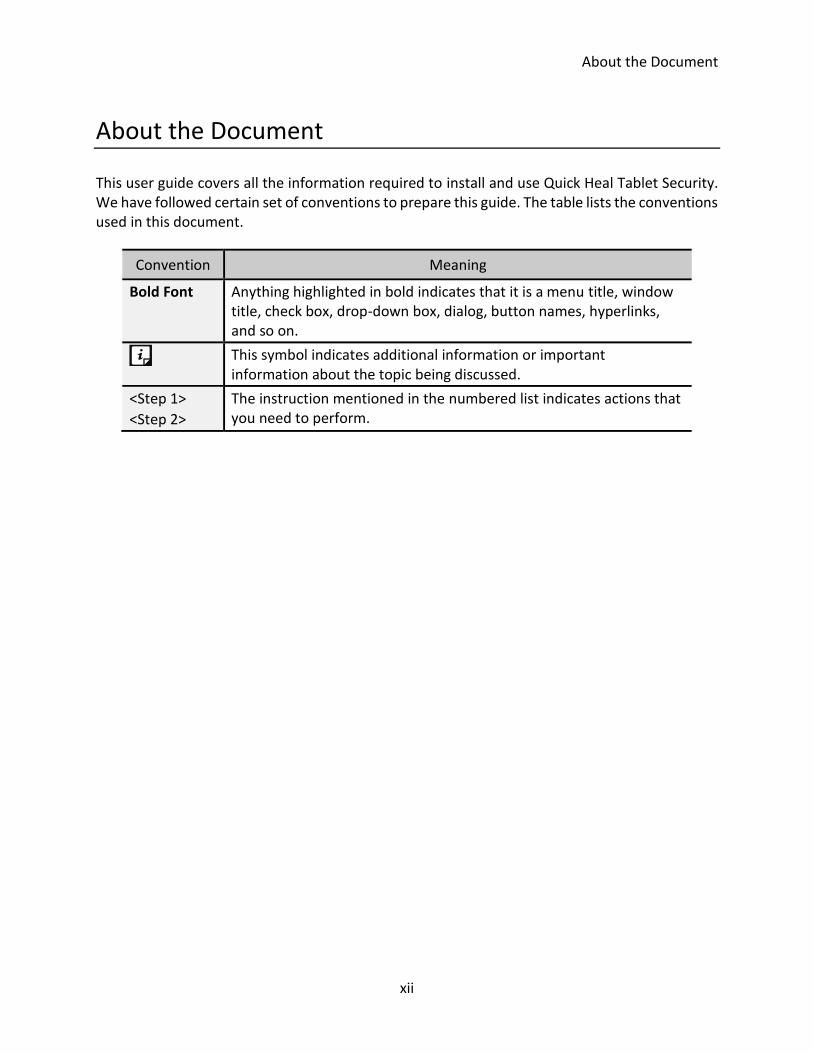
About the Document
This user guide covers all the information required to install and use Quick Heal Tablet Security. We have followed certain set of conventions to prepare this guide. The table lists the conventions used in this document.
Convention Meaning
Bold Font Anything highlighted in bold indicates that it is a menu title, window title, check box, drop-down box, dialog, button names, hyperlinks, and so on.
This symbol indicates additional information or important information about the topic being discussed.
<Step 1>
<Step 2>
The instruction mentioned in the numbered list indicates actions that you need to perform.
Introducing Quick Heal Tablet Security for Android
xiii
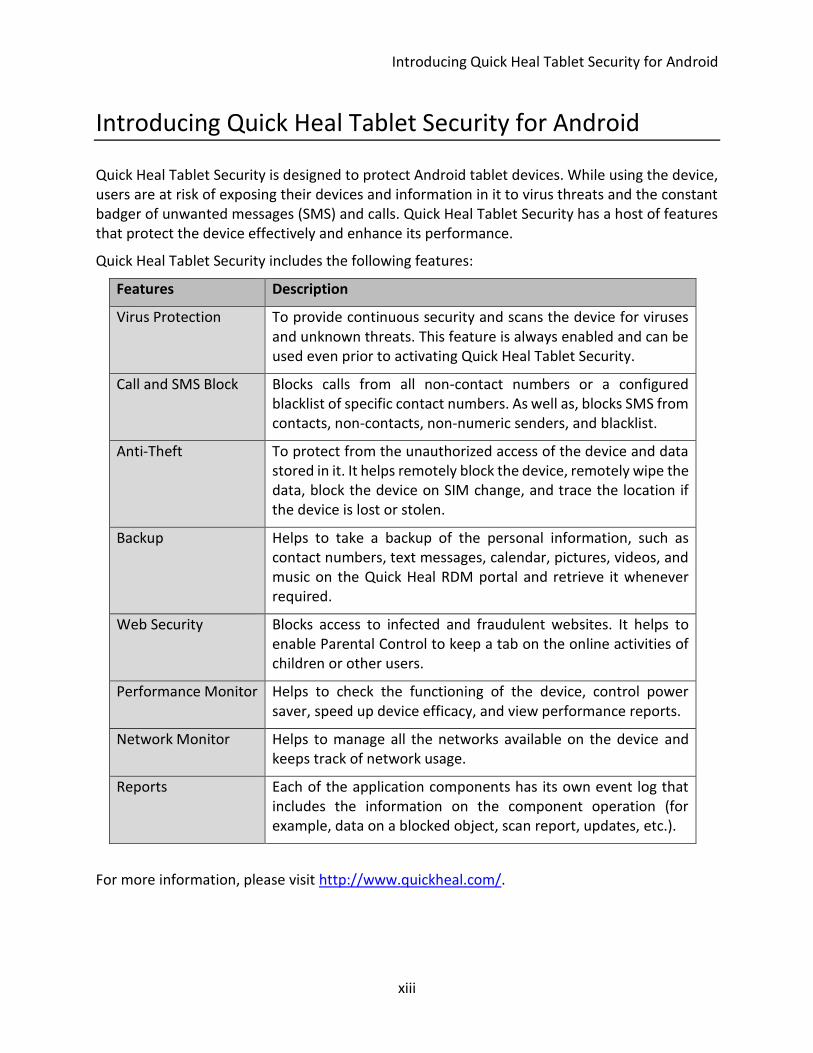
Introducing Quick Heal Tablet Security for Android
Quick Heal Tablet Security is designed to protect Android tablet devices. While using the device, users are at risk of exposing their devices and information in it to virus threats and the constant badger of unwanted messages (SMS) and calls. Quick Heal Tablet Security has a host of features that protect the device effectively and enhance its performance.
Quick Heal Tablet Security includes the following features:
Features Description
Virus Protection To provide continuous security and scans the device for viruses and unknown threats. This feature is always enabled and can be used even prior to activating Quick Heal Tablet Security.
Call and SMS Block Blocks calls from all non-contact numbers or a configured blacklist of specific contact numbers. As well as, blocks SMS from contacts, non-contacts, non-numeric senders, and blacklist.
Anti-Theft To protect from the unauthorized access of the device and data stored in it. It helps remotely block the device, remotely wipe the data, block the device on SIM change, and trace the location if the device is lost or stolen.
Backup Helps to take a backup of the personal information, such as contact numbers, text messages, calendar, pictures, videos, and music on the Quick Heal RDM portal and retrieve it whenever required.
Web Security Blocks access to infected and fraudulent websites. It helps to enable Parental Control to keep a tab on the online activities of children or other users.
Performance Monitor Helps to check the functioning of the device, control power saver, speed up device efficacy, and view performance reports.
Network Monitor Helps to manage all the networks available on the device and keeps track of network usage.
Reports Each of the application components has its own event log that includes the information on the component operation (for example, data on a blocked object, scan report, updates, etc.).
For more information, please visit http://www.quickheal.com/.

Contents
xiv
Contents
1. Getting started ............................................................................................. 1
Prerequisites ............................................................................................................................. 1
System Requirements ............................................................................................................... 1
Installing Quick Heal Tablet Security ........................................................................................ 1
Activating Quick Heal Tablet Security ....................................................................................... 2
Uninstalling Quick Heal Tablet Security .................................................................................... 2
Deactivating Quick Heal Tablet Security ................................................................................. 2
Uninstalling Quick Heal Tablet Security .................................................................................. 3
2. Registration, Reactivation, Renewal ............................................................ 6
Registering Quick Heal Tablet Security ..................................................................................... 6
Managing Device through Quick Heal Remote Device Management Portal (Quick Heal RDM)................................................................................................................................................... 7
Activating Quick Heal RDM Account ....................................................................................... 7
Sign Up for a Quick Heal RDM Account .................................................................................. 7
Adding Device to Quick Heal RDM Account............................................................................ 8
Creating Quick Heal RDM account using existing Google account ......................................... 8
Using Quick Heal Remote Device Management ..................................................................... 9
Reactivating Quick Heal Tablet Security ................................................................................... 9
Renewing Quick Heal Tablet Security ..................................................................................... 10
Buy Renewal .......................................................................................................................... 10
Renew My License................................................................................................................. 10
3. Using Quick Heal Tablet Security Dashboard ............................................. 12
Notification Area ..................................................................................................................... 12
Security Status ........................................................................................................................ 12
Quick Heal Tablet Security Dashboard Features .................................................................... 13
Quick Heal Tablet Security menu ............................................................................................ 13
4. Using Quick Heal Tablet Security ............................................................... 15
Scan Now................................................................................................................................. 15
SMS Blocking ........................................................................................................................... 16
SMS Blocking Features .......................................................................................................... 16
Call Blocking ............................................................................................................................ 18
Contents
xv
Call Blocking Features ........................................................................................................... 18
Anti-Theft ................................................................................................................................ 19
Turning ON Uninstallation Protection .................................................................................. 20
Turning OFF Uninstallation Protection ................................................................................. 20
Trusted SIMs List ..................................................................................................................... 21
Unblocking Your Device .......................................................................................................... 21
Web Security ........................................................................................................................... 22
Web Security Features .......................................................................................................... 22
Virus Protection ...................................................................................................................... 23
Configuring Scan Settings...................................................................................................... 24
Configuring Virus Protection ................................................................................................. 24
Configuring Advanced Protection ......................................................................................... 25
Configuring Quarantine ........................................................................................................ 25
Configuring Exclusion ............................................................................................................ 25
Backup ..................................................................................................................................... 26
Using Data Backup ................................................................................................................ 26
Performance ........................................................................................................................... 27
Safe List ................................................................................................................................. 27
Power Saving ......................................................................................................................... 28
Speed Up Device ................................................................................................................... 28
Reports .................................................................................................................................. 28
Network Monitor .................................................................................................................... 29
Configuring a Network .......................................................................................................... 29
5. Quick Heal Tablet Security menu ............................................................... 30
General Settings ...................................................................................................................... 30
Change PIN ............................................................................................................................ 30
Notification Settings .............................................................................................................. 31
Internet Settings ................................................................................................................... 31
Reports Settings .................................................................................................................... 31
NEWS Settings ....................................................................................................................... 31
Virus Statistics Settings ......................................................................................................... 32
Application Statistics Settings ............................................................................................... 32
Tools ........................................................................................................................................ 32
Update ................................................................................................................................... 32
Quarantine ............................................................................................................................ 33
Remove personal data .......................................................................................................... 33

Contents
xvi
Reports .................................................................................................................................... 34
6. Technical Support ...................................................................................... 35
Help ......................................................................................................................................... 35
About ..................................................................................................................................... 35
Support .................................................................................................................................. 36
Help ....................................................................................................................................... 36
Deactivation .......................................................................................................................... 36
1
Getting started
Quick Heal Tablet Security is simple to install and easy to use. During installation, read each installation screen carefully and follow the instructions. Quick Heal Tablet Security can be installed on any Android tablet device.
Prerequisites Remember the following requisites before installing Quick Heal Tablet Security on the tablets:
A device with multiple antivirus software apps installed may result in system malfunction.
To avoid any issues, remove other antivirus program before installing Quick Heal Tablet Security.
System Requirements Quick Heal Tablet Security is designed for installation on tablets. Quick Heal Tablet Security supports the following versions and resolutions of Android.
Supported Versions of Android
Quick Heal Tablet Security is compatible with the following versions: 2.1 and later.
Supported Resolutions of Android
Quick Heal Tablet Security supports the following resolutions:
Small screen - 7 inches - 1024×600 , 800 x 480
Large screen - 10 inches - 1280×800
Installing Quick Heal Tablet Security The latest Quick Heal Tablet Security installer can be downloaded from the following website: http://www.quickheal.com/qhmtas
To download the product, you require a 20-digit valid product key of Quick Heal Tablet Security. You can see the product key on the scratch card after you purchase the product.
Chapter
1

Getting Started
2
To install Quick Heal Tablet Security, follow these steps:
Go to the folder in the Android device where the Quick Heal Tablet Security installer is placed, then tap the installer (.apk) file. If the installer file is downloaded on PC, then copy the installer file on the Android device. From the device, tap the installer (.apk) file to continue with installation.
In the Install dialog, tap Install.
In the Application installed dialog, the Open and Done buttons are displayed.
The Quick Heal icon is displayed in All apps.
To open the application, tap Quick Heal Tablet Security.
In License Agreement dialog, tap I Agree to go to the Activation screen.
Activating Quick Heal Tablet Security After the Quick Heal Tablet Security is installed on the device, it is recommended to activate the product in order to use all the features and get technical support.
Open Quick Heal Tablet Security.
In License Agreement dialog, tap I Agree to proceed to the Activation screen.
To activate the product, follow the instructions on the screen carefully.
To activate the product, users have to register the product. To know how to register Quick Heal Tablet Security, refer Registering Quick Heal Tablet Security.
Uninstalling Quick Heal Tablet Security Uninstalling Quick Heal Tablet Security exposes the device and its valuable data to virus threats. Hence, it is advised to remove app only when formatting the device or installing it on another device.
Before uninstalling Quick Heal Tablet Security, it must be deactivated.
Deactivating Quick Heal Tablet Security
To deactivate Quick Heal Tablet Security, follow these steps:
Open Quick Heal Tablet Security.
In the menu, tap Help.
Tap Deactivation.
The When to deactivate Quick Heal Tablet Security dialog appears, and then tap Deactivate.
On the confirmation screen for deactivation, tap Yes.

Getting Started
3
If the device is not connected to the Internet, but supports SIM, a screen with the option Deactivate using SMS appears. Deactivate your product key through SMS. However, if the device does not support SIM, a message that the device is not connected to the Internet appears.
Uninstalling Quick Heal Tablet Security
Before uninstalling Quick Heal Tablet Security from the device, make sure the product is deactivated. This ensures that you can reinstall Quick Heal Tablet Security later easily and successfully.
To deactivate the product, refer Deactivating Quick Heal Tablet Security in the preceding section.
To uninstall Quick Heal Tablet Security, follow these steps:
When Uninstallation Protection is enabled
Through Deactivation
Quick Heal recommends uninstallation through deactivation. This is applicable for licensed copy users only.
Open Quick Heal Tablet Security.
In the menu, tap Help, and then tap Deactivation.
In the When to deactivate Quick Heal Tablet Security dialog, tap the Deactivate button.
In the Anti-Theft block dialog, tap Unblock and type the 4-digit PIN and then tap Go.
In the deactivation confirmation screen, tap Yes.
Tap OK. In uninstall application dialog, tap OK.
If the device is not connected to the Internet, but supports SIM, a screen with the option Deactivate using SMS appears. Deactivate your product key through SMS. However, if the device does not support SIM, a message that the device is not connected to the Internet appears.
Through Device Settings
Go to the device settings.
Tap Security.
In the Security screen, tap Device administrators.
Clear the check box against Quick Heal Tablet Security.
In the Device administrators screen, tap Deactivate.
In the Anti-Theft block screen, tap Unblock, type the 4-digit PIN, and then tap Go.

Getting Started
4
In the confirmation screen for deactivating the Device Admin, tap OK.
Now go to the Manage applications option in the device settings and tap Quick Heal Tablet Security.
In the app info screen, tap Uninstall.
In the confirmation screen for uninstalling the application, tap OK.
To close the screen, tap OK.
When Uninstallation Protection is not enabled
Through Deactivation
Quick Heal recommends uninstallation through deactivation. This is applicable for licensed copy users only.
Open Quick Heal Tablet Security.
In the menu, tap Help.
Tap Deactivation.
In the When to deactivate Quick Heal Tablet Security screen, tap the Deactivation button.
If Anti-Theft is configured, the Anti-Theft block screen appears. Tap Unblock, type the 4-digit PIN, and then tap Go.
The When to deactivate Quick Heal Tablet Security screen appears, irrespective of the Anti-Theft is configured or it is not configured.
In the confirmation screen, tap Yes.
In the Deactivation confirmation screen, tap OK.
In the uninstall application screen, tap OK.
To close the screen, tap OK.
If the device is not connected to the Internet, but supports SIM, a screen with the option Deactivate using SMS appears. Deactivate your product key through SMS. However, if the device does not support SIM, a message that the device is not connected to the Internet appears.
Getting Started
5
Through Device Settings
Go to the device settings.
Tap Applications and then tap Manage applications.
Tap Quick Heal Tablet Security.
In the app info screen, tap Uninstall.
In the Anti-Theft block screen, tap Unblock, type the 4-digit PIN, and then tap Go.
In the confirmation screen to uninstall the application, tap OK.
To close the screen, tap OK.
6
Registration, Reactivation, Renewal
Quick Heal Tablet Security must be immediately registered after the installation to activate the copy. Only the activated copy will receive the database updates and technical support whenever required. If the product is not regularly updated, it cannot protect the device against the latest threats.
Registering Quick Heal Tablet Security Quick Heal Tablet Security is simple to register.
To register the product, follow these steps:
Open Quick Heal Tablet Security.
In the License Agreement screen, tap I Agree.
Enter the 20-digit valid product key in the Product Key text box.
Enter relevant information in the User Name, Mobile Number, Email Address, and Confirm Email Address text boxes.
Tap Submit.
In the Configure PIN screen, enter the 4-digit PIN in the Enter PIN text box.
Re-enter the same PIN in the Confirm PIN text box.
In the Alternate Mobile Number field, you can type a mobile number or select a contact from the Contact list by tapping the Contact icon.
Tap the Submit button. The Activate device administrator screen is displayed.
Tap the Activate button to enable Uninstall Protection.
The Activation completed successfully screen is displayed. Tap OK.
Chapter
2

Registration, Reactivation, Renewal
7
If the device is not connected to the Internet, but supports SIM, a screen with the option Deactivate using SMS appears. Deactivate your product key through SMS. However, if the device does not support SIM, a message that the device is not connected to the Internet appears.
Currently Registration/Reactivation/Renewal/Deactivation and conversion of trial copy to registered copy through SMS facility is available only in India.
Mobile numbers listed in the National Do Not Call Registry (DND) list may or may not be able to Register/Reactivate/Deactivate/Renew and convert trial copy to registered copy through the SMS methods depending on the Indian government's current telephone regulatory policies.
Registration through SMS will cost the user as per the subscriber’s SMS charges.
Managing Device through Quick Heal Remote Device Management Portal (Quick Heal RDM) Quick Heal allows to control and manage the device remotely through Quick Heal RDM. To use this feature, activate the account with the Quick Heal RDM portal. Register the Android device on which Quick Heal app is installed and manage it with a single account.
To activate an account with the Quick Heal RDM portal, activate the Quick Heal app on the device with valid product key. To activate the Quick Heal app, refer Registering Quick Heal Tablet Security.
Activating Quick Heal RDM Account
To activate the Quick Heal RDM account, follow these steps:
After the successful registration of Quick Heal Tablet Security, an email to activate the Quick Heal RDM account is sent to the registered email Id.
Check the email and click the Activate button or copy the given link from the email to the browser.
The user is redirected to the Set Password page of the Quick Heal RDM portal. Create the password and click Save.
The username and password should be used every time to log on to the Quick Heal RDM account.
Sign Up for a Quick Heal RDM Account
Use the Sign up option to create and activate a Quick Heal RDM account in the following ways:
Visit: https://mydevice.quickheal.com.
Click the Sign Up button.

Registration, Reactivation, Renewal
8
Create an account with the user name or email Id, valid mobile number, and product key.
Enter the correct verification code.
After reading the License Agreement and Privacy Policy documents carefully, select I agree to the Quick Heal License Agreement and Privacy Policy check box.
Click the Sign Up button.
An email on creating Quick Heal RDM account is sent to the registered email Id.
Check the email and click the Activate button or copy the link from the email to the browser.
User is redirected to the Set Password page of the Quick Heal RDM portal. Set the password and then click Save.
The username and password should be used every time to log on to the Quick Heal RDM account.
After successful sign up with the Quick Heal RDM account, the user can add the Android tablet device in the Add Device page.
Adding Device to Quick Heal RDM Account
To manage the device remotely add the device in Quick Heal RDM.
To add a device, follow these steps:
Visit: https://mydevice.quickheal.com.
Log on to the RDM account by using valid details.
Click the Add Device button.
In the Name text box, type any name for the device.
Enter the valid product key in the Product Key text box.
Click Add.
A One Time Password (OTP) is sent to the device.
In the One Time Password text box enter the OTP and click Submit.
The Resend OTP button can be used in case of failure to receive the OTP.
Creating Quick Heal RDM account using existing Google account
Click the Sign up with the Google button.
Enter the Username and Password of the existing Google account.
After redirecting to the Google account settings page, click Allow.
On the Create New Account page, enter valid mobile number and product key.
Registration, Reactivation, Renewal
9
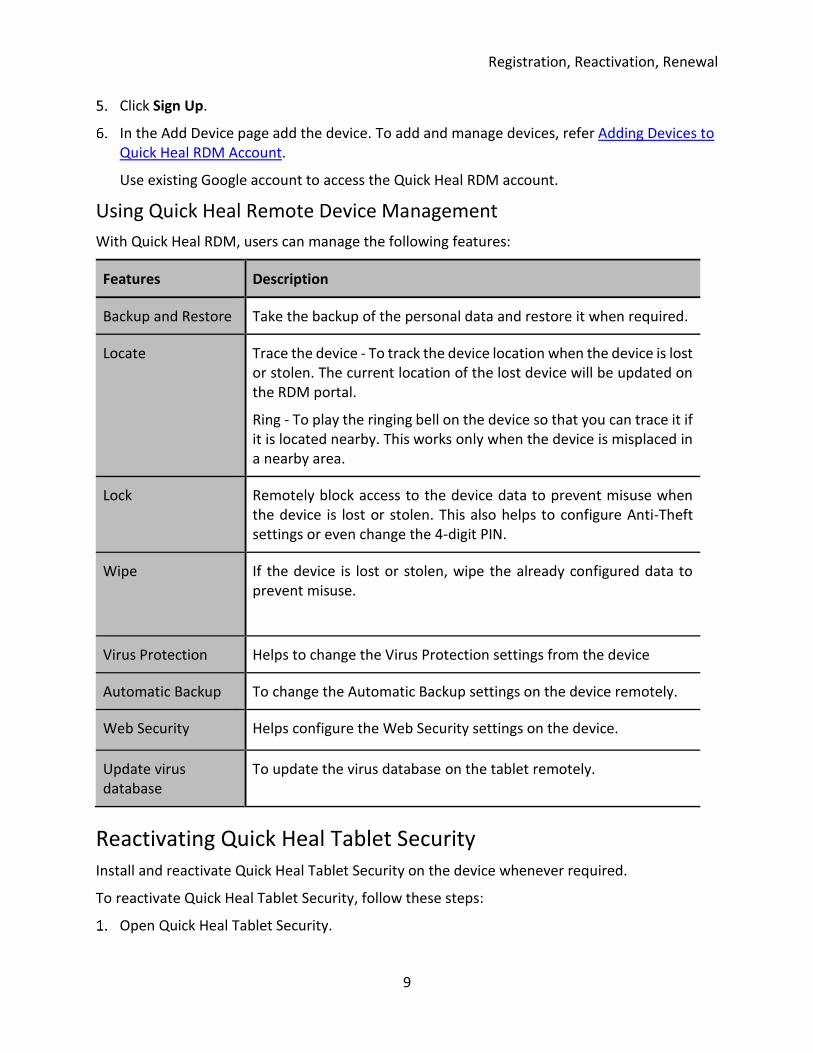
Click Sign Up.
In the Add Device page add the device. To add and manage devices, refer Adding Devices to Quick Heal RDM Account.
Use existing Google account to access the Quick Heal RDM account.
Using Quick Heal Remote Device Management
With Quick Heal RDM, users can manage the following features:
Features Description
Backup and Restore Take the backup of the personal data and restore it when required.
Locate
Trace the device - To track the device location when the device is lost or stolen. The current location of the lost device will be updated on the RDM portal.
Ring - To play the ringing bell on the device so that you can trace it if it is located nearby. This works only when the device is misplaced in a nearby area.
Lock
Remotely block access to the device data to prevent misuse when the device is lost or stolen. This also helps to configure Anti-Theft settings or even change the 4-digit PIN.
Wipe If the device is lost or stolen, wipe the already configured data to prevent misuse.
Virus Protection Helps to change the Virus Protection settings from the device
Automatic Backup To change the Automatic Backup settings on the device remotely.
Web Security Helps configure the Web Security settings on the device.
Update virus database
To update the virus database on the tablet remotely.
Reactivating Quick Heal Tablet Security Install and reactivate Quick Heal Tablet Security on the device whenever required.
To reactivate Quick Heal Tablet Security, follow these steps:
Open Quick Heal Tablet Security.

Registration, Reactivation, Renewal
10
In the License Agreement screen, tap I Agree.
In the Registration Type screen, tap Activation.
Enter the 20-digit valid product key in the Enter Product Key text box.
In the Configure PIN screen, enter the 4-digit PIN in the Enter PIN text box.
Re-enter the same PIN in the Confirm PIN text box.
In the Alternate Mobile Number text box, you can type a mobile number or select a Contact from the Contact list by tapping the Contact icon.
Tap the Submit button. The Activate device administrator screen is displayed.
Tap the Activate button to enable Uninstall Protection.
The Activation completed successfully screen is displayed. Tap OK.
Renewing Quick Heal Tablet Security Renewing the product before the validity date expires, protects it from unknown and malicious threats. It also gives the flexibility to use all the features and avail support.
To renew the Quick Heal Tablet Security license, follow these steps:
Open Quick Heal Tablet Security.
In the menu, tap Help.
Tap About, and then tap Renew Now. You will be redirected to the Renew Now screen.
Two options Buy Renewal and Renew my License appear. To buy a renewal or renew the license, follow the steps mentioned under respective options.
Buy Renewal
To buy renewal code online from a PC, tap Renew Online.
Contact the nearest dealer in the locality to buy a renewal code by tapping Locate a Dealer.
To get assistance in buying renewal code, contact the Quick Heal Renewal Team by tapping Call Us.
Renew My License
If the renewal code is already purchased, proceed further to renew the license.
In the Renew Option screen, tap Renew My License.
Product Key is displayed in the text box.
Enter the renewal code.
If required, edit the mobile number and email ID.
Tap Submit.
Registration, Reactivation, Renewal
11
Enter the mobile number that was provided at the time of registration.
As soon as the license is renewed online from the PC, the product license is updated on the server. However, the license expiry date on the device is updated after it is updated through Update License.
If the device is not connected to the Internet, but supports SIM, a screen with the option Deactivate using SMS appears. Deactivate your product key through SMS. However, if the device does not support SIM, a message that the device is not connected to the Internet appears.

12
Using Quick Heal Tablet Security Dashboard
Dashboard of Quick Heal Tablet Security is divided into four sections: notification area, security status, main screen, and the menus.
Notification Area Notification area displays the call or message received from a blocked number or virus detected.
Security Status The security status is displayed on Dashboard. It gives information of various events such as virus protection is enabled or disabled and license expiry information. Dashboard displays security situation messages as mentioned in the table.
Security Status Message
Copy is not registered Register Now!
Specific (30) days left for expiry.
On the day of expiry.
License period expires in 30 days!
License period expires today!
License expired. License period has expired.
Renew Now!
Virus protection is ON Your device is secure!
On Virus Protection disable Your device is not secure!
Virus protection is Off!
Not Updated since 7 days Protection is out of date!
Update Now!
Virus data base date is older than current date by 15 days
Protection is out of date!
Update Now!
Chapter
3

Using Quick Heal Tablet Security Dashboard
13
Quick Heal Tablet Security Dashboard Features The main screen of Dashboard displays commonly used features of Quick Heal Tablet Security and can be accessed directly. These features are as follows:
Features Description
SMS Blocking Blocks messages (SMS) from contacts, non-contacts, non-numeric senders, and blacklist.
Call Blocking Blocks calls from all non-contact numbers or blacklist of specific contact numbers.
Anti-Theft Protects the device and data stored from unauthorized access. Helps remotely block the device, remotely wipe data, block the device on SIM change, and trace the device location.
Web Security Helps to block infected and fraudulent websites that may harm or phish the confidential information. Also helps in setting Parental Control to help regulate the online activities of children or other users.
Virus Protection Provides continuous protection and run a scan on the device for viruses and unknown threats.
Backup Takes back up of valuable device data to the Quick Heal RDM portal. This data can be retrieved whenever required.
Performance Checks the performance of the device, controls power saver, speeds up the device performance, and helps in viewing the performance reports.
Network Monitor Manages all the networks available on the device. It checks the current usage of all the networks and controls the usage.
Messenger Provides updates about tablet protection, security alerts, or other important issues.
Scan Now Runs a scan on the device or only memory cards.
Quick Heal Tablet Security menu The Quick Heal Tablet Security menu includes all the features. If the feature is not available on Dashboard, it can be found in the menu.
To access a feature under menu:
Open Quick Heal Tablet Security.

Using Quick Heal Tablet Security Dashboard
14
Tap menu, which is available next to the Quick Heal Tablet Security icon.

15
Using Quick Heal Tablet Security
Quick Heal Tablet Security with easy user-interface is designed to simplify the task of securing the device. Quick Heal Tablet Security can be accessed from the Home screen in any of the following ways:
By selecting menu > Apps > Quick Heal Tablet Security.
By selecting menu > Widgets > Quick Heal Tablet Security.
By tapping the Quick Heal Tablet Security Icon.
There are number of smart features that helps to protect and manage the tablet device. These include:
Scan Now The Scan Now feature helps to scan the device whenever required. It includes the following scanning options:
Full Scan: Runs a scan of the entire device.
Scan Memory Card: Runs a scan of the memory card only.
To initiate scanning of the device, follow these steps:
Open Quick Heal Tablet Security.
On Dashboard, tap Scan Now.
Select either Full Scan or Scan Memory Card to begin scanning.
After the scan is completed, tap View Details to view the report of threats if any.
In case virus is found in already installed apps, tap the Resolve Now button and select the app.
Choose either Skip or Uninstall option.
If virus is not found, the No threats found message is displayed.
Chapter
4
Using Quick Heal Tablet Security
16
If manual scan is done, the device will be scanned for viruses irrespective whether Virus Protection is enabled or disabled through the Virus Protection feature.
SMS Blocking The SMS Blocking feature helps to block all the unwanted messages (SMS) such as news, advertisements, marketing messages, and offensive texts.
This feature also blocks messages from non-contact numbers, specific contact numbers, and non-numeric numbers. Configuring whitelist and blacklist, provides filtration for SMS blocking.
The blacklist and the whitelist may include the contacts that are either available or not available in the phone directory.
To configure SMS Blocking, follow these steps:
Open Quick Heal Tablet Security.
On Dashboard, tap SMS Blocking. Alternatively, select menu > SMS Blocking.
SMS Blocking Features
SMS Blocking includes the following features:
Blocked SMS
The Blocked SMS feature displays a list of blocked messages received from blocked contact numbers. These messages can be read and moved to the message box. They can also be forwarded to any other contact or deleted if not required.
Settings
Settings helps to enable SMS scan, block spam messages, block SMS from contacts, non-contacts, and non-numeric senders. It enables Show notifications of blocked SMS whenever the user receives a message from the blocked contacts.
To configure Settings, follow these steps:
In the SMS Blocking menu, tap Settings.
To enable scanning of messages, turn ON Enable SMS Scan.
To block spam messages, turn ON Block SMS Spam.
To block messages from the contacts of phone directory, turn ON Block SMS from Contacts.
To block messages from the contacts that are not in the phone directory, turn ON Block SMS from Non-Contacts.
To block messages from non-numeric senders, turn ON Block SMS from Non-Numeric Sender.
Using Quick Heal Tablet Security
17
To get the notification when a SMS is received from a blocked contact, turn ON Show notifications of blocked SMS.
Black List
The Black List feature helps to create a blacklist of contacts. Messages from the blacklisted contacts will be blocked.
To create a blacklist of contacts, follow these steps:
In the SMS Blocking menu, tap Black List.
To add a contact, tap the plus sign (+).
In the Add contact to black list screen, type the contact number in the text box or add a contact from the phone directory by tapping the Contact list icon.
To block calls from the same contact, select the Block Call from selected contacts option.
Tap Save.
Be sure that the contact entered in the blacklist does not exist in the whitelist.
White List
This White List feature helps to create a whitelist of contacts. Messages from the whitelisted contacts will be allowed. This provides privilege to receive messages from certain trusted contacts.
To create a blacklist of contacts, follow these steps:
In the SMS Blocking menu, tap Black List.
To add a contact, tap the plus sign (+).
In the Add contact to black list screen, type the contact number in the text box or add a contact from the phone directory by tapping the Contact list icon.
To block calls from the same contact, select the Block Call from selected contacts option.
Tap Save.
Be sure that the contact entered in the whitelist does not exist in the blacklist.
Spam Keywords List
The Spam keyword List feature helps to create a list of spam keywords. It blocks the incoming SMS containing any of the keywords added to the list.
To create spam keyword list, follow these steps:
In the SMS Blocking menu, tap Spam Keyword List.
Using Quick Heal Tablet Security
18
To add spam keywords, tap the plus sign (+).
In the Add keyword to Spam Keyword List screen, enter the valid spam keyword in the text box.
Tap Save to save your spam keyword.
Call Blocking The Call Blocking feature helps to block all unwanted calls such as sales calls, promotional calls, and other unnecessary calls.
This feature enables call block and blocks all non-contact numbers or specific numbers by creating a blacklist of contacts. The blacklist may include the contacts that are either available or not available in the phone directory.
To configure Call Blocking, follow these steps:
Open Quick Heal Tablet Security.
On Dashboard, tap Call Blocking. Alternatively, select menu > Call Blocking.
Call Blocking Features
Call Blocking includes the following features:
Blocked Calls
The Blocked Calls feature displays a list of blocked calls received from blocked contact numbers. Users can check the blocked calls, remove them from the blacklist, and delete them if not required.
Settings
Settings enable call block and blocks calls received from non-contacts. Users can enable the Show notifications of blocked Calls option whenever a call is received from the blocked contact.
To configure Settings, follow these steps:
In the Call Blocking menu, tap Settings.
To enable call block, turn ON Enable Call Block.
To block calls from non-contacts, turn ON Block Calls from non-contacts.
To get notification on calls from blocked contact, turn ON Show notifications of blocked Calls.
Black List
This Black List option helps to create a blacklist of contacts. Calls from blacklisted contacts will be blocked.
To create a blacklist of contacts, follow these steps:

Using Quick Heal Tablet Security
19
In the Call Blocking menu, tap Black List.
To add a contact, tap the plus sign (+).
In the Add contact to black list screen, type the contact in text box or add a contact from phone directory by tapping the Contact list icon.
To block SMS from the same contact, select the Block SMS from selected contacts option.
Tap Save.
Anti-Theft The tablet gives a privilege of making a call, store important contacts, store confidential data, and access the Internet.
The Anti-Theft feature protects the device data from unauthorized access when the device is lost or stolen. This feature blocks the device remotely, wipe the confidential data, block device on SIM change, and trace the device if lost or stolen.
The blocked tablet screen displays the owner comment with alternate contact number of the owner. On SIM change, a message to the authorized owner is sent to the alternate contact number. This helps to get back the device or trace its location.
If the Uninstallation Protection option is not selected while configuring Anti-Theft, still the users can select this option later. To enable protection, go to the Anti-Theft setting screen and turn ON Uninstallation Protection.
The active SIM is taken as Trusted SIM. To know more about Trusted SIMs, refer Trusted SIMs List in the following section.
The alternate contact number is displayed on the blocked device screen. This option
helps to trace the lost or stolen device.
If the SIM card of the lost device is changed, instant message is sent to the configured alternate number. This message gives information about the new mobile number.
If the Remote Data Wipe feature is used, all contacts, pre-selected folders, pictures, and SMS stored in the device are removed.
Remotely lock the device or remotely wipe the data or trace the device location by sending the following messages from any device to the lost device.
o To remotely lock the device, send: BLOCK PIN (For example – BLOCK XXXX).
o To remotely unblock the device, send: UNBLOCK PIN (For example – UNBLOCK XXXX).
o To remotely wipe data, send: WIPE PIN (For example – WIPE XXXX).
o To get device location, send: TRACE PIN (For example – TRACE XXXX).
o To ring the device, send: RING PIN (For example – RING XXXX).

Using Quick Heal Tablet Security
20
'XXXX' stands for the 4-digit PIN that was set while registering Quick Heal Tablet Security.
Turning ON Uninstallation Protection
To make the Quick Heal app more secure, add the app in the Device administrators. This will not allow any unauthorized person to uninstall the app from the device; however, this is optional.
To turn ON Uninstallation Protection, follow these steps:
Open Quick Heal Tablet Security.
On Dashboard, tap Anti-Theft. Alternatively, on the menu > Settings > Anti-Theft > Uninstallation Protection.
Enable Uninstallation Protection.
In the Device Administrator screen, tap Activate.
If the Uninstallation Protection option is not selected, still users can select this option later.
To uninstall Quick Heal Tablet Security, first clear the Uninstallation Protection check box.
Turning OFF Uninstallation Protection
The Uninstallation Protection can be turned OFF in two different ways.
Through Anti-Theft Settings
Open Quick Heal Tablet Security.
On Dashboard, tap Anti-Theft and then type the 4-digit PIN.
Tap Go.
On the Anti-Theft Settings screen, tap Uninstallation Protection. Turn OFF the Uninstallation Protection option.
On confirmation dialog, tap YES.
Through Device Settings
Go to the device settings.
Select Security > Device administrators.
Clear the Quick Heal Tablet Security check box.
On the confirmation dialog, tap Deactivate.
In the Anti-Theft Block screen, tap Unblock.
In the Unblock Device screen, type the 4-digit PIN.
Tap Go.

Using Quick Heal Tablet Security
21
On confirmation screen, tap OK.
Trusted SIMs List The Trusted SIMs List feature is useful for users using dual-SIM device or multiple SIM cards. It helps to add or remove additional SIMs to the Trusted SIMs list. Thus, when SIM is changed, the device is not blocked.
Trusted SIMs list is a list of SIM cards that are considered reliable and safe. The device is not blocked if a SIM from the trusted list is being used. Fifty (50) SIM cards can be added to this list.
If Anti-Theft is configured and a new SIM card is detected, which is not included in the Trusted SIMs list on the device, the device gets blocked. However, when Anti-Theft is enabled for the first time, the SIM card present in the device is taken as trusted SIM automatically.
To add SIMs to the Trusted SIMs list, restart the device with a new SIM and add the SIM to the Trusted SIMs list when prompted.
Unblocking Your Device If the device is locked by mistake or lost or the SIM is changed from lost device, a message Tablet is blocked is displayed on the device screen.
To unblock the device, follow these steps;
Tap Unblock.
Enter the 4-digit PIN in the Enter PIN text box that was set while registration.
Tap Go. Your tablet is unblocked successfully.
In case, the user forgets the PIN, still the device can be unblocked and a new PIN can be set in the following ways:
Unblock Using Forgot PIN option
On the device block screen, tap Unblock.
Tap Forgot PIN. The Unblock Device screen is displayed.
Tap Send. A Temporary PIN will be sent to the Alternate contact. You can also use the RDM portal to reset the PIN.
In the Unblock Device screen, enter the OTP in the text box.
Tap Go. The Change PIN screen is displayed.
Enter a new 4-digit PIN in the New PIN text box and enter the same PIN in the Confirm PIN text box.
Tap Save.

Using Quick Heal Tablet Security
22
Web Security The Web Security feature blocks infected and fraudulent websites that may harm or phish the confidential information. The Parental Control option helps to regulate online activities of the children or other users.
The Web Security feature supports only the default browser of Android.
To configure Web Security, follow these steps:
Open Quick Heal Tablet Security.
On Dashboard, tap Web Security. Alternatively, select menu > Web Security.
Web Security Features
Web Security includes the following features:
Settings
Settings help to enable browsing protection and phishing protection.
To configure Settings, follow these steps:
In the Web Security menu, tap Settings.
To block access to the infected websites, turn ON Browsing Protection. By default this option is turned ON.
To block access to the fraudulent websites, turn ON Phishing Protection. By default this option is turned ON.
Parental Control
The Parental Control feature help parents to restrict categories of websites or block specific websites. They can also allow access to trusted sites, even from a blocked website category. For example, if the category of social networking sites is blocked, Facebook can be accessible.
To configure Parental Control, follow these steps:
In the Web Security menu, tap Parental Control.
To enable Parental Control, turn ON Parental Control.
By default Parental Control and Exclude Websites features are enabled.
To block the categories of websites, select Categories. All the sites falling under a category will be blocked.
Using Quick Heal Tablet Security
23
Exclude Websites
The Exclude Websites feature allows access to a specific website, even if that website falls in a category that was blocked. For example, if the Social Networking sites category is blocked, Facebook is accessible.
To configure the Exclude Websites feature, follow these steps:
In the Web Security menu, tap Exclude Websites.
The Excluded Websites list appears if websites are already entered, else a message appears. The Exclude websites option is activated only if Parental Control is enabled.
To add a website, tap the plus sign (+).
In Add URL to the Exclude screen, enter the website URL and then tap the Save button.
Be sure that same URL is not entered that exists in the Restrict Websites list.
Restrict Websites
The Restrict Websites feature blocks access to the specific websites. This is also helpful when a website does not fall in a correct category or if the website category is restricted yet a certain website is accessible that needs to be blocked.
This feature is not available only on the devices Android OS 4.0 and later.
To configure Restrict Websites options, follow these steps:
In the Web Security menu, tap Restrict Websites.
The Restrict Websites list appears if websites are already entered, else a message appears.
To enable Restrict Websites, turn ON Restrict access to specified websites. To add a website, tap the plus sign (+).
In Add URL to Block Access screen, enter the website URL and then click the Save button.
Be sure that the same URL is not entered in the existing Exclude Websites list.
Virus Protection The Virus Protection feature helps the device to be monitored continuously for virus threats caused by an email attachment, Internet downloads, file transfer, file execution and so on. However, Virus Protection is turned ON by default to protect from any potential threats.
The menus and their functions in Virus Protection are as follows:
Features Description
Scan Settings Helps Repair, Delete, or Skip when virus is found.
Using Quick Heal Tablet Security
24
Virus protection Helps to enable or disable Virus Protection. It takes action such as Repair, Delete, or Skip when virus is found.
Advanced Protection Helps secure the device from applications having security risks (PUA) and adware.
Quarantine Helps delete the quarantined files after the configured schedule.
Exclusion Helps exclude applications, files, or folders from Virus Scanning.
Configuring Scan Settings
The Scan Settings option helps to configure the actions required when a virus is detected.
To configure the Scan Settings, follow these steps:
Open Quick Heal Tablet Security.
On Dashboard, tap Virus Protection. Alternatively, select menu > Anti Virus > Virus Protection.
On the Antivirus screen, tap Scan Settings.
Select any one action, such as Repair, Delete, or Skip.
The actions configured will be performed automatically during the scanning.
Configuring Virus Protection
To configure Virus Protection, follow these steps:
Open Quick Heal Tablet Security.
On Dashboard, tap Virus Protection. Alternatively, select menu > Anti Virus > Virus Protection.
To enable Virus Protection, turn ON Virus Protection.
Select an action to be taken when a virus is found from the Action to perform when a malware is found list.
To get notification on when virus was found and action on it, turn ON Display virus protection alert message.

Using Quick Heal Tablet Security
25
Configuring Advanced Protection
To configure Advanced Protection, follow these steps:
Open Quick Heal Tablet Security.
On Dashboard, tap Virus Protection. Alternatively, select menu > Anti Virus > Virus Protection.
On the Antivirus screen, tap Advanced Protection.
Enable or disable either options;
Scan Application having security risks (PUA): Detects the applications that can harm the device.
Scan Adware: Check for any possible applications that are capable of displaying advertisements that consume the Internet usage.
However, these options are turned ON by default.
Configuring Quarantine
To configure Quarantine, follow these steps:
Open Quick Heal Tablet Security.
On Dashboard, tap Virus Protection. Alternatively, select menu > Anti Virus > Virus Protection.
On the Antivirus screen, tap Quarantine.
Turn ON Delete quarantined files to enable this feature. However, this feature is enabled by default.
If Delete quarantine files is turned OFF, the frequency option is disabled and frequency cannot be set.
Select the frequency to delete the quarantined files from the given options: After 7 days or After 30 days or After 45 days.
Configuring Exclusion
The Exclusion feature excludes the applications, files, and folders from scanning.
To configure Exclusion, follow these steps:
Open Quick Heal Tablet Security.
On Dashboard, tap Virus Protection. Alternatively, select menu > Anti Virus > Virus Protection.
In the Antivirus screen, tap Exclusion. Two tabs Excluded Apps and Excluded Files and Folders are displayed.

Using Quick Heal Tablet Security
26
To exclude applications, tap Excluded Apps and then do the following:
Tap the plus sign (+).
From the application list, select the applications to be excluded and tap the Save button.
To exclude files and folders, tap Excluded Files and Folders and then do the following:
Tap the plus sign (+).
From the list of files and folders, select the files and folders to be excluded and tap the Save button.
Backup The Backup feature helps to take back up of valuable data such as contact numbers, calendar, messages (SMS), pictures, music, and videos. This data is saved in Quick Heal RDM and can be retrieved whenever required.
To configure Backup, follow these steps:
Open Quick Heal Tablet Security.
On Dashboard, tap Backup. Alternatively, select menu > Backup.
To take the backup, go to the Backup Settings feature and then select the data types under the Take backup option to secure your important information.
To take the backup automatically, turn ON Automatic Backup.
From the Backup Schedule list, select the time frequency for automatic backup, such as: After 7 days or After 30 days or After 45 days.
However, the Backup Schedule At every day is selected by default.
Using Data Backup
The Data Backup option helps you to restore the backup, delete the backup, and take the backup manually whenever required.
Once the Automatic Backup is turned ON, the data is stored automatically to the Quick Heal RDM. Restore this data whenever required.
Taking Backup Manually
Take the backup manually, irrespective whether Automatic Backup is turned ON or OFF.
To take the backup manually, follow these steps:
In the Backup menu, go either to Backup Settings or Data Backup.
Tap Backup Now.
Using Quick Heal Tablet Security
27
Backup is taken for the data types selected in the Backup Settings feature. If a new file is added to the existing files, then backup of the newly added file is taken. This is because; the existing files were backed up earlier.
Restore Backup
Restore the backup if the data is lost for any reason. Backup of the data can be restored from the last backup taken as configured in Backup Settings.
To restore the backup, follow these steps:
In the Backup menu, tap Data Backup.
To restore the data, tap Restore Backup.
Deleting Data
Delete the backup; if the data is obsolete. However, after the data is deleted, it cannot be retrieved.
To delete the data, follow these steps:
In the Backup menu, tap Data Backup.
To delete the backup, tap Delete Backup.
Performance The Performance option helps to check the functioning of the device, control power saver, speed up the device performance, and view the performance reports.
To configure Performance, follow these steps:
Open Quick Heal Tablet Security.
On Dashboard, tap Performance. Alternatively, select menu > Performance.
In Summary, check the current performance of the device, settings for power saving mode, and all the apps running.
Safe List
The apps added to Safe List are not killed automatically.
To add apps to Safe List, follow these steps:
In the Performance menu, tap Safe List.
To add an app to the Safe List, tap the plus sign (+).
In the Add to Safe List screen, select the apps to add to the Safe List.
To save your settings, tap the Save button.
Using Quick Heal Tablet Security
28
Power Saving
The Power Saving feature enables power saver and take steps to save power to increase the battery life.
To configure Power Saving, follow these steps:
In the Performance menu, tap Power Saving.
To enable Power Saving, turn ON Enable Power Saving.
To set a percentage for power saving, tap Active power saving mode if battery is below.
A slider appears. Adjust the percentage on the slider.
To set brightness when in power saving mode, tap Set brightness of screen to.
A slider appears. Adjust the percentage on the slider. It is ideal to set lower brightness in power saving mode.
Select any of the following options as required to save the power:
Select Disable Wi-Fi in power saving mode.
Select Disable Bluetooth in power saving mode.
Select Disable Mobile Network in power saving mode.
Select Kill all running apps.
Select Kill apps from safe list also.
Speed Up Device
The Speed Up Device feature enhances the performance of the device by stopping the running apps and killing idle apps on a regular basis.
To configure Speed Up Device, follow these steps:
In the Performance menu, tap Speed Up Device.
To enable stopping of apps, turn ON Enable apps kill on screen lock.
Set frequency when to kill apps on screen lock in the Kill apps on screen lock after list.
To set stopping of apps, turn ON Enable apps kill schedule.
Select a frequency to kill running apps from Frequency to kill running apps list.
Reports
This Reports feature helps you to view the reports related to killing of apps. The reports can be viewed for the current and previous month.
To view reports, go to the Performance menu, and tap Reports.
Using Quick Heal Tablet Security
29
Network Monitor The Network Monitor feature manages all the networks used on the device. Network Monitor checks the current usage of all the networks and controls the usage.
To configure Network Monitor, follow these steps:
Open Quick Heal Tablet Security.
On Dashboard, tap Network Monitor. Alternatively, select menu > Network Monitor.
In the Network Monitor Settings screen turn ON Device Network Monitor, and then configure the desired networks.
Configuring a Network
To configure a network, follow these steps:
In the Network Monitor menu, tap Summary and ensure that Device Network Monitor is turned ON.
Select a network to be configured.
In this example, Network – 3G is selected.
In the Data usage bill date list, tap the date picker to select the billing date.
To set data usage limit, select the Set data usage limit option.
Enter the data limit in the Alert if data usage reached max limit of option.
Enter the data usage limit in the Alert if data usage reaches option to get alerts.
Data usage limit in the Alert if data usage reached max limit option should be equal to or higher than that of in the Alert if data usage reaches option.
To stop network after the data usage limit reaches its maximum limit, turn ON Stop network usage on max limit reaches.
30
Quick Heal Tablet Security menu
The Quick Heal Tablet Security menu includes all the features of the software. If a feature is not available on Dashboard, it can be found in the menu.
Following features are available under the Quick Heal Tablet Security menu:
General Settings Helps configure all the features of Quick Heal Tablet Security.
Tools Helps to view, remove, restore the Quarantine files, and update the product.
Reports Helps to view reports of all blocked calls, blocked SMS, Anti-Theft, scans, virus protection, and web security.
Help Helps to access the Help topics, seek Technical Support, and view the license details of the product.
General Settings To change PIN and configure the settings for notification, Internet, reports, messenger, and web console.
Change PIN
The Change PIN settings helps to change the PIN.
To change PIN, follow these steps:
Open Quick Heal Tablet Security.
Tap menu and then tap General Settings.
In the General Settings menu, tap Change PIN.
Enter the 4-digit PIN in the New PIN text box.
Enter the same 4-digit PIN in the Confirm PIN text box.
Tap Save button. “Your settings are saved” confirmation dialog is displayed.
Chapter
5

Quick Heal Tablet Security menu
31
Notification Settings
The Notification Settings helps to enable alerts for events such as, virus detected, license expiry information, device security status, virus database update, and information about calls or SMSs received from the blocked contact numbers. All these notifications help to take an appropriate action on time.
To configure Notification Settings, follow these steps:
Open Quick Heal Tablet Security.
Tap menu and then tap General Settings.
In the General Settings menu, tap Notification Settings.
To enable Notification Settings, turn ON Enable Notification.
Internet Settings
The Internet Settings helps to select and manage any available network on the device.
To configure Internet Settings, follow these steps:
Open Quick Heal Tablet Security.
Tap menu and then tap General Settings.
In the General Settings menu, tap Internet Settings.
Select one of the following network: Any available network, Wi-Fi only, or Mobile networks.
Reports Settings
The Reports Settings helps to configure the reports to be generated on various events of Quick Heal Tablet Security. The reports will be generated automatically depending on the set schedule.
To configure Reports Settings, follow these steps:
Open Quick Heal Tablet Security.
Tap menu and then tap General Settings.
In the General Settings menu, tap Reports Settings.
To generate reports, select the number of days from the following options: 7 days, 30 days, and 45 days.
However, 30 days is selected by default.
NEWS Settings
The NEWS Settings helps to enable or disable NEWS and NEWS notifications.
To configure NEWS Settings, follow these steps:
Open Quick Heal Tablet Security.

Quick Heal Tablet Security menu
32
Tap menu and then tap General Settings.
In the General Settings menu, tap NEWS Settings.
To enable NEWS, turn ON NEWS.
To enable NEWS Notification, turn ON NEWS Notification.
Virus Statistics Settings
The Virus Statistics Settings report virus statistics to the Quick Heal server.
To configure Virus Statistic Settings, follow these steps:
Open Quick Heal Tablet Security.
Tap menu and then tap General Settings.
In the General Settings menu, tap Virus Statistics Settings.
To report virus statistics to Quick Heal server, turn ON Virus Statistics.
Application Statistics Settings
The Application Statistics Settings report app statistics to the Quick Heal server.
To configure Application Statistic Settings, follow these steps:
Open Quick Heal Tablet Security.
Tap menu and then tap General Settings.
In the General Settings menu, tap Application Statistics Settings.
To report application statistics to Quick Heal server, turn ON Application Statistics.
Tools You can perform following actions with the help of the Tools option:
Update
If the device is connected to the Internet, Quick Heal Tablet Security gets updated automatically for any virus database.
This is helpful if the device was not connected to the Internet or was switched off for few days.
To take the updates, follow these steps:
Open Quick Heal Tablet Security.
Tap menu and then tap Tools.
In the Tools menu, tap Update.
In the Update item, tap Update Now.

Quick Heal Tablet Security menu
33
In case there are no latest updates available, the Up to Date message is displayed.
Quarantine
Quarantine is a specific folder where Quick Heal Tablet Security places all potentially suspicious, malicious objects. Check the list of quarantined objects to get the details on the objects full name and the date of detection. The quarantined objects can be deleted or restored.
To take action on the quarantined files, follow these steps:
Open Quick Heal Tablet Security.
Tap menu and then tap Tools.
In the Tools menu, tap Quarantine.
Do one of the following:
To Remove: Select the files and tap Remove to remove the suspicious files.
After the files are removed, they cannot be retrieved.
To Restore: Select the files and then tap Restore to restore the files.
Remove personal data
The Remove personal data helps to remove all the contacts, SMS, calendar, and SD card data can be deleted. This is a secured deletion method where data is deleted permanently.
To remove personal data, follow these steps:
Open Quick Heal Tablet Security.
Tap menu and then tap Tools.
In the Tools menu, tap Remove personal data.
Select the data type that you want to remove.
Select one of the deletion methods:
One Pass – Quick Data Destruction
Multi Pass – More Secure Destruction
DoD – Standard Data Destruction
To remove the selected data, tap Secure Delete.
One Pass – Quick Data Destruction
Uses random letters to overwrite the data. This is the best and default file deletion method. Data once deleted cannot be recovered.
Multi Pass – More Secure Destruction
Uses twice the number of random letters to overwrite the data. This method of deletion

Quick Heal Tablet Security menu
34
provides additional layer of security. Data once deleted cannot be recovered by any recovery software.
DoD –
Standard Data Destruction
Uses the encryption method of using random letters to overwrite data as per the Department of Defense Memo. Data once deleted cannot be recovered by any recovery software.
Reports With Reports, view the reports generated on various events as follows:
Blocked SMS Displays the list of blocked SMSs.
Blocked Calls Displays the list of blocked calls. For every entry there is a list of last 10 calls, date and time details.
Anti-Theft Displays Anti-Theft reports such as whether the device was ever blocked on SIM change, device was locked remotely, or data was wiped remotely etc.
Scan Displays Scan report with information of threat found, location and action taken.
Virus Protection Displays Virus report with information of threat found, location and action taken.
Update Displays details of updates taken for Virus Database.
Backup Displays reports on backup taken or deleted.
Web Security Displays reports on all activities related to web security such as the blocked sites, malicious sites visited, phishing sites etc.
To view reports, follow these steps:
Open Quick Heal Tablet Security.
Tap menu, and then tap Reports.

35
Technical Support
Quick Heal provides extensive technical support for the registered users in various ways. Access the Help menu to get information to use Quick Heal Tablet Security, to get assistance on any issue from Quick Heal experts, and so on.
Help The Help menu includes information about the product license, support system, the help topics, and the deactivation option.
To view Help, follow these steps:
Open Quick Heal Tablet Security.
In the menu, tap Help.
To view the Help topics, tap Help.
About
The About screen includes details of the product (Product Name, Version and Virus Database Date) and License details (User Name, License valid till date, etc.) along with the options such as Update Now, Renew Now, Update License, and Update email Id.
Updating License after Buying Renewal Code
To update the product license after buying renewal code, follow these steps:
Open Quick Heal Tablet Security.
In the menu, tap Help.
Tap About.
Tap Update Now.
Chapter
6

Technical Support
36
Support
Quick Heal provides extensive technical support for the registered users of Quick Heal Tablet Security. The Support menu includes the following support systems:
Web Support (Visit FAQ) – Frequently Asked Questions offers answers to the most common queries related to Quick Heal Tablet Security.
Email Support (Submit Ticket) – This is an online Technical Support system that helps to submit the queries and issues.
Live Chat Support (Chat Now) – Chat with our experts online if expert attention is required for the issue.
Telephonic Support – Call us at our telephone support number to get your issues and queries resolved.
India-based support number: +91 – 927 223 3000.
8:00 AM to 10:00 PM (Monday to Saturday) IST
9:30 AM to 06:30 PM (Sunday).
Email Us: Email your queries and issues to [email protected].
Logs
Send us the logs for the technical issues to troubleshoot the issue.
To send the logs, follow these steps:
Turn ON the Enable Logs option.
Tap the Send Logs button.
Help
To view the Help topics, follow these steps:
Open Quick Heal Tablet Security.
In the menu, select Help > Help.
Deactivation
To remove Quick Heal Tablet Security, first deactivate the product. This will help to re-install and reactivate the product later.
To deactivate Quick Heal Tablet Security, refer Deactivating Quick Heal Tablet Security.

Index
37
Index
A
About, 35 Activating Quick Heal RDM Account, 7 Activating Quick Heal Tablet Security, 2 Adding Device to Quick Heal RDM Account, 8 Anti-Theft, 13, 19, 34 Application Statistics Settings, 32
B
Backup, 13, 26, 34 Black List, 17, See Blocked Calls, 18, 34 Blocked SMS, 16, 34
C
Call Blocking, 13, 18 Call Blocking Features, 18 Change PIN, 30 Configuring a Network, 29 Configuring Advanced Protection, 24 Configuring Exclusion, 25 Configuring Quarantine, 25 Configuring Scan Settings, 24 Configuring Virus Protection, 24 Creating Quick Heal RDM account using existing Google
account, 9
D
Deactivating Quick Heal Tablet Security, 2 Deleting Data, 27 Disable Bluetooth in power saving mode, 28 Disable Mobile Network in power saving mode., 28 Disable Wi-Fi in power saving mode., 28 DoD –, 34
E
Email Support, 36 Email Us, 36 Exclude Websites, 23
F
Full Scan, 15
G
General Settings, 30
H
Help, 35, 36
I
install, 2 Installing Quick Heal Tablet Security, 1 Internet Settings, 31
K
Kill all running apps, 28 Kill apps from safe list also, 28
L
Logs, 36
M
Managing Device Through Quick Heal Remote Device Management Portal, 7
Messenger, 13 Multi Pass – More Secure Destruction, 34
N
Network Monitor, 13, 28 NEWS Settings, 31 Notification Area, 12
O
One Pass – Quick Data Destruction, 33
P
Parental Control, 22 Performance, 13, 27 Power Saving, 27 Prerequisites, 1 product key, 1
Q
Quarantine, 33 Quick Heal Tablet Security, 1 Quick Heal Tablet Security Dashboard Features, 13 Quick Heal Tablet Security Menu, 30

Index
38
R
Reactivating Quick Heal Tablet Security, 10 Registering Quick Heal Tablet Security, 6 Registration, Reactivation, Renewal, 6 Remove personal data, 33 Renew Now, 10 Renewing Quick Heal Tablet Security, 10 Reports, 28, 34 Reports Settings, 31 Restore Backup, 26 Restrict Websites, 23
S
Safe List, 27 Scan, 34 Scan Memory Card, 15 Scan Now, 13, 15 Scan Settings. See Security Status, 12 Set brightness of screen to, 28 Settings, 16, 18, 22 Sign Up for a Quick Heal RDM Account, 8 SMS Blocking, 13, 16 SMS Blocking Features. See Spam Keywords List, 17 Speed Up Device, 28 Support, 36 System Requirements, 1
T
Taking Backup Manually, 26 Technical Support, 35 Telephonic Support, 36
Through Anti-Theft Settings, 20 Through Deactivation, 3, 4 Through Device Settings, 3, 4, 20 Tools, 32 Trusted SIMs List, 21 Turning Uninstallation Protection OFF, 20 Turning Uninstallation Protection ON, 20
U
Unblock Using Forgot PIN option, 21 Unblocking Your Device, 21 Uninstalling Quick Heal Tablet Security, 2, 3 Update, 32, 34 Updating License after Buying Renewal Code, 35 Using Data Backup, 26 Using Quick Heal Remote Device Management, 9 Using Quick Heal Tablet Security, 15 Using Quick Heal Tablet Security Dashboard, 12
V
Virus Protection, 13, 23, 34 Virus Statistics Settings, 32
W
Web Security, 13, 22, 34 Web Security Features, 22 Web Support, 36 When Uninstallation Protection is enabled, 3 When Uninstallation Protection is not enabled, 4 White List, 17