quick and dirty pruning the basics - colorado state universityquick and dirty pruning – the basics...
TRANSCRIPT

Quick and Dirty Pruning – The Basics
Created by the Grand Junction District
For more information contact us
at 970-248-7325

• The following pruning information and instructions are designed for small to medium sized pruning jobs
• If the work is off the ground, if a chainsaw is needed, or for tree removal: the work should be done by a ISA Certified Arborist with insurance
– International Society of Arboriculture, www.isa-arbor.com
Caution

Pruning Tools
Do not leave the ground - leave that to the professionals Image source: pruningsaws.info

Pruning Tools
Image source: farmerfredrant.blogspot.com
Bypass pruners are superior to anvil pruners
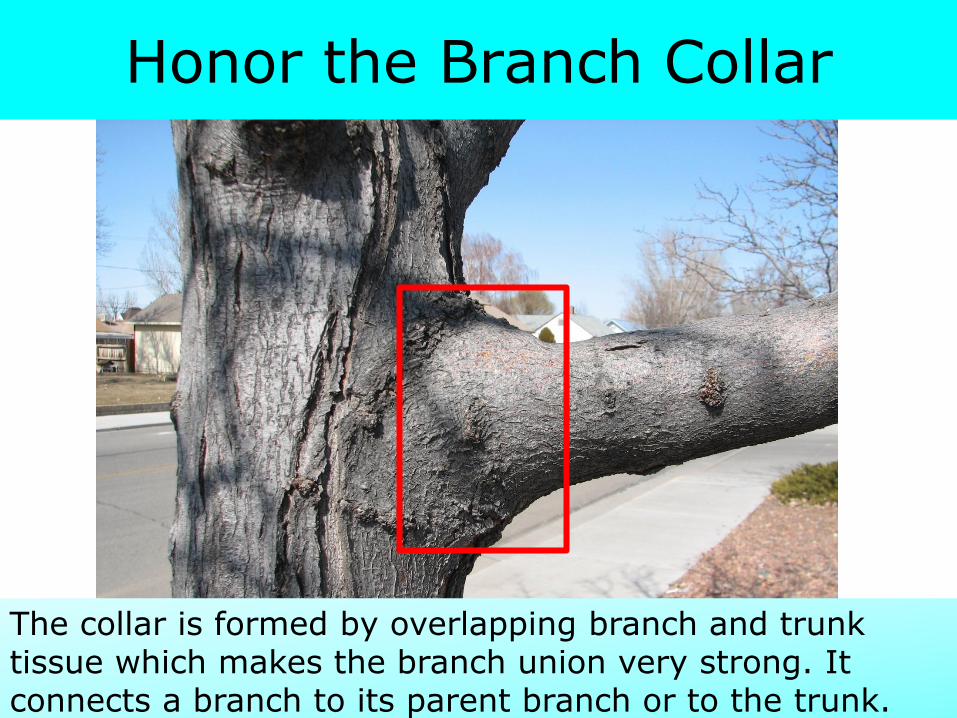
The collar is formed by overlapping branch and trunk tissue which makes the branch union very strong. It connects a branch to its parent branch or to the trunk.
Honor the Branch Collar

Honor the Branch Bark Ridge
Bark that has been pushed up into a ridge as the branch and trunk grow. It indicates a strong branch attachment. It is not visible on all tree species.

Using Hand Pruners branch diameter is less than 1 inch
Image source: newleaftreecare.net
Do not cut into the branch collar or bark ridge. No flush cut.
Place pruning blade against stem of branch for proper cut.
Image source: ca.uky.edu

Three Step Process – branch diameter is greater than one inch
• Three Step Process prevents the weight of the branch from tearing any bark off the trunk
• First Cut – ¼ to 1/3 through underside of branch
• Second Cut – Above first cut and all the way through branch. This cut will leave a stub.
• Third Cut – Remove remaining stub. Do not cut into the branch collar or branch bark ridge. Double-sided arrow indicates length of stub
Image source: extension.missouri.edu

Three Step Pruning Process
1. Cut UP 2. Cut DOWN 3. Cut OFF (remove stub) Not always a defined collar, look for swell or branch bark ridge
1
2
3

1. Cut UP 2. Cut DOWN 3. Cut OFF (remove stub)
Three Step Pruning Process

1. Cut UP 2. Cut DOWN 3. Cut OFF (remove stub)
Three Step Pruning Process

• If not followed, the weight of the branch will tear the bark off the tree resulting in a larger wound
• The first step in the three step process is the undercut and it will prevent this from occurring
Do not violate the three step process for Large Branches

Callus Wood
Oval callus wood indicates the cut was made too close
to the trunk = flush cut
Circular callus wood indicates good wound closure

What Not To Do

Flush Cutting
Image source: Joseph O'Brien, USDA Forest Service, Bugwood.org
• Inside the collar is a unique barrier: Branch Protection Zone
• This zone has chemical and physical properties that slow or stop the spread of decay into the trunk
• Flush cutting removes this protection zone and allows decay inside the tree

Flush Cutting -Do not cut into the collar
Image source: treeworld.info

Trees React to Injury
Trees react poorly to injuries such as flush cuts or torn branches

Pruning Stubs
Branch stubs are a great place for insects and diseases to attack and damage the tree

Watersprouts
This tree reacted to
being topped by producing water sprouts

Topping trees promotes bad branch structure and allows decay into the wounds
Do Not Top Trees
Image source: greensboro-nc.gov
Image source: Ed Gilman

Safety First
Never, ever use a branch. He needs to hire a professional Image source: coldclimategardening.com

Favorite Websites
Special Thanks to Vince Urbina for his pictures and information.
• Dr. Ed Gillman – http://hort.ifas.ufl.edu/woody/
• OSU Landscape Plants – http://oregonstate.edu/dept/ldplants/
• Tree Browser from Utah State University – Extension Forestry – http://treebrowser.org
• Colorado State Extention – www.ext.colostate.edu/
• Colorado Tree Coalition – www.coloradotrees.org