q&com =c13 n - appliance parts & consumer electronic ... · holders and other linens a satb...
TRANSCRIPT

.q&com
=C13 Safety Instruc_ons ............ 2-7
Operating Instrudions
Baking or Roasting .............. 12
Broiling, Broiling Guide ......... 14Clock and Timer . .............. 15
Control I_ockout ............... 11
Cookware ...................... 9
Oven ...................... 10-21Sabbath Feature ................ 18
SelfZCleaning ............... 20, 21
Special Features ................ 17
Surfi_ce Burneis .............. 8, 9
Thermostat .................... 19
Timed Baking & Roasting ........ 16
Care and CleaningBroiler Pan and (;rid ........... 24
Burner Assembly ............... 22Burner Grates, Vent Grille
and Vent Grille Cap ............ 23Control Panel ................. 26
Door ......................... 25
Floor ......................... 26
Knobs ........................ 22
I,ift-Off Oven Door . ............ 25
Light Bulbs ................. 23, 24
NJCSP28
()yen Vent and
Cooktop _Mr Inlet ............... 26
Packagdng _E_pe ................ 22Painted Surfaces ................ 26
Racks ........................ 24
Stainless Steel Surfi_ces .......... 26
Storage Drawer . ............... 24Vent ......................... 26
....... 21-,: 0Troubleshooting Tips _ _
Accessories ................... 33
Consumer Support
Consumer Support ..... Back Cover
Product Regdstrafion ......... 31,32Warranty fbr Customeis
in Canada .................... 35
*¢\arranty for Customeisin the U.S.A ................... 34
www.geappliances, ca
Write the model and serialnumbers here:
Model #
Serial #
You can lind them on a label
behind the open oven dooron the lower left corner of the
range ti'ame.
49-80354 11-05JR
IMPORTANTSAFETYINFORMATION.READALLINSTRUCTIONSBEFOREUSING.
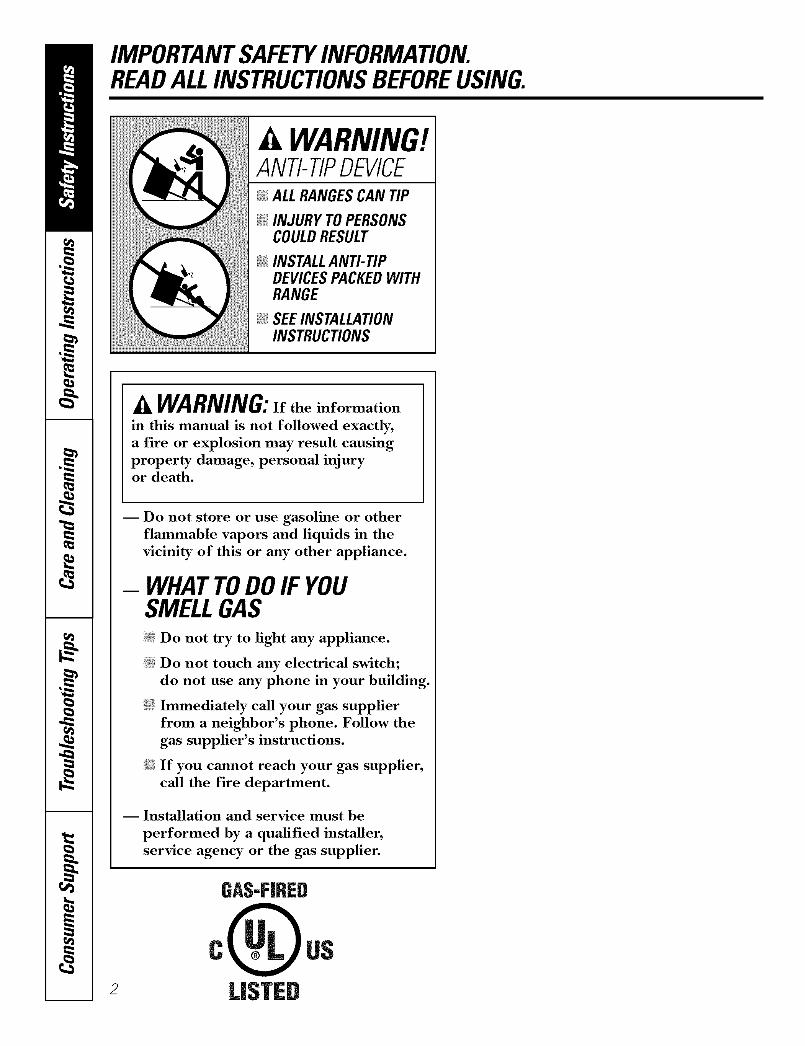
A WARNING!ANTI-TIPDEVICE_;_ALL RANGESCAN TIP
_;i:INJURY TOPERSONSCOULDRESULT
@ INSTALLANTI-TIPDEVICESPACKEDWITHRANGE
_ SEEINSTALLATIONINSTRUCTIONS
A WARNING:If the information
in this manual is not followed exactly,
a fire or explosion may result causing
property damage, personal injuryor death.
2
I Do not store or use gasoline or otherflammable vapors and liquids in the
vicinity of this or any other appliance.
- WHATTODOIF YOUSMELLGASiJ_:illDo not try to light any appliance.
i_i:iDo not touch any electrical switch;
do not use any phone in your building.
Immediately call your gas supplier
from a neighbor's phone. Follow the
gas supplier's instructions.
If you cannot reach your gas supplier,
call the fire department.
-- Installation and service must be
performed by a qualified installer,
service agency or the gas supplier.
GAS-FIRED
LI_TED
_e.COITI
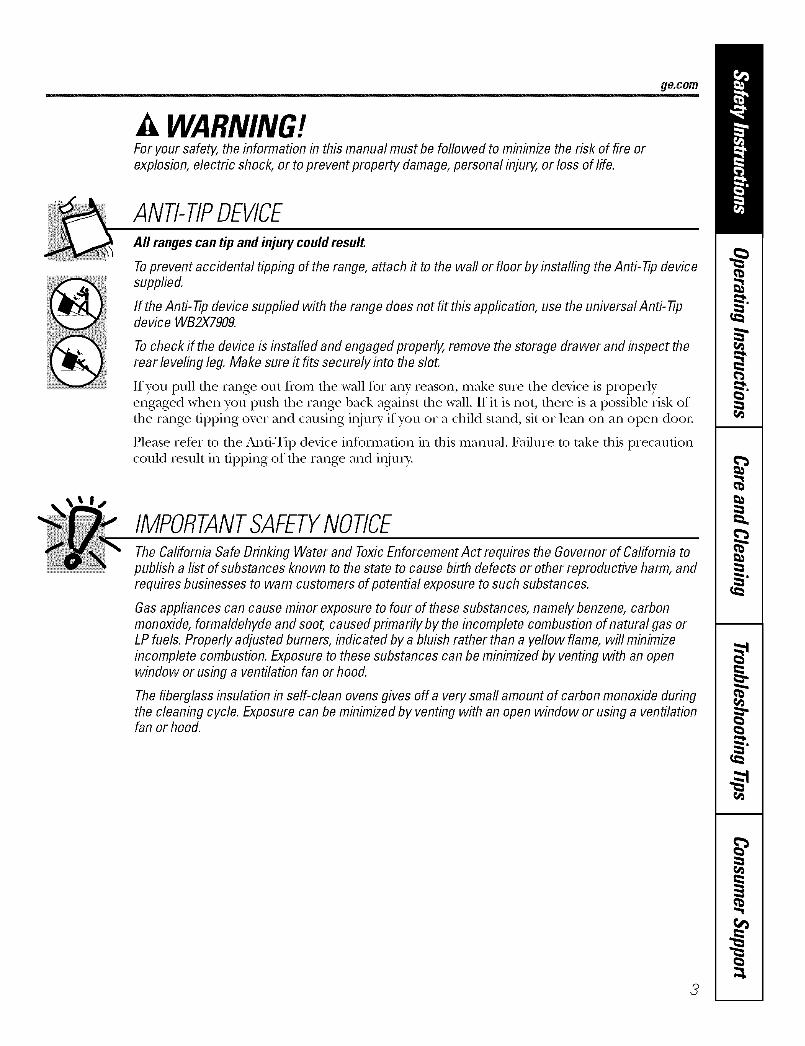
WARNING!For your safety, the information in this manual must be followed to minimize the risk of fire orexplosion, electric shock, or to prevent property damage, personal injury, or loss of life.
ANTI-TIPDEVICEAll ranges can tip and injury could result.
Toprevent accidental tipping of the range, attach it to the wall or floor by installing the Anti--tip devicesupplied.
If the Anti--tip device supplied with the range does not f# this application, use the universal Anti--17pdevice WB2X7909.
To check if the device is installed and engaged properly, remove the storage drawer and inspect therear leveling leg. Make sure #fits securely into the slot.
If yOU pull tile range otlt flom tile wall for ally reason, mal<e stlie the device is properlyengaged when you push tile rang_ back against file wall. If it is not, there is a possible risk ofthe rang_ tipping oxer and causing iIljuFy" if YOUor a child stand, sit or lean on an open door
Please refer m the And-Tip device infounafion in tiffs manual. Failure m rake fills precautioncould resuh in tipping of the rang_ and iIIjm>
IMPORTANTSAFETYNOTICEThe Californb Safe Drinking Water and Toxic Enforcement Act requires the Governor of Californb topublish a list of substances known to the state to cause birth defects or other reproductive harm, andrequires businesses to warn customers of potential exposure to such substances.
Gas appliances can cause minor exposure to four of these substances, namely benzene, carbonmonoxide, formaldehyde and soot, caused primarily by the incomplete combustion of natural gas orLP fuels. Properly adjusted burners, indicated by a bluish rather than a yellow flame, will minimizeincomplete combustion. Exposure to these substances can be minimized by venting with an openwindow or using a ventilation fan or hood.
The fiberglass insulation in self-clean ovens gives off a very small amount of carbon monoxide duringthe cleaning cycle. Exposure can be minimized by venting with an open window or using a ventilationfan or hood.
3
IMPORTANTSAFETYINFORMATION.READALLINSTRUCTIONSBEFOREUSING.
WARNING!SAFETYPRECAUflONSWhen using electrical appfiances, basic safety precautions should be foflowed, including thefollowing:
_7{_Use this appliance only %r its intendedpurpose as described m tins )wner sManual.
_:: Be sure your appliance is properly installed
and grounded by a qualified technician inaccordance with the provided installationinstructions.
_{:_Before perfo_ning any service, disconnectthe range power supply at the householddisu-ibufion panel by removing the fl_se or
switching off the circuit breaken
;fi:,iHaxe the installer show you the location of
the circuit breaker or fl_se. Mark it for easyreference.
J; Do not leme children alone----r'hildren
should not be left alone or unattended in
an area where an appliance is in use. Theyshould nexer be allowed to sit or stand on
any part of the appliance.
J; Haxe the installer show you the location
of the range gas shut-offxahe and how toshut it off if necessa U.
J; Hax> your rang_ installed and properly
grounded by a qualified installei; inaccordance with the Installation
Instructions. Any adjusunent and se_Mce
should be perforated only 1)yqualified gasrange installers or service technicians.
_{:_Locate the range out of kitchen traffic pail)and out of dr_fftv locations to prexent poorair circulation.
_t_::Be snre all packaging materials areremoved from rite rang_ before operatingit to pre\ent fire or smoke damage should
the packaging mamrial ignite.
Do not attempt to repair or replace anypart of your range unless it is specificallyrecommended in this manual. All other
service should be refelTed to a qualifiedtechnician.
Be sure your range is con-ecfly adjusmdby a qualified se_Mce mchnician or installer
for the type of g_s (natural or LP) that isto be used. Your rang_ can be conx_rmdfor use with either type of gas. See the
Installation Instructions packed withthe rang_.
_:: Plug your range into a 190=\_lt grounded
outlet only. Do not remove the roundg_ounding prong from the plug. If indoubt about the grounding of the home
elecuical system, it is your personalresponsibility and obligation m hax>an ungrounded outlet replaced with a
properly gTounded, three-prong outlet inaccordance with the National Electrical(;ode. Do not use an exmnsion cord with
this appliance.
WARNING:theseadjustmentsmust be made by a qualified servicetechnician in accordance with themanufacturer's instructions and aft codes
and requirements of the authority havingjurisdiction. Failure to follow theseinstructions could result in serious injury orproperty damage. The qualified agencyperforming this work assumesresponsibility for the conversion.
_:: Kee I) the hood and grease filters clean tomaintain good xenting and to mold greasefires.
J; Do not leme children alone or unattended
where a range is hot or in operation. Theycould be seriously bm_ed. N
Teach children not to play with thecontrols or any other part of the rang>.
Always kee I) dish towels, dish cloths, potholders and other linens a satb distance
fronl vonr rangP.
d

ge.com
SAFETYPRECAUTIONS;_?:,;Always kee I) wooden and plastic utensils
and canned tbod a safe distance flora your
range.
_i:,:Always kee I) combnsdble wall coxefings,curtains or drapes a safe distance flom
yonr range.
_i;:Do not clean tile rang_ with flammable orx_latile cleaning fluids.
_i:,i'After prolonged use of a range, high floormmperamres may result and many floorcoxeling3 will not withstand this kind ofuse. Nexer install tile range oxer vinyl tileor linoleum that cannot withstand such
type of use. Nexer install it directly overinmxJor kitchen caq)eting.
;_i:,:Do not allow anyone to climb, stand orhang on dm oxen doox; storage drawer orcooktop. They could damage tile rangeand even tip it oxex; causing sexerepersonal i_jury.
,&CAUTION:Itemsinteresttochildrenshouldnot be storedin cabinetsabovea rangeoron the backsplashof a range--children climbingon the rangeto reachitems could beseriouslyinjured.
,& WARNING:NEVERusethisappliance as a space heater to heat or
wam_ the room. Doing so may resultin carbon monoxide poisoning andoxerheating of the cooktop or oxen.
_i:,iFox your safety', nexer use your appliancefox wmlning or heaung the room.
;_?:':Larg> scratches or impacts to glass doorscan lead to broken or shattered glass.
;_i:,:Do not clean the range when flxe applianceis in use.
:_i:,:Nexer wear loose-fitting or hanginggarments while using file appliance.Be carefifl when reaching for imms storedin cabinets oxer the range. Flammablematerial could be ig_lited if brought incontact wifll flame or hot oxen snrt_acesand may cause sexere bums.
Do not store flammable mamdals in an
oxen, a range storage drawer or near acooktop.
Do not store or use combustible materials,
gasoline or other flammable vapors andliquids in the vicinity of this or any otherappliance.
Do not let cooking grease or otherflammable mamrials accumulam in or
near the range.
Do not use wamr on grease fires. Nexerpick up a flaming pan. Turn fl_e controlsoff: Smother a flaming pan on a surfl_ceburner by coveting the pan completelywiflx a well-fitting lid, cookie sheet or fiattr W. Use a mulfi-pml)ose d U chemical ortbam-type rixe extinguisher
Flaming grease outside a pan can be putout by covering it with baking soda ox;if available, by using a multi-pml)ose d Uchemical or foam-type fire extinguisher.
Flame in dxe oven can be smothered
completely by closing the oven door andturning tile control to off or by using amulti-pull)ose d U chemical or tbam-tvpefire extinguisher
Let tile burner gxates and other surfacescool before touching them or leavingthem where children can reach them.
_?i::Nexer block d_e xents (air openings) ofthe range. They provide tile air inlet andoutlet that are necessmw fox rixe range tooperate properly with coxxect combnsuon.'Air openings are located through the rearand front center of the cooktop, at the topand bottom of the oxen doox; and at the
bottom of the range under the storagedrawer or kick panel.
_7_::Do not lift the cooktop. IJfting thecooktop can lead to damage and improperoperation of the range.
5

IMPORTANTSAFETYINFORMATION.READALLINSTRUCTIONSBEFOREUSING.
WARNING!SURFACEBURNERSUseproperpan size--avoid pansthat are unstableor easilytipped.Selectcookware havingflat bottomslargeenoughto coverburnergrates. Toavoid spillovers,makesure cookwareis largeenoughto containthe foodproperly, Thiswill both save cleaningtimeandprevent hazardousaccumulationsof food,sinceMaw spatteringor spilloversleft on rangecan ignite.Usepans with handlesthat can be easilygraspedand remaincooL
_i)!Ahvays use tim UTE position when ignitingthe top burners and make sure the burnershme ig_dted.
!_'Never leme the stuface btunets unattended
at high flame settings. Boilovers causesmoking and greasy spillovers that maycatch on fire.
!_'Adjust the top burner flame size so it doesnot extend 1)eyond the edge of the cookware.Excessive flame is hazardous.
!_:Use only dry pot holders--moist or damp potholders on hot surPaces may resuh in burnsflom smam. Do not let pot holders comenear open flames when lifting cookware. Donot use a towel or other 1)ulky cloth in placeof a pot holder:
!_'X_\hen using glass cookware, make sure itis desig_md for top-of-range cooking.
!:_'To minimize tim possibilib, of 1)urns, ignitionof flammal)le materials and spillage, turncookware handles toward the side or back of
the range without extending over adjacentbtlI'IleI's.
_i_!Careflflly watch foods 1)eing flied at a highflame setting.
_i_!Ahvays heat fat slowly and watch as it heats.
!_:Do not lea\e any imms on the cooktop. Thehot air flom the vent may ig_im flammableimms and will increase pressure in closedcontainers, which may cm_se them m l)u_st.
_i)!If a coml)ination of oils or _lts will be used
in flying, stir together before heating oras _lts meh slowh,
_i_!Use a deep flu thermometer wheneverpossible to prevent oxerheating _t 1)eyondthe smoking point.
_i)!Do not operate the burner wifl_out all btunerparts in place.
the pan too flfll of_u can cause spilloverswhen food is added.
X&qmnpreparing flaming foods under thehood, turn the fan on.
Do not use a wok on tim cooking sur£1ceif the wok has a round metal ring that isplaced o\er the burner gram m support thewok. This ring acts as a heat m_p, which mWdamage the burner g_v_mand N_rner head.Also, it m W cm_se the N_rner m workimproperly. This may cause a cad)onmonoxide level above that allowed by currentstandards, resulting in a heahh hazard.
Foods for flTing should be as dry as possible.Frost on flozen foods or moisture on flesh
foods can cause hot flu to 1)ul)l)le up and overthe sides of the pan.
Never u), to move a pan of hot Pat especiallya deep _t flyer. X'\hit until the _t is cool.
Do not leme plastic items on tim cooktop--they may meh if left too close to the vent.
Kee I) all plastics mvay flom the surPace1)tlI'Ile I'S.
To moid the possibili b, of a burn always becertain that the conuols for all burners are
at the OFFposition and all grates are coolbefore attempting to remove them.
If _ange is located near a window, do nothang long curtains that could 1)low over thesurface burners and create a fire hazard.
If you smell gas, turn off the g;_s to the rangeand call a qualified service technician. Nexeruse an open flame to locate a leak.
Ahvays ttun the stuJ_ce 1)tunet conuols offbefore removing cookware.
_i)!Use the least possible amount of£u forefl>ctive shallow or deep-Set flying. Filling
ge.com
COOKMEATANDPOULTRYTHOROUGHLY...Cookmeatandpoultrythoroughly--meattoat leastanINTERNALtemperatureof 160°Fandpoultryto at leastanINTERNALtemperatureof I80°ECookingto thesetemperaturesusualt/pmtectsagainstfoodbomeillness.
it WARNING!OVENStand awayfrom the range when opening the oven door. Hot air or steam which escapes can causebums to hands, face and/or eyes.
Do not heat unopened flood containers.Pressurecould build up and the containercould bulst, causing an inju U.
Keep tile oven vents unobstructed.
Kee I) the oven flee from grease buildup.
Place tile oven rack in tile desired positionwhile the oven is cool. If rocks must be handled
when hot, do not let pot holder contact the
heating elements.
iJii:iWhen using cooking or roasting bags in tileoven, follow tile manufi_ctu,er's directions.
Pulling out tile rock to tile stop-lock is aconvenience in lifting heavy fbods. It is also aprecaution against burns flom touching hotsurfiaces of the door or oven walls.
Do not use tile oven to dU newspape,s.If overheated, the} can catch on fire.
Do not use the oven fur a storage area. Itemsstored in an oven can ignite.
Do not leave paper products, cooking utensilsor food in the oven when not in use.
a, WARNING:NEVERcoverany slots, holes or passages in the oven bottomor cover an entire rack with materials such as
alunfinuln [oil. Doing so blocks air flowthrough the oven and may cause carboninonoxide poisoning. Alunlinuln fbil liningsmay also map heat, causing a fire hazard.
Do not use aluminum foil to line oven bottoms,
except as suggested in this inanual, hnproperinstallation of alulninuln foil may result in arisk of electric shock or fire.
Make sure tile broiler pan is in place conectl)to reduce the possibilit) of grease fires.
If you should have a grease fire in tile broilerpan, press tile Cl£AR/Offpad and keep tileoven door closed to contain fire until itBuI'nS OUt,
SELF-CLEANINGOVENDo not use oven cleaners.No commercialoven cleaner or ovenliner protective coatingof any kind shouldbeusedin or aroundany part of the oven.Residuefrom ovencleanerswill damagethe inside of the oven when theself-clean cycle is used,
iJii:iDo not clean tile door gasket. Tile (loot gasketis essential fbr a good seal. Care should betoken not to rub, damage or move tile gasket.
iJi;:iBe%re selfkleaning the oven, remove tile mcLs,broiler pan, grid and other cookware.
iJii:iBe sure to wipe up excess spillage befbrestarting the self cleaning operation.
iJii:iIf tile self cleaning mode malflmctions, turn theoven off and disconnect tile power supply. Haveit serviced b} a qualified technician.
iJi;:iClean only parts listed in this Owner's Manual.
READANDFOLLOWTHISSAFETYINFORMATIONCAREFULLY.SAVETHESEINSTRUCTIONS 7

Using thegas surfaceburners.
Throughout this manual, features and appearance may vary from your model.
Push the control knob in and turn itto the LITEposifion.
How to Light a Gas Surface Burner
Push the control knob in and turn it to
tile LITE position.
You will hear a little clicking noise---
tile sound of the electric s,)ark ionifin,_
the burnel:
Mtei" the flame lights, turn the knob to
ac!iust the flmne size, If the knob stays at
Ill'E, it will continue to click,
When one burxler is turxled to LITE, all
the burne_ spark. Do not attempt todisassemble or clean around anv bm'nerwhile another burner is on. An electric
shock may result, which could cause youto knock over hot cookware.
Sealed Gas Burners
Tile slnaller burner (right rear posidon)
will give the best silnlner results flw
delicate fi_ods, such as sauces or fi)ods
which need to cook over low heat fiw a
hmg dine. It can be turned down to a vei_'
low setting.
The largest, burnels are hi_*her,_ l)°wered
than the othels and will 1)ring liquids to
a boil quickeI:
How to Select Flame Size
Forsafehandllegof cookware,neverlet theflamesextendupthesidesof thecookware.
_'atch the flalne, not the knob, as you
reduce heat. The flame size oil a gasburner should inatch the cookware
VOII aI'e rising.
An} flame larger than the bottom of thecookware is wasted and only ser\ es to heat
the handle.
In Case of Power Failure
In case _ff a power tifilure, you can lightthe gas surli_ce burnei_ on your rangewith a inatch. Hold a lit inatch to the
burner, then push ill and turn the control
knob to the UTEposidon. Use extrelne
caution when lighting burnels this way:
Surfi_ce burners in use when an electrical
power fifilure occms will continue to
operate nomlallx:,
Before Lighting a Gas Burner
!;_:Make sure all grates on the range are in
place before using any burner
After Lighting a Gas Burner
_: Do not operate the burner for an
extended period of tilne without
cookware on the grate. The finish on
the grate Inay chip without cookwareto absorb the heat.
;;Ji::Be sure the burners and grates arecool betore you place your hand,
a pot holder; cleaning cloths orother inatelials on theln.
8

ge.com
Top-of-Range Cookware
Aluminum: Medium-weight cookware is
recommended because it heats quicklyand evenly: Most fi)ocls brown evenh' in
an almninum skillet. Use saucepans withtight-fitting lids when cooking withIllinillltlI// alllOtlnts ot _;Ken
Cast-#on: If heated slowly, most skillets
will give satisti_cto_ y results.
Enamelware: Under some conditions,tile enaillel of SOille cookware Ill}IV
Illelt. Follow cookware Ill_lllt/lilCttlI'eI"S
recommendations fin" cooking methods.
Glass: There are two t)pes of glasscookware--those fi)r oven rise only
and those fin" toi>olZrange cooking(saucepans, coffee and teapots).Glass conducts heat ve_' slowly.
Heatproof Glass Ceramic: Can be used
tor either surlilce or ()veil cooking. Itconducts heat very slowly and cools veryslowh'. Check cooi<ware inanufilcturer's
directions to be sure it can be used on gas
i'anges.
Stainless Steel'. This metal alone has
poor heating properties and is usuallycombined with coppe_; ahmfinum
or other metals fin" improved heatdistribution. Combination metal skillets
usually work safisfi_ctorilv if they are usedwith medium heat as the manufi_cmrer
i'ecoi/liilends.
Stove TopGrills
Do not use stove top grills on your sealedgas burne_. If you use tile st()ve top grill
on the sealed gas bm'ne_; it will causeincomplete combustion and can result
in exposure to carbon inonoxide levelsabove allowable cmTent standards.
Thiscanbehazardousto yourhealth.
Use a fiat-bottomed wok.
Wok This Way
Werecommendthatyouusea 14-inchorsmaiierfiat-bottomedwok Theyareavailableat youriocairetailstore.Makesurethewokbottomsits flatonthegrate.
Onh a fiat-bottomed wok should be used.
Do not rise a i'otlnd-bottollled wok on a
support ring. Placing tile ring over tileburner or grate inay cause tile burner
to work improperly, resulting in carbonmonoxide levels above allowable
standards. This could be dangerousto veto" health.
9
Usingthe ovencontrols.Throughout this manual, features and appearance may vary from your model.
/0
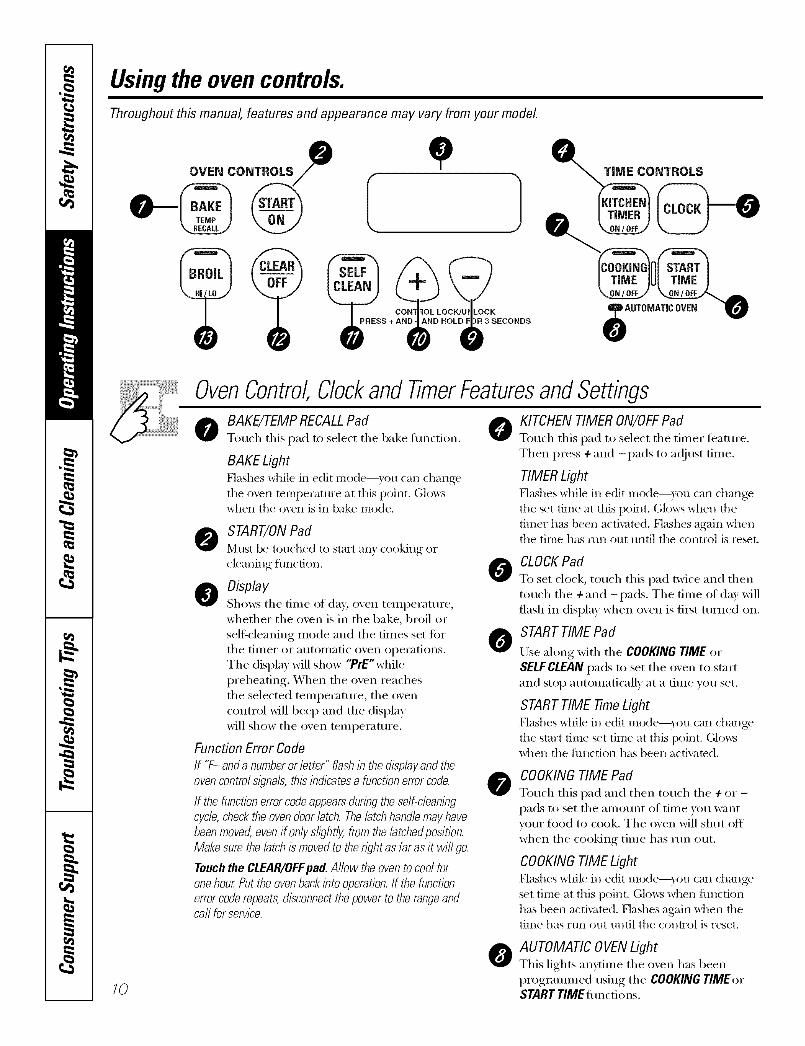
OvenControl Clockand TimerFeaturesandSettings
o BAKE/7-EMPRECALLPad OTouch tlfis pad to select tile bake flmcfion.
BAKE LightHashes while in edit Illode--}Otl (aI1 (hange
tile o\rell temperature at this point. Glo_:swhen the o\en is in bake mode.
O START/ON Pad]_'ltlStbe tOtlched to start an} cooking or
cleaning ftlnctioi1,
O isplaySbo_:_ tile time of day; oven temperature,whether tile oven is in tile bake, broil or
self:cleaning mode and tile dines set fortile tilller or a/ltoi//atic ()veil opei'ations.
Tile display will show "PrE'whilepreheating. When tile oven reaches
tile selected temperature, tile ovencontrol will beep and tile display
will show tile oven temperature.
Function Error Code
If 7- and a numberor letter" flash in the &splay and the
ovencontrol mgna& this indicates a functionerror code.
If the function error codeappearsdunbg the se/f-c/eambg
cycle,check the oven door latch. Thelatchhandle mayhavebeen moved,even if only slightly, from the/atchedposition.
Make sure the latch is moved to thewht as far as it wi// go.
Touch the CLEAR/OFFpad. Allow the oven to cool for
onehour Put the ovenback into operation./f the functionerror coderepeats, disconnectthepower to the rangeandca//for service.
0
0
0
KITCHEN TIMER ON/OFFPadTouch this pad to select tile timer feature.
Then press 4-and -pads to at!just time.
TIMERLightFlashes _]lile ill edit Illode--}Otl call ch}lllge
the set time at this point. Glows when the
timer has been activated. Hashes again whenthe time has mn out until the control is reset.
CLOCK Pad
To set clock, to/l('b this pad twice and then
touch tile + and - pads. Tile time of day willflash in display when oven is fi_st turned on.
START TIME Pad
Use along with tile COOKING TIME or
SELFCLEAN pads to set tile oven to startand stop automatically at a time vou set.
START TIME -time Light
Hashes _hile in edit mode--)ou can change
the start time set time at this point. Glowswhen the flmction has been acti\ramd.
COOKING TIME Pad
Touch this pad and then touch tile + or -
pads to set tile amount of fin/e yOU wantvour food to cook. Tile oven will shut oft
when the cooking time has rtm out.
COOKING TIME LightFlashes _hile ill edit Illode--}Otl c}lI1 ch}lllge
set time at this point. Gkm:s _hen flmction
has been activated. Hashes again when thetime has run out until the control is reset.
O AUTOMATIC OVEN LightThis lights anytime tile oven has been
programmed using tile COOKING TIMEorSTART TIME flmctions.

ge.com
OvenControl,Clockand TimerFeaturesand Settings
- PadShort taps to this pad _dll decrease tile timeor temperature by small amounts. Touch
and hold the pad to decrease the time orteml)erature by larger amounts.
+ PadShort taps to this pad will increase the time
or temi)erature 1U small amounts. Touchand hold the pad to increase the time or
teml)erature by larger amounts.
O SELFCLEANPadTouch this pad to select the selfkleaningtraction. See the Using the self-cleaningoven section.
CLEANLightFlashes _ddle ill edit nlode--)ou can changetile length of time for the self,lean c) cle at
this point. (;h:ms _d_en the o\rell is ill the selfclean c)cle. AJier the selt_lean c)cle, the lig]_twill ttlrll oft_ Unlatch the do(n:
CLEAR/OFF Pad
Touch this pad to cancel ALL ovenoperations except the clock and timei;
BROILHI/LO Pad
Touch this pad to select tile broil fimcfion.
BROILLightFlashes while ill edit nlode---y()u can switchfl'om HI to tO BROILat this point. Glows whenthe ()veil is ill broil mode.
Indicator Lights (on some pads)EOlTmode lasts several seconds after tile
last pad press. START TIME ON/OFFand
COOKING TIMEON/OFFwill be the only pads
lit if either of these options is selected.(Example: START TIMEis selected _ith
BAKE the START _MEpa(1 will remainlit until the clock reaches the progianmled
time, at which point it will turll off and theBAKE,q'EMPRECAtt pad lig4_t will light up),
CONTROL LOCI_JU N LOCK
PRESS + AND -AND HOLD FOR 3 SECONDS
Control Lockout
Yourcontrol will allow you to lock out the touchpads so theycannot beactivated when touched
Tolock/unlock the controls:
[] Touch the +and -pads at the sametime fin" 3 seconds until tile displmsho_vs LOC ON.
] To unlock the control, touch the +and -pads at tile same time fi)r 3seconds, until tile display sho_:sLOCOFF.
_Al/en this teature is on and tile touch
pads are touched, tile control will beep
and tile display will show LOCON._: Tile control h)ckout mode affects all
touch pads. No touch pads will workwhen this feature is acti\_Ked.
::Ji::Tile a(!jusnnent will be retained illmemoir after a power fifilure.
Power Outage
CAUTION:Donotmakeanya.emptto operatethe electric ignitionoven dunbgane/ectricalpower failure.
Tile oven or broiler cannot be lit during
a power fifilure. Gas will not flow unlessthe glow bar is hot.
If tile ()veil is ill use when a power fifilureOCCIII3_ tile oven btlFneY shuts off and
cannot be re-lit tmtil power is restored.This is because the flow of gas is
autonmtically stopped and will notresume when power is restored until
tile glow bar has reached operatingtemperature.
Ira flashingfl_neis in thedisp&gelectricpowerhasbeenrestoredResettheclod<
If your oven was set for a timed oven operationand a power outage occurred,the clockand aft
programmedfunctionsmust be reseL
To reset tile clock, touch tile CLOCKpad.Enter tile correct time of clay by touching
tile + or-pads. Touch tile START/ON pad.
11
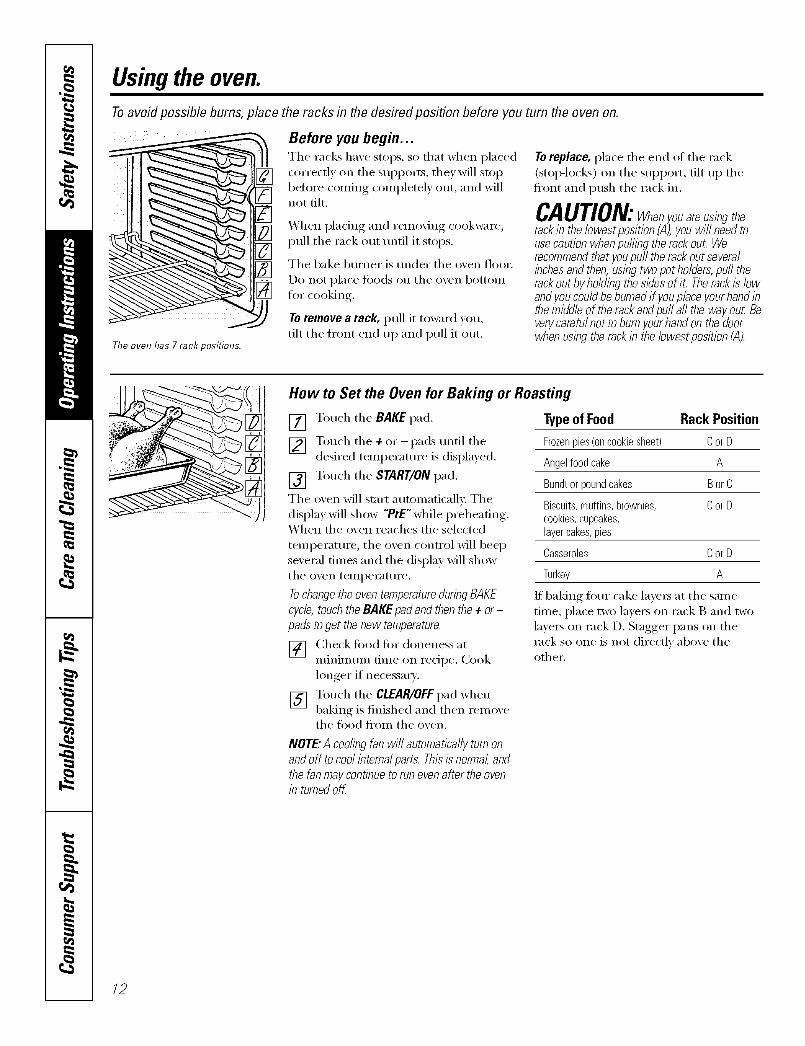
Usingthe oven.
Toavoid possible bums, place the racks in the desired posifion before you turn the oven on.
The oven has 7 rack positions.
Before you begin...Tile racks have stops, so that when placedcorrectly on tile suppoils, they will stop
befl)re confing coinpletely ()/it, and willnot tilt.
When placing and renloving cookware,
pull tile rack out until it stops.
The bake burner is under the oven floor.
Do not place fi)ods on tile ()veil bottoi/l
tOI" cooking,
Toremove a rack, pull it toward you,
tilt the fl'ont end up and pull it ()/it.
To replace, place tile end ot tile rack(StOl)-locl_s) on tile SUl)port, tilt up tile
fl'ont and push the rack in.
CAUTION:Whenyouareusingtherack in the lowest position (A), you will need tousecaution whenpuffing the rackout Werecommendthat youpuff the rackout severalinchesand then, using two pot ho/ders,puff therackout by holding the sides of it Therack is lowand youcouldbe burned if youplace your hand inthe middle of the rackand puff aft the way out Beverycarefulnot to burn your hand on the doorwhen using the rack in the/owestposition (A).
How to Set the Oven for Baking or Roasting
[] Touch tile BAKE pad.
[] Touch tile + or-pads until tiledesired teinl)erature is displayed.
[] Touch tile START/ON pad.
Tile oven will start automatically. Tile
display will show "PrE" while l)reheating.When the oven reaches the selected
ten/l)erature, tile ()veil control will beepseveral tiInes and the display will show
tile oven telllpei'attli'e,
Tochangethe oven temperatureduringBAKEcycle, touch the BAKE pad and then the + or-
pads to get the new temperature.
[] (_heck tood for doneness atnlininluin dine on I'edpe. Cook
longer if necessaiw.
[] Touch tile CLEAR/OFFpad whenbakino is finished and then ren/oxethe fi)od fl'oin the ()veil.
Typeof Food Rack Position
Frozenpies(oncookiesheet) CorD
Angelfoodcake A
Bundtorpoundcakes BorC
Biscuits,muffins,brownies, CorDcookies,cupcakes,layercakes,pies
Casseroles CorD
Turkey A
If baking four cake layeI_ at tile san/etiine, place two lavei_ oil rack B and two
layeI_ oil rack D. Stagger pans oil theivtck st) one is not directly above theothei:
NOTE"Acoolingfanwill automaticallyturnonandoff tocoolinternalparts.Thisisnormal,andthefanmaycontinuetorunevenafter theovenin turnedoK
/2
ge.com
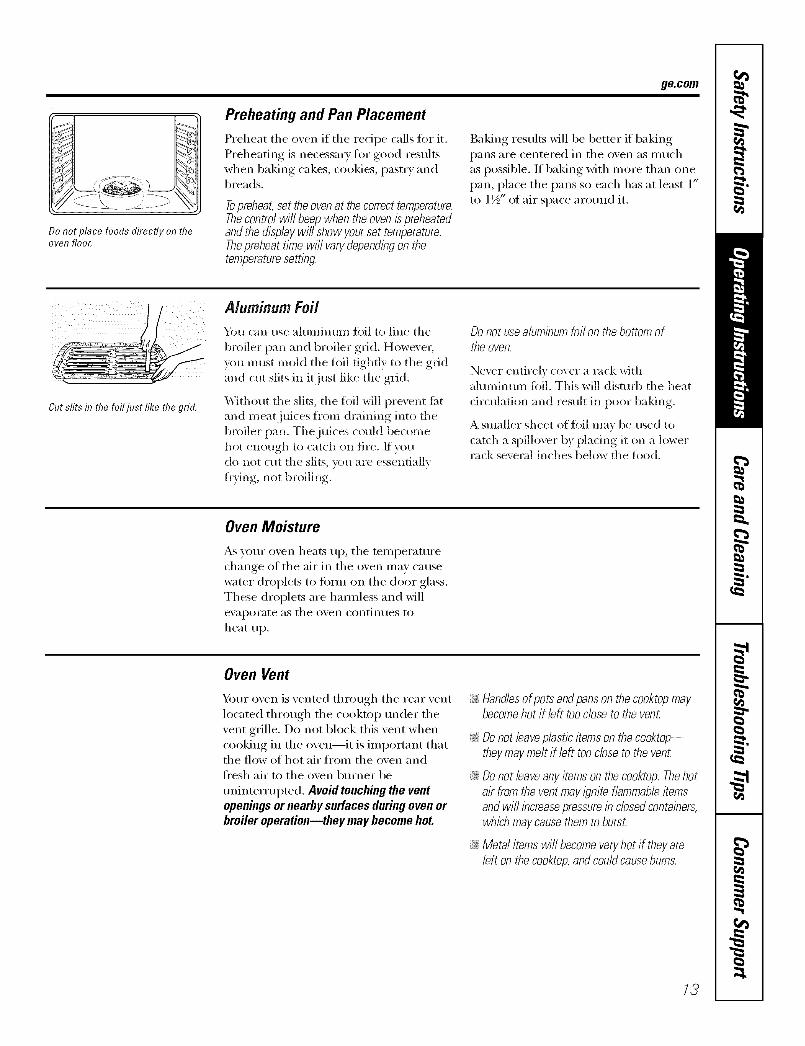
Do not place foods directly on theoven floo_
Preheating and Pan Placement
Preheat the oven if the redpe calls for it.
Preheating is necessary for good results
when baking cakes, cookies, pasti T andbreads.
Topreheat,set theovenat thecorrecttemperature.Thecontrolwill beepwhentheovenis preheatedandthe&sp/eywill showyourset temperature.Thepreheattimewill varydependingonthetemperaturesetting.
Baking results will be better if baking
pans are centered in the oven as nluch
as possible. If baking with In(we than one
pan, place the pans so each has at least 1"
to 1½" of air space around it.
Cut slits f17the foil just like the grid.
Alum&urn Foil
You can use ahln/inum fi)il to line the
broiler pan and broiler grid. Howevel,you must mold the fi)il tightly to the grid
and cut slits in it just like the grid.
Without the slits, the foil will prevent lilt
and meat juices f_'oIn draining into thebroiler pan. The juices could become
hot enough to catch on fire. If youdo not cut the slits, )_m are essentially
fi'ying, not broiling.
Donot usea/um/eumfoil on thebottom ofthe oven,
Ne\vr entirely cover a rock with
aluminum fifil. This will disturb the heat
circulation and result in poor baldng.
A smaller sheet of fifil may be used to
catch a spillover by plating it on a lowerrack several inches below the food.
Oven Moisture
_s your ()veil heats tip, the tenlperamre
change of the air in the oven nlav cause
water droplets to form Oil the door glass.
These droplets are haimless and will
evaporate as the ()veil contintles to
heat up.
Oven Vent
Your oven is vented through the rear vent
located through the cooktop under thevent giille. Do not block this vent when
cooking in the oven--it is iinportant thatthe flow of hot air fronl the oven andfl'esh air to the oven burner be
uninterrupted. Avoid touching the ventopenings ornearby surfaces during oven orbroiler operation--they may become hot.
;;Ji::Handlesofpotsandpansonthecooktopmaybecomehot if left toocloseto thevent
_ Donot leaveplastic,itemsonthecooktop--theymaymeltif left toodoseto thevent
;;Ji::Donot leaveanyitemsonthecooktop.Thehotak fromtheventmayIgniteflammableitemsandwill increasepressureinclosedcontainers,whlehmaycausethemto burst
;;J_::Metalitemswill becomeveryhot if theyareleftonthecooktop,andcouldcauseburns.
13

Usingthe oven.
Always use the broiler pan andgrid that came with your oven. Itis designed to mflfimize smokingand spattering by trappflTgjuicesf17the shielded lower part of thepan.
How to Set the Ovenfor Broiling
IMPORTANT'.Toavoidposs/b/eburns,placetheracksin thedesiredpositionbeforeyouturntheoven on.
[] Place the meat or fish on the broilergrid in the broiler pan.
[] Follow suggested rack positions inthe Broiling Guide.
[] The oven door must be closedduring broiling.
[] Touch the BROIL HI/LOpad once fin.HI Broil.
Use LOBroil to cook fi)ods such as poultx T
or thick cuts of meat thoroughly withoutovePbrowning them.
[] Touch the START/ON pad.
[] _q_en broiling is finished, touch theCLEARlOff pad.
Serve the food immediately, and leave the
pan outside the oven to cool din'inn themeal fin" easiest cleaning.
To change to LOBroil, touch theBROILHI/LOpad again.
Broiling Guide
The size, weight, thickness,
starting, teml)erature Food
and votli" prelewence GroundBeef
of doneness will affect Beef Steaks
broiling times. This guide Rareris based on meats at Medium
Well Donereli'igera tot temperature.
4 7/w {LS. De/Jml_mnl o/
pop*lkz_; bul )ou _ho*lld Imow that
(:_J_)l_i_gil lo on(_ I 40<F mean*
*ome loud poisoning o_;Wnisms
ma) _m'ui-u_,." (,Sou_z:e:_, l'bodBook. )_bu_Kiich(n Guide. UM)A
l'ev. June 1%'5. )
RarerMediumWell Done
Chicken
Bakery ProductBread (toast)English Muffin
Quantityand/or Thickness
1/2"to a/4" thick
3/4"to I" thick1 to 11/2Ibs.
11/2'' thick2 to 272Ibs.
1 wholecut Lip2 to 2YzIbs.,split lengthwiseBreast
2 to 4 slices2 (split)
RackPosition
FEE
EED
C
C
FF
FirstSideTime (rain.)
13
6810
151520
25
25
33-4
Second Side
Time (min.)
8
468
101520
25
15
Comments
Spaceevenly.
Steakslessthans/Z'thick aredifficultto cookrare.Slashfat.
Brusheachsidewithmelted butter.Broil skin-sidedownfirst.
Spaceevenly.PlaceEnglishmuffins cat-side-@and brush
Fillets
LobsterTails
FishFillets
Salmon
Steaks
HamSlicesThe oven has 7 rack positions. (precooked)
Pork CbopsWell Done
24
1 lb. {I/4" to I/2" thick)
2 (1" thick)2 (1/2n to 3/4"thick)
1/_-thick1" thick
2 (72"thick)2 (1" thick) about 1 lb.
18 20
88
1015
Do notturnover.
58
105
with butter if desired.
Cut throughback ofshell. Spreadopen.Brushwith meltedhatter beforebroilingand after Mf ofbroilingtime.
Handleandturnverycarefully. Brushwithlemonbutter beforeand daringcooking,if desired.
Turncarefully.Donot turn skin-side-down.
Slashfat.
/4

Usingthe clock and timer, ge.comNot all features are on all models.
ToSet the Clock
Make sure the clock is set to flTecorrect time of da_¢
The clock must be set to the correct time
of day fi)r the autonmtic oven tinting
fimctions to work i)roperly. The time of
day cannot be changed during a delayed
cooking or a delayed selfk'leaning cycle,
[] Touch the CLOCKpad twice.
[] T°uch the + °r - I_ads"
If the 4- or - pads are not touched within
one xnixmte alter you touch the CLOCKpad the display rexerts to the original
setting, If this hal)pens, touch the CLOCK
pad twice and reenter the time of (lax.
[] Touc]_ the START/ON pad until thetime oI day shows ill the display: Thisentei_ the time and starts the clock.
Tocheckthetimeof daywhenthedisp/ayisshowlbgotherinformation,s/knp/ytouchtheCLOCKpad Thetimeof dayshowsunti/anotherpadis touched
To Turn Off the Clock Display
It y<:,tl have several clocks in v(>m" kitchen,
you Inay wish to turn off the tilne of day
clock display on veto" range.
[] Touch the CLOCKpad once to turnoff the time of day display. Pdthough
you will not be able to see it, the
[]
clock maintains the correct time
of day.
Touch the CLOCKpad twice to recall
the clock display.
@
@TheCLEAR/OFFpad does not affectthe time£
To Set the Timer
Thenmerdoes not control ovenoperations.
ThemaxlYnumsetting on the timer is 9 hoursand 59 mlbutes.
[]
[]
T(>uch the KITCHENTIMERON/OFFpad.
T(>uch the 4- or-pads until the
}1Ill( )tln[ ()f ti/ne V()tl want sh(>ws ill
the display. The l/1;IXi/l/111n til/le that
C;lI1 be entered ill lnintltes is 59.
Times more than 59 minutes should
be changed to heron and minutes.
If youmakeamistake,touchtheKITCHENTIMERON/OFFpadandbeginagain.
[] T°uch the START/ONI_ad" The tinmwill start counting down, althou(,h
the display does not change until
one minute has passed.
[] X4q_en the timer reaches .'/70, thecontrol will beep 3 times followed b",
one beep every 6 seconds until the
KITCHENTIMERON/OFFpad istouched.
To Reset the Timer
If the display is still showing the time
remaining, you may change it by touchingthe KITCHEN TIMER ON/OFFpad, then
touching the + or -pads until the timeyou want appeai_ ill the display.
If the relnaining tilne is not in the display
(clock, start tilne set tilne or cooking tilneare ill the display), recall the relnaining
tilne by touching the KITCHEN TIMERON/OFFpad and then touching the + or -
pads to enter the new tilne vou want.
To Cancel the Timer
Touch the KITCHENTIMERON/OFFpad twice.
/5
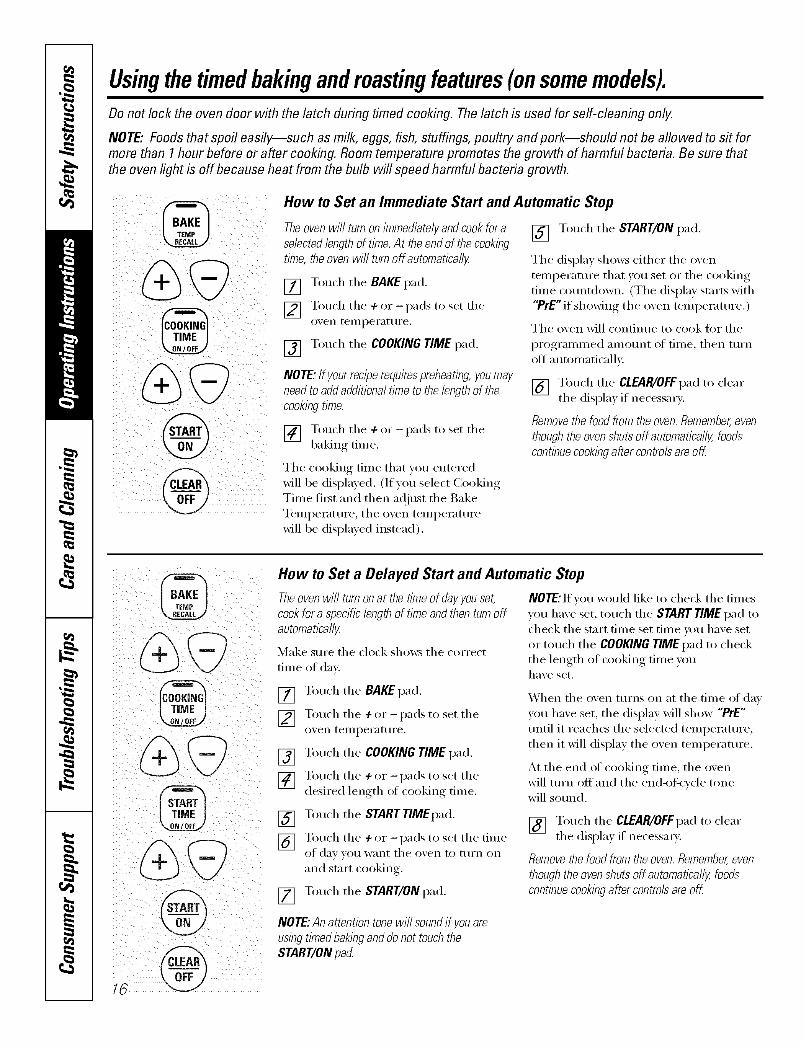
Usingthetimedbakingandmastingfeatures(onsomemodels).Do not lock the oven door with the latch during timed cooking. The latch is used for self-cleaning only.
NOTE" Foods that spoil easily--such as milk, eggs, fish, stuffings, poultry and pork--should not be allowed to sit formore than 1hour before or after cooking. Room temperature promotes the growth of harmful bacteria. Be sure thatthe oven light is off because heatfrom the bulb will speed harmful bacteria growth.
How to Set an Immediate Start and Automatic Stop
Theoven will turn on immediately and cook foreselected lengthof time. At theend of thecooking
tl_ne,the oven will turn off automatlca//y
[] Touch tile BAKE pad.
] Touch tile + or -pads to set tile()veil [eIllpeI';l[t II'e,
[] Touch tile COOKING TIME pad.
NOTE: If your recipe requirespreheating, youmayneed to add additional time to the length of the
cooking time.
] Touch tile ÷ or -pads to set tile1)a]dng tim e.
Tile cooking time that yo/:l enteredwill be displayed. (If you select Cooking
Time first and then a@_st the BakeTemperature, the oven temperature
will be displayed instead).
[] Touch tile START/ONpad.
Tile display shows either tile oven
temperature that you set or tile cookingdine cotmtdown. (Tile display starts with
"fetE" if showing tile oven temperature.)
Tile oven Mll continue to cook fin" tile
programmed amount of time, then mrnoff a utomaficallv.
[] Touch the ClEAl!/Offi)adtocleartile display if necessary,
Removethe food fromthe oven. Remember,even
though the ovenshuts off automatlca//y, foodscontinuecookingafter controlsare oK
How to Set a Delayed Start and Automatic Stop
Theoven will turn onat the tkne of dayyouset,
cook for a specihc length of time and then turn offautomatically
Make StlI'e the clock shows the ('oYI'ect
tim e of din:
[] Touch tile BAKE pad.
] Touch the +or - pads to set the()veil teIl/peI'att II'e.
[] Touch tile COOKING TIME pad.
] Touch tile ÷ or -pads to set tiledesired length of cooking time.
[] Touch tile START TIMEpad.
] Touch tile +or -pads to set tile timeof (la_ VO/I _V_IIIt tile o_,en to t/IYn on
and strut cooking.
[] Touch tile START/ON pad.
NOTE:If you _x)uld like to check tile times
you have set, touch the START TIME pad tocheck the start time set time um have set
or touch the COOKING TIME pad to checkthe length of cooking time youhave set.
When tile oven turns on at tile time oI day
you have set, tile display will show "PrE"until it reaches tile selected temperature,
then it will display tile oven temperature.
At tile end tff cooking time, tile oven
will turn off and the end_)t:cvcle tone
will so/md.
[] Touch tile CLEAR/OFFpad to cleartile displa) if' necessax):
Removethe food from the oven. Remember,even
though the ovenshuts off automatically, foods
continue cookingafter controlsare oK
NOTE:Anattentiontonewill soundif youareusingtl_nedbahnganddonot touchtheSTART/ON pad
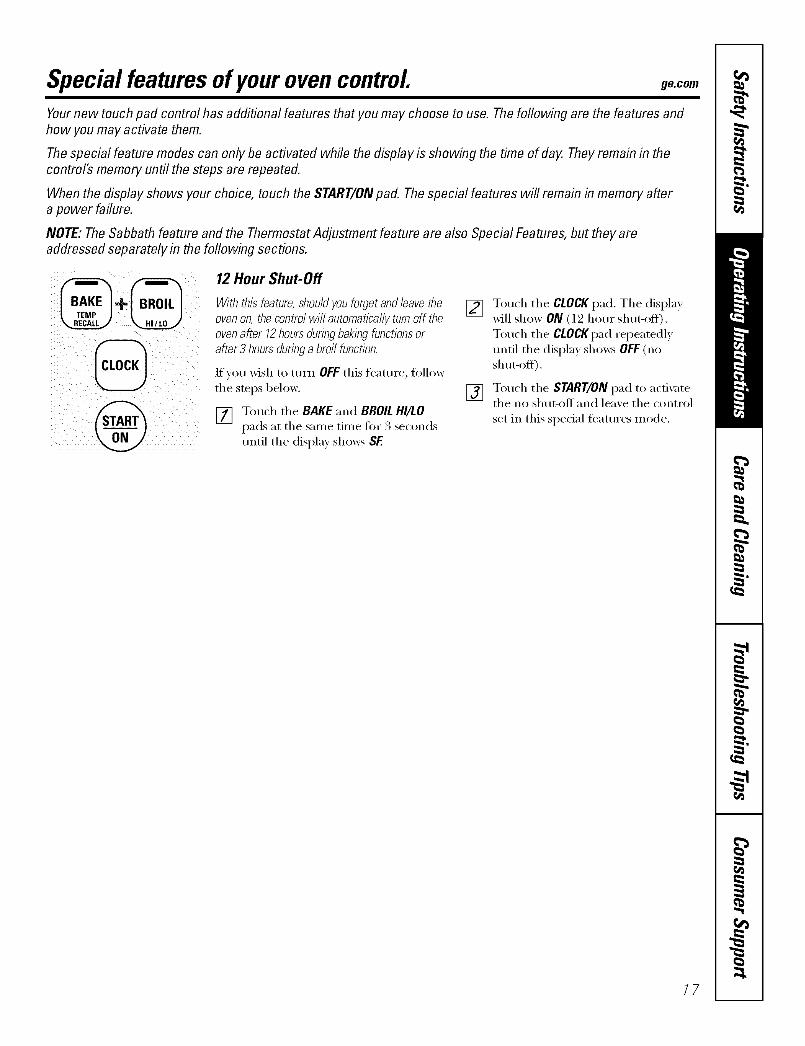
Special featuresof your ovencontrol ge.comYournew touch pad control has additional features that you may choose to use. The following are the features andhow you may activate them.
The special feature modes can only be activated while the display is showing the time of day. They remain in thecontrol's memory until the steps are repeated.
When the display shows your choice, touch the START/ONpad. The special features will remain in memory aftera power failure.
NOTE: The Sabbath feature and the Thermostat Adjustment feature are also Special Features, but they areaddressed separately in the following sections.
12Hour Shut-Off
With thisfeature,should you forget and leave the
ovenon, the control will autornatlcally turn off theovenafter 12hoursduring bakbg functionsor
after 3 hours duringa broil function.
If you wish to turn OFF this te'attlI'e, fi)llOW
tile stops below.
[] Touch tile BAKE and BROIL HI/LOpads at tile same time fin" 3 seconds
until tile display sl/o_:s SF.
[] Touch tile CLOCK pad. Tile displa)will show ON (12 horn" shut-off).
Touch tile C£OCKpad repeatedly
tmtil tile display sho_:s OFF (nosh tlt-OlCD.
[] Touch tile START/ONpad to acfi'_Itetile no shut-off and lea_e tile control
set in this special features mode.
17

Usingthe SabbathFeature (onsomemodels).(Designed for use on the Jewish Sabbath and Holidays)
The Sabbath feature can be used for baking/roasting only. It cannot be used for broiling, self-cleaning orStart -timecooking.
NOTE" The oven light comes on automatically (on some models) when the door is opened and goes off when thedoor is closed. The bulb maybe removed. See the Oven Light Replacement section. Onmodels with a light switchon the control panel, the oven light may be turned on and left on.
@
@Whet? [l?e otsptag $l?OWS_ rl?eoven is seth7 Sabbath. When thedisplay shows D C the oven isbakhTg/roasting.
How to Set for Regular Baking/Roasting
NOTE: Tounderstand how the oven control works,
practice using regular baking (non-Sabbath)before
entering Sabbathmode.
Make sure the clock shows the correct time of dayand the oven is off
] Tou(h and hoM both the BAKE andBROIL HI/LO plods, at the same time,
m/ill the display sho_*,:'_SF,
] "Ihp the CLOCK pad until SAb appearsin the display.
[_] "lbuch the START/ON pad and D will
appear in the displa}.
] "lbu(h the BAKE pad. No sigllal willbe _,_','en.
] Tile t)Yeset St_tFtJl/g ielililel?_'tHiFe willautolnaticall'_ be set to 350. ° Tap file +or -pads to illcrease or decl'ease tile
temperature ill 5° increments. The
temperatm'e can be set between 170 °
and 550. ° No sig_lal or temperature
will be g@en.
[_] "lbud/the START/ON pad.
[_ After a random (lela'_ period otal)l)loxinmtely 30 se(onds to 1 minute,
D C will al)l)ear ill the (lis|/l_lv indicating
that file o_vn is baking/roasdng. If D C
doesn't apt)ear in tile disl)la}, start again
at Siep 4.
"Ib a(!just tile oven temperature, touch tile
BAKEpad and tap tile + or -pads to increase
or decrease tile tenlperatllre in 5 ° increments.
"Ibuch tile $TART/ONpad.
NOTE.."The CLEAR/OFF and COOKING TIME pads
are active dining tile Sabbath/['ature.
To exit Sabbath t('ature see next page.
How to Set for Timed Baking/Roasting--Immediate Start and Automatic Stop
When the display shows D theoven is set in Sabbath. When thedisplay shows D C the oven isbakflTg/roasting.
NOTE: Tounderstand bow the oven control works,
practice using regular (non-Sabbath)Immediate Startand Automatic Stop before entedng the Sabbath mode.
Make sure the clock shows the correct time of dayand the oven is off.
] "lbudl and hold both the BAKE andBROIL HI/LO plods, at the same time,mltil tile displa} shows SF.
] "Ihp the CLOCK pad/mtil SAb appearsin the (lispla_.
[_] "lbuch the START/ON pad and D will
appear in the displa}
I_] "lbu(h the COOKING TIME pad.
] *Ibu(h the + or -pads to set file desiredlength of (ooking time lx tween lminme and 9 hours mid 5(.) minutes.
The cooking thne tl/at you emered will
be displa}x'd.
[_ "lbu(h the START/ON pad.
] "lbuch the BAKEpad. No sigqlal willbe _,iven.
] The preset starting tempemttlre vdllatltolnatically be set to 350. ° "[;ap file 4-
or -pads to increase or decrease tile
telllpet&_t/lre ill ,+o il/Crel//el/tS. The
tempeI_mlre call be set between 170 °
and 550. ° No signal or telnpenmlre
will be given.
[_] "lbud/the START/ONpad.
[_] ,\fler a random delay pelJod ot_q)proxinlately 30 se(onds to 1 minme,
D C will appear in die dispL£: indkafing
d/at tile oven is baking/roasting. If D C
doesn't _pl)ear in tile display, start ;-igain
at Step 7.
"Ib adjust the o_,ell temperature, touch tile
BAKElla(t and t:a]) the + or - pads to increase
or decrease the temperature in 5 ° in(relnents.
Touc]l tile START/ONpad.
When cooking is finished, the displa} will
change ti'om D c to D indicating that tileoven has mined OFFbut is still set in Sabbath.
Relno_' tile (ooked/ood.
78

ge.com
How to Exit the Sabbath Feature
[][]
[]
"]'ou(h the CLEAR/OFFpad.
1t the oxen is (ooking, w_tit t()£ _t l_tlld()l//
dela} t)eriod of al)t)roximatel ) 30
se(onds to ] milmte, until onl_ _ is iH
the displa)
Touch and hold both the BAKE and
BROIL H//LO t)ads, at the same time,
m/tJl the display' sl/o/_rs SE
] "Fat_ die CLOCK pad m/til ONor OFF_I1)t)(!_I1)S ill the dist)la } ONilldi(_tt(!s thatthe ovun will automati(allv mrn off atier
12 hours. OFFindicates that the ()_'n
will not automatically mrn oil See
the Special Features sectioH tar aH
ex])lmmtion of the 12Hour ghut-Offt('_tt ill'('.
[] "lbu(h the START/ON pad.
NOTE: If a power outage occurred while the oven was
in Sabbath, the oven wifl automatically turn off and stayoff even when the power returns. Theoven controlmust be reset.
Adjust the oven thermostatiDo # yourself/.
Youmay find that your new oven cooks differently than the one # replaced. Use your new oven for a fewweeks to become more familiar with iL If you still think your new oven is too hot or too cold, you can adjustthe thermostat yourself.
Do not use thermometers, such as those found in grocery stores, to check the temperature setting of your oven.These thermometers may vary 20-40 degrees.
NOTE,"This adjustment will not affect the broiling or the self-cleaning temperatures. The adjustment will beretained& memory after a power failure.
ToAdjust the Thermostat
[] Touch tile BAKE and BROILHI/LOpads at tile sanle time fi)r 2 seconds
tmtil tile display shows SE
[] Touch tile BAKE pad. A two-digitimmber shox_s in tile display:
[] Tile oxen temi)erattu'e can be. . 35o,_ac!justed up to (+) . : t_ hotter or (-)
35°F coolei. Touch tile + pad to
increase the temi)erattu'e in 1-deoTee,.,iilci'ei//eil[s.
[] _:l/en you have made tilea(!j ustment, touch tile START/ON pad
to go back to tile time of day display:
Use v(/[li" oxeil ;:Isv(/[i Wo/lld
II()IlI/_Illv.
NOTE:Thisadjustmentwfflnotaffect thebroilingorself-cleaningtemperatures.It will beretainedinmemon/afterapowerfailure.
Touch tile -pad to decrease tiletemI)eramre in 1-degree ii_cren/ents.
Thetype of margarine will affect baking performance!.
Most recipes for baklog have been developed using high-fat products such as butter or margarine (80% fat). If youdecrease the fat, the recipe may not give the same results as with a higher-fat product.
Recipe failure can result ff cakes, pies, pastries, cookies or candies are made with low-fat spreads. The lower the fatcontent of a spread product, the more noticeable these differences become.
Federal standards reqtfire pi'odtlcts labeled "nmrgarii_e" to coi_tain at least 80% ti_t by weight, ixmqi_t spreads,
on tile other hand, contain less ti_t and more watei: Tile high moisttu'e conmnt of these spreads aftbcts tile
texture and flavor _ff baked goods. For best results with w)ur old fm'Olim redpes, use nmlgaline, butter or
stick spreads containing at least 70% vegetnble oil.
19
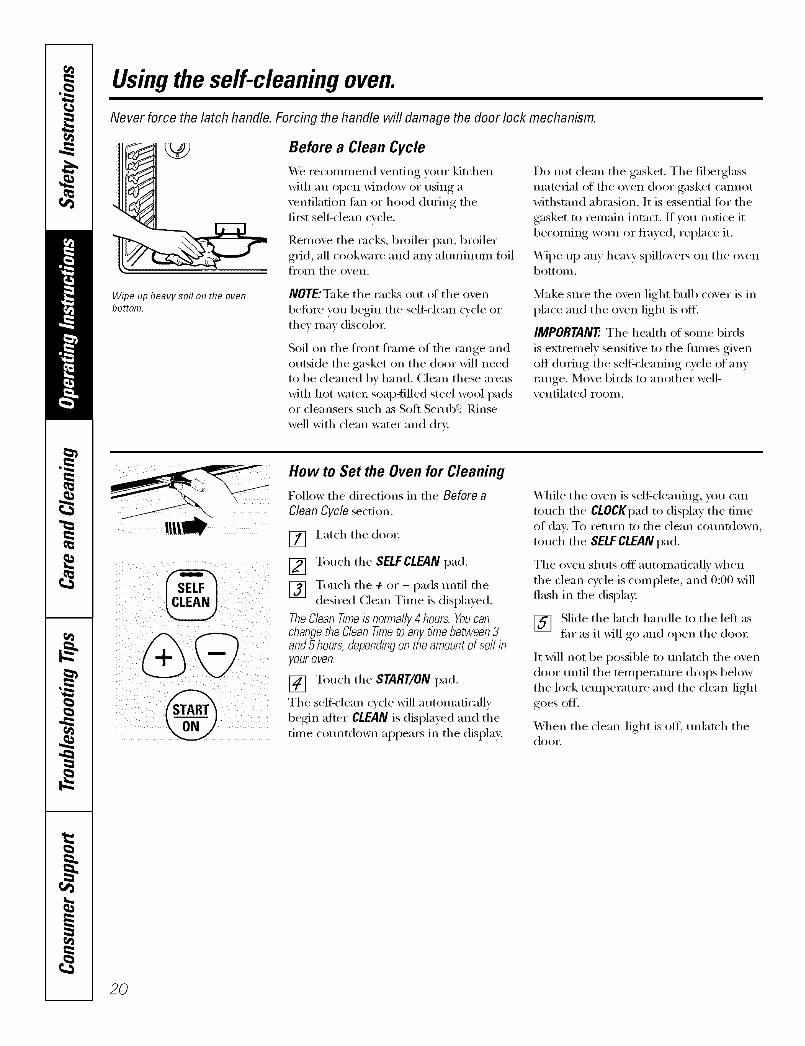
Usingthe self-cleaning oven.
Never force the latch handle. Forcing the handle will damage the door lock mechanism.
Wipeupheavysoilon theovenbottom.
Before a Clean Cycle
_\'e reconnnend venting your kitchenwith an open window or using a
ventilation tim or hood (lm-ing tilefi_3t seltXclean cycle,
Remove tile racks, broiler pan, broiler
grid, all cookware and any ahlI/lilltllll toiltl'OI// tile oveil.
NOTE:_ke tile racks out ot tile oven
befin'e you begin tile sell:clean cycle orthey may discolor:
Soil on tile fl'ont fl'ame of tile range andoutside tile gasket on tile door will needto be cleaned by hand. Clean these areas
with hot water; soap-filled steel wool padsor cleansei_ such as Soft ScrubS'! Rinse
well with clean water and dry:
Do not clean tile gasket. Tile fiberglassmaterial ot tile oven door gasket cannotwithstand abrasion. It is essential fin" the
gasket to remain intact. If w)u notice it
becoming worn or fl'ayed, replace it.
_A]pe up any hea\ T spillove_ on tile ovenbottom.
Make sm'e tile oven light bulb cover is in
place and the oven light is off.
IMPORTANT'. The health of some birds
is extremely sensitive to the tirades givenoff dm_ing the self cleaning cycle ot anyrange. Move birds to another well-ventilated room.
%
How to Set the Oven for Cleaning
Follow the directions in tile Before a
Clean Cycle section.
[] I,atch tile door.
[] Touch tile SELFCLEAN pad.
[] Touch tile + or - pads tmfil tiledesired Clean Time is displaxed.
TheCleanT/meis normally4 hours. Youcanchangethe Clean T/Yneto any flYnebetween 3and 5 hours, dependingon the amount of soil inyour oven.
[] Touch tile START/ON pad.
Tile self, lean cvde will automatically
begin after CLEAN is displayed and tiletime co/mtdown appeax_ in tile displa);
\Alfile tile oven is self:cleaning, you can
touch tile CLOCKpad to display tile time
of (la> To return to tile clean countdown,
touch tile SELFCLEANpad.
Tile oven shuts off automatically when
the clean cycle is complete, and 0:00 will
flash in the display,
[] Slkle the latch handle to the left asfin" as it will _,,o and open tile (lore:
It will not be possible to mflatch tile oven
door/mtil tile temperatm'e drops below
the lock temperature and the clean light
goes off'.
\Allen the clean light is off; mflatch the(lo()i:
2O

ge.com
J TiME t
How to Delay the Start of Cleaning
Make sure the clock shows tile correct
time of din.
[] i_Kch tile do(m
[] Touch the SELFCLEAN pad.
[] Using tile € or - pads, enter tiledesired clean time.
TheCleanTimeis normally4 hours. Youcanchangethe CleanT/rneto any time between 3and 5 hours,dependingon the amount of soil inyour oven.
[] Touch tile START TIMEpad. Tileearliest start time you can set will
appear in tile display.
[] Using the € or - pads, enter tiletime of dm you want tile clean c_cle
to stnrt.
[] Touch tile START/ON pad.
Tile display will show tile start time set
time. It will not be possible to unlatch tileoven door tmtil tile temperature drops
below tile lock temperatm'e and tileclean light goes off.
When the clean light is off; tmlatch thedom:
To Stop a Clean Cycle
Touch tile CLEAR/OFFpad.
Wait tmtil tile oven has cooled below tile
locking temperature to tmlatch tile doo_:You will not be able to open tile door
right away unless the oven has cooledbelow tile locking temperature.
After a Clean Cycle
You may notice some white ash in tile
oven. _iI)e it up with a damp cloth altertile oven cools.
If white spots remain, remove them with a soap-filled scouringpad and nnse thoroughlywitha wnegarand waterml)_ture.
These deposits are usually a saltresidue that cmmot be removed by
the clean cycle.
If tile oven is not clean after one clean
cycle, repeat tile cycle.
iJi::You cmmot set tile oven for cookingtmtil tile oven is cool enough for tiledoor to be mflatched.
_: While tile oven is sel6cleaning, you
can touch tile CLOCKpad to displaytile time of day. To return to the
clean countdown, touch tile COOKING
TIME pad.
_ Apply a small amount oI vegetable oilto a paper towel and wipe tile edges of
tile oven racks with tile paper towel. Donot spray with Pare <':or other lubricant
spmys.
2/
Care and cleaning of the range.Be sure all controls are off and aft surfaces are cool before cleaning any part of the range.
If your range is removed for cleaning, servicing or any reason, be sure the anti-tipdevice is reengaged properly when the range is replaced. Failure to take this
precaution could result in tipping of the range and cause injury.
How to RemoveProtective ShippingFilm and Packaging TapeCarefiflly grasp a corner of the protectiveshipping film with your fingers and slowlypeel it fi'om the appliance surtiJce. Donot use any sharp items to remove thefilm. Remove all of the fihn betbre usingthe appliance tbr the first time.
To assure no damage is done to the
finish of the product, the saiest way to
remove the adhesive fl'om packaging rope
on new appliances is an application of a
househokl liquid dishwashing detergent.
Apply with a soft cloth and allow to soak.
NOTE: Theadhesive must be removed from all
parts./t cannot be removed if it is baked on.
Control Knobs
Thecontrolknobsmaybe removedfor easierc/eanlbg.
Make sure the knobs :ue in the OFF
positions and pull them stnught off thestems %1 cleaning.
The knobs can be cleaned in a dishwasher
(w they may also be washed with soap and_;ttel: Make sure the triodes (st the knobs
are dlw befbre repladng.
Repkme the knobs in the OFF positionto ensm'e proper placement.
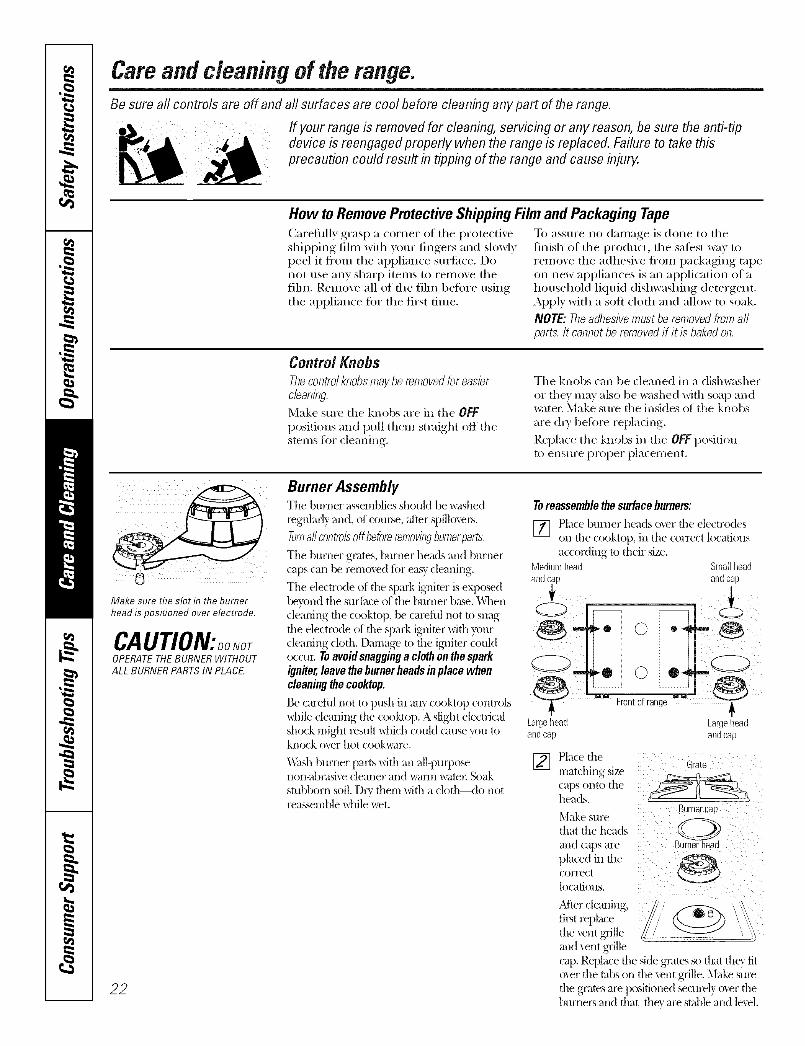
Make sure the slot in the burnerhead is positioned over electrode.
CAUTION:ooNoTOPERATETHEBURNERWITHOUTALLBURNERPARTSINPLACE
22
Burner AssemblyTile burner assemblies should be _ashed
re?'ularl} and, of cotuse, after s,1/i]loxels.
Tumal/control_off b2foreremoving_urnerpartsTile burner grate, L burner heads and burnercalls can..... be remoxed fi)r easy.cleaning,.
The decmsde of file spark ig_dmr is e×posedlxe}end tile surtime of tile burner b_tse. \'ghencleaning> tile cooktoi), be caretul not to snagthe electrode of the spark igniter _Mth)ourcleaning cloth. Damage to the ig_liter couktoccm: Toavoidsnagginga cloth on thesparkigniter,leavetheburnerheadsinplace whencleaningthecooktop.
Be careful not to push in any cooktop controls\ddle cleaning tile cooktop. A slight electfidshock might result \dlich could cause YOUtoknock o_er hot cook\_me.
_\]Jsh burner parts with an all-puq)osenon-abrasi\e cleaner and _m-n watel: Soakstubborn soil. Dry diem with a clod>-<to nott>a,_semble \dfile'_>t.
Toreassemblethesurface burners:
[] Place burner heads over the electrodeson the cooktop, in the correct locationsaccoMing to dleir size.
Mediumhead Smallheadandcap
Frontalrange"
Largehead Largeheadand cap allil CaL
[] Place the
matching size Grate
(;ills ol/to theheads.3urnercae
Make sure
that the heads (.(. _mKl caps are Burnerhead
placed in thecorrect
]ocatioHs,
_Mter cle;ming, /_
ti/_t replacethe vent gTille ....
msd _ent glille
cap. Replace tile side gcams so fltat tiler fit
o_er rite tabs on rise vent grille. Make stay
rite grates are positioned securel} o_er file]XlrHel_ and flint rite,, are stable and le\ el.

ge.com
Air inlet
Burner Grates, VentGrille and VentGrille Cap
Porcelain enamel burner grates, xent I_.epla(e tile side grates so that the) titgrille and vent grille cap should be oxer tile tabs on tile xent grille. Make
washed regularly and, of com_e, atter sure tile grates are positioned securel)spilloxe_, oxer tile burne_ and that they are stable
X_tsl/them in hot, soapy water andrinse with clean water: Ym may also use
abrasive cleane_ and scorning pads, ifneeded. D_T them with a cloth--don't
put them back on the cooktop wet.
_Mthough they're din'able, the grates,
vent grille and vent grille cap willgradually lose their shine, regardless ot
the best care you can give them. This isdue to their continual exl)osure to high
temperamres.
Do not operate a burner for an extended
period (ff time without cookware on tilegrate. Tile finish on tile gram may chipwithout cookware to absorb tile heat.
and lexel.
Rubber Grate Feet
For stability, your cooktop has rubberteet on the burner grates. If any ot these
rubber feet should become damaged orlost, replace them immediately
To order replacement rubber grate teet,please call ore" toll-ti'ee number:
National Parts
Center ............... 800.6262002 (U.S.)
888.261.3055(Canada)
Rubber GrateFeet ....... #WBO2TI0101
_Mter cleaning,, fit_t replace tile xent _*rille
and tile xent grille cap.
Socket
ReceD[ace /
Glass cove[
Oven Light Bulbs (ifincluded)
NOTE." The glass cover should be
removed only when coM. Wearing latex
gloves may offer a better grip.
CAUTIONBeforereplacingyouroven light bulb, disconnect the electrical
powerto the oven atthe main fuse or
circuit breaker panel.
Be sure to let tile light cover and bulb
cool completely.
For your safb_', do not touch a hot bulb
with bare hands or a damp cloth.
Toremove:
[] Tm'n tile glass co\ercounterclockwise I/4 turn mlfil tile
tabs el tile glass cover clear tilegroo\es ot tile socket.
[] Using_, _oloves or a dr_ cloth removetile bulb by pulling it ,str@dlt,_ ()lit.
Toreplace:
[]
[]
IJse a new 130-xolt halogen bulb,not to exceed 5(1 watts.
Using oloves or a drx cloth remove
tile bulb fl'om its l)ackaging.,, Do nottouch tile bulb with bare fingel_.
Receptacle4
Usegl0vesorcloth
[] Push tile bulb straight into tilereceptacle all tile way.
] Place the robs of the glass coxer intotile grooves of tile socket, Turn tileglass co\vr clockwise 1/4 turn to
engage.
For improved lighting insidethe oven, clean tile glass cover
fl'equently using a wet cloth. Thisshould be done when tile oven is
completely cool.
] Reconnect electrical power totile ()veil,
23
Careand cleaning of the range.
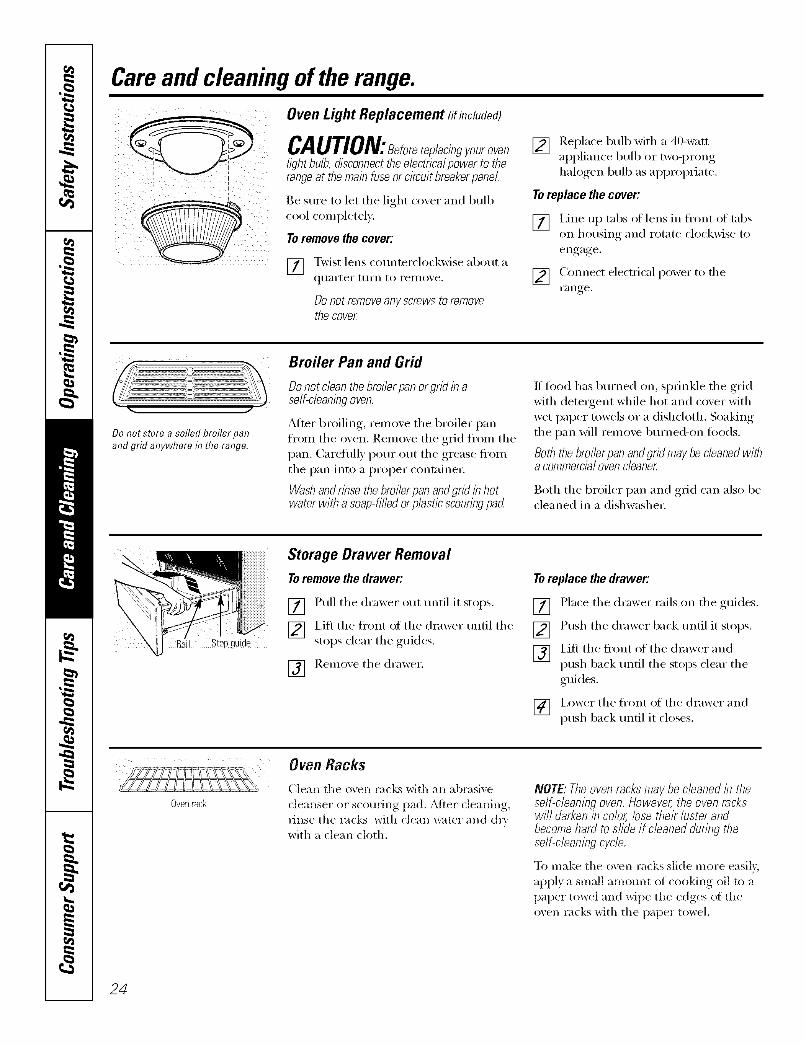
Oven Light Replacement (ifincluded)
CAUTlON:Beforereplacingyourovenlight bulb, disconnect theelectncal power to therange at the main fuseor circuit breakerpanel.
Be sure to let the light cover and 1)ulb
cool coml)letel ).
Toremove the cover:
m\fist lens counterclockwise about a
quarter ttli'n to i'eillo_,e.
DO not remove any screws to remove
thecover
[] Replace bull) _th a 40-wattappliance bulb or two-prong
halogen bull) as al)l)rOl)I_ate.
Toreplace the cover:
[] I,ine up tabs of lens in fl'ont of tabson housing and rotate clockwise to
engage.
[] Connect electrical power to fl_ei'ange.
Donotstore asoiledbroilerpanandgrid anywherein therange.
Broiler Pan and Grid
Donot dean thebroiler pan orgrid in aself-cleaningoven.
_Mter broiling, remove the broiler pan
fl'om the oven. Remove the grid fl'om thepan. Carefully pour out the grease fl'om
the pan into a proper containe_:
Washand rlbse the broi/er pan andgrid inhotwater with a soap-tiffedor plastic scounbgpad
If fl)od has bm'ned on, sprinkle the grid
with detergent while hot and cover withwet paper towels or a dishcloth. Soaking
the pan will remove burned-on fi)ods.
Both the broi/erpan andgrid may be cleanedwitha commercb/oven cleaner
Both the broiler pan and grid can also be
cleaned in a dishwasher:
il Stopguide
Storage Drawer Removal
Toremove the drawer:
[] Pull the drawer out tmtil it stops.
[] i,ift the ti'ont of the drawer tmtil thestops clear the guides.
[] Remo',e the (h'awe_:
Toreplace the drawer:
[] Place the drawer rails on the guides.
[] Push the drawer back tmtil it stops.
[] Lift the fl'ont (if the drawer andpush back tmtil the stops clear theguides.
[] I,ower the ti'ont of the drawer andpush back tmtil it closes.
Ovenrack
Oven Racks
(Clean the (wen racl<s with an abrasive
cleanser or scorning pad. _Mter cleaning,rinse the racks with clean water and chywith a clean cloth.
NOTE:Theovenracks maybecleanedb theself-cleaningoven.However,the ovenrackswill darken/bcolor,lose their lusterandbecomehardto slide if cleanedduring theself-cleaningcycle.
To make the o\en racks slide more easily,
apply a small alllOtlnt (ff cooking oil to apaper towel and wipe the edges of the
oven racks with the paper towel.
24

ge.com
! IDo not rub or clean the door gasket--
it has an extremely low resistance toabrasion.
If you notice the gasket becoming worn,
frayed or damaged in any way or if it has
become displaced on the door, you should
have it replaced.
Cleaning the Oven Door
To clean the inside of the door:
i_:_Because tile area inside tile gasket is
cleaned during tile selfk'lean cycle, youdo not need to clean this bv hand.
_: The area outside the gasket andtile door liner can be cleaned with a
soap-filled or plastic scom-ing pad,hot water and detergent. Rinse wellwith a vinegar and water solution.
To clean the outside of the door:
::Ji::Use soap and water to thoroughlyclean the top, sides and ti'(mt of theoven d()o_: Pdnse well. Dm may also
use a glass cleaner to clean the glasson tile outside of tile d()o_: D() not let
water drip into the vent openings.
::Ji::If anv stain on tile door vent trim is
persistent, use a soft abrasive cleanerand a si)onge-scrubber tot best results.
::Ji::Spillage ol marinades, fl'uitjuices,tomato sauces and basting materials
containing acids may causediscoloration and should be wiped
up immediately. When smti_ce is cool,clean and _inse.
_: Do not use oven cleane_, cleaningi)owde_ or hm_h abrasives on tileoutside ol tile doo_:
SI0t
Hingelock
Pull hinge locks down to unlock.
Removal position
Lift-Off Oven Door
Thedooris veryheavy.Be carefulwhenremovingand lifting thedoor.
Donot hfi thedoorby thehandle.
Toremovethe door:
[] Fully open tile dora:
[] Pull tile hinge locks down towardtile door ti'ame, to tile tmlocked
I)osition. A tool, such as a smallfiat-blade screwdriver; may be
required.
[] Firefly grasp both sides of tile doorat tile top.
[] Close door to tile door remoxalposition, which is halfway between
the broil stop position and flfllvclosed.
[] I,ift door up and out tmtil tile hingeam_ is clear of the slot.
Toreplace the door:
[] Fimd_ grasp both sides ot the doorat tile top.
[]
[]
[]
X'_qthtile Bottomdoor at tile edge
d sbtsame angle astile removal
position, seat theindentation of
the hinge mminto tile bottom
edge of tile hinge slot. Tile notch in
the hinge am_ must be flfllv seatedinto tile bottom ot tile slot.
Fully open tile doo_: If tile door willnot full} open, tile indentation isnot seated correctly in tile bottom
edge of the slot.
Push tile hinge, locks t:lI) aoainstm tilefl'ont fl'ame of tile oxen cavit_ to tile
locked position.
arm
Hing (_
Push hinge locks up to lock.
[] Close tile o_en doo_:
25

Careand cleaning of the range.
Stainless Steel Surfaces (onsomemodels)
Donotusea steel woolpad;it will scratchthesurface.
To clean the stainless steel surfi_ce,
use warm sudsy water or a stainless steel
cleaner or polish. _Mwa)_s wipe the suHi_ce
in the direction of the grain. Follow the
cleaner instructions fin" cleaning the
stninless steel smthce.
To inquire about pro'chasing stainlesssteel appliance cleaner or polish, or tofind the location _ff a dealer or Camco
Parts Store nearest you, please call ore"toll-fl'ee nmnber:
NationalPartsCenter 1.800.626.2002(U.S.)1.800.661.1616(Canada)
ge.com(U.S.)www.GEAppliances.ca(Canada)
Painted Surfaces
Painted sm'ti_ces include the top and
sides of the doo_; and the drawer fi'ont.
Clean these with soap and water or
a vinegar and water solution.
Do not use commercial o',en cleanet_,
cleaning powde_, steel wool or ha_h
abrasixes on an) painted sm'ti_ce.
Cooktopair inlet
Oven Vent and Cooktop Air Inlet
The oven is vented through an opening
in the cooktop trader the grille. The
cooktop rakes in air through the air inlet
locamd through the cooktop.
Never c_wer these openings Mth
almninmn fifil or anv other material.
This would prevent the vents fi'om
working i)roperly.
Control Panel
If desired,thetouchpadsmaybe turnedoffbeforecleaning.
See the Control Lockoutsection.
Clean up splatte_ with a damp cloth.
Remove heavier soil with wam_ soap)wateI: Do not t/se abI'asi_,es of _lIIV kind.
Turnonthetouchpadsaftercleaning.
Oyenflo°r _
iiii_ --.<
/"
Removable OvenFloor
To remove the oven floor for easier
cleaning:
[] Remo_e the o_en door using theinstructions in the Lift-OffOvenDoorsection.
[] GI'aS l) o_,en f]ooI" at the I'e_lI" fingei"
slots on each side, 1N it up, push it
back and pull it Otlt.
V_ Clean the oven floor with warn/
SOap} wateI:
IMPORTANT ?dw'a)s replace theremovable floor befin'e the next use.
26

Before you carl for service.., gecom
Troubleshooting -tipsSave time and money/.Review the charts on the followingpages first and you may not need to call for service.
Burners have yellow oryellow-tipped flames
Possible Causes What ToDo
The combustion quality ofburner flmnes needs to be
determhmd visually.
• Use the illustrations beh)w to detemfine if your burnerflames are hernial. If burner flames look like A, call forservice. Nomml burner flames should look like B or C,
depending on the t,ipe of gas you rise. _]th I,P gas, seineyellow tipping on outer cones is hernial.
A-Yellow flames B-Yellow tips C-Softblue flamesCarlfor service onouter cones Normal for natural
NormalforLPgas gas
Control knobs Knob isn't pushed down. • To turn fl'om the OFF position, push the knob in andwill notturn then tUl'U.
Burnersdo Plug on range is not • Make sure electrical plug is plugged into a live, properly
not light completely inserted in the grounded ouflet.electrical outlet.
Gas supply not commcted • See the Installation/ustru(fious that came with your
or turned on. range.
A fuse in your home may be • Rel)lace the fl/se or reset the circuit breakel:blown or the circuit breaker
tripped.
Burner parts not replaced • See the Care and cleaning of the range section.
correctly.
Control Lockout feature • ]f LOC0Nal)pe:u_ in the display, the oven control isis activated h)cked. Turn this teature ott to use the oven. See the
Control Lockout section.
_cking sound of spark Control knob is still • Turn the knob out of the LifE l)osifiou to the desired
igniter persists after in the LITE position, setting.
burner lights • Turn the burner ott and relight. If ticking is still
l)reseut, call for service.
Burner flames very hnproper air to gas ratio. • ]f range is connected to 12 gas, check :ill steps
large oryellow in the hastallation Instructions that came with
votu" range.
Oven light does Light bulb is loose or defective. • Tighten or replace the btdb.
not workSwitch operating • (:all fin" service.
light is broken.
Oven will not work Plug on range is not completely • Make sure electrical l)lug is l)lugged into a live, l)roperly
inserted in the electrical outlet, grounded ouflet.
A fuse in your home may be • Rel)lace the fl/se (>r reset the drcuit breaker:blown or the circuit
breaker tripped.
Oven conlrols improperly set. • See the Using the oven section.
Door left in the locked position. • If necessary, allow the (wen to cool; then tudockthe doo_: 27

Before you call forservice...
Troubleshooting -tips
Possible Causes What ToDo
Fooddoes not bake Oven controls improperly set. * See tile Using the oven section.or roast properly
Rack position is incorrect * See the Using the oven section.or the rack is not level.
Incorrect cookware or * See the Usingthe oven sectilm.
cookware of improper
size being used.
Oven thermostat needs * See the Adjust the oven thermostat- Do it yourself!adjustment, section.
Fooddoesnot Oven controls improperly set. * Make sure you touch the BROILHI/LOpad.bmil properly
Improper rack position * See tile Broiling Guide.
being used.
Cookware not stilted * Use the broiling, lean and ,grid that came with your range.
for broiling.
Alumhmm foil used on the * See tile Usingthe oven section.
the broiling pan mad grid has
not been fitted properly madslit as recommended.
ha some areas the power * Preheat tile broil element fin" 10 minutes.
(voltage) maybe low. * Broil for the hm,_est__ period of time recommended ill
the Broiling Guide.
Oventemperature Oven thermostat * See the Adjust the oven thermostat- Do it yourself!too hot or too cold needs adjustment, section.
Oven door is crooked The door is out of position. * Because the oven door is removable, it sometimes
gets out of position during installation. Remove and
replace the oven door. See the Lift-Off Oven Doorse('tion,
Storagedrawer Rear drawer support is * Reposition the draweL See the Storage Draweris crooked on top of the guide rail. Removal instructions in tile Care and cleaning of your
range section.
Storagedrawer Rear drawer support is • Reposition the drawel: See the Storage Drawerwon'tclose on top of the guide rail. Remova/instructions in tile Care and cleaning of
your range se(-tion.
28

ge.com
Possible Causes What To Do
Clock and timer do Plug on range is not completely * Make sure electrical l_lug, is l)lugged,, into a live, laroperlynot work inserted ha the electrical oudet, grounded outlet.
A fuse ha your home * Rel)lace tile h/se or reset tile circuit breaker:may be blo_aa or thecircuit breaker tripped.
Oven con_cols improperly set. * See the Using the clock and timer section.
Oven will not self-clean Oven consols improperly set. * See the Using the self-cleaning oven section.
Oven door is not in the * Make sure you move the door latch handle all the way
locked position, to the right.
"Crackling" or This is the somad of the * This is normal.
"popping" sound metal heating and coolingduring both the cooking madcleaning functions.
Excessive smoking Excessive soil. * Tourh the CLEAR/OFFpad. Ol)eU the windows to
during a clean cycle rid the room of smoke. Wait tu]til the light on theSELF CLEANpad goes off. Wipe up the excess soiland reset the clean cycle.
Oven door will not Oven too hot. * Alh)w the oven to cool beh)w h)ckiug temperature.open after a clean cycle
Oven not clean after a Oven conlrols not properly set. * See the Using the self-cleaning oven section.clean cycle
Oven was heavily soiled. * Clean u l) heavy sl)illovers before starting the cleancycle. Heavily soiled ovens may need to self:cleanagain or for a lou,,er_ period of time.
"F--anda number You have a ftmction error code. * Touch the CLEAP_/OFFIaad.Put the oven back intoor letter" flash ()perati(>u.
in the display If the function code repeats. * Dis('onuect all power to the range for at least 30
seconds and then reconnect power./f the flu]ctiouerror code repeats, call for service.
•/f a flmctiou error code alalaears during the self:cleaniu,_ cycle, check the oven door latch. The latch
may have been moved, if only slightly, from thelocked position. Make sure the latch is moved tothe right as thr as it will go. Touch the CLEAP_/OFFpad.Allow the (),,'ell to COO1 f()l" oue hotu'. Put the ovel]
back into Olaeratiou.
29
Before you call for service...
Troubleshooting tips
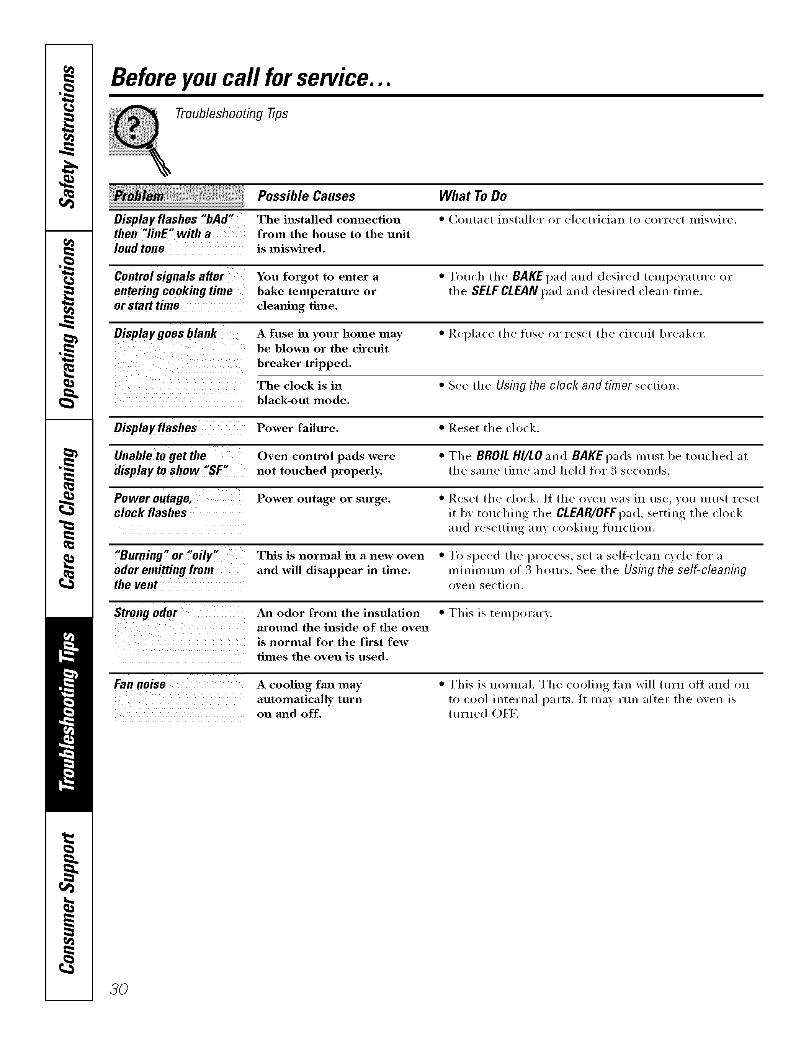
Possible Causes What To Do
Display flashes "bAd" The installed connection * Contact installer or electrician to correct miswire.then "linE" with a from the house to the refitloud tone is miswired.
Control signals after You forgot to enter a * Touch the BAKE pad and desired temperatm'e or
entering cooking time bake temperature or the SELF CLEAN pad and desired clean time.or start time cleaning time.
Display goes blank A fuse in your home may * Replace the fllse or reset the circuit breaker.be blown or the circttit
breaker tripped.
The clock is in * See the Using the clock and timer section.black-out mode.
Displayflashes Power failure. * Reset the clock.
Unable to get the Oven control pads were *TheBROILHI/LOandBAKEpadsmt,stl)etouchedat
displayto show "SF" not touched properly, the same time and held for 3 seconds.
Power outage, Power outage or surge. * Reset the clock. If the oven was in use _ou must reset
clock flashes it 1)_,,touching, the CLEAR/OFFpad, ,settim,_ the ch)ckand resetting an 3 cooking flmction.
"Burning" or ?oily" This is normal in a new oven * To speed the process, set a self-clean cxcle for aodor emitting from and wiU disappear in time. minimmn of 3 horn's. See the Using tho se/f-c/eaningthe vent oven section.
Strong Odor An odor from the insulation * This is temporary.around the inside of the ovenis normaJ for the first fewtimes the oven is used.
Fan noise A cooling fan may
automatically turnon and off.
• This is normal. The cooling tim will mrn off and onto cool internal parts. It may Hm after the o_en istin'ned OFF.
30
GE Service Protection Plus 'M
GE, a name recognized worldwide fbr quality and dependability, of;%rs you
Service Protection Plus'_'--comprehensive protection on all yore appliances--No Matter What Brand!
Benefits Include:
* Backed by GE
* All brands covered
* Unlimited service calls
. All parts and labor costs included
o No out-of-pocket expenses
o No hidden deductibles
o One 800 number to call
We 71 Cover Any Appliance.Anywhere. Anytime.
You will be completel) satisfied with our service protection or )ou ma) request your mone) back
on the remaining value of your contract. No questions asked. It's that simple.
Protect yore" refrigerator, dishwasher, washer and dryer, range, TV_ VCR and much more--aaay brand!
Plus there's no extra charge flw emergency service and low monthly financing is available. Even icemaker
coverage and fl)od spoilage protection is offered. You can rest easy, knowing that all your valuable
household products are protected against expensive repairs.
Place ,our confidence in GE and call us in the U.S. toll-free at _UU._Z_.ZZZ_
for n/ol'e in_ol'I-t/atiOll.
:i,k*]l I)l?}ln(/s (o_.(tl_(%L tip to _0 )eltl?S ill(I, ]11 the (ontillenl tl [.S.
_ (]tll here
Please place in envelope and mail to:
GeneralElectricCompanyWarranty Registration DepartmentP.O. Box 32150
Louisville, KY 40232-2150
27
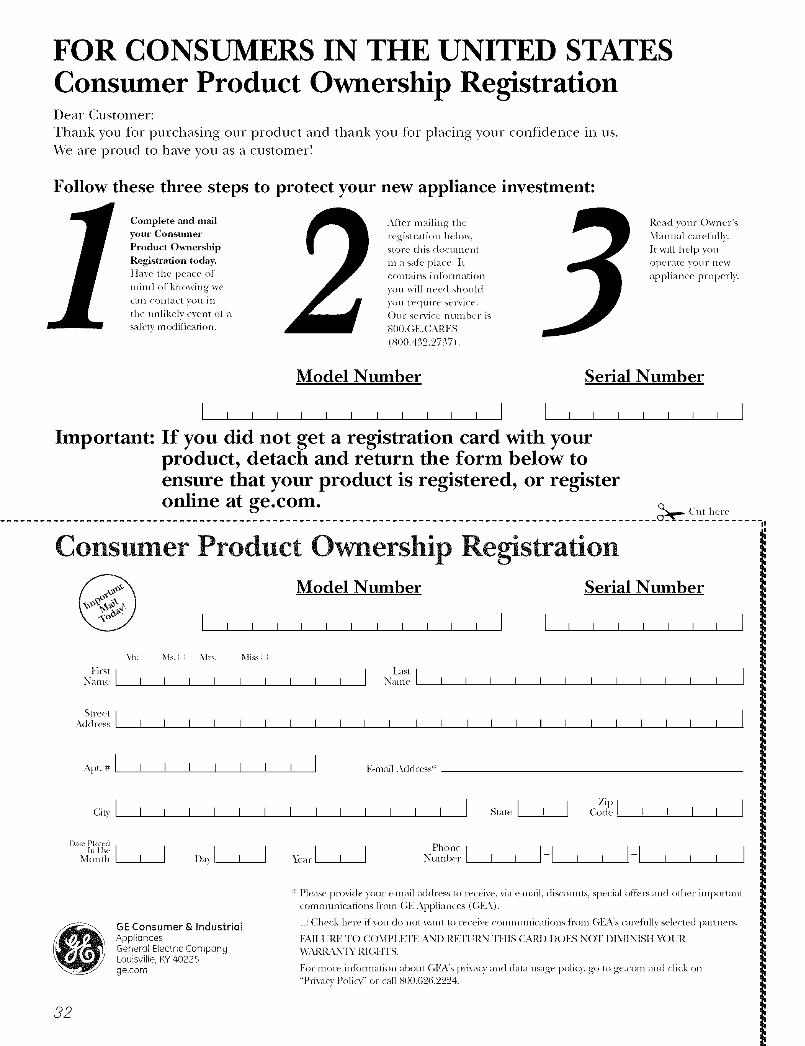
FOR CONSUMERS IN THE UNITED STATES
Consumer Product Ownership RegistrationDear Customer:
Thank you for purchasing our product and thank you for placing your confidence in us.
We are proud to ha_e you as a custonler!
Follow these three steps to protect your new appliance investment:
Complete and mail
yoor Consurlrler
Product Ownership
Registration today.
ttuvc tile peace of
mind of knowing w_call ( olltact VOll ill
the unlikely exent of a
satbty m_Mification.
Aher mailing tile
registration below,store this doclllllellt
in a sati,, place. Itcontains intornlation
you will need should
you require service.Our selMce mmlber is
800.GE.CARES
(800.432.2737).
Read VOllr ()wller's
Manual carefilllv.
It will help you
opel-_lte VOIlF llew
appliance properly.
Model Number Serial Number
I IImportant: If you did not get a registration card with your
product, detach and return the form below toensure that your product is registered, or registeronline at ge.com.
I I
._,,.,_ Cut here
Consumer Product Ownership Registration
Model Number Serial NumberI,,,,,, , , , , , I I , , , , , ,
, , I
M*: Ms. Mrs. Miss
Firsl ] ] Last]Name I I I I I I I I I Name I I I I I I I I I I I I
_[1"( (!1 [A&hx ss I I I I I I I I I I I I I I I I I I I I I I I I
A..#i , , , , , , , i E-lllail_\(l(h'ess*
GE Consumer & IndustriaJ
ApplioncesGenerol Electric ComponyLouisville, K¥ 40225
ge.com
* Please pr_)vid_ y_)ur e-mail address to receive, via eqnail, discounts, special oflbr_ and other important
communications from GE Appliances ((;ILk).
[ Check here if you do not want to receive comnmnications ti-om G1LVs carefillly selected partner',.
FAILI JRE T() COMPLETE AND RETI RN TIIIS CAR1) D()ES NOT DIMINISt t _,_)t R
"_,)_.IL \N'IY RI(;IITS.
For more inti)rmaIion about (',ILVs priv_Q" and dala usage polk3; go to ge.com and click on"Pri_a_y Policy" or call 800.626.2224.
22

Accessories.
Looking For Something More?
Youcan find these accessories and many more at ge.com (U.S.) or www.geappliances.ca(Canada), or call 800.626.2002 (U.S.) or 888.261.3055 (Canada) (during normal businesshours). Have your model number ready.
Grates Surface Burner Heads & Caps
Oven Racks Broiler Pan Cleaner and polish
Light Bulbs Knobs
Tired of discolored _cks? ¼qshing you had exmMlea_T-duty oven racks?
NOW AVAILABLE for your range:
(;E's inn(wative, self:cleanable porcelain-coated oven racks!
• Hem T Duty
• Durable
• Able to be cleaned in a self-cleaning oven
Visit ge.com (U.S.) or www.geappliances.ca (Canada) %r moreinff) rmation.
33

GEGasRange Warranty.(Forc.stemersintheUnitedStates)
All warranty service provided by our Factory Service Centers,or an authorized Customer Care® technician. To schedule service,on-line, 24 hours a day, visit us at ge.com, or carl 800.GE.CARES(800.432.2737). Please have serial number and model numberavailable when calling for service.
Staple your receipt here.Proof of the original
purchase date is needed toobtain service under the
warranty.
Fromthe date of theoriginal purchase
GE Will Replace:
Any part of the range which tifils due to a detect in materials or worlananship. During this
limited one-year warranty, GE will also provkle, free of charge, all labor and in-home service toreplace the defecti\'e part,
!!! !!!!!!!!!!!!!!!!!!!!!!!!!!!!!!!!!!!!!!!!!!!!!!!!!!!!!!!!!!!!!!!!!!!!!!!!!!!!!!!!!!!!!!!!!!!!!!!!!!!!!!!!!!!!....::Ji::Service trips to your home to teach you how to use
the product.
!i_:Improper h_sta]lation, delivery or mahltenmlce.
::Ji::Failure of the product if it is abused, misused,
or used for other thm_ the intended purpose or
used commercially.
_: Replacentent of house fuses or resetting of circuitbreakers.
::Ji::Damage to the product caused by accident, fire, floodsor acts of God.
_: h_cidenta] or consequential da_mage caused by possible
defects with this applimlce.
iJi::Dmnage caused after delivery.
_: Product not accessible to provide required service.
EXCLUSIONOFIMPLIED WARRANTIES--Your sole and exclusive remedy is product repak as provided in this LimitedWarranty. Any implied warranties, including the implied warranties of merchantability or fituess for a particular purpose,are limited to oneyear or the shortest period allowed by law.
This warranty is extended to the original purchaser and any succeeding owner for products purchased forhome use within the USA. If the product is located in an area where service by a GEAuthorized Servicer is notavailable, you maybe responsible for a trip charge or you maybe required to bring the product to an Authorized GEService location for service. In Alaska, the warranty excludes the cost of shipping or service calls to your home.
Some states do not allow the exclusion or limitation of incidental or consequential damages. This warrantygives you specific legal rights, and you may also have other rights which vary from state to state. To know whatyour legal rights are, consult your local or state consumer affairs office or your state's Attorney General.
Warrantor: General Electric Company.Louisville,KY 40225
34

GEGasRange Warranty. (Forc.stomersinCanada)
Aft warranty service provided by our Factory Service Centersor an authorized Customer Care® technician. For service,carl 1.800.361.3400.Please have serial number and model number
available when calling for service.
Staple your receipt here.
Proof of the original
purchase date is needed toobtain service under the
warrantz
Fromthe date of theoriginalpurchase
Camco Will Replace:
Anypatt oI the range which fidls due to a defect in materials or workananship. During this
limited one-year warranty, Camco will also provide, free of charge, all labor and in-home
service to replace the (lefe(ti\'e part.
?_:Service trips to your home to teach you how to use
the product.
iJi::hnproper h_staJlation, delivery or maintenance.
?_:Failure of the product if it is abused, misused,
or used for other thm_ the intended purpose or
used commercially.
?_:Replacement of house fuses or resetting of circuit
breakers.
!i?_Dmnage to the product caused by accident, fire, floodsor acts of God.
::Ji::IucidentaJ or consequential dmnage caused by possible
defects with this appliance.
!i_ Dmnage caused after delivery.
!i?_Product not accessible to provide required service.
I XCLDSION OFIMPLIED WARRANTIES--Your sole and exclusive remedy is product repa# asprovided in this LimitedWarranty.Any implied warranties, including the implied warrauties of merchantability or fitness for a particular purpose,are limited to one year or the shortestperiod allowed by law.
I WARRANTOR IS NOT RESP()NSIBLE F()R C()NSEO.UENTIAI, DAMAGES. I
I Warrantor: CAMC() IN(;. I
35

ConsumerSupport.
GEAppliancesWebsite Inthe_.s.:go.camHave a question or need assistance with your appliance? Try the GE Appliances Website 24 hom_ a day,any day of the year'. For greater comvnience and fhster service, pm can now download ()wner's Manuals,
order patqrs, catalogs, or e\ en schedule se_Mce on-line. You can also "_sk ()ur Team of Experts'"" your questions,and so much more_. In Canada: www.geappliaJaces.ca
ScheduleService ,, the_.,.s.:go.camExpe_ (;E repair service is onl} one step awe} fl'om _our doo_: Get on-line and schedule ",our service at }ourconvenience 24 hom_ am day of the ?ear! Or call 800.(;E.CARES (800.432.2737) during normal business hom_.
In Canada, call 1.800.361.3400
RealLifeDesignStudio ,, the,_.,.s.:go.camGE suppo_s the lJnive_al Design concept--products, services and enviromnents that can be used by people (ff
all ages, sizes and capabilities. We recognize the need to design for a wide range of physical and mental abilitiesand impairments. For details of OE's Universal Design applications, including ldtchen design ideas for people with
disabilities, check out our Website today. For the heating impaired, please call S00.TDD.GEAC (800.833A322).
In Canada, contact: Manage*; Consmner Relations, Camco, Inc.Snite 310, I Facto_" I,aneMoncton, N.B. E1 C 9M3
ExtendedWarranties In the Ij.S.: go.camPurchase a (;E extended warranty and learn about special discounts that are available while _our warranty is still
• o (( -c _c ,in eitbct. You can purchase it on-line am_ime, r call 8 ) ).626.2224 during natural business houlN. (lIE (]OllStln/er
Home Services will still be there after }our warrant} expires. In Canada, call 1.888.261.2133
PartsandAccessories In the Ij.S.: go.camIndividuals qualified to sel_'ice their own appliances can have pmqrs or accessories sent direcdy to their homes
(VISA, MasterCard and Discover caids aie accepted). Order on-line today, 24 hours every clay or by phone at800.626.2002 during normal business hours.
Instructions contained in this manual cover procedures to he performed by any user. Other servicing generally should hereferred to qualified service personnel Caution must he exereised, since impreper servicing may cause unsafe operation.
Customers in Canada should consult the yellow pages for the nearest Camro service centeL or call 1.888.261.305,5.
ContactUs In the U.S.: go.cornIf you are not satisfied with the service you receive fl'om GE, contact us on ore" Website with all the detailsincluding your phone numbe_; or write to: General Manage_; Customer Relations
GE Appliances, Appliance ParkLouisville, KY 40225
In Canada: www.geappliaJaces.ca, or write to: Directo*; Consumer Relations, Camco, Inc.Snite 310, 1 Facto_ T I,aneMoncton, N.B. E 1C 9M3
RegisterYourApplbnce ,, the_.,.s.:oo.comRegister your new appfiaaace on-line--at your convenience! Timel) product registration will al]o_ for enhancedcommunication and prompt service under the terms of }our warranty, should the need arise. You ma_ also mail
in the pre-pfinted registration card included in the l)acldng, material. In Canada: www.geappliamces.ca
Printedin theUnitedStates