pyautogui documentation · pyautogui documentation pyautogui lets your python scripts control the...
TRANSCRIPT

PyAutoGUI Documentation
Al Sweigart
Jan 10, 2020

Contents
1 Examples 3
2 FAQ: Frequently Asked Questions 5
3 Fail-Safes 73.1 Installation . . . . . . . . . . . . . . . . . . . . . . . . . . . . . . . . . . . . . . . . . . . . . . . . 83.2 Cheat Sheet . . . . . . . . . . . . . . . . . . . . . . . . . . . . . . . . . . . . . . . . . . . . . . . . 83.3 Mouse Control Functions . . . . . . . . . . . . . . . . . . . . . . . . . . . . . . . . . . . . . . . . 113.4 Keyboard Control Functions . . . . . . . . . . . . . . . . . . . . . . . . . . . . . . . . . . . . . . . 153.5 Message Box Functions . . . . . . . . . . . . . . . . . . . . . . . . . . . . . . . . . . . . . . . . . 173.6 Screenshot Functions . . . . . . . . . . . . . . . . . . . . . . . . . . . . . . . . . . . . . . . . . . . 183.7 Testing . . . . . . . . . . . . . . . . . . . . . . . . . . . . . . . . . . . . . . . . . . . . . . . . . . 223.8 Roadmap . . . . . . . . . . . . . . . . . . . . . . . . . . . . . . . . . . . . . . . . . . . . . . . . . 223.9 pyautogui . . . . . . . . . . . . . . . . . . . . . . . . . . . . . . . . . . . . . . . . . . . . . . . . . 23
4 Indices and tables 25
i

ii

PyAutoGUI Documentation
PyAutoGUI lets your Python scripts control the mouse and keyboard to automate interactions with other applications.The API is designed to be as simple. PyAutoGUI works on Windows, macOS, and Linux, and runs on Python 2 and3.
To install with pip, run: pip install pyautogui
The source is available on: https://github.com/asweigart/pyautogui
PyAutoGUI has several features:
• Moving the mouse and clicking or typing in the windows of other applications.
• Sending keystrokes to applications (for example, to fill out forms).
• Take screenshots, and given an image (for example, of a button or checkbox), find it on the screen.
• Locate an application’s window, and move, resize, maximize, minimize, or close it (Windows-only, currently)
• Display message boxes for user interaction while your GUI automation script runs.
For a quick example of what PyAutoGUI is capable of, here’s a YouTube video of a bot automatically playing thegame Sushi Go Round. The bot watches the game’s application window, searching for images of sushi orders. Whenit finds one, it clicks the buttons for the sushi ingredients to complete the order. It also clicks the countertop to collectany finished plates. The bot can finish all seven days of the game, though many human players achieve higher scoresthan the bot.
Contents 1

PyAutoGUI Documentation
2 Contents

CHAPTER 1
Examples
>>> import pyautogui
>>> screenWidth, screenHeight = pyautogui.size() # Get the size of the primary→˓monitor.
>>> currentMouseX, currentMouseY = pyautogui.position() # Get the XY position of the→˓mouse.
>>> pyautogui.moveTo(100, 150) # Move the mouse to XY coordinates.
>>> pyautogui.click() # Click the mouse.>>> pyautogui.click(100, 200) # Move the mouse to XY coordinates and click it.>>> pyautogui.click('button.png') # Find where button.png appears on the screen and→˓click it.
>>> pyautogui.move(0, 10) # Move mouse 10 pixels down from its current position.>>> pyautogui.doubleClick() # Double click the mouse.>>> pyautogui.moveTo(500, 500, duration=2, tween=pyautogui.easeInOutQuad) # Use→˓tweening/easing function to move mouse over 2 seconds.
>>> pyautogui.write('Hello world!', interval=0.25) # type with quarter-second pause→˓in between each key>>> pyautogui.press('esc') # Press the Esc key. All key names are in pyautogui.→˓KEY_NAMES
>>> pyautogui.keyDown('shift') # Press the Shift key down and hold it.>>> pyautogui.press(['left', 'left', 'left', 'left']) # Press the left arrow key 4→˓times.>>> pyautogui.keyUp('shift') # Let go of the Shift key.
>>> pyautogui.hotkey('ctrl', 'c') # Press the Ctrl-C hotkey combination.
>>> pyautogui.alert('This is the message to display.') # Make an alert box appear and→˓pause the program until OK is clicked.
3

PyAutoGUI Documentation
This example drags the mouse in a square spiral shape in MS Paint (or any graphics drawing program):
>>> distance = 200>>> while distance > 0:
pyautogui.drag(distance, 0, duration=0.5) # move rightdistance -= 5pyautogui.drag(0, distance, duration=0.5) # move downpyautogui.drag(-distance, 0, duration=0.5) # move leftdistance -= 5pyautogui.drag(0, -distance, duration=0.5) # move up
The benefit of using PyAutoGUI, as opposed to a script that directly generates the image file, is that you can use thebrush tools that MS Paint provides.
4 Chapter 1. Examples

CHAPTER 2
FAQ: Frequently Asked Questions
Send questions to [email protected]
Q: Can PyAutoGUI work on Android, iOS, or tablet/smartphone apps.
A: Unfortunately no. PyAutoGUI only runs on Windows, macOS, and Linux.
Q: Does PyAutoGUI work on multi-monitor setups.
A: No, right now PyAutoGUI only handles the primary monitor.
Q: Does PyAutoGUI do OCR?
A: No, but this is a feature that’s on the roadmap.
Q: Can PyAutoGUI do keylogging, or detect if a key is currently pressed down?
A: No, PyAutoGUI cannot do this currently.
5

PyAutoGUI Documentation
6 Chapter 2. FAQ: Frequently Asked Questions
CHAPTER 3
Fail-Safes
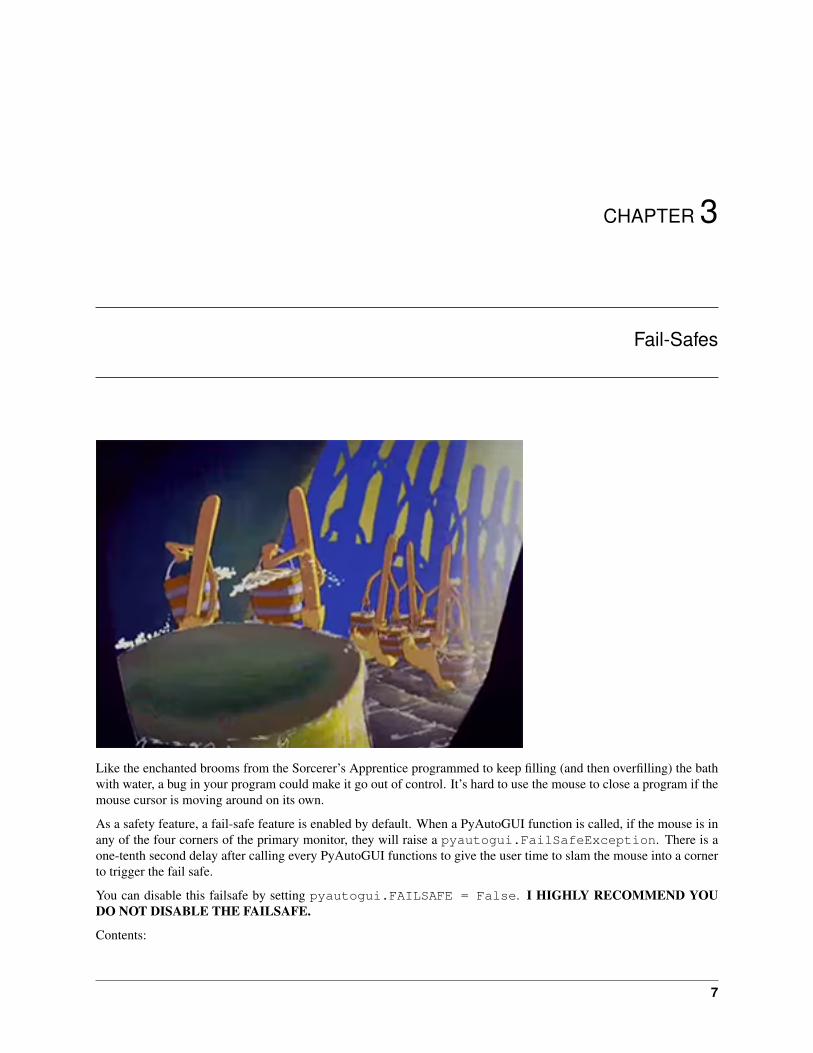
Like the enchanted brooms from the Sorcerer’s Apprentice programmed to keep filling (and then overfilling) the bathwith water, a bug in your program could make it go out of control. It’s hard to use the mouse to close a program if themouse cursor is moving around on its own.
As a safety feature, a fail-safe feature is enabled by default. When a PyAutoGUI function is called, if the mouse is inany of the four corners of the primary monitor, they will raise a pyautogui.FailSafeException. There is aone-tenth second delay after calling every PyAutoGUI functions to give the user time to slam the mouse into a cornerto trigger the fail safe.
You can disable this failsafe by setting pyautogui.FAILSAFE = False. I HIGHLY RECOMMEND YOUDO NOT DISABLE THE FAILSAFE.
Contents:
7
PyAutoGUI Documentation
3.1 Installation
To install PyAutoGUI, install the pyautogui package from PyPI by running pip install pyautogui (onWindows) or pip3 install pyautogui (on macOS and Linux). (On macOS and Linux, pip refers to Python2’s pip tool.)
OS-specific instructions are below.
NOTE: As of October 2019, the Pillow module doesn’t support Python 3.8. PyAutoGUI currently depends onthis module for its screenshot capabilities.
3.1.1 Windows
On Windows, you can use the py.exe program to run the latest version of Python:
py -m pip install pyautogui
If you have multiply versions of Python installed, you can select which one with a command line argument to py. Forexample, for Python 3.8, run:
py -3.8 -m pip install pyautogui
(This is the same as running pip install pyautogui.)
3.1.2 macOS
On macOS and Linux, you need to run python3:
python3 -m pip install pyautogui
If you are running El Capitan and have problems installing pyobjc try:
MACOSX_DEPLOYMENT_TARGET=10.11 pip install pyobjc
3.1.3 Linux
On macOS and Linux, you need to run python3:
python3 -m pip install pyautogui
On Linux, additionally you need to install the scrot application, as well as Tkinter:
sudo apt-get install scrot
sudo apt-get install python3-tk
sudo apt-get install python3-dev
PyAutoGUI install the modules it depends on, including PyTweening, PyScreeze, PyGetWindow, PymsgBox, andMouseInfo.
3.2 Cheat Sheet
This is a quickstart reference to using PyAutoGUI. PyAutoGUI is cross-platform GUI automation module that workson Python 2 & 3. You can control the mouse and keyboard as well as perform basic image recognition to automatetasks on your computer.
8 Chapter 3. Fail-Safes

PyAutoGUI Documentation
All the keyword arguments in the examples on this page are optional.
>>> import pyautogui
PyAutoGUI works on Windows/Mac/Linux and on Python 2 & 3. Install from PyPI with pip installpyautogui.
3.2.1 General Functions
>>> pyautogui.position() # current mouse x and y(968, 56)>>> pyautogui.size() # current screen resolution width and height(1920, 1080)>>> pyautogui.onScreen(x, y) # True if x & y are within the screen.True
3.2.2 Fail-Safes
Set up a 2.5 second pause after each PyAutoGUI call:
>>> import pyautogui>>> pyautogui.PAUSE = 2.5
When fail-safe mode is True, moving the mouse to the upper-left will raise a pyautogui.FailSafeExceptionthat can abort your program:
>>> import pyautogui>>> pyautogui.FAILSAFE = True
3.2.3 Mouse Functions
XY coordinates have 0, 0 origin at top left corner of the screen. X increases going right, Y increases going down.
>>> pyautogui.moveTo(x, y, duration=num_seconds) # move mouse to XY coordinates over→˓num_second seconds>>> pyautogui.moveRel(xOffset, yOffset, duration=num_seconds) # move mouse relative→˓to its current position
If duration is 0 or unspecified, movement is immediate. Note: dragging on Mac can’t be immediate.
>>> pyautogui.dragTo(x, y, duration=num_seconds) # drag mouse to XY>>> pyautogui.dragRel(xOffset, yOffset, duration=num_seconds) # drag mouse relative→˓to its current position
Calling click() just clicks the mouse once with the left button at the mouse’s current location, but the keywordarguments can change that:
>>> pyautogui.click(x=moveToX, y=moveToY, clicks=num_of_clicks, interval=secs_between_→˓clicks, button='left')
The button keyword argument can be 'left', 'middle', or 'right'.
All clicks can be done with click(), but these functions exist for readability. Keyword args are optional:
3.2. Cheat Sheet 9

PyAutoGUI Documentation
>>> pyautogui.rightClick(x=moveToX, y=moveToY)>>> pyautogui.middleClick(x=moveToX, y=moveToY)>>> pyautogui.doubleClick(x=moveToX, y=moveToY)>>> pyautogui.tripleClick(x=moveToX, y=moveToY)
Positive scrolling will scroll up, negative scrolling will scroll down:
>>> pyautogui.scroll(amount_to_scroll, x=moveToX, y=moveToY)
Individual button down and up events can be called separately:
>>> pyautogui.mouseDown(x=moveToX, y=moveToY, button='left')>>> pyautogui.mouseUp(x=moveToX, y=moveToY, button='left')
3.2.4 Keyboard Functions
Key presses go to wherever the keyboard cursor is at function-calling time.
>>> pyautogui.typewrite('Hello world!\n', interval=secs_between_keys) # useful for→˓entering text, newline is Enter
A list of key names can be passed too:
>>> pyautogui.typewrite(['a', 'b', 'c', 'left', 'backspace', 'enter', 'f1'],→˓interval=secs_between_keys)
The full list of key names is in pyautogui.KEYBOARD_KEYS.
Keyboard hotkeys like Ctrl-S or Ctrl-Shift-1 can be done by passing a list of key names to hotkey():
>>> pyautogui.hotkey('ctrl', 'c') # ctrl-c to copy>>> pyautogui.hotkey('ctrl', 'v') # ctrl-v to paste
Individual button down and up events can be called separately:
>>> pyautogui.keyDown(key_name)>>> pyautogui.keyUp(key_name)
3.2.5 Message Box Functions
If you need to pause the program until the user clicks OK on something, or want to display some information to theuser, the message box functions have similar names that JavaScript has:
>>> pyautogui.alert('This displays some text with an OK button.')>>> pyautogui.confirm('This displays text and has an OK and Cancel button.')'OK'>>> pyautogui.prompt('This lets the user type in a string and press OK.')'This is what I typed in.'
The prompt() function will return None if the user clicked Cancel.
10 Chapter 3. Fail-Safes

PyAutoGUI Documentation
3.2.6 Screenshot Functions
PyAutoGUI uses Pillow/PIL for its image-related data.
On Linux, you must run sudo apt-get install scrot to use the screenshot features.
>>> pyautogui.screenshot() # returns a Pillow/PIL Image object<PIL.Image.Image image mode=RGB size=1920x1080 at 0x24C3EF0>>>> pyautogui.screenshot('foo.png') # returns a Pillow/PIL Image object, and saves→˓it to a file<PIL.Image.Image image mode=RGB size=1920x1080 at 0x31AA198>
If you have an image file of something you want to click on, you can find it on the screen with locateOnScreen().
>>> pyautogui.locateOnScreen('looksLikeThis.png') # returns (left, top, width,→˓height) of first place it is found(863, 417, 70, 13)
The locateAllOnScreen() function will return a generator for all the locations it is found on the screen:
>>> for i in pyautogui.locateAllOnScreen('looksLikeThis.png')......(863, 117, 70, 13)(623, 137, 70, 13)(853, 577, 70, 13)(883, 617, 70, 13)(973, 657, 70, 13)(933, 877, 70, 13)
>>> list(pyautogui.locateAllOnScreen('looksLikeThis.png'))[(863, 117, 70, 13), (623, 137, 70, 13), (853, 577, 70, 13), (883, 617, 70, 13), (973,→˓ 657, 70, 13), (933, 877, 70, 13)]
The locateCenterOnScreen() function just returns the XY coordinates of the middle of where the image isfound on the screen:
>>> pyautogui.locateCenterOnScreen('looksLikeThis.png') # returns center x and y(898, 423)
These functions return None if the image couldn’t be found on the screen.
Note: The locate functions are slow and can take a full second or two.
3.3 Mouse Control Functions
3.3.1 The Screen and Mouse Position
Locations on your screen are referred to by X and Y Cartesian coordinates. The X coordinate starts at 0 on the left sideand increases going right. Unlike in mathematics, the Y coordinate starts at 0 on the top and increases going down.
0,0 X increases -->+---------------------------+| | Y increases| | |
(continues on next page)
3.3. Mouse Control Functions 11

PyAutoGUI Documentation
(continued from previous page)
| 1920 x 1080 screen | || | V| || |+---------------------------+ 1919, 1079
The pixel at the top-left corner is at coordinates 0, 0. If your screen’s resolution is 1920 x 1080, the pixel in the lowerright corner will be 1919, 1079 (since the coordinates begin at 0, not 1).
The screen resolution size is returned by the size() function as a tuple of two integers. The current X and Ycoordinates of the mouse cursor are returned by the position() function.
For example:
>>> pyautogui.size()(1920, 1080)>>> pyautogui.position()(187, 567)
Here is a short Python 3 program that will constantly print out the position of the mouse cursor:
#! python3import pyautogui, sysprint('Press Ctrl-C to quit.')try:
while True:x, y = pyautogui.position()positionStr = 'X: ' + str(x).rjust(4) + ' Y: ' + str(y).rjust(4)print(positionStr, end='')print('\b' * len(positionStr), end='', flush=True)
except KeyboardInterrupt:print('\n')
Here is the Python 2 version:
#! pythonimport pyautogui, sysprint('Press Ctrl-C to quit.')try:
while True:x, y = pyautogui.position()positionStr = 'X: ' + str(x).rjust(4) + ' Y: ' + str(y).rjust(4)print positionStr,print '\b' * (len(positionStr) + 2),sys.stdout.flush()
except KeyboardInterrupt:print '\n'
To check if XY coordinates are on the screen, pass them (either as two integer arguments or a single tuple/list argumentswith two integers) to the onScreen() function, which will return True if they are within the screen’s boundariesand False if not. For example:
>>> pyautogui.onScreen(0, 0)True>>> pyautogui.onScreen(0, -1)False>>> pyautogui.onScreen(0, 99999999)
(continues on next page)
12 Chapter 3. Fail-Safes

PyAutoGUI Documentation
(continued from previous page)
False>>> pyautogui.size()(1920, 1080)>>> pyautogui.onScreen(1920, 1080)False>>> pyautogui.onScreen(1919, 1079)True
3.3.2 Mouse Movement
The moveTo() function will move the mouse cursor to the X and Y integer coordinates you pass it. The None valuecan be passed for a coordinate to mean “the current mouse cursor position”. For example:
>>> pyautogui.moveTo(100, 200) # moves mouse to X of 100, Y of 200.>>> pyautogui.moveTo(None, 500) # moves mouse to X of 100, Y of 500.>>> pyautogui.moveTo(600, None) # moves mouse to X of 600, Y of 500.
Normally the mouse cursor will instantly move to the new coordinates. If you want the mouse to gradually move tothe new location, pass a third argument for the duration (in seconds) the movement should take. For example:
>>> pyautogui.moveTo(100, 200, 2) # moves mouse to X of 100, Y of 200 over 2 seconds
(If the duration is less than pyautogui.MINIMUM_DURATION the movement will be instant. By default,pyautogui.MINIMUM_DURATION is 0.1.)
If you want to move the mouse cursor over a few pixels relative to its current position, use the move() function. Thisfunction has similar parameters as moveTo(). For example:
>>> pyautogui.moveTo(100, 200) # moves mouse to X of 100, Y of 200.>>> pyautogui.move(0, 50) # move the mouse down 50 pixels.>>> pyautogui.move(-30, 0) # move the mouse left 30 pixels.>>> pyautogui.move(-30, None) # move the mouse left 30 pixels.
3.3.3 Mouse Drags
PyAutoGUI’s dragTo() and drag() functions have similar parameters as the moveTo() and move() functions.In addition, they have a button keyword which can be set to 'left', 'middle', and 'right' for which mousebutton to hold down while dragging. For example:
>>> pyautogui.dragTo(100, 200, button='left') # drag mouse to X of 100, Y of 200→˓while holding down left mouse button>>> pyautogui.dragTo(300, 400, 2, button='left') # drag mouse to X of 300, Y of 400→˓over 2 seconds while holding down left mouse button>>> pyautogui.drag(30, 0, 2, button='right') # drag the mouse left 30 pixels over 2→˓seconds while holding down the right mouse button
3.3.4 Tween / Easing Functions
Tweening is an extra feature to make the mouse movements fancy. You can probably skip this section if you don’t careabout this.
3.3. Mouse Control Functions 13

PyAutoGUI Documentation
A tween or easing function dictates the progress of the mouse as it moves to its destination. Normally when movingthe mouse over a duration of time, the mouse moves directly towards the destination in a straight line at a constantspeed. This is known as a linear tween or linear easing function.
PyAutoGUI has other tweening functions available in the pyautogui module. The pyautogui.easeInQuadfunction can be passed for the 4th argument to moveTo(), move(), dragTo(), and drag() functions to have themouse cursor start off moving slowly and then speeding up towards the destination. The total duration is still the sameas the argument passed to the function. The pyautogui.easeOutQuad is the reverse: the mouse cursor startsmoving fast but slows down as it approaches the destination. The pyautogui.easeOutElastic will overshootthe destination and “rubber band” back and forth until it settles at the destination.
For example:
>>> pyautogui.moveTo(100, 100, 2, pyautogui.easeInQuad) # start slow, end fast>>> pyautogui.moveTo(100, 100, 2, pyautogui.easeOutQuad) # start fast, end slow>>> pyautogui.moveTo(100, 100, 2, pyautogui.easeInOutQuad) # start and end fast,→˓slow in middle>>> pyautogui.moveTo(100, 100, 2, pyautogui.easeInBounce) # bounce at the end>>> pyautogui.moveTo(100, 100, 2, pyautogui.easeInElastic) # rubber band at the end
These tweening functions are copied from Al Sweigart’s PyTweening module: https://pypi.python.org/pypi/PyTweening https://github.com/asweigart/pytweening This module does not have to be installed to use the tweeningfunctions.
If you want to create your own tweening function, define a function that takes a single float argument between 0.0(representing the start of the mouse travelling) and 1.0 (representing the end of the mouse travelling) and returns afloat value between 0.0 and 1.0.
3.3.5 Mouse Clicks
The click() function simulates a single, left-button mouse click at the mouse’s current position. A “click” is definedas pushing the button down and then releasing it up. For example:
>>> pyautogui.click() # click the mouse
To combine a moveTo() call before the click, pass integers for the x and y keyword argument:
>>> pyautogui.click(x=100, y=200) # move to 100, 200, then click the left mouse→˓button.
To specify a different mouse button to click, pass 'left', 'middle', or 'right' for the button keywordargument:
>>> pyautogui.click(button='right') # right-click the mouse
To do multiple clicks, pass an integer to the clicks keyword argument. Optionally, you can pass a float or integer tothe interval keyword argument to specify the amount of pause between the clicks in seconds. For example:
>>> pyautogui.click(clicks=2) # double-click the left mouse button>>> pyautogui.click(clicks=2, interval=0.25) # double-click the left mouse button,→˓but with a quarter second pause in between clicks>>> pyautogui.click(button='right', clicks=3, interval=0.25) ## triple-click the→˓right mouse button with a quarter second pause in between clicks
As a convenient shortcut, the doubleClick() function will perform a double click of the left mouse button. It alsohas the optional x, y, interval, and button keyword arguments. For example:
14 Chapter 3. Fail-Safes

PyAutoGUI Documentation
>>> pyautogui.doubleClick() # perform a left-button double click
There is also a tripleClick() function with similar optional keyword arguments.
The rightClick() function has optional x and y keyword arguments.
3.3.6 The mouseDown() and mouseUp() Functions
Mouse clicks and drags are composed of both pressing the mouse button down and releasing it back up. If you wantto perform these actions separately, call the mouseDown() and mouseUp() functions. They have the same x, y,and button. For example:
>>> pyautogui.mouseDown(); pyautogui.mouseUp() # does the same thing as a left-→˓button mouse click>>> pyautogui.mouseDown(button='right') # press the right button down>>> pyautogui.mouseUp(button='right', x=100, y=200) # move the mouse to 100, 200,→˓then release the right button up.
3.3.7 Mouse Scrolling
The mouse scroll wheel can be simulated by calling the scroll() function and passing an integer number of “clicks”to scroll. The amount of scrolling in a “click” varies between platforms. Optionally, integers can be passed for the thex and y keyword arguments to move the mouse cursor before performing the scroll. For example:
>>> pyautogui.scroll(10) # scroll up 10 "clicks">>> pyautogui.scroll(-10) # scroll down 10 "clicks">>> pyautogui.scroll(10, x=100, y=100) # move mouse cursor to 100, 200, then scroll→˓up 10 "clicks"
On OS X and Linux platforms, PyAutoGUI can also perform horizontal scrolling by calling the hscroll() function. Forexample:
>>> pyautogui.hscroll(10) # scroll right 10 "clicks">>> pyautogui.hscroll(-10) # scroll left 10 "clicks"
The scroll() function is a wrapper for vscroll(), which performs vertical scrolling.
3.4 Keyboard Control Functions
3.4.1 The write() Function
The primary keyboard function is write(). This function will type the characters in the string that is passed. To adda delay interval in between pressing each character key, pass an int or float for the interval keyword argument.
For example:
>>> pyautogui.write('Hello world!') # prints out "Hello world!"→˓instantly>>> pyautogui.write('Hello world!', interval=0.25) # prints out "Hello world!" with→˓a quarter second delay after each character
You can only press single-character keys with write(), so you can’t press the Shift or F1 keys, for example.
3.4. Keyboard Control Functions 15

PyAutoGUI Documentation
3.4.2 The press(), keyDown(), and keyUp() Functions
To press these keys, call the press() function and pass it a string from the pyautogui.KEYBOARD_KEYS suchas enter, esc, f1. See KEYBOARD_KEYS.
For example:
>>> pyautogui.press('enter') # press the Enter key>>> pyautogui.press('f1') # press the F1 key>>> pyautogui.press('left') # press the left arrow key
The press() function is really just a wrapper for the keyDown() and keyUp() functions, which simulate pressinga key down and then releasing it up. These functions can be called by themselves. For example, to press the left arrowkey three times while holding down the Shift key, call the following:
>>> pyautogui.keyDown('shift') # hold down the shift key>>> pyautogui.press('left') # press the left arrow key>>> pyautogui.press('left') # press the left arrow key>>> pyautogui.press('left') # press the left arrow key>>> pyautogui.keyUp('shift') # release the shift key
To press multiple keys similar to what write() does, pass a list of strings to press(). For example:
>>> pyautogui.press(['left', 'left', 'left'])
Or you can set how many presses left:
>>> pyautogui.press('left', presses=3)
To add a delay interval in between each press, pass an int or float for the interval keyword argument.
3.4.3 The hotkey() Function
To make pressing hotkeys or keyboard shortcuts convenient, the hotkey() can be passed several key strings whichwill be pressed down in order, and then released in reverse order. This code:
>>> pyautogui.hotkey('ctrl', 'shift', 'esc')
. . . is equivalent to this code:
>>> pyautogui.keyDown('ctrl')>>> pyautogui.keyDown('shift')>>> pyautogui.keyDown('esc')>>> pyautogui.keyUp('esc')>>> pyautogui.keyUp('shift')>>> pyautogui.keyUp('ctrl')
To add a delay interval in between each press, pass an int or float for the interval keyword argument.
3.4.4 KEYBOARD_KEYS
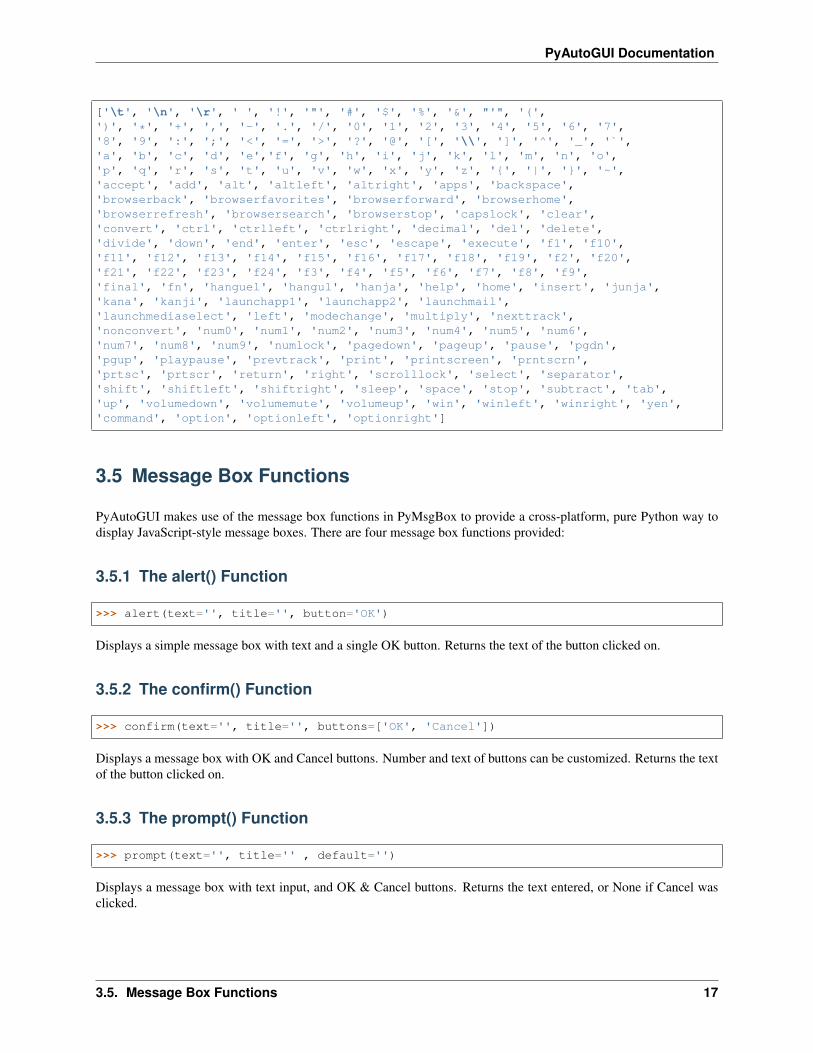
The following are the valid strings to pass to the press(), keyDown(), keyUp(), and hotkey() functions:
16 Chapter 3. Fail-Safes
PyAutoGUI Documentation
['\t', '\n', '\r', ' ', '!', '"', '#', '$', '%', '&', "'", '(',')', '*', '+', ',', '-', '.', '/', '0', '1', '2', '3', '4', '5', '6', '7','8', '9', ':', ';', '<', '=', '>', '?', '@', '[', '\\', ']', '^', '_', '`','a', 'b', 'c', 'd', 'e','f', 'g', 'h', 'i', 'j', 'k', 'l', 'm', 'n', 'o','p', 'q', 'r', 's', 't', 'u', 'v', 'w', 'x', 'y', 'z', '{', '|', '}', '~','accept', 'add', 'alt', 'altleft', 'altright', 'apps', 'backspace','browserback', 'browserfavorites', 'browserforward', 'browserhome','browserrefresh', 'browsersearch', 'browserstop', 'capslock', 'clear','convert', 'ctrl', 'ctrlleft', 'ctrlright', 'decimal', 'del', 'delete','divide', 'down', 'end', 'enter', 'esc', 'escape', 'execute', 'f1', 'f10','f11', 'f12', 'f13', 'f14', 'f15', 'f16', 'f17', 'f18', 'f19', 'f2', 'f20','f21', 'f22', 'f23', 'f24', 'f3', 'f4', 'f5', 'f6', 'f7', 'f8', 'f9','final', 'fn', 'hanguel', 'hangul', 'hanja', 'help', 'home', 'insert', 'junja','kana', 'kanji', 'launchapp1', 'launchapp2', 'launchmail','launchmediaselect', 'left', 'modechange', 'multiply', 'nexttrack','nonconvert', 'num0', 'num1', 'num2', 'num3', 'num4', 'num5', 'num6','num7', 'num8', 'num9', 'numlock', 'pagedown', 'pageup', 'pause', 'pgdn','pgup', 'playpause', 'prevtrack', 'print', 'printscreen', 'prntscrn','prtsc', 'prtscr', 'return', 'right', 'scrolllock', 'select', 'separator','shift', 'shiftleft', 'shiftright', 'sleep', 'space', 'stop', 'subtract', 'tab','up', 'volumedown', 'volumemute', 'volumeup', 'win', 'winleft', 'winright', 'yen','command', 'option', 'optionleft', 'optionright']
3.5 Message Box Functions
PyAutoGUI makes use of the message box functions in PyMsgBox to provide a cross-platform, pure Python way todisplay JavaScript-style message boxes. There are four message box functions provided:
3.5.1 The alert() Function
>>> alert(text='', title='', button='OK')
Displays a simple message box with text and a single OK button. Returns the text of the button clicked on.
3.5.2 The confirm() Function
>>> confirm(text='', title='', buttons=['OK', 'Cancel'])
Displays a message box with OK and Cancel buttons. Number and text of buttons can be customized. Returns the textof the button clicked on.
3.5.3 The prompt() Function
>>> prompt(text='', title='' , default='')
Displays a message box with text input, and OK & Cancel buttons. Returns the text entered, or None if Cancel wasclicked.
3.5. Message Box Functions 17

PyAutoGUI Documentation
3.5.4 The password() Function
>>> password(text='', title='', default='', mask='*')
Displays a message box with text input, and OK & Cancel buttons. Typed characters appear as *. Returns the textentered, or None if Cancel was clicked.
3.6 Screenshot Functions
PyAutoGUI can take screenshots, save them to files, and locate images within the screen. This is useful if you have asmall image of, say, a button that needs to be clicked and want to locate it on the screen. These features are providedby the PyScreeze module, which is installed with PyAutoGUI.
Screenshot functionality requires the Pillow module. OS X uses the screencapture command, which comeswith the operating system. Linux uses the scrot command, which can be installed by running sudo apt-getinstall scrot.
3.6.1 Special Notes About Ubuntu
Unfortunately, Ubuntu seems to have several deficiencies with installing Pillow. PNG and JPEG support are not in-cluded with Pillow out of the box on Ubuntu. The following links have more information: https://stackoverflow.com/questions/7648200/pip-install-pil-e-tickets-1-no-jpeg-png-support http://ubuntuforums.org/showthread.php?t=1751455
3.6.2 The screenshot() Function
Calling screenshot() will return an Image object (see the Pillow or PIL module documentation for details).Passing a string of a filename will save the screenshot to a file as well as return it as an Image object.
>>> import pyautogui>>> im1 = pyautogui.screenshot()>>> im2 = pyautogui.screenshot('my_screenshot.png')
On a 1920 x 1080 screen, the screenshot() function takes roughly 100 milliseconds - it’s not fast but it’s not slow.
There is also an optional region keyword argument, if you do not want a screenshot of the entire screen. You canpass a four-integer tuple of the left, top, width, and height of the region to capture:
>>> import pyautogui>>> im = pyautogui.screenshot(region=(0,0, 300, 400))
3.6.3 The Locate Functions
NOTE: As of version 0.9.41, if the locate functions can’t find the provided image, they’ll raiseImageNotFoundException instead of returning None.
You can visually locate something on the screen if you have an image file of it. For example, say the calculator appwas running on your computer and looked like this:
18 Chapter 3. Fail-Safes

PyAutoGUI Documentation
You can’t call the moveTo() and click() functions if you don’t know the exact screen coordinates of where thecalculator buttons are. The calculator can appear in a slightly different place each time it is launched, causing you tore-find the coordinates each time. However, if you have an image of the button, such as the image of the 7 button:
. . . you can call the locateOnScreen('calc7key.png') function to get the screen coordinates. The returnvalue is a 4-integer tuple: (left, top, width, height). This tuple can be passed to center() to get the X and Ycoordinates at the center of this region. If the image can’t be found on the screen, locateOnScreen() raisesImageNotFoundException.
>>> import pyautogui>>> button7location = pyautogui.locateOnScreen('calc7key.png')>>> button7locationBox(left=1416, top=562, width=50, height=41)>>> button7location[0]1416>>> button7location.left
(continues on next page)
3.6. Screenshot Functions 19

PyAutoGUI Documentation
(continued from previous page)
1416>>> button7point = pyautogui.center(button7location)>>> button7pointPoint(x=1441, y=582)>>> button7point[0]1441>>> button7point.x1441>>> button7x, button7y = button7point>>> pyautogui.click(button7x, button7y) # clicks the center of where the 7 button→˓was found>>> pyautogui.click('calc7key.png') # a shortcut version to click on the center of→˓where the 7 button was found
The optional confidence keyword argument specifies the accuracy with which the function should locate the imageon screen. This is helpful in case the function is not able to locate an image due to negligible pixel differences:
>>> import pyautogui>>> button7location = pyautogui.locateOnScreen('calc7key.png', confidence=0.9)>>> button7locationBox(left=1416, top=562, width=50, height=41)
Note: You need to have OpenCV installed for the confidence keyword to work.
The locateCenterOnScreen() function combines locateOnScreen() and center():
>>> import pyautogui>>> x, y = pyautogui.locateCenterOnScreen('calc7key.png')>>> pyautogui.click(x, y)
On a 1920 x 1080 screen, the locate function calls take about 1 or 2 seconds. This may be too slow for action videogames, but works for most purposes and applications.
There are several “locate” functions. They all start looking at the top-left corner of the screen (or image) and look tothe right and then down. The arguments can either be a
• locateOnScreen(image, grayscale=False) - Returns (left, top, width, height) coordinate of firstfound instance of the image on the screen. Raises ImageNotFoundException if not found on the screen.
• locateCenterOnScreen(image, grayscale=False) - Returns (x, y) coordinates of the center ofthe first found instance of the image on the screen. Raises ImageNotFoundException if not found on thescreen.
• locateAllOnScreen(image, grayscale=False) - Returns a generator that yields (left, top, width,height) tuples for where the image is found on the screen.
• locate(needleImage, haystackImage, grayscale=False) - Returns (left, top, width,height) coordinate of first found instance of needleImage in haystackImage. RaisesImageNotFoundException if not found on the screen.
• locateAll(needleImage, haystackImage, grayscale=False) - Returns a generator thatyields (left, top, width, height) tuples for where needleImage is found in haystackImage.
The “locate all” functions can be used in for loops or passed to list():
>>> import pyautogui>>> for pos in pyautogui.locateAllOnScreen('someButton.png')... print(pos)
(continues on next page)
20 Chapter 3. Fail-Safes
PyAutoGUI Documentation
(continued from previous page)
...(1101, 252, 50, 50)(59, 481, 50, 50)(1395, 640, 50, 50)(1838, 676, 50, 50)>>> list(pyautogui.locateAllOnScreen('someButton.png'))[(1101, 252, 50, 50), (59, 481, 50, 50), (1395, 640, 50, 50), (1838, 676, 50, 50)]
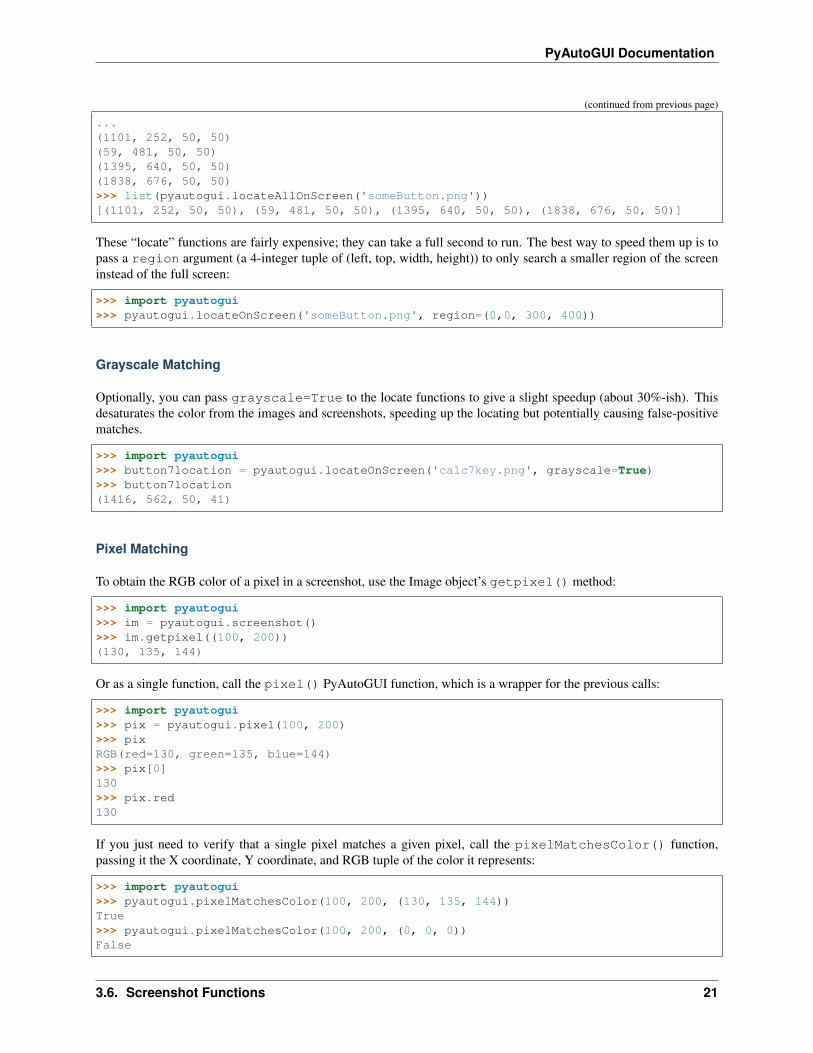
These “locate” functions are fairly expensive; they can take a full second to run. The best way to speed them up is topass a region argument (a 4-integer tuple of (left, top, width, height)) to only search a smaller region of the screeninstead of the full screen:
>>> import pyautogui>>> pyautogui.locateOnScreen('someButton.png', region=(0,0, 300, 400))
Grayscale Matching
Optionally, you can pass grayscale=True to the locate functions to give a slight speedup (about 30%-ish). Thisdesaturates the color from the images and screenshots, speeding up the locating but potentially causing false-positivematches.
>>> import pyautogui>>> button7location = pyautogui.locateOnScreen('calc7key.png', grayscale=True)>>> button7location(1416, 562, 50, 41)
Pixel Matching
To obtain the RGB color of a pixel in a screenshot, use the Image object’s getpixel() method:
>>> import pyautogui>>> im = pyautogui.screenshot()>>> im.getpixel((100, 200))(130, 135, 144)
Or as a single function, call the pixel() PyAutoGUI function, which is a wrapper for the previous calls:
>>> import pyautogui>>> pix = pyautogui.pixel(100, 200)>>> pixRGB(red=130, green=135, blue=144)>>> pix[0]130>>> pix.red130
If you just need to verify that a single pixel matches a given pixel, call the pixelMatchesColor() function,passing it the X coordinate, Y coordinate, and RGB tuple of the color it represents:
>>> import pyautogui>>> pyautogui.pixelMatchesColor(100, 200, (130, 135, 144))True>>> pyautogui.pixelMatchesColor(100, 200, (0, 0, 0))False
3.6. Screenshot Functions 21
PyAutoGUI Documentation
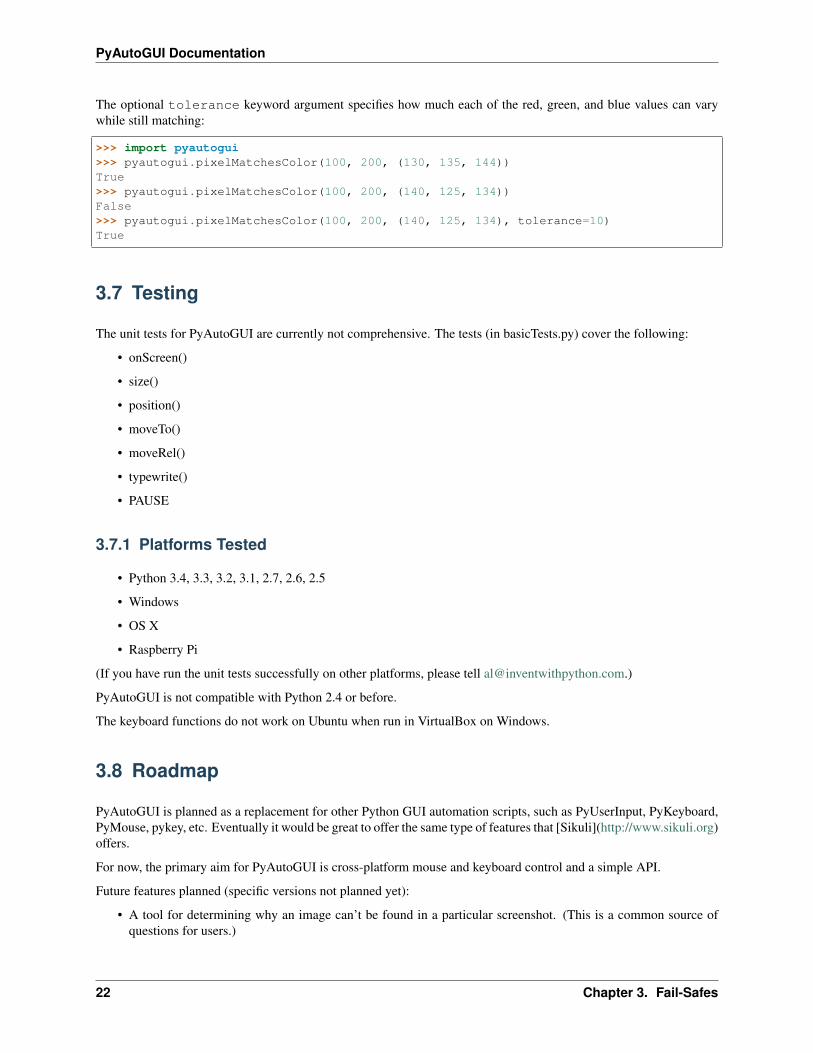
The optional tolerance keyword argument specifies how much each of the red, green, and blue values can varywhile still matching:
>>> import pyautogui>>> pyautogui.pixelMatchesColor(100, 200, (130, 135, 144))True>>> pyautogui.pixelMatchesColor(100, 200, (140, 125, 134))False>>> pyautogui.pixelMatchesColor(100, 200, (140, 125, 134), tolerance=10)True
3.7 Testing
The unit tests for PyAutoGUI are currently not comprehensive. The tests (in basicTests.py) cover the following:
• onScreen()
• size()
• position()
• moveTo()
• moveRel()
• typewrite()
• PAUSE
3.7.1 Platforms Tested
• Python 3.4, 3.3, 3.2, 3.1, 2.7, 2.6, 2.5
• Windows
• OS X
• Raspberry Pi
(If you have run the unit tests successfully on other platforms, please tell [email protected].)
PyAutoGUI is not compatible with Python 2.4 or before.
The keyboard functions do not work on Ubuntu when run in VirtualBox on Windows.
3.8 Roadmap
PyAutoGUI is planned as a replacement for other Python GUI automation scripts, such as PyUserInput, PyKeyboard,PyMouse, pykey, etc. Eventually it would be great to offer the same type of features that [Sikuli](http://www.sikuli.org)offers.
For now, the primary aim for PyAutoGUI is cross-platform mouse and keyboard control and a simple API.
Future features planned (specific versions not planned yet):
• A tool for determining why an image can’t be found in a particular screenshot. (This is a common source ofquestions for users.)
22 Chapter 3. Fail-Safes

PyAutoGUI Documentation
• Full compatibility on Raspberry Pis.
• “Wave” function, which is used just to see where the mouse is by shaking the mouse cursor a bit. A small helperfunction.
• locateNear() function, which is like the other locate-related screen reading functions except it finds the firstinstance near an xy point on the screen.
• Find a list of all windows and their captions.
• Click coordinates relative to a window, instead of the entire screen.
• Make it easier to work on systems with multiple monitors.
• GetKeyState() type of function
• Ability to set global hotkey on all platforms so that there can be an easy “kill switch” for GUI automationprograms.
• Optional nonblocking pyautogui calls.
• “strict” mode for keyboard - passing an invalid keyboard key causes an exception instead of silently skipping it.
• rename keyboardMapping to KEYBOARD_MAPPING
• Ability to convert png and other image files into a string that can be copy/pasted directly in the source code, sothat they don’t have to be shared separately with people’s pyautogui scripts.
• Test to make sure pyautogui works in Windows/mac/linux VMs.
• A way to compare two images and highlight differences between them (good for pointing out when a UI changes,etc.)
Window handling features:
• pyautogui.getWindows() # returns a dict of window titles mapped to window IDs
• pyautogui.getWindow(str_title_or_int_id) # returns a “Win” object
• win.move(x, y)
• win.resize(width, height)
• win.maximize()
• win.minimize()
• win.restore()
• win.close()
• win.position() # returns (x, y) of top-left corner
• win.moveRel(x=0, y=0) # moves relative to the x, y of top-left corner of the window
• win.clickRel(x=0, y=0, clicks=1, interval=0.0, button=’left’) # click relative to the x, y of top-left cornerof the window
• Additions to screenshot functionality so that it can capture specific windows instead of full screen.
3.9 pyautogui
3.9.1 pyautogui package
3.9. pyautogui 23

PyAutoGUI Documentation
Submodules
pyautogui.keynames module
Module contents
This documentation is still a work in progress.
24 Chapter 3. Fail-Safes
CHAPTER 4
Indices and tables
• genindex
• modindex
• search
25