proview - flightscapeflightscape.com/wp-content/uploads/2016/06/insight_4_sp6_proview.pdf1•proview...
TRANSCRIPT

Insight©
4 Service Pack 6
ProView
User’s Reference
March 2016
CAE Flightscape
1135 Innovation Drive
Ottawa, Ontario, Canada
K2K 3G7
www.flightscape.com
Copyright ©2016 CAE Inc.


i•ProView Insight©
4 SP6
1.0 INTRODUCTION..................................................................................................... 1
1.1 INSTALLING AND UNINSTALLING INSIGHT©
|PROVIEW ..................................................... 2
1.1.1 Installing Insight©|ProView ....................................................................................... 2
1.1.2 Uninstalling Insight©|ProView ................................................................................... 3
1.1.3 Adding or Removing Insight©|ProView Components ................................................. 3
1.2 RECOMMENDED SYSTEM REQUIREMENTS ........................................................................ 4
1.3 FLIGHTSCAPE SUPPORT .................................................................................................... 5
2.0 EXPLORING INSIGHT©|PROVIEW .................................................................... 6
2.1 MAIN INTERFACE ............................................................................................................. 6
2.1.1 Main Menu and Toolbar ............................................................................................. 7
2.1.2 Main Window .............................................................................................................. 9
2.1.3 Status Bar .................................................................................................................... 9
2.2 OPENING AN INSIGHT©
|PROVIEW FILE ........................................................................... 10
2.3 EXITING INSIGHT©
|PROVIEW ......................................................................................... 11
2.4 OPTIONS ......................................................................................................................... 12
2.4.1 Graphics .................................................................................................................... 12
2.5 PLAYBACK CONTROL ..................................................................................................... 14
2.5.1 Time Buttons ............................................................................................................. 14
2.5.2 Time Slider ................................................................................................................ 15
2.6 KEYBOARD SHORTCUTS ................................................................................................. 16
2.7 MOUSE ........................................................................................................................... 17

1•ProView Insight©
4, Service Pack 6
1.0 Introduction
Insight©|ProView is an interactive tool to view 3D flight animation. It allows the playback of
animations at full native resolution with smaller file sizes than AVI.
Insight©
|ProView can display unlimited aircraft, high resolution terrain and complex cockpit
instrumentation, providing accurate replay and visualization of data as it was recorded on the
aircraft.
Animation, for the purpose of reconstructing an aircraft’s flight, can be a very powerful tool. It
can be a daunting task to inspect numerous print-outs and plots of data from an aircraft with
hundreds or thousands of parameters, trying to keep the time aspect of the data in perspective.
Insight©
|ProView puts this information together in an easy and interactive form.
Insight©
4, Service Pack 6 ProView•2
1.1 Installing and Uninstalling Insight©|ProView
This product does not require a license.
1.1.1 Installing Insight©|ProView
To install Insight©
|ProView
1. Close all applications currently running.
2. If installing from CD-ROM,
Insert the Insight Installation CD in the CD-ROM drive and click on
Insight©
|ProView.
If the Insight©
|ProView Setup Wizard does not start automatically, click the Start
button on the Windows taskbar, and click Run. Type D:\Setup, where D is the letter
that corresponds to the CD-ROM drive.
If installing from a downloaded .exe file
Double click the .exe file
3. Follow the instructions in the Insight©
|ProView Installer Wizard.
4. Restart the computer if necessary.
Note:
Insight©
|ProView is typically installed under "C:\Program Files (x86)\Flightscape" where C is
the letter that corresponds to the SystemDrive, the drive on which the Windows® operating
system was installed.

3•ProView Insight©
4 SP6
1.1.2 Uninstalling Insight©|ProView
To uninstall Insight©
|ProView
Option 1
Click Start on the Windows taskbar.
Click Control Panel,then Add/Remove Programs (latter menu may be called
(Programs & Features).
Choose Insight©|ProView from the list of programs and click Remove.
Follow the instructions to remove Insight©|ProView from your system.
Option 2
Insert the Insight©
|ProView CD in the CD-ROM drive.
Choose the Remove option from the Insight©
|ProView Setup Wizard.
Follow the instructions in the Insight©
|ProView Setup Wizard.
Note:
All files and folders that have been changed while working with the program will not be
removed from your system's Insight©
|ProView install directory during the uninstall process.
1.1.3 Adding or Removing Insight©
|ProView Components
To modify, repair or remove Insight©
|ProView components
Click Start on the Windows taskbar.
Click Control Panel Add/Remove Programs.
Choose Insight©
|ProView from the list of programs and click Change.
Follow the instructions in the Insight©
|ProView Installer Wizard.
Insight©
4, Service Pack 6 ProView•4
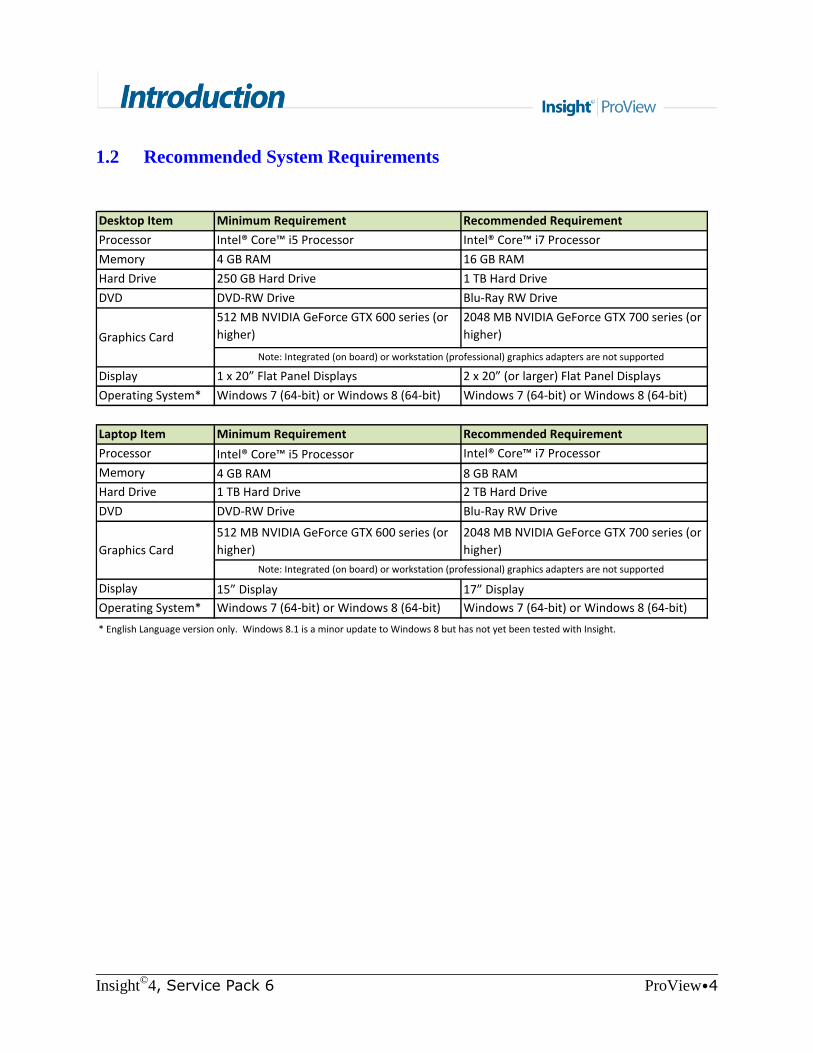
1.2 Recommended System Requirements
Desktop Item Minimum Requirement Recommended Requirement
Processor Intel® Core™ i5 Processor Intel® Core™ i7 Processor
Memory 4 GB RAM 16 GB RAM
Hard Drive 250 GB Hard Drive 1 TB Hard Drive
DVD DVD-RW Drive Blu-Ray RW Drive
512 MB NVIDIA GeForce GTX 600 series (or
higher)
2048 MB NVIDIA GeForce GTX 700 series (or
higher)
Display 1 x 20” Flat Panel Displays 2 x 20” (or larger) Flat Panel Displays
Operating System* Windows 7 (64-bit) or Windows 8 (64-bit) Windows 7 (64-bit) or Windows 8 (64-bit)
Laptop Item Minimum Requirement Recommended Requirement
Processor Intel® Core™ i5 Processor Intel® Core™ i7 Processor
Memory 4 GB RAM 8 GB RAM
Hard Drive 1 TB Hard Drive 2 TB Hard Drive
DVD DVD-RW Drive Blu-Ray RW Drive
512 MB NVIDIA GeForce GTX 600 series (or
higher)
2048 MB NVIDIA GeForce GTX 700 series (or
higher)
Display 15” Display 17” Display
Operating System* Windows 7 (64-bit) or Windows 8 (64-bit) Windows 7 (64-bit) or Windows 8 (64-bit)
Note: Integrated (on board) or workstation (professional) graphics adapters are not supported
Note: Integrated (on board) or workstation (professional) graphics adapters are not supported
Graphics Card
Graphics Card
* English Language version only. Windows 8.1 is a minor update to Windows 8 but has not yet been tested with Insight.

5•ProView Insight©
4 SP6
1.3 Flightscape Support
Flightscape’s customer support program – 360Insight™ – a web-based portal available through
www.flightscape.comwas initially launched with Insight 4, SP1 and continues to be enhanced in
order to improve our products and service offerings for you.
360Insight™ offers customers 24/7 access to support resources, including an online issue
ticketing system, tutorials, software updates, and documentation.
The online ticketing system requires a personal username and password which may be obtained
from Support via an email request to [email protected]. When you log in, your account
will display any outstanding support issues you may have logged. You may submit issues,
observations, and feature requests.
The Flightscape web site ( www.flightscape.com) also provides a solutions database for known
issues which you can search for suggestions on how to apply workarounds.
If you need to contact Flightscape directly:
24 Hour Support: +1 (613) 287-0777
Fax: +1 (613) 225-0098
E-mail: [email protected]

Insight©
4, Service Pack 6 ProView•6
2.0 Exploring Insight©|ProView
The Insight©
|ProView interface consists of three panes:
1. Main Menu and Toolbar
2. Main Window
3. Status Bar
2.1 Main Interface
7•ProView Insight©
4 SP6
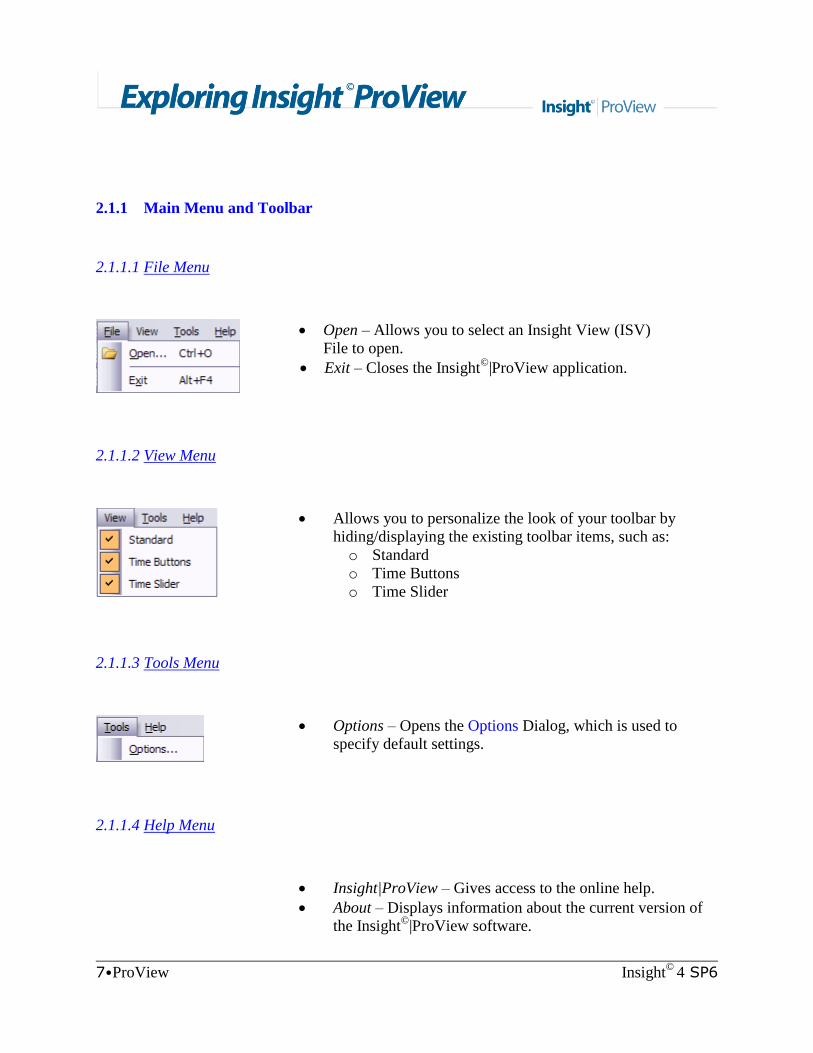
2.1.1 Main Menu and Toolbar
2.1.1.1 File Menu
Open – Allows you to select an Insight View (ISV)
File to open.
Exit – Closes the Insight©
|ProView application.
2.1.1.2 View Menu
Allows you to personalize the look of your toolbar by
hiding/displaying the existing toolbar items, such as:
o Standard
o Time Buttons
o Time Slider
2.1.1.3 Tools Menu
Options – Opens the Options Dialog, which is used to
specify default settings.
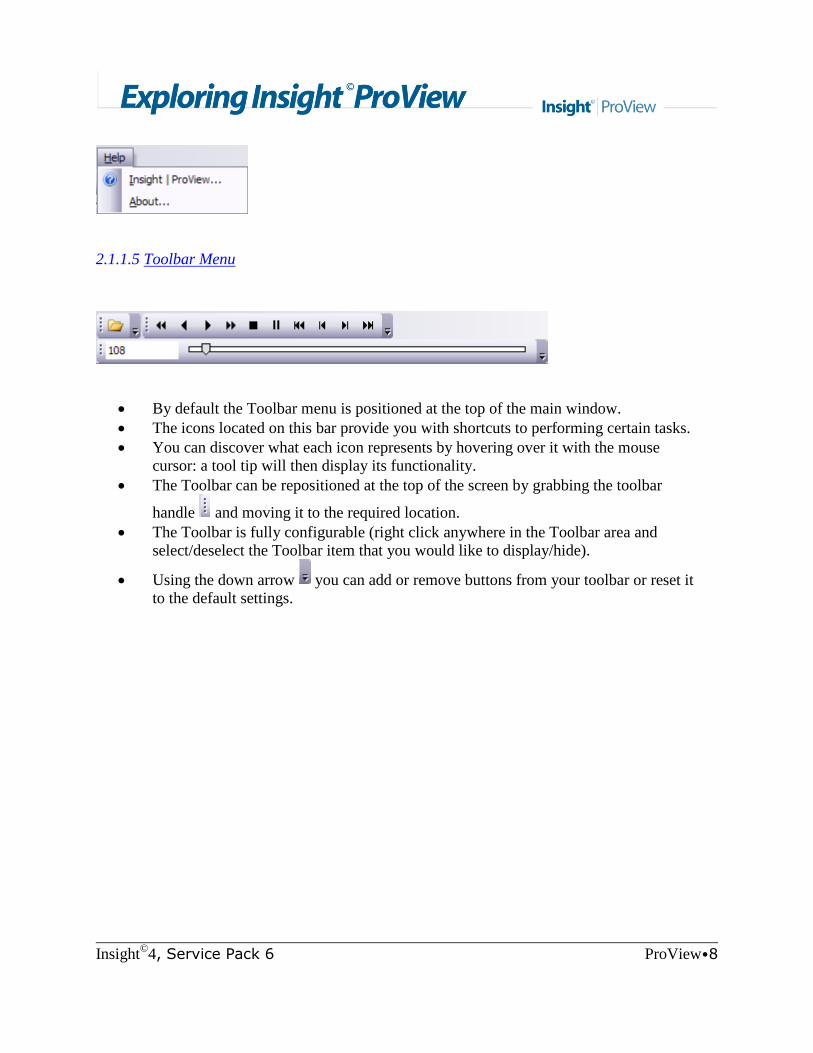
2.1.1.4 Help Menu
Insight|ProView – Gives access to the online help.
About – Displays information about the current version of
the Insight©
|ProView software.
Insight©
4, Service Pack 6 ProView•8
2.1.1.5 Toolbar Menu
By default the Toolbar menu is positioned at the top of the main window.
The icons located on this bar provide you with shortcuts to performing certain tasks.
You can discover what each icon represents by hovering over it with the mouse
cursor: a tool tip will then display its functionality.
The Toolbar can be repositioned at the top of the screen by grabbing the toolbar
handle and moving it to the required location.
The Toolbar is fully configurable (right click anywhere in the Toolbar area and
select/deselect the Toolbar item that you would like to display/hide).
Using the down arrow you can add or remove buttons from your toolbar or reset it
to the default settings.
9•ProView Insight©
4 SP6
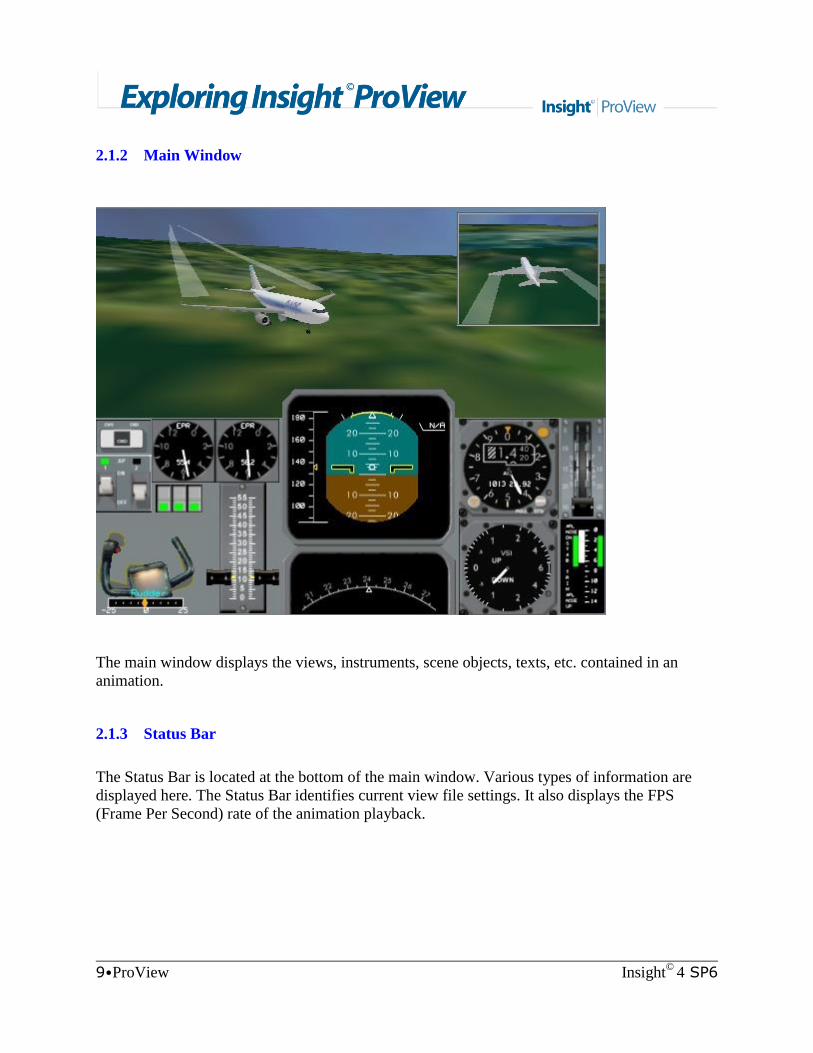
2.1.2 Main Window
The main window displays the views, instruments, scene objects, texts, etc. contained in an
animation.
2.1.3 Status Bar
The Status Bar is located at the bottom of the main window. Various types of information are
displayed here. The Status Bar identifies current view file settings. It also displays the FPS
(Frame Per Second) rate of the animation playback.
Insight©
4, Service Pack 6 ProView•10
2.2 Opening an Insight©|ProView File
To open an Insight©
|ProView file
Choose File-Open.
Choose the drive and folder where the file is stored.
Choose a Filename (with an .isv extension).
Click Open.
To open an Insight©
|ProView file from the history list
Insight©
|ProView retains the four most recently used files under the File menu. To reopen one of
these files, simply click on the required file name from the list.

11•ProView Insight©
4 SP6
2.3 Exiting Insight©|ProView
To exit Insight©
|ProView
Choose File-Exit.
Click the button at the top right corner of the main form.

Insight©
4, Service Pack 6 ProView•12
2.4 Options
2.4.1 Graphics
Smooth Edges: Smoothes jagged edges on models using anti-aliasing.
An alternate implementation of the smoothing algorithm is used for text and lines when the
smoothing option is disabled. Even though 2x and 4x full scene anti-aliasing may be available
when smoothing is enabled, 6x is recommended to reduce text and line quality degradation.
Texture Sharpening: Reduces texture blurring using anisotropic filtering.
Cache Models: Stores model rendering information in memory using display lists.
Fast Render: Optimizes the way model data is sent to the video card using vertex arrays.
When it is enabled, transparency on colour scale surfaces is disabled, and no smoothing is used
unless full scene anti-aliasing is enabled as well.
Insight©
|ProView allows you to modify smoothing options if your graphics card supports multi-
sample full scene anti-aliasing. Most of the relatively new graphics cards support this
functionality.
If turning anti-aliasing on seems to have no effect on the smoothness of polygon edges, then
check the display properties for your graphics card. For the application to be able to modify anti-
aliasing levels, the anti-aliasing setting on the graphics card must be set to Application
Preference.

13•ProView Insight©
4 SP6
Some older graphics cards use super-sampling instead of multi-sampling. For these graphics
cards, the anti-aliasing settings need to be modified in the graphics card's display properties.
Note: If smooth edges and/or texture sharpening levels are set higher than the video card can
support they will be reduced accordingly.
Insight©
4, Service Pack 6 ProView•14
2.5 Playback Control
There are two toolbars (Time Buttons Toolbar and Time Slider Toolbar) available to control the
playback of an animation.
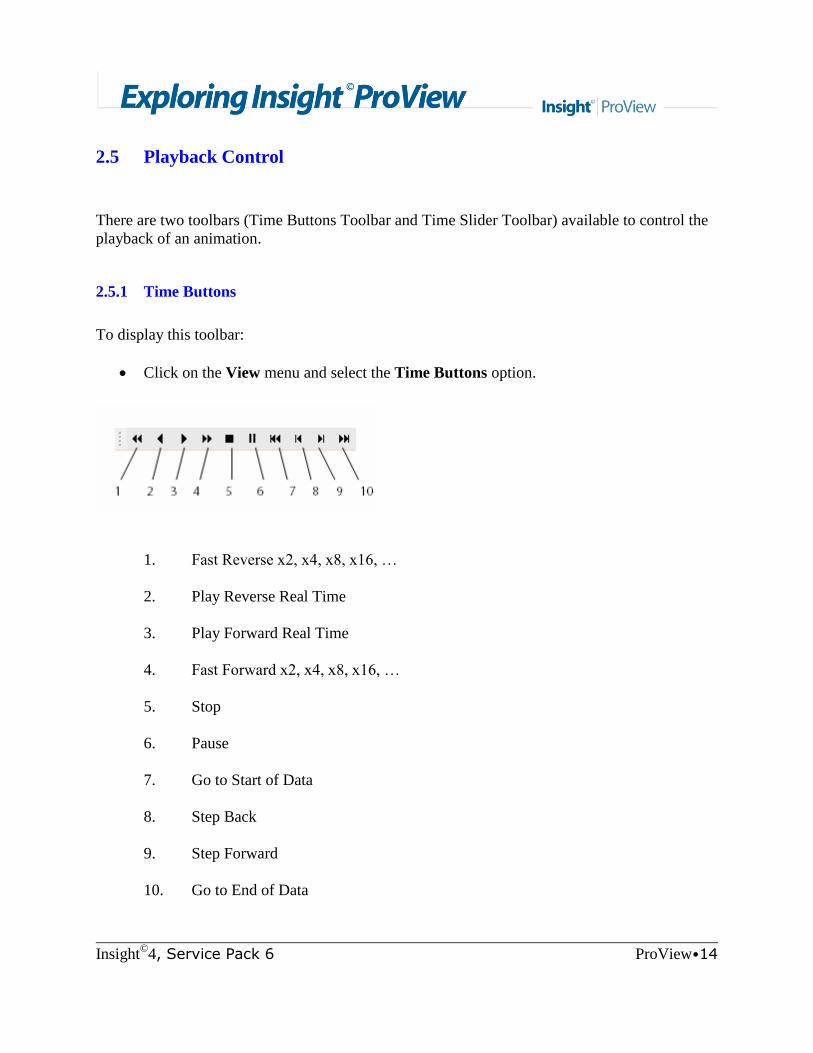
2.5.1 Time Buttons
To display this toolbar:
Click on the View menu and select the Time Buttons option.
1. Fast Reverse x2, x4, x8, x16, …
2. Play Reverse Real Time
3. Play Forward Real Time
4. Fast Forward x2, x4, x8, x16, …
5. Stop
6. Pause
7. Go to Start of Data
8. Step Back
9. Step Forward
10. Go to End of Data
15•ProView Insight©
4 SP6
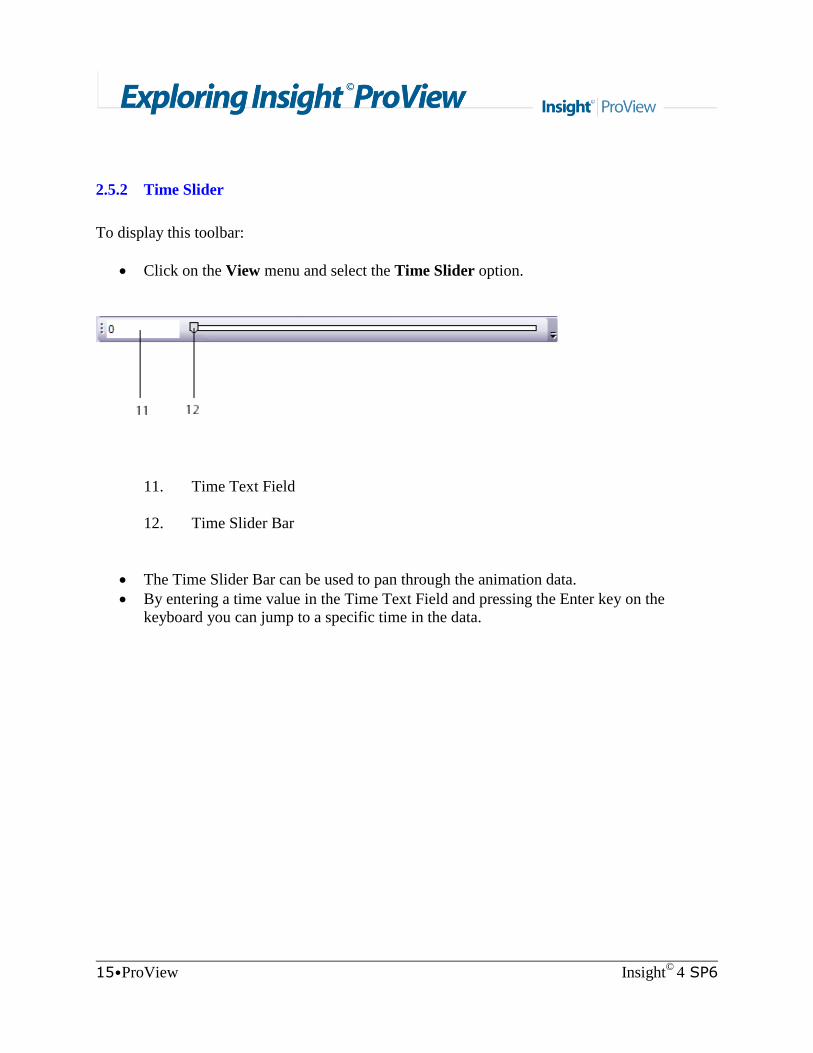
2.5.2 Time Slider
To display this toolbar:
Click on the View menu and select the Time Slider option.
11. Time Text Field
12. Time Slider Bar
The Time Slider Bar can be used to pan through the animation data.
By entering a time value in the Time Text Field and pressing the Enter key on the
keyboard you can jump to a specific time in the data.

Insight©
4, Service Pack 6 ProView•16
2.6 Keyboard Shortcuts
The keyboard can be used to toggle views, change objects, scenes, panels, and so on.
The keyboard functions are outlined here for reference.
F1 Object f Path State
F2 Path s Subtitles On/Off
F3 Scene a Audio On/Off
F4 Panel F Smooth Path
F5 Chase Plane
View
C Smooth Camera
F6 Cockpit View r Start/Stop recording animation
F7 Ground View R Start/Stop recording animation
(no prompt)
F8 Camera Reset e Script Start/Stop
F9 Camera
F11 View
Space Play Start/Stop ,(<) Reverse x1
.(>) Forward x1
/ Single Step
Time Increase Speed Increase
Time Decrease Speed Decrease
Shift Fine Time/Speed

17•ProView Insight©
4 SP6
2.7 Mouse
The mouse can be used for either Camera or Translate Control. These are known as Position
Control Modes. The default mode is Camera Control. Position Control Mode can be set by
pressing “p” on the keyboard. In either mode, a Button 1 click will select the current window,
and a Button 3 Click will enable a popup menu.
Camera Control
Button 1 Click Horizontal/Vertical Position
Button 1 Double
Click
Horizontal/Vertical Tilt
Button 2 Click Radial Position
Button 2 Double
Click
Zoom Angle
Translate Control
Button 1 Click Translate X
Button 1 Double
Click
Translate Y
Button 2 Click Translate Z
Button 2 Double
Click
Translate Time