project lockdown
DESCRIPTION
regarding DBA security.TRANSCRIPT
NOTE: The content provided here is for instructional purposes only and is not validated by Oracle; use it at your own risk! Under no circumstances should you consider it to be part of a consulting or services offering.
Project LockdownA phased approach to securing your database infrastructure
by Arup Nanda
Published May 2006
Imagine that you have just landed a new job as a DBA. On your first day, you hear rumors of an impending security audit driven by Sarbanes-Oxley requirements. You need to get to know your environment as soon as possible, so you know where to look and understand when to take immediate or preventive action.
Or imagine a less serious (yet still alarming) situation in which you have "inherited" database and server that you know have never been hardened, and an audit is on the horizon. You have to do something quickly to secure them, and there is no one to turn to. You're on your own.
Or, perhaps you are a seasoned DBA and have been looking after a database for a while. No audit is impending, but you are concerned about security in general and want to be assertive about it.
Regardless of the specific situation, you can safely make three assumptions:
1. You will have to work quickly. Whether or not an audit is imminent, you cannot afford to leave your environment in an unsecured state for anything but a short period of time (if at all).
2. You will have to work carefully and methodically because you are modifying the production database.
3. You will have to work on this project while performing other routine activities—taking care of the database, fighting fires, handling concerned customers, and so on.
Based on these presumptions, clearly you will need a phased approach to securing your database infrastructure, and one that makes use of the Oracle technology currently at your disposal. In this series, you will receive a blueprint of such a plan. I call it Project Lockdown.
This project is divided into four distinct phases, each of which are achievable and provide measurable improvements within a specific period of time: one day, one week, one month, and one quarter:
Phase 1 (Duration: One Day)
Phase 2 (Duration: One Week)
Phase 3 (Duration: One Month)
Phase 4 (Duration: One Quarter)
(These durations are merely estimates; depending on your installation, you may need more or less than the prescribed amount of time.) At each phase you will learn specifically what you need to do via code samples, examples, and task checklists.
Before beginning this project, I suggest that you read the brief security primer for common terms and concepts.
Because these activities vary widely by Oracle version, only activities relevant to Oracle versions 9.2.0.x (Oracle9i Database Release 2) through 10.2.x (Oracle Database 10g Release 2) will be discussed. Where possible and appropriate, obvious differences across operating systems will be addressed.
Phase 1Duration: One Day
It's Phase 1 of your security and compliance project. Let's see what you can do within 24 hours to lock-down your infrastructure.
Covered in This Installment: · 1.1 Remove Default Passwords · 1.2 Configure Oracle Binary Permissions · 1.3 Secure Other Executables · 1.4 Use umask · 1.5 Limit SYSDBA Login · 1.6 Create a Listener Password · 1.7 Protect the Listener · 1.8 Trim Sweeping Privileges
Project Lockdown by Arup Nanda Page 1 of 66

· 1.9 Change DBSNMP Password
Download Phase 1 Checklist
1.1 Remove Default Passwords
Background During Oracle software installation and database creation, it is common for accounts to be created and then forgotten. These accounts, which often carry default passwords (such as "tiger" for SCOTT), are favored entry points for intruders. You would be shocked to hear how many production database installations I have audited that use "change_on_install" or "oracle" as the password for SYS. Your first line of action should be to immediately identify and remove these default passwords.
Strategy How do you identify the accounts with default passwords? One option is to try to login to the account using the default password—but this is definitely a cumbersome approach, not to mention a time-consuming one.
Fortunately, there is a more elegant option. Take a look at the password column in the view DBA_USERS:
SQL> select username, password 2 from dba_users 3 where username = 'SCOTT';USERNAME PASSWORD------------------------------ ------------------SCOTT F894844C34402B67
The password is hashed and thus undecipherable, but we know that SCOTT's password is "tiger." Therefore, the hash value for "tiger" when userid is "scott" is F894844C34402B67. Now, if SCOTT's password changes, this hash value also changes. You can then confirm in the view DBA_USERS to see if SCOTT's password matches this hash value, which will verify the password as "tiger." Note however that the hash value is not a hash value of the password itself; if another user has the password "tiger", that hash value will be different.
SQL> create user scott2 identified by tiger;
User created.
SQL> select username, password 2 from dba_users 3 where username = 'SCOTT2';
USERNAME PASSWORD------------------------------ --------------------SCOTT2 C44C11D4C34DB67D
Note the different hash value ( C44C11D4C34DB67D), even though the password is identical.
So how can you use this information? It's simple. If you create the default users with default passwords, you will come to know the hash values of those passwords. Then you can build a table of such accounts and the hashed values of the default passwords and compare them against the password hashes stored in the data dictionary.
In January 2006, Oracle made a downloadable utility available for identifying default passwords and their users. This utility is available on MetaLink as described in the document ID 340009.1. As of this writing, the utility checks a handful of default accounts in a manner similar to that described above; by the time you read this, however, its functionality may well have expanded.
Furthermore, security expert Pete Finnigan has done an excellent job collecting all such default accounts created during various Oracle and third-party installations, which he has exposed for public use in his Web site. (Standard disclaimer: Oracle does not validate the content of third-party web sites.) Rather than reinventing the wheel, we will use Pete's work and thank him profusely. I have changed his approach a little bit, however.
First, create the table to store the default accounts and default password.
CREATE TABLE osp_accounts( product VARCHAR2(30), security_level NUMBER(1), username VARCHAR2(30), password VARCHAR2(30), hash_value VARCHAR2(30), commentary VARCHAR2(200))
Then you can load the table using data collected by Pete. (Download the script here.) After the table is loaded, you are ready to search for default passwords. I use a very simple SQL statement to find out the users:
Project Lockdown by Arup Nanda Page 2 of 66

col password format a20col account_status format a20col username format a15select o.username, o.password, d.account_statusfrom dba_users d, osp_accounts owhere o.hash_value = d.password/
USERNAME PASSWORD ACCOUNT_STATUS--------------- -------------------- --------------------CTXSYS CHANGE_ON_INSTALL OPENOLAPSYS MANAGER OPENDIP DIP EXPIRED & LOCKEDDMSYS DMSYS OPENEXFSYS EXFSYS EXPIRED & LOCKEDSYSTEM ORACLE OPENWMSYS WMSYS EXPIRED & LOCKEDXDB CHANGE_ON_INSTALL EXPIRED & LOCKEDOUTLN OUTLN OPENSCOTT TIGER OPENSYS ORACLE OPEN
Here you can see some of the most vulnerable of situations, especially the last line, which says SYS and the password is "ORACLE" (as is that of SYSTEM)! It may not be "change_on_install", but it's just as predictable.
The vulnerability varies across versions. In Oracle Database 10g and later, the database installation has a prompt that asks what the password should be, instead of assuming it to be "change_on_install" or something else. Because the user is forced to make a decision, it is likely that the password will be a non-default one. However, if the user chooses something as predictable as "oracle", then the point is moot. (Perhaps "oracle" was chosen when the database was being built prior to production as a convenience to the DBAs. After it went to production, the password stuck around.)
In versions prior to Oracle Database 10g, the password is not prompted to be entered, and hence it is likely that the default password—e.g. "change_on_install" for SYS and "manager" for SYSTEM—is active. This tool will help you identify such cases.
Also note that the userid SCOTT—the demo account for learning SQL techniques—may be fine for a development database, but not a production one. It is a potential back-door entry for intruders and you should immediately drop it.
Accounts like CTXSYS, DMSYS, and OLAPSYS, are required for Oracle tools. The best strategy is to drop these users if you are not using these options. If you are not sure you are using them, or just want to reserve the opportunity, you can keep these accounts but lock them from connections. To lock an account and expire the password, you would issue:
alter user dmsys account lock expire password;
which will set the account status to EXPIRED & LOCKED. When the user tries to login, the following error will be raised:
ERROR:ORA-28000: the account is lockedWarning: You are no longer connected to ORACLE.
Change the password for all accounts you cannot lock. One such account is DBNSMP, but we'll discuss that later.
Implications The locking of unused accounts shouldn't cause any problems.
Action Plan
1. Identify the unused accounts.
2. Lock them and expire their passwords.
1.2 Configure Oracle Binary Permissions
Background Oracle Database uses several binary files. The most important, of course, is the executable "oracle" in UNIX and Linux flavors and "oracle.exe" in Windows.
Note the permission on these files. For instance, in UNIX, you may see something like this.
# cd $ORACLE_HOME/bin# ls -l oracle-rwsr-s--x 1 oracle oinstall 69344968 Jun 10 14:05 oracle
Project Lockdown by Arup Nanda Page 3 of 66

The permissions (same in all relevant Oracle versions) are the default. Let's see what they mean. (If you are familiar with the UNIX permissions, you can skip this section and go straight to "Two-Task Architecture.")
The first position indicates the type of the file. In UNIX, everything—regular files, directories, devices—are considered files. This is a true file, hence the first position shows "-". Had it been a directory, this position would have shown "d"; in the case of a character special device, it would have shown a "c", and so on.
The second position onward shows the permissions given on the file. The permissions are shown in blocks of three, indicating the status for Read, Write, and Execute respectively. The first three positions show that for the owner, the next three for the permissions given to the group that the file belongs to, and finally, the last three specifies the permissions provided to all others.
Position 1 2 3 4 5 6 7 8 9 10
Value - r w s r - s - - x
Owner Group Other
In each permission set, the permissions are shown as either a value or "-". If a "-" appears in the place, it indicates that the permission is not granted on that privilege. For instance, in the above case, note the sixth position, indicating the Write permission to Group is set to "-", which indicates that the group "dba" (the group the file belongs to) cannot write to the file. If the permission is granted, then the value is set to the corresponding letter. Again, in the above example, the permission for Read by the Group (denoted by position 5) shows "r", indicating that the group "dba" can read this file.
Note the last three positions, which indicate the permissions for the Others (not the owner, oracle, or the users belonging to the group "dba"). From the permissions, you can see that Others can simply execute this file, but not read it or write to it.
Well, that explains "r", "w", and "x"—for Read, Write and eXecute, respectively—but what about the character "s" in the place where there should have been an "x"? This is an interesting twist to the execute privileges. The presence of this "s" on the permission above indicates that this program is setuid enabled. When the program runs, regardless of who runs it, it will run as the user who owns it, i.e. "oracle". This is one way the program can be owned by Oracle software but run by anyone who would connect to it. Thus, the program can operate under the privileges of "oracle" and not the user who runs it—which makes it possible to open database files and so on.
Two-Task Architecture. Remember how the Oracle Database processes operate—by decoupling the user process from the server process. If you don't remember it completely, I highly recommend re-reading the first few chapters of the Oracle Database 10g Concepts Manual. In the interests of time, here is a highly distilled version of the interaction, which merely lays the foundation for understanding the permissions; it's not a substitute for the contents in the manual.
When a user connects to an Oracle database, say with SQL*Plus, Oracle creates a new process to service this user's program. This new process is called the Oracle server process, which differs from the user's process (sqlplus, sqlplus.exe, TOAD.exe, or whatever it else it may be). This server process interacts with the memory structures such as the System Global Area (SGA) and reads from the data files; if the data is not found in the data block buffers in the SGA, and so on. Under no circumstances is the user's process (sqlplus) allowed to directly interact with the Oracle database. As there are two processes (the user process and the server process) working in tandem to get the work done, this is sometimes known as two-task architecture. If a user process does something potentially disruptive, such as violating the memory management in the host machine, the Oracle database itself is not affected and the damage is limited to the user's process.
(Note that the above applies to Oracle connections in a dedicated server environment. In a multi-threaded server environment, this model is a little different in the sense that a single server process can service more than one user process. It's still two-task, but instead of a 1:1 relation between the server and user processes, it's 1:many.)
The server processes are run under the user who owns the Oracle software. Here's an example. Suppose the user logs into the database using SQL*Plus.
$ sqlplus arup/arup
After this, if you search for this process:
$ ps -aef|grep sqlplus
It shows:
oracle 6339 6185 0 13:06 pts/0 00:00:00 sqlplus
This, of course, assumes that no other SQL*Plus sessions have been running on the server.
Note the process id (6339). Now if you search that process ID
$ ps -aef|grep 6339
You will get two processes:
oracle 6339 6185 0 13:06 pts/0 00:00:00 sqlplusoracle 6340 6339 0 13:06 ? 00:00:00 oracleDBA102 (DESCRIPTION=(LOCAL=YES)(ADDRESS=(PROTOCOL=beq)))
Project Lockdown by Arup Nanda Page 4 of 66

The first one you've seen before (the process for the SQL*Plus session). The second one—process ID 6340—is the server process that Oracle creates for the user. Note the Parent Process ID of the process; it's 6339, which is the process ID of the SQL*Plus session.
The process name is "oracleDBA102 (DESCRIPTION=(LOCAL=YES) (ADDRESS=(PROTOCOL=beq)))", which tells you several things. First, the presence of the clause LOCAL=YES indicates that this process started due to another process that is running locally, on the same server as the database itself. It also shows PROTOCOL=beq, which means that the connection was made through a bequeath connection.
You can also find the information about the server process from the dynamic views.
select spidfrom v$session s, v$process pwhere s.sid = (select sid from v$mystat where rownum <2)and p.addr = s.paddr;
The value returned by the above query is the process ID of the server process. This is the only way to get the process ID if the client process is on a different server, such as someone running SQL*Plus on a laptop connecting to the database.
Now, assume the user connects through a slightly modified manner. Instead of connecting directly on the server, she uses the TNS string. Assume your TNS string looks like this (on the server oradba).
DBA102 = (DESCRIPTION = (ADDRESS_LIST = (ADDRESS = (PROTOCOL = TCP)(HOST = oradba)(PORT = 1521)) ) (CONNECT_DATA = (SERVER = DEDICATED) (SERVICE_NAME = DBA102) ) )
Now the user connects (on the same server—oradba) as follows:
sqlplus arup/arup@dba102
Check the process ID from the dynamic views:
SQL> select spid 2 from v$session s, v$process p 3 where s.sid = (select sid from v$mystat where rownum <2) 4 and p.addr = s.paddr 5 /
SPID------------6428
The process ID is 6428. Searching for this on the server:
$ ps -aef|grep sqlplus | grep -v greporacle 6426 6185 0 13:20 pts/0 00:00:00 sqlplus
Now when you search for the server process on the database server:
$ ps -aef|grep 6426 | grep -v greporacle 6426 6185 0 13:20 pts/0 00:00:00 sqlplus
....you don't see the server process. There is no child process of the user process 6426. But you know from the dynamic performance views that the server process is 6428, so what is the parent process of that?
$ ps -aef|grep 6428 | grep -v greporacle 6428 1 0 13:20 ? 00:00:00 oracleDBA102 (LOCAL=NO)
The parent process is "1". But why isn't it 6426?
To understand the answer, you have to understand how different Oracle server processes are created. In the first case, when the user did not use a TNS connect string, the connection was routed directly to the database without going to the listener first. The database created a user process and then handed the control of the process to the process owner, a process known as bequeathing—hence the term bequeath process, which showed up in the process name.
In the second case, when the user was still on the same server but connected through the listener, the listener created the process for the user—which is known as forking. Similarly, if the user process were running on a different machine (such as a laptop), the connection would have to be made to the listener and the listener would have created the process. The process was created by a remote server, hence the process name contains the clause LOCAL=NO. Even if the SQL*Plus session was running on the same server, the fact that it was a non-bequeath connection made it a non-LOCAL one.
Project Lockdown by Arup Nanda Page 5 of 66

(Note: Depending on the OS, you may not see the parent ID of the server process the same way you see the SQL*Plus session in bequeath connections. In some cases, even through the connection is bequeath, the parent ID will show as "1". Therefore, don't rely on the parent ID to determine what type of server process it is; use the process name instead.)
Now that you understand the two-task model; let's see if you get the salient point in the whole discussion. The database creates and runs the server process, not the user who started the client process such as SQL*Plus. The server process uses the executable "oracle" or "oracle.exe", so only the Oracle software owner, named "orasoft" (named so as to avoid confusion with the term "oracle", which is name of the executable), should have privileges to execute them, no one else. So why do you need permissions for the others?
The short answer is: You don't. You can remove the unnecessary permissions by issuing:
$ chmod 4700 $ORACLE_HOME/bin/oracle
After executing the command, the permissions will look like this.
-rws------ 1 orasoft oinstall 248754168 Oct 8 07:11 oracle
Now we can move on to strategy—via the SUID bit. In this case the SUID bit is set to ON (indicated by rws permissions for the owner).
Strategy Since you don't need anyone other than the Oracle software owner ("orasoft", in this case) to run the Oracle executable, you should remove the SUID bit from the executable and make it accessible by only the owner, no one else.
$ chmod 0700 $ORACLE_HOME/bin/oracle
The permissions now look like:
-rwx------ 1 orasoft oinstall 248754168 Oct 8 07:11 oracle
Implications This is a major change and it's important that you understand its impact. When a user (not the Oracle Software owner) on the server tries to connect a local connection, the executable "oracle" is run on his behalf as if the user "orasoft" is running it. This is important; because the server process will open the data files (owned by "orasoft"), it must either run as "orasoft" or the user must have permissions to open the data files.
For example, suppose the UNIX user "ananda" logs in to the same server the database is on and connects locally:
$ sqlplus arup/arup
The user will immediately get an error.
ERROR:ORA-12546: TNS:permission denied
Enter user-name:
The reason why is very simple: You removed the SUID permission on the file "oracle". When the user executes a local connection, he essentially tries to run the executable "oracle", but since the SUID is not set, it's not tried as user "orasoft" but rather as "ananda". As user ananda does not have permission to run this file, it will not be executed—hence the ORA-12546 error.
So, how can ananda connect to the database? There are two options. One is to make all the user processes run on a different server than the database server itself—thus there are no bequeath connections to the database; only non-LOCAL ones. Because the non-LOCAL connections go through the listener process and the listener spawns a server process for them, the server process is owned by "orasoft" (the Oracle software owner) and not the user who is running the client process. There is no permission to issue.
Alternatively, if you must run some user processes on the database server itself, you can connect through the listener with
$ sqlplus arup/arup@dba102
which has the same effect as a user connecting from outside the server. Now only the user who owns the Oracle software (in this case—orasoft) can connect to the database through a bequeath connection.
DBAs with individual Operating System IDs will not be able to shutdown or startup the database using the command connect / as sysdba, even if they belong to group dba. They can do so with
$ sqlplus /nologSQL> connect sys/Password_of_SYS@dba102 as sysdba
Yes, this approach makes use of SYS password; but that's a better practice anyway compared to / as sysdba. A much better practice yet is to create Oracle UserIDs for individual DBAs:
Project Lockdown by Arup Nanda Page 6 of 66

connect ANANDA/Password_of_ANANDA@dba102 as sysdba
A favorite hacker trick is to get into the server using any account and then try to force into the database. (A typical "loose door" is the user "nobody.") Even if the hacker does not get into the database, he can create a denial of service attack by buffer overflow of the oracle executable. If the ability to execute the file is removed, then the effectiveness of the attack is severely limited. At the same, time, as you saw, you have not removed any functionality from legitimate users. Most users connect to the database using the listener anyway and they will not be affected much.
Action Plan Preparation See if any other user on the system makes a bequeath connection. You can do this by:
a. Simply asking
b. Searching for processes on the server and see if you see something as obvious as SQL*Plus
c. Checking the column MACHINE of V$SESSION
select programfrom v$sessionwhere machine = '<machine_name>';
If something comes up, you can identify the exact program running by turning on auditing (which you will learn about in the subsequent phases) and capturing any program coming from the server.
Action IF no programs connect from the server, THEN
Change the permissions of the oracle executable chmod 0700 $ORACLE_HOME/oracle
ELSIF some program connects from the server Change the connection from UserID/Password to UserID/Password@Connect_StringEND IF IF you frequently connect from shell scripts as sqlplus / as sysdba THEN Change it to use DBAUser/Password@Connect_StringEND IF
1.3 Secure Other Executables
Background Take a look at the other executables in the $ORACLE_HOME/bin directory; some may look familiar, such as sqlplus or lsnrctl (the utility to start Listener); others may not.
Some of these files—such as tnslsnr, the utility that the Listener process runs, or dbsnmp, which was used in Oracle Intelligent Agent—are not directly touched by the end user. To properly secure them, you must understand what they do and take appropriate action.
Recall that if the SUID bit is set for a file, then regardless of who runs the file it runs under the privileges of the owner, not the executor. You also learned that setting the SUID can be dangerous and should be discouraged.
There are several other files that have the SUID set to on. Let's find them.
$ cd $ORACLE_HOME$ find . -type f \( -perm -2000 -o -perm -4000 \) -exec ls -l {} \;
In Oracle Database10g Release 1 and later, the above should return only the following executables:
-rwsr-s--x 1 orasoft dba 93300507 Jul 22 11:20 ./bin/oracleO-r-sr-s--- 1 root dba 0 Jul 1 23:15 ./bin/oradism-rwsr-s--x 1 orasoft dba 94492 Jul 22 11:22 ./bin/emtgtctl2-rwsr-s--- 1 root dba 18944 Jul 22 11:22 ./bin/nmb-rwsr-s--- 1 root dba 20110 Jul 22 11:22 ./bin/nmo-r-sr-sr-x 1 nobody nobody 58302 Jul 22 11:23 ./bin/extjob
Project Lockdown by Arup Nanda Page 7 of 66

Let's see what these files are:
Program Description
./bin/oracleO This file is a copy of the executable "oracle". When you recompile the oracle executable using the relink command, the old copy is saved as oracle0. This is a potential security hazard; most DBAs ignore it and it can be an avenue for hackers. Therefore you should take action to remove the permissions. The best option is to have no permissions for it:
$ chmod 0000 oracleO
Now, if you see the permissions:
$ ls -l oracleO ---------- 1 orasoft oinstall 248823320 Sep 15 13:27 oracleO
./bin/oradism Used for Dynamic Intimate Shared Memory. May be in use on your platform. May not be present in all cases. If present, leave as is.
./bin/emtgtctl2 Used for Enterprise Manager Agent. There is no need for it to be set with SUID. The justification is same as the "oracle" executable. Remove the permissions.
$ chmod 0700 emtgtctl2
./bin/nmb Used for Oracle 10g Grid Control agent to collect statistics on the target server. Leave it as is.
./bin/nmo Used for Oracle 10g Grid Control agent to collect statistics on the target server. Leave it as is.
./bin/extjob This is the executable for the EXTJOB (External Jobs, which allow you to execute OS-based programs from within Enterprise Manager). This is something you should be careful about. Do you use external jobs a lot? If not, then you should not even have this executable. In such a case, you can leave it in the directory but change the permissions and the ownership. The owner can be the Oracle software owner (orasoft, in our case) and the permissions should be rwx------.
$ chown orasoft:oinstall extjob $ chmod 0700 extjob
There may be another program present, extjobO, which was a previous compilation of the same program. Change the permissions of that too.
$ chown orasoft:oinstall extjobO $ chmod 0000 extjobO
In Oracle9i Database Release 2, you will find a different file, ./bin/dbsnmp, which is the Oracle Intelligent Agent executable file. The permissions are set as such:
-rwsr-s--- 1 root dba 2986836 Jan 26 2005 dbsnmp
The problem with this file is that it needs root privileges to work properly, hence the SUID bit must be set to on. However, as this file is owned by root, hackers typically exploit it to gain access as root. The best advice is to eliminate it, or make it owned by the Oracle software owner and setting the permissions to 700. You will lose some functionality, but it's worth it to eliminate the risk.
The other executable to consider is tnslsnr, which is the Oracle Net Listener. There are two executables:
tnslsnr - the actual listener executable lsnrctl - the utility that is used to manage the listener, such as starting, stopping, etc.
If you look at the permissions:
$ ls -l *lsnr*-rwxr-x--x 1 orasoft oinstall 214720 Oct 25 01:23 lsnrctl-rwxr-xr-x 1 orasoft oinstall 214720 Oct 1 18:50 lsnrctl0-rwxr-x--x 1 orasoft oinstall 1118816 Oct 25 01:23 tnslsnr-rwxr-xr-x 1 orasoft oinstall 1118816 Oct 1 18:50 tnslsnr0
The files have execute privileges for all. Like the executable oracleO, when a new file tnslsnr is created by relinking the Oracle software, the existing file tnslsnr is renamed to tnslsnr0. This is done because if the process needs to be rolled back, the old executable can be copied over the new one. Because it's the copy of the old exdcutable, the file tnslsnr0 may contain the same functionality as the original tnslsnr. The same goes for lsnrctl0.
Project Lockdown by Arup Nanda Page 8 of 66
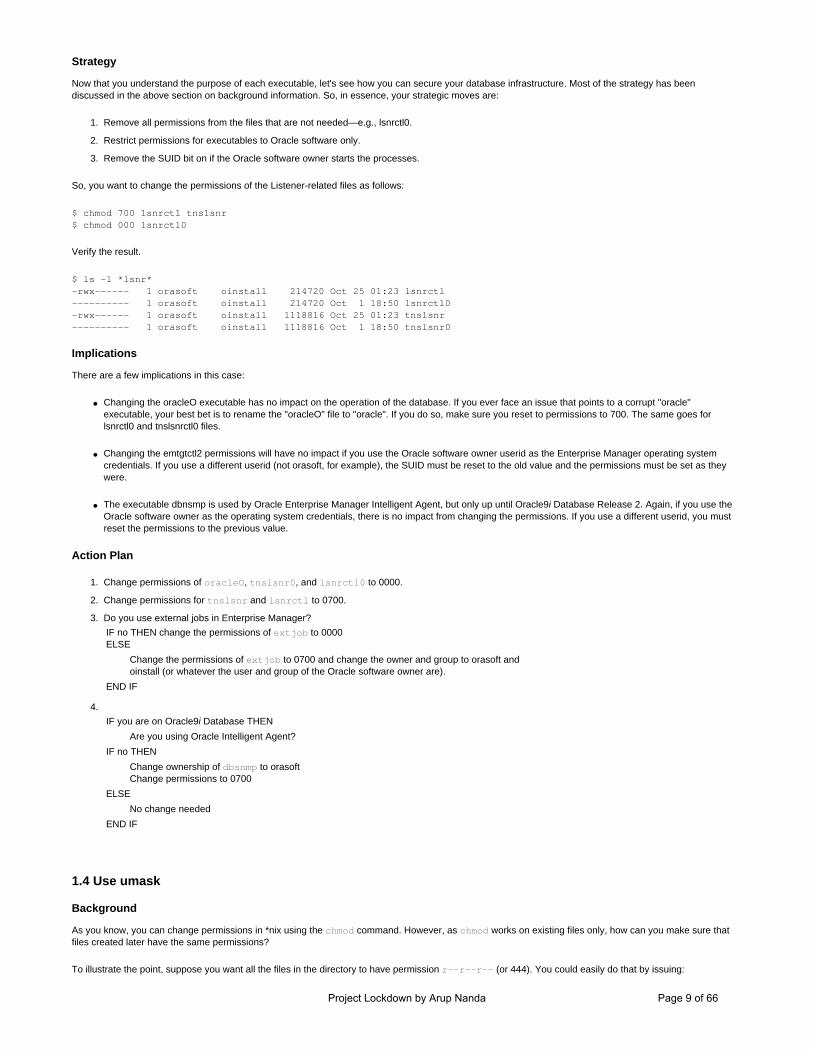
Strategy Now that you understand the purpose of each executable, let's see how you can secure your database infrastructure. Most of the strategy has been discussed in the above section on background information. So, in essence, your strategic moves are:
1. Remove all permissions from the files that are not needed—e.g., lsnrctl0.
2. Restrict permissions for executables to Oracle software only.
3. Remove the SUID bit on if the Oracle software owner starts the processes.
So, you want to change the permissions of the Listener-related files as follows:
$ chmod 700 lsnrctl tnslsnr$ chmod 000 lsnrctl0
Verify the result.
$ ls -l *lsnr*-rwx------ 1 orasoft oinstall 214720 Oct 25 01:23 lsnrctl---------- 1 orasoft oinstall 214720 Oct 1 18:50 lsnrctl0-rwx------ 1 orasoft oinstall 1118816 Oct 25 01:23 tnslsnr---------- 1 orasoft oinstall 1118816 Oct 1 18:50 tnslsnr0
Implications There are a few implications in this case:
● Changing the oracleO executable has no impact on the operation of the database. If you ever face an issue that points to a corrupt "oracle" executable, your best bet is to rename the "oracleO" file to "oracle". If you do so, make sure you reset to permissions to 700. The same goes for lsnrctl0 and tnslsnrctl0 files.
● Changing the emtgtctl2 permissions will have no impact if you use the Oracle software owner userid as the Enterprise Manager operating system credentials. If you use a different userid (not orasoft, for example), the SUID must be reset to the old value and the permissions must be set as they were.
● The executable dbnsmp is used by Oracle Enterprise Manager Intelligent Agent, but only up until Oracle9i Database Release 2. Again, if you use the Oracle software owner as the operating system credentials, there is no impact from changing the permissions. If you use a different userid, you must reset the permissions to the previous value.
Action Plan
1. Change permissions of oracleO, tnslsnr0, and lsnrctl0 to 0000.
2. Change permissions for tnslsnr and lsnrctl to 0700.
3. Do you use external jobs in Enterprise Manager? IF no THEN change the permissions of extjob to 0000 ELSE
Change the permissions of extjob to 0700 and change the owner and group to orasoft and oinstall (or whatever the user and group of the Oracle software owner are).
END IF
4. IF you are on Oracle9i Database THEN Are you using Oracle Intelligent Agent?IF no THEN
Change ownership of dbsnmp to orasoft Change permissions to 0700
ELSE No change neededEND IF
1.4 Use umask
Background As you know, you can change permissions in *nix using the chmod command. However, as chmod works on existing files only, how can you make sure that files created later have the same permissions?
To illustrate the point, suppose you want all the files in the directory to have permission r--r--r-- (or 444). You could easily do that by issuing:
Project Lockdown by Arup Nanda Page 9 of 66

$ chmod 444 *
Now create a simple file on the directory without contents, and check its permissions.
$ touch a_file.txt$ ls -l a_file.txt-rw-r--r-- 1 orasoft dba 0 Oct 21 13:44 a_file.txt
The permissions are set to Read+Write for owner, Read for group, and Read for others (or 644), not 444 as you wanted. Why not?
The exact permissions set on a newly created file is dictated by a special parameter called umask. The umask is a set of values that is subtracted from the all-permissions to arrive at the permission value of the new file. For example, if you have umask set to 777, it's subtracted from the overall permission value 777, resulting in 000—no permissions on the new file. Let's see an example:
$ umask 777$ touch b_file.txt$ ls -l ?_file.txt-rw-r--r-- 1 oracrmp dba 0 Oct 21 13:44 a_file.txt---------- 1 oracrmp dba 0 Oct 21 13:53 b_file.txt
Note the permission on the file b_file.txt; it's 000, or ---------. Also note that the file previously created—a_file.txt—is still set to its original permissions. The setting of umask—777—resulted in the permissions on the new file.
The umask is a powerful and effective way to set permissions for the different files Oracle will create.
Strategy The overall umask of the Oracle software owner should be 022, which results in the files as Read+Write by owner and Read by all others. You can place this in the login profile file of the user so that it takes effect at all times.
There are many different types of files used by Oracle—data files, redo log files, trace files, and so on. Datafiles may be known beforehand and you can easily change their permissions, but tracefiles are generated at runtime. Thus, you should use umask to ensure the files are not exposed to any external users—trace files contain a variety of confidential information that can be exploited by hackers. For instance, someone could theoretically steal data files by copying them, mount them on a separate server, and bring the database up to rifle through its contents.
Set the umask for the directories as shown below:
Directory Description umask
Directory specified by the initialization parameter background_dump_dest
Some trace files are generated here as well as the database alert log. Permissions should be rw------- (Read+Write by Oracle software owner only).
0177
Directory specified by the initialization parameter user_dump_dest Trace files are generated here. Permissions should be the same as above.
0177
$ORACLE_HOME/rdbms/log Some database log files are generated here. Permissions should be the same as above.
0177
$ORACLE_HOME/rdbms/audit Audit trails of database audit are stored here by default, unless you have set the audit_file_dest initialization parameter. Permissions should be the same as above. Even if you have DB audit trail, some common events such as SYSDBA connections and database startup/shutdown are always audited and placed here.
0177
Directory specified by the initialization parameter audit_file_dest Audit trails of database audit are stored here by default, unless you have set the audit_file_dest initialization parameter. Permissions should be the same as above.
0177
Implications Setting the umask in this manner might prevent some developers from accessing the session trace files, which are generated in the user_dump_dest directory and fed to tkprof to be formatted. Therefore, you may want to relax the rules on that directory only.
Action Plan
● Change umask on background_dump_dest to 0177.
● Change umask on $ORACLE_HOME/rdbms/log to 0177.
Project Lockdown by Arup Nanda Page 10 of 66

● Change umask on $ORACLE_HOME/rdbms/audit to 0177.
● Change umask on audit_file_dest to 0177.
● (Optional) Change umask on user_dump_dest to 0177.
1.5 Limit SYSDBA Login
Background You might have noticed that any *nix user who is the member of the group "dba" can login as the SYSDBA user by issuing:
sqlplus / as sysdba
This is usually taken as a matter of convenience since you don't need to remember or enter the password of the user SYS. However, this also creates a vulnerability: Any user who can login as a dba group member can log into the database as SYS. The fortified password of SYS is not of much use then. If you have a strong SYS account, you should perhaps protect that as well as the dba group users so that the password of SYS is necessary to login as SYS. This approach does not eliminate the risk of infiltration but does reduce it considerably.
Strategy This process is controlled by the parameter SQLNET.AUTHENTICATION_SERVICES in the file SQLNET.ORA. If this parameter is set to NONE, then the auto login of the SYSDBA role is disabled. To disable it, place the following line in SQLNET.ORA file located in $ORACLE_HOME/network/admin directory.
SQLNET.AUTHENTICATION_SERVICES=(NONE)
From that point on, if a *nix user belonging to the group dba wants to connect using the familiar login:
$ sqlplus / as sysdba
They will get:
ERROR:ORA-01031: insufficient privileges
To connect, you must provide the SYS password:
$ sqlplus /nologSQL> connect sys/oracle as sysdba
This protects against someone who still does not know the SYS password from gaining access to the dba accounts.
Implications As shown above, the biggest implication is the use of SYS passwords. You may need to make some changes to the scripts that connect to SYS.
If you ever lose the SYS password, don't worry. You can comment the line in the file SQLNET.ORA and then connect the old-fashioned way— / as sysdba.
Action Plan IF you use SYS connections in scripts THEN
Change / as sysdba to sys/<SysPassword> as sysdba Place SQLNET.AUTHENTICATION_SERVICES=(NONE) in the file SQLNET.ORA
ELSE No change neededEND IF
1.6 Create a Listener Password
Background One of the most popular hacker tricks is to inject a large amount of text into the listener, thereby causing it to abort. The database could be still up, but since the listener is down, no new connections can be established—which in effect is a "denial of service" attack.
To do that, the hacker might attempt to change the attributes of the listener. A popular tactic here is to list the various services handled by the listener via the services command. Note how much information is displayed—possibly enough for the hacker to gain illegitimate access:
LSNRCTL> set displaymode verboseLSNRCTL> services
Project Lockdown by Arup Nanda Page 11 of 66

Connecting to (DESCRIPTION=(ADDRESS=(PROTOCOL=TCP)(HOST=prolin1.proligence.com)(PORT=1521)(IP=FIRST)))Services Summary...Service "PROPRD" has 1 instance(s). Instance "PROPRD1", status READY, has 1 handler(s) for thisservice... Handler(s): "DEDICATED" established:0 refused:0 state:ready LOCAL SERVER(ADDRESS=(PROTOCOL=BEQ)(PROGRAM=/u01/oracle/products/10.1/db1/bin/oracle)(ARGV0=oraclePROPRD11)(ARGS='(LOCAL=NO)')(ENVS='_=/u01/oracle/products/10.1/db1/bin/racgmain,_USR_ORA_CONNECT_STR=/ assysdba,_CAA_CHECK_INTERVAL=600,SHLIB_PATH=/u01/oracle/products/10.1/db1/lib32:/u01/oracrs/10gr1crs/lib32:/opt/nmapi/nmapi2/lib/hpux32:,_CAA_ACTIVE_PLACEMENT=0,PATH=,_USR_ORA_ALERT_NAME=,_USR_ORA_IF=,_CAA_OPTIONAL_RESOURCES=,_USR_ORA_START_TIMEOUT=0,ORACLE_BASE=/u01/oracle/products/10.1/db2,_USR_ORA_DISCONNECT=false,_CAA_SCRIPT_TIMEOUT=600,_CAA_UPTIME_THRESHOLD=7d,_USR_ORA_STOP_TIMEOUT=0,_CAA_FAILOVER_DELAY=0,_USR_ORA_PRECONNECT=none,_USR_ORA_FLAGS=,_CAA_TYPE=application,_USR_ORA_INST_NOT_SHUTDOWN=,_CAA_REASON=boot,INIT_STATE=3,_USR_ORA_OPEN_MODE=,_CAA_STATE=:OFFLINE,,_CAA_RESTART_ATTEMPTS=5,_CAA_ACTION_SCRIPT=/u01/oracle/products/10.1/db1/bin/racgwrap,_CAA_DESCRIPTION=CRSapplication forInstance,_CAA_HOSTING_MEMBERS=prolin1,ORA_RACG_EXEC_ENV=LD_LIBRARY_PATH=/u01/oracle/products/10.1/db1/lib:/u01/oracrs/10gr1crs/lib:/opt/nmapi/nmapi2/lib/hpux64:/usr/lib:,_CAA_CLIENT_LOCALE=,_CAA_NAME=ora.PROPRD1.PROPRD11.inst,ORA_CRS_HOME=/u01/oracrs/10gr1crs,_CAA_AUTO_START=1,_CAA_TARGET=:ONLINE,,_USR_ORA_PFILE=,_USR_ORA_OPI=false,_USR_ORA_CHECK_TIMEOUT=0,_CAA_PLACEMENT=restricted,_USR_ORA_LANG=,LD_LIBRARY_PATH=/u01/oracle/products/10.1/db1/lib:/u01/oracrs/10gr1crs/lib:/opt/nmapi/nmapi2/lib/hpux64:/usr/lib:,_CAA_REQUIRED_RESOURCES=ora.prolin1.vip,_CAA_FAILURE_THRESHOLD=0,ORACLE_HOME=/u01/oracle/products/10.1/db1,_USR_ORA_SRV=,PWD=/u01/oracrs/10gr1crs/bin,_USR_ORA_VIP=,_USR_ORA_STOP_MODE=immediate,_CAA_FAILURE_INTERVAL=0,_USR_ORA_NETMASK=,_USR_ORA_DEBUG=0,ORACLE_SID=PROPRD1,ORA_NET2_DESC=9,12,ORACLE_SPAWNED_PROCESS=1')(ENV_POLICY=NONE))
Another hacker trick is to shut down the listener. New connections will be refused, again effectively creating a denial of service attack.
In addition, the listener can also be remotely administered. Using this technique, the hacker can remotely stop a listener by attacking another vulnerable machine.
How do you protect yourself from these threats?
Strategy The best option is to remove all permissions from the executable files tnslsnr and lsnrctl , except those for the owner. (This method has been described in the previous section.) This way no one, excepting the Oracle software owner, can start or stop the listener. The executables look like this:
-rwx------ 1 orasoft oinstall 214720 Oct 25 01:23 lsnrctl-rwx------ 1 orasoft oinstall 1118816 Oct 25 01:23 tnslsnr
In some cases you may want to grant the authority to start and stop the listener. In that case you have to turn on the permissions.
$ chmod 0711 lsnrctl
However, in such a case, you should prevent unauthorized use by enforcing a password. When you set a password, all commands—except some benign ones like HELP—are disabled.
Setting the password works the same way in all versions; but the enforcement mechanism varies:
● In Oracle9i Database Release 2 and earlier, all users need a password.
● In Oracle Database 10g Release 1 and later, the OS user who owns the database software does not need a password. All others need a password.
Here's how to set the password:
$ lsnrctl
LSNRCTL> change_passwordOld password: <OldPassword> Not displayedNew password: <NewPassword> Not displayedReenter new password: <NewPassword> Not displayedConnecting to (DESCRIPTION=(ADDRESS=(PROTOCOL=TCP)(HOST=prolin1)(PORT=1521)(IP=FIRST)))Password changed for LISTENER
Project Lockdown by Arup Nanda Page 12 of 66

The command completed successfully
If you are setting the password for the first time, you can press ENTER when asked for the "Old Password." After making the change, save it on the parameter file:
LSNRCTL> save_config
This command encrypts the password and places it in the listener parameter file. You can examine it later:
#----ADDED BY TNSLSNR 24-OCT-2005 17:02:28---PASSWORDS_LISTENER_ODSSDB01 = 75CD180DE6C75466#--------------------------------------------
When you decide to use a command, you have to supply the right password. (In Oracle Database 10g and later, the OS user that owns the software does not need a password.)
LSNRCTL> servicesConnecting to (ADDRESS=(PROTOCOL=tcp)(HOST=)(PORT=1521))TNS-01169: The listener has not recognized the password
To pass the correct password:
LSNRCTL> set password mypasswordThe command completed successfullyLSNRCTL> statusConnecting to (ADDRESS=(PROTOCOL=tcp)(HOST=)(PORT=1521))STATUS of the LISTENER------------------------Alias LISTENER...
If you pass the wrong password, you will receive the error
TNS-01169: The listener has not recognized the password.
If you do not pass the password and try executing a powerful command, you will receive the error
TNS-01190: The user is not authorized to execute the requested listener command
To confirm the password is in effect, view the setting in the STATUS display of the listener. To do so, issue:
$ lsnrctl status
The output varies between versions. For Oracle9i Database, here is a partial output:
STATUS of the LISTENER------------------------Alias LISTENERVersion TNSLSNR for Solaris: Version 9.2.0.6.0 - ProductionStart Date 25-OCT-2005 10:26:47Uptime 0 days 13 hr. 8 min. 36 secTrace Level offSecurity ON
Note the last line (Security ON), which indicates the password is set.
In Oracle Database 10g, this process is a little different. Remember, in that release, the listener is set to be executable by the Oracle software owner only without a password. If you have set a password, then other users can execute it after supplying the password. Here is the status display:
STATUS of the LISTENER------------------------Alias LISTENER_ODSPDB02Version TNSLSNR for HPUX: Version 10.1.0.4.0 - ProductionStart Date 16-OCT-2005 05:58:35Uptime 9 days 17 hr. 44 min. 41 secTrace Level offSecurity ON: Local OS Authentication
Note the last line, ON: Local OS Authentication, which indicates that the password has not been set. When the password is set, the display will show that line as:
Security ON: Password or Local OS Authentication
Project Lockdown by Arup Nanda Page 13 of 66

Note the additional clause above—Password— which indicates a password has been set.
Implications In Oracle Database 10g and later, there are no implications; OS authentication is used to authenticate the user and there is no need to provide a password to start or stop the listener. In Oracle9i and earlier, you have to provide a password, and hence the script requires a password.
Action Plan IF Oracle Database 10g or later THEN Remove the permissions from all except the owner ELSE
Remove the permissions from all except the owner Set a password for the listener operations
END IF
1.7 Protect the Listener
Background Creating a buffer overflow—crashing the listener by sending a large string to be executed—is a common intruder tactic. Another popular one is to see the various components using SET DISPLAYMODE VERBOSE from the lsnrctl utility. In this case the hacker may manipulate the settings by running lsnrctl on a vulnerable machine to administer the listener on the target server. Here's an example:
LSNRCTL> set trc_level supportConnecting to (DESCRIPTION=(ADDRESS=(PROTOCOL=TCP)(HOST=prolin1)(PORT=1521)))LISTENER parameter "trc_level" set to supportThe command completed successfullyLSNRCTL> set trc_directory /tmpConnecting to (DESCRIPTION=(ADDRESS=(PROTOCOL=TCP)(HOST=prolin1)(PORT=1521)))LISTENER parameter "trc_directory" set to /tmpThe command completed successfully
As the trace level is SUPPORT , the listener generates a lot of information that you may not want the hacker to know. Also, because the trace files are written to the directory /tmp, he can easily see them as well. All this can be learned without even being on the server.
Strategy To protect the listener, the best option is to set a password. In addition, you can employ another approach: restricting the ability to set various parameters of the listeners using the lsnrctl utility. In that case, the only way to change parameters is to set them in the listener configuration file and then reload it. To set these restrictions, you can place the following line in the listener.ora file:
ADMIN_RESTRICTIONS_LISTENER = ON
and then restart the listener. Now, you can no longer use the SET command in the lsnrctl prompt to change a value. For example:
LSNRCTL> set trc_directory /hacker_dirConnecting to (ADDRESS=(PROTOCOL=IPC)(KEY=PROPRD1))TNS-12508: TNS:listener could not resolve the COMMAND given
Note the TNS-12508. From now on, to change a value, you must do so in listener.ora and then use the reload command.
LSNRCTL> reload
This is true for all Oracle versions discussed in this series.
Even if you use a password to protect the listener, you should still use this technique to further restrict the hacker's ability to administer the listener. This is particularly true in Oracle Database 10g, where a listener password is not required for the Oracle software owner.
Implications The implications are negligible. Few users edit parameters online anyway; rather, they edit listener.ora and then reload the listener. Thus, this change will not affect them at all.
Note however that it will no longer be possible to use remote listener control to administer a listener on a different server. Instead, you have to log onto the server to make the change in listener.ora and then reload the listener, which is best practice anyway.
Action Plan
1. Place the parameter ADMIN_RESTRICTIONS_LISTENER = ON in the file listener.ora.
Project Lockdown by Arup Nanda Page 14 of 66

2. Reload the listener by issuing lsnrctl reload.
1.8 Trim Sweeping Privileges
Background A typical user needs privileges that are important to perform his or her job—nothing more nor less. As this policy may prove unrealistic, however, you may need to adopt a middle-of-the-road approach: removing the most powerful privileges the users do not need.
One example of a powerful privilege is CREATE ANY TABLE, which lets the user create a table in any schema, not just its own. Rarely do users need this privilege; you can safely revoke it. On the other hand, a privilege like QUERY REWRITE, which allows the users' sessions to rewrite a query to take advantage of a function-based index or materialized view, is relatively innocuous.
Strategy First, identify all the privileges you consider innocuous (CREATE TYPE, CREATE SESSION, and so on). Here I have included UNLIMITED TABLESPACE as a non-sweeping privilege, but you may disagree.
set pages 50000break on privilege skip 1
select privilege, grantee, admin_optionfrom dba_sys_privswhere privilege not in( /* list any other privilege here you don't find "sweeping" */ 'ALTER SESSION', 'QUERY REWRITE', 'CREATE DIMENSION', 'CREATE INDEXTYPE', 'CREATE LIBRARY', 'CREATE OPERATOR', 'CREATE PROCEDURE', 'CREATE SEQUENCE', 'CREATE SESSION', 'CREATE SNAPSHOT', 'CREATE SYNONYM', 'CREATE TABLE', 'CREATE TRIGGER', 'CREATE TYPE', 'CREATE USER', 'CREATE VIEW', 'UNLIMITED TABLESPACE')and grantee not in ('SYS','SYSTEM','WKSYS','XDB', 'MDSYS','ORDPLUGINS','ODM','DBA') /* Place all the user names you want to exclude */order by privilege, grantee/
Here is part of a sample output:
PRIVILEGE GRANTEE ADM--------------------------- ------------------------------ ---ADMINISTER DATABASE TRIGGER EXFSYS NO IMP_FULL_DATABASE NO
ADMINISTER RESOURCE MANAGER EXP_FULL_DATABASE NO IMP_FULL_DATABASE NO
ALTER ANY MATERIALIZED VIEW DWETL NO REPORTMAN NO
ALTER ANY OUTLINE REPORTMAN NO
ALTER ANY PROCEDURE IMP_FULL_DATABASE NO QCO NO
ALTER ANY RULE CDC_PUB YES
ALTER ANY RULE SET CDC_PUB YES
Project Lockdown by Arup Nanda Page 15 of 66

ALTER ANY TABLE IMP_FULL_DATABASE NO CNSMP NO QCO NO
ALTER ANY TRIGGER IMP_FULL_DATABASE NO QCO NO VCHANG NO
ALTER ANY TYPE IMP_FULL_DATABASE NO
ALTER SYSTEM ORADBA NO QCO NO
ALTER TABLESPACE QCO NO
ALTER USER QCO NO SYSMAN NO
ANALYZE ANY AFFMAN NO ARAO NO CONCASTER NOCREATE ANY SYNONYM ATHOTANG YES ARUP YES IMP_FULL_DATABASE NO DB_MONITOR YES QCO YES RCHUNG YES SPOT YES
CREATE ANY TABLE IMP_FULL_DATABASE NO CNSMP NO QCO NO SYSMAN NO
DROP ANY TABLE ATHOTANG YES IMP_FULL_DATABASE NO CNSMP NO QCO YES_ and so on _
Note some of the key lines of the output. Some sweeping privileges—DROP ANY TABLE, for instance—probably shouldn't have been granted to anyone. In this case, let's see which users have this privilege.
● IMP_FULL_DATABASE is a role used to do a full database import, usually granted to the DBA or to any other user needed in the import. The privilege is probably necessary.
● QCO refers to Quest Central for Oracle, a popular tool for managing databases. The privilege is probably necessary.
● The users CNSMP and ATHOTANG, unless they are DBAs, do not appear to need any sweeping privileges. The privilege should be revoked.
Implications This is one action you can't execute immediately. Before revoking any privilege from any user, you have to carefully analyze its impact.
If you have doubts, the best course of action is to interview the humans behind the userids. For example, perhaps ATHOTANG does not really need to drop tables but was assumed to do so. (Don't be surprised; such assumptions are common.)
Action Plan This task requires some planning, so reserve any action for the next phase. Until then, collect the required information.
1.9 Change DBSNMP Password
Background As you may know, Oracle Intelligent Agent communicates with Oracle Enterprise Manager to pass on information about components such as the database, the listener, and the server itself. To get data about the database, it needs to connect to the database using some userid. By default, the userid used is DBSNMP.
When the database is created, the password of dbsnmp is also set to dbsnmp. This user has some powerful privileges, such as UNLIMITED TABLESPACE, SELECT ANY DICTIONARY (which allows the user to select from dynamic performance views and data dictionary views), and ANALYZE ANY DICTIONARY (which allows analyze of the system objects). Many intruders use this user and password for back-door entry into the database. Needless to say, this is a huge security hole.
Project Lockdown by Arup Nanda Page 16 of 66

Strategy You have to change the password of this user to something other than dbsnmp. However, you can't just change the password at the database level, because that password is also stored in the agent configuration files. You need to update the configuration files to use the new password as well. Here's the procedure for Oracle Database 10g.
1. First change the password of the user DBSNMP to something else, e.g. TopSecret:
SQL> alter user dbsnmp identified by topsecret;
2. Go to the directory where the Oracle Agent Home is installed (not ORACLE_HOME), e.g. /u01/app/oracle/10.1/gridc.
3. Go to directory <hostname>/sysman/emd , where <hostname> is the name of the host or server. For instance, if the name of the server is prolin1, then the directory should be prolin1/sysman/emd.
4. Here you will find a file named targets.xml. Copy it under a new name (e.g. targets.xml.old).
5. Open the file targets.xml and search for the word "dbsnmp"; it should be similar to
<Target TYPE="oracle_database" NAME="PROPRD1_prolin1"><Property NAME="MachineName" VALUE="192.168.101"/><Property NAME="OracleHome" VALUE="/u01/app/oracle/10.1/db1"/><Property NAME="Port" VALUE="1521"/><Property NAME="Role" VALUE="NORMAL"/><Property NAME="SID" VALUE="PROPRD1"/><Property NAME="ServiceName" VALUE="PROPRD"/><Property NAME="UserName" VALUE="dbsnmp"/><Property NAME="password" VALUE="3797cf30e7c4a9c6" ENCRYPTED="TRUE"/><CompositeMembership><MemberOf TYPE="rac_database" NAME="PROPRD" ASSOCIATION="cluster_member"/></CompositeMembership></Target>
6. Note the line:
<Property NAME="password" VALUE="3797cf30e7c4a9c6" ENCRYPTED="TRUE"/>
This is where you will set the value of the password. Replace the above with:
<Property NAME="password" VALUE="topsecret" ENCRYPTED="FALSE"/>
Note that you changed the value of ENCRYPTED to FALSE.
7. If this is a RAC database, this line will occur twice in the file. Make sure you change both occurrences. Search the file for the word "password" to locate these two instances.
8. Now stop the agent by issuing:
/u01/app/oracle/10.1/gridc/bin/emctl stop agent
9. Restart the agent:
/u01/app/oracle/10.1/gridc/bin/emctl stop agent
10. When you restart the agent, the cleartext password in the configuration file is encrypted. If you check the above line in the targets.xml file again, you will see something similar to:
<Property NAME="password" VALUE="3797cf30e7c4a9c6" ENCRYPTED="TRUE"/>
Note how the cleartext value has been converted to encrypted value.
11. Now the agent is configured with the new password.
12. If you use the stand-alone Database Console instead of Grid Control, then the procedure is similar—except that in Step 2, you would go to ORACLE_HOME, not where the Agent Home is located.
Implications There are no user implications here.
Action Plan
1. Change the password of the user DBSNMP.
2. Update the agent files to reflect the new password. Project Lockdown by Arup Nanda Page 17 of 66

Phase 2Duration: One Week
It's Phase 2 of your security and compliance project. Let's see what you can do within 5 business days to lock down your infrastructure.
Even if it only lasted 24 hours, you accomplished much in Phase 1 of Project Lockdown. Now it's time for the second phase, which will take about a week. In this phase, you will follow up on work performed in the earlier phase and make new headway as well. As before, you will take some simple yet highly effective actions for securing the database.
Why does this phase last a week, you may ask?
● Some changes require setting of parameters that lead to recycling of the database, and that can take some planning.
● Some changes are based on Phase 1 actions, and may require some careful planning.
Let's get started!
Covered in This Installment: · 2.1 Remove utl_file_dir · 2.2 Limit OS Authentication · 2.3 Disable Remote OS Authentication · 2.4 Secure SQL*Plus Using Product Profile · 2.5 Rein In SQL*Plus · 2.6 Wrap Sensitive Code · 2.7 Convert Derived Grants to Direct Grants · 2.8 Limit Tablespace Quotas · 2.9 Monitor Listener Logs for Attempted Break-Ins · 2.10 Audit and Analyze User Access
Download Phase 2 Checklist
2.1 Remove utl_file_dir
Background Oracle provides a way to manipulate OS files from within the database, via SQL and/or PL/SQL, without accessing the host operating system. This facility is provided by the built-in PL/SQL package utl_file. For instance, here is a snippet of code that opens a file named myfile.txt in the directory /tmp and writes the line "Some Text" to it:
1 declare2 l_filename utl_file.file_type;3 begin4 l_filename := utl_file.fopen ('/tmp','myfile.txt','W');5 utl_file.put_line (l_filename, 'Some Text', TRUE);6 utl_file.fclose(l_filename);7 end;
If the file myfile.txt is not present, this code segment will create it. However, for it to work, beforehand you must declare /tmp as a directory that can be opened by the utl_file package via the following initialization parameter:
utl_file_dir = '/tmp'
and then restart the database.
The presence of this parameter indicates that the users can create a file in the directory in /tmp, or overwrite any file there, as long as it's owned by the Oracle software owner. So what's wrong with that?
Nothing, except that most systems will not have this parameter set to /tmp. Rather, to allow developers or users to manipulate files without knowing in advance where the files will be created, the setting will most likely be "*", as in the following:
utl_file_dir = '*'
This means the user can open a file wherever the Oracle software owner has permission to read or write files—even the Oracle data files! Theoretically, then, an adversary can write a program that intentionally corrupts a data file. If this file happens to be for the SYSTEM tablespace, the entire database is gone. (Of course, you can restore it from backup, but the damage is already done.) Even worse, the adversary could damage an archived log file, which would prevent recovery beyond that archived log. The adversary could even remove the file, using the utl_file.fremove supplied package.
Project Lockdown by Arup Nanda Page 18 of 66

Therefore, setting utl_file_dir to "*" is simply a bad idea.
Strategy In Oracle9i Database and later, there is no need for utl_file_dir—programs use the directory object to specify locations, not absolute directories. So, in the above example where the application needs to open a file myfile.txt in the /tmp directory, it can do so by:
1 declare2 l_filename utl_file.file_type;3 begin4 l_filename := utl_file.fopen ('TMP_DIR','myfile.txt','W');5 utl_file.put_line (l_filename, 'Some Text', TRUE);6 utl_file.fclose(l_filename);7 end;
The directory object TMP_DIR must have been created earlier by:
create directory TMP_DIR as '/tmp';
This command, create directory, is given only once. Subsequently, anyone who has access to the directory can create or read files from here.
You could grant this directory object in a fine-grained manner. For instance, suppose you have a directory object on the directory where the alert log is located and you have created an application that reads and manipulates the alert log. You can grant read access to the directory to SCOTT but write access to ananda, who is a DBA.
So, remove the utl_file_dir from the database parameter and replace the code with directory objects.
As a corollary, you should also remove the create directory system privilege from PUBLIC and any other user.
Implications The implication depends on how much the utl_file package is used to manipulate external files. If the package is never used, you can remove it right away. If you are using it, you need a plan first.
Action Plan
1. Scan the code to see the following string: utl_file.fopen.
2. Collect all the names in the first parameter. For instance ,when you see utl_file.fopen ('/tmp','myfile.txt','W'), record the value "/tmp". Go through all the files to get all the directory locations. There may be 10 files using "/tmp", 5 using "/ftpdata", and so on.
3. As user SYS, create a directory object for each of these directories, e.g.
create directory TMPDIR for '/tmp';
4. Grant these directories to the users accessing them, e.g.
grant read on directory TMPDIR to SCOTT;
5. Remove the directory name form the code replacing it with directory object name. For instance, the line:
utl_file.fopen ('/tmp','myfile.txt','W')
will become
utl_file.fopen ('TMPDIR','myfile.txt','W')
6. Recompile the programs.
7. Remove create any directory system privilege from PUBLIC and all users except DBAs.
revoke create any directory from public;
2.2 Limit OS Authentication
Background Oracle users can be authenticated in different ways, most commonly via database authentication. When a user is created as create user ananda identified by abc123, the only way the user can log in to database is by passing its userid and password.
Project Lockdown by Arup Nanda Page 19 of 66

One alternative is operating system authentication, in which the user is created as:
create user ops$ananda identified externally;
If the host operating system has a userid named "ananda", then Oracle does not check its credentials anymore. It simply assumes the host must have done its authentication and lets the user into the database without any further checking.
That's where the problem lies. If the host operating system is strong in authentication, it may be secure; but in some weak OSs, it is possible to login as a user by cracking the password or entering without a password:
sqlplus /
Note the lack of userid and password—the string "/" instructs the database to accept the connection of the userid ananda to the database account ops$ananda.
This type of authentication commonly useful in shell scripts so that you don't have to embed the password in the script, but simply call it as sqlplus /. This is not only convenient but also somewhat secure, since the password is not present. However, consider this scenario: In weak-security OSs, someone can create an account called ananda and then use it to log into account ops$ananda.
Must it be ops$? Not really; you can change it by setting an initialization parameter. In the following example, I have set it to osauthent$.
os_authent_prefix = 'osauthent$'
You can find these users by using the following query:
SQL> select username, password from dba_users 2 where password = 'EXTERNAL' 3 / USERNAME PASSWORD------------------------------ ------------------------------OPS$ANANDA EXTERNALOPS$ORACLE EXTERNAL
When the initialization parameter is set like this, the account ops$ananda will not work; instead, you need to create those accounts (OS-authenticated) as osauthent$ananda. In an interesting twist , you can also set it to "" (null). In that case the OS user ananda will map to Oracle user ananda. You can even set the password for this account:
alter user ops$ananda identified by oracle;
In that case, the user can log into the database in either manner:
sqlplus /sqlplus ops$ananda/oracle
So, what's wrong with that? Well, consider the situation. Suppose the parameter os_authent_prefix is set to "" (null). In a weak OS, someone can create a user called SYSTEM and login as
sqlplus /
This will log the user as the Oracle user SYSTEM! Once logged in, the user can do anything they want—create users, drop data files, look into sensitive data, and a lot of other things. Suddenly, something that seemed like a convenience is a huge liability.
Strategy As you can see, the issue arises only in certain combination of occurrences. One of them is the OS_AUTHENT_PREFIX being not null, and the other one is setting the password for OS-authenticated accounts. So the first thing to check is the OS authentication prefix.
SQL> select value 2 from v$parameter 3 where name = 'os_authent_prefix'; VALUE-----------------------ops$
If the above returns null, then you should make plans to change it. The actual value is not important, but you must include some non-alphanumeric character. That way, the OS-authenticated username will never match an actual user.
Second, you need to make sure the OS-authenticated accounts are authenticated exactly that way—by the OS—and never have a password. For example, if your OS_AUTHENT_PREFIX were set to OPS$, you would use the following query to find out whether or not the password is set:
Project Lockdown by Arup Nanda Page 20 of 66

SQL> select username, password from dba_users 2 where username like 'OPS$%';
USERNAME PASSWORD------------------------------ ------------------------------OPS$ORACLE 17C96FEC14DC431FOPS$ANANDA EXTERNAL
This shows that the user OPS$ORACLE cannot login through the OS authentication route or the password route. This is exactly what you want to avoid; there should be only one way to authenticate. To change the mode of authentication of OPS$ORACLE, you should use:
alter user OPS$ORACLE identified externally;
This changes the PASSWORD column to EXTERNAL.
Implications The implications of these changes may be extensive depending on the usage of these accounts. If you have any of these types of accounts, scan the programs to find out how easily they can be changed.
Action PlanFind out which programs are using the OPS$ accounts. If none then
Check initialization parameter os_authent_prefix If it's null then
Change it to OPS$ (database restart required)
Check password of OPS$ accounts If not EXTERNAL then
Change them to EXTERNALIf some then
Check if they are using it as a password as well (e.g. OPS$ORACLE/mypass). If a password is used, remove it—e.g. the line sqlplus OPS$ORACLE/mypass should become sqlplus /.
2.3 Disable Remote OS Authentication
Background Remote OS authentication is a similar process. In OS authentication, you can create users who are authenticated on the local operating system. For instance, if you have a user named ananda on the UNIX server and a user named OPS$ANANDA in the database running on the same server, the user ananda can simply issue the following command to log into the database:
sqlplus /
This works for the local users—users on the same server where the database runs. However, what happens when a user of a remote server tries to connect to the database? For instance, suppose you have two servers, node1 and node2, and a database runs on the node1 server. This database has a user OPS$ANANDA identified externally. There is a user ananda on the server node2, not node1. When user ananda on the server node2 tries to connect to the database on node1 by issuing:
sqlplus /@node1
will he be able to connect?
The answer depends on the settings of the database initialization parameter remote_os_authent. If the parameter is set to TRUE, he connection attempt is successful; if FALSE, the OS-authenticated connections from remote servers are not allowed. The default is FALSE.
Why not? For a very good reason: On your database server you may have a great deal of security, so OS-authenticated users may not be an issue. But you cannot say the same thing for client machines. Depending on the OS, an adversary may be able to create an account called ananda on the remote servers, and when it connects to the database server, it can connect to ops$ananda without a password. Because you can't easily control client machines, this functionality puts a big chink into your armor.
Strategy
The task here is quite simple. Check if the parameter is set to TRUE. If true, change it to FALSE and restart the database.
Implications In many databases, this parameter may already be set to FALSE. However, if it's set to TRUE and some client machines connect as OS-authenticated users, those accounts will not work. You can find them before making this change:
Project Lockdown by Arup Nanda Page 21 of 66
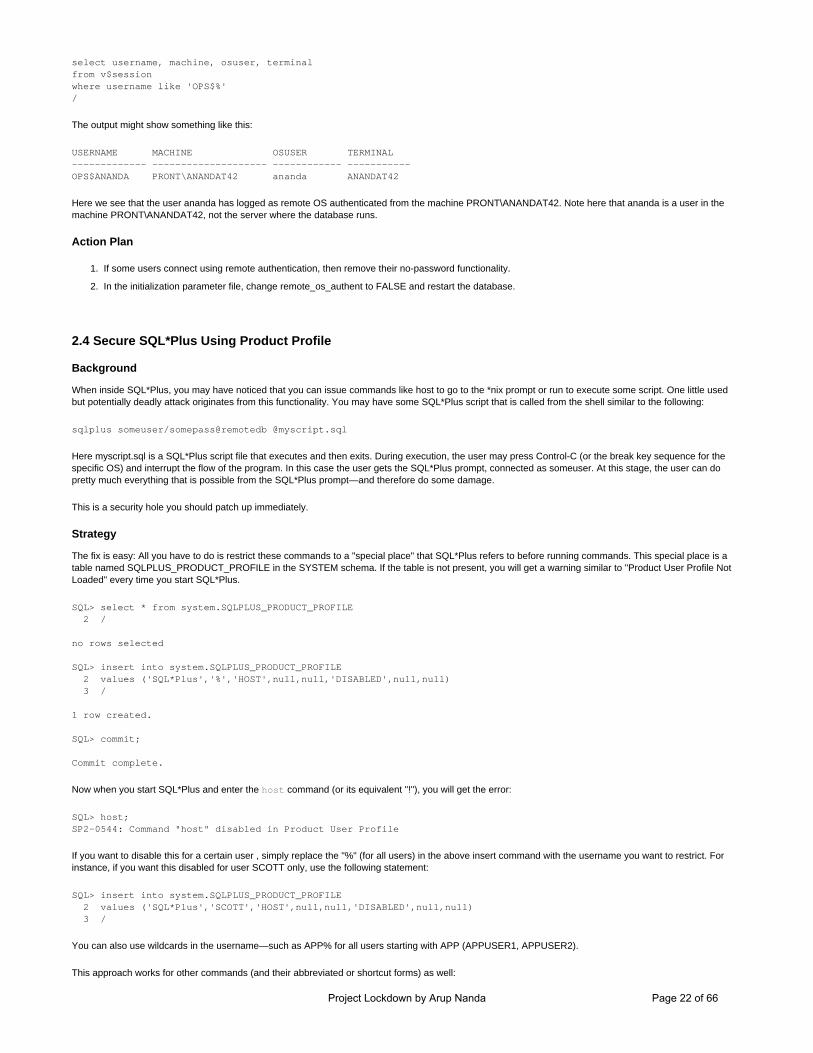
select username, machine, osuser, terminalfrom v$sessionwhere username like 'OPS$%'/
The output might show something like this:
USERNAME MACHINE OSUSER TERMINAL------------- -------------------- ------------ -----------OPS$ANANDA PRONT\ANANDAT42 ananda ANANDAT42
Here we see that the user ananda has logged as remote OS authenticated from the machine PRONT\ANANDAT42. Note here that ananda is a user in the machine PRONT\ANANDAT42, not the server where the database runs.
Action Plan
1. If some users connect using remote authentication, then remove their no-password functionality.
2. In the initialization parameter file, change remote_os_authent to FALSE and restart the database.
2.4 Secure SQL*Plus Using Product Profile
Background When inside SQL*Plus, you may have noticed that you can issue commands like host to go to the *nix prompt or run to execute some script. One little used but potentially deadly attack originates from this functionality. You may have some SQL*Plus script that is called from the shell similar to the following:
sqlplus someuser/somepass@remotedb @myscript.sql
Here myscript.sql is a SQL*Plus script file that executes and then exits. During execution, the user may press Control-C (or the break key sequence for the specific OS) and interrupt the flow of the program. In this case the user gets the SQL*Plus prompt, connected as someuser. At this stage, the user can do pretty much everything that is possible from the SQL*Plus prompt—and therefore do some damage.
This is a security hole you should patch up immediately.
Strategy The fix is easy: All you have to do is restrict these commands to a "special place" that SQL*Plus refers to before running commands. This special place is a table named SQLPLUS_PRODUCT_PROFILE in the SYSTEM schema. If the table is not present, you will get a warning similar to "Product User Profile Not Loaded" every time you start SQL*Plus.
SQL> select * from system.SQLPLUS_PRODUCT_PROFILE 2 / no rows selected SQL> insert into system.SQLPLUS_PRODUCT_PROFILE 2 values ('SQL*Plus','%','HOST',null,null,'DISABLED',null,null) 3 / 1 row created. SQL> commit; Commit complete.
Now when you start SQL*Plus and enter the host command (or its equivalent "!"), you will get the error:
SQL> host;SP2-0544: Command "host" disabled in Product User Profile
If you want to disable this for a certain user , simply replace the "%" (for all users) in the above insert command with the username you want to restrict. For instance, if you want this disabled for user SCOTT only, use the following statement:
SQL> insert into system.SQLPLUS_PRODUCT_PROFILE 2 values ('SQL*Plus','SCOTT','HOST',null,null,'DISABLED',null,null) 3 /
You can also use wildcards in the username—such as APP% for all users starting with APP (APPUSER1, APPUSER2).
This approach works for other commands (and their abbreviated or shortcut forms) as well:
Project Lockdown by Arup Nanda Page 22 of 66

accept edit repheaderappend execute runarchive log exit save attribute quit setbreak get show btitle help shutdown change host spoolclear input startcolumn list startup compute password storeconnect pause timingcopy print ttitle define prompt undefinedel recover variabledescribe remark whenever oserrordisconnect repfooter whenever sqlerror
This method also applies to SQL commands, not just SQL*Plus. For instance, if you want to disable the lock command, you will need to insert:
insert into system.SQLPLUS_PRODUCT_PROFILEvalues ('SQL*Plus','%','LOCK',null,null,'DISABLED',null,null)/
Note that the SQL command lock is disabled, yet we have used the "SQL*Plus" keyword above.
The following SQL commands can be disabled:
alter drop revokeanalyze explain rollbackassociate flashback savepointaudit grant selectcall insert set constraintscomment lock set rolecommit merge set transactioncreate noaudit truncatedelete purge update disassociate rename validate
Implications Before starting, note an important point: This approach applies to the SQL*Plus running on the server itself. It does not affect the SQL*Plus running elsewhere, such as at the client.
This action requires some careful planning. If your shell scripts depend on the host command from SQL*Plus, disabling them would obviously stop these jobs. One very good example is the old host backup command. A typical SQL script file may look like:
alter tablespace xyz begin backup;host cp /fs1/xyz.dbf /backup/xyz.dbfalter tablespace xyz end backup;
...and so on for all tablespaces. This script will of course fail—unless it's run from the SYS user, in which case the command disabling won't not work.
Action Plan Disable all such commands from SQL*Plus when they are least likely to be used.
2.5 Rein In SQL*Plus
Background Depending on your use of SQL*Plus scripts, you may or may not be exposed to the previously described threats. In either case it's beneficial to reduce the threat level by taking preventive measures. One option is to disable the commands in the product profile as described, but an easier one, available since Oracle9i Database, is to use SQL*Plus restrictions. In this option, you have to call SQL*Plus with a new parameter, restrict. There are different levels of restriction. Level 1 disables the host and edit commands only.
sqlplus –restrict 1 scott/tiger
Once inside the shell, if the user calls host command, he gets:
SQL> hostSP2-0738: Restricted command "host" not available
Project Lockdown by Arup Nanda Page 23 of 66

Note the error message is different from the product user profile message.
Using -restrict 2 disables save, store, and spool commands, in addition to host and edit. Using -restrict 3 adds get and start to the existing list.
The most important difference is that all users, even SYS, will be subject to this limitation. The product profile restriction does not apply to SYS.
Strategy This may be a better option than using the product user profile. In this case, create a shell script named "sqlplus" in $ORACLE_HOME/bin and rename the sqlplus executable to something like "sqlplus_orig". Place the following line in the script "sqlplus".
$ORACLE_HOME/bin/sqlplus_orig –restrict 1
This will have the same effect as the command line parameter. Of course, you can add any parameter to restrict you want.
Implications The implications are similar to those of the previous task, only a little more extensive since they apply to SYS as well. If your scripts call the restricted commands, you may need to modify them or use a non-restricted version.
Action Plan Identify the SQL scripts that call the restricted commands. If some are found, then
Modify them OR Use an unrestricted version
ELSE
Rename sqlplus to sqlplus_orig Create the file sqlplus with the restriction on
2.6 Wrap Sensitive Code
Background You may have placed sensitive information such as password or encryption keys inside stored procedures and functions. When you do so, an adversary can easily select it from within the code. Here is an example form a site I recently audited:
l_password := 'GobbleDGook';
An adversary can select the source code as:
select textfrom dba_sourcewhere name = 'MYFUNC';
The best way to eliminate this risk is to use the wrap utility. Once you create the script file to create the procedure or function, wrap it by:
wrap iname=myfunc.sql oname=myfunc.plb
This will create a file myfunc.plb that has the source code stored is an undecipherable manner, protecting your code.
In Oracle Database 10g Release 2, you can create the wrapped code directly without a script by calling the supplied procedure:
begin dbms_ddl.create_wrapped ('create or replace function myfunc ...')end;
You can also use this to write your own wrap utility:
1 declare2 l_input_code dbms_sql.varchar2s;3 begin4 l_input_code (1) := 'Array to hold the MYP';5 l_input_code (2) := 'create or replace procedure myproc as ';6 l_input_code (3) := ' l_key VARCHAR2(200);';7 l_input_code (4) := 'begin ';8 l_input_code (5) := ' ...;';9 l_input_code (6) := 'end;';
Project Lockdown by Arup Nanda Page 24 of 66

10 l_input_code (7) := 'the end';11 sys.dbms_ddl.create_wrapped (12 ddl => l_input_code,13 lb => 2,14 ub => 615 );16* end;
and then place all your code in the input varray for wrapping.
One other thing to be aware of: In Oracle9i, the wrap utility does not wrap variable values. Thus, secret words like password and keys are clearly shown inside the wrapped code.
Let's see an example. Here are the contents of the file a.sql:
create or replace procedure myprocas l_v varchar2(200);begin l_v := 'SecretKey';end;
I have used the value of the secret words as SecretKey. Let's wrap the source:
$ wrap iname=a.sql oname=a.plb
Now if you check inside of the wrapped code, you will still see the value in cleartext:
$ grep SecretKey a.plb1SecretKey:
Again, this issue is not present in Oracle Database 10g Release 1 and later.
To protect your variable values, you should make the cleartext value inside the code less readable. For instance, your code could read:
create or replace procedure myprocas l_v1 varchar2(200); l_v2 varchar2(200); l_v3 varchar2(200); l_lv varchar2(200);begin l_v1 := 'LotsOfJunktoMakeSureSecurityIsWaterTight'; l_v2 := 'AdditionalValueToInterpretTheSecretWord'; l_v3 := 'WowWeDontStopAtTheKeyDoWe'; l_lv := substr(l_v1,21,3); l_lv := l_lv||substr(l_v2,24,3); l_lv := l_lv||substr(l_v3,19,3);end;/
Note how we have embedded the parts of the secret word inside the strings and used the positions inside the code. You can't see the first part of the code inside the first string.
Strategy There is no clear way to identify the source code referencing this sensitive data. Your best bet is to ask around the development group to learn who may be using the sensitive words. You can also do a preliminary check to find out if codes contain words like PASSWORD, SECRET, ENC (for ENCrypted, ENCryption, ENCiphered, ENCoded), DEC, and so on.
select name, textfrom dba_sourcewhere upper(text) like '%PASSWORD%'or upper(text) like '%ENC%'or upper(text) like '%DEC%'or upper(text) like '%SECRET%'or upper(text) like '%PASS%'/
This may offer some clue that will help you identify the possible code segments to examine. Once you identify all such code, you should wrap it using the wrap utility and run the wrapped code.
Project Lockdown by Arup Nanda Page 25 of 66

Implications There are no implications. However, you should be aware of a very serious issue: Wrapping is a one-way street; you can wrap cleartext code, but not create cleartext from the wrapped code. So, you should preserve the cleartext code in some safe place for further editing. If you lose it, you lose the ability to change the code forever.
Action Plan
Identify the code containing the sensitive data. IF in Oracle9i, THEN
Break the values into multiple parts and embed each one inside a phrase. Create a variable to extract the parts from the phrases. Reconstruct the value inside the code.
ELSE Do nothing.ENDIF Create script files from the clear text. Wrap the script. Run the wrapped script.
2.7 Convert Derived Grants to Direct Grants
Background When you grant a privilege, you can optionally use the with grant option clause so that the grantee can grant it further. Here is an example on grants on a table TAB1 owned by user A.
Step1Connect A/******Grant select on tab1 to B;
Step 2Connect B/******Grant select on a.tab1 to C;
The user receives the error
ORA-01031: insufficient privileges
due to the fact that user B does not have the privileges to grant the privilege it itself received from someone. However, in step 1, if the statement were
Grant select on tab1 to b with grant option;
then user B would have had the privileges to grant it further, and step 2 would have been successful.
Similarly, B can also grant it C with grant option, who in turn can grant it to D and so on.
On the surface it sounds like a good plan. The original owner A does not need to worry about to whom to grant or revoke privileges; the process is self-managed on an as-needed basis. So what's the problem?
Well, consider this scenario:
Connect A/*****Revoke select on tab1 from B.
Remember, C got its privileges on TAB1 from B, not directly from A; so what happens to its privileges now that B lost them? C loses its privilege as well, since it was a derived one.
Furthermore, suppose A has granted select on TAB1 to C directly. Now C has two grants on TAB1—one from B and one from A. When you revoke a privilege, the other one is still in effect, making you falsely believe that the privilege is not present.
Despite its ostensible elegance, this process actually creates confusion and security holes and introduces difficult-to-track bugs. It makes much more sense to grant the privileges directly without an intermediary.
Strategy Your goal is to identify which privileges were granted via another user and then do direct grants instead. These are clearly visible from the view DBA_TAB_PRIVS, where the column grantor shows the user that granted the privilege.
SQL> col grantee format a15
Project Lockdown by Arup Nanda Page 26 of 66

SQL> col privilege format a15SQL> col owner format a20SQL> col table_name format a20SQL> select grantee, privilege, owner, table_name 2 from dba_tab_privs 3* where grantor != owner 4 /
A sample output is shown below.
PUBLIC EXECUTE XDB.DBMS_XMLSCHEMA SYSPUBLIC EXECUTE XDB.XDB_PRIVILEGES SYSPUBLIC EXECUTE XDB.DBMS_XMLSCHEMA_INT SYSAPP1 SELECT ANANDA.MP RUSER
The first three lines can be ignored, where the grant is made to the role PUBLIC by the user SYS. The privilege is on the package DBMS_XMLSCHEMA owned by the schema XDB. Being a special supplied package by Oracle, this may be allowed; but the fourth line clearly needs attention. The table MP, owned by ANANDA, has been granted by RUSER and should be corrected. The fix is really simple: Grant select on the object to APP1 directly, even if RUSER has a with grant option privilege.
There are two ways to do that:
1. Owner of the object grants it directly
2. A superuser such as SYS grants it
The second option is easier to implement. The SYS user does not really inherit the grants; it grants the privilege by using the system privilege grant any object privilege. When SYS grants the privilege as:
grant select on a.tab1 to c;
The GRANTOR column shows A, not SYS; which is exactly what you want.
set lines 300set pages 0spool grant_direct.sqlselect 'grant '||privilege||' on '||owner|| '.'||table_name||' to '||grantee||';'from dba_tab_privswhere grantor != owner/spool off
Now run the file grant_direct.sql to grant the privileges directly.
After this is successful, you have to revoke the privileges you have granted indirectly. This is not possible in a single statement since you must be connected as the grantor as well.
break on conn skip 2select 'connect '||grantor conn, 'revoke '||privilege||' on '||owner|| '.'||table_name||' from '||grantee||';' linefrom dba_tab_privswhere GRANTOR != 'SYS'and grantor != ownerorder by 1,2/
Spool this script to a file, edit it to supply the password for each user, and execute it to revoke the grants.
Implications There are two potential implications. First, since you are revoking privileges and re-granting them, you may introduce errors by failing to re-grant the privileges. So, it's important to get a snapshot of the privileges before and after this change to confirm success. Use this script to find out the privileges:
SQL> select grantee, privilege, owner, table_name 2 from dba_tab_privs 3* where grantor != owner 4 /
Run this before and after the change, save the outputs, and compare them to make sure the privileges are intact.
The second implication is more pronounced. The grant-and-revoke cycle will make the cursors on these objects in the library cache invalid and will force the cursors to be reparsed, which will momentarily degrade performance.
Project Lockdown by Arup Nanda Page 27 of 66

In addition, some dependent objects will be invalidated. Since the privileges are re-granted, the objects will compile fine when they are referenced; but you may want to take some proactive action and recompile them beforehand.
Action Plan
1. Find out the privileges granted by others, using the grantable option.
2. Revoke the privileges.
3. Re-grant without the grant option.
4. Check for invalid objects and recompile them.
2.8 Limit Tablespace Quotas
Background How much space inside a tablespace can a user use, and how many tablespaces can he write to? The answer depends on the quota available to be user on the tablespace. You can specify the quota like this:
alter user ananda quota 12M on users;
This limits the user ananda to create stored objects such as tables, indexes, and materialized views whose total size doesn't exceed 12MB. To confirm or find out how much the user has used, issue the query
SQL> col used format 999,999.999 head "Used (MB)"SQL> col quota format 999,999.999 head "Quota (MB)"SQL> col tablespace_name format a15SQL> select username, tablespace_name, 2 bytes/1024/1024 used, 3 max_bytes/1024/1024 quota 4 from dba_ts_quotas 5 order by username 6 /
Sample output is shown below.
USERNAME TABLESPACE_NAME Used (MB) Quota (MB)------------------- --------------- ------------ ------------USER1 USERS .000 100.000USER1 APP1_INDEX 504.875 -.000USER2 USERS .125 5.000
This needs some explanation. The output shows that the user USER1 has a quota of 100MB on the tablespace USERS (shown under the column Quota). Of this, the user has used nothing (as shown under the column Used). The second line is interesting—see how the Quota columns shows "-0". It indicates that the user has unlimited tablespace privileges on that tablespace—APP1_INDEX. The user USER2 has a quota of 5MB on tablespace USERS, of which only 0.125 MB has been used.
It's the unlimited tablespace you should watch out for. A user can be given the unlimited quota by:
alter user ananda quota unlimited on users;
However, this act may have a security implication; if a regular user has an unlimited tablespace quota on a business-critical tablespace, the user could potentially fill the tablespace up completely—which is akin to a denial of service attack.
A more serious risk is the system privilege UNLIMITED TABLESPACE, which allows the user to have unlimited quota on all tablespaces without a specific quota grant on them. Let me repeat: The user has unlimited quota on all tablespaces, including SYSTEM—so the user can create objects there. Not good.
First, check for any explicit tablespace quota on SYSTEM:
select username, bytes/1024/1024 used, max_bytes/1024/1024 quotafrom dba_ts_quotaswhere tablespace_name = 'SYSTEM'order by username;
If this query brings up something, you should evaluate it and if necessary revoke the quota.
The next step is to identify the users with unlimited tablespace system privileges.
Project Lockdown by Arup Nanda Page 28 of 66

select granteefrom dba_sys_privswhere privilege = 'UNLIMITED TABLESPACE';
This list should be carefully evaluated as this system privilege also includes that for SYSTEM tablespace.
Strategy Now that you have identified all users and their quotas on tablespaces, your next task is to mitigate their risk. There are two tasks here, one more disruptive than the other.
First, try to remove the unlimited quota from the SYSTEM tablespace. This can be done without much disruption to applications. But before that, you need to make sure the SYSTEM tablespace does not contain objects from outside the SYS schema. The following query accomplishes that.
select owner, segment_type, segment_namefrom dba_segmentswhere tablespace_name = 'SYSTEM'and owner not in ('SYS','SYSTEM');
The output is
OWNER SEGMENT_TYPE SEGMENT_NAME--------------- --------------- --------------OUTLN INDEX OL$HNT_NUMOUTLN INDEX OL$SIGNATUREOUTLN INDEX OL$NAMEOUTLN TABLE OL$NODESOUTLN TABLE OL$HINTSOUTLN TABLE OL$
In this case, only the OUTLN objects are in SYSTEM tablespace, which is acceptable. If you see any other object, then you should move them.
The root cause of the problem could be the
select usernamefrom dba_userswhere default_tablespace = 'SYSTEM';
It should return only the following.
USERNAME----------SYSTEMSYSOUTLN
If it shows other usernames, alter the user to a different tablespace. For instance, to change the default tablespace of user SCOTT to USER_DATA, issue
alter user scott default tablespace user_data;
Then move all the objects out of the system tablespace.
alter table scott.tab1 move tablespace user_data;
Now, your next task is to ensure the quota is 0 for all users in the SYSTEM tablespace. There are two underlying reasons for the quota to be unlimited, one of which is the direct grant of unlimited tablespace. The other one is the grant of the role RESOURCE, which has UNLIMITED TABLESPACE as a system privilege in Oracle9i Database and earlier. In contrast, Oracle Database 10g does not have the system privilege granted to the RESOURCE role.
For Oracle9i Database
Confirm that UNLIMITED TABLESPACE is indeed granted to the RESOURCE role.
SQL> select * 2 from dba_sys_privs 3 where grantee = 'RESOURCE';
GRANTEE PRIVILEGE ADM------------------------------ ---------------------------------------- ---RESOURCE CREATE TYPE NORESOURCE CREATE TABLE NORESOURCE CREATE CLUSTER NORESOURCE CREATE TRIGGER NORESOURCE CREATE OPERATOR NO
Project Lockdown by Arup Nanda Page 29 of 66

RESOURCE CREATE SEQUENCE NORESOURCE CREATE INDEXTYPE NORESOURCE CREATE PROCEDURE NORESOURCE UNLIMITED TABLESPACE NO
If UNLIMITED TABLESPACE is not listed, you don't need to do anything at this stage. Jump ahead to "Common Tasks."
For Oracle Database 10g
Confirm that UNLIMITED TABLESPACE is not granted to the RESOURCE role.
SQL> select * 2 from dba_sys_privs 3 where grantee = 'RESOURCE';
GRANTEE PRIVILEGE ADM------------------------------ ---------------------------------------- ---RESOURCE CREATE TYPE NORESOURCE CREATE TABLE NORESOURCE CREATE CLUSTER NORESOURCE CREATE TRIGGER NORESOURCE CREATE OPERATOR NORESOURCE CREATE SEQUENCE NORESOURCE CREATE INDEXTYPE NORESOURCE CREATE PROCEDURE NO
Common Tasks
Identify the users with the UNLIMITED TABLESPACE privilege and alter their quota to unlimited on all tablespaces.
set lines 300set pages 0spool quota.sqlselect 'alter user '||grantee||' quota unlimited on '||tablespace_name||';'from dba_sys_privs p, dba_tablespaces twhere p.grantee in (select usernamefrom dba_users)and p.privilege = 'UNLIMITED TABLESPACE'and t.tablespace_name not in ('SYSTEM','SYSAUX')order by grantee, tablespace_name/spool off
This creates a file with contents similar to
alter user ORAAGENT quota unlimited on INDEX01;alter user ORAAGENT quota unlimited on INDEX02;alter user ORADBA quota unlimited on INDEX02;
Next, you can execute this script file to have the unlimited quotas of these users. Finally, remove UNLIMITED TABLESPACE.
set lines 300set pages 0spool revoke_ut.sqlselect 'revoke unlimited tablespace from '||grantee||';'from dba_sys_privswhere privilege = 'UNLIMITED TABLESPACE'/spool off
Then execute this script file to revoke the privilege.
Implications There are no implications for removing these privileges and reducing the quota to 0 on the SYSTEM tablespace. However, if you have segments in the SYSTEM tablespace and you move them to a different tablespace, there will be two consequences:
● The rowid will change because of the physical movement. If you have a rowid-based application, be aware of it.
● The indexes on the tables will become unusable—you have to rebuild them.
The change may also invalidate some dependent procedures.Project Lockdown by Arup Nanda Page 30 of 66

Action Plan
Find out the default tablespace of users other than SYS, SYSTEM, and OUTLN. If it's SYSTEM, change it to a non-SYSTEM tablespace. Find out the segments in the SYSTEM tablespace belonging to users other than SYS, SYSTEM, and OUTLN. IF found, THEN
Move them out to their tablespaces Rebuild indexes, materialized view, etc.
ENDIF Find out the users with UNLIMITED TABLESPACE system privilege IF found, THEN
Grant them unlimited quota on all tablespaces except SYSTEM and SYSAUX Revoke the system privilege UNLIMITED TABLESPACE
ENDIF
2.9 Monitor Listener Logs for Attempted Break-Ins
Background In Phase 1.7, you learned how to secure the Oracle Listener by restricting the ability to change parameters online. That's fine and good, but how will you know if and when anyone tries to break in? Prevention is just part of the story; tracking the effectiveness of your defenses is just as important.
Well, you can explore attempted unsuccessful logins from the listener log file. When a user supplies the wrong password and attempts to modify the listener, the following message writes to the listener log:
12-NOV-2005 23:23:12 * (CONNECT_DATA=(CID=(PROGRAM=)(HOST=prolin01)(USER=ananda))(COMMAND=stop)(ARGUMENTS=64)(SERVICE=LISTENER_PROLIN01)(VERSION=168821760)) * stop * 1190TNS-01190: The user is not authorized to execute the requested listener command
This shows that on Nov 12 at 11:23 p.m. the user "ananda" was trying to stop the listener (note the presence of (COMMAND=stop) ) but supplied a wrong password. Could that indicate an attempted break-in? Possibly. Or perhaps ananda is a legitimate user but made a typo while entering the password, generating this error. But if you see this error many times, it may indeed signify an attempted break-in. You should visit user ananda and verify that he indeed was trying to stop the listener.
Similarly, when the admin options are restricted in the listener, your user can't just set the parameters from the command line. If the user tries a command like:
$ lsnrctlLSNRCTL> set trc_level support
He will immediately get an error.
TNS-12508: TNS:listener could not resolve the COMMAND given
And the following entry will appear in the listener log file.
12-NOV-2005 23:26:34 * trc_level * 12508TNS-12508: TNS:listener could not resolve the COMMAND given
This entry should tell you that someone was trying to set the trc_level directly on the LSNRCTL prompt. Again, this could be an honest mistake, but repeated attempts may indicate an attack.
Strategy The best approach is to check the listener log files periodically for these patterns. You can do that in several ways.
First, you could write a shell script using the following code:
$ grep "(COMMAND=stop)" listener.log | cut -f4 -d"*"
The following output would indicate that the listener command STOP was issued three times:
0 0 0
You can also make this script much more informative using sophisticated tools such as awk or scripting languages like PERL. However, if SQL is most familiar to you (which is likely), using SQL to extract information from this log file will be much more attractive.
Project Lockdown by Arup Nanda Page 31 of 66

The trick here is to use the listener log as an external table. First, create a directory object on the directory where the listener log is located.
create directory listener_log_diras '/u01/app/oracle/10.1/db1/network/log'/
Next, create the external table on the log file. Note the contents of the log file carefully; it generally contains six pieces of information separated by the "*" character. These pieces will become columns of the external table.
create table listener_log( log_date date, connect_data varchar2(300), protocol_data varchar2(300), command varchar2(15), service_name varchar2(15), return_code number(10))organization external ( type oracle_loader default directory LISTENER_LOG_DIR access parameters ( records delimited by newline nobadfile nologfile nodiscardfile fields terminated by "*" lrtrim missing field values are null ( log_datechar(30) date_format date mask "DD-MON-YYYY HH24:MI:SS", connect_data, protocol_data, command, service_name, return_code ) ) location ('listener_prolin01.log'))reject limit unlimited/
After the table is created, you can select from it to confirm the definition is correct.
The lines are fairly descriptive but embedded commands such as (COMMAND=stop) can make it difficult to decipher. In that case, write another function to extract the values from the strings:
create or replace function extract_value( p_in varchar2, p_param in varchar2)return varchar2as l_begin number(3); l_end number(3); l_val varchar2(2000);begin l_begin := instr (upper(p_in), '('||p_param||'='); l_begin := instr (upper(p_in), '=', l_begin); l_end := instr (upper(p_in), ')', l_begin); l_val := substr (p_in, l_begin+1, l_end - l_begin - 1); return l_val;end;
The monitoring becomes extremely easy then. All you have to do to uncover failed login attempts is issue
col l_user format a10with the embeddecol service format a20col logdate format a20col host format a10col RC format a5select to_char(log_date,'mm/dd/yy hh24:mi:ss') logdate,
Project Lockdown by Arup Nanda Page 32 of 66

extract_value (connect_data,'HOST') host, extract_value (connect_data,'USER') l_user, extract_value (connect_data,'SERVICE') service, action RCfrom listener_logwhere extract_value (connect_data, 'COMMAND') in( 'password', 'rawmode', 'displaymode', 'trc_file', 'trc_directory', 'trc_level', 'log_file', 'log_directory', 'log_status', 'current_listener', 'inbound_connect_timeout', 'startup_waittime', 'save_config_on_stop', 'start', 'stop', 'status', 'services', 'version', 'reload', 'save_config', 'trace', 'spawn', 'change_password', 'quit', 'exit')
This returns output similar to
LOGDATE COMMAND HOST L_USER SERVICE RC-------------------- --------------- ---------- ---------- -------------------- -----10/02/05 02:57:36 stop prlddb01 oraprld LISTENER_PRLDDB01 010/02/05 04:47:03 stop prlddb01 oraprld listener_prlddb01 010/03/05 15:14:53 stop prlddb01 oraprld LISTENER_PRLDDB01 011/18/05 23:48:26 reload prlddb01 oraprld LISTENER_PRLDDB01 0
As you can see, the output shows the date and time of the command along with the return codes. You can also modify the query to show only those values where the return code is not 0. You can also add a predicate to show records after a certain date only, so that the attempts for only today are shown. If you run this script every day, you can see the attempts of that day only.
The above shows data for invalid passwords only. For the admin-restricted listeners, the error string shows only three fields and thus the columns of the table LISTENER_LOG have different meanings: The second column shows the command issued by the user and the third column shows the return code.
select log_date, connect_data command, protocol_data return_codefrom listener_logwhere connect_data in( 'password', 'rawmode', 'displaymode', 'trc_file', 'trc_directory', 'trc_level', 'log_file', 'log_directory', 'log_status', 'current_listener', 'inbound_connect_timeout', 'startup_waittime', 'save_config_on_stop', 'start', 'stop', 'status', 'services', 'version', 'reload', 'save_config',
Project Lockdown by Arup Nanda Page 33 of 66

'trace', 'spawn', 'change_password', 'quit', 'exit')/
This returns:
LOG_DATE COMMAND RETURN_CODE--------- -------------------- ---------------06-NOV-05 change_password 006-NOV-05 save_config 006-NOV-05 log_file 006-NOV-05 trc_level 1250806-NOV-05 save_config_on_stop 1250806-NOV-05 log_directory 1250806-NOV-05 log_directory 1250806-NOV-05 stop 116906-NOV-05 stop 116906-NOV-05 services 116906-NOV-05 status 116906-NOV-05 reload 116906-NOV-05 status 116906-NOV-05 stop 116906-NOV-05 status 116906-NOV-05 stop 1169
Implications None; this activity is merely diagnostic.
Action Plan
1. Create the Listener Log external table.
2. Select records where administrative commands have been issued without a password, identifiable by a non-zero return code.
3. Select records where commands were issued on the listener control prompt.
4. If records are found that can't be explained by activities by any of the DBAs, you may have identified foul play.
2.10 Audit and Analyze User Access
Background How well do you know your users? Do you know which machines they connect from, what they do when they connect, and so on? Probably not. But keep in mind that a successful security plan involves understanding these details, or at least the important ones. This is where the auditing facility in Oracle Database becomes very useful.
The auditing functionality in Oracle Database is quite comprehensive. Here you need to enable just a portion of that functionality to create a "profile" of the database. All you will attempt to do is see the users connecting, the userid they use to connect, and the type of authentication used. You will also uncover invalid login attempts—for instance, when the userid/password combination was wrong. As discussed previously, finding patterns to these unusual events may provide clues to uncovering a potential attack.
Strategy To enable auditing, set the following parameter in the database initialization parameter file.
audit_trail = db
This is a static parameter; you must recycle the database for it to take effect. After this is done, issue the following for the auditing to kick in.
AUDIT SESSION;
This command will create a record whenever a user logs in or logs out. An audit trail will be created even if the login attempt was unsuccessful. After the database runs for a while, you can look for patterns in the audit trail. The column RETURNCODE records the Oracle Error Code the user received while making the operation.
SQL> select returncode, count(1) 2 from dba_audit_trail 3 group by returncode 4 /
Project Lockdown by Arup Nanda Page 34 of 66

RETURNCODE COUNT(1)---------- ---------- 0 1710880 604 3 955 17 987 2 1013 2 1017 1428 1045 1 1555 4 1652 4 1950 1 2002 1 2004 4 28000 4 28009 3
This clearly shows a pattern of errors; most of the operations were successful (where the return code is 0). For the rest of the codes, you can get descriptions by issuing
oerr ora <errorno>
from the *nix prompt. For instance, to find out what error code 1017 means, issue
oerr ora 1017
this returns
01017, 00000, "invalid username/password; logon denied"// *Cause:// *Action:
This, the most common error, is the target for your analysis as it will reveal attack patterns most effectively. A high incidence of invalid/password combinations may indicate an attempted break-in.
Now you should see where these sessions were coming from. Invalid passwords on a particular userid might indicate an attack on that userid. You can see the userids by:
select username, count(1)from dba_audit_trailwhere returncode = 1017group by usernameorder by 2 desc;
The output shows something similar to the following:
USERNAME COUNT(1)------------------------------ ----------ARAO 569DBSNMP 381DW_DQS 181
Here we see that a user ARAO, apparently a human one, has attempted to use an invalid password 569 times. The next userid, DBSNMP (381 invalid password attempts), is not a human user; it's the userid of Enterprise Manager. This should immediately raise alarm signals—DBSNMP is a favorite hacker target.
To examine it more closely, let's see where these attacks are coming from:
select userhost, terminal, os_username, count(1)from dba_audit_trailwhere returncode = 1017and username = 'DBSNMP'group by userhost, terminal, os_username;
the output is:
USERHOST TERMINAL OS_USERNAM COUNT(1)------------------------- --------------- ---------- ----------prlpdb01 oraprlp 199prlpdb01 pts/2 oraprlp 4prlpdb01 pts/7 oraprlp 9prlpdb02 oraprlp 130PRONT\PRANANDAT42 PRANANDAT42 ananda 3
Project Lockdown by Arup Nanda Page 35 of 66

progcpdb unknown oracle 34
Notice that the server where this database is running is prlpdb01. Since this is a RAC database, the second node is also present, and the server name is prlpdb02. Most of the bad connection attempts have come from these servers, and using the OS user (oraprlp), which is the Oracle software owner. If this was indeed an attack, the user has access to the Oracle software owner and could have logged in as SYSDBA. There was no need to login as DBSNMP, and clearly the password was wrong. So, it does not look like an attack.
You can also see that the invalid logins are coming from two other machines: PRONT\PRANANDAT42 and progcpdb. They may seem suspicious, we can confirm the identities of these machines—the first one belongs to a DBA named "ananda" and the other one is the Grid Control server, which is expected to connect using this userid.
Next, analyze the pattern of these failures. If they are clustered around a specific time, it could indicate an attack.
SQL> select to_char (timestamp,'mm/dd/yy') ts, count(1) 2 from dba_audit_trail 3 where returncode = 1017 4 and username = 'DBSNMP' 5 group by to_char (timestamp,'mm/dd/yy') 6 /
TS COUNT(1)-------------------- ----------10/14/05 910/16/05 22210/27/05 1510/28/05 12511/09/05 411/11/05 211/12/05 211/14/05 2
As you can see, there are two distinct clusters: on 10/16 and on 10/28. You should mount a full investigation.
Implications Auditing may have minimal impact on performance; but it still has some impact. Furthermore, remember that the audit trails are written into the tablespace SYSTEM, which may get filled up. So you have to be vigilant for free space inside SYSTEM tablespace.
Action Plan
1. Turn on auditing by placing AUDIT_TRAIL initialization parameter.
2. Enable auditing for sessions.
3. Look for invalid or unsuccessful attempts to log in.
4. Examine the unsuccessful attempts for patterns (clusters of dates).
Phase 3Duration: One Month
It's Phase 3 of your security and compliance project. Let's see what you can do within about a month to secure your database infrastructure.
What can you accomplish in a month? Plenty, but you'll need to plan carefully. This phase includes some potentially disruptive tasks that require additional analysis.
Covered in This Installment: · 3.1 Remove Passwords from Scripts · 3.2 Remove Password from RMAN · 3.3 Move DBA Scripts to Scheduler · 3.4 Lock Down Objects · 3.5 Create Profiles of Database Users · 3.6 Create and Analyze Object Access Profiles · 3.7 Enable Auditing for Future Objects · 3.8 Restrict Access from Specific Nodes Only
Download Phase 3 Checklist
Project Lockdown by Arup Nanda Page 36 of 66

3.1 Remove Passwords from Scripts
Background Some of your most serious potential threats arise from the use of hard-coded passwords in applications, programs, and scripts. In many cases, eliminating those passwords is a trivial exercise that will have an immediate impact.
For example, in many installations I have audited, a STATSPACK job runs as a shell script such as:
export ORACLE_HOME=/u01/app/oracle/10.1/dbexport ORACLE_SID=MYSIDcd $ORACLE_HOME/bin$ORACLE_HOME/bin/sqlplus -s perfstat/perfstat @statspack.sql
The shell script is then scheduled through cron or Windows Scheduler. There are two major risks to this approach:
● An intruder may find the file statspack.sh and see the password of the user perfstat.
● When the shell script is running, someone on the *nix server can issue a ps -aef command and see the command running—with the password clearly visible.
When I ask the reason for this approach, the answer is almost universally the same: because the previous DBA did it that way. Whatever the reason, the threat is clear and present and must be eliminated.
Strategy You have several options for eliminating the exposure of passwords. Don't be fooled into believing that the following will hide one:
sqlplus -s scott/$SCOTTPASSWORD @script.sql
where SCOTTPASSWORD is an environmental variable defined prior to the execution of the script. When a user issues the command /usr/ucb/ps uxgaeww, he can see all the environmental variables used in the process that will expose the password. Therefore, you have to literally hide the password in some manner. Let's explore the options.
Option 1. One simple option is to use the nolog parameter in SQL*Plus. In this option, the previous script would change to
export ORACLE_HOME=/u01/app/oracle/10.1/dbexport ORACLE_SID=MYSIDcd $ORACLE_HOME/bin$ORACLE_HOME/bin/sqlplus /nolog @statspack.sql
This script allows a SQL*Plus session to be established but not yet connected to the database. Inside the script statspack.sql, you should place the userid and password:
connect perfstat/perfstat... the rest of the script comes here ...
Thus, if someone issues ps -aef, he will not see the userid or the password. (By the way, this is also best practice for initiating SQL*Plus sessions interactively.)
Option 2.This small variation of the above approach is useful in cases where SQL statements are not in a SQL script but rather embedded in the shell script directly, as in:
$ORACLE_HOME/bin/sqlplus user/pass << EOF... SQL statements come here ... EOF
You can change the shell script to
$ORACLE_HOME/bin/sqlplus /nolog << EOFconnect user/pass... SQL statements come here ... EOF
Again, this is a good practice for building quick-and-dirty shell scripts that process SQL.
Option 3. In this option, you can create a password file containing userids and passwords and read them at the runtime. First, create a file named .passwords (note the period before the filename) containing all userids and passwords. Since the filename starts with a period, it will be invisible when someone uses the ls -l (but it will be visible with ls -la) command. Then change the permissions to 0600 so that only the owner can read it.
The file should contain the userids and passwords (one per line) separated by a space.
scott tiger
Project Lockdown by Arup Nanda Page 37 of 66

jane tarzan... and so on ...
Now create another file, a shell script named .getpass.sh (note the period again), with the following lines.
fgrep $1 $HOME/.passwords | cut -d " " -f2
Make the permissions of this script 0700 so that no one else can see and execute it. Subsequently, when you need to run a script as scott, all you have to do is code the lines like this:
.getpass.sh scott | sqlplus -s scott @script.sql
This will get the password of scott from the file and pass it to the sqlplus command. If someone issues the ps command, he will not be able to see the password.
As a fringe benefit, you have now enabled a flexible password management system. Whenever scott's password changes (and it should change periodically as a good practice), all you have to do is edit the password file.
Option 4. This is where the OS-authenticated users come into the picture. (You learned about them in Phase 2.) As a recap, if you have a *nix user named ananda, you can create a Oracle user as:
create user ops$ananda identified externally;
Here the user can login to the database as
sqlplus /
Note that there is no userid and password. The database does not actually authenticate the user; it assumes that user ananda has been properly authenticated at the OS level. While this is not a great practice, it can be an attractive one—for shell scripts, for example. Your script could look like:
sqlplus -s / @script.sql
Since the username or the password is not passed, there is no risk of its exposure via the ps command.
Implications None; replacing hard-coded passwords with a password management system does not affect the functionality of scripts, just how the password is supplied. You do however have to make sure to back up the password file or keep copies of it, as well as keep them up to date.
Action Plan
1. Identify scripts with hard-coded passwords.
2. Pick an option for implementation:
a. Connect command inside the SQL script
b. Connect command inside the shell script (no SQL script)
c. Use a password file
d. Use OS-authenticated accounts
3. Modify the scripts to remove the passwords.
3.2 Remove Password from RMAN
Background Hard-coded passwords are not limited to scripts. Recovery Manager (RMAN) scripts are susceptible to the same bad habits.
Here is a typical RMAN command inside a script for making a backup:
rman target=/ rcvcat=catowner/catpass@catalog_connect_string
Here the catalog database is referenced in the connect string catalog_connect_string and the userid and password of the catalog are catowner and catpass, respectively. The userid and password are clearly visible if someone issues a ps command, just as previously described.
You have a couple of options for removing these hard-coded passwords:
Option 1. In this option, use the connect string inside the RMAN script like this:
connect target /Project Lockdown by Arup Nanda Page 38 of 66

connect catalog catowner/catpass@catalog_connect_stringrun { allocate channel ...... and so on ...
This is clearly the preferred method—not only because it hides the password from the process listing, but also because it makes it easier to examine mistakes in the catalog connect strings.
Option 2. The other option is to use OS authentication for the catalog connection. You need to make a few additional changes, though. First, the catalog is probably on a different database than the one being backed up. To enable OS authentication in that case, you need to enable remote OS authentication on the catalog database.
On the catalog database, add the following initialization parameter and then restart.
remote_os_authent=TRUE
Now create a userid OPS$ORACLE as follows (on the catalog database).
create user ops$oracle identified externally;
Now your RMAN connection will look like this:
rman target=/ rcvcat=/@catalog_connect_string
This will not reveal the password of the RMAN user or password.
As you now connect as OPS$ORACLE and not catowner, you must rebuild the repository. After connecting, use the command
RMAN> register database;
to rebuild the catalog. You are now ready to use this script in RMAN backups.
Implications There are a few implications here. First, the change in the catalog database exposes it to access from an outside server by anyone with login "oracle". This is a serious security hole in itself; as you can't control the clients, someone could infiltrate a client server—possibly via an inherently insecure operating system—create an id called "oracle", and login to the catalog database.
You can prevent such an infiltration in several ways. The simplest method is to enable node filtering (discussed in 3.8) to prevent any random server from connecting to this node.
Also be aware of the possibility of a different name for the Oracle software owner on the source database server. If you use "orasoft" on database server A and "oracle" on database server B, the users you need to create on the catalog database are OPS$ORASOFT and OPS$ORACLE, respectively—thus there will be two repositories, not one. This is not necessarily a bad thing, but if you want to report on backups from the catalog, you will have to know all the repositories in the database.
Action Plan
1. Pick a method for hiding the RMAN catalog owner password:
a. Connect command inside the script
b. Connect as OS-authenticated user
2. IF b., then
a. Enable remote OS authentication on the catalog database (requires restart).
b. Enable node validation in the catalog database to reject all nodes except the known few.
c. Create users in the name OPS$ORACLE.
d. Modify RMAN catalog connect string to use OPS$ORACLE.
3. Rebuild catalog.
3.3 Move DBA Scripts to Scheduler
Background What about those rather common DBA scripts that require a database login—for statistics collection, index rebuilding, and so on? Traditionally DBAs use the cron (or AT, in Windows) job approach to run jobs, but there are two risks here:
1. If this script needs to login to the database—and most DBA scripts do—the userid and passwords must be placed in the script or somehow passed to the script. So, anyone with access to this script will be able to learn the password.
Project Lockdown by Arup Nanda Page 39 of 66

2. Worse, anyone with access to the server can issue a ps -aef command and see the password from the process name.
You need to protect the password from being exposed!
Strategy You can follow the same strategy as previously described, by passing the password in the SQL script or letting the shell script read it from a text file. That approach will prevent someone from learning the password in the ps -aef output; however, it will not address the problem of someone accessing the scripts.
In Oracle Database 10g Release 1 and later, you have an elegant way to manage this process via database jobs. Note that prior to Oracle Database 10g, database jobs were managed via the dbms_job supplied package, which could execute a PL/SQL package, code segment, or just plain SQL but not OS executables. In Oracle Database 10g, the new job management system is the supplied package dbms_scheduler (Scheduler, for short). In addition to offering a significantly improved user interface, this tool has a great advantage: It can execute even OS executables—all from within Oracle Database! This capability makes it super-easy to implement a one-stop job management system.
Here's an example. Suppose you have a cron job that collects optimizer statistics as shown below.
00 22 * * 6 /proprd/oracle/dbawork/utils/bin/DbAnalyze -d PROPRD1 -f DbAnalyze_PROPRD1_1.cfg 2>&1 1> /tmp/DbAnalyze1.log
As you can see, this job:
● Runs a program named /proprd/oracle/dbawork/utils/bin/DbAnalyze -d PROPRD1 -f DbAnalyze_PROPRD1_1.cfg
● Runs at 22 minutes past midnight, every Saturday
● Writes output to the file /tmp/DbAnalyze1.log
Now, to convert this to a Scheduler job, you would use the following code segment:
1 BEGIN 2 DBMS_SCHEDULER.create_job 3 (job_name => 'Dbanalyze', 4 repeat_interval => 'FREQ=WEEKLY; BYDAY=SAT BYHOUR=0 BYMINUTE=22', 5 job_type => 'EXECUTABLE', 6 job_action => '/proprd/oracle/dbawork/utils/bin/DbAnalyze -dPROPRD1 -f DbAnalyze_PROPRD1_1.cfg', 7 enabled => TRUE, 8 comments => 'Anlyze' 9 ); 10 END;
The arguments of the procedure are self-explanatory; the calendaring syntax is almost English-like. (For more details about Scheduler, read this OTN article or my book Oracle PL/SQLfor DBAs (O'Reilly Media, 2005)
Why bother with Scheduler when good-old cron is available? For several reasons, actually:
● Scheduler runs jobs only when the database is available, which is a great feature for supporting database-centric jobs. You don't need to worry about checking if the database is up.
● Scheduler syntax is consistent across OSs. If migrating, all you need to do is move your code to the new server and a very simple export-import will enable your scheduled jobs.
● Like objects, Scheduler jobs are owned by users, which allows you to enable finer levels of privilege such as execution of a job by a separate user—unlike cron, which is generally used by a single Oracle software owner account.
● Best of all, since you don't have to place a password anywhere, there is no risk of accidentally exposing one. Even the SYS user will not be able to know the password of the user, because it's not stored anywhere. This ability makes Scheduler an attractive tool for managing DBA (or even regular users') jobs very securely.
● As a fringe benefit of the above, you don't need to worry about changes, such as when user passwords change.
Implications None, as long as the jobs are database dependent. Of course, certain jobs must run even when the database is unavailable—such as jobs to move the alert log to a different location or check if the database is up and running. These jobs should stay outside the database and within cron.
Action Plan
1. Identify database jobs in cron.
2. Decide which jobs should run even when the database is down (example: jobs that move the listener logs to a different location every day).
3. For the rest of the jobs, create Scheduler jobs that are initially disabled by stating ENABLED=FALSE in the CREATE_JOB procedure.
4. Test the execution of the jobs using the dbms_scheduler.run_job() procedure.
5. If successful, turn off the cron job and enable the Scheduler job using the dbms_scheduler.enable() procedure.
Project Lockdown by Arup Nanda Page 40 of 66

3.4 Lock Down Objects
Background Programmatic objects such as packages, procedures, functions, type bodies, and object methods embody the business logic of your organization. Any change to them may affect processing logic overall, and depending on how it is configured, the impact on a production system may be catastrophic.
Many organizations address this issue by implementing a secure change-control process where a change is discussed and approved—ideally, between at least two people—before it is implemented. The challenge is to make the system work automatically—which is actually a requirement in many jurisdictions and industries.
Strategy This secure change-control process could work like this:
● An application super-owner (could be the DBA, if needed) "unlocks" the program to be altered
● The application owner alters the program body
● The super-owner locks the program
Considering that Oracle Database does not contain a native locking mechanism for DDL, how would you implement this process?
One option is to revoke create session system privileges from the schema owner so that the schema owner can never login to make a change. Instead, the changes are made by human application owners with privileges to alter the objects of the specified schema. This is a very good method for securing critical database objects by making it possible to create audit trails of changes made to objects where the trails are traced back to real human users, not generic schema names.
For instance, suppose the schema is BANK and the table name is ACCOUNTS. By revoking create session privileges from BANK, you prevent it from ever logging in to the database. Instead, you allow SCOTT, who has create session privilege, to modify ACCOUNTS. The Oracle user SCOTT is actually owned by the real human user Scott and no one else has access to this userid. Any changes made to ACCOUNTS by SCOTT can be directly attributed to the user Scott, making accountability a key component of your security infrastructure feasible.
Generally, to lock the program in this approach you should revoke the privilege from SCOTT. When the need arises to alter the program, you can grant it again—allowing SCOTT to change the program—and then revoke the grant.
Needless to say, this is not an elegant way to handle security. You will quickly run into issues where privilege management is not as simple as "one user per object." In a typical database infrastructure, hundreds of users will be granted several types of privileges to perhaps thousands of objects. Revoking privileges will erase complex dependencies and cause big management headaches.
A more manageable solution is to use DDL triggers. Using this approach, you can establish the grants as necessary but control changes via DDL triggers.
For example, suppose you want to secure a package called SECURE_PKG in the schema ARUP. You would create a DDL schema trigger as:
1 create or replace trigger no_pkg_alter 2 before ddl 3 on arup.schema 4 begin 5 if ( 6 ora_dict_obj_name = 'SECURE_PKG' 7 and 8 ora_sysevent = 'CREATE' 9 ) 10 then 11 raise_application_error (-20001,'Can''t Alter SECURE_PKG'); 12 end if; 13 end; 14 /
In lines 6 and 8, you are checking if a change is made to the package. Remember, changes to packages are made by the create or replace package statement; hence the event checked for is create. If you want to secure a table from alterations, you can use alter in this value. In line 11, an error is raised when the package is altered.
Once this trigger is in place, when a user with privileges tries to alter this package, or even the owner of the object (ARUP) tries to recreate the package by running the package creation script:
create or replace package secure_pkg
he will get the error:
ERROR at line 1:ORA-00604: error occurred at recursive SQL level 1
Project Lockdown by Arup Nanda Page 41 of 66

ORA-20001: Can't Alter SECURE_PKGORA-06512: at line 8
If you definitely want to modify this package, you can ask the DBA to unlock it by disabling the trigger:
alter trigger no_pkg_alter disable/
Now the package creation script will go through. When done, lock it by asking the DBA to enable the trigger. The underlying privileges remain intact. Even when you allow the schema owner to login and modify objects they own, this method will protect the objects as well. This strategy enables a two-person approach to change management.
Implications None, provided everyone is aware that the DBA must unlock the object when it's ready for a change. If you make this step part of the formal change control process, it will affect reliability in the most positive manner.
Action Plan
1. Make a list of all objects that should be locked down. Note that not all objects need be under such strict control (temporary tables created by the application owner to hold intermediate values, for example).
2. Create the trigger with all these object names in the list. Make the trigger initially disabled. Do not add this functionality to an existing trigger. You should be able to control this trigger independently.
3. Identify a person who should unlock objects. It could also be you.
4. Document when objects should locked and unlocked, workflow, and so on.
5. Enable the trigger.
3.5 Create Profiles of Database Users
Background The design of any security system should start with a thorough and accurate understanding of the users accessing it as well as their modes of access—otherwise, you have no comparative "baseline." As a DBA you should have knowledge about your users and their applications and mechanism of access (such as origin of the access, the DDL involved, and so on) anyway.
Strategy This is where Oracle auditing comes in extremely handy. You don't need to write extensive logon/logoff triggers or write complex pieces of PL/SQL code. Rather, simply enable auditing by placing the following parameter in the database initialization parameter file:
audit_trail = db
and recycle the database. Once set, issue the following command as a DBA user.
audit session;
This statement enables auditing for all session-level activities such logons and logoffs. At the bare minimum, it shows who logged in, when, from which terminal, IP address, host machine, and so on.
After turning auditing on, you can monitor activity by issuing the following SQL.
select to_char(timestamp,'mm/dd/yy hh24:mi:ss') logon_ts, username, os_username, userhost, terminal, to_char(logoff_time,'mm/dd/yy hh24:mi:ss') logoff_tsfrom dba_audit_trailwhere logoff_time is not null;
Here is sample output:
LOGON_TS USERNAME OS_USERNAM USERHOST TERMINAL LOGOFF_TS------------------ --------------- ---------- --------------- --------------- ------------------01/11/06 20:47:06 DELPHI sgoper stcdelpas01 unknown 01/11/06 20:48:4601/11/06 20:48:21 DELPHI sgoper stcdelpas01 unknown 01/11/06 20:48:3801/11/06 20:48:41 DELPHI sgoper stcdelpas01 unknown 01/11/06 20:49:1901/11/06 20:36:03 STMT crmapps stcdwhpd pts/3 01/11/06 20:36:0301/11/06 20:36:04 STMT crmapps stcdwhpd pts/3 01/11/06 20:37:40
Project Lockdown by Arup Nanda Page 42 of 66

Here you can clearly see the userids that connect to the database, their OS userids (OS_USERNAME), and the time they logged off. If they connected from the same server as the database server, their terminal id is shown under the TERMINAL column (pts/3). If they connect from a different server, it shows up in the USERHOST column (stcdelpas01) .
Once you understand how the information is presented, you can construct queries to get more useful information. For instance, one typical question is "Which machines do users usually connect from?" The following SQL statement gets the answer quickly:
select userhost, count(1)from dba_audit_trailgroup by userhostorder by 2/
A sample output may look like (toward the end of the output):
USERHOST COUNT(1)--------------- ----------stccampas01 736stcdwhpd 1235stcdelpas01 2498
This is revealing—as you can see, most of the connections come from the client machine stcdelpas01, but the next maximum number of connections comes from stcdwhpd, which is the name of the database server itself. This could be a surprise since you may have assumed the connections originate externally.
Well, the next question could be: "Who is accessing the database from the server directly?" Another piece of SQL gets you that information:
select os_username, username, count(1)from dba_audit_trailwhere userhost = 'stcdwhpd'group by os_username, usernameorder by 3/
Sample output:
OS_USERNAME USERNAME COUNT(1)----------- -------- --------oracle SYS 100oracle DBSNMP 123oracle PERFSTAT 234infrap DW_ETL 1986
This output clearly reveals that OS user infrap runs something on the server itself and connects as DW_ETL. Is this normal? Ask the user. If you don't get a reasonable response, it's time to dig around some more. The point is to know everything about your users: who they are, where they are coming from, and what they do.
Another crucial piece of information you can obtain from audit trails is evidence of potential past attacks. When an adversary mounts an attack, he may not get the password right every time—so he may resort to a brute-force approach wherein he tries to repeatedly guess the password and then login.
You can detect such an attack by identifying patterns of username/password combinations from the audit trail. The clue is the column RETURNCODE, which stores the Oracle error code the user raised when the connection attempt was made. If a wrong password were supplied, the user would raise:
ORA-1017: invalid username/password; logon denied
So, you should look for ORA-1017, as in the following SQL statement:
select username, os_username, terminal, userhost, to_char(timestamp,'mm/dd/yy hh24:mi:ss') logon_tsfrom dba_audit_trailwhere returncode = 1017;
Here is a sample output:
USERNAME OS_USERNAM TERMINAL USERHOST LOGON_TS--------------- ---------- --------------- --------------- ------------------ABCD_APP jnelson STJNELSONT40 STJNELSONT40 01/11/06 10:42:19ABCD_APP jnelson STJNELSONT40 STJNELSONT40 01/11/06 10:42:28ABCD_APP jnelson STJNELSONT40 STJNELSONT40 01/11/06 10:43:11PERFSTAT oracle pts/5 stcdwhpd 01/11/06 12:05:26ARUP jnelson STANANDAT42 STJNELSONT40 01/11/06 14:09:20ARUP jnelson STANANDAT42 STJNELSONT40 01/11/06 14:23:41
Project Lockdown by Arup Nanda Page 43 of 66

Here you can clearly see who has attempted to connect with a wrong password. Many of the attempts could be honest mistakes, but others may require investigation. For instance, the OS user jnelson has repeatedly tried (and failed) to login as ABCD_APP from the same client machine in a short span of time. Immediately thereafter, jnelson attempted to login as the user ARUP. Now, this is suspicious. Remember, most attacks come from legitimate users within the organization, so no pattern is worth glossing over.
Along the same lines, you can monitor attempted logins with presumably "guessed" userids.
select username from dba_audit_trail where returncode = 1017minusselect username from dba_users;
The output:
USERNAME---------------ASCOTTHR
Here someone has attempted to login as a user that does not exist (SCOTT, which you have judiciously dropped from the database). Who could that be? Is it an innocent user expecting erroneously to connect to the development database, or a malicious user probing to see if SCOTT exists? Again, look for a pattern and identify the human user that made this attempt. Don't be satisfied until you get a satisfactory explanation.
Implications Turning on auditing definitely affects performance. But the rudimentary level of auditing you have enabled in this step will have negligible performance impact, with benefits far outweighing the costs.
The other impact you should consider carefully is the storage of audit trails. The audit trail entries are stored in the SYSTEM tablespace, which grows in size as the audit trails lengthen. If SYSTEM tablespace fills up and there is no more space for audit records, all database interactions fail. Therefore, you have to be vigilant about free space.
Action Plan
1. Set the initialization parameter audit_trail to DB in the database and recycle it.
2. Enable auditing for sessions.
3. Extract information from audit trails and analyze them for patterns of attacks.
3.6 Create and Analyze Object Access Profiles
Background Merely knowing usernames and associated properties such as OS usernames, the terminals they connect from, and so on is not sufficient, however. To properly lock down the database, you also have to know what users are accessing. This information allows you to create an object "access profile"—any deviation from which may indicate attack or intrusion.
Strategy Again, the power of auditing is useful here. In the previous step, you enabled session-level auditing, which allows you to see session details. Now, you have to enable object access auditing.
You may choose, for example, to audit access to objects that are very sensitive—such as tables where credit card numbers are stored, or procedures that return clear text credit-card numbers from encrypted values.
Suppose you want to audit anyone accessing the table credit_cards, owned by ccmaster. You could issue
audit select on ccmaster.credit_cards by access;
Subsequently, anyone who selects from that table will leave an audit trail.
You can record the information two ways. In the first approach, demonstrated above in the keyword by access, a record goes into the audit trail whenever someone selects from the table. If the same user selects from the table twice in the same session, two records go into the trail.
If that volume of information is too much to handle, the other option is to record only once per session:
audit select on ccmaster.credit_cards by session;
In this case, when a user selects from the table more than once in a session, only one record goes into the audit trail.
Once auditing is enabled, you can analyze the trail for access patterns. Project Lockdown by Arup Nanda Page 44 of 66

The trail looks different in each of the approaches. If auditing is enabled by session, you will see one record per session per object. The column action_name in this case will show SESSION REC and the actions will be recorded in the column ses_actions.
select username, timestamp, ses_actionsfrom dba_audit_trailwhere obj_name = 'CREDIT_CARDS'and action_name = 'SESSION REC'/
The output is:
USERNAME TIMESTAMP SES_ACTIONS------------------------------ --------- -------------------ARUP 16-JAN-06 ---------S------
Of course, you can also use other columns, such as os_username, terminal, and so on.
Note how the column ses_actions shows a series of hyphens and a letter "S". That indicates the user ARUP has performed certain actions that are recorded in the single record of the audit trail. The value follows a pattern, where each position indicates a specific action:
Position 1 2 3 4 5 6 7 8 9 10 11 12 13 14 15 16
Action Alter Audit Comment Delete Grant Index Insert Lock Rename Select Update References Execute Not used
Not used
Not used
In the above example, ses_actions shows the following:
---------S------
The "S" is in the 10th po sition, meaning the user ARUP selected from table credit_cards. However, it does not show how often the user selected from this table in this session, since you enabled for session only, not for access. If the user had also inserted and updated in the query, the column value would be:
------S--SS-----
Note there are Ss in the seventh (Insert), 10th (Select), and 11th (Update) positions.
Why the letter "S"? When you enable auditing, you can specify if the trail is to be recorded when the access was successful or unsuccessful. For instance, to record an audit trail only when the access failed for some reason (such as insufficient privileges), you can enable auditing as follows.
audit select on ccmaster.credit_cards by session whenever not successful;
Subsequently, when user ARUP successfully selects from the table, there will be no records in the audit trail. If the access is unsuccessful, there will be a record. The letter in the column ses_actions in that case would be "F" (for failure).
Similarly, if you want to audit only when the access is successful, you would substitute the clause "whenever not successful " to "whenever successful ". By default, both successful and unsuccessful accesses are logged if you do not specify the clause. So what happens if in a single session some accesses were successful but others were not? The letter in that case would be "B" (for both).
For example, here's how the value would change along a time line for user ARUP, who does not have select privileges on table credit_cards:
1. ARUP issues select * from CCMASTER.CREDIT_CARDS.
2. It fails, raising ORA-00942: table or view does not exist.
3. A record goes into audit trail with the ses_actions value as ---------F------. (Note the "F" in the 10th position, indicating a failure.)
4. ARUP is not disconnected from the session. The owner of the table credit_cards, CCMASTER, grants the select privilege to ARUP.
5. ARUP now successfully selects from the table.
6. The ses_action column value will now change to ---------B------. (Note the 10th position has changed to a "B" (both success and failure) from "F".)
After you have audited that object for a while and developed its access profile, you can turn off auditing for successful attempts and enable it for failed ones only. It's usually the failed ones that reveal potential attacks. Auditing for failed ones only will also reduce the overall length of the audit trails.
Had you enabled auditing by access, you would have used a different query, since there would be one record per access. The column ses_actions would not be populated and the column action_name would sh ow the actual action (such as select or insert) instead of the value SESSION REC. So you would use:
col ts format a15col username format a15col userhost format a15col action_name format a10
Project Lockdown by Arup Nanda Page 45 of 66

select to_char(timestamp,’mm/dd/yy hh24:mi:ss’) ts, username, userhost, action_namefrom dba_audit_trailwhere owner = 'CCMASTER'and obj_name = 'CREDIT_CARDS';
TS USERNAME USERHOST ACTION_NAM----------------- ---------- --------------- ----------01/16/06 00:27:44 ARUP stcdwhpd SELECT01/16/06 11:03:24 ARUP stcdwhpd UPDATE01/16/06 12:34:00 ARUP stcdwhpd SELECT
Note there is one record per access (select, update, and so on), which gives you much finer granularity for establishing a pattern of access—as opposed to session-level auditing, which merely shows that ARUP selected and updated from the table credit_cards, but not how many times or when.
So, which type of auditing to use—session level or access level? Remember, access-level auditing writes one record per access, so the amount of audit information written is significantly larger than when only one record per session is written. If you are just trying to establish who accesses the tables and how, you should turn on session-level auditing first. That should give you an idea about how each object is accessed by users. To track down abuse from a specific user, you can turn on access-level auditing.
Implications As described previously, auditing does affect performance. However, the benefits of auditing may far outweigh the cost, especially if you enable it strategically. Moreover, you don't need to keep it turned on forever; you can turn auditing on or off on objects dynamically if necessary.
Action Plan
1. Identify key objects (tables, packages, views) that you want to audit (if not all of them).
2. Turn on session-level auditing for those objects.
3. After some time, which you believe is representative of a typical work cycle, analyze the audit trails. The time you wait for the records to be gathered usually depends on your particular case. For instance, in the retail industry, you may want to wait for a month that will generally capture all the processes—such as month-end processing, tallying of books, and so on.
4. Once you develop the profile, track down unsuccessful attempts. Note the users and objects they were attempting to access.
5. Turn off session-level auditing and turn on access-level auditing for those objects only.
6. Analyze the access pattern by highlighting the failed attempts, the time, the terminal the came from, and so on, and determine the reason behind the failed attempt. If there is no justifiable excuse, pursue the matter as a potential security breach.
3.7 Enable Auditing for Future Objects
Background By now you've learned how to use auditing on specific, sensitive objects. You may also have decided to enable auditing for all objects, not a subset of them—perhaps you don't know which ones are sensitive, or perhaps all of them are. In that case, there is a problem: Objects are created in the database continuously, and when they materialize, you have to remember to enable auditing on them.
Strategy
Auditing Best Practices
Here you have learned how to use auditing to enforce some rudimentary levels of accountability. This approach has one serious limitation, however: You have to enable auditing by setting the initialization parameter AUDIT_TRAIL. This parameter is not dynamic; so to enable it, you must recycle the database. But if scheduling the required outage is difficult—and for many DBAs, it is—what are your options?
When I create a database, I always set the parameter to DB (for Oracle9i and earlier) and DB_EXTENDED (for Oracle Database 10g). But wait, doesn't that enable auditing and fill up the AUD$ table in the SYSTEM tablespace, eventually causing the database to halt?
No. Setting the AUDIT_TRAIL to a value does not enable auditing. It merely prepares the database for auditing—by specifying a location where the trails are written, such as to OS or the database; and the amount and type of auditing done and whether the format is XML (introduced in Oracle Database 10g Release 2).
To enable auditing, you have to use the AUDIT command on an object. For example, use the following command to start auditing on
Default auditing is very useful here. To enable auditing on any object not yet created, you issue:
audit select on default by session;
Afterward, when you create a table in any schema, the auditing options are automatically enabled for select on that table. To check for the default auditing options set in the database currently, use:
SQL> select * from all_def_audit_opts;
ALT AUD COM DEL GRA IND INS LOC REN SEL UPD REF EXE FBK REA--- --- --- --- --- --- --- --- --- --- --- --- --- --- ----/- -/- -/- -/- -/- -/- -/- -/- -/- S/S -/- -/- -/- -/- -/-
Note under the column SEL that you have a value "S/S". The left-hand side value indicates the auditing option when the action is successful. Here it's "S", indicating "session level." The right-hand part indicates when it's not successful, which also shows "S"—indicating session level as well. As you didn't specify when the auditing should be done, the option was set for both success and failure—hence the value "S/S".
Suppose you want to enable default auditing on select at session level when
Project Lockdown by Arup Nanda Page 46 of 66

the table credit_cards.
audit select, insert, update, delete on ccmaster.credit_cards;
Setting the parameter AUDIT_TRAIL while creating the database also allows you to capture auditing for reasons other than security—such as collecting information on CPU and IO used by sessions that will be an input to the Resource Manager. So, next time you bounce the database, place the AUDIT_TRAIL parameter first.
successful, and at access level when not successful? You would issue:
SQL> audit select on default by session whenever successful;
Audit succeeded.
SQL> audit select on default by access whenever nost successful;
Audit succeeded.
Now if you see the default option, you will see:
SQL> select * from all_def_audit_opts;
ALT AUD COM DEL GRA IND INS LOC REN SEL UPD REF EXE FBK REA--- --- --- --- --- --- --- --- --- --- --- --- --- --- ----/- -/- -/- -/- -/- -/- -/- -/- -/- S/A -/- -/- -/- -/- -/-
Here note the column SEL, which shows "S/A"—indicating session level ("S") in success (left side of "/") and access level ("A") in failure (right side of "/").
This arrangement is common when you want to limit the number of audit entries under successful access, hence the session-level auditing for successful access. You would want, however, to track each occurrence of failed access; hence you have enabled access-level auditing for failures.
To disable default auditing, you would issue:
noaudit select on default;
Later, you should check in all_def_audit_opts view to make sure the default audit options are indeed turned off.
Implications In any auditing there is always a performance concern, but the price may be small for the information obtained from it.
However, there is a potential hazard. As the default auditing is enabled for all objects created subsequently without regard to who creates them and who selects from them, you, as the DBA, have no control over the audit options on a table. This situation may be exploited by an adversary, who can create objects indiscriminately, insert into them, select from them, and then finally drop them—all well within the quota imposed at the tablespace level.
However, the auditing is turned on for each created object, so the records keep building up in the audit trail, inflating the AUD$ table. Since that table is in SYSTEM tablespace, it will eventually fill up and kill the database, essentially creating a denial of service attack!
This situation may be rare but it's definitely possible. Fortunately, the prevention is simple: Just keep a close eye on the SYSTEM tablespace. If space runs out fast, explore why the audit records are being created so quickly. If you see a large number of objects created or selected that are not parts of the profile you built using auditing, you should definitely investigate.
As an immediate measure, you could turn off default auditing and then turn off auditing on those objects that crowd the audit trail entries (which can be done online). Then you should delete the records from the audit trail after storing them on a table in a different tablespace for future analysis.
Action Plan
1. Decide what actions on which you want to enable default auditing.
2. Decide what level—session or access—you want the default auditing to be.
3. Enable default auditing.
3.8 Restrict Access from Specific Nodes Only
Background In many cases, only a specified set of client machines will connect to your database servers. Here is a typical architecture:
Project Lockdown by Arup Nanda Page 47 of 66

Here, the database servers are findb01 and hrdb01, with databases named FINDB (financial database) and HRDB (HR database). The clients in the HR department connect to HRDB only; if they need some data from FINDB, they connect to the apps running on the finance department servers and get the data. Similarly, the application servers in the finance department never connect to HRDB directly.
What would happen if a client in the finance department, finas01, tries to connect to HRDB? It will be able to successfully connect, provided it knows a valid userid and password. As always, you should protect the passwords of users, but sometimes there are generic users with well known passwords. Some examples are application users such as HRAPP with a ridiculously insecure password such as "hrapp", "password", or even "abc123". Even with password management policies (described in Phase 4) in place, the password could be well known.
So, you have to build a wall around your servers such that no client machine outside the authorized list of machines can connect to them.
Strategy How can you make ensure that only client connections from the HR department are allowed into the database HRDB? You have two options, login triggers and listener node validation.
Login triggers. In this option, you create a trigger that fires at login, checks the IP address, and fails if the IP address is not in a list of approved ones. Here is the trigger:
1 create or replace trigger valid_ip 2 after logon on database 3 begin 4 if sys_context('USERENV','IP_ADDRESS') not in ( 5 '100.14.32.9' 6 ) then 7 raise_application_error (-20001,'Login not allowed from this IP'); 8 end if; 9* end;
In line 5, you can place all the IP addresses that are valid client machines enclosed in quotes and separated by comma. After this trigger is in effect, when SCOTT tires to connect from an IP address not in the list in the trigger:
Separating Roles
One of the most contentious issues in database security is that of role separation. To administer a database, the DBA must have certain privileges, which is often rolled into a role like SYSDBA or even DBA. However, this role also has powers such as granting privileges to others and selecting all data from any table. This super-user privilege goes against the grain of most regulations such as Sarbanes-Oxley and GLBA because it allows a single person to become too powerful.
The DBA role is a purely technical one that relates to the physical database, and which is generally assigned to a pool of people. If the same people also have the ability to see and change any user data, then this creates a serious potential security risk of data vulnerability.
$ sqlplus scott/tiger@hrdb
ERROR:ORA-00604: error occurred at recursive SQL level 1ORA-20001: Login not allowed from this IPORA-06512: at line 5
Note the error ORA-20001: Login not allowed from this IP, which was placed in the trigger. You can make this message as descriptive as you'd like. You can also make the trigger more robust to collect useful information such as recording such attempts in a table.
Note a very important point, however: Since login triggers do not fire for a DBA user, they do not prevent someone from logging in as a user with the DBA role enabled. This risk is not as bad as it sounds; you may, in fact, want to let DBAs
Project Lockdown by Arup Nanda Page 48 of 66

Accountability is questionable as the DBA can eliminate any data, even the audit trail. However, most compliance requirements demand a clear separation of duties and abilities. Thus, the privileges required to administer the physical database should not include those to query or modify user data.
Traditionally, Oracle Database has not supported that separation. Therefore, in 2006, Oracle announced two revolutionary tools (both in beta at the time of this writing). The first, Oracle Database Vault (an option to Oracle Database 10g Release 2 EE) allows separation of privileges by creating "realms" of authorization. For instance, the DBA role will no longer have carte blanche to query and modify any table. Instead, the role will be limited to a specific domain of privileges, which is implemented as a realm. Thus, Database Vault does away with the concept of an omnipotent super-user who can erase all traces.Similarly, Oracle Audit Vault, a standalone product, provides a secure auditing facility that can be in a separate realm outside the DBA's control or that of the application manager; the audit trail can be controlled only by a security administrator. Using these two tools, the three relevant roles here—administering the physical database, managing object privileges, and managing the audit trail—can be completely separated, the end state demanded by almost all compliance provisions.
login from any client machine.
Listener node validation. The other option is to disable the login attempt at the listener itself. The connection attempt to the database server is disallowed by the listener, so there is no need for a trigger. To enable node validation, simply place the following lines in the file $ORACLE_HOME/network/admin/sqlnet.ora on server hrdb01 .
tcp.validnode_checking = yes tcp.invited_nodes = (hrdb01, hras01, hras02)
Here you have specified that the client machines (hras01 and hras02) that are allowed to connect to the listener. You can also specify the host names as IP addresses. Place all the node names on a single unbroken line (very important) separated by commas. Don't forget to add the database server name (hrdb01).
After restart, if a client attempts to login from a machine other than hras01 or hras02, he gets the error
$ sqlplus scott/tiger@hrdb
ERROR:ORA-12537: TNS:connection closed
This rather non-intuitive error is raised because of the filtering that occurs at the listener level. As the listener itself terminates the connection attempt, you get a connection closed. This error occurs even if the user has the DBA role because the attempt has not yet reached the database.
Node validation is a very powerful feature. For more information on it, read my DBAzine article "Building a Simple Firewall Using Oracle Net."
So, which option should you choose to prevent unwanted clients from connecting? Let's examine the pros and cons.
● Node validation works at the listener level, so all users are stopped from connecting—even the ones with DBA roles. This may or may not be desirable. For instance, if you have a DBA tool installed on your laptop and your laptop has DHCP enabled—which assigns a new IP each time it connects to the network—you can't place the IP address in the list of valid nodes; hence, you will not be able to connect.
● Node validation requires the listener to be restarted. For the brief moment the listener is down, clients will not be able to connect. While this may not be an issue, you should be aware of it. Every time you change the list of valid nodes, you will have to restart the listener.
● If you want to disable node validation temporarily, you should put tcp.valid_node_checking=no in the file sqlnet.ora and restart the listener. In the case of a login trigger, all you have to do is disable the trigger. You can re-enable it later when required.
● In node validation, you can place all the allowed clients on one line, but on one unbroken line only. If the list is too long to fit in one line, then you can't use this approach. Conversely, the trigger approach has virtually no the limitations. Or, you can use another feature called Connection Manager to limit IP addresses more than one line long.
● You have to use specific IP addresses or hostnames in node validation-no wild cards such as 10.20.%.% ", indicating all clients in the subnet 10.20. In the trigger approach you can use wild cards or via Connection Manager.
● The trigger approach lets you build a sophisticated tracking system wherein you can write to some tracking table for all attempts, successful or denied. In node validation, there is no such facility.
● In the trigger approach, you can control access based on parameters other than IP—such as the time of day, the user connecting, and so on. Node validation reads only the IP address.
● Remember, node validation stops attempts at the listener level; the database connections are yet not attempted. Hence, if you have enabled auditing on failed login attempts, they would not be registered.
● Because node validation works at the listener level, the potential adversary does not even get into the database, making denial-of-service attacks more difficult. This is a huge advantage for node validation.
You should decide on your approach after considering the above differences. In general, if the only objective is to stop connections from IP addresses without any other functionality such as tracking those unsuccessful attempts, node validation is a quick and simple method. If you want more sophisticated functionality, then you should look into login triggers.
How do you know which IP addresses to block and which ones to allow? Perhaps this assumption is too simplistic; in reality, the list of client machines will be long and difficult to track. Here is where your previous research comes in handy. Remember, in Phase 2, you captured the IP addresses from which the users connect by mining the listener log. In that step you must have generated a list of valid client IP addresses or hostnames. That list is what you need now.
Implications The implications can be quite serious; if you haven't done your homework, you may block a legitimate client.
Action Plan
1. From Phase 2 Step 1, get the list of valid IP addresses or hostnames of client machines.
2. Decide the approach to use—trigger based or node validation.
3. Implement the plan.
Project Lockdown by Arup Nanda Page 49 of 66

4. Monitor closely for several days, preferably a full cycle such as a month or week, as appropriate in your organization.
5. Fine-tune the approach by adding or removing nodes from being filtered.
Phase 4Duration: One Quarter
You've finally reached the final and longest phase. Here you will analyze some of the more complex setups and do long-term planning to eliminate potential threats.
Covered in This Installment: · 4.1 Enable Fine Grained Auditing · 4.2 Activate a Virtual Private Database · 4.3 Mask Sensitive Columns · 4.4 Encrypt Sensitive Data · 4.5 Secure Backups · 4.6 Mine History from Archived Logs · 4.7 Conclusion
4.1 Enable Fine Grained Auditing
Background Thus far you may have noticed that triggers haven't been mentioned as an auditing mechanism. Why not? Because the use of triggers carries an overhead of secondary sequential SQL execution, which adds to overall execution time. This overhead is rarely acceptable for production systems.
Fine Grained Auditing (FGA) is an excellent solution here because of its minimal performance overhead. If you are already familiar with FGA, please skip ahead to the Strategy section.
FGA was introduced in Oracle9i Database to record an audit trail when a user selects from a table, not just changes it. This was a landmark feature as there was no other way a SELECT activity could be recorded. Regular auditing enabled on SELECT statements merely recorded who issued a statement on an object, but not what was done.
In addition to details such as username, terminal, and time of the query, FGA records the SQL statement that was executed as well as the SCN number of that instance of time. This allows you to see not only the actual statement issued by the user, but the actual values the user saw, by reconstructing the data using flashback queries. In Oracle Database 10g Release 1, this facility was extended to cover other DML statements such as INSERT, UPDATE, and DELETE.
Here's a small example. Suppose there is a table named ACCOUNTS in the schema called BANK.
Name Null? Type ---------------- -------- ------------ACCT_NO NOT NULL NUMBERCUST_ID NOT NULL NUMBERBALANCE NUMBER(15,2)
To enable auditing on it, you will need to define an FGA policy on it using the supplied package DBMS_FGA.
begin dbms_fga.add_policy ( object_schema=>'BANK', object_name =>'ACCOUNTS', policy_name =>'ACCOUNTS_ACCESS' );end;
After the above code is executed, the FGA is active on the table ACCOUNTS. That's it—there's no need to change any initialization parameter or bounce the database.
The above code takes a shared lock on the table while executing, so you could do it online. Now, if a user named ARUP selects from the table by issuing:
select * from bank.accounts;
the action is immediately recorded in the audit trail known as FGA Audit Trail. You can check it with:
select timestamp, db_user, os_user, object_schema,
Project Lockdown by Arup Nanda Page 50 of 66
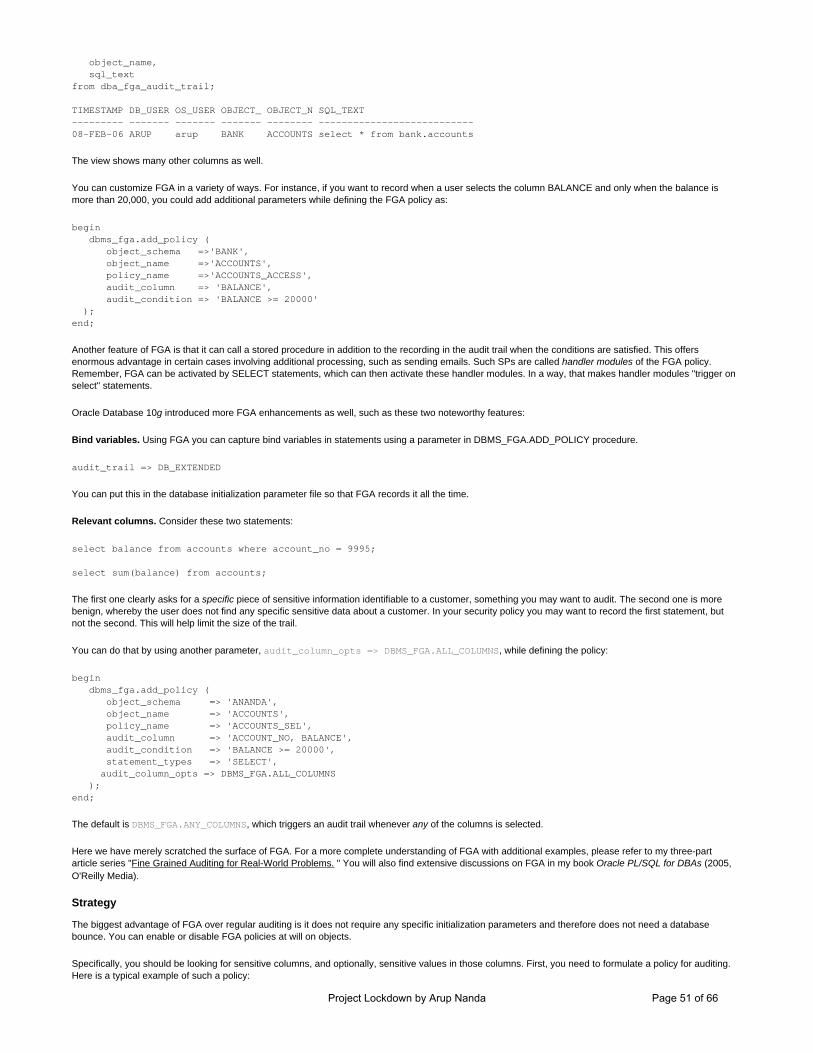
object_name, sql_textfrom dba_fga_audit_trail;
TIMESTAMP DB_USER OS_USER OBJECT_ OBJECT_N SQL_TEXT--------- ------- ------- ------- -------- ---------------------------08-FEB-06 ARUP arup BANK ACCOUNTS select * from bank.accounts
The view shows many other columns as well.
You can customize FGA in a variety of ways. For instance, if you want to record when a user selects the column BALANCE and only when the balance is more than 20,000, you could add additional parameters while defining the FGA policy as:
begin dbms_fga.add_policy ( object_schema =>'BANK', object_name =>'ACCOUNTS', policy_name =>'ACCOUNTS_ACCESS', audit_column => 'BALANCE', audit_condition => 'BALANCE >= 20000' );end;
Another feature of FGA is that it can call a stored procedure in addition to the recording in the audit trail when the conditions are satisfied. This offers enormous advantage in certain cases involving additional processing, such as sending emails. Such SPs are called handler modules of the FGA policy. Remember, FGA can be activated by SELECT statements, which can then activate these handler modules. In a way, that makes handler modules "trigger on select" statements.
Oracle Database 10g introduced more FGA enhancements as well, such as these two noteworthy features:
Bind variables. Using FGA you can capture bind variables in statements using a parameter in DBMS_FGA.ADD_POLICY procedure.
audit_trail => DB_EXTENDED
You can put this in the database initialization parameter file so that FGA records it all the time.
Relevant columns. Consider these two statements:
select balance from accounts where account_no = 9995;
select sum(balance) from accounts;
The first one clearly asks for a specific piece of sensitive information identifiable to a customer, something you may want to audit. The second one is more benign, whereby the user does not find any specific sensitive data about a customer. In your security policy you may want to record the first statement, but not the second. This will help limit the size of the trail.
You can do that by using another parameter, audit_column_opts => DBMS_FGA.ALL_COLUMNS, while defining the policy:
begin dbms_fga.add_policy ( object_schema => 'ANANDA', object_name => 'ACCOUNTS', policy_name => 'ACCOUNTS_SEL', audit_column => 'ACCOUNT_NO, BALANCE', audit_condition => 'BALANCE >= 20000', statement_types => 'SELECT', audit_column_opts => DBMS_FGA.ALL_COLUMNS );end;
The default is DBMS_FGA.ANY_COLUMNS, which triggers an audit trail whenever any of the columns is selected.
Here we have merely scratched the surface of FGA. For a more complete understanding of FGA with additional examples, please refer to my three-part article series "Fine Grained Auditing for Real-World Problems. " You will also find extensive discussions on FGA in my book Oracle PL/SQL for DBAs (2005, O'Reilly Media).
Strategy The biggest advantage of FGA over regular auditing is it does not require any specific initialization parameters and therefore does not need a database bounce. You can enable or disable FGA policies at will on objects.
Specifically, you should be looking for sensitive columns, and optionally, sensitive values in those columns. First, you need to formulate a policy for auditing. Here is a typical example of such a policy:
Project Lockdown by Arup Nanda Page 51 of 66

In the table SALARIES:
● Audit when someone SELECTs only the columns SALARY and BONUS. Do not audit when other columns are selected.
● Audit even when the user selects only one column such as SALARY alone, without any identifying information such as EMPNO.
● Audit whenever anyone selects any column from the table for EMPNOS below 1,000, which are reserved for executive management.
● Do not audit when the user SAP_PAYROLL_APP selects. This is the account user id used by the payroll processing application and auditing this will generate volumes of data and fill up the trail.
● HR assistants Monica and Adam regularly check and adjust the salary of employees in the low grades whose salary falls under 1000. Their SELECT statements for salaries under 1000 should not be audited.
● In addition to audit, execute a stored procedure enqueue_message that sends an email to a security officer.
With this in mind, you should build two different FGA policies.
First, the universal policy for EMPNO >= 1000 and for columns SALARY and BONUS only.
begin dbms_fga.add_policy ( object_schema => 'ACCMAN', object_name => 'SALARY', policy_name => 'SAL_SEL_UNIV', audit_column => 'SALARY, BONUS', statement_types => 'SELECT', audit_option => 'EMPNO >= 1000 and USER NOT IN(''SAP_PAYROLL_APP'', ''MONICA'', ''ADAM'')', handler_module => 'ENQUEUE_MESSAGE' );end;
Second, build the all-columns policy for EMPNO < 1,000.
begin dbms_fga.add_policy ( object_schema => 'ACCMAN', object_name => 'SALARY', policy_name => 'SAL_SEL_EXEC', statement_types => 'SELECT', audit_option => 'EMPNO < 1000', handler_module => 'ENQUEUE_MESSAGE' );end;
Third, add the special policy for MONICA and ADAM.
begin dbms_fga.add_policy ( object_schema => 'ACCMAN', object_name => 'SALARY', policy_name => 'SAL_SEL_SPEC', audit_column => 'SALARY, BONUS', statement_types => 'SELECT', audit_option => 'EMPNO >= 1000 AND SAL <= 1000 and USER IN(''MONICA'', ''ADAM'') AND USER != ''SAP_PAYROLL_APP''', handler_module => 'ENQUEUE_MESSAGE' );end;
As you can see, the conditions in the audit_option are mutually exclusive, so only one policy will be in effect and only one record will be written when any user attempts the SELECT statements.
Using this strategy, you can build a set of FGA policies. You can then enable and disable policies at will without impacting operation.
Implications There are four serious implications:
1. If the handler module, if defined, throws errors while the selection is made, it will cause different behavior in different versions of Oracle: ❍ In Oracle9i Database, it silently stops retrieving that row without reporting an error. So, if there are 100 rows and 4 of them satisfied the audit
condition, the handler module fire 4 times and each time it will fail. The query will return only 96 rows, without reporting any error and you ill never know that it happened. This obviously leads to inaccurate results.
❍ In Oracle Database 10g Release 1, it will ignore the errors in the handler module and retrieve all 100 rows as expected.
❍ In Oracle Database 10g Release 2, it will report the error on the user's session performing the query without returning any rows, not even the
Project Lockdown by Arup Nanda Page 52 of 66
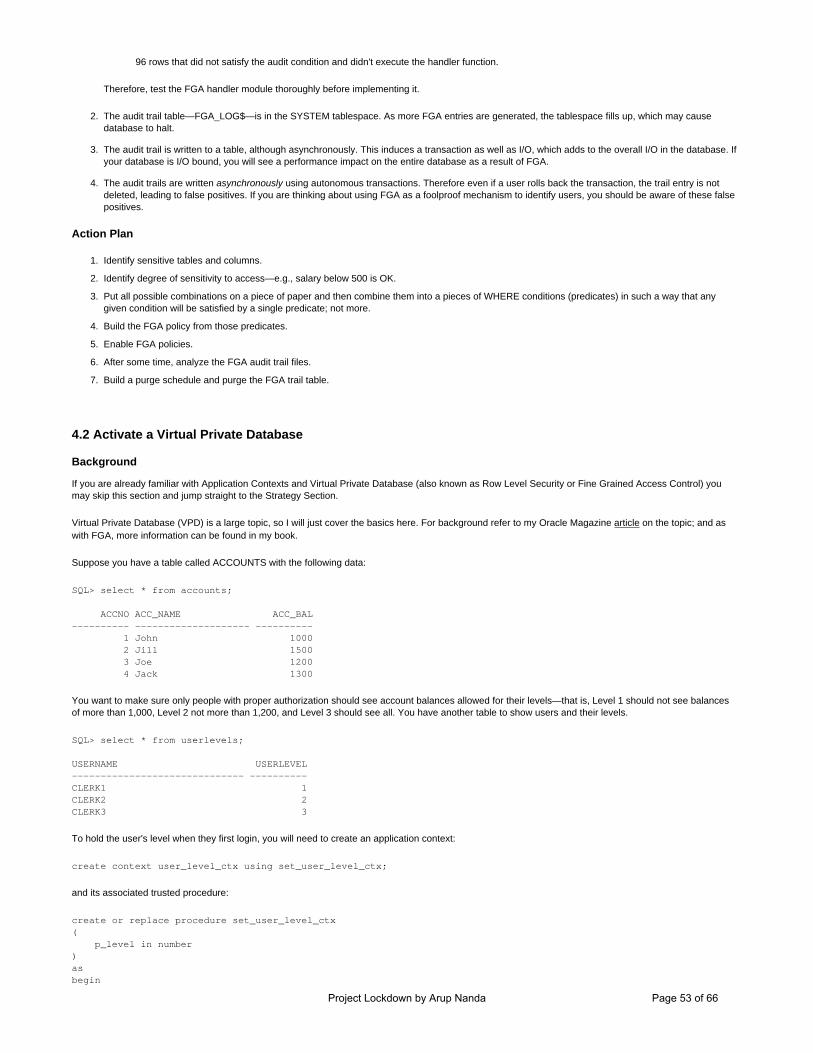
96 rows that did not satisfy the audit condition and didn't execute the handler function.
Therefore, test the FGA handler module thoroughly before implementing it.
2. The audit trail table—FGA_LOG$—is in the SYSTEM tablespace. As more FGA entries are generated, the tablespace fills up, which may cause database to halt.
3. The audit trail is written to a table, although asynchronously. This induces a transaction as well as I/O, which adds to the overall I/O in the database. If your database is I/O bound, you will see a performance impact on the entire database as a result of FGA.
4. The audit trails are written asynchronously using autonomous transactions. Therefore even if a user rolls back the transaction, the trail entry is not deleted, leading to false positives. If you are thinking about using FGA as a foolproof mechanism to identify users, you should be aware of these false positives.
Action Plan
1. Identify sensitive tables and columns.
2. Identify degree of sensitivity to access—e.g., salary below 500 is OK.
3. Put all possible combinations on a piece of paper and then combine them into a pieces of WHERE conditions (predicates) in such a way that any given condition will be satisfied by a single predicate; not more.
4. Build the FGA policy from those predicates.
5. Enable FGA policies.
6. After some time, analyze the FGA audit trail files.
7. Build a purge schedule and purge the FGA trail table.
4.2 Activate a Virtual Private Database
Background If you are already familiar with Application Contexts and Virtual Private Database (also known as Row Level Security or Fine Grained Access Control) you may skip this section and jump straight to the Strategy Section.
Virtual Private Database (VPD) is a large topic, so I will just cover the basics here. For background refer to my Oracle Magazine article on the topic; and as with FGA, more information can be found in my book.
Suppose you have a table called ACCOUNTS with the following data:
SQL> select * from accounts;
ACCNO ACC_NAME ACC_BAL---------- -------------------- ---------- 1 John 1000 2 Jill 1500 3 Joe 1200 4 Jack 1300
You want to make sure only people with proper authorization should see account balances allowed for their levels—that is, Level 1 should not see balances of more than 1,000, Level 2 not more than 1,200, and Level 3 should see all. You have another table to show users and their levels.
SQL> select * from userlevels;
USERNAME USERLEVEL------------------------------ ----------CLERK1 1CLERK2 2CLERK3 3
To hold the user's level when they first login, you will need to create an application context:
create context user_level_ctx using set_user_level_ctx;
and its associated trusted procedure:
create or replace procedure set_user_level_ctx( p_level in number)asbegin
Project Lockdown by Arup Nanda Page 53 of 66

dbms_session.set_context ( 'USER_LEVEL_CTX', 'LEVEL', p_level );end;
Then you need to create a login trigger to set the proper application context.
create or replace trigger tr_set_user_levelafter logonon databasedeclare l_level number;begin select userlevel into l_level from arup.userlevels where username = user; set_user_level_ctx (l_level);exception when NO_DATA_FOUND then null; when OTHERS then raise;end;
This sets the stage for setting the user levels in the application context attributes. Let's test to make sure:
SQL> conn clerk1/clerk1Connected.SQL> select sys_context('USER_LEVEL_CTX','LEVEL') from dual;
SYS_CONTEXT('USER_LEVEL_CTX','LEVEL')--------------------------------------1
SQL> conn clerk2/clerk2Connected.SQL> select sys_context('USER_LEVEL_CTX','LEVEL') from dual;
SYS_CONTEXT('USER_LEVEL_CTX','LEVEL')--------------------------------------2
SQL> conn clerk3/clerk3Connected.SQL> select sys_context('USER_LEVEL_CTX','LEVEL') from dual;
SYS_CONTEXT('USER_LEVEL_CTX','LEVEL')--------------------------------------3
As you can see, each user ID properly sets the levels. Now, you can build the VPD on the table. The whole VPD infrastructure can be controlled using the supplied PL/SQL package DBMS_RLS ; the rules governing which rows should be shown are controlled by a concept called a policy. A policy applies a "predicate" (a WHERE condition) to all the queries on the table, effectively restricting the access to rows. The WHERE condition is generated by a function called a policy function. So, first we have to create the policy function that returns a WHERE condition to be applied to the queries.
create or replace function get_acc_max_bal( p_schema in varchar2, p_obj in varchar2)return varchar2as l_ret varchar2(2000);begin select case userlevel when 1 then 'acc_bal <= 1000' when 2 then 'acc_bal <= 1200' when 3 then null else '1=2' end into l_ret from userlevels
Project Lockdown by Arup Nanda Page 54 of 66

where username = USER; return l_ret;end;
then add the policy:
begin dbms_rls.add_policy ( object_name => 'ACCOUNTS', policy_name => 'ACC_MAX_BAL', policy_function => 'GET_ACC_MAX_BAL', statement_types => 'INSERT, UPDATE, DELETE, SELECT', update_check => TRUE );end;
At this time the table is protected. When CLERK1 logs in and selects from the table:
SQL> select * from arup.accounts;
ACCNO ACC_NAME ACC_BAL---------- -------------------- ---------- 1 John 1000
Clerk1 sees only ACCNO 1, with balance 1000. Since he is not authorized to see anything above that account balance, the other accounts are invisible to him. But when Clerk2 logs in:
SQL> conn clerk2/clerk2Connected.SQL> select * from arup.accounts;
ACCNO ACC_NAME ACC_BAL---------- -------------------- ---------- 1 John 1000 2 Joe 1200
She can see ACCNO 2 as well. The balance of ACCNO 2 is 1200, within the authorized limit for Clerk2.
Using this technique you can build a sort of restricted view into the table. This will be a very handy tool in Project Lockdown.
Strategy The key is to find out what information is to be protected from all parties and on which columns. This sounds much easier than it actually is. Collecting this information requires business knowledge, or at least collaboration with someone more familiar with those processes. Once you identify the tables and columns, you should be able to implement the VPD policy as shown in the examples in the Background section above.
What if you want to let some users have unrestricted access to the tables even though the VPD is in effect? The role EXEMPT ACCESS POLICY does exactly that.
grant exempt access policy to ananda;
From that point on, ANANDA will bypass all access policies defined on all tables.
It is probably unacceptable to allow a user to bypass all access restrictions, however; a better solution is to code it in the policy function itself. A good example is the schema owner of the table—you definitely want it to see all the rows of the table it owns without restriction. You can code it in the policy function as follows:
create or replace function get_acc_max_bal( p_schema in varchar2, p_obj in varchar2)return varchar2as l_ret varchar2(2000);begin if (p_schema = USER) then l_ret := NULL; else select case userlevel when 1 then 'acc_bal <= 1000' when 2 then 'acc_bal <= 1200' when 3 then null else
Project Lockdown by Arup Nanda Page 55 of 66

'1=2' end into l_ret from userlevels where username = USER; end if; return l_ret;end;
This version of the function returns NULL when the owner of the table logs in (p_schema = USER) and therefore provides unrestricted access to the table. You can, of course, make any changes in the function to allow more users to bypass the VPD policy.
The biggest challenge in VPD is putting the restriction on the child tables. Your limiting condition may be on a column called, say, ACC_BAL; but all other child tables may not have the column. So how can you restrict those tables?
For example, here is a table called ADDRESSES, which contain the customer addresses. This table does not have a column called ACC_BAL, so how can you put the same restriction on this table, as on ACCOUNTS? There are two ways:
● Add a column ACC_BAL on the table ADDRESSES. This column may be updated through a trigger on the main table ACCOUNTS. Now you can define a policy on the table using the same policy function used on ACCOUNTS.
● Use a different policy function for ADDRESSES. In this function the return value should be
ACCNO in (SELECT ACCNO FROM ACCOUNTS)
This is the predicate used in the policy restriction. So, the address will be displayed only of the account exists on ACCOUNTS, and since the table ACCOUNTS is restricted anyway, the table ADDRESSES will be automatically restricted.
You have to choose between these two approaches based on your situation.
Implications There are several potentially damaging implications:
● VPD works by rewriting queries to add the additional predicate. The user queries may have been well written and perhaps well tuned, but the introduction of the additional predicate does throw a wrench into that since the optimization plan may change. You should carefully consider the potential impact and mitigate the risk by building indexes.
● Materialized views work by selecting the rows from the underlying tables. If the schema owner of the view does not have unrestricted access to the table, only those rows that satisfy the VPD policy will be refreshed, rendering the view inaccurate.
● If you have set up replication, the users doing the propagation and reception should have unrestricted access to the table, else they will replicate only part of a table.
● If you load the table using Direct Path Insert (INSERT with the APPEND hint), then you cannot have a VPD policy on the table. Either you should disable the policy temporarily or do the insert using a user that has unrestricted access to the table.
● Direct Path Exports bypass the SQL Layer; hence the VPD policy will not be applied. Therefore, when you export a table using DIRECT=Y option, Oracle ignores it and exports it using the conventional path. This may add to the overall execution time.
Action Plan
This is a complex and fluid plan:
1. Identify the tables to be protected by VPD.
2. Identify the columns of those tables that need to be protected.
3. Identify the restricting condition, e.g. Salaries > 1000.
4. Identify how to establish privileges—for example, do users have authority levels or roles? You may want to divide users into three groups with certain levels of authority associated with them. Or, perhaps you want to assign access restrictions on groups of users based on role—managers can access all rows, clerks can access SALARY > 2000, and so on.
5. Decide how you will pass the privileges to the policy function—through a package variable, through an application context, or through a static table.
6. Identify if further indexes need to be created.
7. Create additional indexes.
8. Identify child tables and decide on a scheme to enable the restriction on them—via a new column or the IN condition.
9. Re-identify the need for indexes based on your decision above.
10. Create indexes.
11. Build the policy function.
12. Create the policy (but as disabled).
Project Lockdown by Arup Nanda Page 56 of 66

13. On a light-activity time of day, enable the policy and test accessing the table from a regular user account to make sure that the policy works. If it does not work, check trace files to find the error.
14. If it works, enable the policy.
15. Monitor performance.
16. Identify further needs to build indexes, use outlines, and so on.
17. Iterate for all tables.
4.3 Mask Sensitive Columns
Background Imagine that you're an amateur database hacker. The database in this case contains medical records and the information you are looking for is diagnosis codes. What column would you look for? Probably one named DIAGNOSIS, DISEASE, or something similar.
As you can see, sensitive columns with obvious names are a crucial security issue.
Strategy When adversaries have no prior knowledge of the contents of your database, they will not decipher the meaning of your columns if they have nonintuitive names. This is a strategy known as "security by obscurity." Even seasoned adversaries who deliberately force into the database will still need to track down the column names before they can do anything else. Since they may have limited time—they almost always do—they will usually move on to the next opportunity. Of course, using obscure column names makes development harder as well.
There is an alternative to making this tradeoff, however: column masking, in which you hide the contents of the column and expose it only to legitimate users.
There are two column-masking approaches: by using a view and by using VPD.
Using a View. This method is applicable to any version of Oracle but usually the only choice when your database release is Oracle9i or earlier.
Suppose your table looks like this:
SQL> desc patient_diagnosis Name Null? Type ------------------- ------ ------------- PATIENT_ID NUMBER DIAGNOSIS_ID NUMBER DIAGNOSIS_CODE VARCHAR2(2) DOCTOR_ID NUMBER(2) BILLING_CODE NUMBER(10)
The rows look like this:
SQL> select * from patient_diagnosis;
PATIENT_ID DIAGNOSIS_ID DI DOCTOR_ID BILLING_CODE---------- ------------ -- ---------- ------------ 1 1 01 1 1003 1 2 02 1 1003 1 3 11 1 1003 2 1 11 1 1005 2 2 41 2 1005
In this case, you want to hide the values of the column DIAGNOSIS_CODE.
create view vw_patient_disgnosisasselect patient_id, diagnosis_id, doctor_id, billing_codefrom patient_diagnosis/
Then you can create a synonym PATIENT_DIAGNOSIS for the view VW_PATIENT_DIAGNOSIS and grant select on the view instead of the table. The view hides the column DIAGNOSIS_CODE.
This is a rather simplistic solution, so instead of masking the column for all users, you may want to create role-based obscurity—when the user is a manager, show the protected columns; else don't. You can do so by passing an application context or a global variable to designate the role of the user. If the application context attribute were IS_MANAGER, you could use:
Project Lockdown by Arup Nanda Page 57 of 66

create or replace view vw_patient_disgnosisasselect patient_id, diagnosis_id, decode( sys_context('USER_ROLE_CTX','IS_MANAGER'), 'Y', DIAGNOSIS_CODE, null ) diagnosis_code, doctor_id, billing_codefrom patient_diagnosis;
This is a more flexible view that can be granted to all the users and the contents of the view will be dynamic based on the user's role.
Using VPD. Oracle Database 10g introduced a feature that makes VPD even more useful: There is no need to create a view. Rather, the VPD policy can suppress its display. In this case, the VPD policy function will look like this:
1 create or replace function pd_pol 2 ( 3 p_schema in varchar2, 4 p_obj in varchar2 5 ) 6 return varchar2 7 is 8 l_ret varchar2(2000); 9 begin 10 if (p_schema = USER) then 11 l_ret := NULL; 12 else 13 l_ret := '1=2'; 14 end if; 15 return l_ret; 16 end;
Now create the policy function:
1 begin 2 dbms_rls.add_policy ( 3 object_schema => 'ARUP', 4 object_name => 'PATIENT_DIAGNOSIS', 5 policy_name => 'PD_POL', 6 policy_function => 'PD_POL', 7 statement_types => 'SELECT', 8 update_check => TRUE, 9 sec_relevant_cols => 'DIAGNOSIS_CODE', 10 sec_relevant_cols_opt => dbms_rls.all_rows 11 ); 12 end;
Note line numbers 9 and 10. In line 9, we mention the column DIAGNOSIS_CODE as a sensitive column. In line 10, we specify that if the column is selected, all rows are displayed; but the column value is shown as NULL. This effectively masks the column. From the policy function, note that the predicate applied is NULL when the owner of the table selects from it—so, the VPD restrictions are not applied and the column is shown.
Remember, there is no way to "replace" a policy. If an old policy exists you would have to drop it first.
begin dbms_rls.drop_policy ( object_schema => 'ARUP', object_name => 'PATIENT_DIAGNOSIS', policy_name => 'PD_POL' );end;
Now you can test it.
SQL> conn arup/arupConnected.SQL> select * from patient_diagnosis;
PATIENT_ID DIAGNOSIS_ID DI DOCTOR_ID BILLING_CODE---------- ------------ -- ---------- ------------ 1 1 01 1 1003 1 2 02 1 1003 1 3 11 1 1003
Project Lockdown by Arup Nanda Page 58 of 66

2 1 11 1 1005 2 2 41 2 1005
Note that the DIAGNOSIS_CODE column values are shown, since ARUP is the owner of the table and should see the values. Now, connect as another user who has select privileges on the table and issue the same query.
SQL> set null ?SQL> conn ananda/anandaSQL> select * from arup.patient_diagnosis;
PATIENT_ID DIAGNOSIS_ID D DOCTOR_ID BILLING_CODE---------- ------------ - ---------- ------------ 1 1 ? 1 1003 1 2 ? 1 1003 1 3 ? 1 1003 2 1 ? 1 1005 2 2 ? 2 1005
Note how the column DIAGNOSIS_CODE shows all null values.
This method is much more elegant, even apart from the fact that there is no view to be created on the table, no synonym to be created to point to the view, and no additional grants to be maintained. If you need to have different policies to show this value to different people, you can easily modify the policy function (line 11) to add further checks. For instance, your policy may say that less sensitive diagnosis codes such as those for common cold be exposed to all users. So, your policy function will look like the following, assuming the DIAGNOSIS_CODE for common cold is "01".
1 create or replace function pd_pol 2 ( 3 p_schema in varchar2, 4 p_obj in varchar2 5 ) 6 return varchar2 7 is 8 l_ret varchar2(2000); 9 begin 10 if (p_schema = USER) then 11 l_ret := NULL; 12 else 13 l_ret := 'diagnosis_code=''01'''; 14 end if; 15 return l_ret; 16* end;
Note line 13, where we added the additional predicate to show only when the diagnosis code is "01" and nothing else. Now, test it.
SQL> conn arup/arupConnected.SQL> select * from arup.patient_diagnosis;
PATIENT_ID DIAGNOSIS_ID DI DOCTOR_ID BILLING_CODE---------- ------------ -- ---------- ------------ 1 1 01 1 1003 1 2 02 1 1003 1 3 11 1 1003 2 1 11 1 1005 2 2 41 2 1005
SQL> conn ananda/anandaConnected.SQL> select * from arup.patient_diagnosis;
PATIENT_ID DIAGNOSIS_ID DI DOCTOR_ID BILLING_CODE---------- ------------ -- ---------- ------------ 1 1 01 1 1003 1 2 ? 1 1003 1 3 ? 1 1003 2 1 ? 1 1005 2 2 ? 2 1005
Note the diagnosis code is "01" for patient id 1 and diagnosis id 1, which is the only allowed diagnosis code; so it is shown clearly. All others have been shown as null and are effectively masked.
Implications If you want to mask sensitive columns and the programs do not even mention them, there will be no implications.
If you use the view approach, where the sensitive column is simply removed from the view, it might pose a problem where the programs use a construct like Project Lockdown by Arup Nanda Page 59 of 66

SELECT * FROM TABLE .... Since the columns have not been explicitly named, the absence of one column will affect the program execution. But this is not the issue with the modified view approach where the column is still present but NULLed.
There is one very important implication you should be aware of. Suppose you have a column called CONTRACT_AMOUNT, which is shown if less than a certain value, say $500. If more than $500, then the column shows NULL. The table has three rows with values 300, 300, and 600 in the column. Prior to column masking, if a user issues the query
select avg (contract_amount) from contracts;
he will get 400 (the average of 300, 300, and 600). After column masking, the value of the column will be NULL for the record where the value is $600, so the user will see the values as 300, 300, and NULL. Now the same query would show 200 (300, 300, and NULL). Note the important difference: The value shown is 200; not 400.
Be aware of this important difference column masking can introduce.
Action Plan
1. List all sensitive columns on all sensitive tables.
2. Decide on sensitive columns to be masked.
3. Decide on the privilege scheme.
4. If you are on Oracle Database 10g Release 1 or later, choose the VPD approach, else choose the view-based approach.
5. If you choose the VPD approach:
a. Create policy functions for each table.
b. Create policies for each table. This will help you control masking on specific tables.
6. If you choose the view-based approach:
a. Create views on each table, typically named VW_<table_name>.
b. Create a synonym (the same name as the table) pointing to the view.
c. Revoke privileges made to the users on the table.
d. Re-grant the privileges to the view.
e. Recompile all dependent invalid objects.
4.4 Encrypt Sensitive Data
Background As I mentioned previously in this series, security is like protecting yourself on a cold winter day with layers of clothing, versus wearing the bulkiest winter jacket available. But building layered defenses may not deter the most determined adversary, and certainly won't always prevent a legitimate user from stealing corporate assets. The last line of defense in such a case is encryption, by which the data is accessible to the user (or the adversary) but only with a key. Without the key, the data is useless. If you protect the key, you will protect the data.
Remember, encryption is not a substitute for other layers of security. You must have those defenses in place regardless.
Again, encryption is a vast topic, but I'll try to give you an actionable overview here.
Oracle provides two types of encryption:
1. Encryption APIs such as the packages dbms_obfuscation_toolkit and dbms_crypto (in Oracle Database 10g Release 1 and later). Using these packages you can build your own infrastructure to encrypt data. This is the most flexible approach, but rather complex to build and manage.
2. Transparent Data Encryption, a feature of Oracle Database 10g Release 2 and later, obviates manual key management. The database manages the keys but as the name suggests, the encryption is transparent—data is stored in an encrypted manner only. When selected, it will be in clear case.
I recommend that you review the Oracle documentation (Chapter 17 of the Oracle Database Security Guide and Chapter 3 of the Oracle Database Advanced Security Administrator's Guide, respectively) before proceeding to the Strategy section.
Strategy The choice between regular encryption and Transparent Data Encryption is a vital one. (In releases prior to Oracle Database 10g Release 2, however, only the former is available.)
● In either case you will have to identify the tables, and more specifically the columns, to be encrypted. It's probably not a good idea to encrypt all columns as encryption routines do burn CPU cycles.
● Next, pick an encryption algorithm. A typical choice is Triple Data Encryption Standard with 156-bit encryption (DES3). However, starting with Oracle Database 10g Release 1, you have access to the newer, faster, and more secure Advanced Encryption Standard (AES) algorithm that operates with a
Project Lockdown by Arup Nanda Page 60 of 66

128-bit long key.
● Oracle9i Database provided dbms_obfuscation_toolkit; with Oracle Database 10g Release 1, you have access to dbms_crypto , a much better utility. The older package is still available, but avoid it if you are building encryption infrastructure for the first time.
● At this point you have to decide between TDE and your own routine (if applicable). The table below may help you decide.
Transparent Data Encryption User-built Encryption
Flexibility Minimal—For instance, if the column SALARY in SALARIES table is encrypted, then any user with access to the table will be able to see the data clearly. You can't place selective control on that column based on user roles and levels. The data in the database is encrypted but is decrypted when accessed.
Robust—For instance, you may define the column to be shown in clear text only if the user is a manager; and encrypted otherwise. This will ensure the same application sees the data differently based on who is using them. This flexibility can also be expanded to other variables, such as time of day or the client machine accessing the database.
Setup Minimal—This facility is truly transparent—there is nothing to do but issue this command (provided all other one-time jobs have been executed, such as building the wallet):
ALTER TABLE SALARIES MODIFY (SALARY ENCRYPT)
Extensive—To provide a seamless interface to the users, you have to create a view that does a decryption of the column. This view should then be granted. This introduces several layers of complexity in management.
Key Management Automated—Key management is handled by the database, using a wallet.
Manual—Since you have to manage the keys, you have to decide how you can balance between the two conflicting requirements:
● Make the key secure so that it's not accessible to an adversary
● Make it accessible to applications
Restrictions on columns Some—Certain columns cannot be encrypted, such as those with partition keys, of data types BLOB, etc.
Only restriction is LONG.
Support for indexes N/A—Indexes may not help in queries since the data is stored in an encrypted manner.
Yes—Since you control the encryption, you can create surrogate columns to build indexes on.
If you decide to use TDE, take the following steps.
1. Configure the Wallet: It's generally in the folder $ORACLE_BASE/admin/$ORACLE_SID/wallet, but you can use any location by putting the following lines in the file SQLNET.ORA:
ENCRYPTION_WALLET_LOCATION = (SOURCE= (METHOD=file) (METHOD_DATA= (DIRECTORY=/orawall) ) )
Here, the wallet location is set to /orawall.
2. Open the Wallet and Assign a Password: Issue the command:
alter system set encryption key authenticated by "53cr3t";
3. Choose a password that is difficult to guess but easy to remember. (For security purposes you may want the wallet password to remain unknown to the DBA, so that a second person is needed to open the wallet.) Now, from now on, every time the database opens you have to open the wallet with:
alter system set encryption wallet open authenticated by "53cr3t";
After this, you can create tables with encrypted columns:
create table accounts( acc_no number not null, first_name varchar2(30) not null, last_name varchar2(30) not null, SSN varchar2(9) ENCRYPT USING 'AES128', acc_type varchar2(1) not null,
Project Lockdown by Arup Nanda Page 61 of 66

folio_id number ENCRYPT USING 'AES128', sub_acc_type varchar2(30), acc_open_dt date not null, acc_mod_dt date, acc_mgr_id number)
When users insert data into the table, the data is automatically converted into encrypted value and put on the disk. Similarly, when the data is retrieved by a select statement, it's automatically converted into decrypted value and shown to the user.
Implications As with any major change, there are some serious implications.
● Encryption is a CPU-intensive operation. If the system is already CPU bound, this will make it worse.
● Indexes will not work well with encrypted columns, especially predicates like WHERE <ColumnName> LIKE 'XYZ%', which should have used index range scan in unencrypted columns but will use full table scans.
● Key management is a very important issue. If you lose the keys, the data becomes inaccessible.
Action Plan The action plan is described in the Strategy section.
4.5 Secure Backups
Background In many cases, DBAs forget the most vulnerable of spots: the backup of the database. Once the data leaves the secured perimeters of the server, it's not under your control anymore. If an adversary can steal the tapes, he can mount them on a different server, restore the database, and browse the data at his leisure.
Fortunately, you can eliminate even that risk via backup encryption.
Strategy In Oracle Database 10g Release 2 and later, you can encrypt backups in RMAN in three different modes: transparent, password-based, and dual.
Transparent Mode. In this (the most common) approach, RMAN gets the encryption key from the encryption wallet (discussed in the previous section) and uses it to encrypt the backupset. Needless to say, the wallet must be open during the backup and restore. If the wallet is not open, you will get the errors
ORA-19914: unable to encrypt backup ORA-28365: wallet is not open
1. Open the wallet using the command:
alter system set encryption wallet open authenticated by "53cr3t";
Of course, the password may be something other than "53cr3t ". Remember, this is case sensitive so it must be enclosed in double quotes.
2. Make sure the encryption is enabled for the entire database. You can enable it by issuing
RMAN> configure encryption for database on;
3. Alternately, if you want to encrypt only a few tablespaces, you can issue the following for all tablespaces.
RMAN> configure encryption for tablespace users on;
4. After that you can use the regular backup commands without any other user intervention.
RMAN> backup tablespace users;
5. When you restore the backup, the wallet must be open. If the wallet is not open, then you get the error while restoring:
RMAN> restore tablespace users;
Starting restore at 09-FEB-06using channel ORA_DISK_1
... messages ...ORA-19870: error reading backup piece C:\ORACLE\PRODUCT\10.2.0\FLASH_RECOVERY_AR
Project Lockdown by Arup Nanda Page 62 of 66

EA\ANANDA\BACKUPSET\2006_02_09\O1_MF_NNNDF_TAG20060209T221325_1YR16QLT_.BKPORA-19913: unable to decrypt backupORA-28365: wallet is not open
The error message is pretty clear; the wallet must be opened. If you ever need to restore the tablespace in other servers, the wallet must be copied there and opened with the correct password. If an adversary steals the tapes, he will not be able to restore the backups.
Password-based mode. In this case there is no need to use the wallet for key management. The backups are encrypted by a key that itself is encrypted by a password. Here is how a command looks:
RMAN> set encryption on identified by "53cr3t" only; RMAN> backup tablespace users;
The backupset produced above will be encrypted by the password. To decrypt it during restore, you have to use the password as follows:
RMAN> set decryption identified by "53cr3t "; RMAN> restore tablespace users;
This eliminates the use of wallets. So to restore the backup on any server, all you need is the password, which does away with the backup of the wallet. However, your password must be visible in the scripts and hence any adversary with access to the database server will be able to read it. Refer to Phase 2, where you learned how to hide passwords.
Dual mode. As the name suggests, this mode combines the other two approaches. You take the backup in the following manner:
RMAN> set encryption on identified by "53cr3t"; RMAN> backup tablespace users;
Note there is no " only " clause in the command set encryption. This allows the backup to be restored in either of the two ways: by (password "tiger" or by an open wallet. For instance, note the following command. No password has been given, yet the restore is successful.
RMAN> sql 'alter tablespace users offline';RMAN> restore tablespace users;
Starting restore at 09-FEB-06allocated channel: ORA_DISK_1... restore command output comes here ...
This is useful when you generally use a script to handle backups and you often have to recover the database to a different server, such as a QA server. But in general, this method does not have much practical use.
If you do use the transparent mode of backup encryption, you can backup the wallet as well. Even if an adversary gets the wallet, he will not be able to open it without a password.
Implications
● Encryption, as I mentioned before, is a fairly CPU-intensive process and it's thus a highly CPU-intensive operation to encrypt the entire RMAN backup set. You could reduce the CPU cycles by partially encrypting backups—just select tablespaces that contain sensitive data, not all of them. A better option is to use Transparent Data Encryption for column level encryption.
● The wallet (in transparent approach) and password (in password-based approach) are very important. If you lose them, you will never be able to decrypt the backups; so have a plan for backing these up.
● If you use password based encryption, the password must be in the scripts. It could be vulnerable to theft.
Action Plan
1. Decide if you really want to encrypt entire backupsets as opposed to specific columns in specific tables.
2. If RMAN backupsets are to be encrypted, decide between the entire database and specific tablespaces.
3. Choose between password based, transparent, and dual-mode approaches.
4. If transparent or dual-mode approach, then
a. Configure the wallet.
b. Open the wallet.
c. In RMAN, configure the tablespace(s) or the entire databases to be encrypted in backup.
5. If password or dual-mode approach, then
a. Choose a password and put in the RMAN scripts. Use any of the password hiding techniques described in Phase 2.
b. Take a backup using those scripts only.
Project Lockdown by Arup Nanda Page 63 of 66

4.6 Mine History from Archived Logs
Background One very important part of the lockdown process is ensuring that no unauthorized DDL activity occurs on the database. An adversary, after getting a legitimate route to connect to the database, will find it extremely easy to drop a few segments to create a simple denial-of-service attack.
In Phase 3, you learned how to lock-down key objects so that they cannot be altered without the DBA's consent. But what about the illegitimate alterations done with consent and an attack that was known only later? This is where the fourth pillar of security—accountability—comes into play.
One option is to turn on DDL auditing to track DDL activities. All in all, it's the easiest option—it's easy to setup, even easier to browse, possible to archive, and so on. However, auditing puts pressure on performance, something we are trying to avoid. The question is how to retrace the DDL statements without setting up auditing.
Strategy This is where a tool (or a feature, if you will) called Log Miner comes very handy. Introduced in Oracle8i Database, Log Miner lets you search online redo logs or archived logs.
Here's how you can set up log mining to unearth DDL details. First, get the online log file or archive log file to mine and add that to the Log Miner session.
sqlplus / as sysdba
begin dbms_logmnr.add_logfile ( 'C:\ORACLE\DATABASE\ANANDA\REDO03.LOG'); dbms_logmnr.add_logfile ( 'C:\ORACLE\DATABASE\ANANDA\REDO02.LOG'); dbms_logmnr.add_logfile ( 'C:\ORACLE\DATABASE\ANANDA\REDO01.LOG');end; /
After adding the files, start the Log Miner session. You have to pass the source of the data dictionary; here we have specified the online catalog as the source.
begin dbms_logmnr.start_logmnr ( options => dbms_logmnr.dict_from_online_catalog );end;
The mined contents are placed in a view named V$LOGMNR_CONTENTS; but this view is transient—it is visible only to the session that started the Log Miner. So, if you want to perform an analysis later, you need to preserve it in a permanent table.
create table lm_contentsnologgingasselect * from v$logmnr_contents;
Now for the analysis. To find the DDL commands you would issue the following query:
select sql_redofrom lm_contentswhere operation = 'DDL'and seg_owner not in ('SYS','SYSTEM','PUBLIC');
Here is a sample output. Note that there is no DROP TABLE statement—in Oracle Database 10g, dropped tables are not actually dropped but rather renamed. The SQL_REDO will reflect that. In the cases where the user actually drops the table using the PURGE clause, the column SQL_REDO will reflect the correct command. (To save space, I have trimmed the output so that the DDLs for Functions and Procedures appear partially. I have also used RECSEPCHAR '.' to show devising lines between multi-line records.)
SQL_REDO-------------------------------------------------------------------------------
ALTER PACKAGE "XDB"."DBMS_XSLPROCESSOR" COMPILE SPECIFICATION REUSE SETTINGS;ALTER PACKAGE "XDB"."DBMS_XMLDOM" COMPILE SPECIFICATION REUSE SETTINGS;ALTER PACKAGE "XDB"."DBMS_XMLPARSER" COMPILE SPECIFICATION REUSE SETTINGS;ALTER PACKAGE "EXFSYS"."DBMS_RLMGR_DR" COMPILE BODY REUSE SETTINGS;truncatetable developers;...............................................................................create table patient_diagnosis( patient_id number,
Project Lockdown by Arup Nanda Page 64 of 66

...............................................................................create view vw_patient_diagnosisas...............................................................................create or replace view vw_patient_diagnosisas...............................................................................create or replace function pd_pol( p_schema in varchar2,...............................................................................create or replace function pd_pol( p_schema in varchar2,...............................................................................create or replace function pd_pol( p_schema in varchar2,...............................................................................grant connect, resource to ananda identified by VALUES '1DB10D95DE84E304' ;create or replace function pd_pol(...............................................................................create or replace function pd_pol( p_schema in varchar2,...............................................................................ALTER TABLE "ARUP"."TEST1" RENAME TO "BIN$JQHaX2mpSxOyrhkxAteHmg==$0" ;drop table test1 AS "BIN$JQHaX2mpSxOyrhkxAteHmg==$0" ;
Of course, this output itself is probably meaningless; you have to see more information such as timestamp, SCN, and so on in the Log Miner entries to make a valid connection between user actions and actual events.
select timestamp, scn, seg_owner, seg_namefrom lm_contentswhere operation = 'DDL'and seg_owner not in ('SYS','SYSTEM','PUBLIC')/
Here is a sample output:
TIMESTAMP SCN SEG_OWNER SEG_NAME--------- ---------- ---------- ------------------------------06-FEB-06 1024674 XDB DBMS_XSLPROCESSOR06-FEB-06 1026884 XDB DBMS_XMLDOM06-FEB-06 1026896 XDB DBMS_XMLPARSER06-FEB-06 1026918 EXFSYS DBMS_RLMGR_DR06-FEB-06 1029244 ARUP DEVELOPERS08-FEB-06 1096847 ARUP PATIENT_DIAGNOSIS08-FEB-06 1097057 ARUP VW_PATIENT_DIAGNOSIS08-FEB-06 1097920 ARUP VW_PATIENT_DIAGNOSIS08-FEB-06 1100059 ARUP PD_POL08-FEB-06 1100157 ARUP PD_POL08-FEB-06 1100386 ARUP PD_POL08-FEB-06 1100413 ANANDA08-FEB-06 1101544 ANANDA PD_POL08-FEB-06 1101564 ARUP PD_POL09-FEB-06 1123950 ARUP TEST109-FEB-06 1123953 ARUP TEST1
Note that I have used SEG_OWNER and not the USERNAME. Due to a bug that is unresolved as of Oracle Database 10.2.0.1, the USERNAME is not populated.
This is just one example of how to pull DDL statements from the archived logs. You can use any statement to mine from the logs—DMLs, as well. Mining for DML statements are a great substitute for auditing, since they exert no performance pressures on the database.
Implications Log Miner is not intrusive but it does take a lot of CPU cycles and PGA memory on the server. So, run it carefully, preferably under conditions of reduced load. (Another option is to move the archived logs to a different server and mine them there. This option should be exploited whenever possible.)
Action Plan
1. Identify what statements you want to mine from logs and how often. Some examples could be DDL statements related to dropping of objects; but you may need to be further selective. In data warehouse environments, applications temporarily create many tables and drop them later, so you may want to exclude those schemas.
Project Lockdown by Arup Nanda Page 65 of 66

2. Use the above technique to extract information from the archived logs on a regular basis and analyze them for possible abuse or pattern.
4.7 Conclusion
This phase had a small number of tasks; but each of these tasks take a considerable amount of time to execute. In addition, these tasks had no clear details as a part of the objective. These minor details vary so much that it is impossible to build a generalized one-size-fits-all description.
The most important factor in your quest for security is to understand that you can't chase it in a vacuum. To effectively build a secured database infrastructure, your actions must be tempered with the understanding of the unique nature of your organization and your analysis must include your business processes to isolate sensitive data from the rest. For instance, credit-card numbers are to be protected at any organization but what about sales numbers? In some organizations such as retailers, the sheer volume of data makes it infeasible to protect it by encryption, but the same can't be said for a hedge-fund trading firm, where sales numbers are zealously guarded. A tiered approach to see sensitive data may work in some cases; but in most cases, it's probably best provided on an as-needed basis.
At the end of this journey, I hope you have learned some valuable tools and techniques you can use right now to protect your database infrastructure. I will highly appreciate if you could take some time to let me know of your feedback and suggestions on enhancing this four-part series with other relevant issues and material.
About the Author
Arup Nanda ([email protected]) has been an Oracle DBA for more than 12 years, handling all aspects of database administration—from performance tuning to security and disaster recovery. He is a coauthor of PL/SQL for DBAs (O'Reilly Media, 2005). He was Oracle Magazine's DBA of the Year in 2003.
Project Lockdown by Arup Nanda Page 66 of 66

A Brief Security Primer
First, it's important to understand what "security" means in the context of this project.
Database security is akin to a roof over a building. The roof is held in place by four pillars—authentication, authorization, assurance, and accountability—with each pillar contributing to the core principle of security in a different way.
Authentication means establishing identity—confirming that a user is what he or she claims to be. If authentication is weak, an intruder may gain entry into the infrastructure. When the user is authenticated, you allow her to see only the data she is "authorized" to see. Authorization implies control over what the user can or can't see after she is authenticated; at this stage, identity is not questioned. ("Authentication" and "authorization" are often confused or used interchangeably, which is incorrect.) Basically, authorization establishes the perimeter of the user's access inside the database, and if that perimeter is porous, a legitimate user will be able to see a lot more than she should.
As a legitimate, properly authenticated user acting inside the boundaries of authorization manipulates data, the data moves inside and outside the protective "roof" of database security. To guarantee that the data is not contaminated or illegally manipulated during this process, assurance comes into play.
Finally, security is incomplete without the user being accountable for her actions. Without it, anyone can potentially do something that is perfectly legal but might affect the overall stability of the system. So, security is concerned not just with allowing legitimate users to work under an authorization scheme, but also with what they are doing and why. Therefore, the concept of accountability is the final pillar of security infrastructure.
All four pillars are required to hold the roof in place. If any single one of them crumbles, the roof collapses entirely. You must erect and reinforce all four pillars to create a reasonable security structure; a single weakness in this architecture will make your entire infrastructure vulnerable.
A Layered Approach
Here's another way to look at security. Suppose you are sending a very valuable and delicate piece of item on a regular commercial carrier. Do you simply stuff it inside an envelope and drop it in the mailbox or the carrier's bin? Not likely. Rather, you probably wrap it in bubble wrap or newspaper put it in a protective box. (Depending on the nature of the article, you may want to add a watertight container as well.) You now have layers of protection around the valuable object, with each layer performing a specific function. If someone is intent on getting the item, he has to remove (or penetrate) these layers, one by one, until he reaches the contents of the package.
Database security works in a similar manner; you need layers of security around your data, with each layer protecting a specific area. For example, your organization may have a firewall around the corporate network to prevent external attacks. Inside the organization, you may have a second firewall around the database servers, with ports open only for the application servers. After these layers are penetrated, the intruder must overcome a third obstacle: authentication (that is, proving that she is a legitimate user). If the intruder gets past that layer via password theft, for example, she is still restricted to what she can see—by the layer of correct authorization, with which you can protect key components such as tables containing sensitive information. Finally, if all these layers fail and the intruder gains access to the "inner sanctum," you have one final line of defense: disguising the data (encryption).
The Risks
Does this model work well? In most cases, yes—but there are exceptions. For example, what if the break-in originate from inside your organization (in fact, most break-ins do), or what if data backups are lost or stolen?
The first case demonstrates that although it is relatively easy to erect a firewall, if the intruder is already inside it, the whole point of a firewall is moot. As insiders such as curious or disgruntled employees are often already properly authenticated—they are legitimate users—your next layer, access control, must be solid. You must verify that only those privileges required for the job are granted; nothing more. The principle of "least privileges," as opposed to redundant privileges to perform a task, is a requirement here.

The second case is even more frightening. Even if you have designed the database like a fortress, there is at least one occasion when the data leaves that fortress: for backup storage. Many organizations send backup tapes to a remote location to protect them from local disasters such as fire, flooding, and so on; in many cases, this remote facility is a different company specializing in that business. Without proper security, tapes can be stolen (or simply lost) from the facility itself or en route to it. An intruder who obtains these tapes can theoretically restore them to a server he has access to and browse the data at his leisure. Scariest of all, in some cases, the tapes can be returned safely to the storage facility without the breach ever being discovered.
These two risks can throw a monkey wrench into your carefully planned security. However, it's possible to protect the database even from these two events via a combination of the following:
● A reliable authentication scheme—if a user is SCOTT, there shouldn't be any doubt that he is indeed SCOTT, not MARTIN
● Prevention of impersonation
● Prevention of eavesdropping by unauthorized users
● Protection of data "at rest" from illegal modification
● Auditing of user activities
...which is what you'll learn to implement in Project Lockdown. Let's get started!

Project Lockdown: Phase 1 Checklist
Task Completion Date
Identify and change all default passwords.
Identify and lock all unused and default accounts.
Change the permission of the file $ORACLE_HOME/bin/oracle to 0700.
Change the permission of the file $ORACLE_HOME/bin/tnslsnr and lsnrctl to 0700.
Change the permission of the redundant files $ORACLE_HOME/bin/oracleO, tnslsnr0, lsnrctl0, extjob0, etc. to 0000.
Update scripts that call sqlplus / as sysdba to sqlplus sys/<password> as sysdba.
Change the permission of the file $ORACLE_HOME/bin/oracle to 0700.
Change umask on background_dump_dest to 0177.
Change umask on $ORACLE_HOME/rdbms/log to 0177.
Change umask on $ORACLE_HOME/rdbms/audit to 0177.
Change umask on audit_file_dest to 0177.
(Optional) Change umask on user_dump_dest to 0177.
Disallow sqlplus / as sysdba type connections where the SYS password is not required by placing the line SQLNET.AUTHENTICATION_SERVICES=(NONE) in the file sqlnet.ora.
Set the listener password.
Restrict Listener Management so that powerful commands are not allowed from command line.
Identify users with sweeping privileges and plan to remove them.
Update the password of the user DBSNMP.
Provided by Oracle Technology Network. Copyright 2006 Oracle. All Rights Reserved.
For demonstration purposes only; use at your own risk!

Project Lockdown: Phase 2 Checklist
Activity Completion Date
Set the parameter UTL_FILE_DIR to some non-crucial directory, and not to a wild card character such as ‘*’.
Convert all codes using hard-coded directory names to use named directories instead.
Remove CREATE ANY DIRECTORY system privilege from PUBLIC and any other user who does not need them.
Eliminate or reduce the OS-authenticated users, e.g. OPS$ANANDA.
Make sure the parameter OS_AUTHENT_PREFIX is set to OPS$, or some other value that is not ordinarily used, and not NULL.
Set all OS-authenticated account passwords to EXTERNAL.
Remove users authenticated on a remote system. Replace them with password-authenticated users.
Make sure the parameter remote_os_authent is set to FALSE.
Restrict SQL*Plus via the restrict option.
Disable SQL*Plus commands that could potentially be used maliciously, e.g. host.
Wrap sensitive source code in the database.
Revoke derived privileges from users and replace them with direct grants, where required.
Remove all privileges with grant option.
Remove the UNLIMITED TABLESPACE system privilege from all users except SYS and SYSTEM.
Check Listener log periodically to identify patterns of listener password mismatch, issuance of restricted listener commands, etc.
Enable auditing.
Analyze audit trails.
Provided by Oracle Technology Network. Copyright 2006 Oracle. All Rights Reserved.
For demonstration purposes only; use at your own risk!

Project Lockdown: Phase 3 Checklist
Activity Completed OnRemove password from user scripts.
Remove passwords from RMAN scripts.
Convert DBA jobs to Scheduler.
Lock down objects via two-person change control.
Develop and monitor database access profiles.
Develop and monitor object access profiles.
Examine audit trail information to identify and track unsuccessful attempts. Unless there is a plausible explanation, consider all unsuccessful attempts as potential attacks.
Turn on default auditing.
Enable node validation to restrict access to a set of client machines only.
Provided by Oracle Technology Network. Copyright 2006 Oracle. All Rights Reserved.
For demonstration purposes only; use at your own risk!