professional learning communities facilitator’s...
TRANSCRIPT
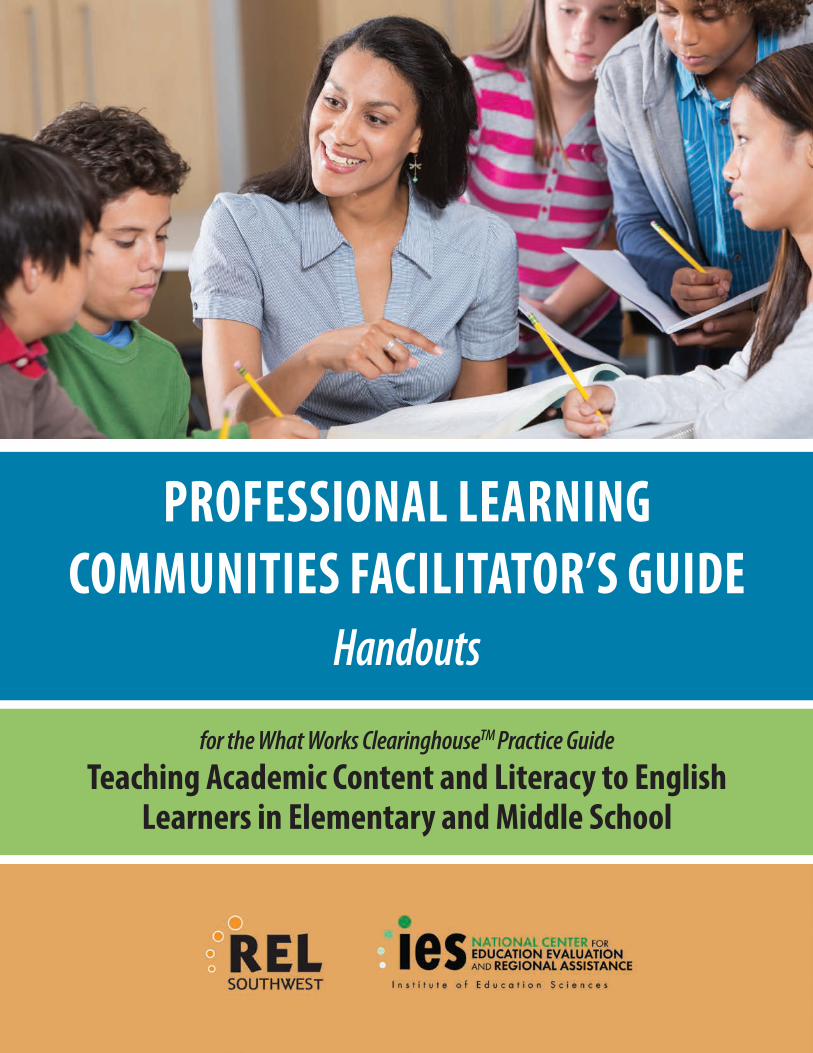
PROFESSIONAL LEARNING COMMUNITIES FACILITATOR’S GUIDE
Handouts
for the What Works ClearinghouseTM Practice Guide Teaching Academic Content and Literacy to English
Learners in Elementary and Middle School
U.S. Department of Education Arne Duncan, Secretary
Institute of Education Sciences Sue Betka, Acting Director
National Center for Education Evaluation and Regional Assistance Ruth Curran Neild, Commissioner Joy Lesnick, Associate Commissioner Amy Johnson, Action Editor Chris Boccanfuso, Project Officer
REL 2015–105
The National Center for Education Evaluation and Regional Assistance (NCEE) conducts unbiased large-scale evaluations of education programs and practices supported by federal funds; provides research-based technical assistance to educators and policymakers; and supports the synthesis and the widespread dissemination of the results of research and evaluation throughout the United States.
JULY 2015
This publication was prepared for the Institute of Education Sciences (IES) under Contract ED-IES-12-C-0012 by Regional Educational Laboratory (REL) Southwest, administered by SEDL. The content of the publication does not necessarily reflect the views or policies of IES or the U.S. Department of Education, nor does mention of trade names, commercial products, or organizations imply endorsement by the U.S. Government.
This REL publication is in the public domain. While permission to reprint or use this publication and ancillary materials is not necessary, it should be cited as:
Dimino, J. A., Taylor, M., & Morris, J. (2015). Professional learning communities facilitator’s guide handouts for the What Works Clearinghouse practice guide: Teaching academic content and literacy to English learners in elementary and middle school (REL 2015–105). Washington, DC: U.S. Department of Education, Institute of Education Sciences, National Center for Education Evaluation and Regional Assistance, Regional Educational Laboratory Southwest. Retrieved from http://ies.ed.gov/ncee/edlabs.
This publication is available on the Regional Educational Laboratory website at http://ies.ed.gov/ncee/edlabs
Photo Credits Photographic images used by the Regional Educational Laboratory Southwest at SEDL on the indicated pages (cover, 6, 8, 22, 24, and 35) supplied by iStockphoto in compliance with SEDL’s annual license agreement.

PROFESSIONAL LEARNING COMMUNITIES FACILITATOR’S GUIDE
Handouts for the What Works ClearinghouseTM Practice Guide
Teaching Academic Content and Literacy to English Learners in Elementary and Middle School
Developed by Joseph A. Dimino, Ph.D.
Mary Jo Taylor, Ed.D. INSTRUCTIONAL RESEARCH GROUP
With assistance from Joan Morris, M.A.
PRACTICE GUIDE PANEL MEMBER
July 2015
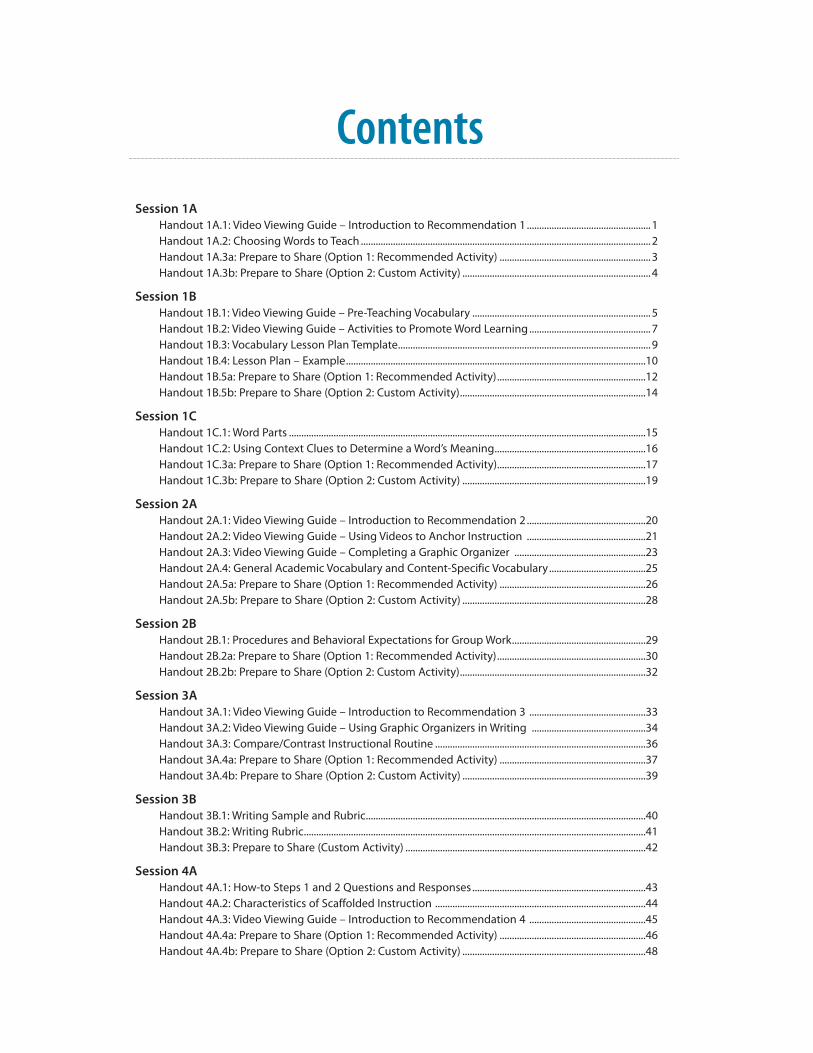
Contents Session 1A
Handout 1A.1: Video Viewing Guide – Introduction to Recommendation 1 ..................................................1 Handout 1A.2: Choosing Words to Teach ..................................................................................................................... 2 Handout 1A.3a: Prepare to Share (Option 1: Recommended Activity) ............................................................. 3 Handout 1A.3b: Prepare to Share (Option 2: Custom Activity) ............................................................................ 4
Session 1B Handout 1B.1: Video Viewing Guide – Pre-Teaching Vocabulary ........................................................................ 5 Handout 1B.2: Video Viewing Guide – Activities to Promote Word Learning ................................................. 7 Handout 1B.3: Vocabulary Lesson Plan Template...................................................................................................... 9 Handout 1B.4: Lesson Plan – Example.........................................................................................................................10 Handout 1B.5a: Prepare to Share (Option 1: Recommended Activity)............................................................12 Handout 1B.5b: Prepare to Share (Option 2: Custom Activity)...........................................................................14
Session 1C Handout 1C.1: Word Parts ................................................................................................................................................15 Handout 1C.2: Using Context Clues to Determine a Word’s Meaning.............................................................16 Handout 1C.3a: Prepare to Share (Option 1: Recommended Activity)............................................................17 Handout 1C.3b: Prepare to Share (Option 2: Custom Activity) ..........................................................................19
Session 2A Handout 2A.1: Video Viewing Guide – Introduction to Recommendation 2 ................................................20 Handout 2A.2: Video Viewing Guide – Using Videos to Anchor Instruction ................................................21 Handout 2A.3: Video Viewing Guide – Completing a Graphic Organizer .....................................................23 Handout 2A.4: General Academic Vocabulary and Content-Specific Vocabulary.......................................25 Handout 2A.5a: Prepare to Share (Option 1: Recommended Activity) ...........................................................26 Handout 2A.5b: Prepare to Share (Option 2: Custom Activity) ..........................................................................28
Session 2B Handout 2B.1: Procedures and Behavioral Expectations for Group Work......................................................29 Handout 2B.2a: Prepare to Share (Option 1: Recommended Activity)............................................................30 Handout 2B.2b: Prepare to Share (Option 2: Custom Activity)...........................................................................32
Session 3A Handout 3A.1: Video Viewing Guide – Introduction to Recommendation 3 ...............................................33 Handout 3A.2: Video Viewing Guide – Using Graphic Organizers in Writing ..............................................34 Handout 3A.3: Compare/Contrast Instructional Routine .....................................................................................36 Handout 3A.4a: Prepare to Share (Option 1: Recommended Activity) ...........................................................37 Handout 3A.4b: Prepare to Share (Option 2: Custom Activity) ..........................................................................39
Session 3B Handout 3B.1: Writing Sample and Rubric.................................................................................................................40 Handout 3B.2: Writing Rubric..........................................................................................................................................41 Handout 3B.3: Prepare to Share (Custom Activity) .................................................................................................42
Session 4A Handout 4A.1: How-to Steps 1 and 2 Questions and Responses......................................................................43 Handout 4A.2: Characteristics of Scaffolded Instruction .....................................................................................44 Handout 4A.3: Video Viewing Guide – Introduction to Recommendation 4 ...............................................45 Handout 4A.4a: Prepare to Share (Option 1: Recommended Activity) ...........................................................46 Handout 4A.4b: Prepare to Share (Option 2: Custom Activity) ..........................................................................48
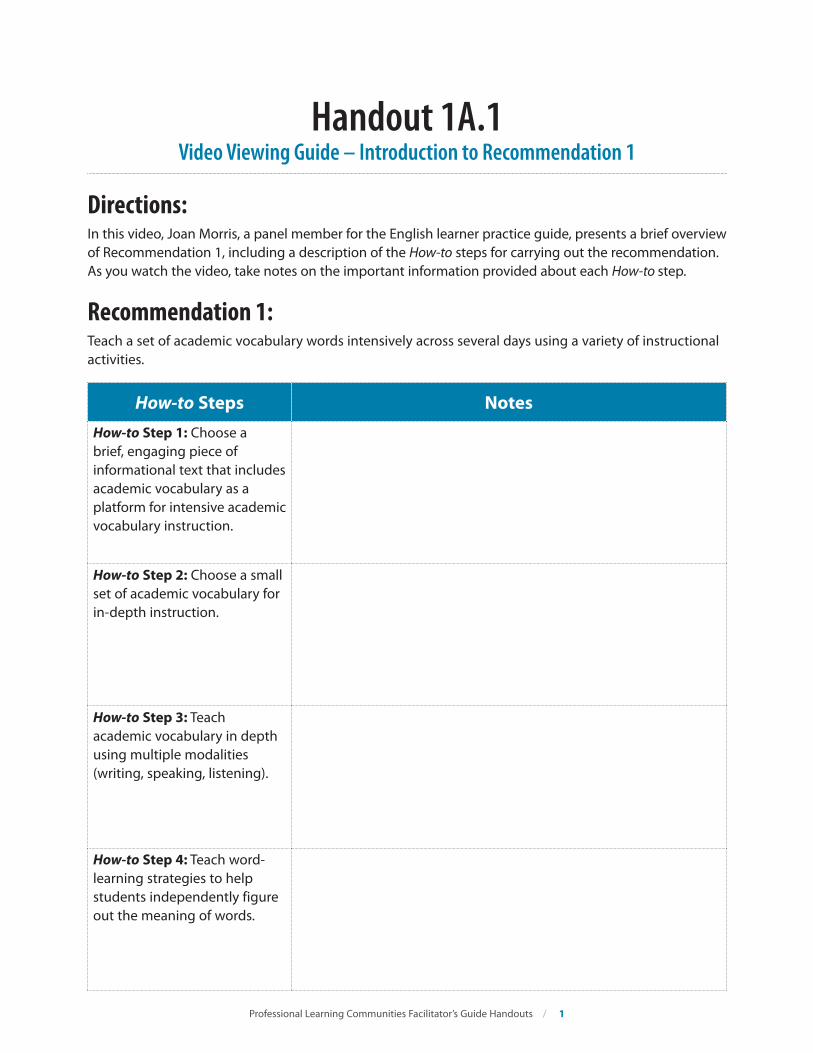
Handout 1A.1 Video Viewing Guide – Introduction to Recommendation 1
Directions: In this video, Joan Morris, a panel member for the English learner practice guide, presents a brief overview of Recommendation 1, including a description of the How-to steps for carrying out the recommendation. As you watch the video, take notes on the important information provided about each How-to step.
Recommendation 1: Teach a set of academic vocabulary words intensively across several days using a variety of instructional activities.
How-to Steps Notes How-to Step 1: Choose a brief, engaging piece of informational text that includes academic vocabulary as a platform for intensive academic vocabulary instruction.
How-to Step 2: Choose a small set of academic vocabulary for in-depth instruction.
How-to Step 3: Teach academic vocabulary in depth using multiple modalities (writing, speaking, listening).
How-to Step 4: Teach word-learning strategies to help students independently figure out the meaning of words.
Professional Learning Communities Facilitator’s Guide Handouts / 1
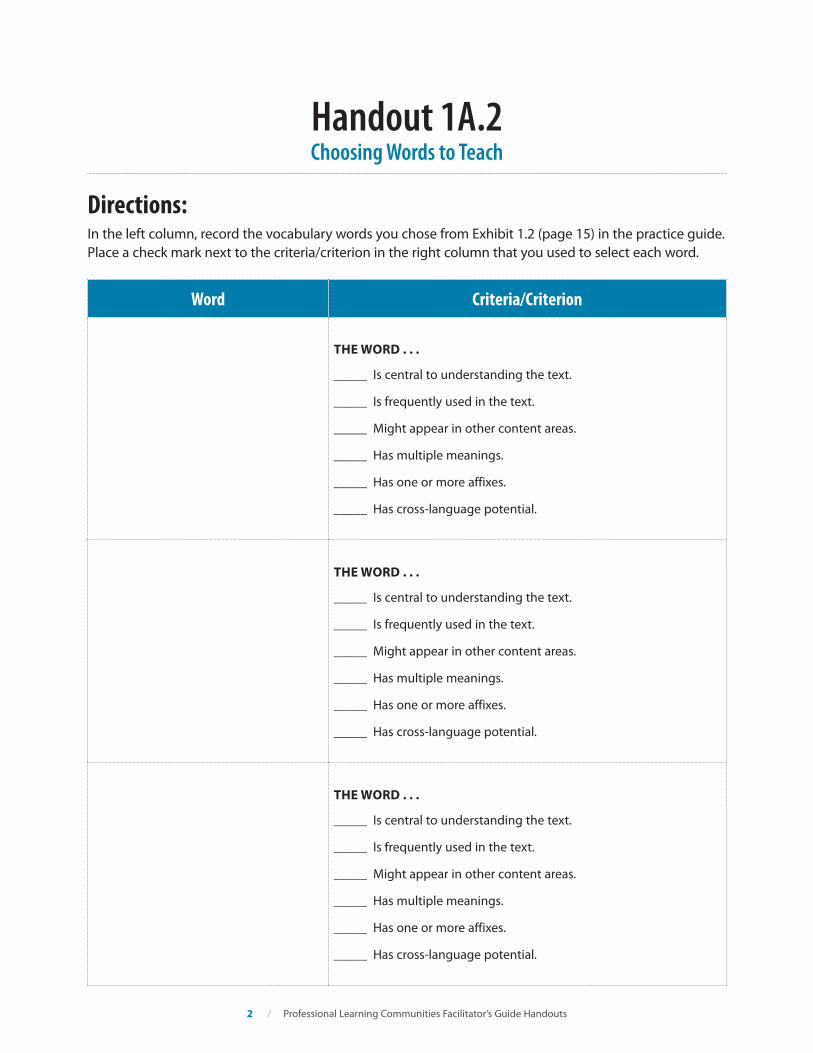
Handout 1A.2 Choosing Words to Teach
Directions: In the left column, record the vocabulary words you chose from Exhibit 1.2 (page 15) in the practice guide. Place a check mark next to the criteria/criterion in the right column that you used to select each word.
Word Criteria/Criterion
THE WORD . . .
_____ Is central to understanding the text.
_____ Is frequently used in the text.
_____ Might appear in other content areas.
_____ Has multiple meanings.
_____ Has one or more affixes.
_____ Has cross-language potential.
THE WORD . . .
_____ Is central to understanding the text.
_____ Is frequently used in the text.
_____ Might appear in other content areas.
_____ Has multiple meanings.
_____ Has one or more affixes.
_____ Has cross-language potential.
THE WORD . . .
_____ Is central to understanding the text.
_____ Is frequently used in the text.
_____ Might appear in other content areas.
_____ Has multiple meanings.
_____ Has one or more affixes.
_____ Has cross-language potential.
2 / Professional Learning Communities Facilitator’s Guide Handouts
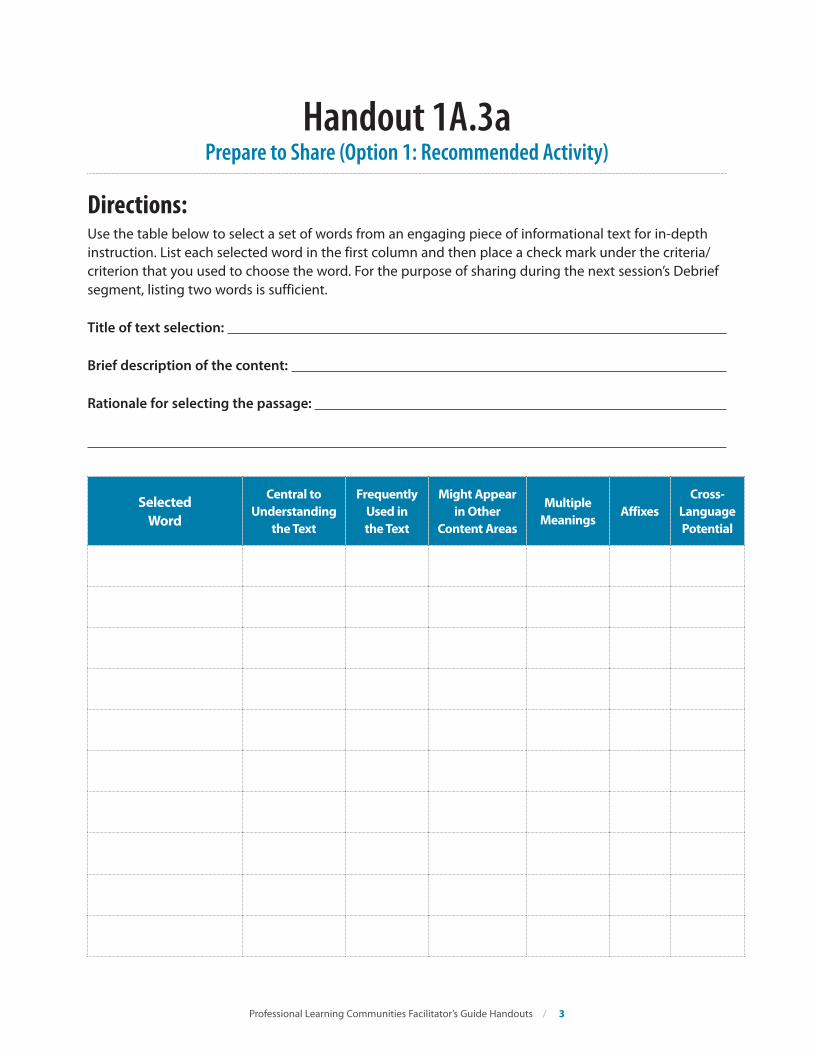
Handout 1A.3a Prepare to Share (Option 1: Recommended Activity)
Directions: Use the table below to select a set of words from an engaging piece of informational text for in-depth instruction. List each selected word in the first column and then place a check mark under the criteria/ criterion that you used to choose the word. For the purpose of sharing during the next session’s Debrief segment, listing two words is sufficient.
Title of text selection:
Brief description of the content:
Rationale for selecting the passage:
Selected Word
Central to Understanding
the Text
Frequently Used in the Text
Might Appear in Other
Content Areas
Multiple Meanings
Affixes Cross-
Language Potential
Professional Learning Communities Facilitator’s Guide Handouts / 3
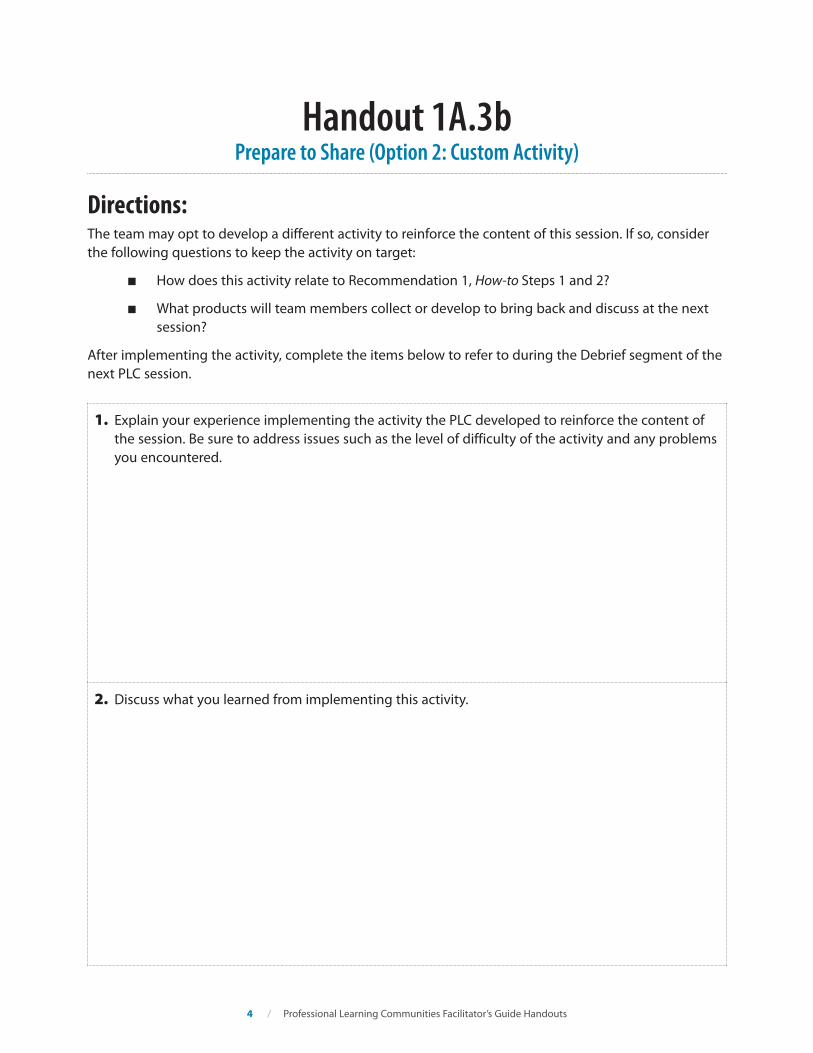
Handout 1A.3b Prepare to Share (Option 2: Custom Activity)
Directions: The team may opt to develop a different activity to reinforce the content of this session. If so, consider the following questions to keep the activity on target:
■ ■ How does this activity relate to Recommendation 1, How-to Steps 1 and 2?
■ ■ What products will team members collect or develop to bring back and discuss at the next session?
After implementing the activity, complete the items below to refer to during the Debrief segment of the next PLC session.
1. Explain your experience implementing the activity the PLC developed to reinforce the content of the session. Be sure to address issues such as the level of difficulty of the activity and any problems you encountered.
2. Discuss what you learned from implementing this activity.
4 / Professional Learning Communities Facilitator’s Guide Handouts
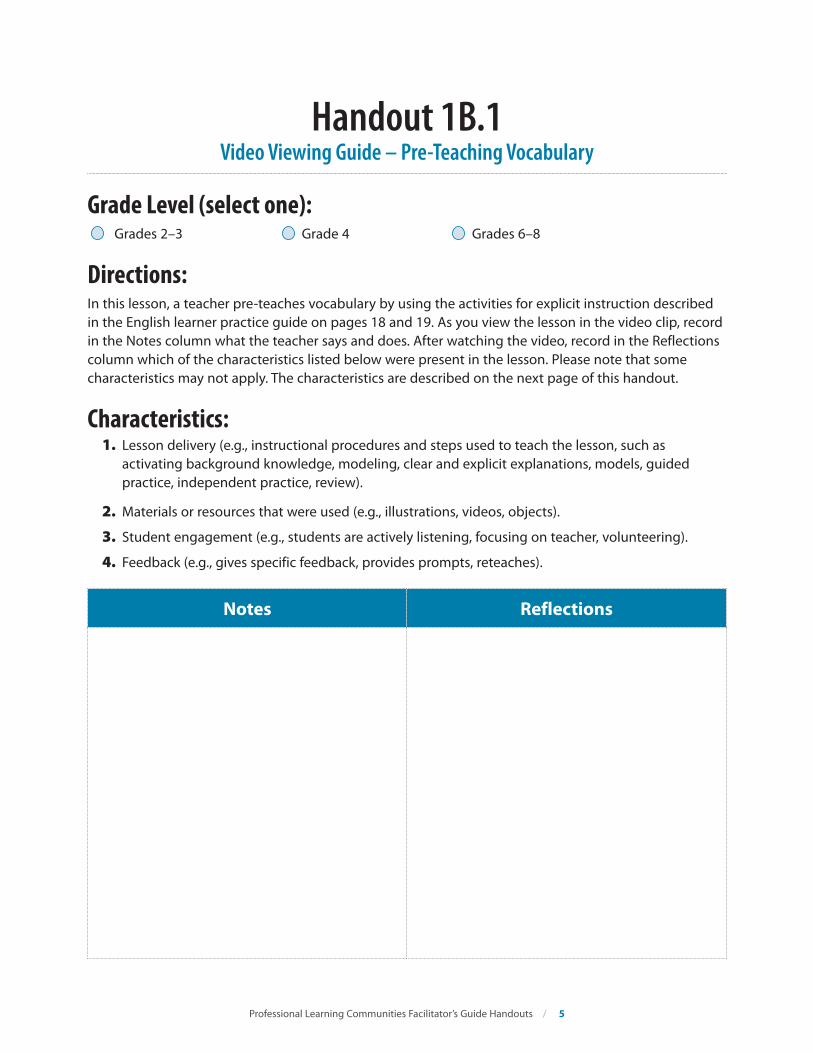
Handout 1B.1 Video Viewing Guide – Pre-Teaching Vocabulary
Grade Level (select one): Grades 2–3 Grade 4 Grades 6–8
Directions: In this lesson, a teacher pre-teaches vocabulary by using the activities for explicit instruction described in the English learner practice guide on pages 18 and 19. As you view the lesson in the video clip, record in the Notes column what the teacher says and does. After watching the video, record in the Reflections column which of the characteristics listed below were present in the lesson. Please note that some characteristics may not apply. The characteristics are described on the next page of this handout.
Characteristics: 1. Lesson delivery (e.g., instructional procedures and steps used to teach the lesson, such as
activating background knowledge, modeling, clear and explicit explanations, models, guided practice, independent practice, review).
2. Materials or resources that were used (e.g., illustrations, videos, objects).
3. Student engagement (e.g., students are actively listening, focusing on teacher, volunteering).
4. Feedback (e.g., gives specific feedback, provides prompts, reteaches).
Notes Reflections
Professional Learning Communities Facilitator’s Guide Handouts / 5
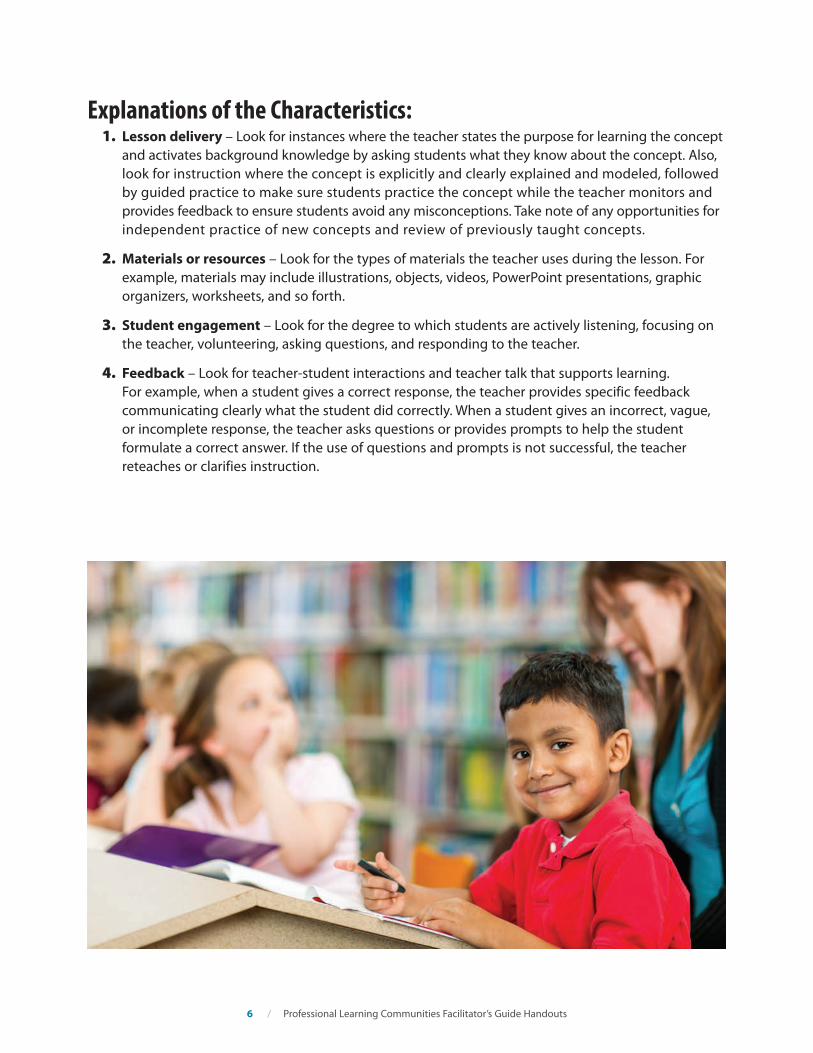
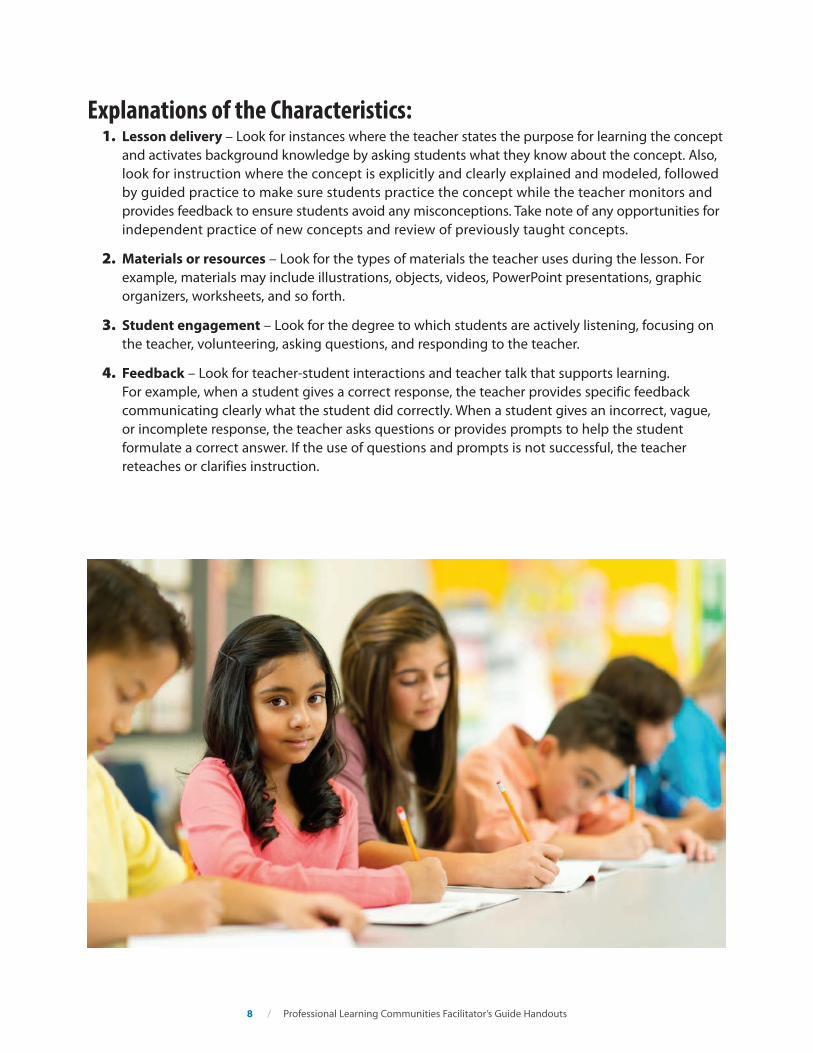
Explanations of the Characteristics: 1. Lesson delivery – Look for instances where the teacher states the purpose for learning the concept
and activates background knowledge by asking students what they know about the concept. Also, look for instruction where the concept is explicitly and clearly explained and modeled, followed by guided practice to make sure students practice the concept while the teacher monitors and provides feedback to ensure students avoid any misconceptions. Take note of any opportunities for independent practice of new concepts and review of previously taught concepts.
2. Materials or resources – Look for the types of materials the teacher uses during the lesson. For example, materials may include illustrations, objects, videos, PowerPoint presentations, graphic organizers, worksheets, and so forth.
3. Student engagement – Look for the degree to which students are actively listening, focusing on the teacher, volunteering, asking questions, and responding to the teacher.
4. Feedback – Look for teacher-student interactions and teacher talk that supports learning. For example, when a student gives a correct response, the teacher provides specific feedback communicating clearly what the student did correctly. When a student gives an incorrect, vague, or incomplete response, the teacher asks questions or provides prompts to help the student formulate a correct answer. If the use of questions and prompts is not successful, the teacher reteaches or clarifies instruction.
6 / Professional Learning Communities Facilitator’s Guide Handouts
Handout 1B.2 Video Viewing Guide – Activities to Promote Word Learning
Grade Level (select one): Grades 2–3 Grade 4 Grades 6–8
Directions: In this video, a teacher uses activities to promote word learning that are similar to those described in the practice guide on pages 20 and 21. As you view the lesson in the video clip, record in the Notes column what the teacher says and does. After watching the video, record in the Reflections column which of the characteristics listed below were present in the lesson. Please note that some characteristics may not apply. The characteristics are described on the next page of this handout.
Characteristics: 1. Lesson delivery (e.g., instructional procedures and steps used to teach the lesson, such as
activating background knowledge, modeling, clear and explicit explanations and models, guided practice, independent practice, review).
2. Materials or resources that were used (e.g., illustrations, videos, objects).
3. Student engagement (e.g., students are actively listening, focusing on teacher, volunteering).
4. Feedback (e.g., gives specific feedback, provides prompts, reteaches).
Notes Reflections
Professional Learning Communities Facilitator’s Guide Handouts / 7
Explanations of the Characteristics: 1. Lesson delivery – Look for instances where the teacher states the purpose for learning the concept
and activates background knowledge by asking students what they know about the concept. Also, look for instruction where the concept is explicitly and clearly explained and modeled, followed by guided practice to make sure students practice the concept while the teacher monitors and provides feedback to ensure students avoid any misconceptions. Take note of any opportunities for independent practice of new concepts and review of previously taught concepts.
2. Materials or resources – Look for the types of materials the teacher uses during the lesson. For example, materials may include illustrations, objects, videos, PowerPoint presentations, graphic organizers, worksheets, and so forth.
3. Student engagement – Look for the degree to which students are actively listening, focusing on the teacher, volunteering, asking questions, and responding to the teacher.
4. Feedback – Look for teacher-student interactions and teacher talk that supports learning. For example, when a student gives a correct response, the teacher provides specific feedback communicating clearly what the student did correctly. When a student gives an incorrect, vague, or incomplete response, the teacher asks questions or provides prompts to help the student formulate a correct answer. If the use of questions and prompts is not successful, the teacher reteaches or clarifies instruction.
8 / Professional Learning Communities Facilitator’s Guide Handouts
Handout 1B.3 Vocabulary Lesson Plan Template
Title of the selection:
Target word:
Student-friendly definition:
Examples:
Non-examples:
Concrete representations:
Activities that increase exposure to and experiences with words:
Describe how you will incorporate structured student discussions, writing activities, and other activities that increase students’ exposure to and engagement with the target word:
Professional Learning Communities Facilitator’s Guide Handouts / 9
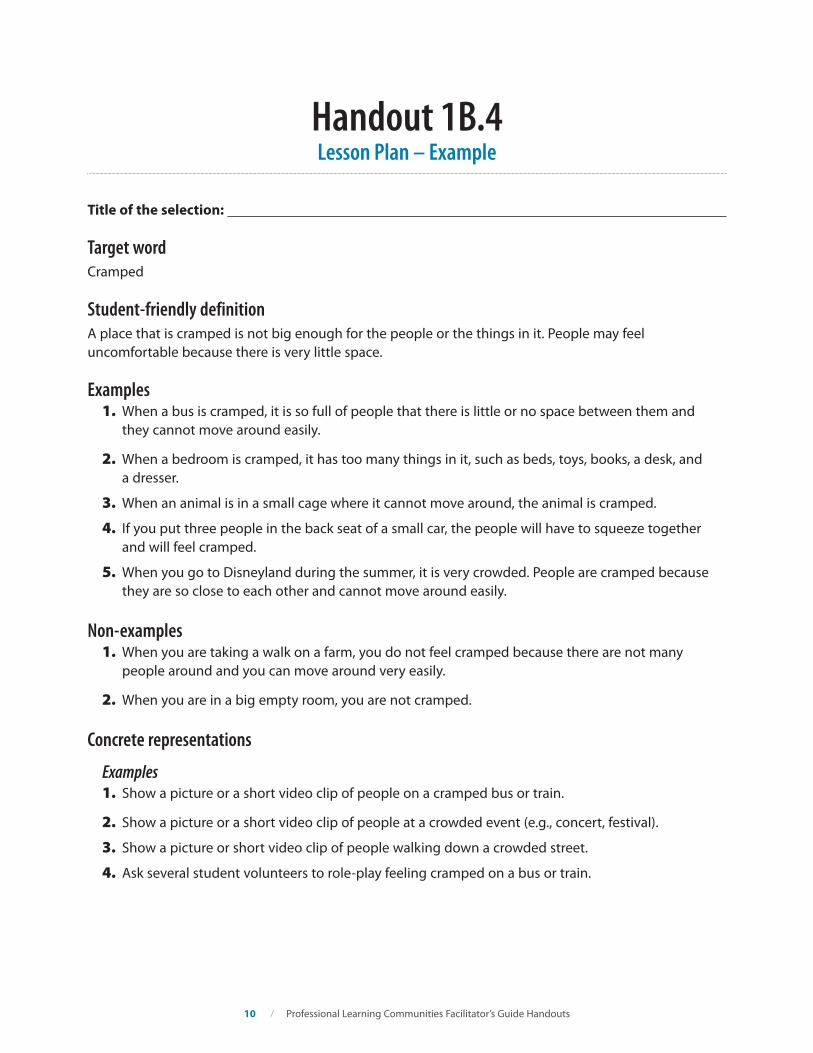
Handout 1B.4 Lesson Plan – Example
Title of the selection:
Target word Cramped
Student-friendly definition A place that is cramped is not big enough for the people or the things in it. People may feel uncomfortable because there is very little space.
Examples 1. When a bus is cramped, it is so full of people that there is little or no space between them and
they cannot move around easily.
2. When a bedroom is cramped, it has too many things in it, such as beds, toys, books, a desk, and a dresser.
3. When an animal is in a small cage where it cannot move around, the animal is cramped.
4. If you put three people in the back seat of a small car, the people will have to squeeze together and will feel cramped.
5. When you go to Disneyland during the summer, it is very crowded. People are cramped because they are so close to each other and cannot move around easily.
Non-examples 1. When you are taking a walk on a farm, you do not feel cramped because there are not many
people around and you can move around very easily.
2. When you are in a big empty room, you are not cramped.
Concrete representations
Examples 1. Show a picture or a short video clip of people on a cramped bus or train.
2. Show a picture or a short video clip of people at a crowded event (e.g., concert, festival).
3. Show a picture or short video clip of people walking down a crowded street.
4. Ask several student volunteers to role-play feeling cramped on a bus or train.
10 / Professional Learning Communities Facilitator’s Guide Handouts
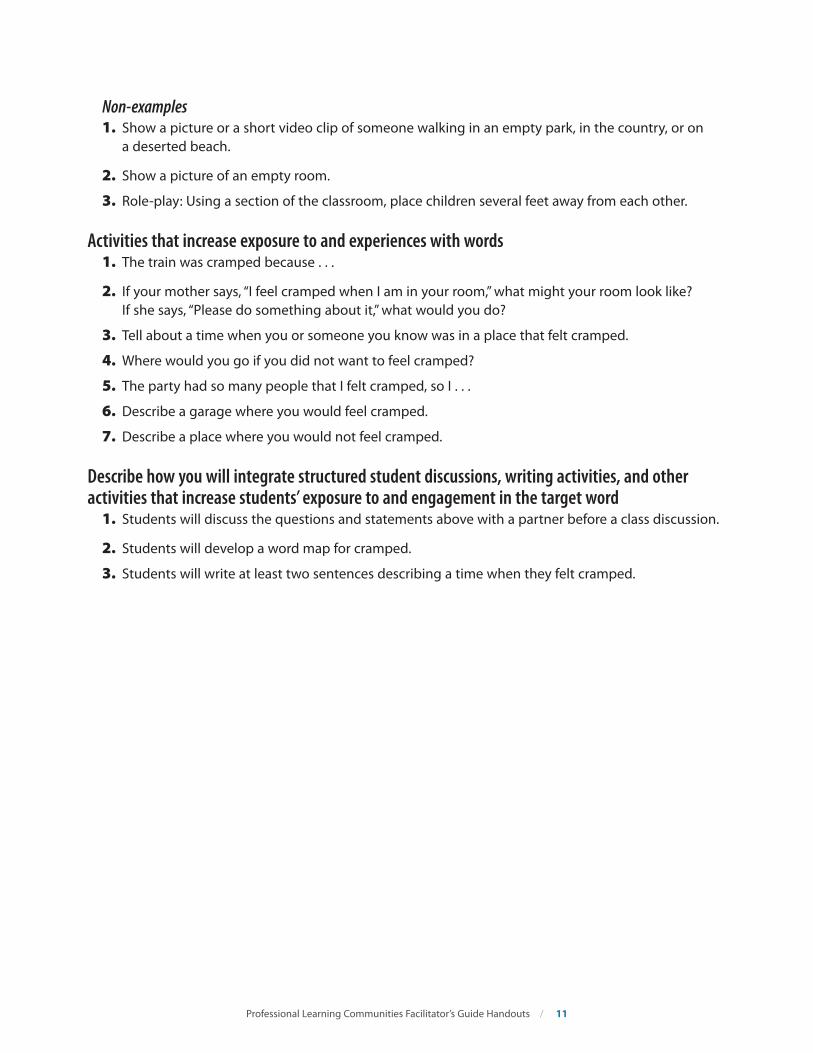
Non-examples 1. Show a picture or a short video clip of someone walking in an empty park, in the country, or on
a deserted beach.
2. Show a picture of an empty room.
3. Role-play: Using a section of the classroom, place children several feet away from each other.
Activities that increase exposure to and experiences with words 1. The train was cramped because . . .
2. If your mother says, “I feel cramped when I am in your room,” what might your room look like? If she says, “Please do something about it,” what would you do?
3. Tell about a time when you or someone you know was in a place that felt cramped.
4. Where would you go if you did not want to feel cramped?
5. The party had so many people that I felt cramped, so I . . .
6. Describe a garage where you would feel cramped.
7. Describe a place where you would not feel cramped.
Describe how you will integrate structured student discussions, writing activities, and other activities that increase students’ exposure to and engagement in the target word
1. Students will discuss the questions and statements above with a partner before a class discussion.
2. Students will develop a word map for cramped.
3. Students will write at least two sentences describing a time when they felt cramped.
Professional Learning Communities Facilitator’s Guide Handouts / 11
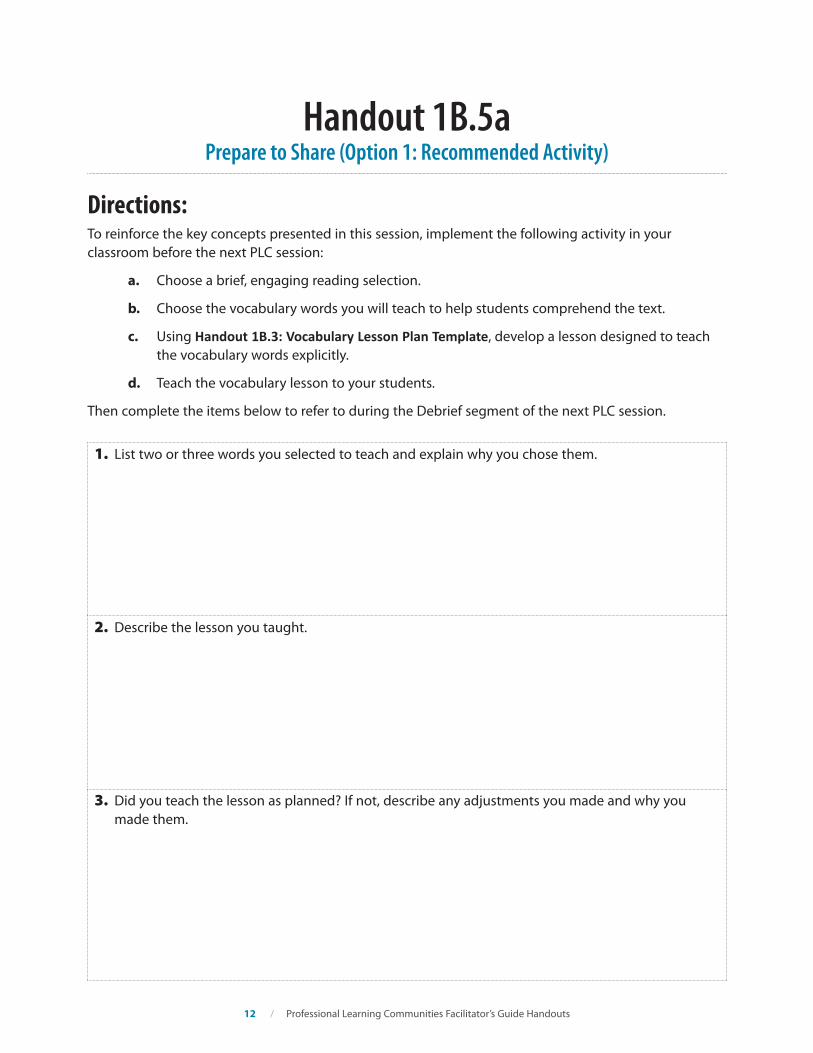
Handout 1B.5a Prepare to Share (Option 1: Recommended Activity)
Directions: To reinforce the key concepts presented in this session, implement the following activity in your classroom before the next PLC session:
a. Choose a brief, engaging reading selection.
b. Choose the vocabulary words you will teach to help students comprehend the text.
c. Using Handout 1B.3: Vocabulary Lesson Plan Template, develop a lesson designed to teach the vocabulary words explicitly.
d. Teach the vocabulary lesson to your students.
Then complete the items below to refer to during the Debrief segment of the next PLC session.
1. List two or three words you selected to teach and explain why you chose them.
2. Describe the lesson you taught.
3. Did you teach the lesson as planned? If not, describe any adjustments you made and why you made them.
12 / Professional Learning Communities Facilitator’s Guide Handouts
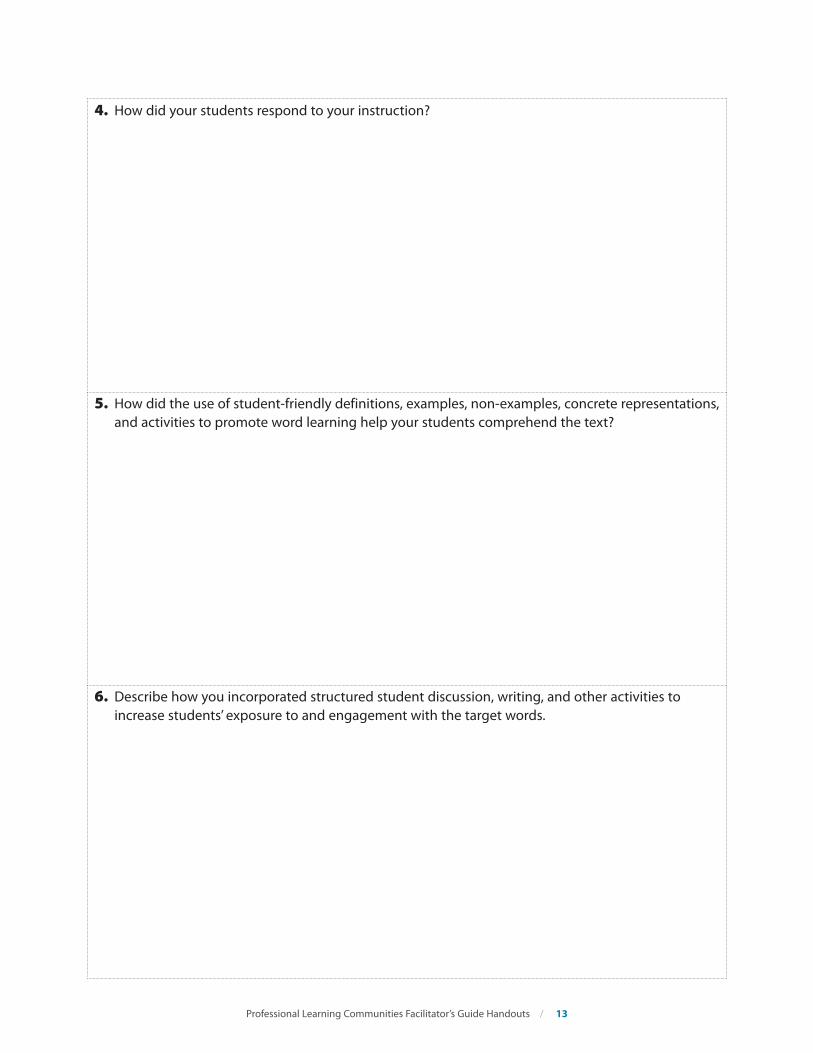
4. How did your students respond to your instruction?
5. How did the use of student-friendly definitions, examples, non-examples, concrete representations, and activities to promote word learning help your students comprehend the text?
6. Describe how you incorporated structured student discussion, writing, and other activities to increase students’ exposure to and engagement with the target words.
Professional Learning Communities Facilitator’s Guide Handouts / 13

Handout 1B.5b Prepare to Share (Option 2: Custom Activity)
Directions: The team may opt to develop a different activity to reinforce the content of this session. If so, consider the following questions to keep the activity on target:
■ ■ How does this activity relate to Recommendation 1, How-to Step 3?
■ ■ What products will team members collect or develop to bring back and discuss at the next session?
After implementing the activity, complete the items below to refer to during the Debrief segment of the next PLC session.
1. Explain your experience implementing the activity the PLC developed to reinforce the content of the session. Be sure to address issues such as the level of difficulty of the activity and any problems you encountered.
2. Discuss what you learned from implementing this activity.
14 / Professional Learning Communities Facilitator’s Guide Handouts
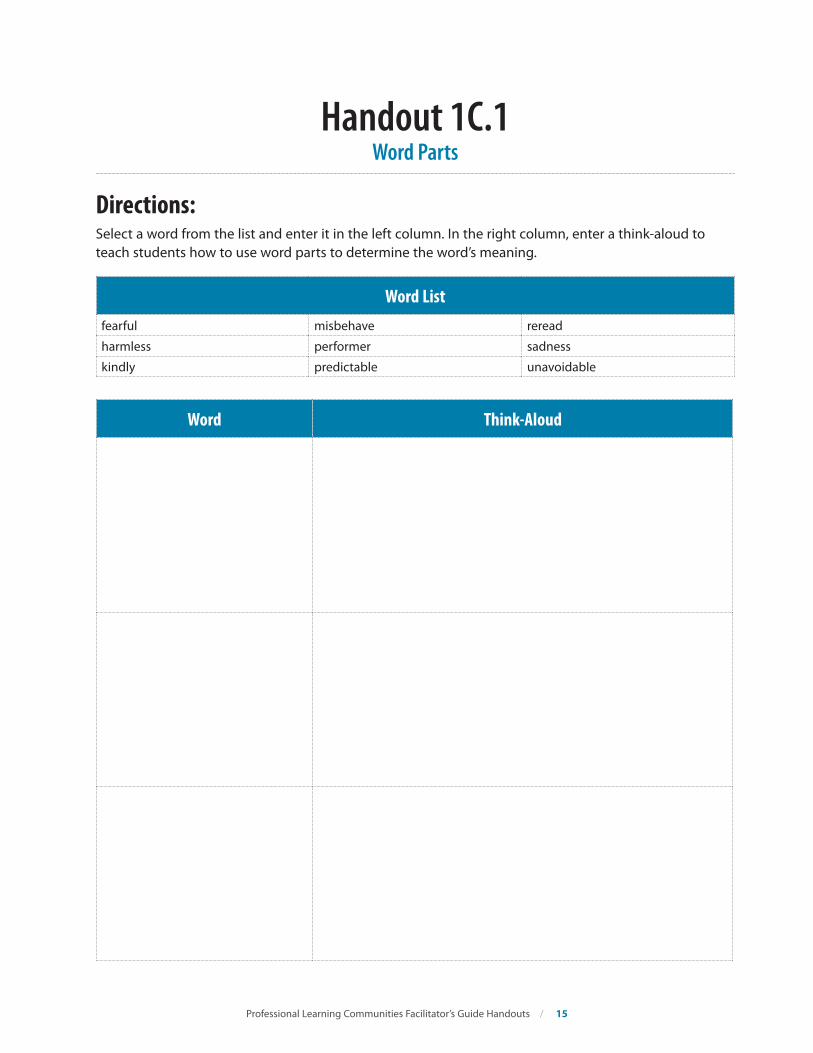
Handout 1C.1 Word Parts
Directions: Select a word from the list and enter it in the left column. In the right column, enter a think-aloud to teach students how to use word parts to determine the word’s meaning.
Word List fearful misbehave reread
harmless performer sadness
kindly predictable unavoidable
Word Think-Aloud
Professional Learning Communities Facilitator’s Guide Handouts / 15
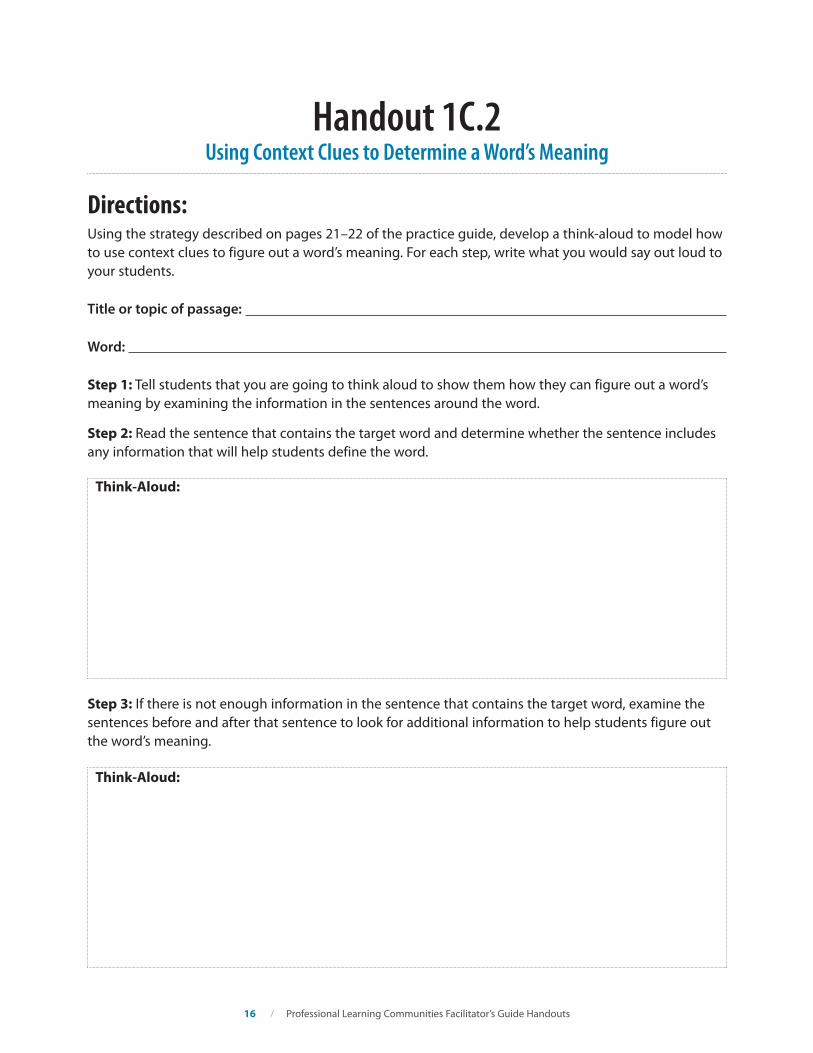
Handout 1C.2 Using Context Clues to Determine a Word’s Meaning
Directions: Using the strategy described on pages 21–22 of the practice guide, develop a think-aloud to model how to use context clues to figure out a word’s meaning. For each step, write what you would say out loud to your students.
Title or topic of passage:
Word:
Step 1: Tell students that you are going to think aloud to show them how they can figure out a word’s meaning by examining the information in the sentences around the word.
Step 2: Read the sentence that contains the target word and determine whether the sentence includes any information that will help students define the word.
Think-Aloud:
Step 3: If there is not enough information in the sentence that contains the target word, examine the sentences before and after that sentence to look for additional information to help students figure out the word’s meaning.
Think-Aloud:
16 / Professional Learning Communities Facilitator’s Guide Handouts
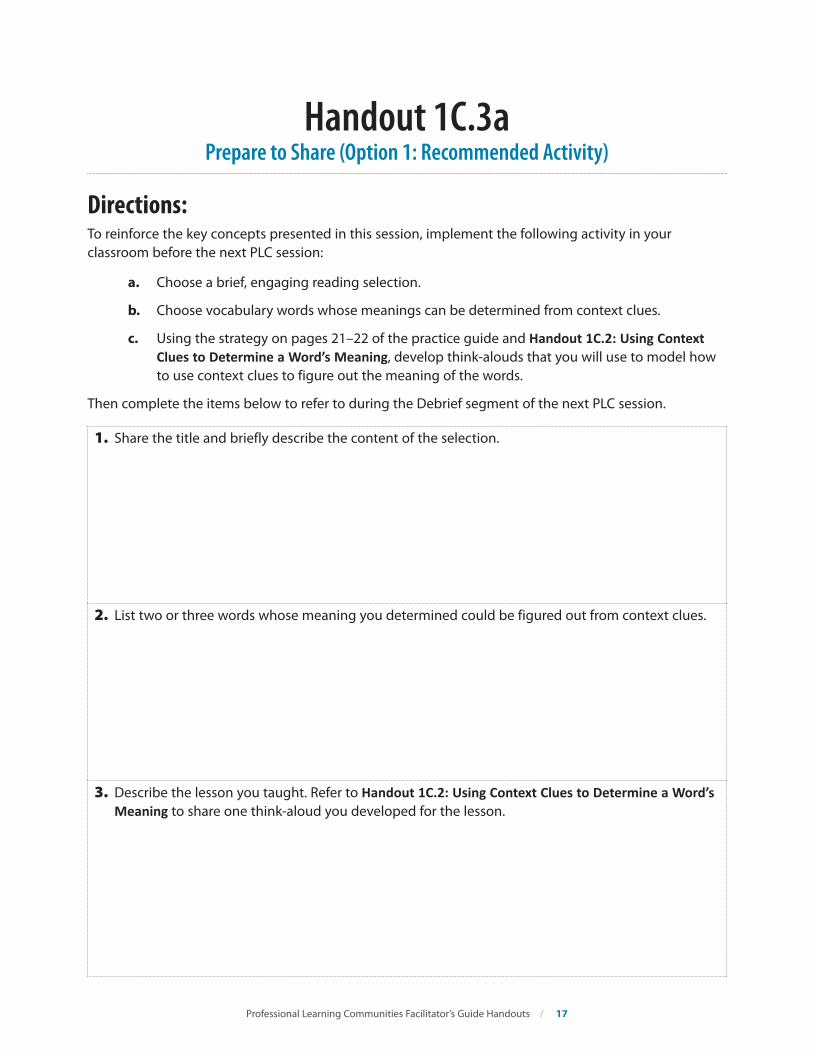
Handout 1C.3a Prepare to Share (Option 1: Recommended Activity)
Directions: To reinforce the key concepts presented in this session, implement the following activity in your classroom before the next PLC session:
a. Choose a brief, engaging reading selection.
b. Choose vocabulary words whose meanings can be determined from context clues.
c. Using the strategy on pages 21–22 of the practice guide and Handout 1C.2: Using Context Clues to Determine a Word’s Meaning, develop think-alouds that you will use to model how to use context clues to figure out the meaning of the words.
Then complete the items below to refer to during the Debrief segment of the next PLC session.
1. Share the title and briefly describe the content of the selection.
2. List two or three words whose meaning you determined could be figured out from context clues.
3. Describe the lesson you taught. Refer to Handout 1C.2: Using Context Clues to Determine a Word’s Meaning to share one think-aloud you developed for the lesson.
Professional Learning Communities Facilitator’s Guide Handouts / 17
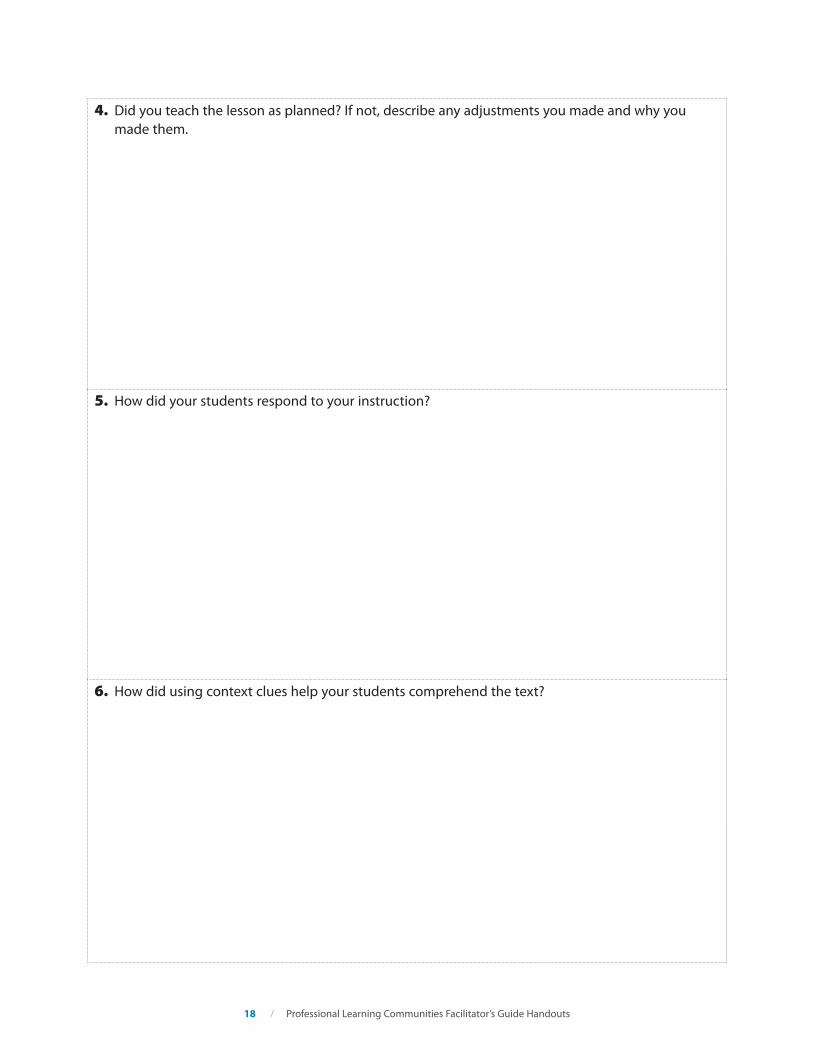
4. Did you teach the lesson as planned? If not, describe any adjustments you made and why you made them.
5. How did your students respond to your instruction?
6. How did using context clues help your students comprehend the text?
18 / Professional Learning Communities Facilitator’s Guide Handouts
Handout 1C.3b Prepare to Share (Option 2: Custom Activity)
Directions: The team may opt to develop a different activity to reinforce the content of this session. If so, consider the following questions to keep the activity on target:
■■ How does this activity relate to Recommendation 1, How-to Step 4?
■■ What products will team members collect or develop to bring back and discuss at the next session?
After implementing the activity, complete the items below to refer to during the Debrief segment of the next PLC session.
1. Explain your experience implementing the activity the PLC developed to reinforce the content of the session. Be sure to address issues such as the level of difficulty of the activity and any problems you encountered.
2. Discuss what you learned from implementing this activity.
Professional Learning Communities Facilitator’s Guide Handouts / 19
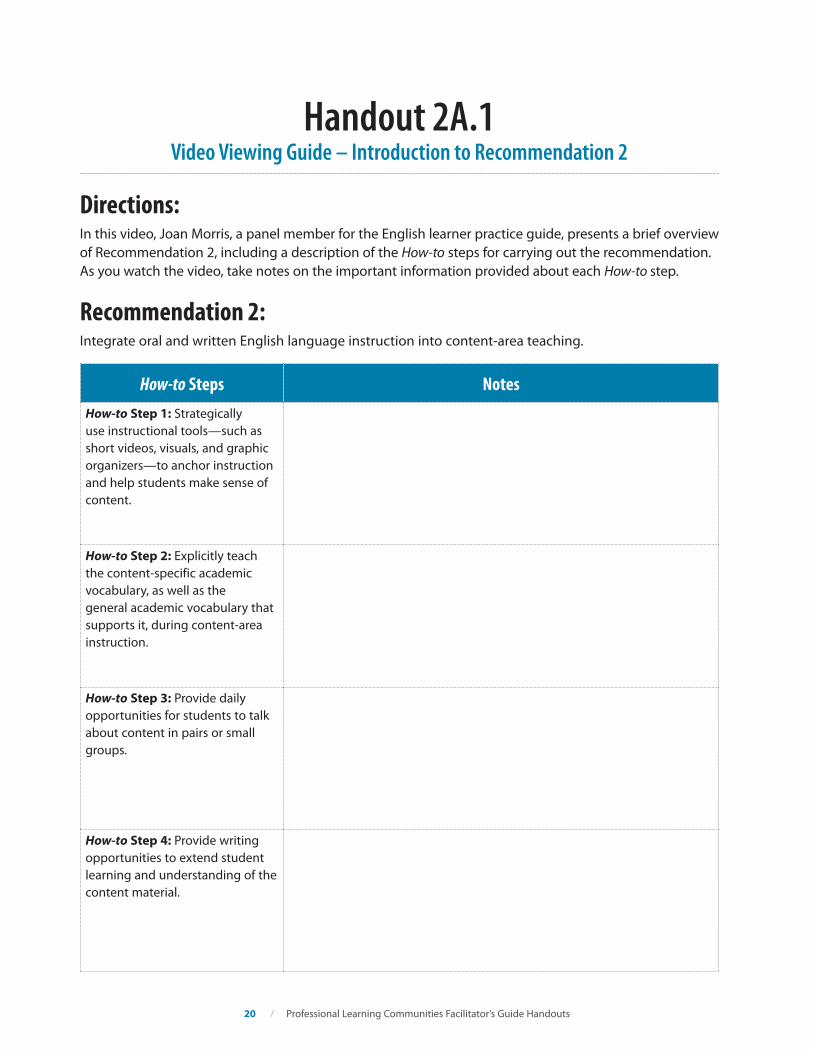
Handout 2A.1 Video Viewing Guide – Introduction to Recommendation 2
Directions: In this video, Joan Morris, a panel member for the English learner practice guide, presents a brief overview of Recommendation 2, including a description of the How-to steps for carrying out the recommendation. As you watch the video, take notes on the important information provided about each How-to step.
Recommendation 2: Integrate oral and written English language instruction into content-area teaching.
How-to Steps Notes How-to Step 1: Strategically use instructional tools—such as short videos, visuals, and graphic organizers—to anchor instruction and help students make sense of content.
How-to Step 2: Explicitly teach the content-specific academic vocabulary, as well as the general academic vocabulary that supports it, during content-area instruction.
How-to Step 3: Provide daily opportunities for students to talk about content in pairs or small groups.
How-to Step 4: Provide writing opportunities to extend student learning and understanding of the content material.
20 / Professional Learning Communities Facilitator’s Guide Handouts
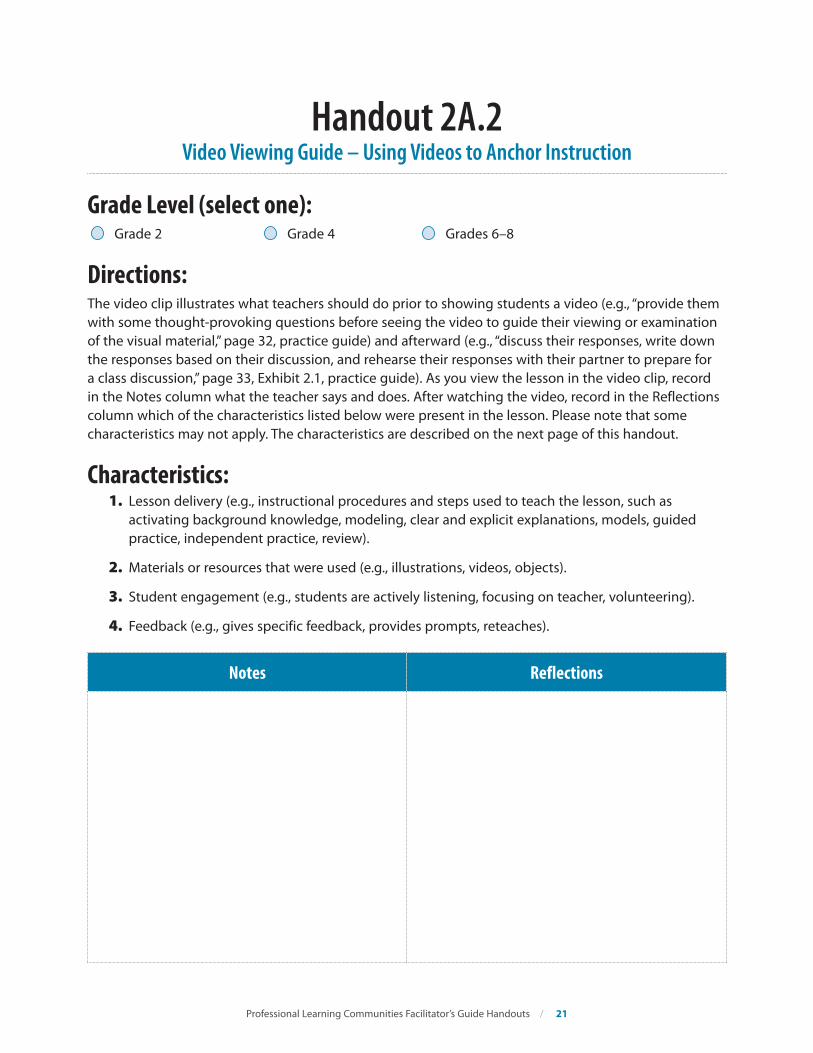
Handout 2A.2 Video Viewing Guide – Using Videos to Anchor Instruction
Grade Level (select one): Grade 2 Grade 4 Grades 6–8
Directions: The video clip illustrates what teachers should do prior to showing students a video (e.g., “provide them with some thought-provoking questions before seeing the video to guide their viewing or examination of the visual material,” page 32, practice guide) and afterward (e.g., “discuss their responses, write down the responses based on their discussion, and rehearse their responses with their partner to prepare for a class discussion,” page 33, Exhibit 2.1, practice guide). As you view the lesson in the video clip, record in the Notes column what the teacher says and does. After watching the video, record in the Reflections column which of the characteristics listed below were present in the lesson. Please note that some characteristics may not apply. The characteristics are described on the next page of this handout.
Characteristics: 1. Lesson delivery (e.g., instructional procedures and steps used to teach the lesson, such as
activating background knowledge, modeling, clear and explicit explanations, models, guided practice, independent practice, review).
2. Materials or resources that were used (e.g., illustrations, videos, objects).
3. Student engagement (e.g., students are actively listening, focusing on teacher, volunteering).
4. Feedback (e.g., gives specific feedback, provides prompts, reteaches).
Notes Reflections
Professional Learning Communities Facilitator’s Guide Handouts / 21
Explanations of the Characteristics: 1. Lesson delivery – Look for instances where the teacher states the purpose for learning the concept
and activates background knowledge by asking students what they know about the concept. Also, look for instruction where the concept is explicitly and clearly explained and modeled, followed by guided practice to make sure students practice the concept while the teacher monitors and provides feedback to ensure students avoid any misconceptions. Take note of any opportunities for independent practice of new concepts and review of previously taught concepts.
2. Materials or resources – Look for the types of materials the teacher uses during the lesson. For example, materials may include illustrations, objects, videos, PowerPoint presentations, graphic organizers, worksheets, and so forth.
3. Student engagement – Look for the degree to which students are actively listening, focusing on the teacher, volunteering, asking questions, and responding to the teacher.
4. Feedback – Look for teacher-student interactions and teacher talk that supports learning. For example, when a student gives a correct response, the teacher provides specific feedback communicating clearly what the student did correctly. When a student gives an incorrect, vague, or incomplete response, the teacher asks questions or provides prompts to help the student formulate a correct answer. If the use of questions and prompts is not successful, the teacher reteaches or clarifies instruction.
22 / Professional Learning Communities Facilitator’s Guide Handouts
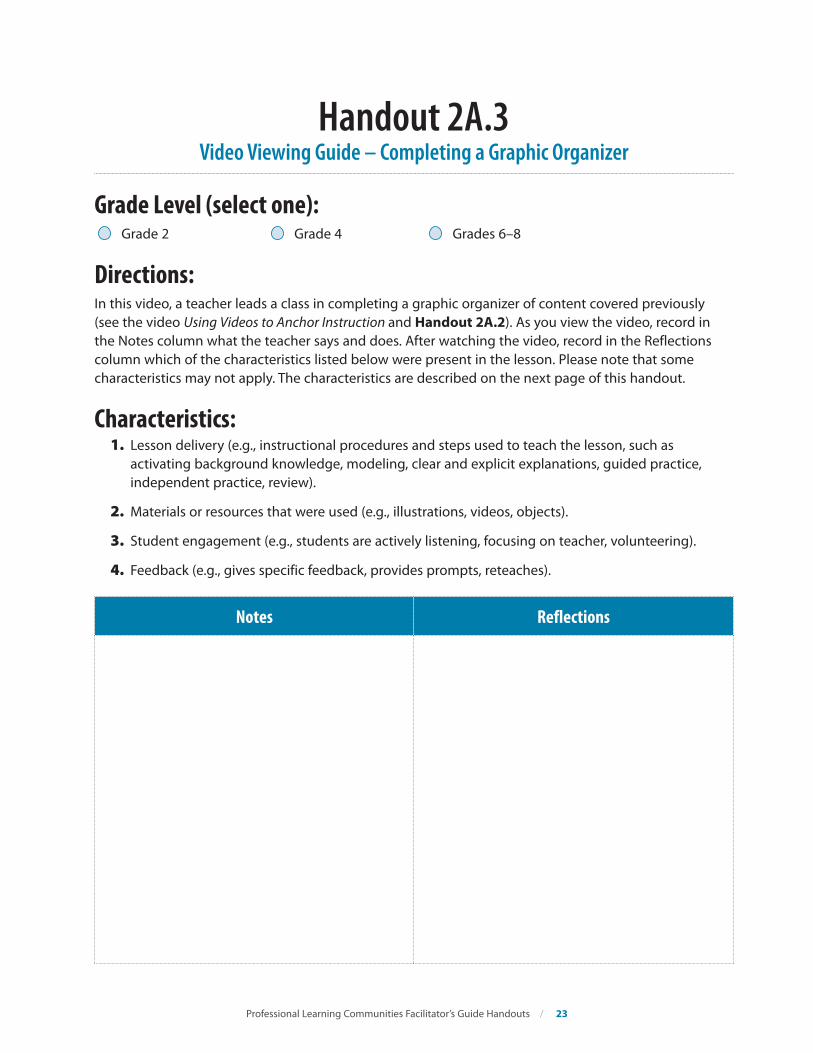
Handout 2A.3 Video Viewing Guide – Completing a Graphic Organizer
Grade Level (select one): Grade 2 Grade 4 Grades 6–8
Directions: In this video, a teacher leads a class in completing a graphic organizer of content covered previously (see the video Using Videos to Anchor Instruction and Handout 2A.2). As you view the video, record in the Notes column what the teacher says and does. After watching the video, record in the Reflections column which of the characteristics listed below were present in the lesson. Please note that some characteristics may not apply. The characteristics are described on the next page of this handout.
Characteristics: 1. Lesson delivery (e.g., instructional procedures and steps used to teach the lesson, such as
activating background knowledge, modeling, clear and explicit explanations, guided practice, independent practice, review).
2. Materials or resources that were used (e.g., illustrations, videos, objects).
3. Student engagement (e.g., students are actively listening, focusing on teacher, volunteering).
4. Feedback (e.g., gives specific feedback, provides prompts, reteaches).
Notes Reflections
Professional Learning Communities Facilitator’s Guide Handouts / 23
Explanations of the Characteristics: 1. Lesson delivery – Look for instances where the teacher states the purpose for learning the concept
and activates background knowledge by asking students what they know about the concept. Also, look for instruction where the concept is explicitly and clearly explained and modeled, followed by guided practice to make sure students practice the concept while the teacher monitors and provides feedback to ensure students avoid any misconceptions. Take note of any opportunities for independent practice of new concepts and review of previously taught concepts.
2. Materials or resources – Look for the types of materials the teacher uses during the lesson. For example, materials may include illustrations, objects, videos, PowerPoint presentations, graphic organizers, worksheets, and so forth.
3. Student engagement – Look for the degree to which students are actively listening, focusing on the teacher, volunteering, asking questions, and responding to the teacher.
4. Feedback – Look for teacher-student interactions and teacher talk that supports learning. For example, when a student gives a correct response, the teacher provides specific feedback by communicating clearly what the student did correctly. When a student gives an incorrect, vague, or incomplete response, the teacher asks questions or provides prompts to help the student formulate a correct answer. If the use of questions and prompts is not successful, the teacher reteaches or clarifies instruction.
24 / Professional Learning Communities Facilitator’s Guide Handouts
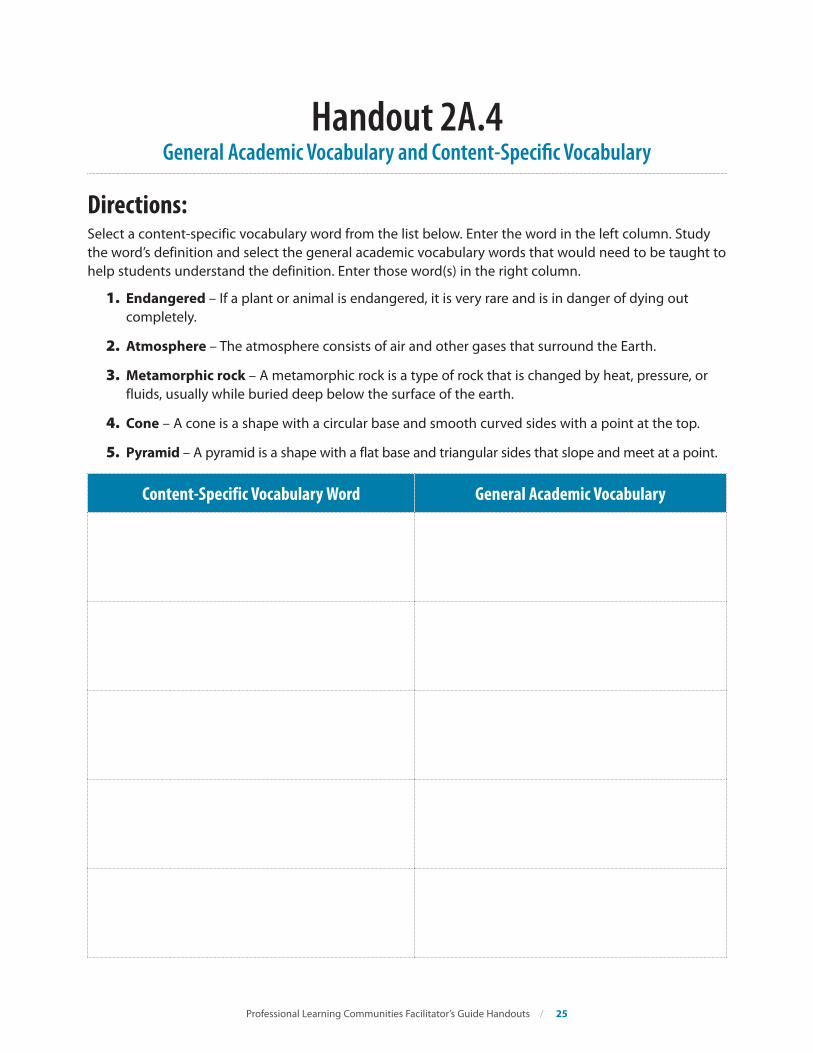
Handout 2A.4 General Academic Vocabulary and Content-Specific Vocabulary
Directions: Select a content-specific vocabulary word from the list below. Enter the word in the left column. Study the word’s definition and select the general academic vocabulary words that would need to be taught to help students understand the definition. Enter those word(s) in the right column.
1. Endangered – If a plant or animal is endangered, it is very rare and is in danger of dying out completely.
2. Atmosphere – The atmosphere consists of air and other gases that surround the Earth.
3. Metamorphic rock – A metamorphic rock is a type of rock that is changed by heat, pressure, or fluids, usually while buried deep below the surface of the earth.
4. Cone – A cone is a shape with a circular base and smooth curved sides with a point at the top.
5. Pyramid – A pyramid is a shape with a flat base and triangular sides that slope and meet at a point.
Content-Specific Vocabulary Word General Academic Vocabulary
Professional Learning Communities Facilitator’s Guide Handouts / 25
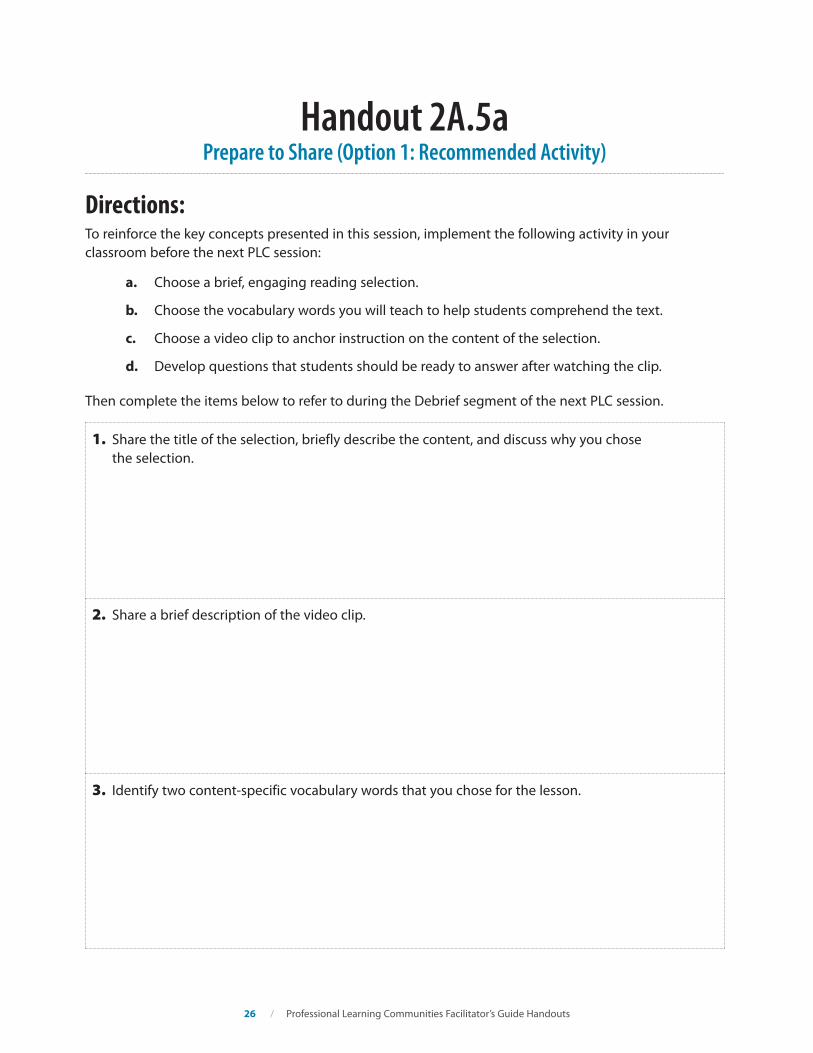
Handout 2A.5a Prepare to Share (Option 1: Recommended Activity)
Directions: To reinforce the key concepts presented in this session, implement the following activity in your classroom before the next PLC session:
a. Choose a brief, engaging reading selection.
b. Choose the vocabulary words you will teach to help students comprehend the text.
c. Choose a video clip to anchor instruction on the content of the selection.
d. Develop questions that students should be ready to answer after watching the clip.
Then complete the items below to refer to during the Debrief segment of the next PLC session.
1. Share the title of the selection, briefly describe the content, and discuss why you chose the selection.
2. Share a brief description of the video clip.
3. Identify two content-specific vocabulary words that you chose for the lesson.
26 / Professional Learning Communities Facilitator’s Guide Handouts
4. Identify any general academic vocabulary words that you chose for the lesson.
5. Share the questions you developed.
6. Describe the lesson you taught.
7. Did you teach the lesson as planned? If not, describe any adjustments you made and why you made them.
8. How did your students respond to your instruction? Discuss how students with different levels of English proficiency responded to your instruction.
Professional Learning Communities Facilitator’s Guide Handouts / 27
Handout 2A.5b Prepare to Share (Option 2: Custom Activity)
Directions: The team may opt to develop a different activity to reinforce the content of this session. If so, consider the following questions to keep the activity on target:
■ ■ How does this activity relate to Recommendation 2, How-to Steps 1 and 2?
■ ■ What products will team members collect or develop to bring back and discuss at the next session?
After implementing the activity, complete the items below to refer to during the Debrief segment of the next PLC session.
1. Explain your experience implementing the activity the PLC developed to reinforce the content of the session. Be sure to address issues such as the level of difficulty of the activity and any problems you encountered.
2. Discuss what you learned from implementing this activity.
28 / Professional Learning Communities Facilitator’s Guide Handouts
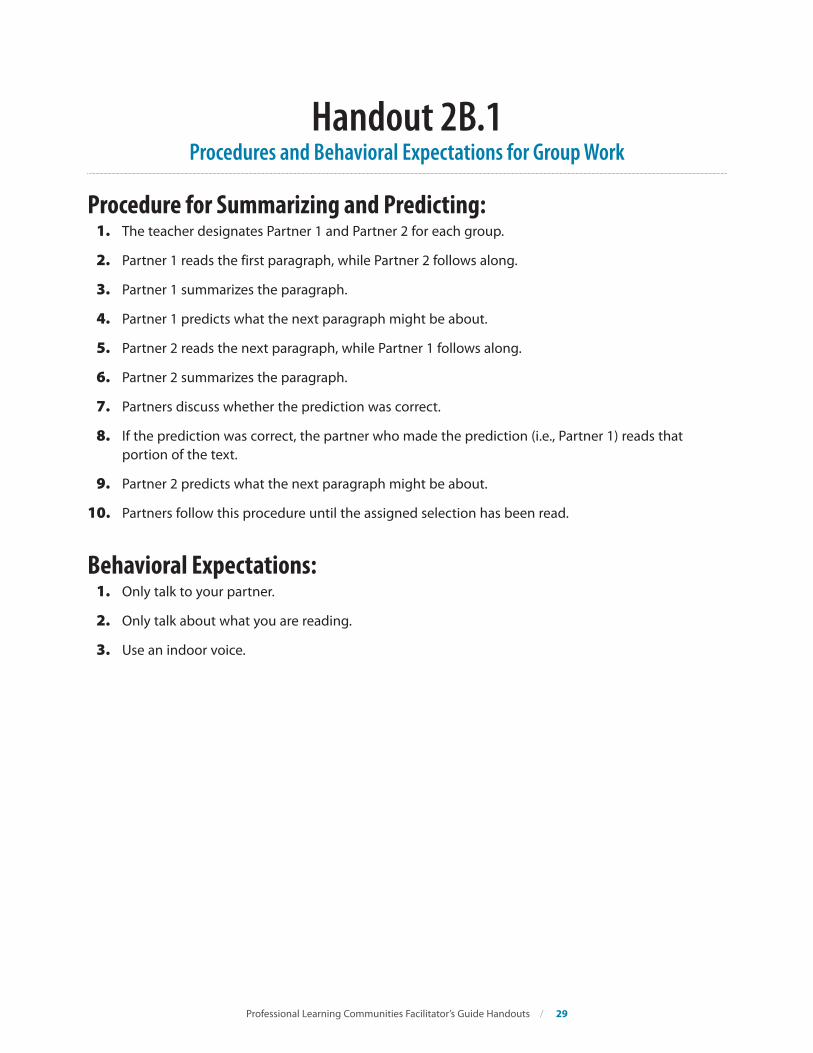
Handout 2B.1 Procedures and Behavioral Expectations for Group Work
Procedure for Summarizing and Predicting: 1. The teacher designates Partner 1 and Partner 2 for each group.
2. Partner 1 reads the first paragraph, while Partner 2 follows along.
3. Partner 1 summarizes the paragraph.
4. Partner 1 predicts what the next paragraph might be about.
5. Partner 2 reads the next paragraph, while Partner 1 follows along.
6. Partner 2 summarizes the paragraph.
7. Partners discuss whether the prediction was correct.
8. If the prediction was correct, the partner who made the prediction (i.e., Partner 1) reads that portion of the text.
9. Partner 2 predicts what the next paragraph might be about.
10. Partners follow this procedure until the assigned selection has been read.
Behavioral Expectations: 1. Only talk to your partner.
2. Only talk about what you are reading.
3. Use an indoor voice.
Professional Learning Communities Facilitator’s Guide Handouts / 29
Handout 2B.2a Prepare to Share (Option 1: Recommended Activity)
Directions: To reinforce the key concepts presented in this session, implement the following activity in your classroom before the next PLC session:
a. Choose a brief, engaging reading selection.
b. Develop a language objective and a content objective for a lesson you will teach before the next session (See Exhibit 2.5 on page 42 of the practice guide for examples).
c. Develop questions that students will discuss in pairs or small groups after reading the selection.
Then complete the items below to refer to during the Debrief segment of the next session.
1. Share the title of the selection, briefly describe the content, and discuss why you chose the selection.
2. Share the language objective and content objective you developed.
Language Objective:
Content Objective:
30 / Professional Learning Communities Facilitator’s Guide Handouts
3. Share the questions you developed.
4. Describe the lesson you taught.
5. Did you teach the lesson as planned? If not, describe any adjustments you made and why you made them.
6. How did your students respond to your instruction? Discuss how students with different levels of English proficiency responded to your instruction.
7. How did the questions you developed help your students comprehend the text?
Professional Learning Communities Facilitator’s Guide Handouts / 31

Handout 2B.2b Prepare to Share (Option 2: Custom Activity)
Directions: The team may opt to develop a different activity to reinforce the content of this session. If so, consider the following questions to keep the activity on target:
■ ■ How does this activity relate to Recommendation 2, How-to Steps 3 and 4?
■ ■ What products will team members collect or develop to bring back and discuss at the next session?
After implementing the activity, complete the items below to refer to during the Debrief segment of the next PLC session.
1. Explain your experience implementing the activity the PLC developed to reinforce the content of the session. Be sure to address issues such as the level of difficulty of the activity and any problems you encountered.
2. Discuss what you learned from implementing this activity.
32 / Professional Learning Communities Facilitator’s Guide Handouts
Handout 3A.1 Video Viewing Guide – Introduction to Recommendation 3
Directions: In this video, Joan Morris, a panel member for the English learner practice guide, presents a brief overview of Recommendation 3, including a description of the How-to steps for carrying out the recommendation. As you watch the video, take notes on the important information provided about each How-to step.
Recommendation 3: Provide regular, structured opportunities to develop written language skills.
How-to Steps Notes How-to Step 1: Provide writing assignments that are anchored in content and focused on developing academic language as well as writing skills.
How-to Step 2: For all writing assignments, provide language-based supports to facilitate students’ entry into, and continued development of, writing.
How-to Step 3: Use small groups or pairs to provide opportunities for students to work and talk together on varied aspects of writing.
How-to Step 4: Assess students’ writing periodically to identify instructional needs and provide positive, constructive feedback in response.
Professional Learning Communities Facilitator’s Guide Handouts / 33
Handout 3A.2 Video Viewing Guide – Using Graphic Organizers in Writing
Grade Level (select one): Grade 2 Grade 4 Grades 6–8
Directions: In this video, a teacher demonstrates how to use a graphic organizer as the foundation of a writing assignment. The teacher models how to move students from a graphic organizer, such as the one shown on page 36 of the English learner practice guide, to a writing format, as shown on page 50 of the practice guide. As you view the lesson in the video clip, record in the Notes column what the teacher says and does. After watching the video, record in the Reflections column which of the characteristics listed below were present in the lesson. Please note that some characteristics may not apply. The characteristics are described on the next page of this handout.
Characteristics: 1. Lesson delivery (e.g., instructional procedures and steps used to teach the lesson, such as
activating background knowledge, modeling, clear and explicit explanations, models, guided practice, independent practice, review).
2. Materials or resources that were used (e.g., illustrations, videos, objects).
3. Student engagement (e.g., students are actively listening, focusing on teacher, volunteering).
4. Feedback (e.g., gives specific feedback, provides prompts, reteaches).
Notes Reflections
34 / Professional Learning Communities Facilitator’s Guide Handouts
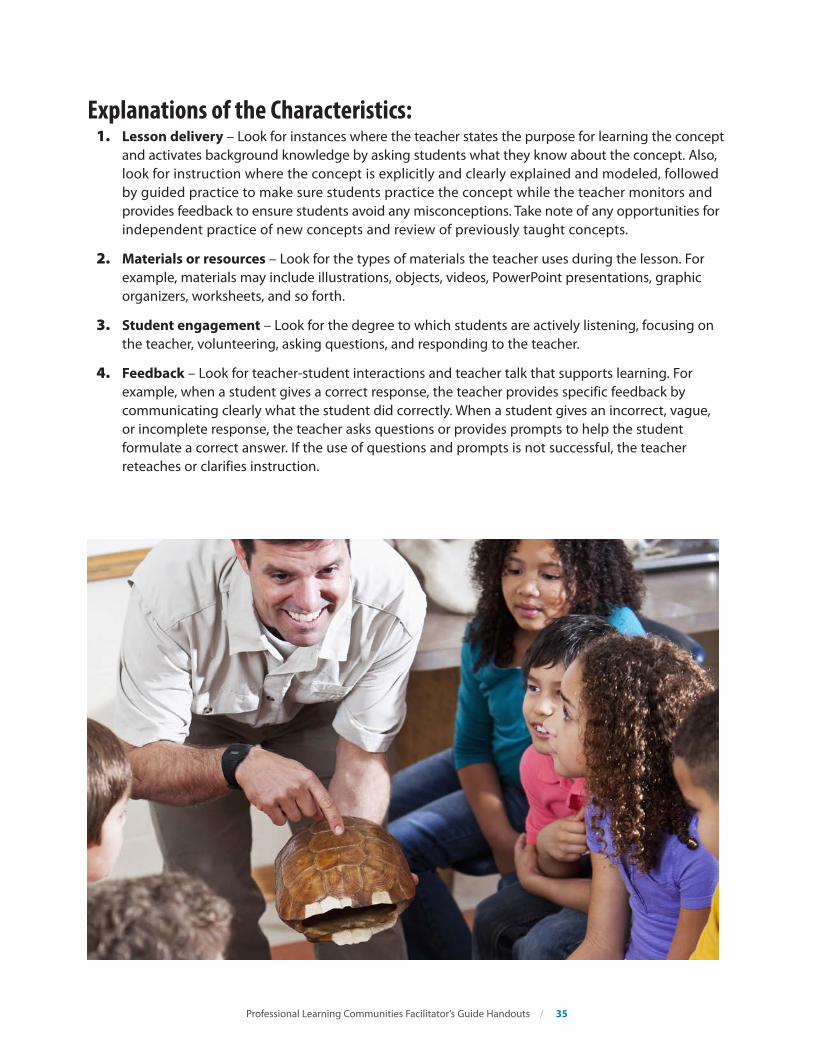
Explanations of the Characteristics: 1. Lesson delivery – Look for instances where the teacher states the purpose for learning the concept
and activates background knowledge by asking students what they know about the concept. Also, look for instruction where the concept is explicitly and clearly explained and modeled, followed by guided practice to make sure students practice the concept while the teacher monitors and provides feedback to ensure students avoid any misconceptions. Take note of any opportunities for independent practice of new concepts and review of previously taught concepts.
2. Materials or resources – Look for the types of materials the teacher uses during the lesson. For example, materials may include illustrations, objects, videos, PowerPoint presentations, graphic organizers, worksheets, and so forth.
3. Student engagement – Look for the degree to which students are actively listening, focusing on the teacher, volunteering, asking questions, and responding to the teacher.
4. Feedback – Look for teacher-student interactions and teacher talk that supports learning. For example, when a student gives a correct response, the teacher provides specific feedback by communicating clearly what the student did correctly. When a student gives an incorrect, vague, or incomplete response, the teacher asks questions or provides prompts to help the student formulate a correct answer. If the use of questions and prompts is not successful, the teacher reteaches or clarifies instruction.
Professional Learning Communities Facilitator’s Guide Handouts / 35
Handout 3A.3 Compare/Contrast Instructional Routine
Sample: 1. Prior to this writing lesson, the teacher led the students in completing a graphic organizer that
shows how to compare/contrast two concepts/topics in a selection students had read. For example, in Exhibit 2.2 on page 36 of the practice guide, there is a Venn diagram comparing zoos from 50 years ago to zoos today, as described in the passage in Exhibit 1.2, page 15.
2. Using the information in the graphic organizer, the teacher reviews the important information about how the two concepts/topics are alike and different by saying:
Let’s use the information we wrote on the graphic organizer to talk about the ways zoos today are different from zoos 50 years ago.
3. To determine the nature of the topic sentence, the teacher should determine whether the purpose of the writing assignment is to explain the similarities and differences between the concepts/topics or to take a position on a concept/topic. In this example, students are going to take a position on the topic of zoos.
4. If students have had little or no instruction on generating topic sentences, the teacher should develop a model topic sentence in advance. If students are in the process of learning to compose a topic sentence independently, the teacher should lead the class in writing a topic sentence.
5. After the topic sentence has either been supplied by the teacher or written by the class, the teacher should direct students to use the information in the graphic organizer to complete their writing assignment with the Writing Framework. For example, for the Compare and Contrast: Writing Framework in Exhibit 3.2 on page 50 of the practice guide, the teacher could say:
We decided to take the position that we would rather visit a zoo that has a new gorilla exhibit. We are going to provide two reasons to support this position. The graphic organizer shows four reasons: (1) the exhibit is a natural environment, (2) the animals have more room, (3) the animals can make choices, and (4) the animals are healthier and happier. Choose two of the reasons and write about them by explaining what they mean. You can go back to the reading or remember the information we discussed in class when we completed the graphic organizer. Remember not to copy the information from your book. You are to explain each reason in your own words.
36 / Professional Learning Communities Facilitator’s Guide Handouts
Handout 3A.4a Prepare to Share (Option 1: Recommended Activity)
Directions: To reinforce the key concepts presented in this session, implement the following activity in your classroom before the next PLC session:
a. Choose a brief, engaging reading selection.
b. Develop a graphic organizer to represent the content of the passage.
c. Develop an instructional routine to help students convert the graphic organizer to a piece of writing.
d. After reading the passage, lead students in completing the graphic organizer.
e. Use the instructional routine to teach students how to use the information in the graphic organizer to compose a piece of writing.
Then complete the items below to refer to during the Debrief segment of the next PLC session.
1. Share the title and briefly describe the content of the selection.
2. Describe and show the graphic organizer you developed to represent the passage.
3. Describe the instructional routine you developed.
Professional Learning Communities Facilitator’s Guide Handouts / 37
4. Describe the lesson you taught.
5. Did you teach the lesson as planned? If not, describe any adjustments you made and why you made them.
6. How did your students respond to your instruction? Discuss how students with different levels of English proficiency responded to your instruction.
7. How did the graphic organizer and instructional routine you developed help your students in the writing process?
38 / Professional Learning Communities Facilitator’s Guide Handouts
Handout 3A.4b Prepare to Share (Option 2: Custom Activity)
Directions: The team may opt to develop a different activity to reinforce the content of this session. If so, consider the following questions to keep the activity on target:
■ ■ How does this activity relate to Recommendation 3, How-to Steps 1 and 2?
■ ■ What products will team members collect or develop to bring back and discuss at the next session?
After implementing the activity, complete the items below to refer to during the Debrief segment of the next PLC session.
1. Explain your experience implementing the activity the PLC developed to reinforce the content of the session. Be sure to address issues such as the level of difficulty of the activity and any problems you encountered.
2. Discuss what you learned from implementing this activity.
Professional Learning Communities Facilitator’s Guide Handouts / 39
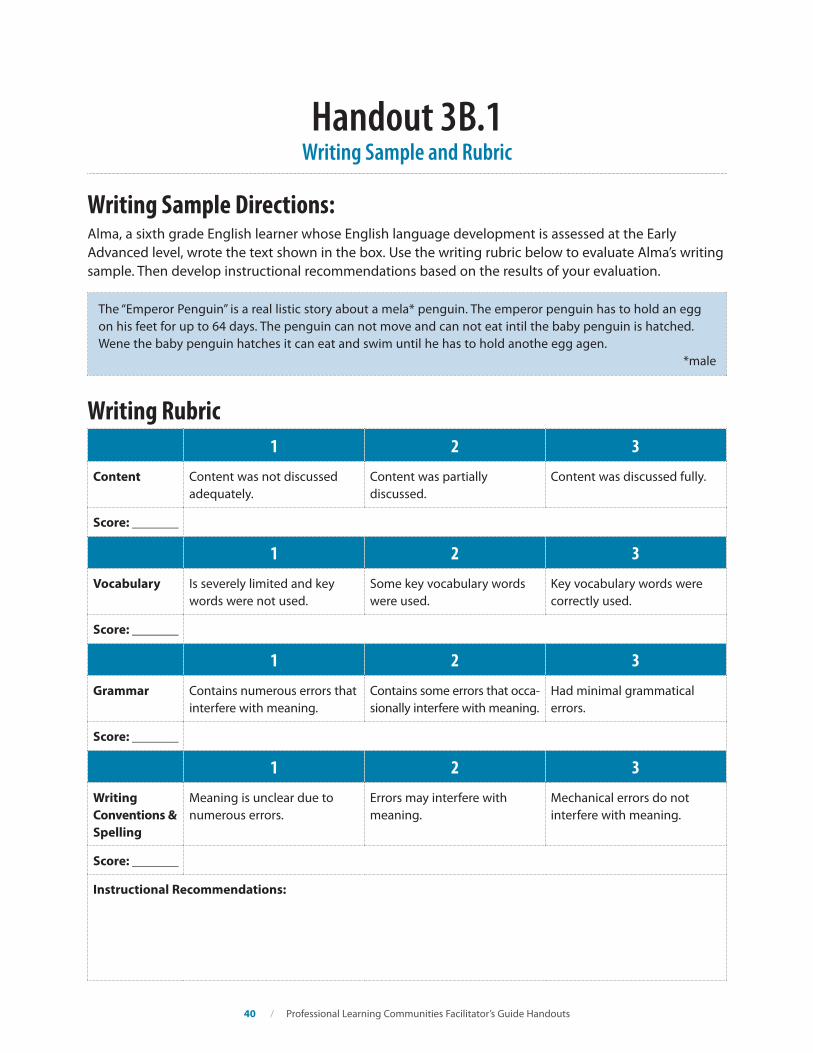
Handout 3B.1 Writing Sample and Rubric
Writing Sample Directions: Alma, a sixth grade English learner whose English language development is assessed at the Early Advanced level, wrote the text shown in the box. Use the writing rubric below to evaluate Alma’s writing sample. Then develop instructional recommendations based on the results of your evaluation.
The “Emperor Penguin” is a real listic story about a mela* penguin. The emperor penguin has to hold an egg on his feet for up to 64 days. The penguin can not move and can not eat intil the baby penguin is hatched. Wene the baby penguin hatches it can eat and swim until he has to hold anothe egg agen.
*male
Writing Rubric 1 2 3
Content Content was not discussed Content was partially Content was discussed fully. adequately. discussed.
Score: _______
1 2 3
Vocabulary Is severely limited and key Some key vocabulary words Key vocabulary words were words were not used. were used. correctly used.
Score: _______
1 2 3
Grammar Contains numerous errors that Contains some errors that occa- Had minimal grammatical interfere with meaning. sionally interfere with meaning. errors.
Score: _______
1 2 3
Writing Meaning is unclear due to Errors may interfere with Mechanical errors do not Conventions & numerous errors. meaning. interfere with meaning. Spelling
Score: _______
Instructional Recommendations:
40 / Professional Learning Communities Facilitator’s Guide Handouts
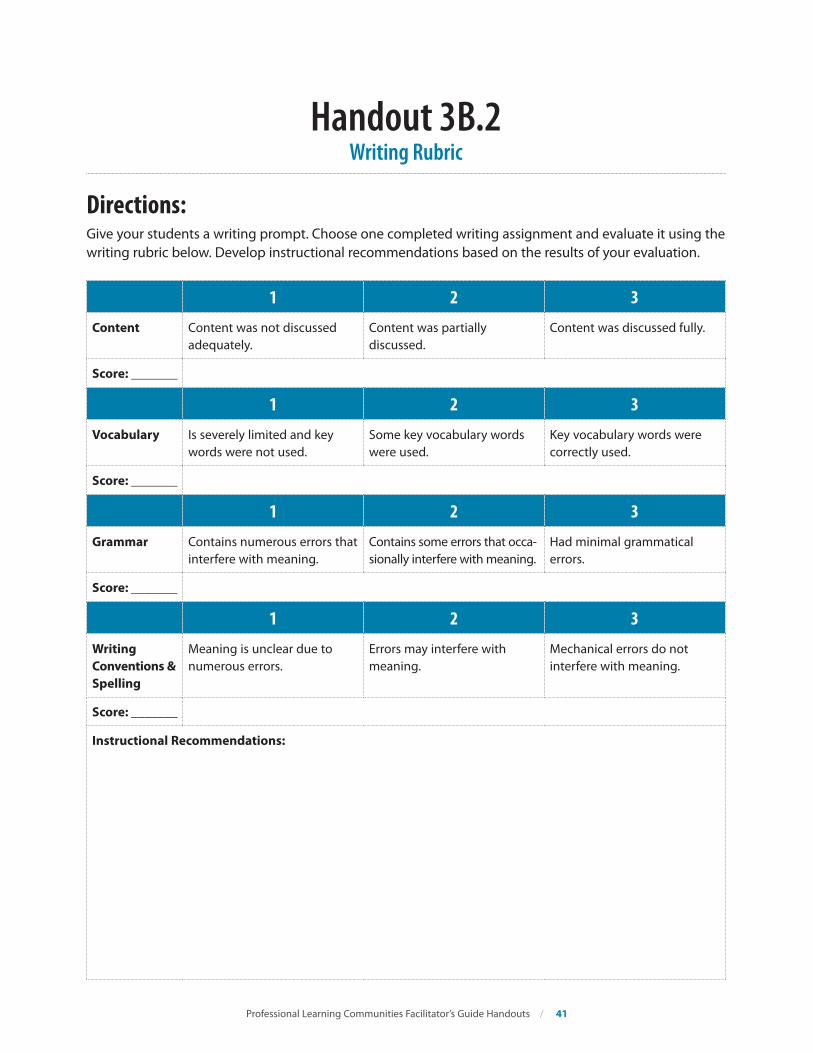
Handout 3B.2 Writing Rubric
Directions: Give your students a writing prompt. Choose one completed writing assignment and evaluate it using the writing rubric below. Develop instructional recommendations based on the results of your evaluation.
1 2 3
Content Content was not discussed Content was partially Content was discussed fully. adequately. discussed.
Score: _______
1 2 3
Vocabulary Is severely limited and key Some key vocabulary words Key vocabulary words were words were not used. were used. correctly used.
Score: _______
1 2 3
Grammar Contains numerous errors that Contains some errors that occa- Had minimal grammatical interfere with meaning. sionally interfere with meaning. errors.
Score: _______
1 2 3
Writing Meaning is unclear due to Errors may interfere with Mechanical errors do not Conventions & numerous errors. meaning. interfere with meaning. Spelling
Score: _______
Instructional Recommendations:
Professional Learning Communities Facilitator’s Guide Handouts / 41
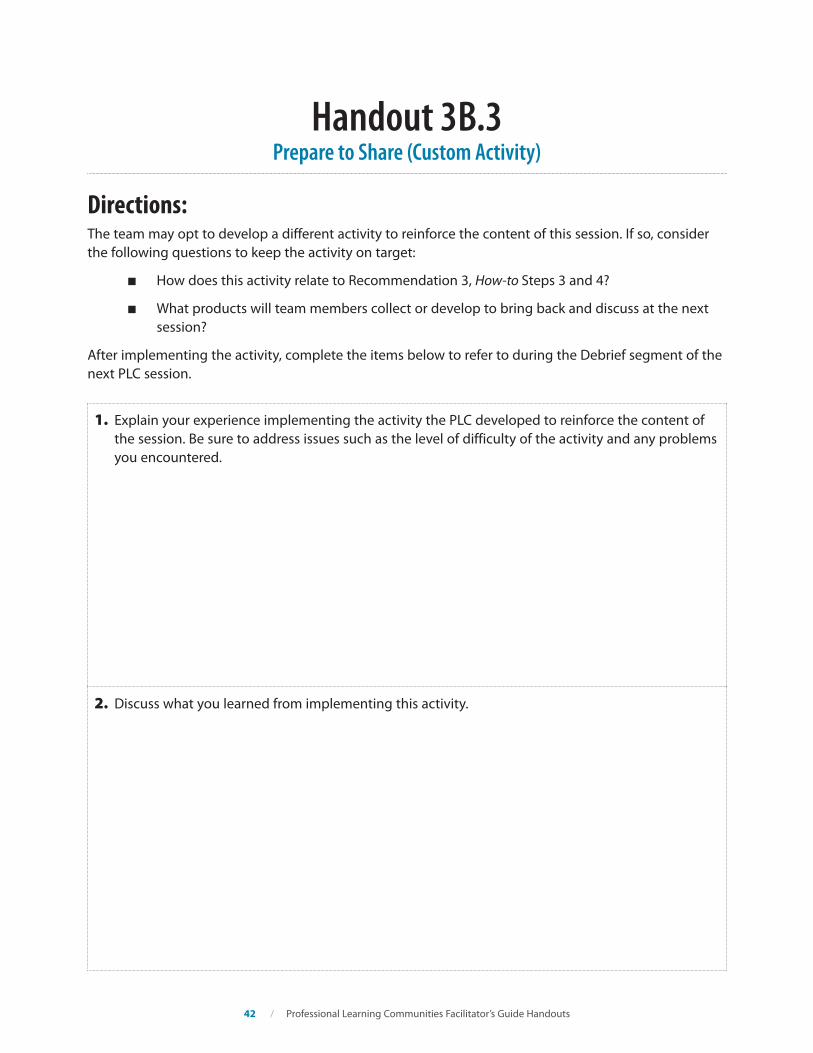
Handout 3B.3 Prepare to Share (Custom Activity)
Directions: The team may opt to develop a different activity to reinforce the content of this session. If so, consider the following questions to keep the activity on target:
■ ■ How does this activity relate to Recommendation 3, How-to Steps 3 and 4?
■ ■ What products will team members collect or develop to bring back and discuss at the next session?
After implementing the activity, complete the items below to refer to during the Debrief segment of the next PLC session.
1. Explain your experience implementing the activity the PLC developed to reinforce the content of the session. Be sure to address issues such as the level of difficulty of the activity and any problems you encountered.
2. Discuss what you learned from implementing this activity.
42 / Professional Learning Communities Facilitator’s Guide Handouts
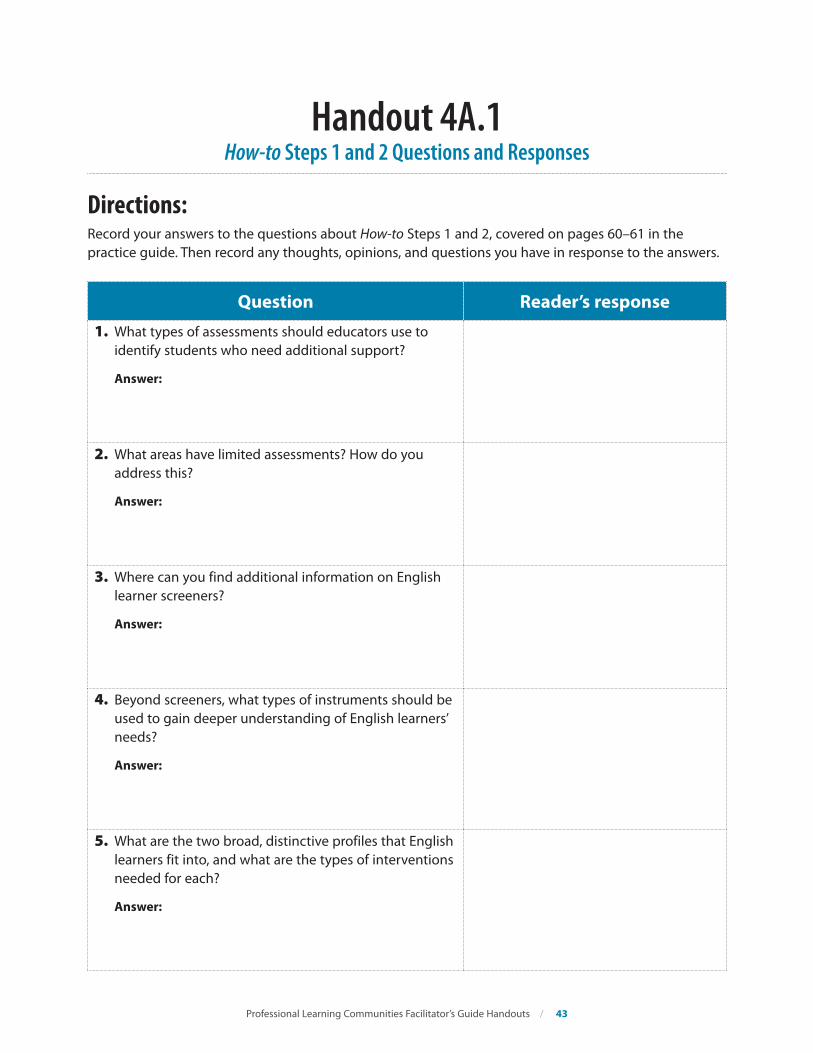
Handout 4A.1 How-to Steps 1 and 2 Questions and Responses
Directions: Record your answers to the questions about How-to Steps 1 and 2, covered on pages 60–61 in the practice guide. Then record any thoughts, opinions, and questions you have in response to the answers.
Question Reader’s response 1. What types of assessments should educators use to
identify students who need additional support?
Answer:
2. What areas have limited assessments? How do you address this?
Answer:
3. Where can you find additional information on English learner screeners?
Answer:
4. Beyond screeners, what types of instruments should be used to gain deeper understanding of English learners’ needs?
Answer:
5. What are the two broad, distinctive profiles that English learners fit into, and what are the types of interventions needed for each?
Answer:
Professional Learning Communities Facilitator’s Guide Handouts / 43
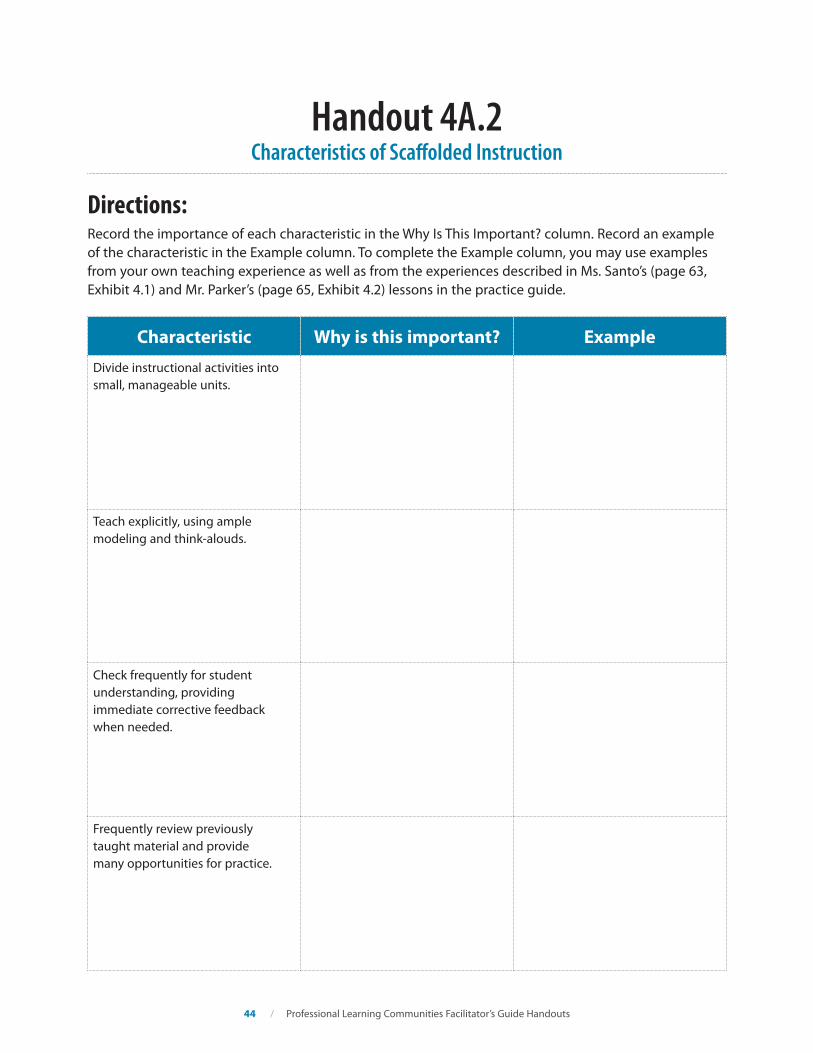
Handout 4A.2 Characteristics of Scaffolded Instruction
Directions: Record the importance of each characteristic in the Why Is This Important? column. Record an example of the characteristic in the Example column. To complete the Example column, you may use examples from your own teaching experience as well as from the experiences described in Ms. Santo’s (page 63, Exhibit 4.1) and Mr. Parker’s (page 65, Exhibit 4.2) lessons in the practice guide.
Characteristic Why is this important? Example
Divide instructional activities into small, manageable units.
Teach explicitly, using ample modeling and think-alouds.
Check frequently for student understanding, providing immediate corrective feedback when needed.
Frequently review previously taught material and provide many opportunities for practice.
44 / Professional Learning Communities Facilitator’s Guide Handouts

Handout 4A.3 Video Viewing Guide – Introduction to Recommendation 4
Directions: In this video, Joan Morris, a panel member for the practice guide, presents a brief overview of Recommendation 4, including a description of the How-to steps for carrying out the recommendation. As you watch the video, take notes on the important information provided about each How-to step.
Recommendation 4: Provide small-group instructional intervention to students struggling in areas of literacy and English language development.
How-to Steps Notes How-to Step 1: Use available assessment information to identify students who demonstrate persistent struggles with aspects of language and literacy development.
How-to Step 2: Design the content of small-group instruction to target students’ identified needs.
How-to Step 3: Provide additional instruction in small groups consisting of three to five students to students struggling with language and literacy.
How-to Step 4: For students who struggle with basic foundational reading skills, spend time not only on these skills but also on vocabulary development and listening and reading comprehension strategies.
How-to Step 5: Provide scaffolded instruction that includes frequent opportunities for students to practice and review newly learned skills and concepts in various contexts over several lessons to ensure retention.
Professional Learning Communities Facilitator’s Guide Handouts / 45
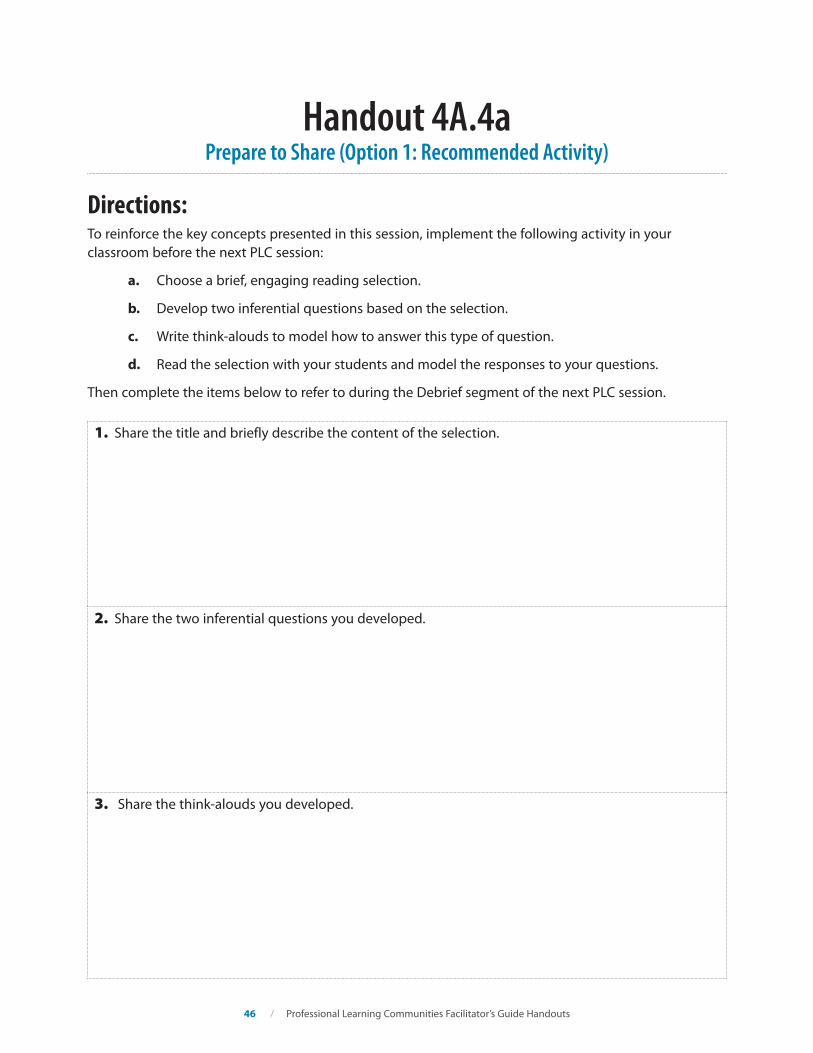
Handout 4A.4a Prepare to Share (Option 1: Recommended Activity)
Directions: To reinforce the key concepts presented in this session, implement the following activity in your classroom before the next PLC session:
a. Choose a brief, engaging reading selection.
b. Develop two inferential questions based on the selection.
c. Write think-alouds to model how to answer this type of question.
d. Read the selection with your students and model the responses to your questions.
Then complete the items below to refer to during the Debrief segment of the next PLC session.
1. Share the title and briefly describe the content of the selection.
2. Share the two inferential questions you developed.
3. Share the think-alouds you developed.
46 / Professional Learning Communities Facilitator’s Guide Handouts
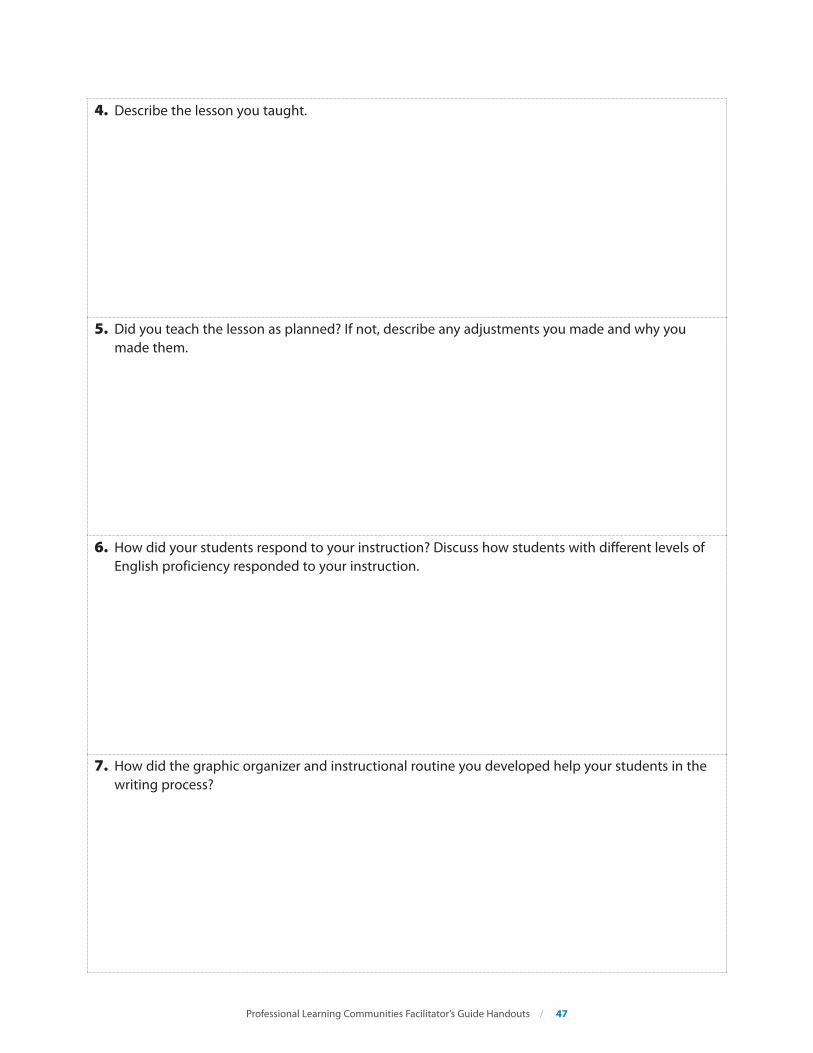
4. Describe the lesson you taught.
5. Did you teach the lesson as planned? If not, describe any adjustments you made and why you made them.
6. How did your students respond to your instruction? Discuss how students with different levels of English proficiency responded to your instruction.
7. How did the graphic organizer and instructional routine you developed help your students in the writing process?
Professional Learning Communities Facilitator’s Guide Handouts / 47

Handout 4A.4b Prepare to Share (Option 2: Custom Activity)
Directions: The team may opt to develop a different activity to reinforce the content of this session. If so, consider the following questions to keep the activity on target:
■ ■ How does this activity relate to Recommendation 4, How-to Steps 1–5?
■ ■ What products will team members collect or develop to bring back and discuss at the next session?
After implementing the activity, complete the items below to refer to during the Debrief segment of the next PLC session.
1. Explain your experience implementing the activity the PLC developed to reinforce the content of the session. Be sure to address issues such as the level of difficulty of the activity and any problems you encountered.
2. Discuss what you learned from implementing this activity.
48 / Professional Learning Communities Facilitator’s Guide Handouts