production of college magazine front cover
DESCRIPTION
how i produced the magazine front coverTRANSCRIPT

Production of College Magazine Front Cover

I uploaded my main image onto a blank page in Adobe Photoshop. I took these on the camera then uploaded them to my computer.

I selected the photo with the best lighting and quality. I had to pick the last one because the others were either too dark or too light. I had to change the photo I was going to use from my sketch because it defied one of the main codes and conventions:
direct address.
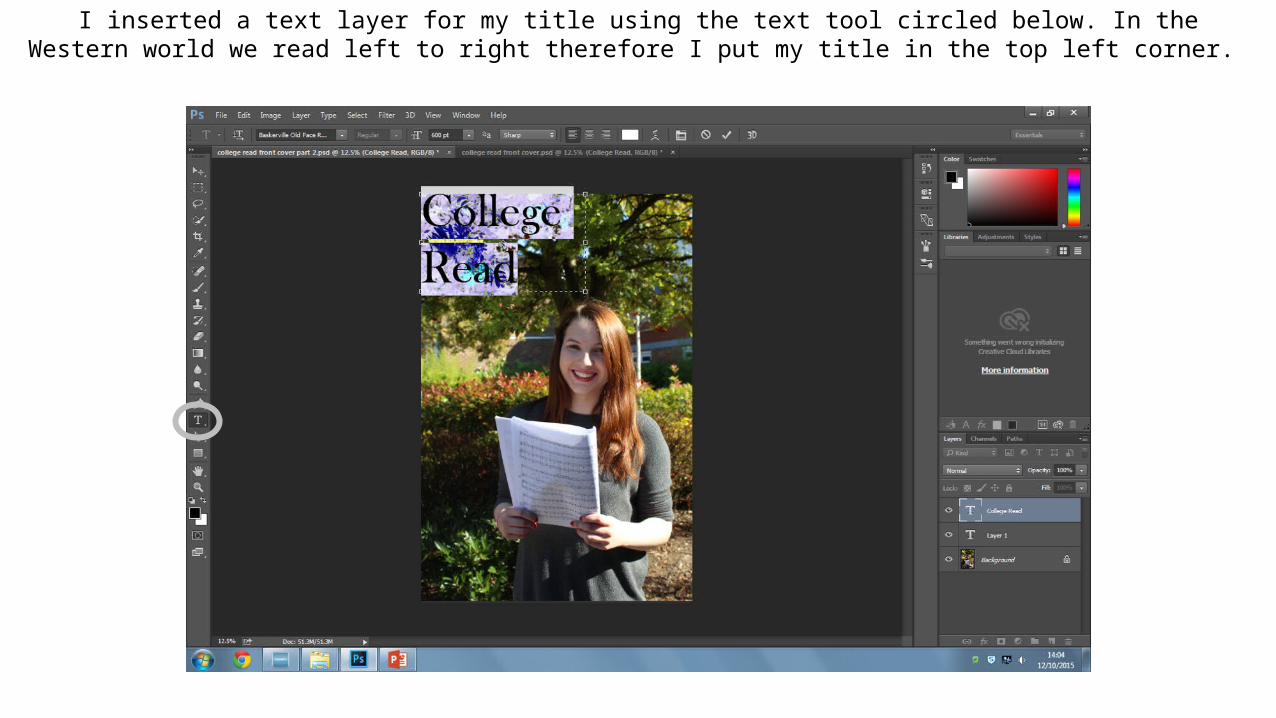
I inserted a text layer for my title using the text tool circled below. In the Western world we read left to right therefore I put my title in the top left corner.

I chose the Baskerville Old Face Regular font for my title, it’s clear and easy to read. To do this I highlighted the text and selected my font from the font bar.

I then inserted the cover lines using the text tool. I then changed the colour of the sub-text to make the main text stand out more. I kept the main cover line white to link to the title and changed the sub-text to grey, continuing the colour scheme. To
change the colour I selected the text and clicked on the colour tool circled below.

I did the same steps for each of my cover lines, except I made my main cover line slightly larger so it will catch the reader’s attention. I had to rearrange them because the layout covered the model’s face. I moved Trouble in the LRC to the bottom
left corner so Exam Stress and Sporting Sign Up could go in the top right corner.

I saved my front cover twice, once as a Photoshop piece and then as an image so I can upload the final product to my blog.