pro tools for music teachers session 2 free 15 setting the session meter 16 setting the session...
TRANSCRIPT
Online 2013
Pro Tools for Music TeachersSession 2Amy BennettMidnight Music

Pro Tools For Music Teachers 4
Working with Multitracks 4
Navigating and selecting 4
Keyboard focus 5
Selecting using the Timebase Ruler 5
Edit Selections 6
Making selections over multiple tracks 6
Resizing tracks 7
Changing track order 7
Zooming 7
Adding Memory Locations 8
Editing 8
Editing commands 9
Separate Clip 10
Heal Separation 10
Grouping clips 10
Consolidating clips 10
Moving clips with the Grabber Tool 10
Trimming clips 10
Nudging clips 10
Fading clips 11
If anything goes wrong 12
Recording MIDI in Pro Tools with Virtual Instruments 12
What is MIDI? 12
Inserting an instrument track 12
Select your track input 13
Using Virtual Instruments 13
Xpand! 14
Boom 15

Structure Free 15
Setting the Session meter 16
Setting the Session tempo 16
Setting the Session Key Signature 17
Viewing and Editing MIDI data 17
3

Pro Tools For Music Teachers
Working with Multi-tracks
Most importantly:
• Label tracks• Choose order of tracks carefully (you can reorder them by dragging them around)• Use memory loca=ons (described later in these notes)• Work at a zoom level, both ver=cally and horizontally, that suits the task you’re performing
Navigating and selecting
Eventually your session may become quite large, so the Universe view can be very helpful when naviga=ng through it.
Universe View
Fig. 1. Universe view
If Universe view is not displayed, go to View > Other Displays > Universe. The Universe view area can be resized by dragging the boLom border of the square. What is currently viewed on the screen is the framed bright rectangle which resizes as you change your project zoom, track heights etc and also scrolls as the edit window scrolls. Click in the universe view to move the current view indicator or click and drag the indicator to scroll through the session.
Current view indicator
Fig. 2. Current view indicator on the same session with =ghter zoom
4

Keyboard focus
In order to simplify the use of Pro Tools using keyboard shortcuts, Pro Tools has a mode called Keyboard Commands Focus Mode. When keyboard focus mode is on, the QWERTY keyboard can be used for many shortcuts. Many of these shortcuts can be found in the Useful Pro Tools Shortcuts documenta=on accompanying these notes. You can choose keyboard focus for a number of windows, when it is on in a window, the “az” keyboard focus buLon is yellow. The usual state of play is to have the keyboard focus on for the main =meline part of the Edit Window.
Keyboard focus buLons for Edit Window (on) and Clip Window (off)
Fig. 3. Keyboard focus buLons to allow keyboard shortcuts to be ac=ve
Selecting using the Timebase Ruler
There are many ways to make selec=ons in Pro Tools. One is using the Timebase Ruler. With any tool selected, drag over the ruler and that area of the =meline will be selected. A[er the selec=on has been made, blue Timeline selec=on in/out points appear on the =meline (red if the track is record enabled).
Fig. 4. Making a =meline selec=on with the selector tool in the Timebase Ruler
5

The Timeline selec=on points are also displayed on the Transport Window and at the top of the Edit Window, as is the length of the selec=on. Values can be input manually into the Start and End fields to make a selec=on also.
Fig. 5. Timeline selec=on fields in the Transport window
Edit Selections
• Selec=ng clips with the Grabber Tool – click on a clip to select it, or Shi[-‐click on the first clip then the last clip in the row to select all clips in between.
• Using the Selector Tool – Click and drag on the =meline to make a selec=on. Double click to select an en=re clip. Triple click to select the en=re Track Playlist.
Note: You can unlink the =meline and edit selec=ons. This is not recommended un=l becoming an advanced Pro Tools user, however it is worth knowing which buLon does it, in case it accidentally gets pressed!
Fig. 6. Link(blue)/Unlink(grey) Timeline and Edit selec=ons
Making selections over multiple tracks
To make a selec=on on mul=ple tracks, drag the selec=on over mul=ple tracks with the Selector Tool. If the tracks are non-‐adjacent, make the selec=on on one track, then Ctrl(Command)-‐click on the required track in the Track Playlist with the Selector Tool.
Fig. 7. Making a selec=on on more than one non-‐adjacent tracks
6

If the Link Track and Edit Selec=on buLon is pressed, you can also select more than one track (via Shi[ or Control (Command) + clicking) and any selec=on will be made on all selected tracks. You can tell a track has been selected when its nameplate is highlighted. Again this buLon will nearly always be pressed but it’s worth knowing where it is incase it is turned off.
Fig. 8. Link(blue)/Unlink(grey) Track and Edit Selec=on
Resizing tracks
There are 8 track heights you can choose. They are changed using the buLon illustrated below. To change all track heights, Alt (Op=on) + click on the change track height buLon.
Change track height buLon
Fig. 9. Change track height buLon
Changing track order
In the Edit or Mix windows, click on the track nameplate and drag it to the required posi=on. In the Track List, click on the track name and drag it to a higher or lower posi=on in the list.
Zooming
The Zoomer Tool can be used to zoom in (one magnifica=on with each click) or out (Alt (Op=on) + click). If you click and drag with the Zoomer Tool, the area you drag over will fill the screen horizontally.Shortcuts for horizontal zooming are R (out) and T (in) if Keyboard Focus Mode is on.
The Zoom buLons on the Edit window are as follows:• Zooming in horizontally• Zooming out horizontally• Zooming waveforms informa=on in and out ver=cally. • Zooming MIDI informa=on in and out ver=cally
Zooming waveforms horizontally can become confusing, as you lose the original size of the waveforms and are not sure if they’ve clipped or not on recording. To reset the size of the waveforms to their original height, hit Alt (Op=on) + A.
7

The 1 – 5 buLons are for Zoom Presets. Set your screen with the desired zoom and Ctrl (Command) + click on the number.
Adding Memory Locations
Pro Tools has what are called memory loca=ons. These can be either markers (playback loca=ons) or selec=ons (edit loca=ons). Markers are the most useful.
View the marker ruler by going to View > Rulers > Markers. Put the cursor where you’d like the marker. Click the + buLon on the marker ruler to bring up the Memory Loca=on dialog box. Give the marker a name and a number. Choose Absolute if you’d like the marker to stay put no maLer what the tempo or meter, and choose Bar|Beat if you’d like the marker to move if the tempo or meter change. Click ok.
The shortcut for adding a marker is Enter on the numeric keypad.
To recall a memory loca=on, click the marker symbol in the Marker Ruler, or bring up the list of memory loca=ons from Window > Memory LocaAons and click the desired marker. You can also click the period (.) on the numeric keypad and then press the marker number. Alt (Op=on) + click a marker to delete it.
Fig. 10. Memory loca=ons on the Markers ruler and the Memory Loca=on window
Editing
Edit modes have already been discussed in Part 1 of these notes. The two you will most likely use the most are Slip and Grid. The shortcuts for the Edit Modes are:
Shuffle Mode – F1Slip Mode – F2Spot Mode – F3Grid Mode – F4
There are two op=ons for Grid Mode, Absolute and Rela=ve. In both modes, selec=ons and inser=on points snap to the Grid intervals. The move and trim opera=ons either align to the grid (Absolute) or move in Grid increments rela=ve to the origina=on point (Rela=ve).
8

Absolute – moving a clip snaps the clip start to the Grid and trimming a clip snaps the trimmed edge to the Grid.Rela=ve – clips are moved and trimmed by grid units. If a clip’s start point is offset from the grid, this will be preserved during moving or trimming. This mode is used to move clips by bars or beats whilst preserving an offset rela=ve to the beat.
Note: Both Grid and Shuffle Mode can be ac=vate together if necessary.
The Grid value is set on the toolbar of the Edit window or on the Transport Window. Click on the drop down arrow to set the grid =mescale and grid size.
Fig. 11. Seqng the Grid parameters
Editing commands
The usual shortcuts apply for the common edi=ng commands such as:
Cut – Control (Command) + XCopy – Control (Command) + CPaste – Control (Command) + VClear – Control (Command) + B Duplicate – Control (Command) + DRepeat – Alt (Op=on) + RThe Clear command removes selected clips or range of audio without placing the deleted audio on the Clipboard.
The Duplicate command copies a selec=on and places the selected audio or MIDI data immediately a[er the end of the selec=on. It is like a copy and paste in one sweet shortcut.
The Repeat command is similar to the Duplicate command but you can specify how many =mes you’d like the material repeated.
9

Separate Clip
Separa=ng a clip means breaking it in two, for a number of edi=ng reasons. Whenever a clip is separated (or split) new clips are created and added to the clip list. To split a clip you can either put the cursor where you’d like to split it, or make a selec=on. Then press Control (Command) + E to split the clip. You can also split a clip at each grid line by going to Edit > Separate Clip > On Grid.
Heal Separation
If you need to undo a separa=on later, select all the clips to put back together and press Control (Command) + H.
Grouping clips
If you are happy with two (or more) clips edited next to each other and would like to turn them into a group so they move together and essen=ally become one clip, select the two clips (click one, hold Shi[ and click the other), right click and select group. You will no=ce that a grouped clip is now siqng in the Clip List.
Consolidating clips
Consolida=ng clips looks like grouping clips, but it turns the several audio clips into one. You can then rename the consolidated clips by right clicking on them in the Clip List. Some people consolidate a whole track when they know they’re finished with the edit so it looks =dy.
Moving clips with the Grabber Tool
In slip mode you can freely move the clips around by clicking on them and dragging them wherever you like. It’s worth knowing however that if you drag clips on top of each other, the top clip will trim the audio underneath. Therefore if you drag a large clip en=rely over a smaller clip, the smaller clip disappears. This can be undone with Control (Command) + Z or Edit > Undo.
When in Grid Mode, the clips snap to the grid when being dragged and when in Shuffle Mode, clips snap to each other like magnets. Their order can be shuffled but no space can be le[ in between them. Don’t worry about Spot Mode for the moment.
Trimming clips
Select the Trim Tool. Move the cursor over the clip you’d like to trim and it will change into either this [ or this ] depending on the side to be trimmed. If you make a selec=on and then trim whilst holding Control (Command) the clip will trim to the selec=on.
Nudging clips
This is probably the cutest sounding thing in Pro Tools. Nudging a clip moves it a small amount to the le[ or right depending on the nudge seqngs. These are set in the Nudge Value sec=on of the toolbar area of the Edit Window or the Transport Window. Again, like the Grid, set the =me scale and the nudge size.
10

Use the + and – keys on the numeric keypad to nudge clips to the le[ and right. If you don’t have a numeric keypad, use the Func=on key and the +/-‐ keys. If Keyboard Focus is on, use < and >.
You can also nudge selec=ons by making a selec=on and using the < or > (or +/-‐) keys to move the selec=on le[ or right. Holding down Shi[ will make the selec=on move without affec=ng the underlying clips. Give this a go, it will make sense when you try it.
Fading clips
The most basic way to make a fade is to select the beginning or end of a clip and press Control (Command) + F. The fade dialog box will open and you can choose the type of fade you desire. A quicker way is to just press F which will put in a fade without bringing up the dialog box.
Fig. 12. Fade dialog box
An even quicker way to put in a fade is to click your cursor where you’d like the fade to start or end. Then press D to fade from the start of the clip to the cursor and G to fade from the cursor to the end of the clip.To make a crossfade, drag a selec=on across the end of one file and the start of the next. Then press Control (Command) + F and click Ok. If you get an error saying there is insufficient audio data within the fade bounds, click Adjust Bounds. It means the clips aren’t long enough to make that long a crossfade.
Fig. 12. Crossfade dialog box11
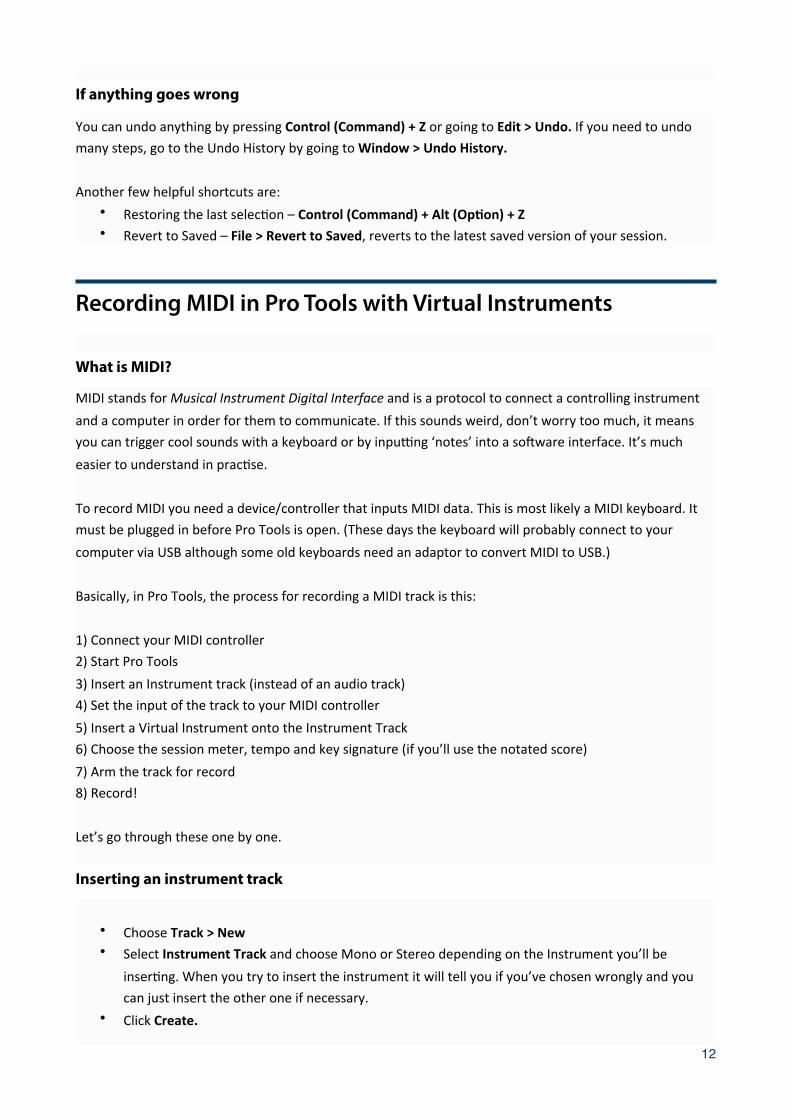
If anything goes wrong
You can undo anything by pressing Control (Command) + Z or going to Edit > Undo. If you need to undo many steps, go to the Undo History by going to Window > Undo History.
Another few helpful shortcuts are:• Restoring the last selec=on – Control (Command) + Alt (OpAon) + Z• Revert to Saved – File > Revert to Saved, reverts to the latest saved version of your session.
Recording MIDI in Pro Tools with Virtual Instruments
What is MIDI?
MIDI stands for Musical Instrument Digital Interface and is a protocol to connect a controlling instrument and a computer in order for them to communicate. If this sounds weird, don’t worry too much, it means you can trigger cool sounds with a keyboard or by inpuqng ‘notes’ into a so[ware interface. It’s much easier to understand in prac=se.
To record MIDI you need a device/controller that inputs MIDI data. This is most likely a MIDI keyboard. It must be plugged in before Pro Tools is open. (These days the keyboard will probably connect to your computer via USB although some old keyboards need an adaptor to convert MIDI to USB.)
Basically, in Pro Tools, the process for recording a MIDI track is this:
1) Connect your MIDI controller2) Start Pro Tools3) Insert an Instrument track (instead of an audio track)4) Set the input of the track to your MIDI controller5) Insert a Virtual Instrument onto the Instrument Track 6) Choose the session meter, tempo and key signature (if you’ll use the notated score)7) Arm the track for record8) Record!
Let’s go through these one by one.
Inserting an instrument track
• Choose Track > New• Select Instrument Track and choose Mono or Stereo depending on the Instrument you’ll be
inser=ng. When you try to insert the instrument it will tell you if you’ve chosen wrongly and you can just insert the other one if necessary.
• Click Create.
12

Fig. 13. Adding an Instrument track
Select your track input
The MIDI input selector for Instrument tracks is located in the Instrument MIDI controls sec=on of the track (Edit window) or channel strip (Mix window). You can bring this sec=on up using View > Edit Window > Instrument or View > Mix window > Instrument.
By default the MIDI inputs are set to ALL, which should cover your device. This means it should work without you changing anything as long as your device is properly connected to your computer and it is connected before you open Pro Tools.
Fig. 14. Viewing Instrument Track MIDI inputs
Using Virtual Instruments
Virtual Instruments can sound a bit scary, but they’re just synthesizers inside Pro Tools. They provide heaps of cool sounds you can play with your MIDI keyboard, from pianos to drums to crazy synths. The ones that come with Pro Tools are:
• Xpand! – Good for synths – more than 2,300 patches (sounds). • Boom – A drum step sequencer• Structure Free – A sampler with 60 preset patches including drum kits and loops, basses, guitars,
leads, EPs, organs, pads, etc.
Others can be bought later if necessary.
You put these Virtual Instruments in as Inserts on your tracks. Inserts are also used for plugins like reverb, delay and EQ but we’ll discuss this in the next session.
If you can’t see the inserts sec=on on your tracks or channel strips, go to View > Edit Window or View > Mix Window and select Inserts.
13

Then to add the Virtual Instrument, go to plug-‐in > Instrument and select which one you’d like to try. The best way to get to know them is to have a big play with each one. Once you’ve added it, it’s just a case of choosing your sound, arming your track and pressing record.
Fig. 15. Adding a virtual instrument to an Instrument track.
Depending on which instrument you’ve chosen, you choose the sound in a certain part of the instrument window that opens.
Xpand!
A classic synthesiser containing many patches and loops. Go to the Librarian menu to change sounds.Librarian Menu
Fig. 16. The Xpand virtual instrument – where to change patches (sounds)
14

Boom
A simple drum-‐machine-‐style step sequencer with 10 classic drum kits. Select the kit using the kit selector, then select each sound and program where in the step sequencer you would like to hear it. You can also play the drum patches with your MIDI keyboard live into the track.
Fig. 17. The Boom virtual instrument
Structure Free
Use a stereo track for Structure. This is a free version of the instrument. The full version of Structure can be purchased.
Fig. 18. The Structure Free virtual instrument
15

Setting the Session meter
The default meter is 4/4. To set the meter, double click on the Current Meter display in the Transport window or click on the + buLon on the Meter Ruler in the Edit window. Enter the desired meter and 1|1|000 if you want the meter to start right at Bar 1.
Fig. 19. Edit window – Meter, Tempo and Key Change rulers
Fig. 20. Meter change window
Setting the Session tempo
The default tempo is 120bpm. To set the tempo, change it in the Transport window (remember to turn the Conductor off if you want to set the tempo manually) or click on the + buLon on the Tempo Ruler in the Edit window. Enter the desired tempo and 1|1|000 if you want the tempo to start right at Bar 1.
Fig. 21. Tempo change window
16

Setting the Session Key Signature
The default key signature is C major. To set the key signature click on the + buLon on the Key Signature Ruler in the Edit window. Enter the desired key signature and 1|1|000 if you want it to start right at Bar 1.
Fig. 22. Key signature change window
Viewing and Editing MIDI data
A[er making a recording, MIDI data will appear on the tracks in the Edit Window as is expected. This data can be view in a number of forms including as clips, notes and velociAes. The view can be changed by clicking on the liLle arrow next to the track view selector and selec=ng the desired view.
Track view selector
Fig. 23. Track view selector
• Clips – The default view, these clips can be selected, copied, cut and trimmed just like audio clips. The shortcut to toggle to this view is Start/Control + Minus. You may need to press this twice to toggle to clips view.
• Notes – This view shows individual MIDI notes in a piano roll format. Pitch is on the ver=cal axis and dura=on on the horizontal axis. In this view notes can be added or deleted using the Pencil Tool, the pitch changed with the Grabber Tool, or the dura=ons changed with the Trimmer Tool.
• Velocity – This view shows the aLack velocity of each note as what is called a velocity stalk. Drag the tops of these up or down with the Grabber Tool to make notes louder or so[er.
17

MIDI Editor Window
It can be super fiddly to edit MIDI within the tracks, so usually it’s beLer to open the MIDI Editor window. To open this window you can either double click on a MIDI clip in the Edit Window or go to Window > MIDI Editor. The liLle music notes buLon allows you to toggle Notes and Nota=on view. You can also display MIDI data from more than one track if you select more than one track in the Track Playlist on the le[ hand side. The MIDI informa=on from different tracks then display overlayed in different colours.
Fig. 24. MIDI Editor Window
18