preparing your publication for printing
TRANSCRIPT
Preparing your Publication for
Printing
The following guidelines are intended to assist you through the process of creating a print-ready publication that will meet industry standards for Web Offset printing. Our goal is to provide you with the resources you need to insure that the print files you submit will result in the best reproduction at press without delays or added cost being incurred.
If you have any questions, feel free to contact one of our sales or customer service representatives at 866.262.4449.
1005 E. Fairplains Street • Greenville, MI 48838Ph: 866.262.4449 • www.go-stafford.com

INDEX
03 Layout formats, setup
04 Design/Layout applications Setting up bleeds 05 Color setup
06 Color chart
07 Things to avoid
08 PDF settings
09 Print info form
10-13 Photo guidelines
14 ftp upload instructions
15 Frequent contacts Resources
16 Internet/Online Publishing
INDEX
03 Layout formats, setup
04 Design/Layout applicationsSetting up bleeds
05 Color setup
06 Color chart
07 Things to avoid
08 PDF settings
09 Print info form
10-13 Photo guidelines
14 ftp upload instructions
15 Frequent contactsResources
16 Internet/Online Publishing
1005 E. Fairplains St.Greenville, MI 48838
866.262.4449 Fax: 616-225-1389
www.go-stafford.com

The most common web press layout formats are Broadsheet, the largest page size; Tabloid, half the page size of a broadsheet; and Mini-Tab, which has a page size that is half that of a tabloid page. Within each format, sizes can vary either in width, height or both. Each are achieved on the same press by how the folds are made in the web.
BROADSHEET • Traditional newspaper format • Sized from 11.5 to 17” wide by 23” tall • Page counts are factored in two page increments • Can fold to either display half of the front page, or quarter of front page
TABLOID • A tabloid can be ready straight off the press untrimmed, or sent to post press to be stitched and trimmed • Untrimmed tabloids have a width of 11.375” wide but can vary in height from 12 to 17” tall
(quarter folded) with the fold across the middle of the front page (often done for mailing purposes) • Trimmed tabloids range from 9.5 to 10.5” wide by 12 to 16” tall. Stitching and trimming is done post-press • Page counts are factored in increments of four
MINITAB • A mini-tab is a stitched and trimmed product that can be produced in a variety of sizes, usually from 6 to 8” wide by 10 to 10.5” tall • Page counts are factored in increments of 8.
LAYOUT FORMATS
3

USING DESIGN AND LAYOUT APPLICATIONS Adobe InDesign and QuarkXpress are the two industry standard layout applications that are
two, InDesign
SETTING UP BLEEDS A bleed is any image or design element that extends off of the printed piece. Bleeds can be used only when the printed piece is going to be trimmed. Your bleed elements must be extended 1/4” beyond the trim edge of the document.
1/4” of bleed by checking the appropriate box in the pdf settings.
4
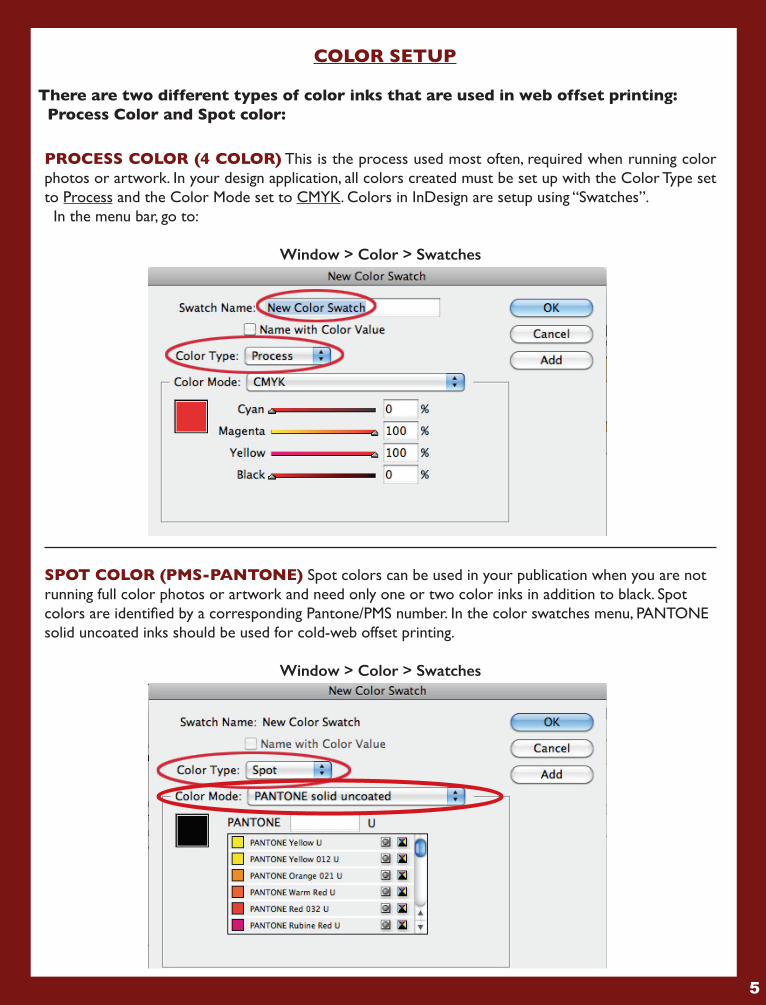
COLOR SETUP There are two different types of color inks that are used in web offset printing: Process Color and Spot color:
PROCESS COLOR (4 COLOR) This is the process used most often, required when running color photos or artwork. In your design application, all colors created must be set up with the Color Type set to Process and the Color Mode set to CMYK. Colors in InDesign are setup using “Swatches”. In the menu bar, go to:
Window > Color > Swatches
SPOT COLOR (PMS-PANTONE) Spot colors can be used in your publication when you are not running full color photos or artwork and need only one or two color inks in addition to black. Spot
solid uncoated inks should be used for cold-web offset printing.
Window > Color > Swatches
5

SIMPLIFY YOUR CMYK COLOR MIX FOR BETTER REPRODUCTIONThe more ink used to create a color mix, the more likely that color will become muddy and darker when
6

THINGS TO AVOIDBLACK TYPE IN ALL 4 COLORS
Be sure that any color ads/graphics created in Photoshop are done in the CMYK mode and that you are using Process BLACK, not a combination of CMYK process colors, or Registration Black. For black and white ads, use Grayscale mode. When black type is created using all 4 colors, even slight mis-registration on press can render the type
saturate and lead to more offsetting onto the opposite page.
REVERSE (KNOCKOUT) TYPE IN ALL 4 COLORS
The minimum recommended point size for type reversing out of color backgrounds is 14pt. Even at this size it could present registration issues that lead to legibility being compromised. It’s always better to use a bold San Serif typeface. Serif types should be avoided altogether in reverses. See below...
USING PHOTOSHOP FOR TYPE
When creating ads or artwork for your publication in Photoshop, avoid using text be-low 12pt. if possible. Photoshop is a raster based program (using pixels) and will make
your ad/graphic image, and litle or no compression when saving.
MISSING FONTS
Fonts must be embedded and converted to outlines or paths before your document is sent to print and before you convert / export to pdf. If you are sending a native ap-
-sign has a package option (File > Package) that can gather all your fonts and links into
RGB FILES
may result in color shifts. Files sent with RGB color issues are usually placed on hold
7

Once you’ve set up your publication in InDesign, the next step before sending it to the printer is to create a print quality pdf.
Below is a set of screen shots that shows the settings to use. Access these settings by going to File > Export in your InDesign menu bar.
In the Marks and Bleeds settings, check only if your publication uses bleeds. The remaining settings can be left to their default settings. Click Export and your pdf will be created.
The first time you do this, you should save your preset so it can be accessed through your Adobe PDF Presets. This allows you to call it up without having to put in the settings each time you Export to pdf.
PDF Export Settings
8
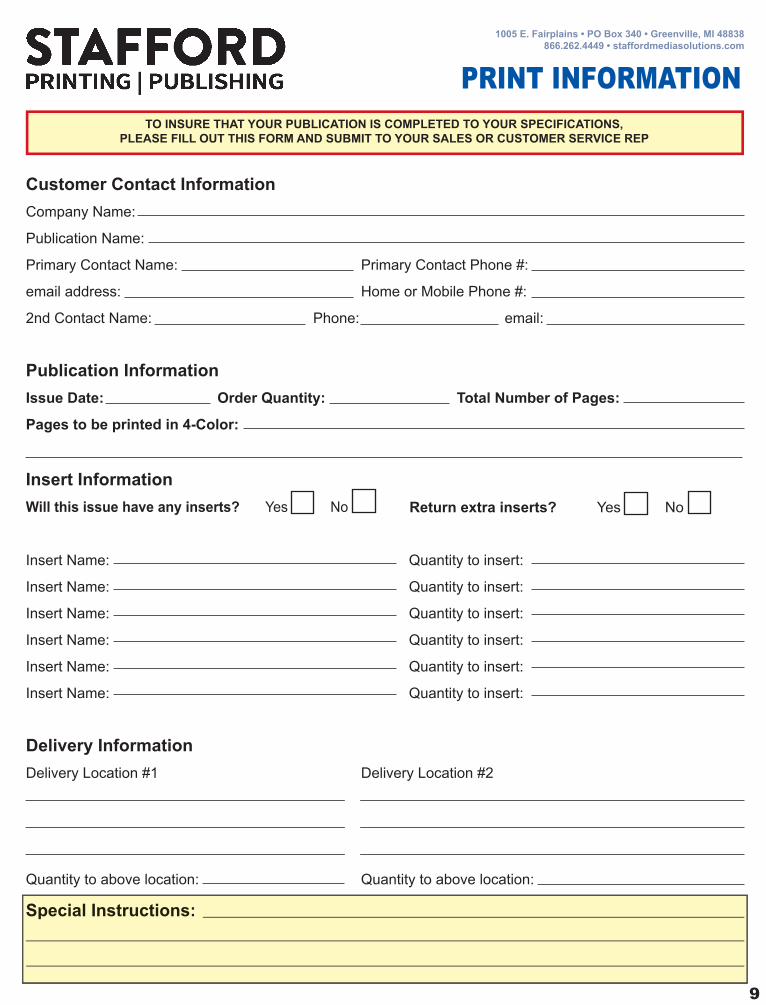
PRINT INFORMATION
Company Name:
Publication Name:
Primary Contact Name: Primary Contact Phone #:
email address: Home or Mobile Phone #:
2nd Contact Name: Phone: email:
Yes No
Insert Name: Quantity to insert:
Insert Name: Quantity to insert:
Insert Name: Quantity to insert:
Insert Name: Quantity to insert:
Insert Name: Quantity to insert:
Insert Name: Quantity to insert:
Delivery Location #1 Delivery Location #2
Quantity to above location: Quantity to above location:
Yes No
9
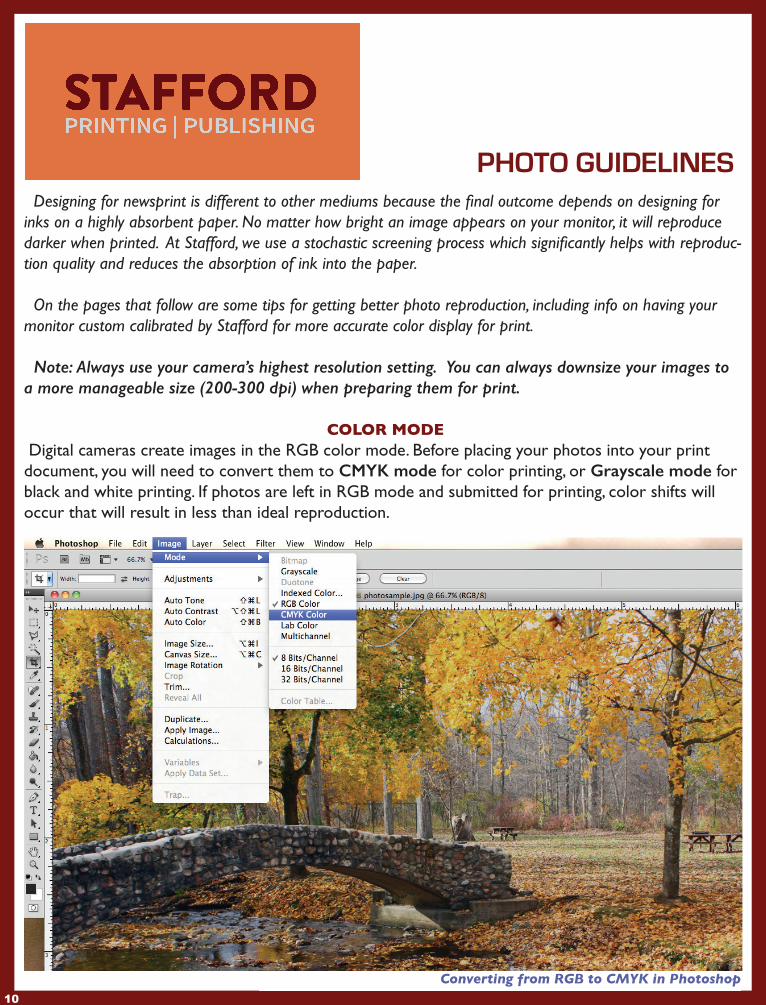
PHOTO GUIDELINES
Converting from RGB to CMYK in Photoshop
-
Note: Always use your camera’s highest resolution setting. You can always downsize your images to a more manageable size (200-300 dpi) when preparing them for print.
COLOR MODE Digital cameras create images in the RGB color mode. Before placing your photos into your print document, you will need to convert them to CMYK mode for color printing, or Grayscale mode for black and white printing. If photos are left in RGB mode and submitted for printing, color shifts will occur that will result in less than ideal reproduction.
10
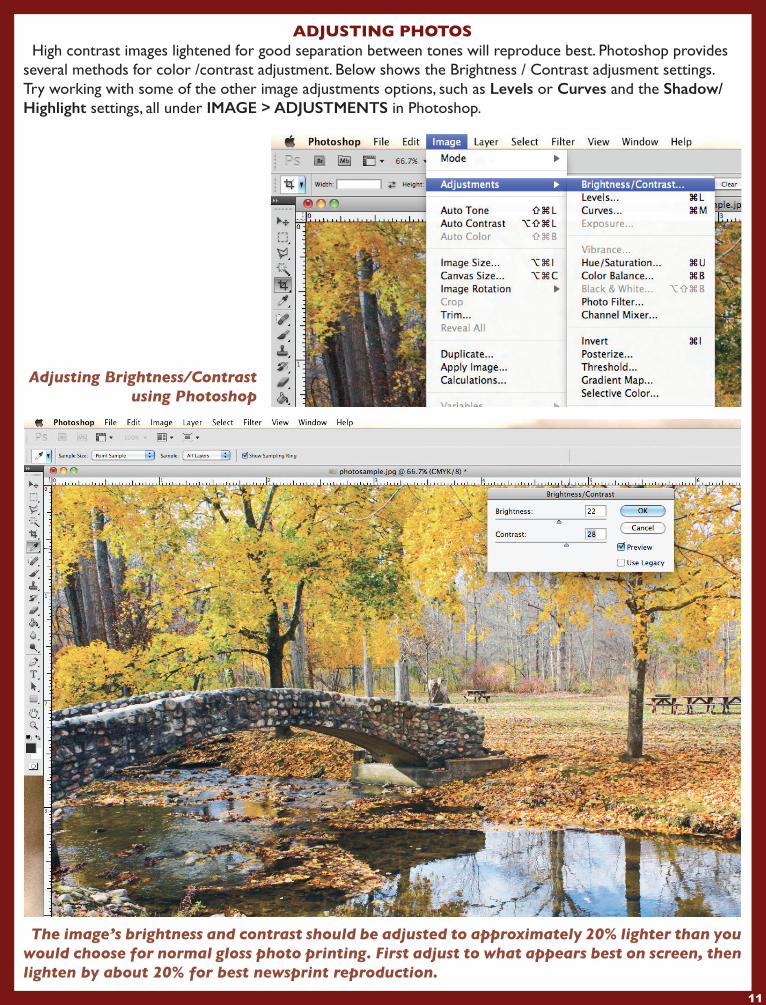
Adjusting Brightness/Contrast using Photoshop
The image’s brightness and contrast should be adjusted to approximately 20% lighter than you would choose for normal gloss photo printing. First adjust to what appears best on screen, then lighten by about 20% for best newsprint reproduction.
ADJUSTING PHOTOS High contrast images lightened for good separation between tones will reproduce best. Photoshop provides several methods for color /contrast adjustment. Below shows the Brightness / Contrast adjusment settings.Try working with some of the other image adjustments options, such as Levels or Curves and the Shadow/Highlight settings, all under IMAGE > ADJUSTMENTS in Photoshop.
11

LINKS TO MORE TIPS
IMAGE SIZE, DPI
Adjusting Image Sizeusing Photoshop
COLOR CALIBRATION
-
12

AVOID USING LOW RESOLUTION WEB IMAGES FOR PRINT
-
Hi-res image - 300 dpi
Loi-res image - 72dpi
13
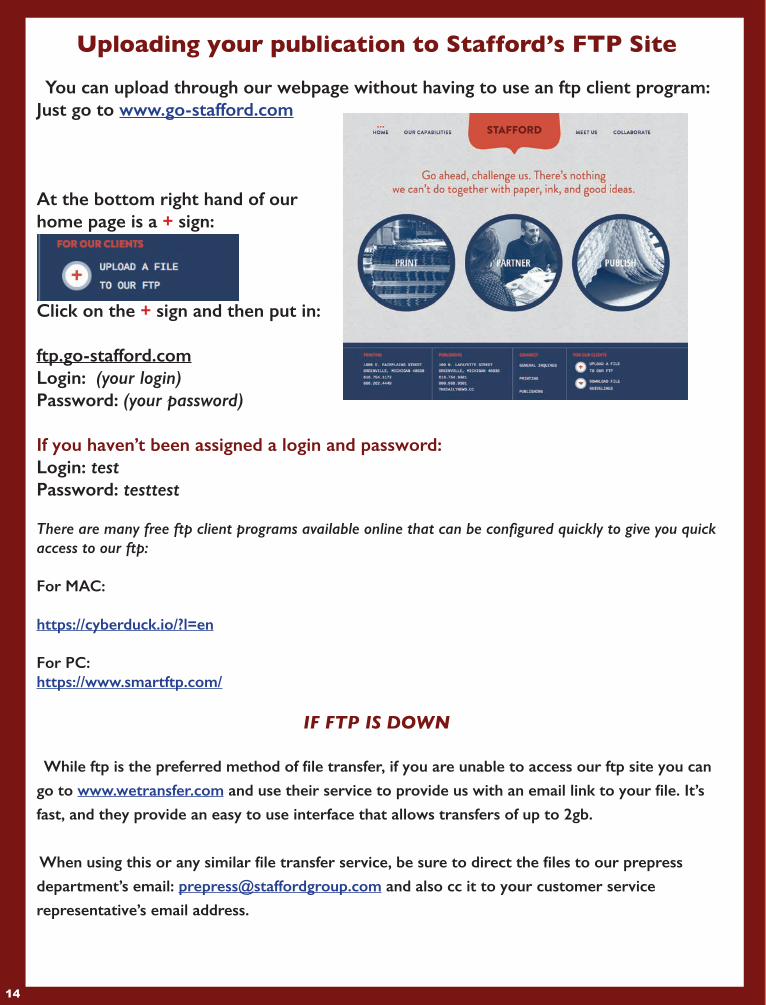
Uploading your publication to Stafford’s FTP Site
Just go to www.go-stafford.com
home page is a + sign:
+ sign and then put in:
ftp.go-stafford.com (your login)
(your password)
testtesttest
access to our ftp:
https://www.smartftp.com/
IF FTP IS DOWN
go to www.wetransfer.com
department’s email: [email protected] and also cc it to your customer service
representative’s email address.
14
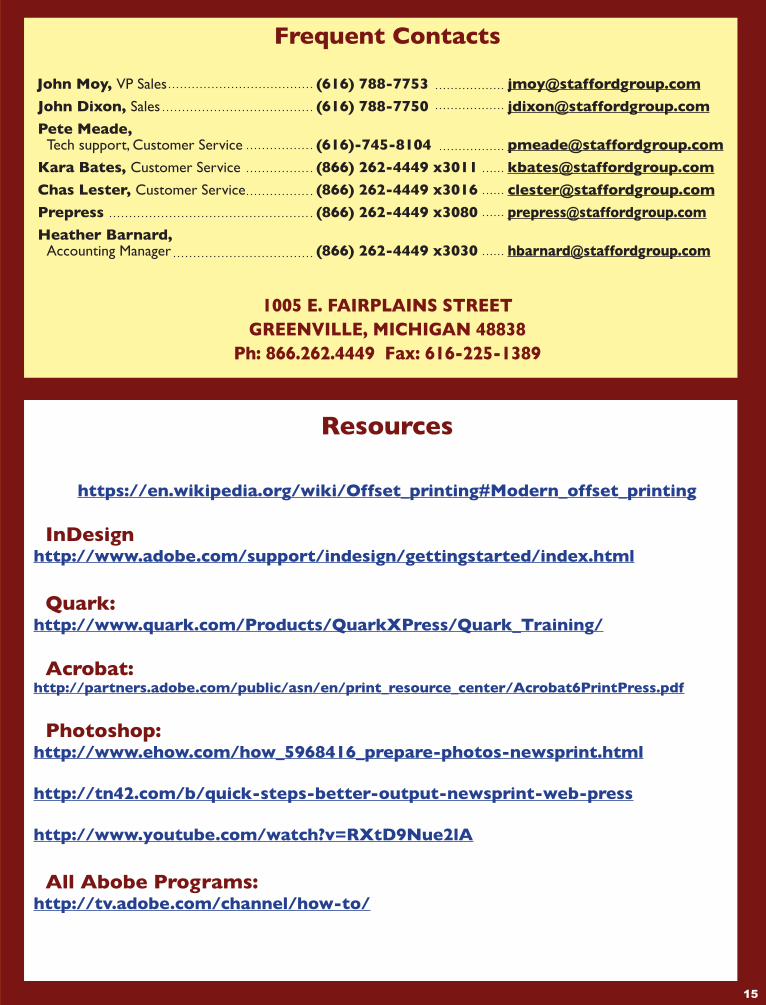
Frequent Contacts
John Moy, VP Sales (616) 788-7753 [email protected] John Dixon, Sales (616) 788-7750 [email protected] Pete Meade, Tech support, Customer Service (616)-745-8104 [email protected] Kara Bates, Customer Service (866) 262-4449 x3011 [email protected] Chas Lester, Customer Service (866) 262-4449 x3016 [email protected] Prepress (866) 262-4449 x3080 [email protected] Heather Barnard, Accounting Manager (866) 262-4449 x3030 [email protected]
1005 E. FAIRPLAINS STREET GREENVILLE, MICHIGAN 48838
Ph: 866.262.4449 Fax: 616-225-1389
Resources
https://en.wikipedia.org/wiki/Offset_printing#Modern_offset_printing
InDesignhttp://www.adobe.com/support/indesign/gettingstarted/index.html
Quark:http://www.quark.com/Products/QuarkXPress/Quark_Training/
Acrobat:http://partners.adobe.com/public/asn/en/print_resource_center/Acrobat6PrintPress.pdf
Photoshop:http://www.ehow.com/how_5968416_prepare-photos-newsprint.html
http://tn42.com/b/quick-steps-better-output-newsprint-web-press
http://www.youtube.com/watch?v=RXtD9Nue2lA
All Abobe Programs:http://tv.adobe.com/channel/how-to/
15

Contact your sales or customer service rep for more info
16