pre- and post-field trip activities for your field trip to...
TRANSCRIPT
© This activity book was produced by the Asombro Institute for Science Education (Las Cruces, NM; www.asombro.org). Updated 2005. 1
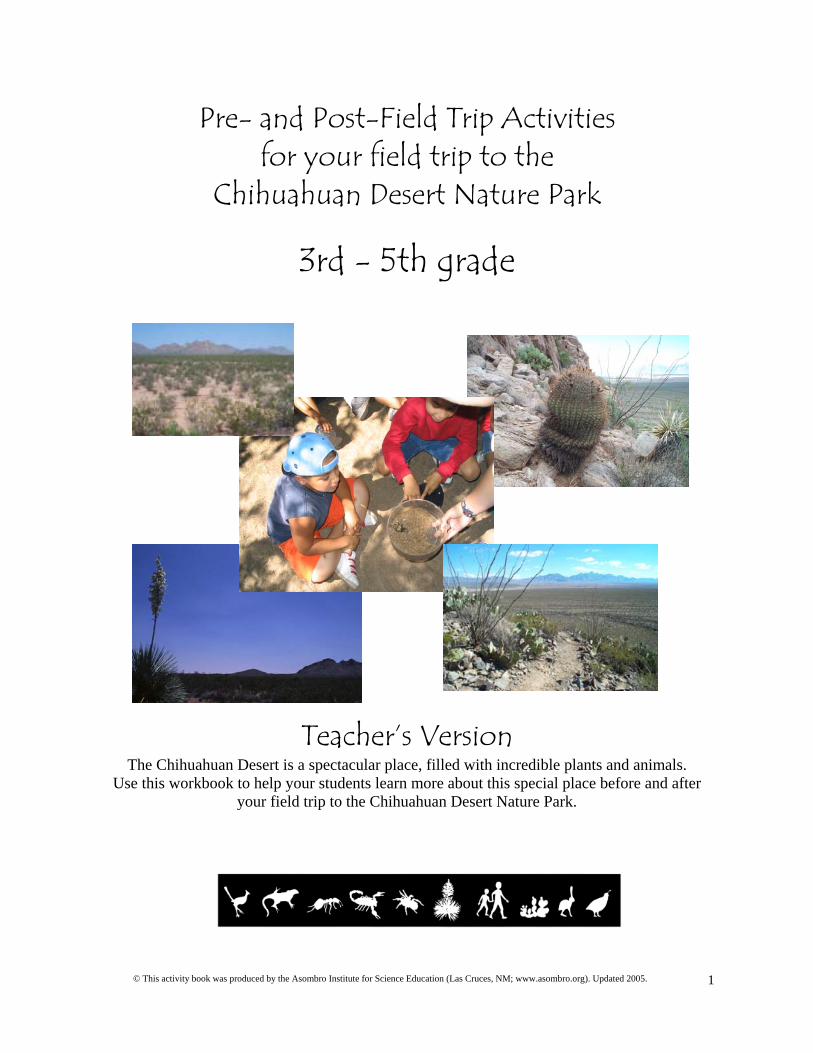
Pre- and Post-Field Trip Activities for your field trip to the
Chihuahuan Desert Nature Park
3rd - 5th grade
Teacher’s Version The Chihuahuan Desert is a spectacular place, filled with incredible plants and animals.
Use this workbook to help your students learn more about this special place before and after your field trip to the Chihuahuan Desert Nature Park.
© This activity book was produced by the Asombro Institute for Science Education (Las Cruces, NM; www.asombro.org). Updated 2005. 2
Table of Contents Introduction and Acknowledgments 3 Background Information What is a Desert? 4 The Chihuahuan Desert 4 Soil 5 Plant Adaptations to Desert Conditions 5 Animal Adaptations to Desert Conditions 7 Humans in the Desert 8 Pre-Visit Activities Where Did the Water Go? 11 Water Cycle Model 12 Graphing Precipitation Around the World 13 Desert Plant Adaptations 15 Sponge Creatures – How Dry I Am! 17 That’s Not Just Dirt: What’s in a Soil? 18 Chihuahuan Desert Nametags 19 Post-Visit Activities Chihuahuan Desert Word Find 21 A Desert Story - Fact or Fantasy? 22 Grow Where You’re Planted 24 Sleeping Beauties 28 Understanding Desert Animals 30 Desert Presentation 31 Desert Haiku 31 Desert Diorama 31 Glossary 32 References 33
© This activity book was produced by the Asombro Institute for Science Education (Las Cruces, NM; www.asombro.org). Updated 2005. 3
Introduction Welcome to the Chihuahuan Desert Nature Park’s field trip teacher’s guide! We are pleased that you have chosen the Chihuahuan Desert Nature Park and the Jornada Experimental Range for your field trip, and we look forward to seeing you and your students soon. This manual and the accompanying student workbooks were designed to maximize the amount of information your students get out of the field trip. The activities and background information in this guide are intended to help you prepare your students for a day of fun and learning in the desert. The manual starts with background information on many of the topics we will cover in more detail during the field trip. The rest of the manual is designed using the expose, explore, extend model. Expose: The first set of activities will expose your students to some of the vocabulary and ideas
they will learn in more detail during the field trip. These activities can be done in any order, and you may choose to use one, several, or all of the activities with your class.
Explore: During the field trip, your students will explore the desert and learn about many aspects
of this unique environment. Extend: After you return from the field trip, use the post-visit activities to extend your students’
understanding. These activities are designed to link several of the concepts presented during the field trip and allow students to apply their knowledge to new situations.
The Chihuahuan Desert Nature Park constantly strives to make our programs and materials useful to teachers. As always, we welcome your comments or suggestions for improving this manual.
Acknowledgments
We are grateful to the Native Plant Society of New Mexico for funding the development of this manual and the student workbooks. Thanks also go to Laurie Shade-Neff and Dr. Paul Hyder for many of the wonderful sketches, to intern Heather Van Houten for many hours of writing and research, and to Dorothy Michaels for reviewing the entire manual from a teacher’s perspective. Scientists at the Jornada Experimental Range were once again generous with their time and expertise. Finally, we are thankful to the many teachers and students who have given invaluable input as we field-tested the activities.

© This activity book was produced by the Asombro Institute for Science Education (Las Cruces, NM; www.asombro.org). Updated 2005. 4
What is a Desert?
Despite its clarity and simplicity, however, the desert wears at the same time, paradoxically, a veil of mystery. Motionless and silent it evokes in us an elusive hint of something unknown, unknowable, about to be revealed. -Edward Abbey
When you say the word “desert,” many people immediately picture a vast stretch of sand, a blazing sun, few plants, and fewer animals anywhere in sight. In reality, though, few deserts fit this description. Deserts are found on every continent except Antarctica, and they vary considerably in their formation, average temperature, elevation, flora, and fauna. Approximately one-third of the Earth’s land surface is part of the desert biome, and 20% of the world’s population lives in these arid lands. The variation in deserts creates some controversy in defining just what it takes to be a desert. Many people define deserts as places that receive less than 10 inches (254 mm) of precipitation each year. A more recent definition defines deserts as places where more water would be lost through evaporation than is gained by precipitation.
The Chihuahuan Desert
The Chihuahuan Desert is the easternmost, southernmost, and largest desert in North America, with an area of approximately 193,000 square miles (~500,000 km). It spans from south of Albuquerque, New Mexico to Northern Hidalgo, Mexico, and from southeast Arizona to West Texas. The Chihuahuan Desert presents many challenges to living organisms, particularly in three areas: 1) Extreme temperatures: The Chihuahuan Desert has an average temperature of 19.2º C (66.5º F), and it has greater temperature variation than any other North American desert (-10 to 60º C/ 23.8 to 140º F), primarily due to its great distance from a large body of water. Winters are relatively mild, but summers can be extremely hot. 2) Low water availability: Like all deserts, the
Chihuahuan Desert is dry. Annual rainfall varies between 200 and 310 mm (7.8 – 12 inches), and snow in the winter is rare. Seventy-five percent of the annual precipitation comes from monsoons in July, August, and September.
3) High solar radiation: Due to a lack of clouds and low humidity in the desert, much of the direct beam radiation from the sun reaches the Earth.
© This activity book was produced by the Asombro Institute for Science Education (Las Cruces, NM; www.asombro.org). Updated 2005. 5
Despite these challenges, the Chihuahuan Desert is one of the most biologically diverse deserts in the world, rivaled only by the Namib Desert of Africa and the Great Sandy Desert of Australia. The Chihuahuan Desert ranks #1 among deserts for the number of aquatic species and the number of mammal species. It is second in the number of plant species and third in the number of reptile species.
Soil
The desert’s soil greatly impacts the amount of water available to plants. Soil is made up of three main particles types: sand, silt, and clay. Sand particles are the largest, silt are medium in size, and clay particles are the smallest. The size of the soil particles, and the consequent size of the spaces in between the particles affects how quickly water can move through the soil. In general, water moves most quickly through sand and slowest through clay. Three terms are important when discussing water availability: runoff, infiltration, and storage capacity. Runoff is water that reaches the upper soil layer, but is not absorbed into the lower soil layers and instead runs over the soil surface. Infiltration is the act of water entering the soil through the surface. The storage capacity is the maximum amount of water that a soil can hold, at which point it will not absorb any more and the remaining water becomes runoff.
Plant Adaptations to Desert Conditions
Escaping Desert Conditions The most obvious way to survive in harsh desert conditions is to escape those conditions. For example, some plants never experience the harsh conditions of the desert because they live only during favorable times. These plants are called ephemerals because they are alive for only short periods of time. When it becomes dry, these plants die. Ephemerals persist in the desert due to several adaptations: -they grow and reproduce rapidly in response to rainfall -their seeds can remain dormant in the soil until a rain -their seeds are highly resistant to high temperatures and drying out Physical Adaptations Physical adaptations allow plants to (1) gather water quickly when it is available, (2) lose water slowly, and/or (3) store water. These adaptations occur primarily in the leaves and roots of the plants. Leaves Stomata are the openings in leaves that allow plants to take in carbon dioxide needed for photosynthesis. However, these openings are also the primary way that water is lost from a plant (through a process called transpiration). Many desert plants leave their stomata closed during the day and only open them at night when it is cooler and less water is lost.
© This activity book was produced by the Asombro Institute for Science Education (Las Cruces, NM; www.asombro.org). Updated 2005. 6
One of the most common physical adaptations to arid conditions is small leaves or no leaves. This adaptation allows the plant to lose heat quickly and probably also decreases the amount of water lost through transpiration. The creosote bush uses this strategy with its small leaves. Most cacti have no normal leaves (technically, cactus spines are modified leaves). Many familiar desert plants have a protective waxy coat on their leaves that helps keep water inside the plant. The prickly pear cactus has this waxy coating on the stem (the pad). Some plants have reflective, hair-covered leaf surfaces that decrease heating by shading
them from the sunlight. Others orient their leaves according to the sun’s position to decrease the amount of solar radiation absorbed.
Leaves that are organized in certain arrangements may also benefit desert plants. For
example, the rosette formation of yucca leaves is thought to help shade lower leaves, resulting in less solar heating and water loss.
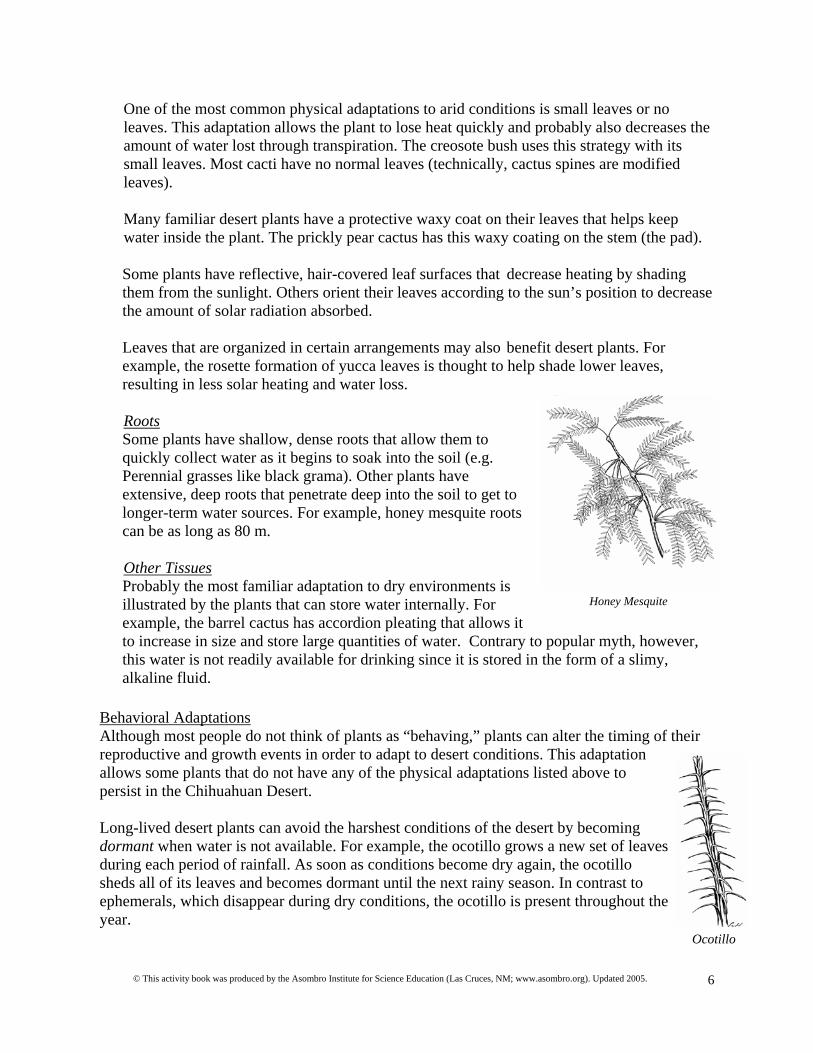
Roots Some plants have shallow, dense roots that allow them to quickly collect water as it begins to soak into the soil (e.g. Perennial grasses like black grama). Other plants have
extensive, deep roots that penetrate deep into the soil to get to longer-term water sources. For example, honey mesquite roots can be as long as 80 m.
Other Tissues Probably the most familiar adaptation to dry environments is
illustrated by the plants that can store water internally. For example, the barrel cactus has accordion pleating that allows it to increase in size and store large quantities of water. Contrary to popular myth, however, this water is not readily available for drinking since it is stored in the form of a slimy, alkaline fluid.
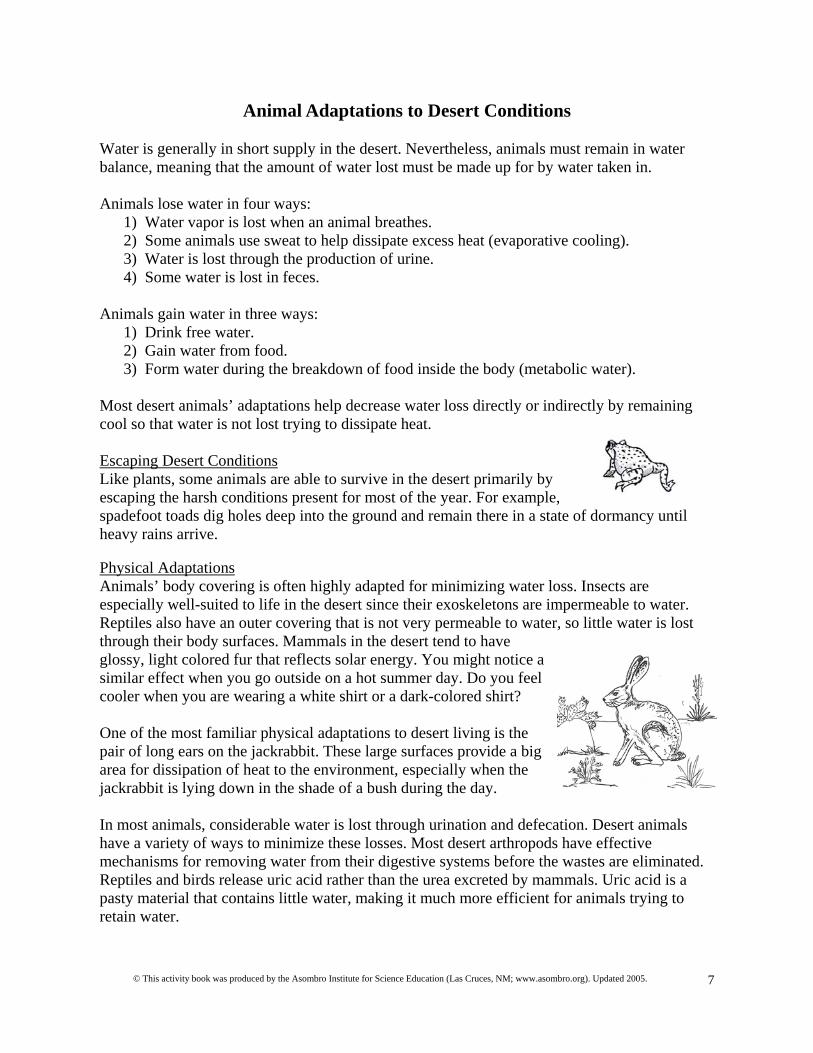
Behavioral Adaptations Although most people do not think of plants as “behaving,” plants can alter the timing of their reproductive and growth events in order to adapt to desert conditions. This adaptation allows some plants that do not have any of the physical adaptations listed above to persist in the Chihuahuan Desert. Long-lived desert plants can avoid the harshest conditions of the desert by becoming dormant when water is not available. For example, the ocotillo grows a new set of leaves during each period of rainfall. As soon as conditions become dry again, the ocotillo sheds all of its leaves and becomes dormant until the next rainy season. In contrast to ephemerals, which disappear during dry conditions, the ocotillo is present throughout the year.
Ocotillo
Honey Mesquite
© This activity book was produced by the Asombro Institute for Science Education (Las Cruces, NM; www.asombro.org). Updated 2005. 7
Animal Adaptations to Desert Conditions
Water is generally in short supply in the desert. Nevertheless, animals must remain in water balance, meaning that the amount of water lost must be made up for by water taken in. Animals lose water in four ways:
1) Water vapor is lost when an animal breathes. 2) Some animals use sweat to help dissipate excess heat (evaporative cooling). 3) Water is lost through the production of urine. 4) Some water is lost in feces.
Animals gain water in three ways:
1) Drink free water. 2) Gain water from food. 3) Form water during the breakdown of food inside the body (metabolic water).
Most desert animals’ adaptations help decrease water loss directly or indirectly by remaining cool so that water is not lost trying to dissipate heat. Escaping Desert Conditions Like plants, some animals are able to survive in the desert primarily by escaping the harsh conditions present for most of the year. For example, spadefoot toads dig holes deep into the ground and remain there in a state of dormancy until heavy rains arrive. Physical Adaptations Animals’ body covering is often highly adapted for minimizing water loss. Insects are especially well-suited to life in the desert since their exoskeletons are impermeable to water. Reptiles also have an outer covering that is not very permeable to water, so little water is lost through their body surfaces. Mammals in the desert tend to have glossy, light colored fur that reflects solar energy. You might notice a similar effect when you go outside on a hot summer day. Do you feel cooler when you are wearing a white shirt or a dark-colored shirt? One of the most familiar physical adaptations to desert living is the pair of long ears on the jackrabbit. These large surfaces provide a big area for dissipation of heat to the environment, especially when the jackrabbit is lying down in the shade of a bush during the day. In most animals, considerable water is lost through urination and defecation. Desert animals have a variety of ways to minimize these losses. Most desert arthropods have effective mechanisms for removing water from their digestive systems before the wastes are eliminated. Reptiles and birds release uric acid rather than the urea excreted by mammals. Uric acid is a pasty material that contains little water, making it much more efficient for animals trying to retain water.
© This activity book was produced by the Asombro Institute for Science Education (Las Cruces, NM; www.asombro.org). Updated 2005. 8
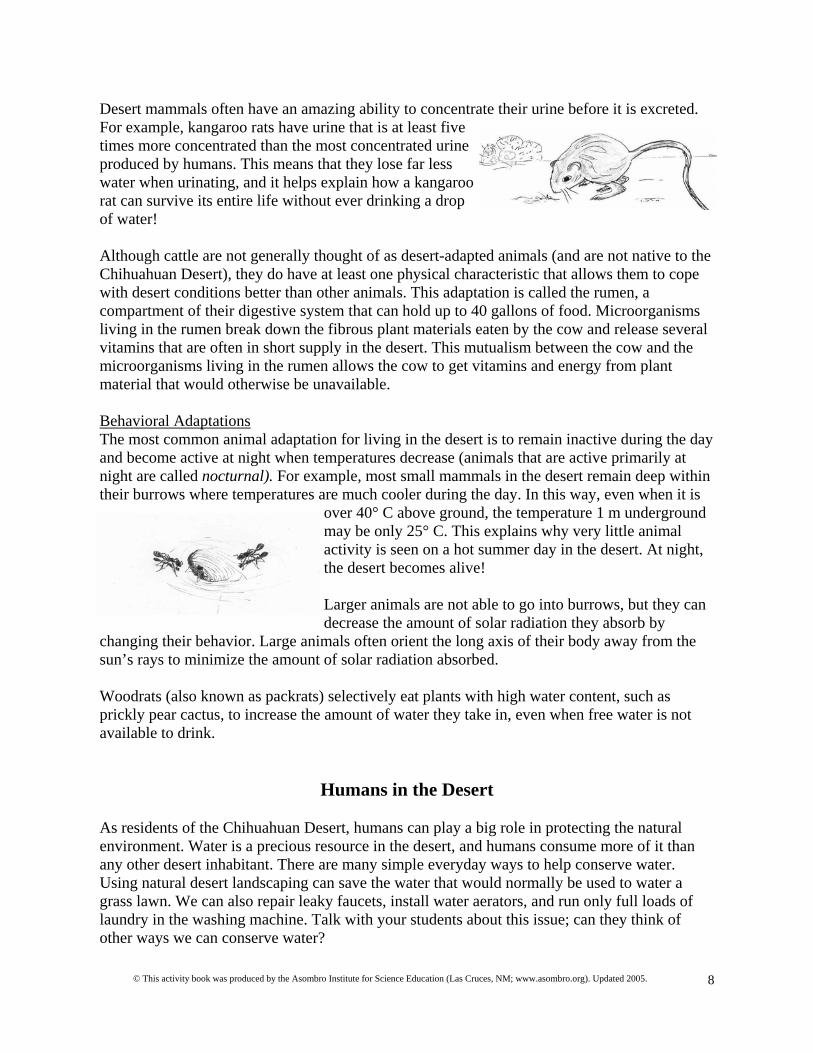
Desert mammals often have an amazing ability to concentrate their urine before it is excreted. For example, kangaroo rats have urine that is at least five times more concentrated than the most concentrated urine produced by humans. This means that they lose far less water when urinating, and it helps explain how a kangaroo rat can survive its entire life without ever drinking a drop of water! Although cattle are not generally thought of as desert-adapted animals (and are not native to the Chihuahuan Desert), they do have at least one physical characteristic that allows them to cope with desert conditions better than other animals. This adaptation is called the rumen, a compartment of their digestive system that can hold up to 40 gallons of food. Microorganisms living in the rumen break down the fibrous plant materials eaten by the cow and release several vitamins that are often in short supply in the desert. This mutualism between the cow and the microorganisms living in the rumen allows the cow to get vitamins and energy from plant material that would otherwise be unavailable. Behavioral Adaptations The most common animal adaptation for living in the desert is to remain inactive during the day and become active at night when temperatures decrease (animals that are active primarily at night are called nocturnal). For example, most small mammals in the desert remain deep within their burrows where temperatures are much cooler during the day. In this way, even when it is
over 40° C above ground, the temperature 1 m underground may be only 25° C. This explains why very little animal activity is seen on a hot summer day in the desert. At night, the desert becomes alive! Larger animals are not able to go into burrows, but they can decrease the amount of solar radiation they absorb by
changing their behavior. Large animals often orient the long axis of their body away from the sun’s rays to minimize the amount of solar radiation absorbed. Woodrats (also known as packrats) selectively eat plants with high water content, such as prickly pear cactus, to increase the amount of water they take in, even when free water is not available to drink.
Humans in the Desert
As residents of the Chihuahuan Desert, humans can play a big role in protecting the natural environment. Water is a precious resource in the desert, and humans consume more of it than any other desert inhabitant. There are many simple everyday ways to help conserve water. Using natural desert landscaping can save the water that would normally be used to water a grass lawn. We can also repair leaky faucets, install water aerators, and run only full loads of laundry in the washing machine. Talk with your students about this issue; can they think of other ways we can conserve water?
© This activity book was produced by the Asombro Institute for Science Education (Las Cruces, NM; www.asombro.org). Updated 2005. 9
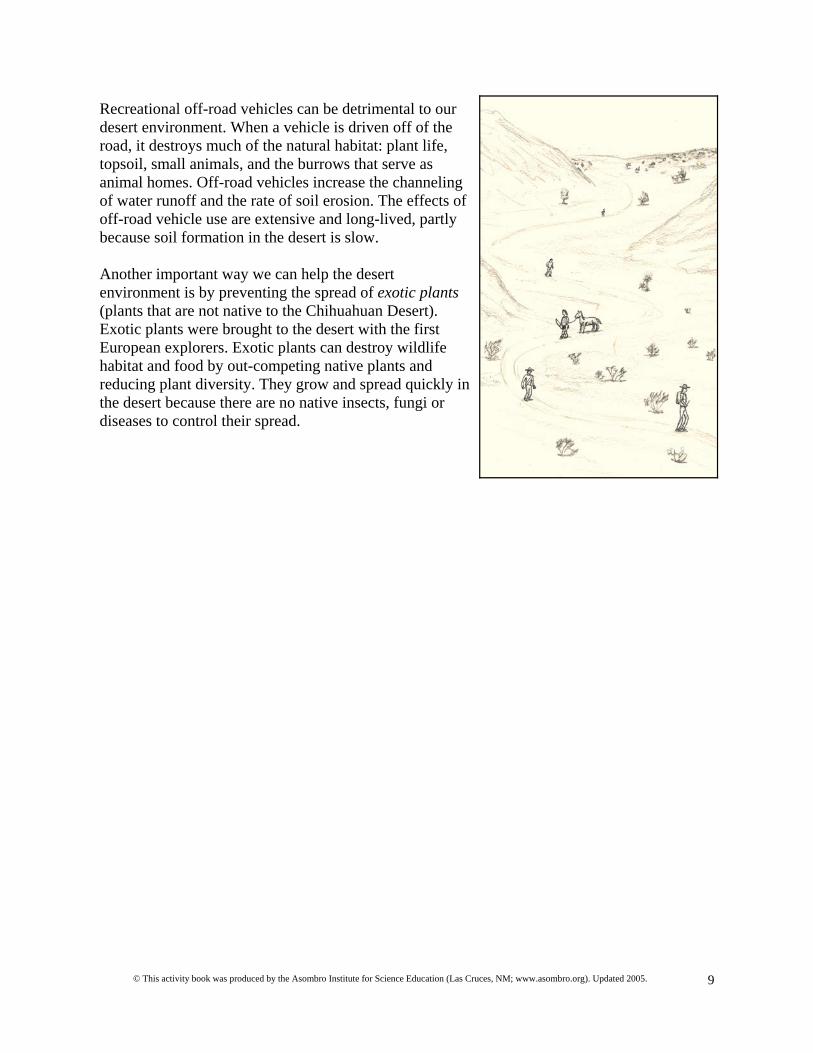
Recreational off-road vehicles can be detrimental to our desert environment. When a vehicle is driven off of the road, it destroys much of the natural habitat: plant life, topsoil, small animals, and the burrows that serve as animal homes. Off-road vehicles increase the channeling of water runoff and the rate of soil erosion. The effects of off-road vehicle use are extensive and long-lived, partly because soil formation in the desert is slow. Another important way we can help the desert environment is by preventing the spread of exotic plants (plants that are not native to the Chihuahuan Desert). Exotic plants were brought to the desert with the first European explorers. Exotic plants can destroy wildlife habitat and food by out-competing native plants and reducing plant diversity. They grow and spread quickly in the desert because there are no native insects, fungi or diseases to control their spread.
© This activity book was produced by the Asombro Institute for Science Education (Las Cruces, NM; www.asombro.org). Updated 2005. 10
Pre-Field Trip Activities
© This activity book was produced by the Asombro Institute for Science Education (Las Cruces, NM; www.asombro.org). Updated 2005. 11
Where Did the Water Go?
Introduction: This activity will introduce students to the concept of evaporation and prepare them for learning one definition of a desert (a place where more water would be lost through evaporation than is gained by precipitation).
Materials: • Sponges or inexpensive paintbrushes • Bucket of water
Procedures: 1. Take students outside to a large area with cement or blacktop. 2. Give each student a wet sponge or paintbrush and have them “write” their name in water on the cement. If you have a sunny area and a shady area available, have half of the students write their name in each location. 3. Have the students time how long it takes for their name to disappear. Results: It took my name __________________ minutes and ________________ seconds to disappear. Discussion: Which disappeared faster, the names in the sun or in the shade? Where do you think the water went? Why did the water disappear? Can you think of other experiments you could try using these procedures? Have students test other questions they might come up with during the experiment. For example: Do shorter names evaporate faster than longer names? Does evaporation happen faster at 1 pm than it does at 9 am? Does evaporation happen faster in January or May?
© This activity book was produced by the Asombro Institute for Science Education (Las Cruces, NM; www.asombro.org). Updated 2005. 12
Water Cycle Model
Introduction: This demonstration will allow students to see parts of the water cycle (evaporation, condensation, and precipitation) in a simple model inside a jar. You can either make one model for the class to examine or have individuals or groups of students make their own models. Materials: • 2 glass jars (baby food jars work well for students to create their own model) • bottle cap • potting soil • sand • small rocks
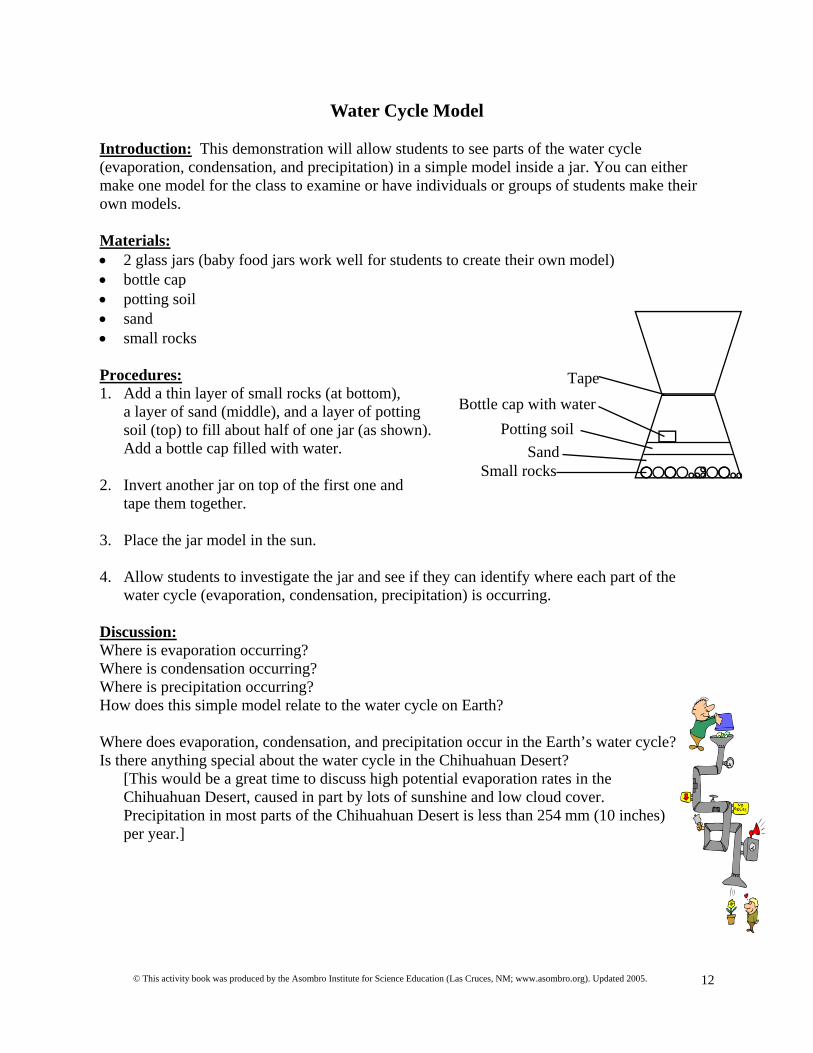
Procedures: 1. Add a thin layer of small rocks (at bottom), a layer of sand (middle), and a layer of potting soil (top) to fill about half of one jar (as shown). Add a bottle cap filled with water. 2. Invert another jar on top of the first one and tape them together. 3. Place the jar model in the sun. 4. Allow students to investigate the jar and see if they can identify where each part of the water cycle (evaporation, condensation, precipitation) is occurring.
Discussion: Where is evaporation occurring? Where is condensation occurring? Where is precipitation occurring? How does this simple model relate to the water cycle on Earth? Where does evaporation, condensation, and precipitation occur in the Earth’s water cycle? Is there anything special about the water cycle in the Chihuahuan Desert? [This would be a great time to discuss high potential evaporation rates in the Chihuahuan Desert, caused in part by lots of sunshine and low cloud cover. Precipitation in most parts of the Chihuahuan Desert is less than 254 mm (10 inches) per year.]
Tape Bottle cap with water
Potting soil Sand
Small rocks
© This activity book was produced by the Asombro Institute for Science Education (Las Cruces, NM; www.asombro.org). Updated 2005. 13
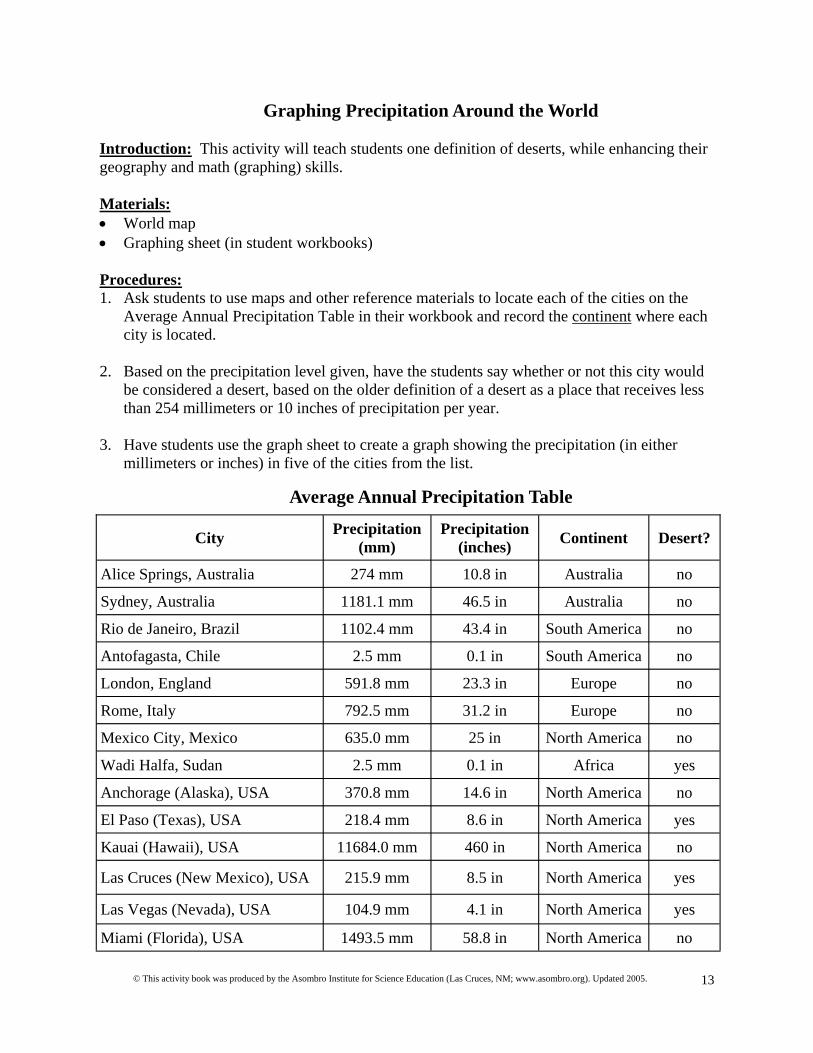
Graphing Precipitation Around the World Introduction: This activity will teach students one definition of deserts, while enhancing their geography and math (graphing) skills. Materials: • World map • Graphing sheet (in student workbooks) Procedures: 1. Ask students to use maps and other reference materials to locate each of the cities on the Average Annual Precipitation Table in their workbook and record the continent where each city is located. 2. Based on the precipitation level given, have the students say whether or not this city would be considered a desert, based on the older definition of a desert as a place that receives less than 254 millimeters or 10 inches of precipitation per year. 3. Have students use the graph sheet to create a graph showing the precipitation (in either millimeters or inches) in five of the cities from the list.
Average Annual Precipitation Table
City Precipitation (mm)
Precipitation (inches) Continent Desert?
Alice Springs, Australia 274 mm 10.8 in Australia no
Sydney, Australia 1181.1 mm 46.5 in Australia no
Rio de Janeiro, Brazil 1102.4 mm 43.4 in South America no
Antofagasta, Chile 2.5 mm 0.1 in South America no
London, England 591.8 mm 23.3 in Europe no
Rome, Italy 792.5 mm 31.2 in Europe no
Mexico City, Mexico 635.0 mm 25 in North America no
Wadi Halfa, Sudan 2.5 mm 0.1 in Africa yes
Anchorage (Alaska), USA 370.8 mm 14.6 in North America no
El Paso (Texas), USA 218.4 mm 8.6 in North America yes
Kauai (Hawaii), USA 11684.0 mm 460 in North America no
Las Cruces (New Mexico), USA 215.9 mm 8.5 in North America yes
Las Vegas (Nevada), USA 104.9 mm 4.1 in North America yes
Miami (Florida), USA 1493.5 mm 58.8 in North America no

© This activity book was produced by the Asombro Institute for Science Education (Las Cruces, NM; www.asombro.org). Updated 2005. 14
Discussion: Based on the graph and/or the list, which city has the least amount precipitation per year? Which city has the most precipitation per year? How do Las Cruces and El Paso compare with the other cities on the list? Extension: Plot the desert cities on a world map and see if the students can identify any factors that may help explain why desert are located where they are. Based on the understanding students gained above, have them pick a city (either in a desert or far from one) and predict the annual precipitation for this city. Use the internet or other resources to test this prediction.
© This activity book was produced by the Asombro Institute for Science Education (Las Cruces, NM; www.asombro.org). Updated 2005. 15
Desert Plant Adaptations Introduction: Desert plants are adapted to survive in the desert environment where water is usually scarce. Desert plant adaptations include long roots, shallow and extensive roots, small or no leaves, a waxy surface, and the ability to expand to store water (in cactus). These activities introduce students to some of these adaptations and to some of the plants they will see during the field trip. Materials (per group): Part A: Examples of desert plants and non-desert plants (pictures or plant cuttings) Part B: Wax paper, water Part C: Two paper towels, water Part D: One piece of 8.5” x 11” paper, tape Procedures: For each of these activities, you can do one demonstration for the whole class or have students work in small groups. Part A: Observation Have students examine samples or photos of desert plants and non-desert plants and list the differences between the two groups (e.g., root size, leaf size, stem thickness, texture). A few local desert plants that students will see on the field trip include creosote bush, honey mesquite, ocotillo, yucca, and prickly pear cactus. Discuss desert plants’ need to hold moisture. Have students form hypotheses about why desert plants look so different from non-desert plants. For example, why do some desert plants have thick leaves? Part B: Waxy Skin 1. Place a few drops of water onto a piece of wax paper. 2. Observe how the water rolls on the surface of the paper but doesn’t soak through. This is
how the waxy coating of plants keeps water from escaping the inside of the plant. Show the students a prickly pear cactus pad to illustrate the waxy coating.
Part C: Low Surface Area 1. Wet two paper towels. 2. Crumble one towel into a ball and leave the other one flat. 3. Lay both paper towels in the sun and have students hypothesize which one will dry out faster. 4. Discuss “surface area” and the idea that the flat towel has more surface area exposed, allowing it to dry out faster. Many desert plants have the minimum surface area (relative to their volume) by being shaped in a ball. Show students photos of a barrel cactus.
© This activity book was produced by the Asombro Institute for Science Education (Las Cruces, NM; www.asombro.org). Updated 2005. 16
Part D: Accordion Pleating 1. Fold a 8.5” x 11’ piece of paper into an accordion in approximately 1” sections. 2. Tape the two ends together to make a pleated circle. 3. Place your arm through the circle, making the pleats flatten out. This simulates a cactus’ pleats flattening, allowing it to expand and store water. Barrel cacti use this adaptation. After all experiments, discuss the students’ hypotheses and conclusions about the different adaptations plants have developed in the desert. Have them examine the plants from Part A again and see if they can see any of the demonstrated adaptations in these plants.
© This activity book was produced by the Asombro Institute for Science Education (Las Cruces, NM; www.asombro.org). Updated 2005. 17
Sponge Creatures - How Dry I Am! Introduction: Water is limited in the desert, so desert animals must find ways to conserve it in order to survive. Many desert animals’ adaptations serve to keep the animal cool, thereby reducing the amount of water needed to get rid of heat through sweating or other means. For example, many animals are nocturnal, coming out only at night when temperatures are cooler. Other animals live in underground burrows or rest in the shade of plants where they keep out of the direct sun. In this activity, students will model methods of water conservation used by desert animals. Materials: • Sponges • Water • Scale • Materials for protection (for example: cups, plastic bags, petroleum jelly, film canisters, tape,
wax paper – use your imagination) Procedures: 1. Tell students that they will have a desert “sponge creature” that lives in an environment with
very little water. Their job is to create a home for the creature that helps it keep as much water as possible inside its body.
2. Show students the materials that they have to work with, and ask them to design a plan for a home that will help the sponge creature stay wet for a few days. 3. After the students’ plans are approved, have them create the home using the materials provided. 4. Have students get a sponge creature and soak it in water. 5. Weigh the sponge creature and record the initial weight on the data sheet. Place the sponge creature in its home (the homes can be placed anywhere in the classroom). 6. Set up one control sponge creature in the front of the classroom. This sponge creature will be left out in the open during the experiment. 7. At the end of 24-48 hours, have students weigh their sponge creatures and record the weight on the data sheet. 8. Calculate the amount of water lost during the experiment. 9. Repeat number 7 and 8 with the control sponge creature. Conclusion: Let students take the lead. Which strategies worked best for allowing the sponge creatures to not lose much water? How did the students’ sponge creatures’ weight loss compare with the control? Note: This activity is fun to do both before and after the field trip. Students’ sponge creature homes before the field trip are often elaborate but ineffective for preventing water loss.

© This activity book was produced by the Asombro Institute for Science Education (Las Cruces, NM; www.asombro.org). Updated 2005. 18
That’s Not Just Dirt: What’s in a Soil?
Introduction: This demonstration will illustrate the three general types of particles that make up soil. Set up one jar at least 24 hours before class so that the students will be able to see the completed product. Encourage students to bring soil from their own backyards so they can compare the different amounts of sand, silt, and clay in the soil around town. Materials: • One mayonnaise jar or one baby food jar (with lid) for each student • Water • Soil collected from schoolyard or students’ backyards Procedures: 1. Fill a jar about 2/3 full of water. Add soil until the jar is nearly full, leaving about 1 cm
space at the top. Screw on the top of the jar tightly, and have students take turns shaking it vigorously for one to two minutes (until soil is in suspension in the water).
2. Allow the soil to settle for one minute, and have students place a mark on the side of the jar at the top of the layer that has settled. 3. Ask students which one of the three particles this must be. (Sand, since the particles are bigger and heavier and therefore settle out first). 4. Set the jar aside. You will come back and examine the jar in one hour and mark the next layer (this will be the silt). 5. After 24 hours, most of the clay will also be settled out. Make sure to link this back to particle size. 6. Estimate what percentage of the soil in each jar is sand, what percentage is silt, and what percentage is clay. 7. Using a pie chart, graph your soil component percentages. 8. If you used soil from students’ yards, compare the percentages between jars. Conclusion: Let students take the lead. Which particles (sand, silt, or clay) settled to the bottom first? Why? Are the percentages of sand, silt, and clay different in different parts of town? Extension: Does the size of the particle affect how quickly water can move through each kind of soil particle? Note: Sand particles are big and therefore can not pack tightly together. The larger spaces between the particles means that water can move through sandy soils much more quickly than it can through silt or clay particles.
© This activity book was produced by the Asombro Institute for Science Education (Las Cruces, NM; www.asombro.org). Updated 2005. 19
Chihuahuan Desert Nametags Introduction: In this art activity, students will create their own nametags to wear during the field trip. Depending on the age of your class, you can allow them to create their own nametag ideas or provide them with simple patterns to follow. Materials: • Construction paper or tag board • Crayons, colored pencils, etc. • Large markers • Hole punch • Tape • Ribbon or string Procedures: 1. Ask students to pick a plant or animal from the Chihuahuan Desert (using
the reference pages in this book or other reference materials) and make a nametag that they can wear during the field trip. Please, no saguaro cacti - they do not live in our desert! Students can use crayons, colored pencils, or other art materials to decorate their tag. Do not forget to
have them write their name in large letters. 2. Place a piece of tape near the top of the nametag and punch a hole through
the tape (to keep the paper from tearing). 3. String the ribbon through the hole and make a necklace long enough to go over the student’s head. 4. Save the nametags for the day of the field trip, and be ready to show off your nametags and your knowledge of desert plants and animals to the scientists!
For Older Students: 1. Scramble the nametags and have an adult put an unseen tag on each student’s back. 2. Students try to identify the animal or plant on their back by asking questions of other students. Extensions: If students chose their own plant or animal, have students categorize the class’s choices (e.g., have them count how many students chose mammals, birds, reptiles, insects, plants, etc.). Use these numbers to create a graph. Compare this graph to the true number of mammal, bird, reptile, insect, and plant species in the Chihuahuan Desert (students can look this data up in reference books or on the internet).
© This activity book was produced by the Asombro Institute for Science Education (Las Cruces, NM; www.asombro.org). Updated 2005. 20
Post-Field Trip Activities
© This activity book was produced by the Asombro Institute for Science Education (Las Cruces, NM; www.asombro.org). Updated 2005. 21
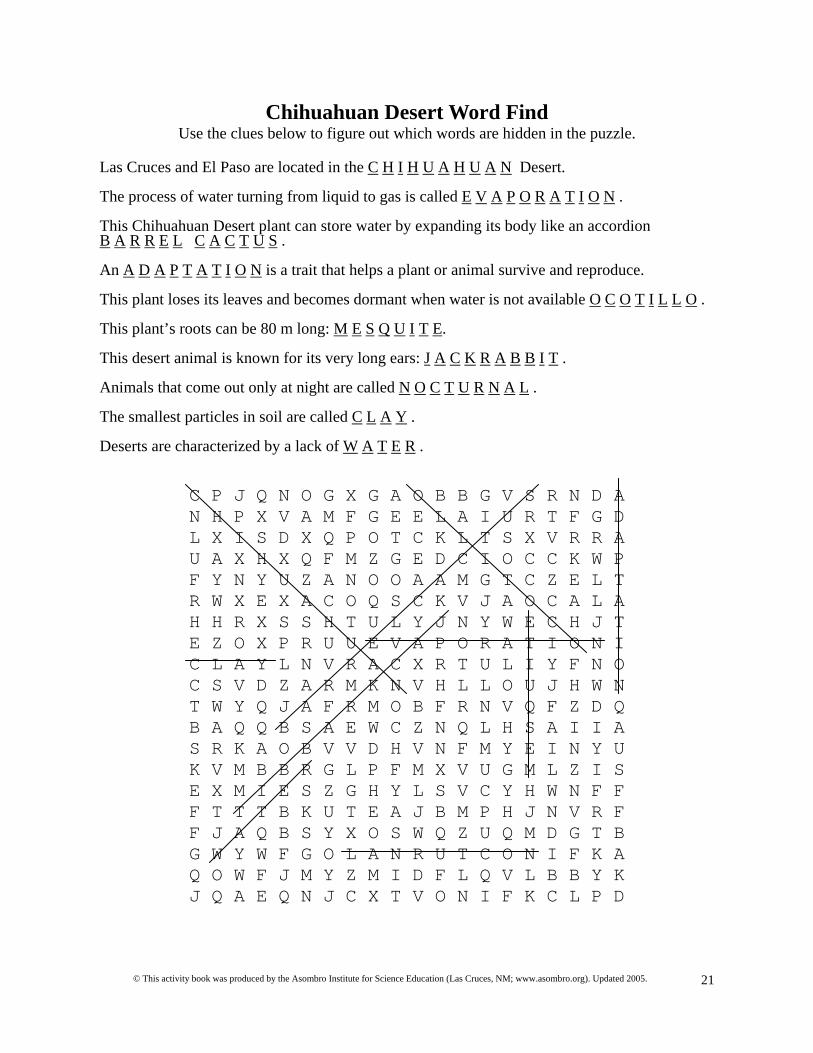
Chihuahuan Desert Word Find Use the clues below to figure out which words are hidden in the puzzle.
Las Cruces and El Paso are located in the C H I H U A H U A N Desert. The process of water turning from liquid to gas is called E V A P O R A T I O N . This Chihuahuan Desert plant can store water by expanding its body like an accordion B A R R E L C A C T U S . An A D A P T A T I O N is a trait that helps a plant or animal survive and reproduce. This plant loses its leaves and becomes dormant when water is not available O C O T I L L O . This plant’s roots can be 80 m long: M E S Q U I T E. This desert animal is known for its very long ears: J A C K R A B B I T . Animals that come out only at night are called N O C T U R N A L . The smallest particles in soil are called C L A Y . Deserts are characterized by a lack of W A T E R .
C P J Q N O G X G A O B B G V S R N D A N H P X V A M F G E E L A I U R T F G D L X I S D X Q P O T C K L T S X V R R A U A X H X Q F M Z G E D C I O C C K W P F Y N Y U Z A N O O A A M G T C Z E L T R W X E X A C O Q S C K V J A O C A L A H H R X S S H T U L Y J N Y W E C H J T E Z O X P R U U E V A P O R A T I O N I C L A Y L N V R A C X R T U L I Y F N O C S V D Z A R M K N V H L L O U J H W N T W Y Q J A F R M O B F R N V Q F Z D Q B A Q Q B S A E W C Z N Q L H S A I I A S R K A O B V V D H V N F M Y E I N Y U K V M B B R G L P F M X V U G M L Z I S E X M I E S Z G H Y L S V C Y H W N F F F T T T B K U T E A J B M P H J N V R F F J A Q B S Y X O S W Q Z U Q M D G T B G W Y W F G O L A N R U T C O N I F K A Q O W F J M Y Z M I D F L Q V L B B Y K J Q A E Q N J C X T V O N I F K C L P D

© This activity book was produced by the Asombro Institute for Science Education (Las Cruces, NM; www.asombro.org). Updated 2005. 22
A Desert Story – Fact or Fantasy?
The following story contains many inaccurate statements about the desert and the plants and animals who live there. The main characters, Mario and Beth, also make some critical mistakes when they go into the desert. Read the story to your class or have them read it to themselves and pick out at least 10 things that are wrong with the story. Alternatively, have the students act out the story with the appropriate props (backpack, kangaroo rat picture, mesquite branch, etc.). One student can be the narrator, one can be Mario, and one can be Beth. Mario and Beth are students at Saharan Desert Elementary, the only elementary school in Las Cruces, New Mexico named for the desert where they live. One weekend, they decide to go explore the desert near their home. Although it has been raining a little bit every day in April, they are lucky that the day they pick for their trip is nice and sunny. They decide to enjoy the sunny day by wearing shorts, t-shirts, and sandals. Since Mario and Beth’s parents are still asleep, they tiptoe downstairs to avoid waking them. They put sandwiches, apples, and cookies into their backpacks and head out for their trip. They begin walking at 9:00 in the morning, and they almost immediately see a kangaroo rat leaving its burrow for a long day of hunting small animals. Since the kangaroo rat is away from its burrow, they decide to look inside. Beth puts her hand deep inside one of the burrow entrances and tells Mario that it is much hotter down in the hole than it is above ground. Mario doesn’t believe her, but he agrees once he places his hand in the hole. They continue their walk through the desert, and Mario finds a set of tracks in the sand. Following the tracks, they discover hundreds of frog eggs under a mesquite bush. “Feel the stem of this mesquite,” Mario says. “It is so smooth. I bet animals like to rub up against it.” The sun becomes hotter and hotter as the morning goes on, and they guess that it is over 100 degrees by 11:00 am. Beth and Mario start to get tired and thirsty, so they decide to head for home. But when they look up, they realize that they don’t know which way their house is located. They walk quickly in one direction, but nothing looks familiar. They run up a hill and look in every direction, but they can’t find their house anywhere. Beth and Mario are now getting worried. “I think our house is over there,” says Beth. Mario points the opposite direction and says, “I think it is that way.” Mario and Beth discuss a few options. They could split up, each walking in one direction until one person finds their home. Or they could find some shade under a bush, like many desert animals do, and wait until someone finds them. Because they are so hot and tired, they decide to find some shade. As they sit in the shade, they spot a rattlesnake resting in the sunshine. They congratulate themselves on seeing the snake, and feel relieved that it didn’t slither after them to attack as they had heard most rattlesnakes like to do. Suddenly, Beth hears a faint sound, way off in the distance. “Beth, Mario, can you hear us?” It is their mom.
© This activity book was produced by the Asombro Institute for Science Education (Las Cruces, NM; www.asombro.org). Updated 2005. 23
“Mom, we’re over here!” shouts Mario, as loud as he can. “Stay where you are. We’re coming,” answers his mom. Beth and Mario let out huge sighs of relief. They realized a few of their mistakes, and they promise each other to be smarter the next time they go for a hike in the desert. INACCURACIES Paragraph 1: Las Cruces is in the Chihuahuan Desert, not the Saharan Desert. It almost never rains a little bit each day in the desert, especially in April which is during the
dry season. They do not wear the proper clothing; long-sleeved shirts, pants, and closed-toe shoes are
best when hiking in the desert. They do not tell anyone where they are going. They forgot to bring water!
Paragraph 2: Kangaroo rats are nocturnal. Kangaroo rats eat seeds, not other animals. They should never put their arms into a hole in the desert. On a hot day, it is cooler underground than it is on top of the ground.
Paragraph 3: Frogs lay their eggs in water, so they could not put them under a mesquite shrub. Mesquite has sharp thorns on its stems; it is not smooth.
Paragraph 4: They did not keep track of which direction they were walking.
Paragraph 5: They did the RIGHT thing by staying together and staying in one place. It was also good
that they didn’t panic when they discovered they were lost. Snakes would not be resting in the sunshine when it is 100 degrees. Rattlesnakes do not seek out people to attack!
© This activity book was produced by the Asombro Institute for Science Education (Las Cruces, NM; www.asombro.org). Updated 2005. 24
GROW WHERE YOU’RE PLANTED: The Effects of Soil on Plant Growth
Introduction: When you are out in the desert, notice where different plants are located, what types of plants grow where, and what the soil is like in those locations. Does soil affect which plants can grow where? This experiment is designed to help you answer that question. You will use seeds planted in three types of soil to determine if soil type has an effect on the germination and growth of seeds. Materials: • One pair of empty film canisters for each student. One canister should have a small hole
drilled in the bottom. The hole should be large enough for the wick (see below) to fit through.
• 3 different soil types (e.g., sand, potting soil, soil from under a pine tree, soil from the school yard)
• 1 type of seed (radish, alfalfa, corn, pea, and lettuce seeds all work well) • 1 wick for each student (approximately 2cm x 4cm strips cut from terrycloth towels) • Masking tape to label canisters • Soda flats (trays) to hold the canisters • Water Hypothesis: Write at least two hypotheses for what you think will happen in this experiment. Your hypotheses might address some of these questions: 1) Which soil do you think will produce the tallest plants? 2) Which will produce the shortest plants? 3) Which soil will help seeds germinate fastest? Write your hypotheses here: 1. ________________________________________________________________________ 2. _______________________________________________________________________ Procedures: 1. Your teacher will help you choose a soil type (soil 1, soil 2, or soil 3). One option is to make an equal number of pieces of scratch paper marked “Soil 1,” “Soil 2,” and “Soil 3” and have each student pick a piece of paper. Make sure there are
approximately equal numbers of students planting seeds in each soil type. 2. Gather all of your materials. 3. Use masking tape to label your canister with the soil type and your name.
© This activity book was produced by the Asombro Institute for Science Education (Las Cruces, NM; www.asombro.org). Updated 2005. 25
4. Thread a wick through the hole in the bottom of one canister, leaving about 1cm inside the canister and 3cm hanging out the bottom
5. Remove rocks and other debris, and fill the canister with the wick almost to the top,
surrounding the wick with soil. 6. Count out 3 seeds (2 if you are using corn, peas, or other large seeds). Place these seeds 5mm
under the surface of the soil in each canister. Make sure each seed is covered. Some students find it easiest to make a small depression with their finger, place the seeds in the bottom of the depression and then cover with soil. This method may be difficult with some soils (e.g., sand).
7. Place water in the canister without a hole. Fill the canister about ¾ of the way to the top. 8. Carefully place the soil-filled canister on top of the water-filled canister, making sure the
wick is in the water. 9. Place your canister with your classmates’ canisters in a location where the seedlings can get
sunlight. Set all of the canisters in a cardboard tray. The height of the walls should be less than the height of the canisters. The location of each canister within the tray should be randomly assigned (i.e., don’t put all of the canisters with Soil 1 in the same part of the tray). Place the box in a warm spot with relatively uniform lighting. If you use a window or other directional light source, be sure to rotate the canisters every few days.
10. Add a consistent amount of water to all of the bottom film canisters when needed. Measuring Your Seedlings (Collect Data): You can have your students check on their plants each day, recording written observations (whether or not it has germinated, how it looks, etc.) and taking height measurements each school day. Students will measure their plants at the end of 1-3 weeks. The amount of time you wait will depend on the temperature of your classroom and the kind of seed selected. For example, corn generally germinates in 5-7 days, snap peas germinate in 7-10 days, and radishes germinate in 7-14 days. Allow most of the seedlings to grow at least 5cm before measuring. NOTE: Have the students measure the TALLEST of their seedlings, if more than one
germinates. Measure the highest of the seedlings in your canister. If none of the seeds in your canister germinated, the height should be recorded as “0.”
Write the height of your seedling here _______________(be sure to measure in centimeters).
© This activity book was produced by the Asombro Institute for Science Education (Las Cruces, NM; www.asombro.org). Updated 2005. 26
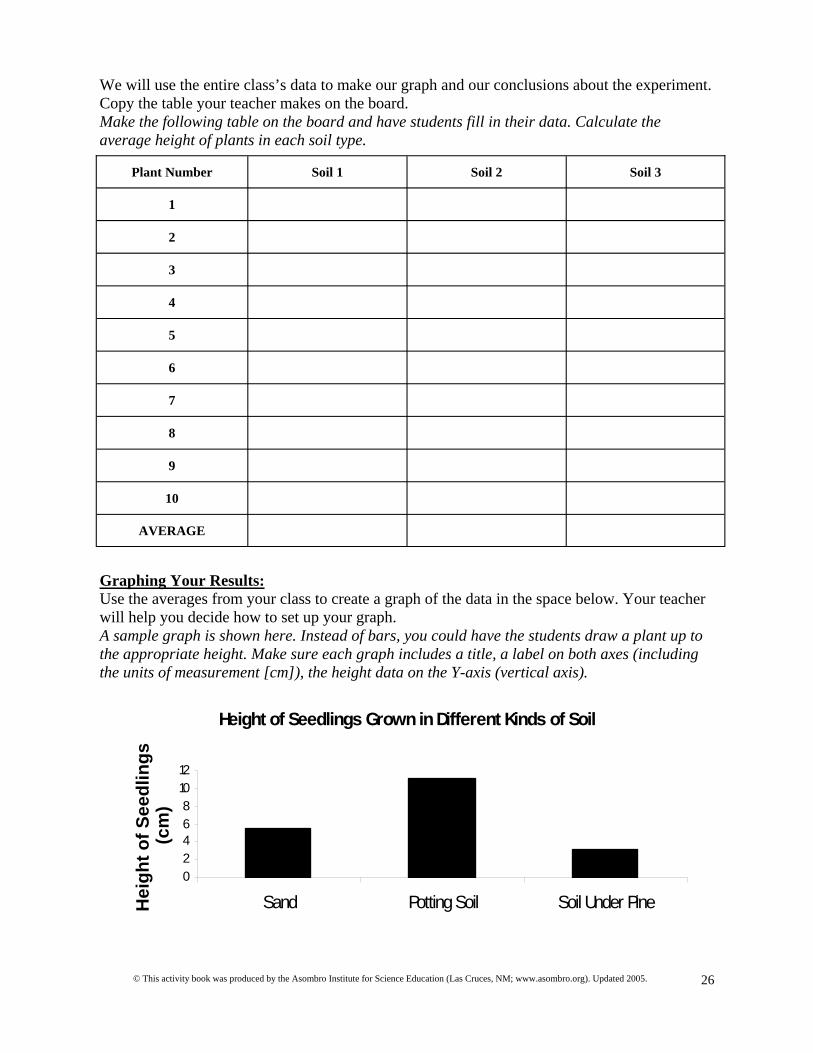
We will use the entire class’s data to make our graph and our conclusions about the experiment. Copy the table your teacher makes on the board. Make the following table on the board and have students fill in their data. Calculate the average height of plants in each soil type.
Graphing Your Results: Use the averages from your class to create a graph of the data in the space below. Your teacher will help you decide how to set up your graph. A sample graph is shown here. Instead of bars, you could have the students draw a plant up to the appropriate height. Make sure each graph includes a title, a label on both axes (including the units of measurement [cm]), the height data on the Y-axis (vertical axis).
Plant Number Soil 1 Soil 2 Soil 3
1
2
3
4
5
6
7
8
9
10
AVERAGE
Height of Seedlings Grown in Different Kinds of Soil
02468
1012
Sand Potting Soil Soil Under PineHei
ght o
f See
dlin
gs
(cm
)
© This activity book was produced by the Asombro Institute for Science Education (Las Cruces, NM; www.asombro.org). Updated 2005. 27
Conclusions: 1. Go back to your hypotheses on page 1. Did the results support your Hypothesis #1? Why or why not?
Emphasize that it is FINE if their hypotheses were incorrect. That happens to adult scientists all the time, and it is how we learn through science.
2. Did the results support your Hypothesis #2? Why or why not? 3. Are there any other explanations (besides differences in soil type) that may explain the results?
Get students to start thinking about potential “confounding factors,” such as the amount of light each seedling got (based on it’s placement near the window), the amount of soil that was added to start the experiment, etc. A confounding factor is any factor that you were NOT testing that could have had an effect on the outcome of the experiment. Ideally, you would have thought of every potential confounding factor before you started your experiment and controlled for each one. That RARELY happens, so it’s good for students to start thinking about potential confounding factors!
4. If you conclude that soil type IS important for the growth of seeds, why do you think this is so (in other words, what might make one soil better than another for the growth of seeds)? Can you think of an experiment to test your ideas?
Soil has numerous effects on plant growth. Different soils contain different amounts of nutrients. Different soils are also made up of particles of different sizes. For example, sand particles are large with large spaces between them. Water can move very quickly through the spaces between sand particles, often so quickly that it is difficult for the plant roots to access it. Encourage your students to think about what a plant needs to grow and how soil plays into these factors.
© This activity book was produced by the Asombro Institute for Science Education (Las Cruces, NM; www.asombro.org). Updated 2005. 28
SLEEPING BEAUTIES: Life in the Playa
Introduction: Playas are low-lying, shallow areas that are intermittently flooded, forming temporary wetlands. Flooding may last from a few days to weeks. In the desert where water is such a scarce commodity, many animals have developed amazing methods to deal with the unpredictable nature of their aquatic world. One of the most interesting is anhydrobiosis (life without water). Organisms that exhibit anhydrobiosis rest in an egg or dormant (sleeping) stage in the soil, with metabolic rates so low that they appear lifeless. When water is added, they rapidly become active and play out their life cycles in the brief time allowed by their temporary water supply. Decaying organic matter in the soil provides a constant food source for some of the organisms, while some eat other organisms in the soil. Playa soils hold a wide variety of invertebrates, and the composition of the invertebrate community changes dramatically as the time the playa is flooded increases. The life history of most of these playa invertebrates is unknown. In this activity, you will add water to playa soil and observe the organisms that inhabit this microcosm after only a few days. Materials: • Bucket and shovel • Local playa soil • Plastic basins (2-L soda bottles with the tops cut off work well) • Distilled water • One 75-watt light bulb for every two basins • Small dishes for observing organisms Procedures: 1. Take a shovel and bucket to a playa and collect at least 1 lb. of local playa soil. The trick is to
skim only the top few centimeters of soil with the shovel. 2. When you return to the classroom, add a thin layer of soil to the bottom of two plastic basins
and add distilled water until the basins are about half full. 3. Place the basins under a 75-watt light bulb so that the temperature is about 26 ºC. Leave the
basins undisturbed for two weeks to a month. Add tap water that has been left out for 24 hours when needed.
4. After one week to one month has passed, observe the organisms in the water. The water may
be murky, so transfer organisms to a clean jar of distilled water for observation if necessary. 5. Draw a picture of your organisms and try to identify them. Questions: 1. Draw all of the different types of animals you find in your playa microcosm. 2. What are two important adaptations of the life forms in the playa soil?
© This activity book was produced by the Asombro Institute for Science Education (Las Cruces, NM; www.asombro.org). Updated 2005. 29
SLEEPING BEAUTIES A GUIDE TO WHAT YOU MIGHT FIND
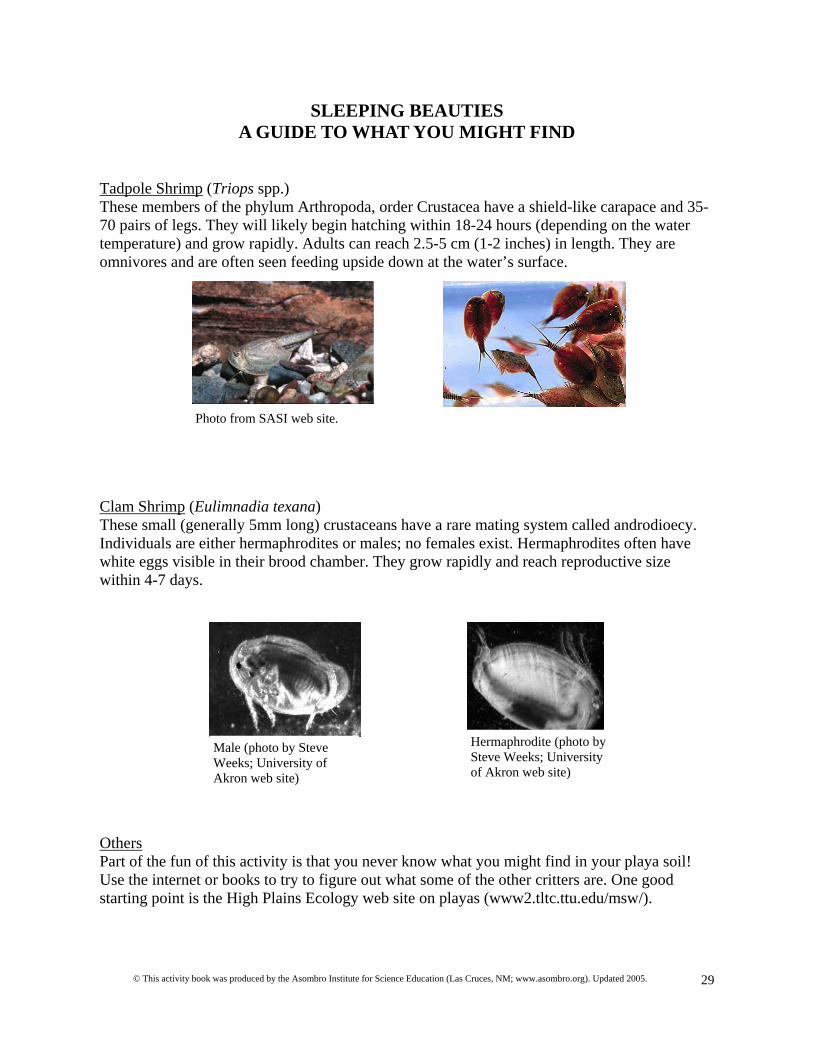
Tadpole Shrimp (Triops spp.) These members of the phylum Arthropoda, order Crustacea have a shield-like carapace and 35-70 pairs of legs. They will likely begin hatching within 18-24 hours (depending on the water temperature) and grow rapidly. Adults can reach 2.5-5 cm (1-2 inches) in length. They are omnivores and are often seen feeding upside down at the water’s surface.
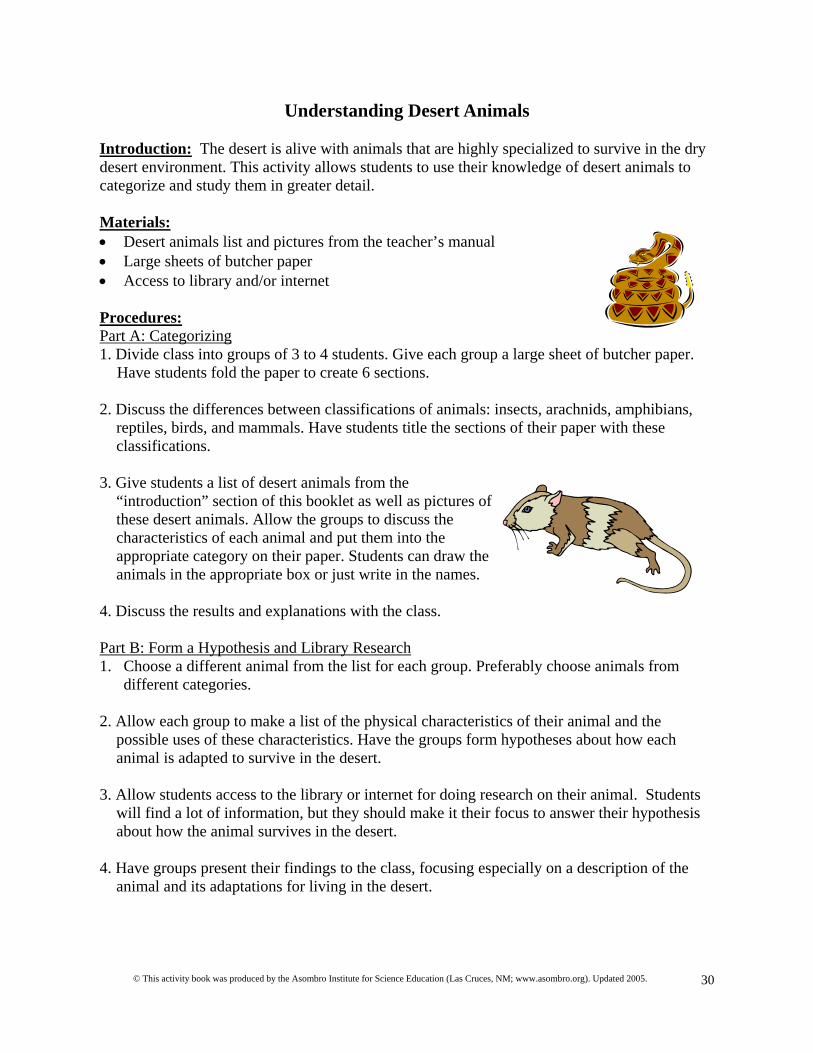
Clam Shrimp (Eulimnadia texana) These small (generally 5mm long) crustaceans have a rare mating system called androdioecy. Individuals are either hermaphrodites or males; no females exist. Hermaphrodites often have white eggs visible in their brood chamber. They grow rapidly and reach reproductive size within 4-7 days.
Others Part of the fun of this activity is that you never know what you might find in your playa soil! Use the internet or books to try to figure out what some of the other critters are. One good starting point is the High Plains Ecology web site on playas (www2.tltc.ttu.edu/msw/).
Male (photo by Steve Weeks; University of Akron web site)
Hermaphrodite (photo by Steve Weeks; University of Akron web site)
Photo from SASI web site.
© This activity book was produced by the Asombro Institute for Science Education (Las Cruces, NM; www.asombro.org). Updated 2005. 30
Understanding Desert Animals Introduction: The desert is alive with animals that are highly specialized to survive in the dry desert environment. This activity allows students to use their knowledge of desert animals to categorize and study them in greater detail. Materials: • Desert animals list and pictures from the teacher’s manual • Large sheets of butcher paper • Access to library and/or internet Procedures: Part A: Categorizing 1. Divide class into groups of 3 to 4 students. Give each group a large sheet of butcher paper.
Have students fold the paper to create 6 sections. 2. Discuss the differences between classifications of animals: insects, arachnids, amphibians,
reptiles, birds, and mammals. Have students title the sections of their paper with these classifications.
3. Give students a list of desert animals from the
“introduction” section of this booklet as well as pictures of these desert animals. Allow the groups to discuss the characteristics of each animal and put them into the appropriate category on their paper. Students can draw the animals in the appropriate box or just write in the names.
4. Discuss the results and explanations with the class. Part B: Form a Hypothesis and Library Research 1. Choose a different animal from the list for each group. Preferably choose animals from
different categories. 2. Allow each group to make a list of the physical characteristics of their animal and the
possible uses of these characteristics. Have the groups form hypotheses about how each animal is adapted to survive in the desert.
3. Allow students access to the library or internet for doing research on their animal. Students
will find a lot of information, but they should make it their focus to answer their hypothesis about how the animal survives in the desert.
4. Have groups present their findings to the class, focusing especially on a description of the
animal and its adaptations for living in the desert.
© This activity book was produced by the Asombro Institute for Science Education (Las Cruces, NM; www.asombro.org). Updated 2005. 31
Desert Presentation
Bring a camera to the field trip and have students document what they see. When you return to the classroom, have students create a presentation from their photos (you can even set the presentation to music if you have a really creative class!). Have students give the presentation to their parents, other classes, Nature Park staff, etc. Students should be responsible for checking the accuracy of the information they present.
Desert Haiku
Haiku is a form of Japanese poetry with a particular structure of syllables in each line. Ask the students to create a desert haiku about their field trip experience. It may help to create a haiku as a class before the students work on their own. Line 1 (5 syllables) Mesquite thorns protect Line 2 (7 syllables) clever, collecting packrats Line 3 (5 syllables) from hungry foxes.
Desert Diorama Have students create a desert scene in a small, plastic wading pool using sand, rocks, cutouts of plants and animals, and other materials. Have students add labels, identifying each of the plants and animals in the diorama. Display this diorama for parents and other students.
© This activity book was produced by the Asombro Institute for Science Education (Las Cruces, NM; www.asombro.org). Updated 2005. 32
Glossary Adaptation – an anatomical, behavioral, or physiological trait that improves an organism’s
ability to survive and reproduce Condensation - the process of change from a gaseous to liquid state (e.g., change from water
vapor to liquid water) Desert - a place where more water would be lost through evaporation than is gained by
precipitation (alternate definition: a place that receives less than 254 mm or 10 inches of precipitation per year)
Diurnal - an adjective describing animals that are primarily active during the day Dormant – an inactive state Ephemerals – plants that live briefly and reproduce rapidly in response to water (often called
annuals) Evaporation - the process of change from a liquid or solid state to a gaseous state (e.g., change
from liquid water to water vapor) Exoskeleton – a hard covering on the surface of an animal (opposite of an endoskeleton) Hypothesis - an educated guess that requires further investigation Infiltration – the act of water entering the soil through the surface Nocturnal - an adjective describing animals that are primarily active at night Playa - in the desert, a low-lying, shallow area that floods intermittently Precipitation - water vapor from the air that falls to the Earth as rain, snow, sleet, or hail Rumen – one part of the digestive tract of a ruminant animal, such as a cow or an antelope,
where most fermentation takes place Runoff – water that reaches the upper layer of soil, but is not absorbed into deeper layers Stoma (plural stomata) – a pore on the surface of leaves that allow plants to exchange oxygen
and carbon dioxide with the environment Transpiration – the loss of water vapor from a plant Uric acid – a solid form of nitrogenous wastes excreted by insects, birds, and some reptiles
© This activity book was produced by the Asombro Institute for Science Education (Las Cruces, NM; www.asombro.org). Updated 2005. 33
References
(Note: These and many other books and articles on deserts can be found in the Chihuahuan Desert Nature Park library. Books can be checked out for two weeks. Please contact the Nature Park office at 505-524-3334 for more information.) Burgess, Tony L. 1995. Desert grassland, mixed shrub savanna, shrub steppe, or semidesert
scrub? The dilemma of coexisting growth forms. Pp. 31-67 in The Desert Grassland (Ed. by Mitchel P. McClaran and Thomas R. Van Devender). The University of Arizona Press: Tucson.
Louw, G. N. and M. K. Seely. 1982. Ecology of Desert Organisms. Longman Inc.: New York. MacKay, William P.; John C. Zak; Walter G. Whitford. 1989. The natural history and role of
subterranean termites in the northern Chihuahuan Desert. Pp. 53-77 in Special Biotic Relationships in the Arid Southwest (Ed. by Justin O. Schmidt). University of New Mexico Press: Albuquerque.
McMahon, James A. 1985. Deserts: The Audubon Society Nature Guides. Alfred A. Knopf:
New York. Schmidt-Nielsen, K. 1979. Desert Animals: Physiological Problems of Heat and Water. Dover
Publications, Inc.: New York. Solbrig, Otto T. and Gordon H. Orians. 1977. The adaptive characteristics of desert plants.
American Scientist 65:412-421.