powercampus by ellucian / powercampus self-service student
TRANSCRIPT

PowerCampus Self-ServiceStudent Guide
Release 8.3December 2012

Banner®, Colleague®, Luminis® and Datatel® are trademarks of Ellucian or its affiliates and are registered in the U.S. and other countries. El-lucian™, PowerCampus™, Advance™, Degree Works™, fsaATLAS™, Course Signals™, SmartCall™, Recruiter™, and ILP™ are trademarks of Ellucian Company L.P. or its affiliates. Other names may be trademarks of their respective owners.
© 2012 Ellucian Company L.P. and its affiliates. The unauthorized possession, use, reproduction, distribution, display or disclosure of this material or the information contained herein is prohibited.
Contains confidential and proprietary information of Ellucian and its subsidiaries. Use of these materials is limited to Ellucian licensees, and is subject to the terms and conditions of one or more written license agreements between Ellucian and the licensee in question.
In preparing and providing this publication, Ellucian is not rendering legal, accounting, or other similar professional services. Ellucian makes no claims that an institution's use of this publication or the software for which it is provided will guarantee compliance with applicable federal or state laws, rules, or regulations. Each organization should seek legal, accounting and other similar professional services from competent providers of the organization's own choosing.
Prepared by: Ellucian4375 Fair Lakes CourtFairfax, Virginia 22033United States of America
Revision History
Publication Date Summary
December 2012 New version that supports PowerCampus Self-Service 8.3 software.

PowerCampus Self-Service 8.3 Table of Contents
Table of Contents
Introduction to PowerCampus Self-Service . . . . . . . . . . . . . . . . . . . . . . . . . . . . . . . . 1
Taking a Look at the Home Page. . . . . . . . . . . . . . . . . . . . . . . . . . . . . . . . . . . . . . . . . . . . . . . . . . . . . 2
Using the On-line Help. . . . . . . . . . . . . . . . . . . . . . . . . . . . . . . . . . . . . . . . . . . . . . . . . . . . . . . . . . . . . 3
Logging Into Self-Service . . . . . . . . . . . . . . . . . . . . . . . . . . . . . . . . . . . . . . . . . . . . . . . 6
Logging In . . . . . . . . . . . . . . . . . . . . . . . . . . . . . . . . . . . . . . . . . . . . . . . . . . . . . . . . . . . . . . . . . . . . . . 6
Signing In. . . . . . . . . . . . . . . . . . . . . . . . . . . . . . . . . . . . . . . . . . . . . . . . . . . . . . . . . . . . . . . . . . . . . . . 6
If You Forget Your Password . . . . . . . . . . . . . . . . . . . . . . . . . . . . . . . . . . . . . . . . . . . . . . . . . . . . . . . . 6
Using Your IQ.Web Account to Log In . . . . . . . . . . . . . . . . . . . . . . . . . . . . . . . . . . . . . . . . . . . . . . . . . 7
Requesting an Account . . . . . . . . . . . . . . . . . . . . . . . . . . . . . . . . . . . . . . . . . . . . . . . . . . . . . . . . . . . . 9
Updating Your Personal Information . . . . . . . . . . . . . . . . . . . . . . . . . . . . . . . . . . . . . 10
Viewing Your User Account Information . . . . . . . . . . . . . . . . . . . . . . . . . . . . . . . . . . . . . . . . . . . . . . 10
Listing Your Name in the On-line Directories . . . . . . . . . . . . . . . . . . . . . . . . . . . . . . . . . . . . . . . . . . . 11
Changing Your Password . . . . . . . . . . . . . . . . . . . . . . . . . . . . . . . . . . . . . . . . . . . . . . . . . . . . . . . . . 11
Changing Your Security Question . . . . . . . . . . . . . . . . . . . . . . . . . . . . . . . . . . . . . . . . . . . . . . . . . . . 12
Changing Your Personal Data . . . . . . . . . . . . . . . . . . . . . . . . . . . . . . . . . . . . . . . . . . . . . . . . . . . . . . 12
Updating Your Ethnicity and Race Information . . . . . . . . . . . . . . . . . . . . . . . . . . . . . . . . . . . . . . . . . 13
Updating Your Address Information . . . . . . . . . . . . . . . . . . . . . . . . . . . . . . . . . . . . . . . . . . . . . . . . . . 14
Editing Your Preferred Address . . . . . . . . . . . . . . . . . . . . . . . . . . . . . . . . . . . . . . . . . . . . . . . . . . 14
Adding a New Address . . . . . . . . . . . . . . . . . . . . . . . . . . . . . . . . . . . . . . . . . . . . . . . . . . . . . . . . . 14
Viewing and Managing Your Addresses. . . . . . . . . . . . . . . . . . . . . . . . . . . . . . . . . . . . . . . . . . . . 15
Updating Your Phone Numbers . . . . . . . . . . . . . . . . . . . . . . . . . . . . . . . . . . . . . . . . . . . . . . . . . . . . . 16
Adding a New Phone Number . . . . . . . . . . . . . . . . . . . . . . . . . . . . . . . . . . . . . . . . . . . . . . . . . . . 16
Changing a Phone Number . . . . . . . . . . . . . . . . . . . . . . . . . . . . . . . . . . . . . . . . . . . . . . . . . . . . . 17
Deleting a Phone Number . . . . . . . . . . . . . . . . . . . . . . . . . . . . . . . . . . . . . . . . . . . . . . . . . . . . . . 17
Setting Your Primary Phone Number . . . . . . . . . . . . . . . . . . . . . . . . . . . . . . . . . . . . . . . . . . . . . . 18
Inviting Relatives to Access Your Information . . . . . . . . . . . . . . . . . . . . . . . . . . . . . 18
Sending an Invitation . . . . . . . . . . . . . . . . . . . . . . . . . . . . . . . . . . . . . . . . . . . . . . . . . . . . . . . . . . . . . 18
Managing Your Invitations . . . . . . . . . . . . . . . . . . . . . . . . . . . . . . . . . . . . . . . . . . . . . . . . . . . . . . . . . 20
Managing Your Shared Users . . . . . . . . . . . . . . . . . . . . . . . . . . . . . . . . . . . . . . . . . . . . . . . . . . . . . . 20
PowerCampus Self-Service Student Guide iii12/27/2012

Table of Contents PowerCampus Self-Service 8.3
Reviewing Your Student Status . . . . . . . . . . . . . . . . . . . . . . . . . . . . . . . . . . . . . . . . . 22
Checking Your Application Status . . . . . . . . . . . . . . . . . . . . . . . . . . . . . . . . . . . . . . . . . . . . . . . . . . . 22
Viewing Your Checklist . . . . . . . . . . . . . . . . . . . . . . . . . . . . . . . . . . . . . . . . . . . . . . . . . . . . . . . . . . . 23
Completing a Task on Your Checklist . . . . . . . . . . . . . . . . . . . . . . . . . . . . . . . . . . . . . . . . . . . . . 25
Cancelling a Task on Your Checklist . . . . . . . . . . . . . . . . . . . . . . . . . . . . . . . . . . . . . . . . . . . . . . 26
Waiving a Task on Your Checklist . . . . . . . . . . . . . . . . . . . . . . . . . . . . . . . . . . . . . . . . . . . . . . . . 27
Reassigning a Task on Your Checklist . . . . . . . . . . . . . . . . . . . . . . . . . . . . . . . . . . . . . . . . . . . . . 27
Creating a New Task . . . . . . . . . . . . . . . . . . . . . . . . . . . . . . . . . . . . . . . . . . . . . . . . . . . . . . . . . . 28
Viewing the Courses in Your Cart . . . . . . . . . . . . . . . . . . . . . . . . . . . . . . . . . . . . . . . . . . . . . . . . . . . 30
Reviewing Your Academic Information . . . . . . . . . . . . . . . . . . . . . . . . . . . . . . . . . . . 31
Determining Your Degree Requirements . . . . . . . . . . . . . . . . . . . . . . . . . . . . . . . . . . . . . . . . . . . . . . 31
Viewing Your Academic Plan . . . . . . . . . . . . . . . . . . . . . . . . . . . . . . . . . . . . . . . . . . . . . . . . . . . . . . . 33
Creating a What If? Plan . . . . . . . . . . . . . . . . . . . . . . . . . . . . . . . . . . . . . . . . . . . . . . . . . . . . . . . . . . 36
Viewing Your What If? Plans . . . . . . . . . . . . . . . . . . . . . . . . . . . . . . . . . . . . . . . . . . . . . . . . . . . . 38
Deleting a What If? Plan. . . . . . . . . . . . . . . . . . . . . . . . . . . . . . . . . . . . . . . . . . . . . . . . . . . . . . . . 39
Searching for Courses . . . . . . . . . . . . . . . . . . . . . . . . . . . . . . . . . . . . . . . . . . . . . . . . 40
Searching for Available Course Sections. . . . . . . . . . . . . . . . . . . . . . . . . . . . . . . . . . . . . . . . . . . . . . 40
Searching for Courses in the Course Catalog . . . . . . . . . . . . . . . . . . . . . . . . . . . . . . . . . . . . . . . . . . 41
Searching for People . . . . . . . . . . . . . . . . . . . . . . . . . . . . . . . . . . . . . . . . . . . . . . . . . . 43
Searching for Alumni . . . . . . . . . . . . . . . . . . . . . . . . . . . . . . . . . . . . . . . . . . . . . . . . . . . . . . . . . . . . . 43
Searching for Faculty Members. . . . . . . . . . . . . . . . . . . . . . . . . . . . . . . . . . . . . . . . . . . . . . . . . . . . . 44
Searching for Staff Members . . . . . . . . . . . . . . . . . . . . . . . . . . . . . . . . . . . . . . . . . . . . . . . . . . . . . . . 44
Searching for Other Students . . . . . . . . . . . . . . . . . . . . . . . . . . . . . . . . . . . . . . . . . . . . . . . . . . . . . . 45
Registering for Traditional Courses. . . . . . . . . . . . . . . . . . . . . . . . . . . . . . . . . . . . . . 47
Finding Your Course Sections . . . . . . . . . . . . . . . . . . . . . . . . . . . . . . . . . . . . . . . . . . . . . . . . . . . . . . 47
Choosing a Group of Courses . . . . . . . . . . . . . . . . . . . . . . . . . . . . . . . . . . . . . . . . . . . . . . . . . . . 47
Choosing Individual Courses . . . . . . . . . . . . . . . . . . . . . . . . . . . . . . . . . . . . . . . . . . . . . . . . . . . . 48
Verifying the List of Courses in Your Cart . . . . . . . . . . . . . . . . . . . . . . . . . . . . . . . . . . . . . . . . . . . . . 49
Checking Your Class Schedule . . . . . . . . . . . . . . . . . . . . . . . . . . . . . . . . . . . . . . . . . . . . . . . . . . . . . 50
Registering for the Courses in Your Cart . . . . . . . . . . . . . . . . . . . . . . . . . . . . . . . . . . . . . . . . . . . . . . 50
iv PowerCampus Self-Service Student Guide12/27/2012

PowerCampus Self-Service 8.3 Table of Contents
Registering for Continuing Education Courses . . . . . . . . . . . . . . . . . . . . . . . . . . . . 52
Identifying Yourself. . . . . . . . . . . . . . . . . . . . . . . . . . . . . . . . . . . . . . . . . . . . . . . . . . . . . . . . . . . . . . . 52
I Already Have an Account . . . . . . . . . . . . . . . . . . . . . . . . . . . . . . . . . . . . . . . . . . . . . . . . . . . . . . 53
I Am a New User . . . . . . . . . . . . . . . . . . . . . . . . . . . . . . . . . . . . . . . . . . . . . . . . . . . . . . . . . . . . . 53
Choosing Your Continuing Education Courses . . . . . . . . . . . . . . . . . . . . . . . . . . . . . . . . . . . . . . . . . 55
Reviewing Your Schedule . . . . . . . . . . . . . . . . . . . . . . . . . . . . . . . . . . . . . . . . . . . . . . . . . . . . . . . . . 56
Paying for Your Continuing Education Courses. . . . . . . . . . . . . . . . . . . . . . . . . . . . . . . . . . . . . . . . . 57
Viewing Your Class Information . . . . . . . . . . . . . . . . . . . . . . . . . . . . . . . . . . . . . . . . . 57
Viewing Your Class Schedule . . . . . . . . . . . . . . . . . . . . . . . . . . . . . . . . . . . . . . . . . . . . . . . . . . . . . . 58
Accessing a Course Home Page. . . . . . . . . . . . . . . . . . . . . . . . . . . . . . . . . . . . . . . . . . . . . . . . . . . . 59
Downloading Course and Activity Media . . . . . . . . . . . . . . . . . . . . . . . . . . . . . . . . . . . . . . . . . . . 62
Submitting a Course Activity. . . . . . . . . . . . . . . . . . . . . . . . . . . . . . . . . . . . . . . . . . . . . . . . . . . . . 63
Viewing Your Submitted Activity Media . . . . . . . . . . . . . . . . . . . . . . . . . . . . . . . . . . . . . . . . . . . . 64
Viewing Your Activity Grades . . . . . . . . . . . . . . . . . . . . . . . . . . . . . . . . . . . . . . . . . . . . . . . . . . . . 65
Viewing Your Attendance for a Course . . . . . . . . . . . . . . . . . . . . . . . . . . . . . . . . . . . . . . . . . . . . 66
Posting Information to a Forum . . . . . . . . . . . . . . . . . . . . . . . . . . . . . . . . . . . . . . . . . . . . . . . . . . 67
Viewing Your Permission Requests . . . . . . . . . . . . . . . . . . . . . . . . . . . . . . . . . . . . . . . . . . . . . . . . . . 68
Viewing Your Grades and Transcript . . . . . . . . . . . . . . . . . . . . . . . . . . . . . . . . . . . . . 69
Viewing Your Grade Report . . . . . . . . . . . . . . . . . . . . . . . . . . . . . . . . . . . . . . . . . . . . . . . . . . . . . . . . 69
Viewing Your Unofficial Transcript . . . . . . . . . . . . . . . . . . . . . . . . . . . . . . . . . . . . . . . . . . . . . . . . . . . 71
Requesting Your Transcript . . . . . . . . . . . . . . . . . . . . . . . . . . . . . . . . . . . . . . . . . . . . . . . . . . . . . . . . 71
Viewing Your Financial Information . . . . . . . . . . . . . . . . . . . . . . . . . . . . . . . . . . . . . . 73
Viewing Your Account Balance . . . . . . . . . . . . . . . . . . . . . . . . . . . . . . . . . . . . . . . . . . . . . . . . . . . . . 73
Making a Payment . . . . . . . . . . . . . . . . . . . . . . . . . . . . . . . . . . . . . . . . . . . . . . . . . . . . . . . . . . . . . . . 74
Viewing Your Billing Statement . . . . . . . . . . . . . . . . . . . . . . . . . . . . . . . . . . . . . . . . . . . . . . . . . . . . . 74
Viewing Your Financial Aid Details . . . . . . . . . . . . . . . . . . . . . . . . . . . . . . . . . . . . . . . . . . . . . . . . . . 75
Displaying Pages in a Different Language . . . . . . . . . . . . . . . . . . . . . . . . . . . . . . . . 76
If You Are Using Internet Explorer . . . . . . . . . . . . . . . . . . . . . . . . . . . . . . . . . . . . . . . . . . . . . . . . . . . 76
If You Are Using FireFox . . . . . . . . . . . . . . . . . . . . . . . . . . . . . . . . . . . . . . . . . . . . . . . . . . . . . . . . . . 77
If You Are Using Safari. . . . . . . . . . . . . . . . . . . . . . . . . . . . . . . . . . . . . . . . . . . . . . . . . . . . . . . . . . . . 77
PowerCampus Self-Service Student Guide v12/27/2012


PowerCampus Self-Service 8.3 Introduction to PowerCampus Self-Service
Introduction to PowerCampus Self-Service
This user guide focuses on how students can use PowerCampus Self-Service to access and update their information. Using a Web browser, students can create their academic plans, register for courses, access course materials, view their grades, and more.
All students will first view the PowerCampus Self-Service Home page, which can be used to access general information for all users. Depending on how your school’s system is set up, the Login window at the left will either display a lock icon or User Name and Password fields.
PowerCampus Self-Service Student Guide 112/27/2012

Introduction to PowerCampus Self-Service PowerCampus Self-Service 8.3
Taking a Look at the Home Page
Taking a Look at the Home Page
The Home Page gives you a first look at the basic design of the Web pages. Here is a description of the Web page from top to bottom:
Once students log in, they can access information that applies to them. For example, view their academic plan, financial information, grades, and so on.
Web Page Area Description
Links These links will appear at the top of every page:
• Select Cart to display your shopping cart, which will list any course sections you may have chosen.
• Select Help to display information about the current Web page.
After you log in:
• The Log Out link will also be displayed at the top of every page.
• If your school is also running the PowerCampus Portal, a link to the Portal will also be displayed at the top of every page.
Search You can search for Course Sections that are available for a specified year, term, and session, or search for courses in the Catalog.
1. Specify what you want to search, courses in the Catalog or Course Sections.
2. You have the option to enter a keyword for the course (Art, for example).
• If you enter a keyword, the system will list ALL courses with the specified keyword.
• If you do not enter a keyword, the system will prompt you to enter more information to narrow your search.
3. Select Search.
After you log in, you may also be able to search for information about people who are listed in the alumni, faculty, staff, and student Directories. When you search for a name, the system will list all the people with the specified name who are listed in each of the directories for which you have access.
Tabs Select the tab that corresponds to the function you want to perform. For example, if you wanted to register for courses, you would choose the Register tab.
Menu Items Once you select a tab, the corresponding list of menu items will appear under the tabs.
Options Once you select a menu item, the corresponding options for that menu item will appear along the left pane, and the associated Web page will appear to the right.
2 PowerCampus Self-Service Student Guide12/27/2012

PowerCampus Self-Service 8.3 Introduction to PowerCampus Self-Service
Using the On-line Help
Using the On-line Help
If you have a question about the Web page you are currently viewing, you can display the help text for that page.
1. Select the Help link at the top of the page.
2. From the Help drop-down list, select Help for this page.
PowerCampus Self-Service Student Guide 312/27/2012

Introduction to PowerCampus Self-Service PowerCampus Self-Service 8.3
Using the On-line Help
3. Review the information on the Help window. For example:
4. After reading the help text for the current page, you can either:
• Select in the upper-right corner of the Help window to close the window, or
• Select in the upper-left corner of the Help window to open the entire On-line Help System.
4 PowerCampus Self-Service Student Guide12/27/2012
PowerCampus Self-Service 8.3 Introduction to PowerCampus Self-Service
Using the On-line Help
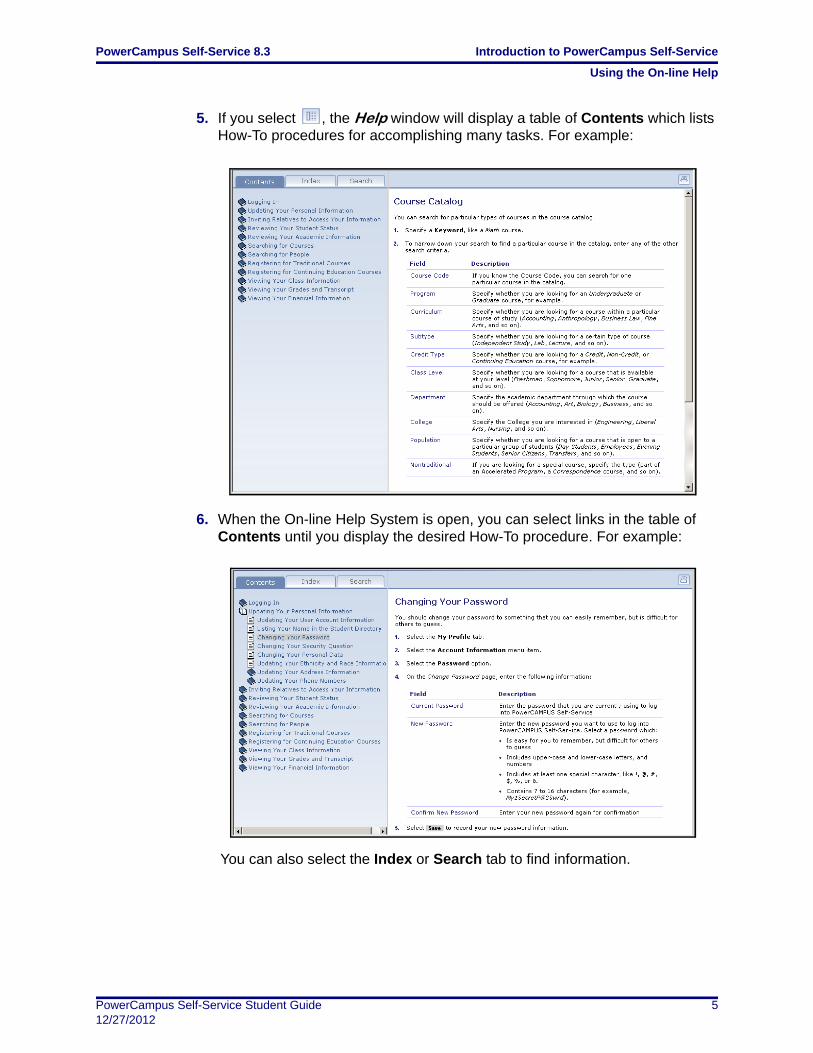
5. If you select , the Help window will display a table of Contents which lists How-To procedures for accomplishing many tasks. For example:
6. When the On-line Help System is open, you can select links in the table of Contents until you display the desired How-To procedure. For example:
You can also select the Index or Search tab to find information.
PowerCampus Self-Service Student Guide 512/27/2012

Logging Into Self-Service PowerCampus Self-Service 8.3
Logging In
Logging Into Self-Service
In order to access most of the Self-Service features, you must first identify yourself as a valid Self-Service user. Depending on how your school’s system is set up, you will either need to log in with your user name and password, or follow other steps to sign in.
• Logging In
• Signing In
Logging In
Using the account information we e-mailed you, please log into Self-Service.
1. In the Login window, enter your User Name.
2. Enter your Password. If You Forget Your Password, a new password will be e-mailed to you after you correctly answer your security question.
3. Select Log In.
Signing In
Using the account information we e-mailed you, please follow these steps to sign into Self-Service.
1. Select the Log In icon.
2. If prompted, choose the Location that was listed in the e-mail we sent you, and then select Continue to Sign In.
3. Enter your User Name.
4. Enter your Password.
5. Select Sign In.
If You Forget Your Password
If the Forgot My Password link is displayed in the Login window, you will be able to reset your password. If the Forgot My Password is NOT displayed, please contact the system administrator to reset your password.
1. On the Login window, select Forgot My Password.
2. On the Forgot My Password page, enter your User Name.
3. Select Submit.
6 PowerCampus Self-Service Student Guide12/27/2012

PowerCampus Self-Service 8.3 Logging Into Self-Service
Using Your IQ.Web Account to Log In
4. Read Your Security Question and enter Your Security Answer.
5. Select Submit.
6. Read the confirmation message which states that your password has been updated and e-mailed to you, and lists your User Name.
7. Log into your e-mail system and read the e-mail message which lists your new Self-Service password.
8. On the Forgot My Password page, select Log In.
9. Enter your User Name and your new Self-Service Password EXACTLY as it appears in the e-mail.
10.Select Log In.
11. Enter the following information:
12.Select Update.
13.Read the confirmation message, which states that your password has been changed.
14.Select Go to the Self-Service Home Page.
Using Your IQ.Web Account to Log In
If you had a PowerCampus IQ.Web account before we upgraded to PowerCampus Self-Service and the Transfer IQ.Web Account link is displayed on the Login window, you can use your IQ.Web User Name and Password to log into Self-Service for the first time. The system will then create a Self-Service account for you and e-mail your new Self-Service User Name and Password to your preferred e-mail address.
Field Description
Current Password Enter the Self-Service password EXACTLY as it appears in the e-mail that was sent to you.
New Password Enter the new password you want to use to log in. Select a password which:
• Is easy for you to remember, but difficult for others to guess
• Includes upper-case and lower-case letters, and numbers
• Includes at least one special character, like !, @, #, $, %, or &
• Contains 7 to 16 characters (for example, My1SecretP@SSwrd)
Confirm New Password Enter your new password a second time for confirmation.
PowerCampus Self-Service Student Guide 712/27/2012

Logging Into Self-Service PowerCampus Self-Service 8.3
Using Your IQ.Web Account to Log In
1. On the Login window, select Transfer IQ.Web Account.
2. Enter your IQ.Web User Name and Password.
3. Select Transfer Account.
4. If your information is found in the system and you have an e-mail address on file, the system will display a confirmation message to let you know that:
• Your PowerCampus Self-Service account will be created, and
• Your new Self-Service User Name and Password will be e-mailed to your preferred e-mail address.
5. Select Finish transfer process.
6. Access your e-mail account and open the message that you just received with your Self-Service User Name and Password.
7. Enter the following information:
8. Select Update.
9. Read the confirmation message, which states that your information has been updated.
10.Select Self-Service Home.
Field Description
Current Password Enter the Self-Service password EXACTLY as it appears in the e-mail that was sent to you.
New Password Enter the new password you want to use to log into PowerCampus Self-Service. Select a password which:
• Is easy for you to remember, but difficult for others to guess
• Includes upper-case and lower-case letters, and numbers
• Includes at least one special character, like !, @, #, $, %, or &
• Contains 7 to 16 characters (for example, My1SecretP@SSwrd)
Confirm New Password Enter your new password a second time for confirmation.
New Security Question If prompted, select the security question that should be used to identify you if you forget your password. Select a question for which other people would not be able to guess your answer.
New Security Answer If prompted, enter the answer to the specified New Security Question.
8 PowerCampus Self-Service Student Guide12/27/2012

PowerCampus Self-Service 8.3 Logging Into Self-Service
Requesting an Account
Requesting an Account
If the Request Account link is displayed on the Login window and you do not already have a PowerCampus Self-Service account, you can request that an account be created for you.
1. On the Login window, select Request Account.
2. On the Request Account page, enter the following information:
3. Select Request Account.
4. If your information is found in the system and you have an e-mail address on file:
• Your PowerCampus Self-Service account will be created, and
• Your User Name and Password will be e-mailed to you.
5. Select Return to Home.
6. Enter your User Name and Password, and select Login.
7. Enter the following information:
Field Description
System ID Enter your 9-digit People ID without hyphens. For example, 123456789.
First Name Enter your legal first name; not your nickname.
Last Name Enter your last name or surname.
Date of Birth Enter the date on which you were born. The date format is determined by your Web browser settings. For example, if your Web browser is set to display Web pages in the English language and you were born on September 22, 1989, you would enter 09/22/1989.
Field Description
Current Password Enter the Self-Service password EXACTLY as it appears in the e-mail that was sent to you.
New Password Enter the new password you want to use to log into PowerCampus Self-Service. Select a password which:
• Is easy for you to remember, but difficult for others to guess
• Includes upper-case and lower-case letters, and numbers
• Includes at least one special character, like !, @, #, $, %, or &
• Contains 7 to 16 characters (for example, My1SecretP@SSwrd)
PowerCampus Self-Service Student Guide 912/27/2012

Updating Your Personal Information PowerCampus Self-Service 8.3
Viewing Your User Account Information
8. Select Update.
9. Read the confirmation message, which states that your information has been updated.
10.Select Go to the Self-Service Home Page.
Updating Your Personal Information
From the My Profile tab, you may be able to update your user account information, specify whether you want to be listed in the on-line student directory, change your password, edit the security question and answer which are used to verify your identity if you forget your password, update your personal, address, and phone information, or invite others to access your data.
• Viewing Your User Account Information
• Listing Your Name in the On-line Directories
• Changing Your Password
• Changing Your Security Question
• Changing Your Personal Data
• Updating Your Ethnicity and Race Information
• Updating Your Address Information
• Updating Your Phone Numbers
• Inviting Relatives to Access Your Information
Viewing Your User Account Information
You can view your user account information. If allowed by the school, you can also edit your e-mail address.
1. Select the My Profile tab.
Confirm New Password Enter your new password a second time for confirmation.
New Security Question If prompted, select a security question for which other people would not be able to guess your answer.
New Security Answer If prompted, enter the answer to the specified New Security Question.
Field Description
10 PowerCampus Self-Service Student Guide12/27/2012

PowerCampus Self-Service 8.3 Updating Your Personal Information
Listing Your Name in the On-line Directories
2. Select the Account Information menu item.
3. On the Account Information page, view your user account information.
4. If allowed by the school, enter any necessary changes to your e-mail address.
• Update your E-mail Address, because it will be used to keep you informed of personal and campus activities.
• Select Save to record your changes.
Listing Your Name in the On-line Directories
Specify whether you want to include your name in any of the on-line directories in which you could be listed.
1. Select the My Profile tab.
2. Select the Account Information menu item.
3. Select the Directory Settings option.
4. Select Directory Privacy Statement to read information about disclosing your information in an on-line directory.
5. For each directory that is listed on the page, follow these steps.
• Read the Description about the on-line directory, which should tell you who will be able to access the directory.
• Choose your Status for the on-line directory.
6. Select Save to record your on-line directory selections.
Changing Your Password
If you logged in with your user name and password, and did not need to follow other steps to sign in, you will be able to change your password. We recommend that you change your password to something that is easy for you to remember, but is difficult for others to guess.
1. Select the My Profile tab.
2. Select the Account Information menu item.
3. Select the Password option.
Status Description
Include Me If you select Include Me, your name will be listed in the on-line directory, unless your records state that you do not want your information to be released.
Exclude Me If you select Exclude Me, your name will NOT be listed in the on-line directory.
PowerCampus Self-Service Student Guide 1112/27/2012

Updating Your Personal Information PowerCampus Self-Service 8.3
Changing Your Security Question
4. On the Change Password page, enter the following information:
5. Select Save to record your new password information.
Changing Your Security Question
If you logged in with your user name and password, and did not need to follow other steps to sign in, you will be able to change the security question and answer which is used to verify your identity when you forget your password.
1. Select the My Profile tab.
2. Select the Account Information menu item.
3. Select the Security Question option.
4. On the Change Security Question page, enter your Password.
5. Select your New Security Question. Choose a question for which other people would not be able to guess your answer.
6. Enter your New Security Answer.
7. Select Save to record your changes.
Changing Your Personal Data
You can view and update the personal information that is currently on file for you, such as your marital status, religion, and citizenship.
1. Select the My Profile tab.
2. Select the Personal Information menu item.
3. On the Personal Information page, review your Current Information.
Field Description
Current Password Enter the password that you are currently using to log into PowerCampus Self-Service.
New Password Enter the new password you want to use to log into PowerCampus Self-Service. Select a password which:
• Is easy for you to remember, but difficult for others to guess
• Includes upper-case and lower-case letters, and numbers
• Includes at least one special character, like !, @, #, $, %, or &.
• Contains 7 to 16 characters (for example, My1SecretP@SSwrd).
Confirm New Password Enter your new password again for confirmation.
12 PowerCampus Self-Service Student Guide12/27/2012
PowerCampus Self-Service 8.3 Updating Your Personal Information
Updating Your Ethnicity and Race Information
4. If you need to update any of your information, select Edit.
5. Enter all the necessary changes.
6. Select Submit to save your changes.
7. Review your information.
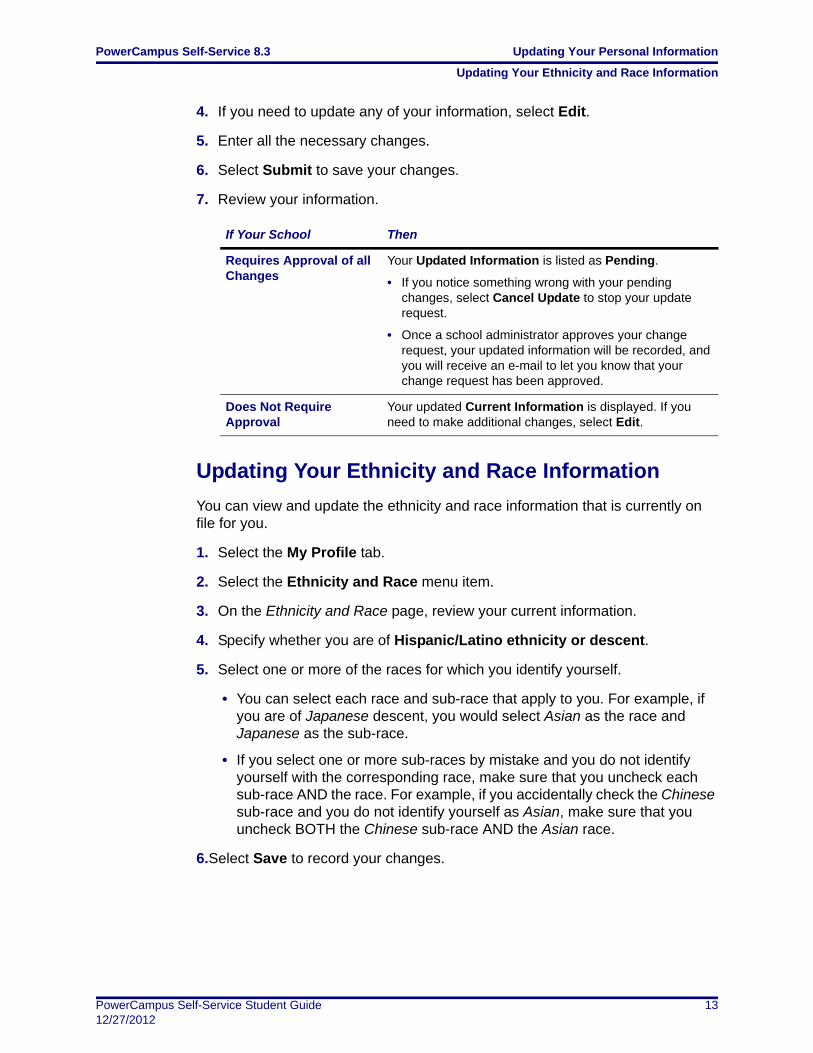
Updating Your Ethnicity and Race Information
You can view and update the ethnicity and race information that is currently on file for you.
1. Select the My Profile tab.
2. Select the Ethnicity and Race menu item.
3. On the Ethnicity and Race page, review your current information.
4. Specify whether you are of Hispanic/Latino ethnicity or descent.
5. Select one or more of the races for which you identify yourself.
• You can select each race and sub-race that apply to you. For example, if you are of Japanese descent, you would select Asian as the race and Japanese as the sub-race.
• If you select one or more sub-races by mistake and you do not identify yourself with the corresponding race, make sure that you uncheck each sub-race AND the race. For example, if you accidentally check the Chinese sub-race and you do not identify yourself as Asian, make sure that you uncheck BOTH the Chinese sub-race AND the Asian race.
6.Select Save to record your changes.
If Your School Then
Requires Approval of all Changes
Your Updated Information is listed as Pending.
• If you notice something wrong with your pending changes, select Cancel Update to stop your update request.
• Once a school administrator approves your change request, your updated information will be recorded, and you will receive an e-mail to let you know that your change request has been approved.
Does Not Require Approval
Your updated Current Information is displayed. If you need to make additional changes, select Edit.
PowerCampus Self-Service Student Guide 1312/27/2012

Updating Your Personal Information PowerCampus Self-Service 8.3
Updating Your Address Information
Updating Your Address Information
You can view and update the address information that is currently on file for you.
• Editing Your Preferred Address
• Adding a New Address
• Viewing and Managing Your Addresses
Editing Your Preferred Address
You can update the Current Preferred Address that you want us to use to contact you.
1. Select the My Profile tab.
2. Select the Addresses menu item.
3. View your Current Preferred address.
4. Select Edit Address.
5. Enter the necessary changes to your preferred address.
6. Select Save to record your changes.
Adding a New Address
If you will be residing in a different address in the future, you can add that address information.
1. Select the My Profile tab.
2. Select the Addresses menu item.
3. View your Current Preferred address.
4. Select Add Address.
5. Enter the information for the new address.
For This Field Enter
Address Type A description of the address that you want us to use to contact you (for example, home address, parent’s address, local address).
House Number The number that identifies the location of the house.
Address Line 1, 2, 3, 4
Enter the first line of the street address on Address Line 1. Then, as needed, use the other address lines.
City The city in which the address is located.
State/Province The state in the address is located.
Postal Code The postal code for the address.
14 PowerCampus Self-Service Student Guide12/27/2012

PowerCampus Self-Service 8.3 Updating Your Personal Information
Updating Your Address Information
6. Select Save.
• If your school requires approval of address changes, the Status of your new address will be listed as Pending on the Manage Addresses page and you will not be able to edit it until it is approved.
• If your school does not require approval, your new address will be recorded.
Viewing and Managing Your Addresses
You can view all of your address information and make any necessary changes.
1. Select the My Profile tab.
2. Select the Addresses menu item.
3. Select Manage Addresses.
4. View your Current Preferred address at the top of the list of addresses.
5. Choose to display your addresses in the Card View or List View.
6. Follow the corresponding steps.
Country The country in which the address is located.
Effective Date The date on which this address should start being used.
Recurring If the address will be used again in the future, check this option.
To Follow These Steps
Change your Preferred Address
1. For the address you want us to use to contact you, select Make Preferred.
2. Select OK to confirm that you want to change your preferred address.
Add a New Address 1. Select Add Address on the Card View or Add Address on the List View.
2. Enter the information for your new address.
3. Select Save to record your new address.
Edit an Address 1. For the address you need to update, select Edit.
2. Enter the necessary changes to the address.
3. Select Save to record your address changes.
Delete an Address 1. For the address you need to delete, select Delete.
2. Select OK to confirm that you want to delete the address.
For This Field Enter
PowerCampus Self-Service Student Guide 1512/27/2012

Updating Your Personal Information PowerCampus Self-Service 8.3
Updating Your Phone Numbers
Updating Your Phone Numbers
You can review and update the list of phone numbers that you want us to use to contact you. You can add a new phone number, edit or delete an existing phone number, or change your primary phone number.
• Adding a New Phone Number
• Changing a Phone Number
• Deleting a Phone Number
• Setting Your Primary Phone Number
Adding a New Phone Number
You can enter information about other phone numbers that you want us to use to contact you.
1. Select the My Profile tab.
2. Select the Phone Numbers menu item.
3. View your current list of phone numbers.
4. Select Add a Phone Number.
5. Enter the information for the new phone number.
6. Select Save to record the information for the phone number.
Field Description
Phone Type Select the type of phone number that you want us to use to contact you. For example, Cell Phone.
Description The system will automatically display a description for the Phone Type you selected. You can change the description so that it clearly identifies your phone number. For example, My Cell Phone, Work Number, Dad’s Cell.
Country Select the country that is associated with the phone number.
Phone Number Enter just the numbers in the phone number, for example, 123456789. Do not enter any spaces or special characters. The phone number will automatically be saved and displayed in the specified country format.
Do Not Call Reason If you do not want us to use this number to contact you, specify the reason why.
16 PowerCampus Self-Service Student Guide12/27/2012

PowerCampus Self-Service 8.3 Updating Your Personal Information
Updating Your Phone Numbers
Changing a Phone Number
You can update the information about any of the phone numbers you want us to use to contact you.
1. Select the My Profile tab.
2. Select the Phone Numbers menu item.
3. View your current list of phone numbers.
4. To the right of the phone number you want to update, select Edit.
5. Update the information for the specified phone number.
6. Select Save to record your changes.
Deleting a Phone Number
You can delete the phone numbers that you no longer want us to use to contact you.
1. Select the My Profile tab.
2. Select the Phone Numbers menu item.
3. View your current list of phone numbers.
4. To the right of the phone number you want to remove from the list, select Delete.
5. Select OK to confirm that you want to delete the phone number.
Field Description
Phone Type Select the type of phone number that you want us to use to contact you. For example, Cell Phone.
Description The system will automatically display a description for the Phone Type you selected. You can change the description so that it clearly identifies your phone number. For example, My Cell Phone, Work Number, Dad’s Cell.
Country Select the country that is associated with the phone number.
Phone Number Enter just the numbers in the phone number, for example, 123456789. Do not enter any spaces or special characters. The phone number will automatically be saved and displayed in the specified country format.
Do Not Call Reason If you do not want us to use this number to contact you, specify the reason why.
PowerCampus Self-Service Student Guide 1712/27/2012

Inviting Relatives to Access Your Information PowerCampus Self-Service 8.3
Sending an Invitation
Setting Your Primary Phone Number
From your list of phone numbers, you can specify the primary phone number you want us to use to contact you.
1. Select the My Profile tab.
2. Select the Phone Numbers menu item.
3. View your current list of phone numbers.
4. To the right of the phone number you want to make your primary number, select Make Primary.
5. Select OK to confirm that you want to make the phone number your primary number.
Your primary phone number will be displayed in bold at the top of the list. If you ever need to delete your primary phone number, you must first make another number your primary phone number.
Inviting Relatives to Access Your Information
You can invite anyone who is listed as your relative in PowerCampus and has a PowerCampus People ID to use the Self-Service application to access your information. For example, you can invite your parents to view your account balance and make a payment on your behalf.
• Sending an Invitation
• Managing Your Invitations
• Managing Your Shared Users
Sending an Invitation
If you want to allow one of your relatives to access your information, follow these steps to send them an invitation.
1. Select the My Profile tab.
2. Select the Shared Access menu item.
3. Select the Invite a User option.
18 PowerCampus Self-Service Student Guide12/27/2012

PowerCampus Self-Service 8.3 Inviting Relatives to Access Your Information
Sending an Invitation
4. For the relative who you want to give access to your information, specify the following information.
5. Select Send Invitation. The system will send your invitation to your relative’s e-mail address.
6. Select OK to confirm that you want to share your information with the specified relative.
Field Description
Relative Everyone who is listed as your relative in PowerCampus and has a People ID will be listed in the drop-down list. Select the relative who you want to invite to access your information via the Self-Service application.
E-mail Address If your relative has a preferred e-mail address on file, it will be displayed automatically. If no e-mail address appears, or the relative prefers that we use a different e-mail address, enter your relative’s e-mail address.
View Academic Plan If you want the specified relative to be able to view your academic plan, check this option.
View Schedule If you want the specified relative to be able to view your course schedule, check this option.
View Balance If you want the specified relative to be able to view your account balance, check this option. If on-line credit card payments are allowed, your relative will also be able to make a payment toward your account balance.
View Financial Aid If you want the specified relative to be able to view your financial aid information, check this option.
View Transcript If you want the specified relative to be able to view your unofficial transcript, check this option.
View Grade Report If you want the specified relative to be able to view your grades, check this option.
View Stop List If you want the specified relative to be able to view your Stop List to see if anything is preventing you from completing some processes (for example, registering for classes), check this option.
View Address If you want the specified relative to be able to view your addresses, check this option.
Disclosure You MUST view and accept the Disclosure Statement before your invitation can be sent to the specified relative.
PowerCampus Self-Service Student Guide 1912/27/2012

Inviting Relatives to Access Your Information PowerCampus Self-Service 8.3
Managing Your Invitations
Managing Your Invitations
Once you have invited one or more of your relatives to access your information, you should review the list to see who has accepted your invitation.
1. Select the My Profile tab.
2. Select the Shared Access menu item.
3. Select the Manage Invitations option.
4. Review the list of relatives who you have invited to share your information.
5. If you decide not to share your information with a relative, or if he or she does not accept your invitation before it expires, you can Remove him or her invitation. The relative will be notified by e-mail that he or she is no longer invited to access your information.
Managing Your Shared Users
Once you have invited one or more of your relatives to access your information, you should review the list to make sure that you have allowed them access to only the information you really want to share.
1. Select the My Profile tab.
2. Select the Shared Access menu item.
3. Select the Manage User Access option.
4. Review the list of relatives who you have invited to share your information.
Field Description
Name The name of the relative you have invited to share your information.
E-mail Address The e-mail address that was used to notify the relative that he or she was invited to share your information.
When Invited The date on which you sent the relative the invitation to share your information.
Valid Until If the relative does not accept your invitation via PowerCampus Self-Service by this date, he or she will not be able to access your information.
20 PowerCampus Self-Service Student Guide12/27/2012

PowerCampus Self-Service 8.3 Inviting Relatives to Access Your Information
Managing Your Shared Users
5. Enter any necessary changes.
6. Verify the access rights for your shared users and determine if you need to make any other changes.
To Follow These Steps
Stop Sharing with a Relative
For any relative with whom you have decided NOT to continue sharing information:
1. Find the person’s name in the list.
2. For THAT user, select Delete User.
3. Select OK to confirm that you want to stop sharing with this user.
4. Verify that the user has been removed from your list of shared users.
Change Which Information is Shared
For any relative whose access you want to change:
1. Find the person’s name in the list.
2. Check ONLY those features you want THIS person to access.
3. Select Save Changes.
4. Review the list of access rights for those users for whom you have just entered changes.
5. Select Confirm Changes to record your updates.
PowerCampus Self-Service Student Guide 2112/27/2012

Reviewing Your Student Status PowerCampus Self-Service 8.3
Checking Your Application Status
Reviewing Your Student Status
You can always view the list of courses in your cart. After you log in, you can also view the status of your applications for admission and view your Checklist of action items required by the school.
• Checking Your Application Status
• Viewing Your Checklist
• Viewing the Courses in Your Cart
Checking Your Application Status
You can display the current status of your application for admission to our school.
1. Select the Home tab.
2. Select the Application Status menu item.
3. View the following status information:
If you submitted more than one application, they will be sorted by Receipt Date and then Period, so that your most recent application will be listed first.
Field Typically Displays
Receipt Date The date on which your application was received by the school.
Period The term for which you have applied for admission.
College Attendance The academic level at which you have applied for admission (for example, graduate, undergraduate).
College The college to which you have applied.
Program, Degree,Curriculum
The program, degree, and curriculum for which you have applied.
Status and Date The current status of your application and the date this status was entered by our school.
Admit Period If our school administrators have chosen to display Application Decision information, the period for which you have been admitted will also be listed.
Decision and Date If our school administrators have chosen to display Application Decision information, the decision and the date on which the decision was made will also be listed.
22 PowerCampus Self-Service Student Guide12/27/2012

PowerCampus Self-Service 8.3 Reviewing Your Student Status
Viewing Your Checklist
Viewing Your Checklist
After you log in, you can view the list of tasks which have been assigned to you. At first, the Checklist will display any incomplete tasks due during the past three months or in the future. You can choose to view other items on your checklist.
1. Select the Home tab.
2. Select the Checklist menu item.
3. Select which checklist items you want to view.
4. Specify whether you want to Display Tasks due For the past three months and in the future, or the tasks that were due 3 to 6 months ago, 6 to 9 months ago, or 9 to 12 months ago, and select View.
5. Specify whether you want to view 10, 20, 30, 50, or 100 Results Per Page, and select Show.
6. Review the checklist items.
Select To View
Incomplete The checklist items that: are still pending, including those which are late (not required) or past due (required).
Completed The checklist items that you have completed.
Waived The checklist items that have been waived.
Canceled The checklist items that have been canceled.
Column Description
Priority The priority level that has been assigned to the Task to signify how important it is that you complete the Task. 999 is the lowest priority level.
Status The current status of the specified Task.
Task The task that has been assigned to you. If ! is displayed before the Task name, the Task is required.
• To sort the items in the checklist by task name, select the Task column heading.
• To view more details about the Task, select the Task name.
• If you have permission to change the status of Tasks, a drop-down list may display options which enable you to Cancel, Waive, or Reassign a Task, or mark it as Complete.
Contact Who you should contact about the Task.
• To sort the items in the checklist by contact name, select the Contact column heading.
• To view the contact’s phone number, e-mail address, and street address, select the Contact’s Name.
PowerCampus Self-Service Student Guide 2312/27/2012

Reviewing Your Student Status PowerCampus Self-Service 8.3
Viewing Your Checklist
7. Select a Task to view more information about it.
Assigned The date on which the Task was assigned to you. To sort the items in the checklist by the assigned date, select the Assigned column heading.
Due The date on which you need to complete the Task. To sort the items in the checklist by the due date, select the Due column heading.
Notes If the Notes column displays ..., you can select ... to display the notes about the Task.
Field Description
Action ID The ID number that has been assigned to the task.
Name The name of the task.
Type The type of action that needs to be taken. For example, a Meeting, Phone, or Missing Documents.
Contact Who you should contact about the task.
Priority The priority level that has been assigned to the Task to signify how important it is that you complete the Task. 999 is the lowest priority level.
Number ofReminders
The number of times you have been reminded to complete the specified task.
Required Whether or not you are required to complete the task.
Assigned The date and time at which the Task was assigned to you.
Due The date and time by which the task should be completed.
Completed Whether or not the task has been completed.
Action If you have permission to change the status of tasks in your checklist, you can select Choose Action to change the status of the task.
CancellationReason
If the task was cancelled, this field should display the reason why the task was cancelled.
Waived Reason If the task was waived, this field should display the reason why the task was waived.
Mode of Contact The type of contact that has been made with you. For example, Personal Interview or Left Message.
Response The type of response you received. For example, Positive Response.
Rating For example, Interested.
Duration The number of days, hours, and minutes spent working on this task. For example, if the task was to contact someone, you might enter the Duration as the length of the phone call.
Column Description
24 PowerCampus Self-Service Student Guide12/27/2012

PowerCampus Self-Service 8.3 Reviewing Your Student Status
Viewing Your Checklist
8. If you have permission to change checklist information and you need to change the Mode of Contact, Response, Rating, Duration, or Notes for the task, follow these steps:
• Select Edit.
• On the Edit Details window, enter the correct information for the task.
• Select Save to record your changes.
9. When you are finished viewing the task details, select Return to Checklist.
Completing a Task on Your Checklist
Once you have completed one of the tasks on your Checklist, you can mark the task as Complete, if you have permission to do so.
1. Select the Home tab.
2. Select the Checklist menu item.
3. Choose to view your Incomplete checklist items.
4. Display Tasks For the time period when the completed task was due: during the past three months and in the future, 3 to 6 months ago, 6 to 9 months ago, or 9 to 12 months ago, and select View.
5. Specify whether you want to view 10, 20, 30, 50, or 100 Results Per Page, and select Show.
6. Select the Task you want to mark as complete.
7. On the drop-down list, either:
• Select Details... to view more information about the Task. Then select Choose Action and Complete.
• Select Complete.
Notes If you have permission to view task Notes, this field will display any notes that have been entered about the task.
Field Description
PowerCampus Self-Service Student Guide 2512/27/2012

Reviewing Your Student Status PowerCampus Self-Service 8.3
Viewing Your Checklist
8. On the Complete Action Item window, enter the following information.
9. Select Save to record your changes.
Cancelling a Task on Your Checklist
If you have permission to cancel a task on your Checklist, follow these steps.
1. Select the Home tab.
2. Select the Checklist menu item.
3. Choose to view your Incomplete checklist items.
4. Display Tasks For the time period when the task you want to cancel was due: during the past three months and in the future, 3 to 6 months ago, 6 to 9 months ago, or 9 to 12 months ago, and select View.
5. Specify whether you want to view 10, 20, 30, 50, or 100 Results Per Page, and select Show.
6. Select the Task you want to cancel.
7. On the drop-down list, either:
• Select Details... to view more information about the Task. Then select Choose Action and Cancel.
• Select Cancel.
8. On the Cancel Action Item window, select the Reason for canceling the specified Task.
9. Enter Notes about why you are canceling the Task.
Field Description
Completed By Your User ID will automatically be displayed. If you are not the person who completed the task, change the User ID to the person who did complete the task.
If you do not know the user’s ID, you can Search for the user, as follows:
1. Enter all or part of the user’s first and/or last name.
2. Select Search.
3. To the right of the name of the person who completed the task, choose Select.
Completed Date Today’s date will automatically be displayed, but you can change it to the actual date on which the task was completed.
Completed Time Enter the time at which the task was completed.
Notes Any comments you want to enter about the task.
26 PowerCampus Self-Service Student Guide12/27/2012

PowerCampus Self-Service 8.3 Reviewing Your Student Status
Viewing Your Checklist
10.Select Save to record your changes.
Waiving a Task on Your Checklist
If you have permission to waive a task on your Checklist, follow these steps.
1. Select the Home tab.
2. Select the Checklist menu item.
3. Choose to view your Incomplete checklist items.
4. Display Tasks For the time period when the task you want to waive was due: during the past three months and in the future, 3 to 6 months ago, 6 to 9 months ago, or 9 to 12 months ago, and select View.
5. Specify whether you want to view 10, 20, 30, 50, or 100 Results Per Page, and select Show.
6. Select the Task you want to waive.
7. On the drop-down list, either:
• Select Details... to view more information about the Task. Then select Choose Action and Waive.
• Select Waive.
8. On the Waive Action Item window, select the Reason for waiving the specified Task.
9. Enter Notes about why you are waiving the Task.
10.Select Save to record your changes.
Reassigning a Task on Your Checklist
If you have permission to reassign a task on your Checklist to another user, follow these steps.
1. Select the Home tab.
2. Select the Checklist menu item.
3. Choose to view your Incomplete checklist items.
4. Display Tasks For the time period when the task you want to reassign was due: during the past three months and in the future, 3 to 6 months ago, 6 to 9 months ago, or 9 to 12 months ago, and select View.
5. Specify whether you want to view 10, 20, 30, 50, or 100 Results Per Page, and select Show.
6. Select the Task you want to reassign to someone else.
PowerCampus Self-Service Student Guide 2712/27/2012

Reviewing Your Student Status PowerCampus Self-Service 8.3
Viewing Your Checklist
7. On the drop-down list, either:
• Select Details... to view more information about the Task. Then select Choose Action and Reassign, or
• Select Reassign.
8. On the Reassign Action Item window, identify the user to whom you want to reassign the specified task.
• If you know the user’s People Code ID, enter the ID number.
• If you do not know the user’s People Code ID: select Search, specify the person’s first and/or last name, select Search, and Select the person.
9. Verify the user’s ID and name on the Reassign Action Item window.
10.Select Save to reassign the task to the specified user.
Creating a New Task
If you have permission to create tasks, you can add tasks to your own checklist or other users’ checklists.
1. Select the Home tab.
2. Select the Checklist menu item.
3. Select Add a Task.
4. Enter the following information about the new task.
Field Description
Action ID Select the type of task to be added to the checklist.
Required If the specified task is required by your school, this field will be selected.
Action Name Once you select the Action ID, the task name will appear.
Office The office, that is associated with the specified Action ID, will be displayed automatically, but you can select another office from the list.
Type Select the type of task being added to the checklist.
PersonResponsible
Your User ID will automatically be displayed, but you can change it to the User ID of the person who is being assigned the new task.
If you do not know the user’s ID, you can Search for the user, as follows:
1. Enter all or part of the user’s first and/or last name.
2. Select Search.
3. To the right of the name of the person who should be responsible for the task, choose Select.
28 PowerCampus Self-Service Student Guide12/27/2012

PowerCampus Self-Service 8.3 Reviewing Your Student Status
Viewing Your Checklist
Person toContact
Enter the User ID of the person who should be contacted regarding the new task.
If you do not know the user’s ID, you can Search for the user, as follows:
1. Enter all or part of the user’s first and/or last name.
2. Select Search.
3. To the right of the name of the person who should be contacted regarding the task, choose Select.
Mode of Contact The type of contact that has been made with you. For example, Personal Interview or Left Message.
Assigned The date and time at which the task was assigned.
Due The date and time at which the task is due to be completed.
Priority The priority level for the Task to signify how important it is that the task be completed. 999 is the lowest priority level.
Response If you are adding a task that has already been completed or is being waived or canceled, you can specify the type of response that was received, if any.
Rating If applicable, you can rate the response you received from the person you contacted.
Duration If this task has already been worked on, enter the number of days, hours, and minutes spent working on this task. For example, if the task was to contact someone, you might enter the Duration as the length of the phone call.
Year Specify the year for which this task is being added to the checklist.
Term Select the term for which this task is being added to the checklist.
Session Select the session for which this task is being added to the checklist.
Number of Reminders
If you are adding a task for which the person responsible has already been reminded to complete the task, enter the number of times the person has been reminded.
Notes Enter any details about the task.
Document If a document is necessary for completing the task, Browse to the location of the document.
Field Description
PowerCampus Self-Service Student Guide 2912/27/2012

Reviewing Your Student Status PowerCampus Self-Service 8.3
Viewing the Courses in Your Cart
5. Select Save to record the information about the task to be added to the checklist.
Viewing the Courses in Your Cart
You can view a list of the courses that you have placed in your shopping cart.
1. You can access your shopping cart in either of these ways:
• Select Cart at the top of the current page.
• Select the Home tab and then the Cart menu item.
• Select View Cart on the Section Search page after you add a course to your schedule.
2. View the information about the courses you have added to your shopping cart for each Academic Period (Year and Term, like 2007 Fall) and Session.
• Each Session and Academic Period will be listed as open or closed for registration, based on the Registration Group to which you belong and the current date.
• To view more information about a course, select the Course code.
3. Make any necessary changes to your shopping cart.
Actions If you are adding a task that has been completed, waived, OR canceled, select the corresponding Action.
• If the task has already been completed and you just want to keep a record of it on the checklist, select Completed.
• If the task has been waived and you just want to keep a record of it on the checklist, select Waived.
• If the task has been canceled and you just want to keep a record of it on the checklist, select Canceled.
Select To
Add Section Add a course section for the specified academic period (year and term). The Section Search page will then appear so you can find the course section.
Credit Type After you add a course section, specify whether you want to take the course for Credit, Non-Credit, as part of Continuing Education, and so on.
Remove Remove a course from your shopping cart that you have decided not to take.
Delete Session Remove ALL the courses from your shopping cart for the specified session.
Field Description
30 PowerCampus Self-Service Student Guide12/27/2012

PowerCampus Self-Service 8.3 Reviewing Your Academic Information
Determining Your Degree Requirements
4. Select View Schedule for an academic period (year and term) to view your class schedule, which includes:
• Any courses for which you are registered, and
• The courses that are listed in your shopping cart.
5. When you are ready to register for the courses listed for an academic period that is open for registration, select Register. The Registration page will then appear.
Reviewing Your Academic Information
You can display a list of the courses necessary for completing your degree requirements, view information about your academic plan, and create What If? plans to help you decide whether to change majors or minors.
• Determining Your Degree Requirements
• Viewing Your Academic Plan
• Creating a What If? Plan
Determining Your Degree Requirements
You can view the course requirements necessary for completing a specified academic plan for a particular year and term.
1. Select the Home tab.
2. Select the Degree Requirements menu item.
3. Select the Period.
4. Select the Program.
5. Select the Degree.
Empty Cart Remove ALL the courses from your shopping cart for the specified academic period (year and term).
Select To
PowerCampus Self-Service Student Guide 3112/27/2012
Reviewing Your Academic Information PowerCampus Self-Service 8.3
Determining Your Degree Requirements
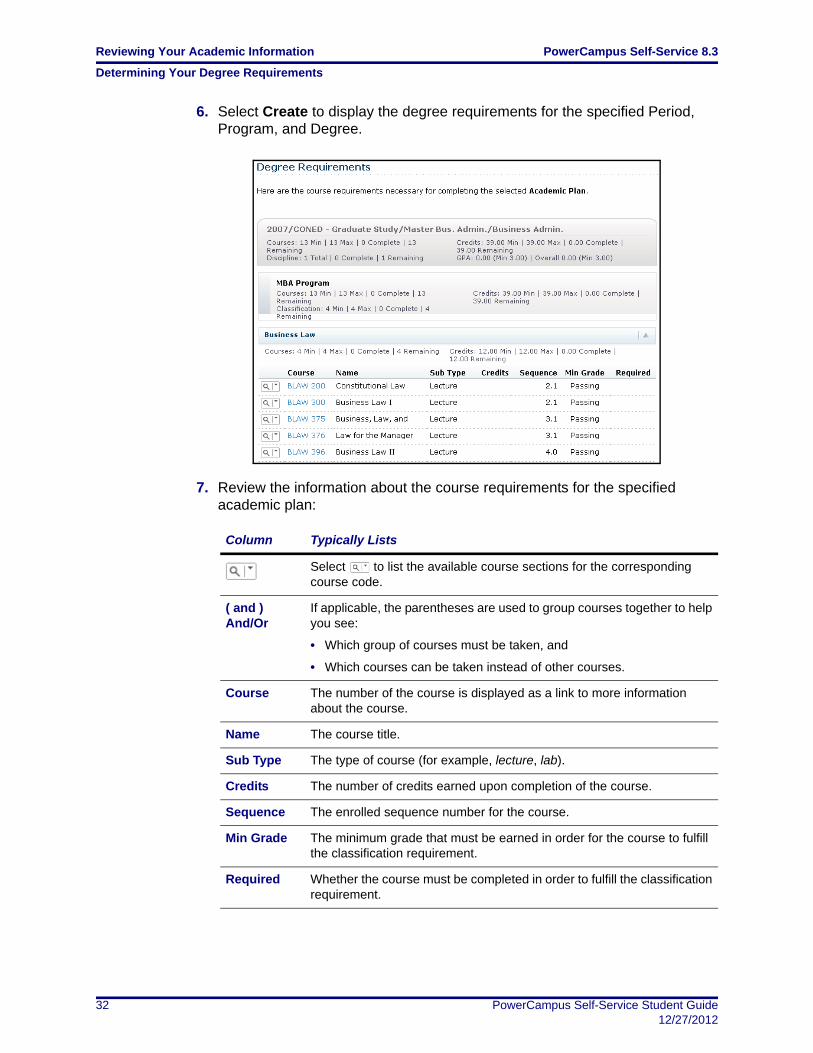
6. Select Create to display the degree requirements for the specified Period, Program, and Degree.
7. Review the information about the course requirements for the specified academic plan:
Column Typically Lists
Select to list the available course sections for the corresponding course code.
( and )And/Or
If applicable, the parentheses are used to group courses together to help you see:
• Which group of courses must be taken, and
• Which courses can be taken instead of other courses.
Course The number of the course is displayed as a link to more information about the course.
Name The course title.
Sub Type The type of course (for example, lecture, lab).
Credits The number of credits earned upon completion of the course.
Sequence The enrolled sequence number for the course.
Min Grade The minimum grade that must be earned in order for the course to fulfill the classification requirement.
Required Whether the course must be completed in order to fulfill the classification requirement.
32 PowerCampus Self-Service Student Guide12/27/2012

PowerCampus Self-Service 8.3 Reviewing Your Academic Information
Viewing Your Academic Plan
Viewing Your Academic Plan
You can view information about your current academic plan.
1. Select the Register tab.
2. Select the Academic Plan menu item.
3. Select the Academic Plan you want to view. The plan lists 3 levels of information:
• The name of your Program, Degree, and Curriculum will appear with a summary of the course and credit information compiled for each associated Discipline and Classification.
• Each Discipline will appear with a summary of the course and credit information for each associated classification.
• Each Classification will appear with a summary of the associated courses.
4. Specify which information you want to View.
5. Select Change.
Select This View To Display
Summary Course and credit totals for the courses you have already completed and the courses that are still remaining for each discipline and classification in your academic plan.
My Academic Plan A list of all the courses associated with your academic plan, which are complete, incomplete, optional pending completion, or optional and associated with complete classifications. Courses which are not associated with any of your academic plans appear at the end.
My Progress A list of the courses associated with your academic plan, which are complete, incomplete, or optional pending completion (except those associated with complete classifications). Courses which are not associated with any of your academic plans appear at the end.
Unassigned A list of the courses which you have completed or are in the process of taking which are not associated with any of your academic plans.
PowerCampus Self-Service Student Guide 3312/27/2012

Reviewing Your Academic Information PowerCampus Self-Service 8.3
Viewing Your Academic Plan
6. If you chose the My Academic Plan or My Progress view, review the information about the courses assigned to your academic plan:
Column Typically Lists
Status Your current status for the course:
• - You have completed the course and have received a grade that meets the minimum grade requirement.
• - You have registered for the course but have not yet received a grade.
• Below Min - You received a grade that does not meet the minimum grade requirement.
Select or to display more information about the course in your Academic Plan. In addition to the Year, Term, Course ID, Sub Type, Name, Credits, and Status, which are already listed on the Academic Plan page, you will see the Session and Section numbers, and your Final Grade (if you completed the course).
For courses which have not been completed, select to list the available course sections for the corresponding course code.
( and )And/Or
If applicable, the parentheses are used to group courses together to help you decipher which group of courses must be taken and which courses can be taken instead of other courses.
Course The number of the course is displayed as a link to more information about the course.
Name The course title.
Sub Type The type of course (for example, lecture, lab).
Credits The number of credits you will earn upon completion of the course.
Sequence The enrolled sequence number for the course.
Min Grade The minimum grade you must earn in order for the course to fulfill the classification requirement.
Required Whether you must complete the course in order to fulfill the classification requirement.
Custom Whether the course was changed from the standard requirement for your academic plan.
34 PowerCampus Self-Service Student Guide12/27/2012

PowerCampus Self-Service 8.3 Reviewing Your Academic Information
Viewing Your Academic Plan
7. If you chose the My Academic Plan or My Progress view, review the information about the courses, which you have taken or are currently taking, that are not assigned to your academic plan:
Column Typically Lists
Status Your current status for the course:
• - You have completed the course and have received a grade that meets the minimum grade requirement.
• - You have registered for the course but have not yet received a grade.
• Below Min - You received a grade that does not meet the minimum grade requirement.
For courses which have not been completed, select to list the available course sections for the corresponding course code.
Course The number of the course is displayed as a link to more information about the course.
Name The course title.
Sub Type The type of course (for example, lecture, lab).
Section The course section.
Final Grade Your final grade for the course (if you completed the course).
Credits The number of credits you will earn upon completion of the course.
Taken The term and session when you took this course.
Repeated If you took this course more than once, a check mark is displayed.
PowerCampus Self-Service Student Guide 3512/27/2012
Reviewing Your Academic Information PowerCampus Self-Service 8.3
Creating a What If? Plan
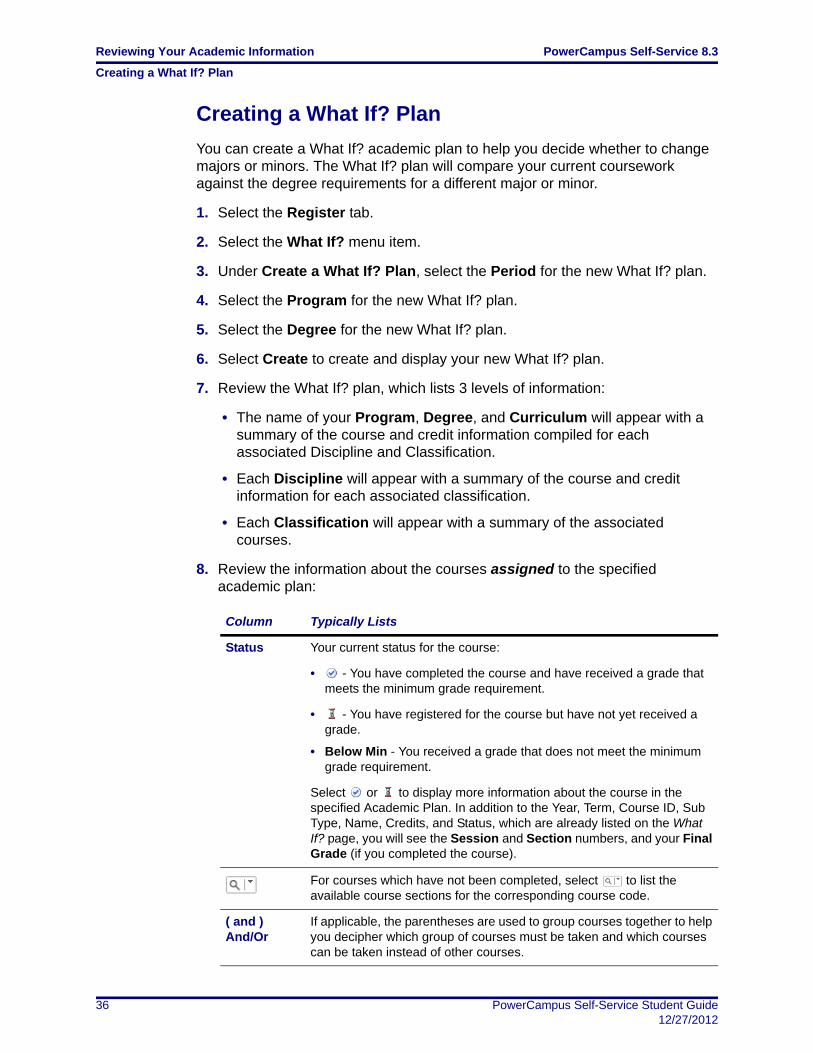
Creating a What If? Plan
You can create a What If? academic plan to help you decide whether to change majors or minors. The What If? plan will compare your current coursework against the degree requirements for a different major or minor.
1. Select the Register tab.
2. Select the What If? menu item.
3. Under Create a What If? Plan, select the Period for the new What If? plan.
4. Select the Program for the new What If? plan.
5. Select the Degree for the new What If? plan.
6. Select Create to create and display your new What If? plan.
7. Review the What If? plan, which lists 3 levels of information:
• The name of your Program, Degree, and Curriculum will appear with a summary of the course and credit information compiled for each associated Discipline and Classification.
• Each Discipline will appear with a summary of the course and credit information for each associated classification.
• Each Classification will appear with a summary of the associated courses.
8. Review the information about the courses assigned to the specified academic plan:
Column Typically Lists
Status Your current status for the course:
• - You have completed the course and have received a grade that meets the minimum grade requirement.
• - You have registered for the course but have not yet received a grade.
• Below Min - You received a grade that does not meet the minimum grade requirement.
Select or to display more information about the course in the specified Academic Plan. In addition to the Year, Term, Course ID, Sub Type, Name, Credits, and Status, which are already listed on the What If? page, you will see the Session and Section numbers, and your Final Grade (if you completed the course).
For courses which have not been completed, select to list the available course sections for the corresponding course code.
( and )And/Or
If applicable, the parentheses are used to group courses together to help you decipher which group of courses must be taken and which courses can be taken instead of other courses.
36 PowerCampus Self-Service Student Guide12/27/2012

PowerCampus Self-Service 8.3 Reviewing Your Academic Information
Creating a What If? Plan
9. Review the information about the courses, which you have taken or are currently taking, that are not assigned to the specified academic plan:
Course The number of the course is displayed as a link to more information about the course.
Name The course title.
Sub Type The type of course (for example, lecture, lab).
Credits The number of credits you will earn upon completion of the course.
Sequence The enrolled sequence number for the course.
Min Grade The minimum grade you must earn in order for the course to fulfill the classification requirement
Required Whether you must complete the course in order to fulfill the classification requirement.
Custom Whether the course was changed from the standard requirement for your academic plan.
Column Typically Lists
Status Your current status for the course:
• - You have completed the course and have received a grade that meets the minimum grade requirement.
• - You have registered for the course but have not yet received a grade.
• Below Min - You received a grade that does not meet the minimum grade requirement.
For courses which have not been completed, select to list the available course sections for the corresponding course code.
Course The number of the course is displayed as a link to more information about the course.
Name The course title.
Sub Type The type of course (for example, lecture, lab).
Section The course section.
Final Grade Your final grade for the course (if you completed the course).
Credits The number of credits you will earn upon completion of the course.
Taken The term and session when you took this course.
Repeated If you took this course more than once, a check mark is displayed.
Column Typically Lists
PowerCampus Self-Service Student Guide 3712/27/2012

Reviewing Your Academic Information PowerCampus Self-Service 8.3
Creating a What If? Plan
Viewing Your What If? Plans
You can view any of the What If? academic plans you have created. What If? plans will help you decide whether to change majors.
1. Select the Register tab.
2. Select the What If? menu item.
3. From the list of My What If? Plans, select the plan you want to view.
4. Review the What If? plan, which lists 3 levels of information:
• The name of the Program, Degree, and Curriculum will appear with a summary of the course and credit information compiled for each associated Discipline and Classification.
• Each Discipline will appear with a summary of the course and credit information for each associated classification.
• Each Classification will appear with a summary of the associated courses.
5. Review the information about the courses assigned to the specified academic plan:
Column Typically Lists
Status Your current status for the course:
• - You have completed the course and have received a grade that meets the minimum grade requirement.
• - You have registered for the course but have not yet received a grade.
• Below Min - You received a grade that does not meet the minimum grade requirement.
Select or to display more information about the course in the specified Academic Plan. In addition to the Year, Term, Course ID, Sub Type, Name, Credits, and Status, which are already listed on the What If? page, you will see the Session and Section numbers, and your Final Grade (if you completed the course).
For courses which have not been completed, select to list the available course sections for the corresponding course code.
( and )And/Or
If applicable, the parentheses are used to group courses together to help you decipher which group of courses must be taken and which courses can be taken instead of other courses.
Course The number of the course is displayed as a link to more information about the course.
Name The course title.
Sub Type The type of course (for example, lecture, lab).
38 PowerCampus Self-Service Student Guide12/27/2012

PowerCampus Self-Service 8.3 Reviewing Your Academic Information
Creating a What If? Plan
6. Review the information about the courses, which you have taken or are currently taking, that are not assigned to the specified academic plan:
Deleting a What If? Plan
You can delete any of the What If? academic plans you have created.
1. Select the Register tab.
2. Select the What If? menu item.
Credits The number of credits you will earn upon completion of the course.
Sequence The enrolled sequence number for the course.
Min Grade The minimum grade you must earn in order for the course to fulfill the classification requirement
Required Whether you must complete the course in order to fulfill the classification requirement.
Custom Whether the course was changed from the standard requirement for your academic plan.
Column Typically Lists
Status Your current status for the course:
• - You have completed the course and have received a grade that meets the minimum grade requirement.
• - You have registered for the course but have not yet received a grade.
• Below Min - You received a grade that does not meet the minimum grade requirement.
For courses which have not been completed, select to list the available course sections for the corresponding course code.
Course The number of the course is displayed as a link to more information about the course.
Name The course title.
Sub Type The type of course (for example, lecture, lab).
Section The course section.
Final Grade Your final grade for the course (if you completed the course).
Credits The number of credits you will earn upon completion of the course.
Taken The term and session when you took this course.
Repeated If you took this course more than once, a check mark is displayed.
Column Typically Lists
PowerCampus Self-Service Student Guide 3912/27/2012

Searching for Courses PowerCampus Self-Service 8.3
Searching for Available Course Sections
3. From the list of My What If? Plans, check the box to the left of the plan you want to delete.
4. Select Delete to remove the specified What If? plan.
Searching for Courses
You can search for Course Sections that are available for a specified term, or search the Course Catalog for courses offered for a specified class level, curriculum, credit type, and so on.
• Searching for Available Course Sections
• Searching for Courses in the Course Catalog
Searching for Available Course Sections
You can search for the course sections that are available for a specified course and term.
1. Perform a basic or an advanced course section search.
For Follow These Steps
BasicSearch
Either:
• In the Search field at the top of any Web page, select Course Sections, enter a keyword (for example, Math), and select Search, or
• Select the Search tab and then the Section Search menu item. Then specify a Keyword, Course Code, or academic period for the courses you want to find, and select Search.
AdvancedSearch
1. Select the Search tab.
2. Select the Section Search menu item.
3. On the Section Search page, select Advanced Search
4. Enter all the information you know about the course sections you want to find. You can enter part of the course information and use the _ wildcard to search for course sections. For example:
• Com would find all Composition and Computer courses.
• Com_101 would find the Composition 101 and Computer 101 courses.
5. Select Search.
40 PowerCampus Self-Service Student Guide12/27/2012
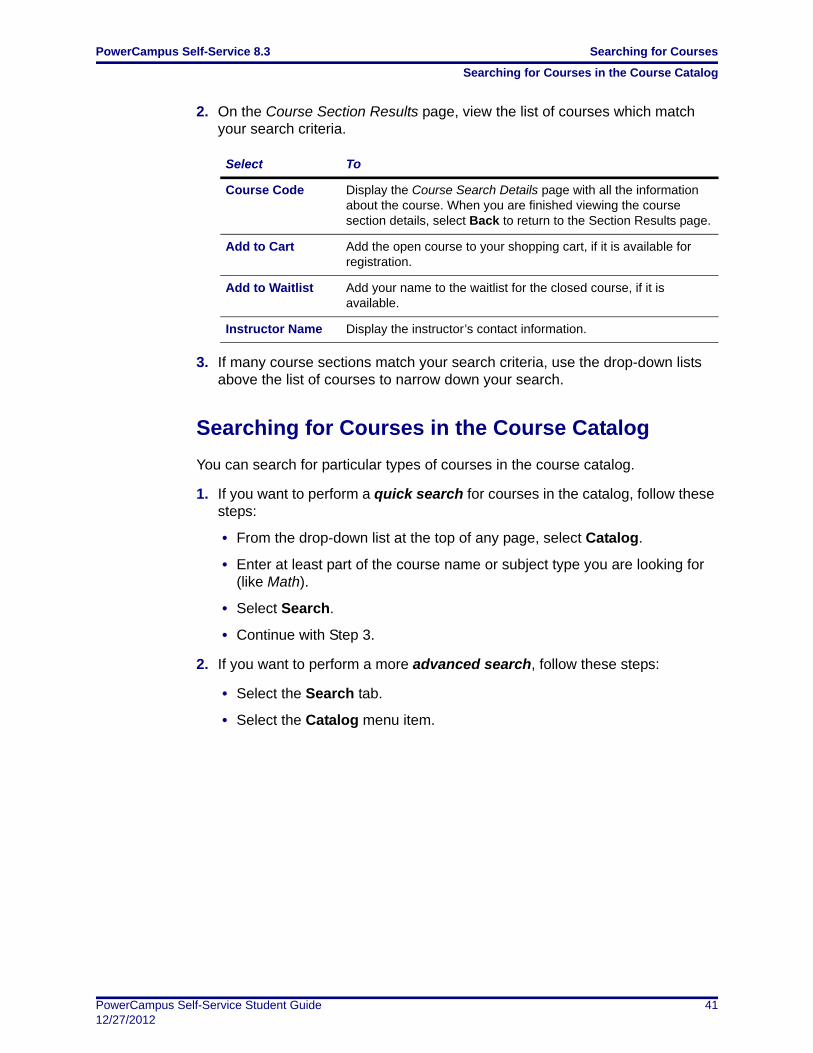
PowerCampus Self-Service 8.3 Searching for Courses
Searching for Courses in the Course Catalog
2. On the Course Section Results page, view the list of courses which match your search criteria.
3. If many course sections match your search criteria, use the drop-down lists above the list of courses to narrow down your search.
Searching for Courses in the Course Catalog
You can search for particular types of courses in the course catalog.
1. If you want to perform a quick search for courses in the catalog, follow these steps:
• From the drop-down list at the top of any page, select Catalog.
• Enter at least part of the course name or subject type you are looking for (like Math).
• Select Search.
• Continue with Step 3.
2. If you want to perform a more advanced search, follow these steps:
• Select the Search tab.
• Select the Catalog menu item.
Select To
Course Code Display the Course Search Details page with all the information about the course. When you are finished viewing the course section details, select Back to return to the Section Results page.
Add to Cart Add the open course to your shopping cart, if it is available for registration.
Add to Waitlist Add your name to the waitlist for the closed course, if it is available.
Instructor Name Display the instructor’s contact information.
PowerCampus Self-Service Student Guide 4112/27/2012

Searching for Courses PowerCampus Self-Service 8.3
Searching for Courses in the Course Catalog
• On the Course Catalog page, enter any of the following search criteria.
3. Review the list of courses which match your search criteria.
Field Description
Course Code If you know the Course Code, you can search for one particular course in the catalog.
Program Specify whether you are looking for an Undergraduate or Graduate course, for example.
Curriculum Specify whether you are looking for a course within a particular course of study (Accounting, Anthropology, Business Law, Fine Arts, and so on).
Subtype Specify whether you are looking for a certain type of course (Independent Study, Lab, Lecture, and so on).
Credit Type Specify whether you are looking for a Credit, Non-Credit, or Continuing Education course, for example.
Class Level Specify whether you are looking for a course that is available at your level (Freshman, Sophomore, Junior, Senior, Graduate, and so on).
Department Specify the academic department through which the course should be offered (Accounting, Art, Biology, Business, and so on).
College Specify the College you are interested in (Engineering, Liberal Arts, Nursing, and so on).
Population Specify whether you are looking for a course that is open to a particular group of students (Day Students, Employees, Evening Students, Senior Citizens, Transfers, and so on).
Nontraditional If you are looking for a special course, specify the type (part of an Accelerated Program, a Correspondence course, and so on).
Select To
Refine Search Enter additional search criteria to narrow down the list of courses.
New Search Search for a different type of course.
Course Code Display more information about a course.
Find Course Sections Search for available course sections for the course.
42 PowerCampus Self-Service Student Guide12/27/2012

PowerCampus Self-Service 8.3 Searching for People
Searching for Alumni
Searching for People
You can search for people in any of the on-line directories for which you have access.
• Searching for Alumni
• Searching for Faculty Members
• Searching for Staff Members
• Searching for Other Students
Searching for Alumni
You can use the on-line alumni directory to search for information about students who have graduated from our school.
1. Select the Search tab.
2. Select the Directory menu item.
3. Select the Alumni option.
4. Enter all the information you know about the alumni member you want to find. You MUST specify at least the first letter of the person’s First Name, Last Name, or Former Name.
• First Name, Middle Name, Last Name Prefix, Last Name, or Former name
• Program, Degree, or Curriculum
• Class Year
• Affiliation Year
5. If you want to limit the number of alumni members who are to be listed on each page, choose the Results per Page.
6. Select Search.
7. View the list of alumni members who match your search criteria.
• The list is sorted by the alumni members’ last names.
• If the list is too long, select Refine Search to specify additional search criteria.
• If the list does not include the person you are looking for, select New Search.
PowerCampus Self-Service Student Guide 4312/27/2012

Searching for People PowerCampus Self-Service 8.3
Searching for Faculty Members
Searching for Faculty Members
You can use the on-line faculty directory to search for information about faculty members at our school.
1. Select the Search tab.
2. Select the Directory menu item.
3. Select the Faculty option.
4. Enter all the information you know about the faculty member you want to find. You MUST specify at least the first letter of the person’s First Name, Last Name, or Former Name.
• First Name, Middle Name, Last Name Prefix, Last Name, or Former name
• Department
Note: If you specify the Department, the search results will only list people who are recorded as Faculty. If other people are included in the faculty directory, like faculty assistants or department heads, they may not be listed in the search results when you specify the Department.
5. If you want to limit the number of faculty members who are to be listed on each page, choose the Results per Page.
6. Select Search.
7. View the list of faculty members who match your search criteria.
• The list is sorted by the faculty members’ last names.
• If the list is too long, select Refine Search to specify additional search criteria.
• If the list does not include the person you are looking for, select New Search.
Searching for Staff Members
You can use the on-line staff directory to search for information about staff members who are working at our school.
1. Select the Search tab.
2. Select the Directory menu item.
3. Select the Staff option.
44 PowerCampus Self-Service Student Guide12/27/2012

PowerCampus Self-Service 8.3 Searching for People
Searching for Other Students
4. Enter all the information you know about the staff member you want to find.
• First Name
• Middle Name
• Last Name Prefix
• Last Name
• Former name
5. If you want to limit the number of staff members who are to be listed on each page, choose the Results per Page.
6. Select Search.
7. View the list of staff members who match your search criteria.
• The list is sorted by the staff members’ last names.
• If the list is too long, select Refine Search to specify additional search criteria.
• If the list does not include the person you are looking for, select New Search.
Searching for Other Students
You can use the on-line student directory to search for information about other students who are currently enrolled at our school.
• The student directory will list those students who are enrolled in one or more of the academic periods included in the directory.
• The student directory will exclude students who have graduated or withdrawn from the most recent academic period within the specified range of academic periods included in the directory.
• The student directory will exclude students who have chosen not to be listed in the directory.
PowerCampus Self-Service Student Guide 4512/27/2012

Searching for People PowerCampus Self-Service 8.3
Searching for Other Students
To search for students, follow these instructions.
1. Select the basic or advanced search.
2. View the list of students who match your search criteria.
• The list is sorted by the students’ last names.
• To display only those students who are currently enrolled in Continuing Education courses or as freshmen or seniors, for example, select the Class Level drop-down list.
• If the list is too long, select Refine Search to specify additional search criteria.
• If the list does not include the person you are looking for, select New Search.
For Follow These Steps
BasicSearch
1. In the Search field at the top of any Web page, select Directory.
2. Enter all or part of the person’s name (for example, Smith).
3. Select Search.
AdvancedSearch
1. Select the Search tab.
2. Select the Directory menu item.
3. On the Directory page, select Student Directory.
4. Enter all the information you know about the student you want to find. You MUST specify at least the first letter of the person’s First Name, Last Name, or Former Name.
• First Name, Middle Name, Last Name Prefix, Last Name, or Former Name
• Class Level
• Program, Degree, or Curriculum
5. If you want to limit the number of students who are listed on each search results page, choose the Results per Page.
6. Select Search.
46 PowerCampus Self-Service Student Guide12/27/2012
PowerCampus Self-Service 8.3 Registering for Traditional Courses
Finding Your Course Sections
Registering for Traditional Courses
You can register for traditional courses within a specified academic period.
1. Select the Register tab.
2. Select the Traditional Courses menu item.
3. Select the Period for which you want to register.
• If the status for the period is OK to register, select the Period and continue with the registration process.
• If the status for the period is NOT OK to register, you are not authorized to register for this Period at this time. You can contact your advisor for more information.
4. Find the courses you want to take and add them to your cart. Refer to the instructions for Finding Your Course Sections.
5. Follow the instructions for Verifying the List of Courses in Your Cart.
6. See how your schedule looks. Refer to the instructions for Checking Your Class Schedule.
7. Pay for your courses. Refer to the instructions for Registering for the Courses in Your Cart.
Finding Your Course Sections
After you select the academic Period for which you want to register for courses, the system will check to see if Block Web Registration has been set up for that Period and your academic data.
• If Block Web Registration has been set up, the Block Web Registration page will appear, so you can register for groups of courses at one time. Continue with the instructions for Choosing a Group of Courses.
• If Block Web Registration has NOT been set up, continue with the instructions for Choosing Individual Courses.
Choosing a Group of Courses
If the system displays the Block Web Registration page after you select the Period for which you want to register for courses, follow these steps to choose your courses. Please Note that the next time you choose to register for courses in the SAME Period, the Block Web Registration page will not appear. The available Course Groups will only be displayed the FIRST time you register for courses for a Period. You can, however, search for individual courses.
PowerCampus Self-Service Student Guide 4712/27/2012

Registering for Traditional Courses PowerCampus Self-Service 8.3
Finding Your Course Sections
1. On the Block Web Registration page, review the courses included in each Course Group.
2. To register for the courses in a Course Group, select Add Group.
3. Depending on the restriction level that has been specified for the Course Group, you may be able to select individual courses from the course group.
4. Select Next to add the selected courses to your cart.
5. Make sure your cart lists only the courses you want to take.
• To return to the previous page and reselect courses, select Previous.
• To register for the courses in your cart, select Next.
6. Select View Schedule to see how your schedule looks with the course sections that are in your cart (and those for which you are already registered or are on the waitlist).
7. When you are finished viewing your schedule, select Close Window.
Continue the registration process by Registering for the Courses in Your Cart.
Choosing Individual Courses
If the system does NOT display the Block Web Registration page after you select the Period for which you want to register for courses, follow these steps to choose your courses.
1. Select Section Search.
2. Enter your search criteria, and Search for the course sections you want to take.
3. View the list of course sections that match your criteria. If too many course sections are listed, get more specific:
• Select Refine Search, or
• Choose a specific Period, Session, Department, and so on from the drop-down lists at the top of the Section Search Results page.
4. Select the courses you want to take:
• For any open course section you want to take, select Add to Cart.
• For any closed course section you want to take, select Add to Waitlist.
48 PowerCampus Self-Service Student Guide12/27/2012

PowerCampus Self-Service 8.3 Registering for Traditional Courses
Verifying the List of Courses in Your Cart
5. Review the Course Added confirmation message that appears above the list of Course Section Results.
6. Continue searching for sections and adding the desired course sections to your schedule.
Continue the registration process by Verifying the List of Courses in Your Cart.
Verifying the List of Courses in Your Cart
1. After you add a course to your cart, you can choose to View Cart.
2. As necessary, update the list of courses in your cart:
3. Select View Schedule to see how your schedule looks with the course sections that are in your cart (and those for which you are already registered or are on the waitlist).
4. When you are finished viewing your schedule, select Close Window.
5. When you are ready to register for the courses in your cart for an open registration period, select Registration (or Register on the Cart page).
Continue the registration process by Registering for the Courses in Your Cart.
Select To
View Cart Display the current list of courses in your cart.
RequestPermission
If you must ask the instructor for permission to take the course, Request Permission also appears for the course. You can request permission now or when you are viewing your cart.
1. Select Request Permission.
2. On the Request Permission window, view the list of prerequisites for the course,
3. In the Comments field, specify why you want to take this course.
4. Select Send Request to send your request to the instructor.
Select To
Add Section Search for the course sections you want to add to your cart.
Remove Remove a course that you no longer want to take.
Delete Session Remove all the courses for the specified session.
Empty Cart Remove all the courses for the specified year an term.
PowerCampus Self-Service Student Guide 4912/27/2012

Registering for Traditional Courses PowerCampus Self-Service 8.3
Checking Your Class Schedule
Checking Your Class Schedule
1. On the Cart page, select View Schedule.
2. View your schedule with the course sections that are in your cart (and those for which you are already registered or are on the waitlist).
3. When you are finished viewing your schedule, select Close Window.
Continue the registration process by Registering for the Courses in Your Cart.
Registering for the Courses in Your Cart
1. Select Registration (or Register on the Cart page).
2. Select the academic Period for which you want to register. (You can only select a period for which the Status is OK to register.)
3. Review your Schedule to verify the course number, duration, session, number of credits, credit type, schedule, location, instructor, and status for each course.
4. If the course list is correct, select Next.
5. On the Finalize Registration page, review the list of courses and the current Status for each course.
Select To
Course Number Display more information about the course (registration type, fees, prerequisites, corequisites, available credit types, class size, status, and the student populations allowed to take the course.
Section Search Choose another course.
Drop Drop a course, for which you have already registered, that is allowed to be dropped.
Remove Remove a course from your shopping cart.
View Schedule Display your class schedule with the courses on the Registered Course list and in your Shopping Cart.
Status Description
Registered You are registered for the course.
Awaiting Advisor Approval
You have added the course to your schedule, but your registration in the course is still awaiting approval from your advisor.
Drop Request Denied Your request to drop the registered course has been denied by your advisor.
Add Request Denied Your request to add the course has been denied by your advisor.
50 PowerCampus Self-Service Student Guide12/27/2012

PowerCampus Self-Service 8.3 Registering for Traditional Courses
Registering for the Courses in Your Cart
6. Review the New Charges.
• If you are ready to accept the New Charges and the Payment Due, and finish the Registration process, continue with Step 7.
• If you want to make changes to your list of registered courses, select Previous to return to the Review Schedule page.
7. If on-line payments are being accepted, you can choose ONE of the following options. (If on-line payments are NOT being accepted, these options will not appear on the page and you will be billed for your courses.)
8. On the Complete Registration page, view your registration confirmation message.
9. Select View Schedule. You may want to print this final schedule, so you have a printout to refer to as you walk around campus.
Payment Option Description
Bill Me Later If your course schedule lists the courses that you want to take, but you are NOT ready to make a credit card payment, select the Bill Me Later option. We will send you a bill for your registration.
1. Select Bill Me Later.
2. Select Next to continue with the registration process.
Pay My Balance of If your course schedule lists the courses that you want to take, AND you want to make a credit card payment for the TOTAL cost of your registration, select the Pay My Balance of option.
1. Select Pay My Balance of.
2. Select Next to continue with the registration process.
3. When the payment vendor site is accessed, log in (if required).
4. Enter your credit card information and submit your payment.
5. When the Payment Successfully Processed page appears, select Close to return to the Complete Registration page.
Make a Payment If your course schedule lists the courses that you want to take, AND you want to make a credit card payment for PART of the cost of your registration, select the Make a Payment option.
1. Select Make a Payment.
2. Enter the amount you want to pay now.
3. Select Next to continue with the registration process.
4. When the payment vendor site is accessed, log in (if required).
5. Enter your credit card information and submit your payment.
6. When the Payment Successfully Processed page appears, select Close to return to the Complete Registration page.
PowerCampus Self-Service Student Guide 5112/27/2012

Registering for Continuing Education Courses PowerCampus Self-Service 8.3
Identifying Yourself
10.Select Finish to end the registration process.
Registering for Continuing Education Courses
You can register for continuing education courses for a session within a specified academic period. The registration process involves three main tasks:
1. Select the Register tab.
2. Select the Continuing Education menu item.
3. Tell us if you are a new user. Refer to the instructions for Identifying Yourself.
4. Find the course you want to take and add them to your cart. Refer to the instructions for Choosing Your Continuing Education Courses.
5. See how your schedule looks. Refer to the instructions for Reviewing Your Schedule.
6. Pay for your courses. Refer to the instructions for Paying for Your Continuing Education Courses.
Identifying Yourself
Depending on whether you already have a student account or are a new student, follow the appropriate instructions.
• I Already Have an Account
• I Am a New User
52 PowerCampus Self-Service Student Guide12/27/2012

PowerCampus Self-Service 8.3 Registering for Continuing Education Courses
Identifying Yourself
I Already Have an Account
1. Enter your User Name.
2. Enter your Password.
3. Select Log In.
4. Begin Choosing Your Continuing Education Courses.
I Am a New User
Follow these steps in order to create your new Self-Service account, so that you can register for Continuing Education courses.
1. Select Create a New Account.
2. Enter your Account Information.
3. Enter your Personal Information.
For This Field Enter
Password The password you want to use to log into the system. You should select a password which:
• Is easy for you to remember, but difficult for others to guess
• Includes upper-case and lower-case letters, and numbers
• Includes at least one special character, like !, @, #, $, % or &
• Contains 7 to 16 characters (for example, My1SecretP@SSwrd)
Confirm Password Your password again to make sure that it is recorded correctly
E-mail Address The e-mail address that you want us to use to contact you.
Security Questionand Answer
If prompted, enter the security question and answer you want the system to use to identify you if you ever forget your password. When you forget your password, the system will display your Security Question. Once you enter the exact Security Answer, you will be able to access the system.
For This Field Enter
Prefix Your starting form of address (for example, Mr., Miss, Ms.).
First Name Your legal first name; not your nickname.
Middle Name Your middle name, if you have one.
Last Name Your last name or surname.
Suffix Your ending form of address (for example, Sr., Jr., RN), if applicable.
PowerCampus Self-Service Student Guide 5312/27/2012
Registering for Continuing Education Courses PowerCampus Self-Service 8.3
Identifying Yourself
4. Enter your Address Information.
5. Enter your Contact Information.
6. Select your Interests.
7. Specify how you heard about our school (if this question is displayed).
8. Select Next.
9. View the account creation message and your new User Name and Password.
10.Log in using your new User Name and Password.
Former Last Name Your previous name, if you were known by a different Name (a maiden name, for example).
Date of Birth Enter the date on which you were born. The date format is determined by your Web browser settings. For example, if your Web browser is set to display Web pages in the English language and you were born on September 22, 1989, you would enter 09/22/1989.
Government ID The 9-digit identification number that has been assigned to you by the government (for example, your Social Security Number). Enter your ID number without dashes.
For This Field Enter
Address Type A description of the address that you want us to use to contact you (for example, home address, parent’s address, local address).
House Number The number that identifies the location of your house.
Address Line 1, 2, 3, 4
Enter the first line of your street address on Address Line 1. Then, as needed, use the other address lines.
City The city in which the address is located.
State The state in the address is located.
Postal Code The postal code for the address.
Country The country in which the address is located.
For This Field Enter
Phone Type Select the type of phone number that you want us to use to contact you. For example, Cell Phone.
Phone Number Enter the phone number that you want us to use to contact you. The phone number must be all numbers; do not enter dashes or any other special characters.
Country Select the country in which the phone number was assigned.
For This Field Enter
54 PowerCampus Self-Service Student Guide12/27/2012

PowerCampus Self-Service 8.3 Registering for Continuing Education Courses
Choosing Your Continuing Education Courses
11. Begin Choosing Your Continuing Education Courses.
Choosing Your Continuing Education Courses
1. If you have not already logged in, you will need to Identify Yourself.
2. Select Section Search.
3. Enter your search criteria and Search for the courses you want to take.
4. View the list of course sections that match your criteria. If too many course sections are listed, get more specific:
• Select Refine Search, or
• Choose a specific Period, Session, Department, and so on from the drop-down lists at the top of the Section Search Results page.
5. If you find a course section that you want, and it’s Start Date is not in the past, select Add to place the course in your cart.
6. View the Course Added confirmation window.
To Follow These Steps
Add Another Courseto Your Cart
1. Select Hide to clear the Course Added confirmation window.
2. Select New Search.
3. Find and add the desired course to your cart.
View the Coursesin Your Cart
1. Select View Cart.
2. Refer to Viewing the Courses in Your Cart.
Register for theCourses in Your Cart
1. Select Proceed to Registration.
2. Refer to Reviewing Your Schedule.
Request Permission If you must ask the instructor for permission to take the course, Request Permission also appears for the course. You can request permission now or when you are viewing your cart.
1. Select Request Permission.
2. On the Request Permission window, view the list of prerequisites for the course,
3. In the Comments field, specify why you want to take this course.
4. Select Send Request to send your request to the instructor.
PowerCampus Self-Service Student Guide 5512/27/2012

Registering for Continuing Education Courses PowerCampus Self-Service 8.3
Reviewing Your Schedule
Reviewing Your Schedule
Once you have chosen your Continuing Education courses, you need to review your schedule.
1. Under Courses to Add, review the list of courses you have added to your cart and the associated Fees.
2. To see how your courses look on your course schedule, follow these steps:
• Select View Schedule.
• On the Schedule page, select the Grid option.
• Choose these viewing options:
• Select Submit.
• When you are ready to continue with the registration process, select the Registration tab and then the Continuing Education menu item.
3. If the schedule is NOT correct, make the necessary changes to your schedule.
4. Select Next to finalize your schedule.
5. Take another look at the courses on your Updated Schedule. Once again, if you really need to, you can View your Schedule or perform a Section Search for other courses.
Select To
Courses in Cart Include the information about the courses which are currently in your cart.
Waitlisted Courses
Include any courses for which you are on the waitlist.
Con Ed Courses Include information about the Continuing Education courses you have selected.
To Follow These Steps
Delete a Course YouDo Not Want to Take
Select Remove to the right of the information about the Course Added to your cart.
Drop a RegisteredCourse
If you decide that you do not want to take one of the courses for which you have already registered, and students are allowed to drop this course, you can select the Drop checkbox displayed to the left of the course information.
Search for AnotherCourse
1. Select Section Search.
2. Enter your search criteria and choose the course as you did before. Refer to Choosing Your Continuing Education Courses.
56 PowerCampus Self-Service Student Guide12/27/2012

PowerCampus Self-Service 8.3 Viewing Your Class Information
Paying for Your Continuing Education Courses
6. Review your Account and Payment information below your course list.
7. If the schedule and the charges are correct, select Next. Then continue with Paying for Your Continuing Education Courses.
Paying for Your Continuing Education Courses
Once you have chosen your Continuing Education courses and have reviewed your course schedule, you need to pay for your courses.
1. Note the Payment Amount. You will not be able to change the amount of payment, since the full amount must be paid in order for you to complete your registration.
2. Select your payment method.
• Bill me later (if allowed)
• Pay With a Credit Card
3. If you are paying with a credit card, follow these steps:
• Select Make a Payment.
• When the payment vendor site is accessed, log in (if required).
• Enter your credit card information and submit your payment.
• When the Payment Successfully Processed page appears, select Close to return to the Complete Registration page.
4. On the Complete Registration page, view your registration confirmation message.
5. Select View Schedule. You may want to print this final schedule, so you have a printout to refer to as you walk around campus.
Viewing Your Class Information
From the Classes tab, you can view information about the courses on your schedule, access the Course Home Page for one of your registered courses, or display a list of your permission requests to take instructors’ classes.
• Viewing Your Class Schedule
• Accessing a Course Home Page
• Viewing Your Permission Requests
PowerCampus Self-Service Student Guide 5712/27/2012

Viewing Your Class Information PowerCampus Self-Service 8.3
Viewing Your Class Schedule
Viewing Your Class Schedule
You can view a schedule of the classes for which you have registered, have been put on the waitlist, or have added to your shopping cart.
1. Select the Classes tab.
2. Select the Schedule menu item.
3. Select the Student Schedule option.
4. Specify whether you want to view your schedule in a Text list or on a calendar Grid.
5. Choose the time Period for the schedule you want to view.
6. Specify which courses you want to include in your schedule.
• Courses in your shopping Cart
• Waitlisted Courses
• Continuing Education courses with a start date or end date in the future
7. Select Submit.
8. If you are viewing your schedule in a Text list, the system will display different information for the various types of courses on your schedule:
Format Description
Text The Text list displays ALL the course details, including the course title and instructor’s name.
Grid The Grid shows your courses on a calendar for the week, so you can clearly see when each course meeting is scheduled. For each course meeting, the grid will display the course number, building name, and room number.
• If you are not taking any courses on Saturday or Sunday, select Hide Weekend to remove the Saturday and Sunday columns from the grid.
• To view the details for ONE day, select that day of the week. For example, to view your course schedule for Wednesday, you would select Wednesday on the calendar grid.
For The Schedule Will List
Registered Courses Course title, instructor’s name, number of credits, duration, schedule, and location
A summary of the total number of registered courses and credits will also be displayed, along with your program, advisor, class level, and full- or part-time status.
Waitlisted, Pending, or Holding Courses(optional)
Course title, instructor’s name, number of credits, duration, schedule, location, and Instructor Permission Status (if the course has a pre-requisite of instructor permission).
58 PowerCampus Self-Service Student Guide12/27/2012

PowerCampus Self-Service 8.3 Viewing Your Class Information
Accessing a Course Home Page
9. To find out more information about a course, select the course title.
10. If a Course Home Page has been created for one of your registered courses, you can access it when you are viewing your schedule in a text list. Accessing a Course Home Page.
Accessing a Course Home Page
You can access the Course Home Page for any of your registered courses which have a Course Home Page. You and all the other students who are registered for a course can view course information, download course documents, submit your course activities, and post information to the course section forums. If you drop the course, you will no longer be able to access the Course Home Page. If you withdraw from the course, you will only be able to view the Course Home Page.
1. Select the Classes tab.
2. Select the Schedule menu item.
3. Select the Student Schedule option.
4. Choose to view your schedule in a Text list.
5. Choose the time Period for the course schedule.
6. Select Submit.
7. In the list of courses, find the registered course for which you want to access the Course Home Page.
Courses in Shopping Cart (optional)
Course title, instructor’s name, number of credits, duration, schedule, location, and Instructor Permission Status (if the course has a pre-requisite of instructor permission).
Continuing EducationCourses (optional)
Course information for a week. If the Continuing Education course varies by week, it will not be displayed on the grid.
For The Schedule Will List
PowerCampus Self-Service Student Guide 5912/27/2012

Viewing Your Class Information PowerCampus Self-Service 8.3
Accessing a Course Home Page
8. Under the information about the registered course, select Go to Course Home Page. (If the Course Home Page is not available at this time, this link will not be displayed. If you are on the waitlist for the course or your registration for the course is pending or on hold, the Go to Course Home Page link will not be displayed.)
9. View the information on the Course Home Page for the specified course. The amount of information that is displayed on the page is determined by the faculty members who are teaching the course section.
For example:
You may be able to view any, or all, of the following Web Parts.
Web Part Description
Course Announcements
View any class announcements that have been posted by the course instructors.
CourseDocuments
Access to the documents the instructors have posted for the course. There may be documents for the course in a Section Media folder, and documents in the folders for each of the course activities.
60 PowerCampus Self-Service Student Guide12/27/2012

PowerCampus Self-Service 8.3 Viewing Your Class Information
Accessing a Course Home Page
My Activities View a list of the required and extra credit activities that have been assigned for the course.
• The date on which the activity was Assigned.
• The date on which the activity is Due.
• Your numeric Score for the activity.
• Your letter Grade for the activity.
You can:
• Select View Details to display more information about the activity on the My Activity Detail Web part.
• Select Submit Media when you are ready to upload your completed activity to your instructor.
Refer to:
• Downloading Course and Activity Media
• Submitting a Course Activity
• Viewing Your Submitted Activity Media
• Viewing Your Activity Grades
My ActivityDetail
When you select View Details to the left of an activity on the My Activities Web part, the system will display more information about the activity on the My Activity Detail Web part.
• The date on which the activity was assigned and the date on which it is due.
• The timeframe when you can view information about the specified activity on the Course Home Page.
• Whether the specified activity is for Extra Credit.
• Whether the grade for the specified activity counts toward your midterm and final grades.
• Your grade and the number of points you have earned.
• Any comments the instructor has written about your grade.
My Attendance View how many times you were marked as absent, tardy, and present for the course.
Refer to Viewing Your Attendance for a Course.
Section Display View information about the course section:
• Course title and description
• When and where the class meets
• Names of the instructors
SubmittedDocuments
There will be a folder for each course activity. You will post each of your completed course assignments in the corresponding folder by the due date and time specified by your instructor.
Web Part Description
PowerCampus Self-Service Student Guide 6112/27/2012

Viewing Your Class Information PowerCampus Self-Service 8.3
Accessing a Course Home Page
10.When you are finished viewing the Course Home Page, you can:
• Select the Self-Service Home link to use the Self-Service features, or
• Select the Course Pages for Year/Term link at the top of the page to display the Site Collection page for all the courses for the specified year and term. Your course schedule will be displayed on the Site Collection page.
Downloading Course and Activity Media
Your instructor will upload to the Course Home Page all the document files that you will need for the course section and for completing the course activities. When these document files are available on the Course Home Page, you can download them to your computer.
1. If you are not already viewing the Course Home Page for the course section, follow these steps:
• Select the Classes tab.
• Select the Schedule menu item.
• Select the Student Schedule option.
• Choose to view your schedule in a Text list.
• Choose the time Period for the course schedule.
• Select Submit.
• In the list of courses, find the registered course for which you want to access the Course Home Page.
• Under the information about the registered course, select Go to Course Home Page. (If the Course Home Page is not available at this time, this link will not be displayed. If you are on the waitlist for the course or your registration for the course is pending or on hold, the Go to Course Home Page link will not be displayed.)
2. On the left pane of the Course Home Page, select Course Documents.
62 PowerCampus Self-Service Student Guide12/27/2012
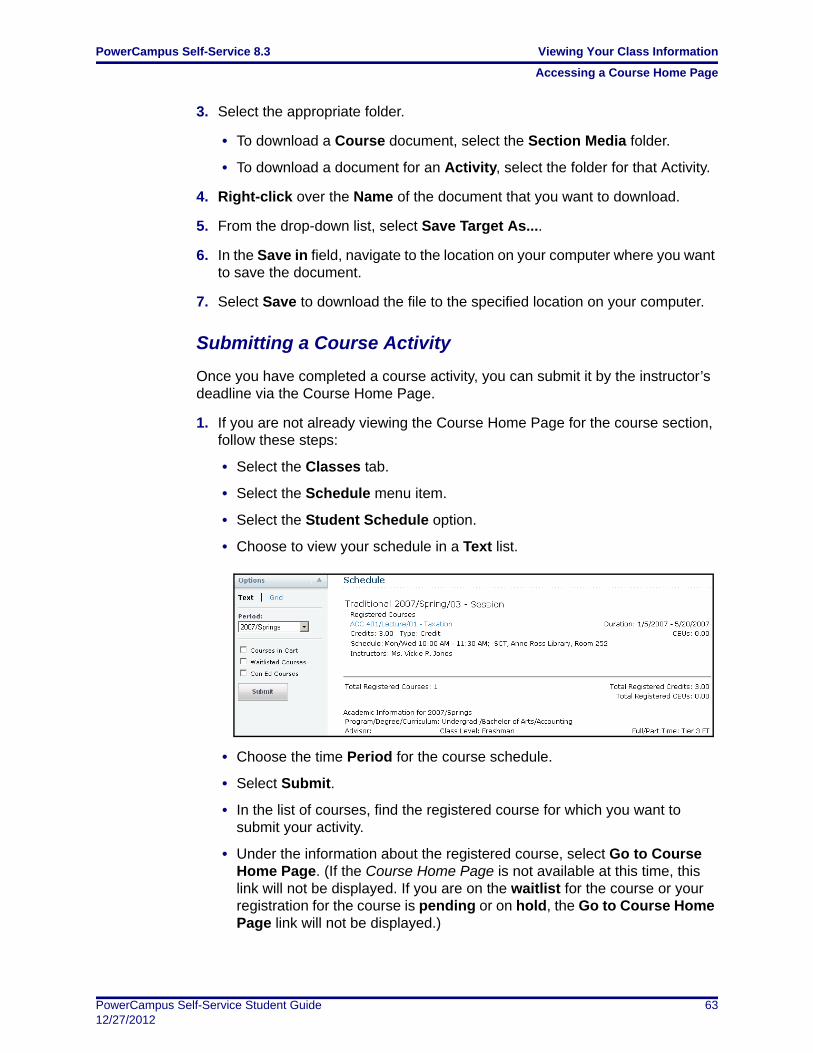
PowerCampus Self-Service 8.3 Viewing Your Class Information
Accessing a Course Home Page
3. Select the appropriate folder.
• To download a Course document, select the Section Media folder.
• To download a document for an Activity, select the folder for that Activity.
4. Right-click over the Name of the document that you want to download.
5. From the drop-down list, select Save Target As....
6. In the Save in field, navigate to the location on your computer where you want to save the document.
7. Select Save to download the file to the specified location on your computer.
Submitting a Course Activity
Once you have completed a course activity, you can submit it by the instructor’s deadline via the Course Home Page.
1. If you are not already viewing the Course Home Page for the course section, follow these steps:
• Select the Classes tab.
• Select the Schedule menu item.
• Select the Student Schedule option.
• Choose to view your schedule in a Text list.
• Choose the time Period for the course schedule.
• Select Submit.
• In the list of courses, find the registered course for which you want to submit your activity.
• Under the information about the registered course, select Go to Course Home Page. (If the Course Home Page is not available at this time, this link will not be displayed. If you are on the waitlist for the course or your registration for the course is pending or on hold, the Go to Course Home Page link will not be displayed.)
PowerCampus Self-Service Student Guide 6312/27/2012

Viewing Your Class Information PowerCampus Self-Service 8.3
Accessing a Course Home Page
2. On the My Activities Web part, find the activity for which you want to upload media.
3. Select Submit Media to the left of the activity.
If View Media is displayed for the activity instead of Submit Media, this means that your instructor is not accepting submissions for this activity now. Your instructor will specify the time period within which students can submit their completed course activities, and whether late submissions will be accepted.
4. On the Submitted Documents page for the specified activity, you should see a folder with your name.
5. Select Upload.
6. On the Upload Document page, select Browse... to find the document file you want to submit.
7. Select OK to upload the file to the submitted document folder for the activity.
Viewing Your Submitted Activity Media
After you have submitted a course activity, you can view it via the Course Home Page.
1. If you are not already viewing the Course Home Page for the course section, follow these steps:
• Select the Classes tab.
• Select the Schedule menu item.
• Select the Student Schedule option.
• Choose to view your schedule in a Text list.
• Choose the time Period for the course schedule.
• Select Submit.
• In the list of courses, find the course for which you want to view your submitted activity.
64 PowerCampus Self-Service Student Guide12/27/2012

PowerCampus Self-Service 8.3 Viewing Your Class Information
Accessing a Course Home Page
• Under the information about the registered course, select Go to Course Home Page. (If the Course Home Page is not available at this time, this link will not be displayed. If you are on the waitlist for the course or your registration for the course is pending or on hold, the Go to Course Home Page link will not be displayed.)
2. On the My Activities Web part, find the activity for which you want to view your submitted media.
3. Select View Media or Submit Media to the left of the activity. Both of these options should allow you to access your media submission.
• If the View Media appears for the activity, this means that submissions are not being accepted for this activity now.
• If the Submit Media option appears, this means that submissions are still being accepted for this activity.
4. On the Submitted Documents page for the specified activity, you should see a folder with your name.
5. Open your media file.
If the Submit Media option appeared for the activity and you decide to make changes to your submitted activity, you can re-submit your activity. Your new media file will overwrite your original file.
Viewing Your Activity Grades
After you have submitted a course activity and your instructor has posted your grade, you can view it on the Course Home Page.
1. If you are not already viewing the Course Home Page for the course section, follow these steps:
• Select the Classes tab.
• Select the Schedule menu item.
• Select the Student Schedule option.
• Choose to view your schedule in a Text list.
PowerCampus Self-Service Student Guide 6512/27/2012

Viewing Your Class Information PowerCampus Self-Service 8.3
Accessing a Course Home Page
• Choose the time Period for the course schedule.
• Select Submit.
• In the list of courses, find the registered course for which you want to access the Course Home Page.
• Under the information about the registered course, select Go to Course Home Page. (If the Course Home Page is not available at this time, this link will not be displayed. If you are on the waitlist for the course or your registration for the course is pending or on hold, the Go to Course Home Page link will not be displayed.)
2. On the My Activities Web part, view your numeric Score and letter Grade that have been posted for your submitted activities.
Viewing Your Attendance for a Course
1. If you are not already viewing the Course Home Page for the course section, follow these steps:
• Select the Classes tab.
• Select the Schedule menu item.
• Select the Student Schedule option.
• Choose to view your schedule in a Text list.
• Choose the time Period for the course schedule.
• Select Submit.
• In the list of courses, find the registered course for which you want to access the Course Home Page.
• Under the information about the registered course, select Go to Course Home Page. (If the Course Home Page is not available at this time, this link will not be displayed. If you are on the waitlist for the course or your registration for the course is pending or on hold, the Go to Course Home Page link will not be displayed.)
66 PowerCampus Self-Service Student Guide12/27/2012

PowerCampus Self-Service 8.3 Viewing Your Class Information
Accessing a Course Home Page
2. On the Attendance Web part, view:
Posting Information to a Forum
If your instructor has chosen to display forums on the Course Home Page, you and your fellow classmates can discuss course topics on-line. Please note that you will not be able to post a new discussion to the forum UNTIL your instructor posts the FIRST discussion.
1. If you are not already viewing the Course Home Page for the course section, follow these steps:
• Select the Classes tab.
• Select the Schedule menu item.
• Select the Student Schedule option.
• Choose to view your schedule in a Text list.
• Choose the time Period for the course schedule.
• Select Submit.
• In the list of courses, find the registered course for which you want to access the Course Home Page.
• Under the information about the registered course, select Go to Course Home Page. (If the Course Home Page is not available at this time, this link will not be displayed. If you are on the waitlist for the course or your registration for the course is pending or on hold, the Go to Course Home Page link will not be displayed.)
2. On the left pane of the Course Home Page, select Course Forum.
Attendance Record Description
Absence The number of class meetings that you missed and whether you had a valid excuse.
Tardiness The number of times you were late for class and whether you had a valid excuse.
Present The number of class meetings that you attended.
PowerCampus Self-Service Student Guide 6712/27/2012

Viewing Your Class Information PowerCampus Self-Service 8.3
Viewing Your Permission Requests
3. View the current list of discussion topics.
Viewing Your Permission Requests
You can view a list of the permission requests that you have sent to instructors in order to take their classes. You can also update your comments to your instructors.
1. Select the Classes tab.
2. Select the Permission Requests menu item.
3. View the information about each of your permission requests.
4. If you modify your request in the My Comments field, select Save to record your changes.
To Follow These Steps
Add a New Topicof Discussion
1. Select Add new discussion.
2. Enter the Subject of your new discussion.
3. Enter your information for the topic of discussion.
4. Select OK to post the new discussion to the Forums Web part.
View a Discussion 1. Position the cursor over the name of the discussion you want to view.
2. On the drop-down list, select View Item.
3. Select Open to view all the postings for the discussion.
4. For any discussion point for which you want to add information:
• Select Reply.
• Enter your reply.
• Select OK to post your reply.
5. Select the Course Code link above the Forums page heading to return to the Course Home Page.
Field Description
My Comments The comments you entered when you requested that you be allowed to register for the course.
Instructor The name of the instructor who is teaching the course.
Status The current status of your request (Denied, Approved, or Waiting).
Revised The date and time at which any of the information about the request was last updated.
68 PowerCampus Self-Service Student Guide12/27/2012

PowerCampus Self-Service 8.3 Viewing Your Grades and Transcript
Viewing Your Grade Report
5. If the instructor’s decision is overridden by someone who is authorized to do so (for example, a registrar), view this additional information.
Viewing Your Grades and Transcript
From the Grades tab, you can view your grade report or your unofficial transcript, or request your transcript.
• Viewing Your Grade Report
• Viewing Your Unofficial Transcript
• Requesting Your Transcript
Viewing Your Grade Report
You can display your grades for a specified year and term.
1. Select the Grades tab.
2. Select the Grade Report menu item.
3. Select the Period for which you want to view your grades.
4. View your grades for the specified period.
Field Description
Name The name of the person who overrode the instructor’s decision.
Date The date on which the person overrode the instructor’s decision.
Comments The reason the person entered for overriding the instructor’s decision.
Column Description
Session The session in which you took the course.
Course The course code and type.
Name The course title.
Credits The number of credits you earned for completing the course.
QualityPoints
The number of quality points you earned for completing the course. Quality points are used for calculating your Grade Point Average.
MidtermGrade
If your school uses midterm grading, this column will appear with your midterm grade.
PowerCampus Self-Service Student Guide 6912/27/2012

Viewing Your Grades and Transcript PowerCampus Self-Service 8.3
Viewing Your Grade Report
5. View your credits, GPA, and awards:
6. If you want to print out your grade report, follow these steps:
• Select Print Report.
• Select Print.
• Specify your printer options.
ProjectedGrade
If you have received a grade for at least one course activity, the system can calculate the final grade you are projected to earn for the course.
• ALL GRADED activities will be used to calculate your projected grade for a course. No activities are dropped.
• The system will display your projected Score for the course and the corresponding letter Grade.
• Your grades for any completed Extra Credit activities will be added to your calculated grade for the required course activities. If your grades for extra credit activities are entered before your grades for required activities, your projected grade may be higher than expected until all your activity grades are entered.
• Your projected grade will be listed UNTIL your final grade is submitted for the course.
Final Grade Your final grade for the course.
Comments Select View to display any comments that your instructor may have entered about your grade.
Field Description
Credits Attempted The number of credits for all the courses you have taken at this school.
Earned The number of credits you have earned by completing courses with passing grades.
GPA Term Your Grade Point Average for the specified term.
Overall Your Grade Point Average for all the courses you have completed at this school.
Awards Term The number of awards you have received during the specified term.
Overall The number of awards you have received while attending this school.
Column Description
70 PowerCampus Self-Service Student Guide12/27/2012

PowerCampus Self-Service 8.3 Viewing Your Grades and Transcript
Viewing Your Unofficial Transcript
Viewing Your Unofficial Transcript
You can display your complete academic history at this school.
1. Select the Grades tab.
2. Select the Unofficial Transcript menu item.
3. View your unofficial transcript, which is sorted by academic year and term, and includes:
• A list of degrees you have been awarded
• A list of the honors and GPAs you have earned at other schools
• Your coursework, grades, and credits for each term you have attended this school. If you have repeated a course, the Grade will appear within brackets.
4. If you want to print out a copy of your unofficial transcript, follow these steps:
• Select Print Transcript.
• Select Print.
• Specify your printer options.
If you have completed your undergraduate coursework and have registered for graduate courses, a second transcript will appear after the first one.
Requesting Your Transcript
You can request that one or more copies of your transcript be sent to a specified person or organization.
1. Select the Grades tab.
2. Select the Request Transcript menu item.
3. Specify where you want us to send your transcript.
Field Description
Name ofRecipient
Specify the name of the person or organization to whom you want us to send your transcript.
House Number The number that identifies the recipient’s building location.
Address Line 1, 2,3, 4
Enter the first line of the recipient’s address on Address Line 1. Then, as needed, use the other address lines.
City Specify the city in which the recipient is located.
State/Province Specify the state or province in which the recipient is located.
Postal Code Specify the zip or postal code for the recipient’s location.
PowerCampus Self-Service Student Guide 7112/27/2012

Viewing Your Grades and Transcript PowerCampus Self-Service 8.3
Requesting Your Transcript
4. Select Submit Request.
5. Review the list of transcript requests.
6. Take note of the Grand Total to be paid for all the transcripts you have requested.
7. Follow the appropriate steps.
Country Specify the country in which the recipient is located.
Number ofCopies
Specify the number of copies of your transcript that you need us to send to the recipient.
Reason forRequest
Specify why you need to send your transcript to the recipient. If you do not want us to process your transcript request now, also tell us when you want it sent. For example, you may want to wait until after graduation.
To Follow These Steps
Complete your Transaction
If you do not need to submit any other transcript requests, and you are ready to complete your transaction, follow these steps.
1. If on-line payment is not required and you are not ready to make a payment now, select the Bill Me Later checkbox.
2. Select Continue.
• If you selected Bill Me Later, the system will display a message to let you know that you will be sent a bill and an e-mail with the transaction details.
• If you are paying with a credit card, continue with step 3.
3. When the payment vendor site is accessed, log in (if required).
4. Enter your credit card information and submit your payment.
5. When the Payment Successfully Processed page appears, select Close to return to the Request Transcript page.
Request More Transcripts
If you need to enter another transcript request, follow these steps.
1. Select Add More....
2. Enter the information for your next transcript request.
Cancel yourTranscript Requests
If you decide NOT to submit any of the transcript requests currently listed on the page, select Cancel Transaction.
Field Description
72 PowerCampus Self-Service Student Guide12/27/2012

PowerCampus Self-Service 8.3 Viewing Your Financial Information
Viewing Your Account Balance
Viewing Your Financial Information
From the Finances tab, you can choose to view your account balance and financial aid details.
• Viewing Your Account Balance
• Making a Payment
• Viewing Your Billing Statement
• Viewing Your Financial Aid Details
Viewing Your Account Balance
The Balance page provides an option to view details of your charges and credits for a specified period, along with a subtotal for any balance from other periods and the amount of financial aid anticipated.
1. Select the Finances tab.
2. Select the Balance menu item.
3. Choose the time Period.
• Select a Period to display your account balance for a specified period, or
• Select All to display your entire balance history.
4. Choose how much information you want to View.
5. Select Change.
6. View your balance.
Select This View To Display
Detail by Chargesand Credits
A list of the charges and credits recorded for the specified Period.
Detail by SummaryType
A list of all the transactions and the total amount recorded for each summary type.
Balance Summary The total amounts for each summary type (for example, tuition, student fees).
PowerCampus Self-Service Student Guide 7312/27/2012

Viewing Your Financial Information PowerCampus Self-Service 8.3
Making a Payment
7. If the Make a Payment section is displayed under the Options section at the left, you can make a credit card payment toward your account balance.
• Select the period you want to Apply Payment To.
• Specify the Amount you want to charge to your credit card.
• Select Make a Payment.
• When the payment vendor site is accessed, log in (if required).
• Enter your credit card information and submit your payment.
• When the Payment Successfully Processed page appears, select Close to return to the Balance page.
Making a Payment
When you are viewing your account balance, you may be able to make a payment toward your account.
1. Select the Finances tab.
2. Select the Balance menu item.
3. View your balance.
4. Under the Options section at the left, locate the Make a Payment section.
Note: If the Make a Payment section is not displayed, you cannot make a credit card payment toward your account balance at this time.
5. Select the period you want to Apply Payment To.
6. Specify the Amount you want to charge to your credit card.
7. Select Make a Payment.
8. When the payment vendor site is accessed, log in (if required).
9. Enter your credit card information and submit your payment.
10.When the Payment Successfully Processed page appears, select Close to return to the Balance page.
Viewing Your Billing Statement
You can view any of the billing statements the bursar has chosen to publish.
1. Select the Finances tab.
2. Select the Statement menu item.
3. Choose the Statement you want to display.
74 PowerCampus Self-Service Student Guide12/27/2012

PowerCampus Self-Service 8.3 Viewing Your Financial Information
Viewing Your Financial Aid Details
4. Select View.
5. Review your statement, which may include any of the following information.
6. If you are ready to pay your balance, print your statement.
• At the top of the Web Browser window, select File.
• Select Print....
• Select the Printer to be used to print your statement.
• Select Print.
7. At the bottom of your statement, complete the payment form.
8. Detach the payment form from the bottom of your statement.
9. Mail the payment form to the school address listed on the form.
Viewing Your Financial Aid Details
You can display your financial aid details (necessary documents, packaging information, your loans, awards by academic year, and award messages).
1. Select the Finances tab.
2. Select the Financial Aid menu item.
3. Choose the financial aid award Period.
4. Select Submit to display the information.
Statement Section Description
Charges A list of the expenses you have incurred, including tuition and fees.
Credits A list of the payments that have been applied to your balance, including loans and grants.
Anticipated Aid A list of the financial aid amounts that we expect you to receive.
Payment PlanInformation
If you have signed up for a payment installment plan, your payment due dates and amounts will be listed.
PowerCampus Self-Service Student Guide 7512/27/2012

Displaying Pages in a Different Language PowerCampus Self-Service 8.3
If You Are Using Internet Explorer
Displaying Pages in a Different Language
By default, the Self-Service pages are displayed in English and dates are displayed and entered in the format mm/dd/yy. If you want to display dates in a different format, change your browser’s language options.
• If You Are Using Internet Explorer
• If You Are Using FireFox
• If You Are Using Safari
If You Are Using Internet Explorer
If you are using Internet Explorer, follow these steps to change the language options and display dates in another format.
1. Select Tools Internet Options.
2. Select the General tab.
3. Select Languages.
4. Select Add... to display the list of languages.
5. Select the language you want to add.
6. Select OK.
7. Select the language and select Move Up until the selected language is listed FIRST on the Language Preference window. For example:
76 PowerCampus Self-Service Student Guide12/27/2012

PowerCampus Self-Service 8.3 Displaying Pages in a Different Language
If You Are Using FireFox
8. Select OK to save your changes.
9. Select OK to close the Internet Options window.
If You Are Using FireFox
If you are using Firefox, follow these steps to change the language options and display dates in another format.
1. Select Tools Options.
2. At the top of the Options window, select Content.
3. In the Languages section, select Choose....
4. To add a language, follow these steps:
• Choose the Select a language to add... drop-down list.
• Select the language you want to add.
• Select Add.
5. Choose the language and select Move Up until the selected language is listed FIRST on the Languages window. For example:
6. Select OK to save your changes.
7. Select OK to close the Options window.
If You Are Using Safari
Safari will use the language of your operating system.
PowerCampus Self-Service Student Guide 7712/27/2012


PowerCampus Self-Service 8.3 Index
Index
A
academic plancreating a What If plan 36deleting one of your What If plans 39viewing your current plan 33viewing your What If plans 38
accountbalance 73information 10
activity gradeshow they affect projected grades 70viewing 65
advanced searchavailable course sections 40course catalog 41
application status 22attendance 66awards 70
B
balance 73Block Web Registration 47
C
cancelling a task on your checklist 26cart 30changing
ethnicity and race information 13password 11security question and answer 12user account information 10
charges and credits 73checklist
cancelling a task 26creating a new task 28marking a task as complete 25reassigning a task to someone else 27viewing your tasks 23waiving a task 27
choosing a good password 12, 53class schedule 58completing a task on your checklist 25continuing education
registration 52
coursecatalog 41sections 40
course home pageaccessing for a course 59downloading course and activity media from 62posting information to a forum 67submitting a course activity 63viewing your activity grades 65viewing your attendance 66viewing your submitted activity media 64
creatingWhat If academic plan 36
creating a new task on your checklist 28
D
degree requirements 31deleting
What If academic plans 39
E
e-mail address 11ethnicity and race information 13extra credit activities
how they affect your projected grade 70listed on Course Home Page 61
F
final grade 70financial aid
viewing your details 75
G
GPA 70grade report
final grade 70midterm grade 69projected grade 70
gradesviewing for activities 65
PowerCampus Self-Service Student Guide I-112/27/2012
Index PowerCampus Self-Service 8.3
I
if you forget your password 6IQ.Web account 7
L
logging in 6using your IQ.Web account 7when you forget your password 6
M
marking a task as complete on your checklist 25midterm grade 69
P
passwordchanging 11choosing a new password 12, 53if you forget your password 6
permission requests 68posting information to a forum 67projected grade 70
R
race and ethnicity information 13reassigning a task on your checklist 27registering for
continuing education courses 52traditional courses 47
S
searchingcourse catalog 41course sections 40
security question and answerchanging 12
shopping cart 30signing in 6status of your application 22
T
transferring your IQ.Web account 7
U
unofficial transcript 71updating
ethnicity and race information 13user account information 10
V
viewing youractivity grades 65application status 22attendance for a course 66balance 73charges and credits 73checklist 23class schedule 58course home page 59current academic plan 33degree requirements 31ethnicity and race information 13financial aid details 75permission requests 68shopping cart 30unofficial transcript 71user account information 10What If academic plans 38
W
waiving a task on your checklist 27What If plan
creating 36deleting 39viewing 38
I-2 PowerCampus Self-Service Student Guide12/27/2012