position creation and maintenance - nessie home · · 2012-02-16similar to banner, ... position...
TRANSCRIPT

Position Creation and Maintenance
Human Resources Front End
How-To Guide
HR Front End Training Team

Position Creation and Maintenance
2 HR Front End Training Team
Position Creation and Maintenance
HR Front End
How-To Guide
Revision Information
Guide ID: Position Creation and Maintenance
Revision Date: April 28, 2009
Version: 1.1
APPROPRIATE USE AND SECURITY OF CONFIDENTIAL AND SENSITIVE INFORMATION
Similar to Banner, HRFE allows you to access confidential and sensitive information. Guidelines have been created to help you manage your responsibility.
You are responsible for any activity that occurs using your logon
Do not share your passwords or store them in an unsecured manner.
Do not leave your workstation unattended while logged on to administrative information systems.
You have access to very sensitive personal information
Do not share confidential and sensitive information with anyone, including colleagues, unless there is a business reason.
Retrieve printed reports quickly, and do not leave the reports lying around in plain view.
Secure reports containing confidential and sensitive information (e.g., FERPA, EEO, or HIPAA protected data).
Shred the documents in a timely manner when disposing of reports containing confidential or sensitive information.
Any violation could subject you to disciplinary action.
Copyright 2009, Board of Trustees of the University of Illinois. All rights reserved. No part of this publication may be
reproduced or used in any form or by any means graphic, electronic or mechanical, including photocopying, recording, taping
or in information storage and retrieval systems without written permission of the Board of Trustees of the University of
Illinois.

Position Creation and Maintenance
HR Front End Training Team 3
HR Front End Position Creation and Maintenance Quick View
• Select Position Creation and Maintenance transaction. 1
• Complete the Position Selection screen. 2
• View the Incumbent History for an existing position.(if necessary). 3
• Complete the Position Data screen. 4 • Transaction Routed and Applied to
Banner. 5

Position Creation and Maintenance
4 HR Front End Training Team
T A B L E O F C O N T E N T S
Introduction .............................................................................................................................. 5
Assumptions .............................................................................................................................................. 5
What is Position Creation and Maintenance? ........................................................................................... 5
Budget Organization Transfers .............................................................................................................. 5
Re-Using Positions vs. Creating New Positions .................................................................................... 6
Position Creation and Maintenance Responsibilities ............................................................................. 6
Conventions Used in this Guide ................................................................................................................ 6
Performing Position Creation and Maintenance .................................................................... 7
Initiating Position Creation and Maintenance ............................................................................................ 7
Selecting a Position ................................................................................................................................... 8
Maintaining an Existing Position and Viewing Incumbent History ......................................................... 9
Creating a New Position ...................................................................................................................... 13
Editing Position Data ............................................................................................................................... 14
Appendix A – Position Creation and Maintenance Process Flow .......................................16
Position Creation and Maintenance
HR Front End Training Team 5
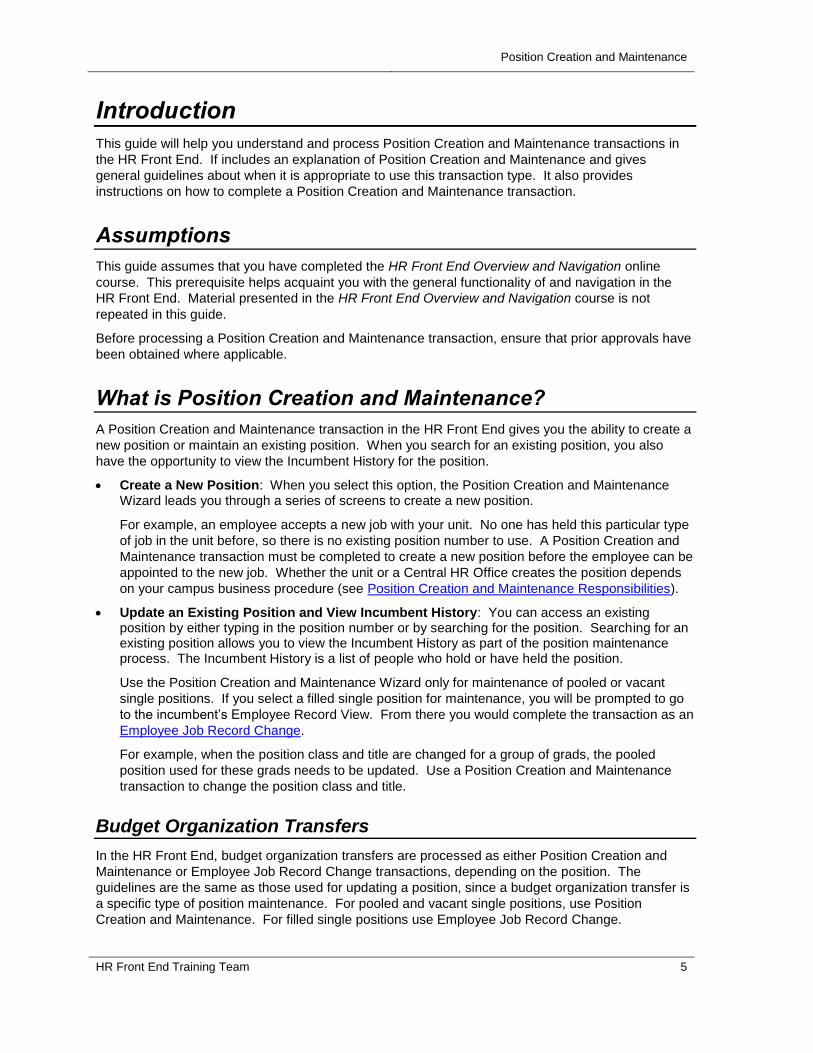
Introduction
This guide will help you understand and process Position Creation and Maintenance transactions in
the HR Front End. If includes an explanation of Position Creation and Maintenance and gives
general guidelines about when it is appropriate to use this transaction type. It also provides
instructions on how to complete a Position Creation and Maintenance transaction.
Assumptions
This guide assumes that you have completed the HR Front End Overview and Navigation online
course. This prerequisite helps acquaint you with the general functionality of and navigation in the
HR Front End. Material presented in the HR Front End Overview and Navigation course is not
repeated in this guide.
Before processing a Position Creation and Maintenance transaction, ensure that prior approvals have
been obtained where applicable.
What is Position Creation and Maintenance?
A Position Creation and Maintenance transaction in the HR Front End gives you the ability to create a
new position or maintain an existing position. When you search for an existing position, you also
have the opportunity to view the Incumbent History for the position.
Create a New Position: When you select this option, the Position Creation and Maintenance Wizard leads you through a series of screens to create a new position.
For example, an employee accepts a new job with your unit. No one has held this particular type
of job in the unit before, so there is no existing position number to use. A Position Creation and
Maintenance transaction must be completed to create a new position before the employee can be
appointed to the new job. Whether the unit or a Central HR Office creates the position depends
on your campus business procedure (see Position Creation and Maintenance Responsibilities).
Update an Existing Position and View Incumbent History: You can access an existing position by either typing in the position number or by searching for the position. Searching for an existing position allows you to view the Incumbent History as part of the position maintenance process. The Incumbent History is a list of people who hold or have held the position.
Use the Position Creation and Maintenance Wizard only for maintenance of pooled or vacant
single positions. If you select a filled single position for maintenance, you will be prompted to go
to the incumbent’s Employee Record View. From there you would complete the transaction as an
Employee Job Record Change.
For example, when the position class and title are changed for a group of grads, the pooled
position used for these grads needs to be updated. Use a Position Creation and Maintenance
transaction to change the position class and title.
Budget Organization Transfers
In the HR Front End, budget organization transfers are processed as either Position Creation and
Maintenance or Employee Job Record Change transactions, depending on the position. The
guidelines are the same as those used for updating a position, since a budget organization transfer is
a specific type of position maintenance. For pooled and vacant single positions, use Position
Creation and Maintenance. For filled single positions use Employee Job Record Change.

Position Creation and Maintenance
6 HR Front End Training Team
Re-Using Positions vs. Creating New Positions
Before creating a new position, determine if there is an existing vacant position that can be re-used.
Whether or not a vacant position can be re-used requires comparing the vacant position to the job
that will be tied to that position. To help prevent the creation of unnecessary positions, you should
re-use an existing vacant position when either of the following applies:
The vacant position and the job have the same P-class, Title, Position Descriptors, etc.
The vacant position and the job belong to the same employee group, even if the P-class, Title, Positions Descriptors, etc. do not match exactly. You have the option in the wizard to edit the P-class, Title, Position Descriptors, etc., of the position to match the job.
For example, a unit might have a vacant position from a job that no one will hold in the
foreseeable future. This position could be modified and used for a new employee performing a
different job within the same employee group.
If neither of the above conditions applies, then the Unit or Central HR Office can create a new
position, as appropriate.
Position Creation and Maintenance Responsibilities
Whether the Unit or a Central HR Office is responsible for position creation and maintenance
depends on the employee group and campus policy. The table below summarizes who is responsible
for position creation and maintenance. Your campus HR offices also can help you determine who is
responsible for creating and maintaining positions.
Employee Group Unit Central HR Offices
Permanent/Status Civil Service UIUC UIC UIS
Extra Help, Clerical UIUC UIC UIS
Extra Help, Non-Clerical UIUC UIC UIS
Student (SA) UIUC UIC UIS
Faculty and Other Academic UIUC UIC UIS
Academic Professional UIUC UIC UIS
Unpaid UIUC UIC UIS
Graduate Assistant UIUC UIC UIS
Hourly (Acad. or Grad.) UIUC UIC UIS
Table 1: Position Creation and Maintenance Responsibilities
Conventions Used in this Guide
Indicates a Note or additional
information that might be helpful to you.
Indicates a Hint such as a tip,
shortcut, or additional way to do something.
Indicates a Warning of an
action that you should not perform or that might cause problems in the application.
Position Creation and Maintenance
HR Front End Training Team 7
Performing Position Creation and Maintenance
You can use the Position Creation and Maintenance transaction to create a new position or maintain
an existing position. Follow these steps to complete a Position Creation and Maintenance
transaction:
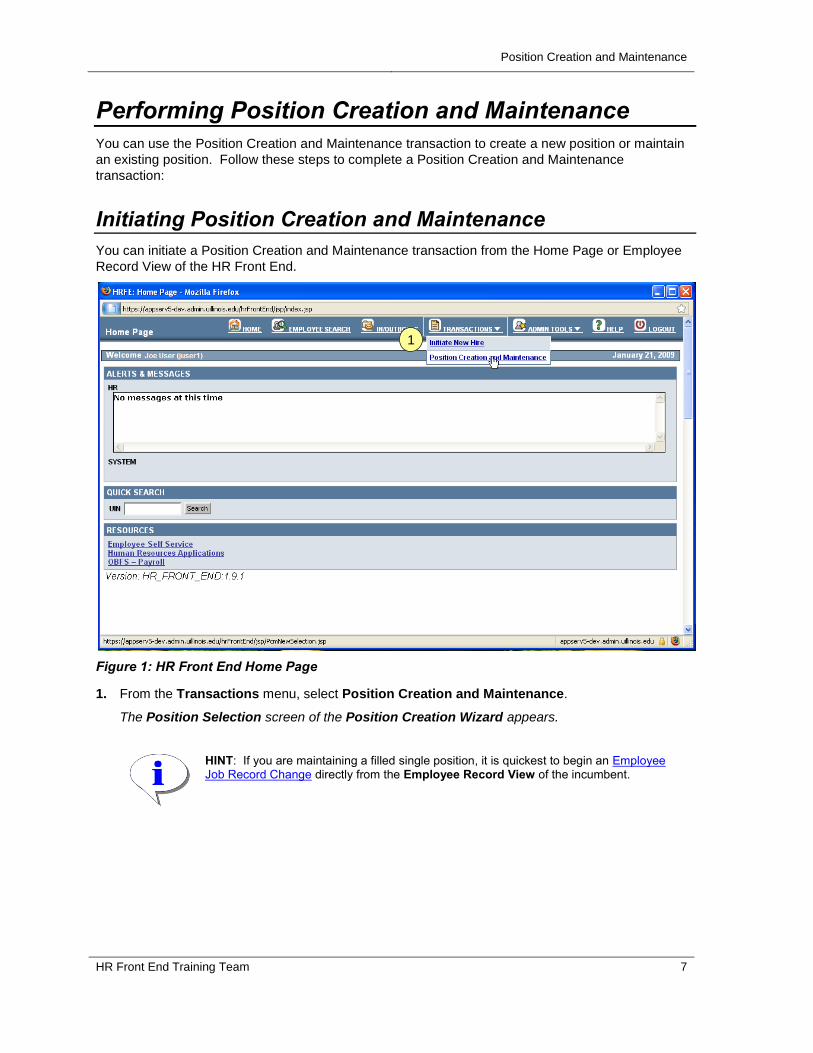
Initiating Position Creation and Maintenance
You can initiate a Position Creation and Maintenance transaction from the Home Page or Employee
Record View of the HR Front End.
Figure 1: HR Front End Home Page
1. From the Transactions menu, select Position Creation and Maintenance.
The Position Selection screen of the Position Creation Wizard appears.
HINT: If you are maintaining a filled single position, it is quickest to begin an Employee Job Record Change directly from the Employee Record View of the incumbent.
1
Position Creation and Maintenance
8 HR Front End Training Team
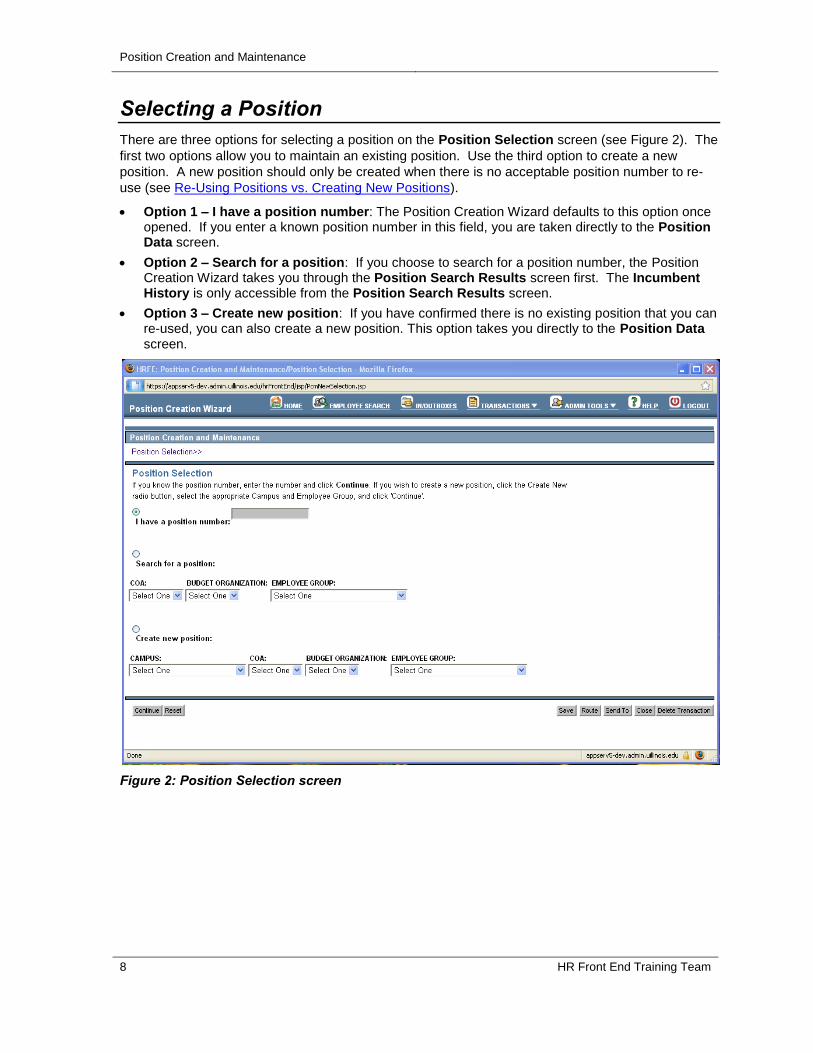
Selecting a Position
There are three options for selecting a position on the Position Selection screen (see Figure 2). The
first two options allow you to maintain an existing position. Use the third option to create a new
position. A new position should only be created when there is no acceptable position number to re-
use (see Re-Using Positions vs. Creating New Positions).
Option 1 – I have a position number: The Position Creation Wizard defaults to this option once opened. If you enter a known position number in this field, you are taken directly to the Position Data screen.
Option 2 – Search for a position: If you choose to search for a position number, the Position Creation Wizard takes you through the Position Search Results screen first. The Incumbent History is only accessible from the Position Search Results screen.
Option 3 – Create new position: If you have confirmed there is no existing position that you can re-used, you can also create a new position. This option takes you directly to the Position Data screen.
Figure 2: Position Selection screen

Position Creation and Maintenance
HR Front End Training Team 9
Maintaining an Existing Position and Viewing Incumbent History
There are two ways to select a position for maintenance – typing the position number or searching for
the position. Only by searching for the position can you view the Incumbent History. The
Incumbent History is a list of all employees who hold or have held the position.
Figure 3: Entering a Position Number in the Position Selection screen
2. If you know the position number and do not want to view incumbents, select I have a position number. Type the position number in the field and click Continue.
The Position Data screen appears. (see Figure 8).
WARNING: If you type the position number for a single position with an active incumbent an error message appears at the top of the Position Selection screen. The message instructs you to access the Employee Record View of the incumbent to edit the Position Data via an Employee Job Record Change.
2

Position Creation and Maintenance
10 HR Front End Training Team
Figure 4: Searching for a position in the Position Selection screen
3. If you do not know the position number, or if you know the position number but wish to view incumbents, you can search for a position.
a. Select Search for a position. Select a value from the COA and Budget Organization lists.
The Budget Organization list filters to contain only organizations that are valid for the COA selected.
b. Select as Employee Group from the list and click Continue.
The Position Search Results screen appears.
3a 3b

Position Creation and Maintenance
HR Front End Training Team 11
Figure 5: Position Search Results screen
NOTE: Last Incumbent information is listed for single positions (Type S) only.
c. To maintain a single filled position, click the incumbent’s name in the Last Incumbent column. Maintenance of single filled positions requires an Employee Job Record Change transaction.
The incumbent’s Employee Record View displays.
WARNING: If you navigate to the Employee Record View at this point, you will not be able to return to the Position Search Results. Use the incumbent link only if you intend to
maintain a single filled position.
HINT: You can identify a single filled position by looking at the Type and Job End Date columns. A single filled position has Type S, and the Job End Date is either blank or in the future.
d. If you want to view past and present incumbents for a position, highlight the row for that position and click Incumbent History below and to the right of the results table.
The Incumbent History screen appears for the selected position.
3c
3f
3d

Position Creation and Maintenance
12 HR Front End Training Team
Figure 6: Incumbent History screen
e. From the Incumbent History, click Return to return to the Position Search Results and complete position maintenance.
The Position Search Results screen reappears (see Figure 5).
f. Select the row that contains the position to be maintained and click Continue.
The Position Data Screen appears.
3e

Position Creation and Maintenance
HR Front End Training Team 13
Creating a New Position
The third option on the Position Selection screen is Create new position. Before creating a new
position, determine whether you can use a position that already exists. (See the Re-Using Positions
vs. Creating New Positions section.)
Figure 7: Creating a new position in the Position Selection screen
4. If you need to create a new position:
a. Select Create new position. Choose the appropriate Campus, COA, and Budget Organization for the new position.
The Budget Organization list filters based on the COA selected.
b. Select an Employee Group from the list and click Continue.
The Position Data screen appears. The Position # is automatically assigned by the HR Front End.
4a 4b

Position Creation and Maintenance
14 HR Front End Training Team
Editing Position Data
Whether you are creating a new position or maintaining an existing position, the final screen of the
Position Creation Wizard is the Position Data screen. On this screen, you can view/edit
information related to the position.
Figure 8: Position Data screen
5. Type or select values for the position in the required fields (*). If applicable, add or edit values in additional editable fields.
HINT: Information regarding the required fields is found in Table 2: Required Position Data
fields. For more information on required and non-required fields, see Online Help. To access Online Help, click Help in the navigation bar at the top of the screen.

Position Creation and Maintenance
HR Front End Training Team 15
Field Name Defaults and Allowed Values
Change Date Defaults to today’s date. If the change needs to be retroactive, change this value to the day the change should have taken effect. Future-dated position changes are not allowed.
Position Number This value is automatically assigned by the HR Front End and is not editable.
Position Class This list is filtered based on the employee group associated with the position.
Position Title A default title may appear in this field depending on the employee group.
Position Employee Class This value defaults based on the position class and is editable. The list is filtered based on
Employee Group selection on the Position Selection screen for new positions
Employee Group already affiliated with the position for existing positions
Position Type This value defaults based on the employee group and is editable. Allowed values are Single or Pooled.
Position Begin Date If you are maintaining an existing position, the original begin date defaults.
PAPE# This field is required for positions with employee group B or Chicago HA positions. If required, choose a value from the list. If the position employee class does not require a PAPE number, this field will not be editable.
Budget Profile For a new position, this value defaults based on the employee group. It is editable for all employee classes except E*, H*, LP, MM, and SA.
Budget COA This value defaults for an existing position. The field is only editable when creating a new position.
Budget Org This value defaults based on the Organization selected on the Position Selection screen. When creating a new position, this field in not editable.
Position Labor Distribution The required fields in this section are COA, Fund, Organization, Account, Program, and Percent. The Total of the Percent values for all labor distribution rows must equal 100.
HINT:
If an Index code exists for the account, this can be used to automatically fill in many of the required segments. You must type or select the Account code after entering the Index.
It is appropriate to change the Position Labor Distribution when there has been a long-term
change in funding for the position. If the Organization code in the labor distribution
changes, it may also be necessary to change the Budget Org.
Table 2: Required Position Data fields
Once you complete the Position Data screen, the transaction is ready to be routed and applied to Banner.

Position Creation and Maintenance
16 HR Front End Training Team
Appendix A – Position Creation and Maintenance Process Flow
Choose PCM to begin
wizard
Enter/Edit information on
Position Data screen
Save transaction and
Route
Apply transaction to
Banner
Enter/Search for position
number or choose create
new position
Click incumbent’s name to
navigate to ERV
Complete an Employee
Job Record Change to
update Position Data
Create a position
OR maintain pooled or
vacant single position?
YES
NO (maintain filled single)

Position Creation and Maintenance
HR Front End Training Team 17
THIS PAGE INTENTIONALLY LEFT BLANK