photoshop tutorial: digital darkroom techniques · photoshop tutorial: digital darkroom techniques...
TRANSCRIPT
PHOTOSHOP TUTORIAL:DIGITAL DARKROOMTECHNIQUESSTEP BY STEP TRAININGLearn by doing step by step exercises.Includes downloadable class files that work on Mac & PC.
Noble Desktop Adobe Authorized Training Center
EDITION 1
Copyright Info
Published by:Noble Desktop LLC594 Broadway, Suite 1202New York, NY 10012www.nobledesktop.com
Copyright © 2017 Noble Desktop LLCPublish Date: 10-02-2017
All rights reserved. No part of this book may be reproduced or transmitted in any form by anymeans, electronic, mechanical, photocopy, recording, or otherwise without express writtenpermission from the publisher. For information on reprint rights, please contact [email protected]
The publisher makes no representations or warranties with respect to the accuracy or completenessof the contents of this work, and specifically disclaims any warranties. Noble Desktop shall nothave any liability to any person or entity with respect to any loss or damage caused or alleged tobe caused directly or indirectly by the instructions contained in this book or by the computersoftware and hardware products described in it. Further, readers should be aware that softwareupdates can make some of the instructions obsolete, and that websites listed in this work may havechanged or disappeared since publication.
Adobe, the Adobe Logo, Creative Cloud, InDesign, Illustrator, Photoshop, and Dreamweaver aretrademarks of Adobe Systems Incorporated.
Apple and macOS are trademarks of Apple Inc. registered in the U.S. and other countries.Microsoft and Windows are either registered trademarks or trademarks of Microsoft Corporation inthe U.S. and other countries. All other trademarks are the property of their respective owners.
Table of Contents
3PHOTOSHOP TUTORIAL: DIGITAL DARKROOM TECHNIQUES • COPYRIGHT NOBLE DESKTOP
Table of Contents
SECTION 1
Exercise 1A: Photoshop Tutorial: Digital Darkroom Techniques . . . . . . . . . . . . . . 5Topics: Adding selective focus by blurring shadows & highlights
, Correcting color casts & re-interpreting color
, Adjusting lighting & shadows
, Advanced selection techniques
, And much more!
REFERENCE MATERIAL
Noble’s Other Workbooks . . . . . . . . . . . . . . . . . . . . . . . . . . . . . . . . . . . . . . . . . 15
INFO & EXERCISES

Exercise 1A: Photoshop Tutorial: Digital Darkroom TechniquesTopics: Adding selective focus by blurring shadows & highlights, Correcting color casts & re-interpreting color, Adjusting lighting & shadows, Advanced selection techniques, And much more!
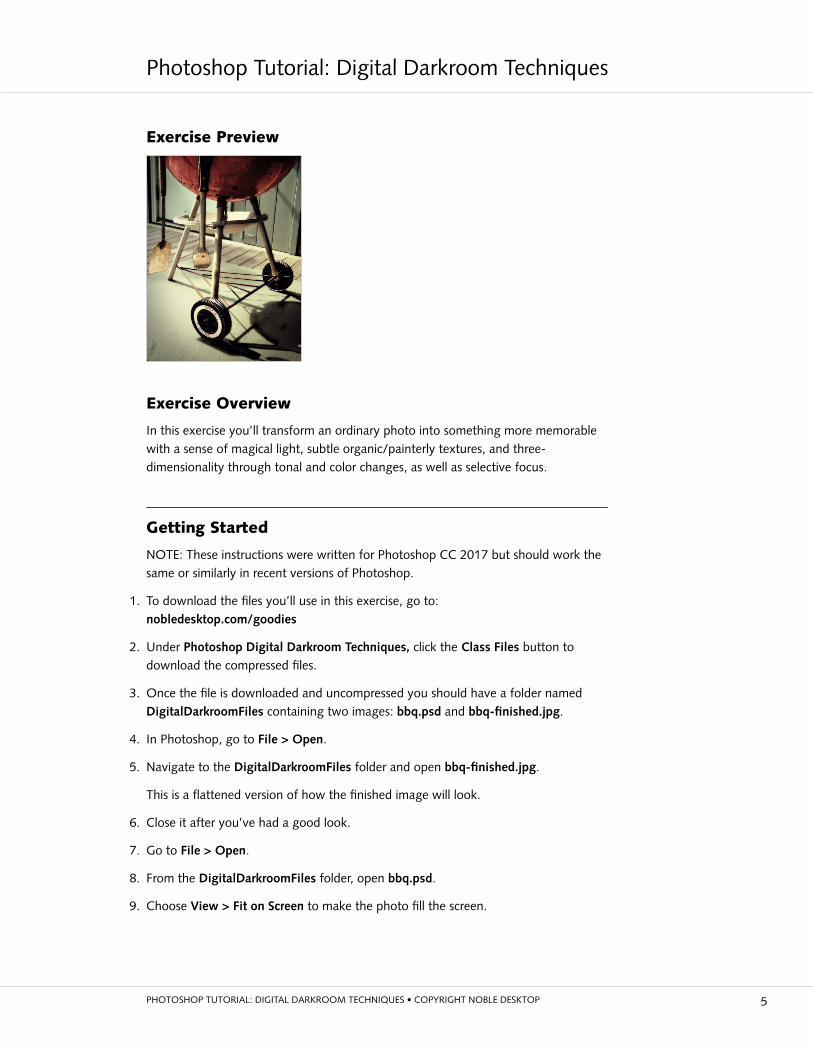
Exercise Preview
Exercise Overview
In this exercise you’ll transform an ordinary photo into something more memorablewith a sense of magical light, subtle organic/painterly textures, and three-dimensionality through tonal and color changes, as well as selective focus.
Getting Started
NOTE: These instructions were written for Photoshop CC 2017 but should work thesame or similarly in recent versions of Photoshop.
1. To download the files you’ll use in this exercise, go to:nobledesktop.com/goodies
2. Under Photoshop Digital Darkroom Techniques, click the Class Files button todownload the compressed files.
3. Once the file is downloaded and uncompressed you should have a folder namedDigitalDarkroomFiles containing two images: bbq.psd and bbq-finished.jpg.
4. In Photoshop, go to File > Open.
5. Navigate to the DigitalDarkroomFiles folder and open bbq-finished.jpg.
This is a flattened version of how the finished image will look.
6. Close it after you’ve had a good look.
7. Go to File > Open.
8. From the DigitalDarkroomFiles folder, open bbq.psd.
9. Choose View > Fit on Screen to make the photo fill the screen.
5PHOTOSHOP TUTORIAL: DIGITAL DARKROOM TECHNIQUES • COPYRIGHT NOBLE DESKTOP
Photoshop Tutorial: Digital Darkroom Techniques
Adding Selective Focus by Blurring Shadows & Highlights
1. To select the top half of the image’s histogram (midtones through highlights), pressCmd–Option–2 (Mac) or Ctrl–Alt–2 (Windows).
2. We want the bottom half of the histogram (shadows through midtones), so invertthe selection by hitting Cmd–Shift–I (Mac) or Ctrl–Shift–I (Windows). That’s theletter i, not a 1.
3. Duplicate only the selected pixels to a new image layer by pressing Cmd–J (Mac) orCtrl–J (Windows) (or choosing Layer > New > Layer Via Copy).
4. Name the new layer blurred shadows.
5. With the new layer selected, go to Filter > Blur > Gaussian Blur.
6. Set the Radius to 2 to make a soft halo around the shadows.
7. Click OK.
8. To intensify the effect, change the layer’s blending mode from Normal to Overlay(at the top left of the Layers panel).
9. Some of the shadows have become too dark. Choose Layer > Layer Mask >Reveal All to add a layer mask to the blurred shadows layer.
10. Choose the Brush tool (press B to select the tool).
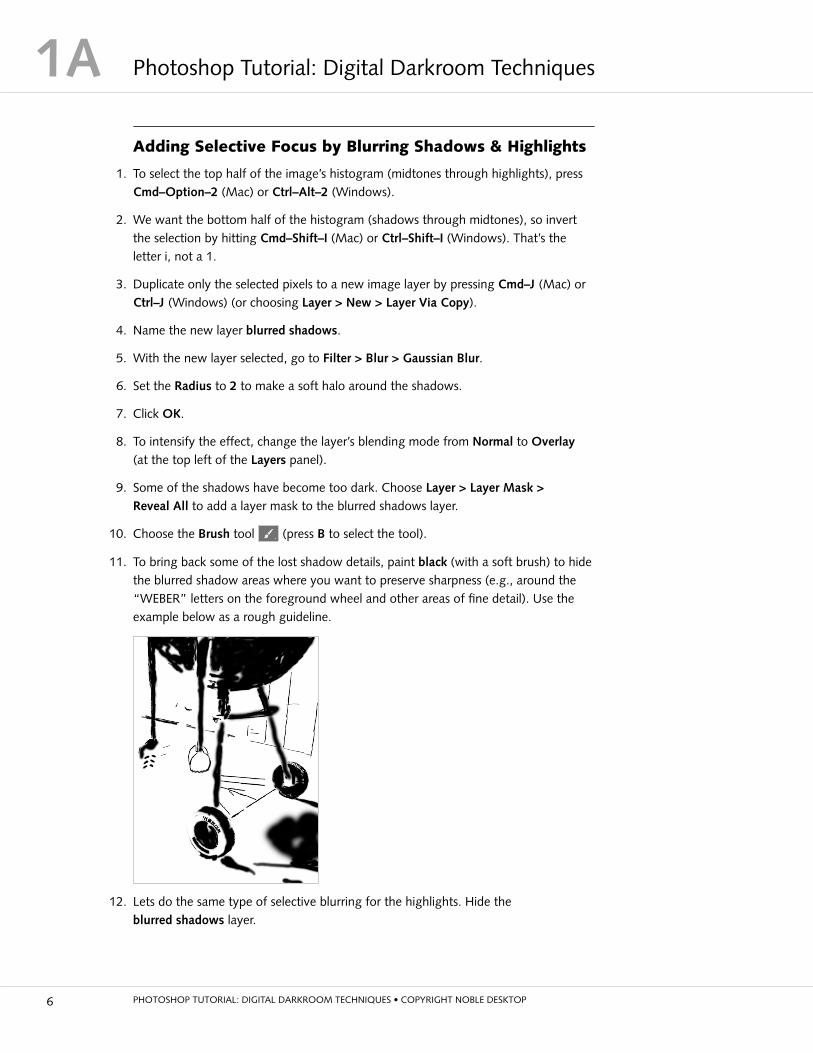
11. To bring back some of the lost shadow details, paint black (with a soft brush) to hidethe blurred shadow areas where you want to preserve sharpness (e.g., around the“WEBER” letters on the foreground wheel and other areas of fine detail). Use theexample below as a rough guideline.
12. Lets do the same type of selective blurring for the highlights. Hide theblurred shadows layer.
PHOTOSHOP TUTORIAL: DIGITAL DARKROOM TECHNIQUES • COPYRIGHT NOBLE DESKTOP6
Photoshop Tutorial: Digital Darkroom Techniques1A
13. Press Cmd–Option–2 (Mac) or Ctrl–Alt–2 (Windows) to select the top half of theimage’s histogram.
14. Select the Background layer.
15. Hit Cmd–J (Mac) or Ctrl–J (Windows) to copy the selected pixels to a new layer.
16. Name the new layer blurred highlights.
17. Move the blurred highlights layer so it’s the top layer.
18. With the new layer selected, choose Filter > Blur > Gaussian Blur.
19. Set the Radius to 2 and click OK.
20. To slightly lessen the overall effect, reduce the layer’s Opacity to 80%.
21. Choose Layer > Layer Mask > Reveal All to add a layer mask to the blurredhighlights layer.
22. Show the blurred shadows layer.
23. Select the blurred highlights layer mask.
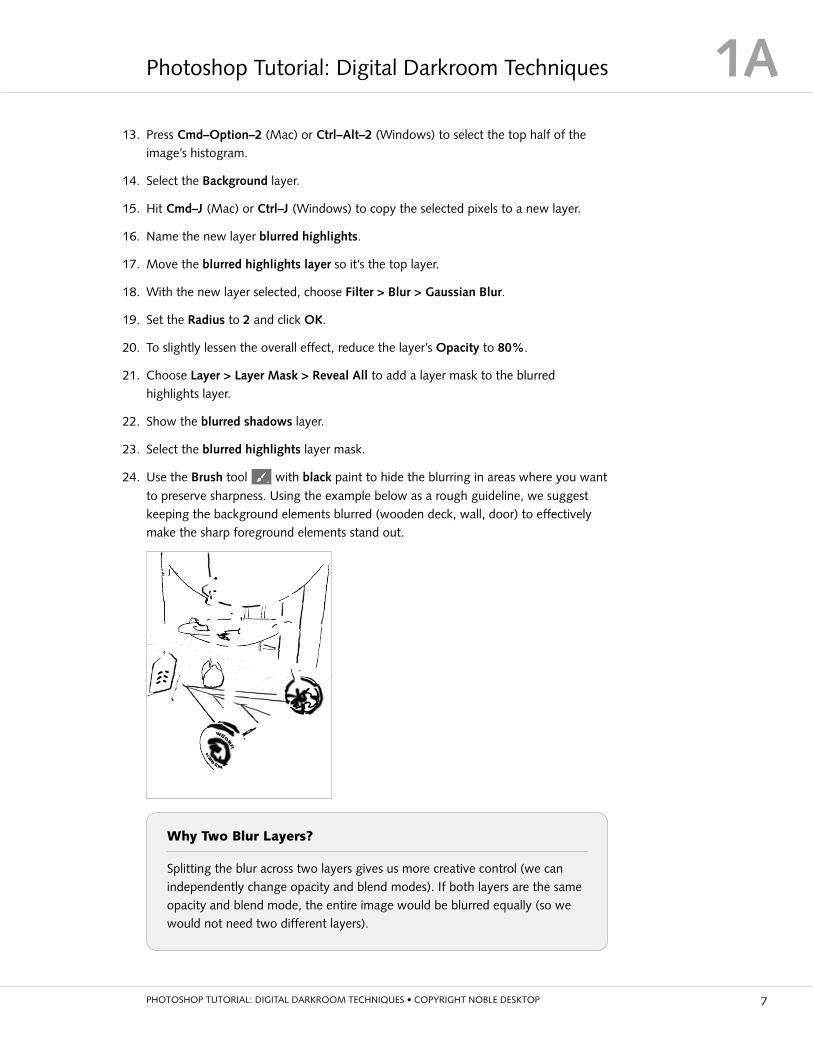
24. Use the Brush tool with black paint to hide the blurring in areas where you wantto preserve sharpness. Using the example below as a rough guideline, we suggestkeeping the background elements blurred (wooden deck, wall, door) to effectivelymake the sharp foreground elements stand out.
Why Two Blur Layers?
Splitting the blur across two layers gives us more creative control (we canindependently change opacity and blend modes). If both layers are the sameopacity and blend mode, the entire image would be blurred equally (so wewould not need two different layers).
7PHOTOSHOP TUTORIAL: DIGITAL DARKROOM TECHNIQUES • COPYRIGHT NOBLE DESKTOP
1APhotoshop Tutorial: Digital Darkroom Techniques

Re-Interpreting the Overall Colors in the Image
1. Select the topmost layer.
2. Choose Layer > New Adjustment Layer > Color Balance.
3. Name it overall color and click OK.
4. In the Properties panel, set the following:
• Change the Tone menu to Shadows and enter these 3 values: +4, 0, +22
• Change the Tone menu to Midtones and set them to +29, -4, -11
• Set Highlights to +13, 0, -41
• Make sure Preserve Luminosity is checked.
NOTE: Why are we using Color Balance (as opposed to Curves, Levels, etc.)? We feltthe visual feedback of its sliders make it easier for people to learn, and it gives usenough control. Curves could do the same type of adjustment, and can even give ussome additional control, but it’s not as intuitive when getting started.
5. The layer mask thumbnail of the color balance layer you just added should currentlybe selected. To add some texture to this adjustment layer’s mask, choose Filter >Noise > Add Noise and set the following:
Amount: 50%
Distribution: Gaussian
6. Click OK.
7. Let’s make the texture more subtle and organic. Go to Filter > Filter Gallery.
8. Choose Brush Strokes > Angled Strokes and set:
Direction Balance: 75
Stroke Length: 33
Sharpness: 1
9. Click OK.
Giving the Greenish Wall & Slate a More Interesting Color
1. Select the Background layer (otherwise the selection we are about to make couldaccidentally alter the mask of another layer).
PHOTOSHOP TUTORIAL: DIGITAL DARKROOM TECHNIQUES • COPYRIGHT NOBLE DESKTOP8
Photoshop Tutorial: Digital Darkroom Techniques1A
2. Selecting the slate floor slab and the wall slats (without selecting much of the floorplanks) will be a bit tricky because the floor planks are a similar color. Go to Select >Color Range and:
• Set Fuzziness to 48.
• Click the eyedropper on the green door in the upper left corner.
• Hold Shift and click the eyedropper on the slate floor and the wall slats to the rightof the grill. Shift–click in additional places as needed. This selection won’t beperfect, but we’ll adjust it manually next.
3. Click OK.
4. Double–click the Quick Mask Mode button at the bottom of the Toolbar tobring up the Quick Mask Options.
5. Set Color Indicates to Selected Areas and click OK.
6. You should now be in Quick Mask Mode. If not, click the button to switch intoQuick Mask Mode.
7. Choose the Brush tool and:
• Paint white over any shadow areas of the grill (to remove it from the selection).
• Paint black over any wall or slate areas (to add it to the selection).
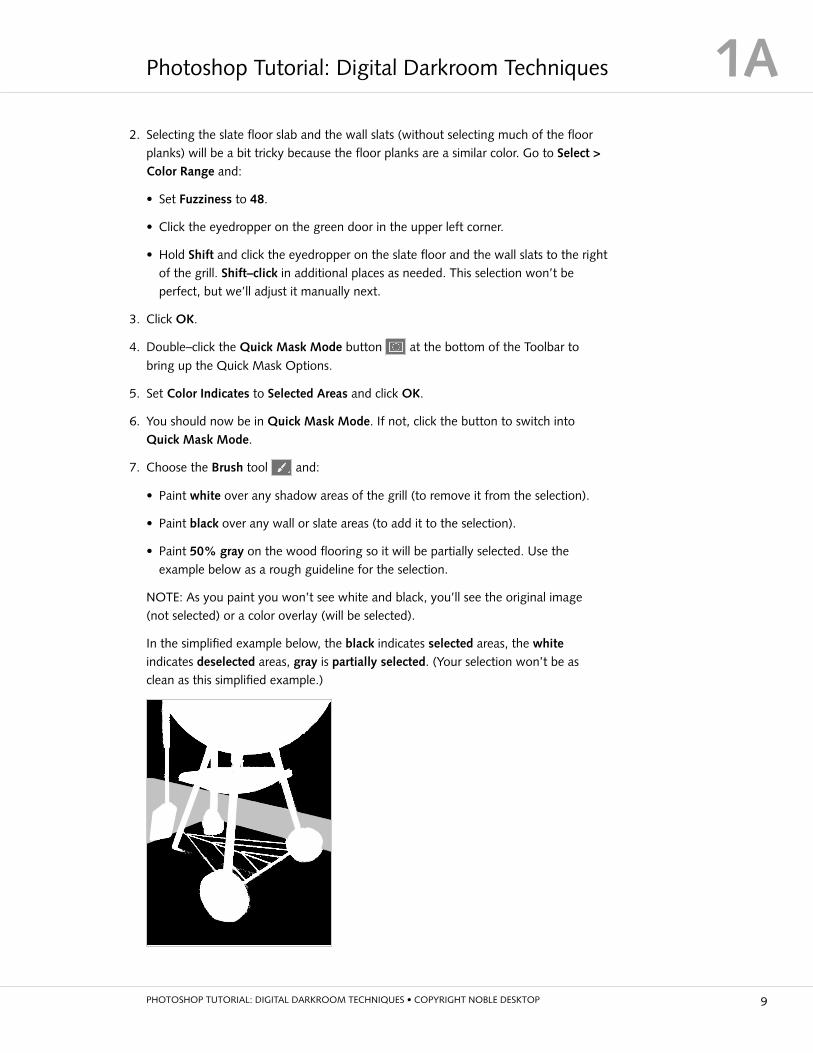
• Paint 50% gray on the wood flooring so it will be partially selected. Use theexample below as a rough guideline for the selection.
NOTE: As you paint you won’t see white and black, you’ll see the original image(not selected) or a color overlay (will be selected).
In the simplified example below, the black indicates selected areas, the whiteindicates deselected areas, gray is partially selected. (Your selection won’t be asclean as this simplified example.)
9PHOTOSHOP TUTORIAL: DIGITAL DARKROOM TECHNIQUES • COPYRIGHT NOBLE DESKTOP
1APhotoshop Tutorial: Digital Darkroom Techniques
8. Press Q to exit Quick Mask Mode.
9. Select the topmost layer.
10. Choose Layer > New Adjustment Layer > Color Balance.
11. Name the adjustment green slate, door, wall and click OK.
12. In the Properties panel, set the following:
• Shadows to +5, +3, 0
• Midtones to +2, +23, 0
• Highlights to -4, +8, 0
• Make sure Preserve Luminosity is checked.
Punching Up the Reds Latent in Bowl, Tools, & Rust onLower Grill Bars
1. Press P to select the Pen tool .
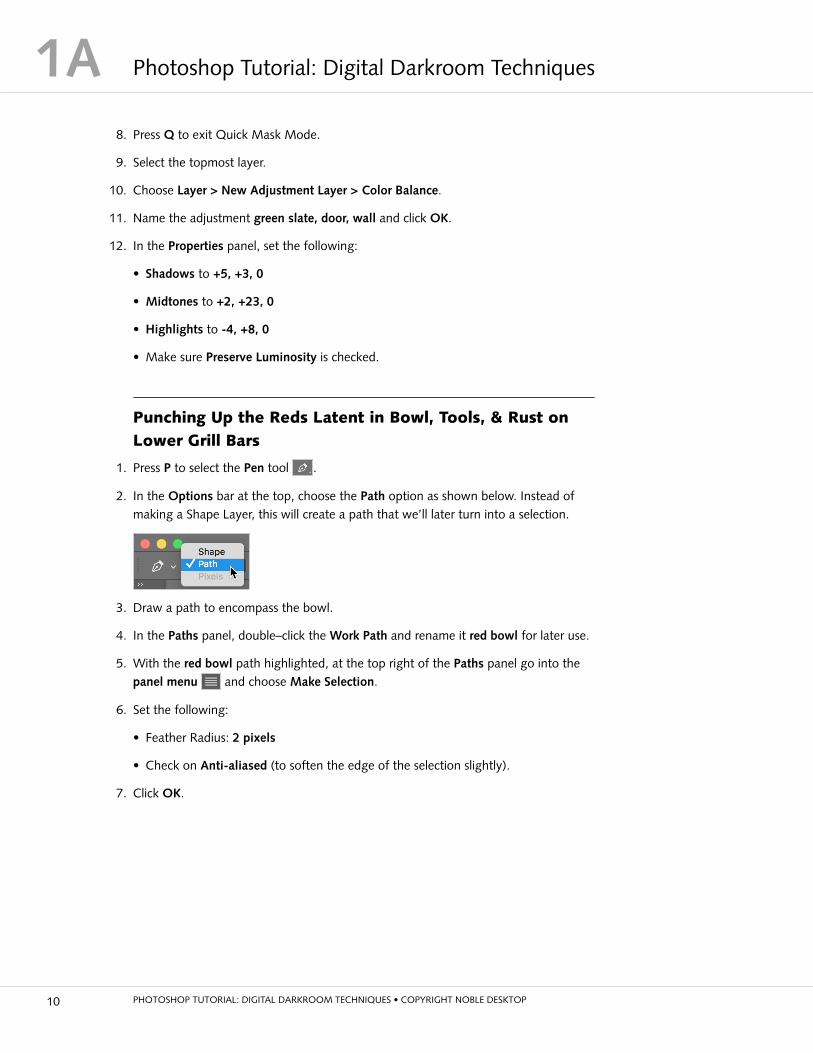
2. In the Options bar at the top, choose the Path option as shown below. Instead ofmaking a Shape Layer, this will create a path that we’ll later turn into a selection.
3. Draw a path to encompass the bowl.
4. In the Paths panel, double–click the Work Path and rename it red bowl for later use.
5. With the red bowl path highlighted, at the top right of the Paths panel go into thepanel menu and choose Make Selection.
6. Set the following:
• Feather Radius: 2 pixels
• Check on Anti-aliased (to soften the edge of the selection slightly).
7. Click OK.
PHOTOSHOP TUTORIAL: DIGITAL DARKROOM TECHNIQUES • COPYRIGHT NOBLE DESKTOP10
Photoshop Tutorial: Digital Darkroom Techniques1A
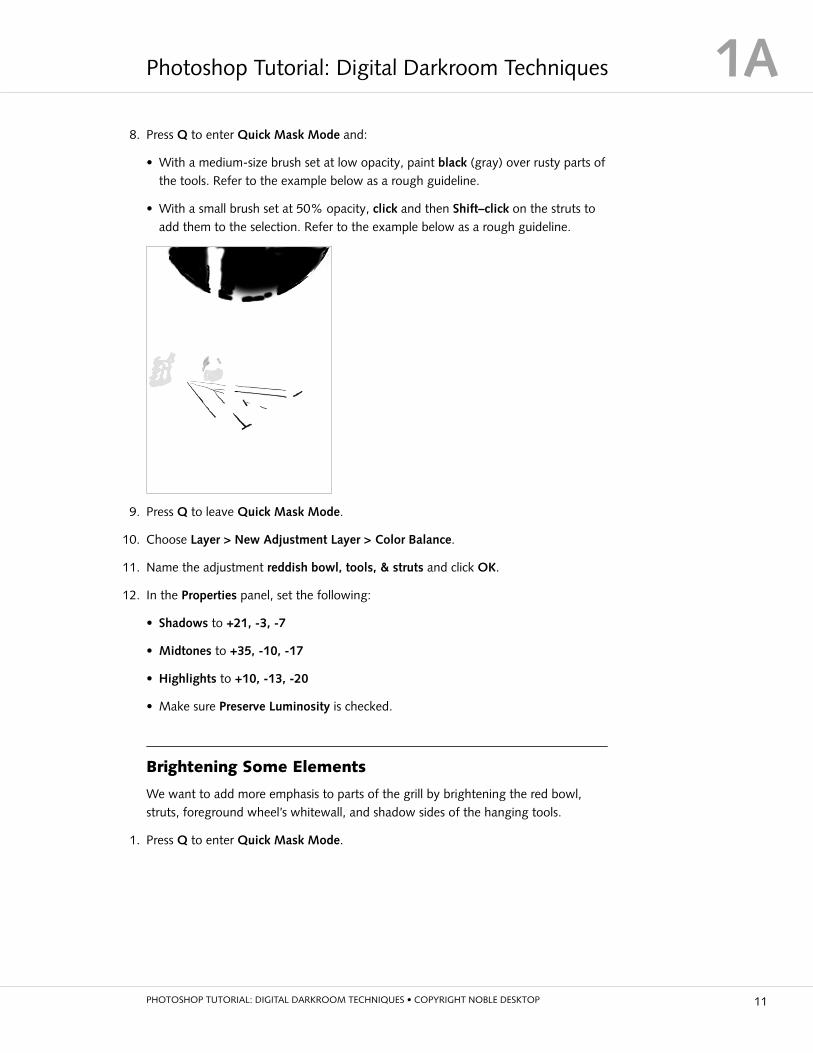
8. Press Q to enter Quick Mask Mode and:
• With a medium-size brush set at low opacity, paint black (gray) over rusty parts ofthe tools. Refer to the example below as a rough guideline.
• With a small brush set at 50% opacity, click and then Shift–click on the struts toadd them to the selection. Refer to the example below as a rough guideline.
9. Press Q to leave Quick Mask Mode.
10. Choose Layer > New Adjustment Layer > Color Balance.
11. Name the adjustment reddish bowl, tools, & struts and click OK.
12. In the Properties panel, set the following:
• Shadows to +21, -3, -7
• Midtones to +35, -10, -17
• Highlights to +10, -13, -20
• Make sure Preserve Luminosity is checked.
Brightening Some Elements
We want to add more emphasis to parts of the grill by brightening the red bowl,struts, foreground wheel’s whitewall, and shadow sides of the hanging tools.
1. Press Q to enter Quick Mask Mode.
11PHOTOSHOP TUTORIAL: DIGITAL DARKROOM TECHNIQUES • COPYRIGHT NOBLE DESKTOP
1APhotoshop Tutorial: Digital Darkroom Techniques

2. Using the example below as a rough guideline, paint black (to select) over the bowl,tools, and wheels.
3. Press Q to leave Quick Mask Mode.
4. Choose Layer > New Adjustment Layer > Curves.
5. Name the adjustment brighten bowl, etc. and click OK.
6. In the Properties panel, brighten the highlights with a curve as shown below.
Balancing the Color Saturation
1. Some colors have become over saturated. To adjust them, choose Layer >New Adjustment Layer > Hue/Saturation.
2. Name the layer balance color saturation and click OK.
PHOTOSHOP TUTORIAL: DIGITAL DARKROOM TECHNIQUES • COPYRIGHT NOBLE DESKTOP12
Photoshop Tutorial: Digital Darkroom Techniques1A
3. In the Properties panel, make sure Colorize is not checked and:
• Set Saturation to -40.
• From the menu that says Master, choose Reds.
• Make Saturation -5 and Lightness +3.
• Change the menu to Yellows and make Saturation +23 and Lightness -15.
• Change the menu to Blues and make Saturation +20.
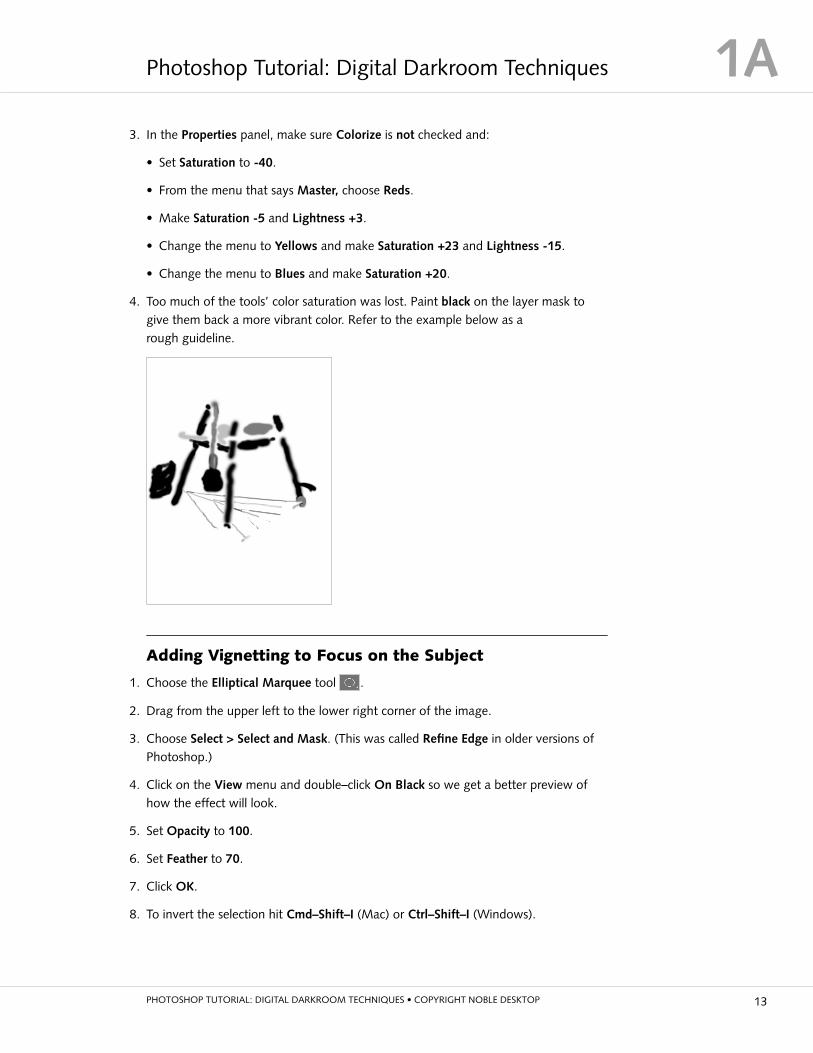
4. Too much of the tools’ color saturation was lost. Paint black on the layer mask togive them back a more vibrant color. Refer to the example below as arough guideline.
Adding Vignetting to Focus on the Subject
1. Choose the Elliptical Marquee tool .
2. Drag from the upper left to the lower right corner of the image.
3. Choose Select > Select and Mask. (This was called Refine Edge in older versions ofPhotoshop.)
4. Click on the View menu and double–click On Black so we get a better preview ofhow the effect will look.
5. Set Opacity to 100.
6. Set Feather to 70.
7. Click OK.
8. To invert the selection hit Cmd–Shift–I (Mac) or Ctrl–Shift–I (Windows).
13PHOTOSHOP TUTORIAL: DIGITAL DARKROOM TECHNIQUES • COPYRIGHT NOBLE DESKTOP
1APhotoshop Tutorial: Digital Darkroom Techniques
9. Cmd–Option–click (Mac) or Ctrl–Alt–click (Windows) on the layer mask on thereddish bowl, tools, & struts layer to subtract those areas from the selection.
10. Choose Layer > New Adjustment Layer > Curves.
11. Name it vignette and click OK.
12. In the Properties panel, drag the White Point (at the top right) straight down toInput 255/Output 138. If you don’t see the Input and Output values, you may haveto resize the Properties panel, making it taller.
13. With the layer mask still selected, use the Brush tool to mask out the vignettingon other foreground elements whose tones you want to preserve, like the hangingtools and wheels.
14. Your image should be looking good! Save and close the file.
Masking Tips
• When creating a mask select the parts of a layer you want to see. Then,when you click the Add layer mask button in the Layers panel, you’llsee what was selected and everything will be masked out (or hidden).
• Shift–click a mask thumbnail to disable it without throwing it away.
• Option–click (Mac) or Alt–click (Windows) a mask thumbnail to viewonly the mask, not the image.
• Option–Shift–click (Mac) or Alt–Shift–click (Windows) a mask thumbnailto view it as a shaded color overlay, much like a Quick Mask.
• Remove a mask by dragging the mask thumbnail to the trash. Photoshopwill ask if you want to Apply mask to layer before removing. In mostcases, you’ll want to choose Discard, to throw away the mask withoutaffecting the image layer. (If you click Apply, Photoshop will delete theareas of the layer that had been hidden by the mask.)
PHOTOSHOP TUTORIAL: DIGITAL DARKROOM TECHNIQUES • COPYRIGHT NOBLE DESKTOP14
Photoshop Tutorial: Digital Darkroom Techniques1A