photo resizing for your site with gimp. - yale university · photo resizing for your site with...
TRANSCRIPT
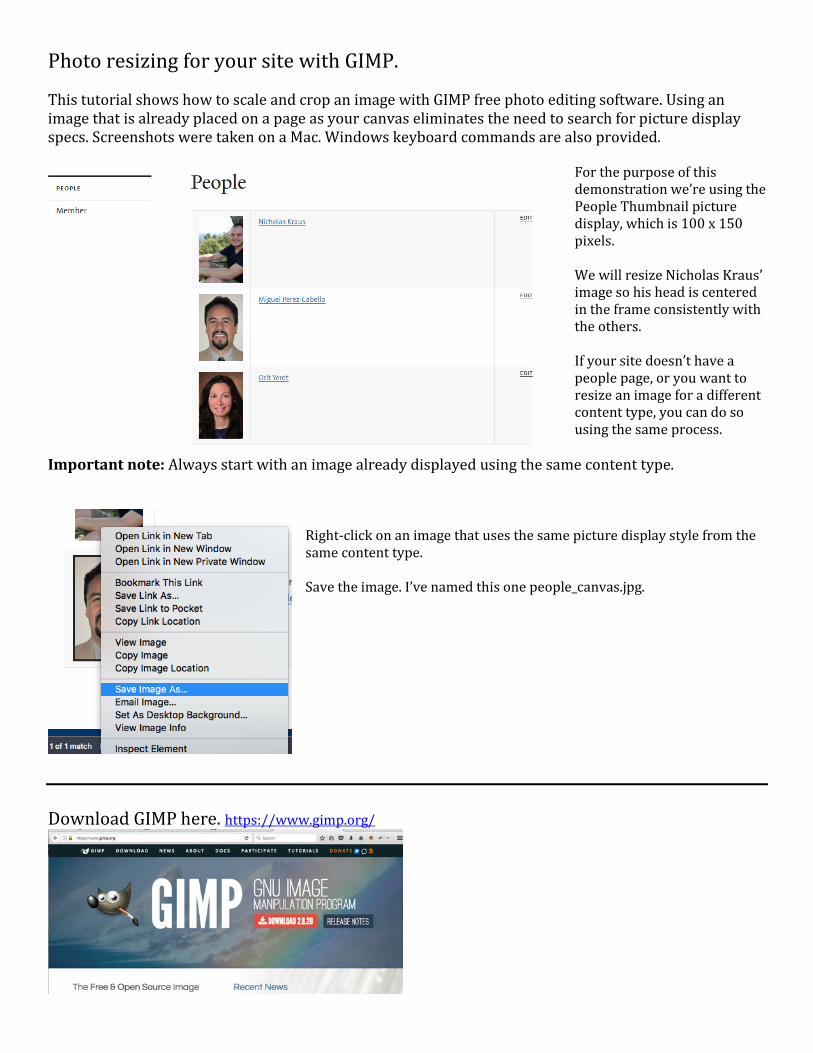
Photo resizing for your site with GIMP. This tutorial shows how to scale and crop an image with GIMP free photo editing software. Using an image that is already placed on a page as your canvas eliminates the need to search for picture display specs. Screenshots were taken on a Mac. Windows keyboard commands are also provided.
For the purpose of this demonstration we’re using the People Thumbnail picture display, which is 100 x 150 pixels. We will resize Nicholas Kraus’ image so his head is centered in the frame consistently with the others. If your site doesn’t have a people page, or you want to resize an image for a different content type, you can do so using the same process.
Important note: Always start with an image already displayed using the same content type.
Right-click on an image that uses the same picture display style from the same content type. Save the image. I’ve named this one people_canvas.jpg.
Download GIMP here. https://www.gimp.org/
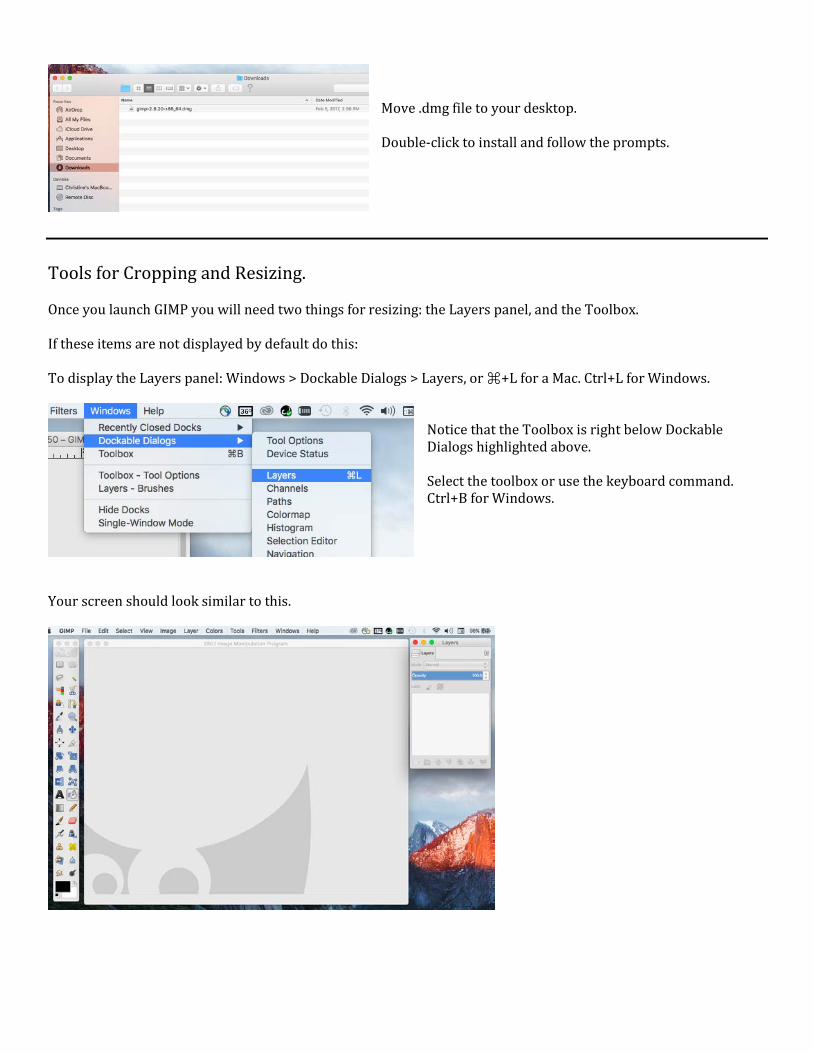
Move .dmg file to your desktop.
Double-click to install and follow the prompts.
Tools for Cropping and Resizing. Once you launch GIMP you will need two things for resizing: the Layers panel, and the Toolbox. If these items are not displayed by default do this: To display the Layers panel: Windows > Dockable Dialogs > Layers, or ⌘+L for a Mac. Ctrl+L for Windows.
Notice that the Toolbox is right below Dockable Dialogs highlighted above. Select the toolbox or use the keyboard command. Ctrl+B for Windows.
Your screen should look similar to this.

Go to File > Open, and navigate to the image on your hard drive, in this case people_canvas.jpg. Do the same to open the image you want to adjust.
The “M” key selects the move tool circled below in red, or use a mouse to select it. Click and drag the image layer circled in purple over to the people_canvas until a green circle with a plus sign appears on a Mac. Then release. A plain black plus sign will display for Windows users.
When you let go you’ll see two layers in the layer panel. The dotted line represents the actual image size of the larger image.
If you cannot see the dotted line you can zoom out using the zoom button in the lower left of the document window, circled in red here.
Layers Image
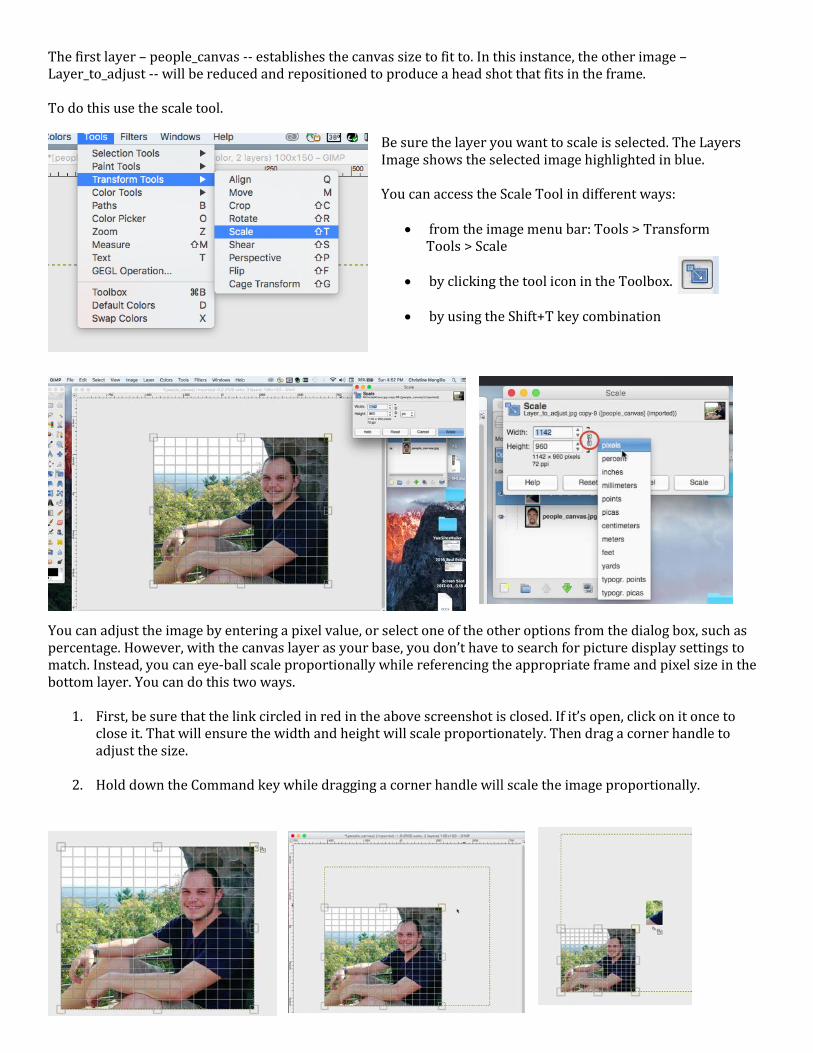
The first layer – people_canvas -- establishes the canvas size to fit to. In this instance, the other image – Layer_to_adjust -- will be reduced and repositioned to produce a head shot that fits in the frame. To do this use the scale tool.
Be sure the layer you want to scale is selected. The Layers Image shows the selected image highlighted in blue. You can access the Scale Tool in different ways:
• from the image menu bar: Tools > Transform Tools > Scale
• by clicking the tool icon in the Toolbox.
• by using the Shift+T key combination
You can adjust the image by entering a pixel value, or select one of the other options from the dialog box, such as percentage. However, with the canvas layer as your base, you don’t have to search for picture display settings to match. Instead, you can eye-ball scale proportionally while referencing the appropriate frame and pixel size in the bottom layer. You can do this two ways.
1. First, be sure that the link circled in red in the above screenshot is closed. If it’s open, click on it once to close it. That will ensure the width and height will scale proportionately. Then drag a corner handle to adjust the size.
2. Hold down the Command key while dragging a corner handle will scale the image proportionally.
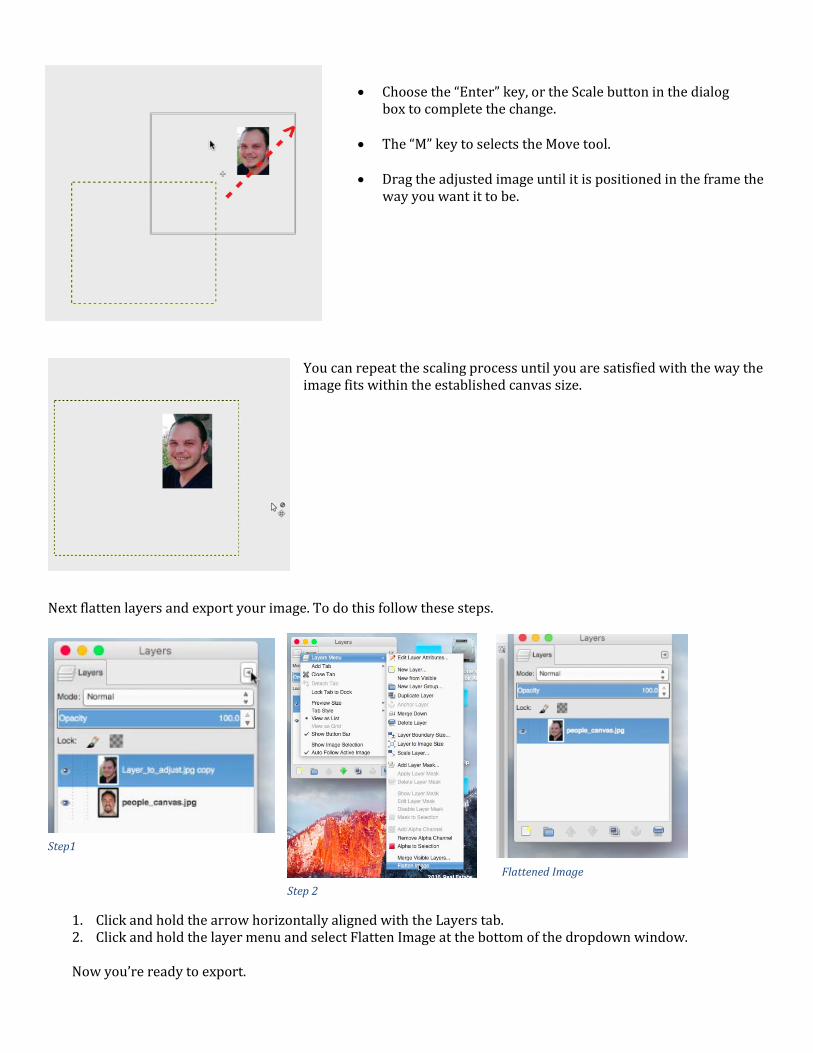
• Choose the “Enter” key, or the Scale button in the dialog box to complete the change.
• The “M” key to selects the Move tool.
• Drag the adjusted image until it is positioned in the frame the way you want it to be.
You can repeat the scaling process until you are satisfied with the way the image fits within the established canvas size.
Next flatten layers and export your image. To do this follow these steps.
1. Click and hold the arrow horizontally aligned with the Layers tab. 2. Click and hold the layer menu and select Flatten Image at the bottom of the dropdown window.
Now you’re ready to export.
Flattened Image
Step1
Step 2
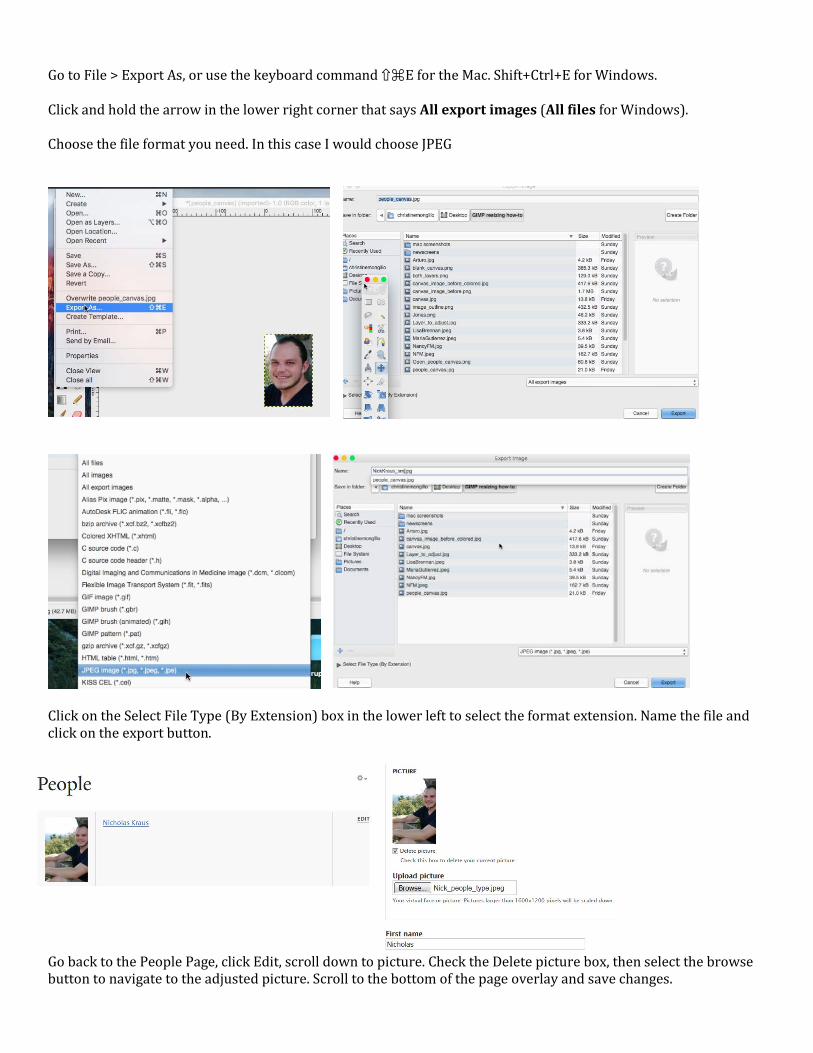
Go to File > Export As, or use the keyboard command ⇧⌘E for the Mac. Shift+Ctrl+E for Windows. Click and hold the arrow in the lower right corner that says All export images (All files for Windows). Choose the file format you need. In this case I would choose JPEG
Click on the Select File Type (By Extension) box in the lower left to select the format extension. Name the file and click on the export button.
Go back to the People Page, click Edit, scroll down to picture. Check the Delete picture box, then select the browse button to navigate to the adjusted picture. Scroll to the bottom of the page overlay and save changes.