pattern collaboration guide
TRANSCRIPT

PATTERNCOLLABORATION
GUIDE

2
HELLO COLLABORATORS! Missouri Star Quilt Company is excited to be partnering with you.
Please review this collaboration guide before you begin your
collaboration with Missouri Star Star Quilt Company. This will help to
ensure our partnership runs smoothly and help answer any questions
you may have.
Our goal for this collaboration is to highlight your amazing project
and who you are as a creator while giving our customers patterns in
the style that we are known for. This guide will cover a few standards
we have for introduction/bio letters, formatting, pattern writing,
diagrams, and basic techniques that we include in all of our patterns.
We will incorporate your techniques and noteworthy information that
we may be missing—so don’t forget to highlight it for us when filling
out the attached google form we supplied along with this guide.
3
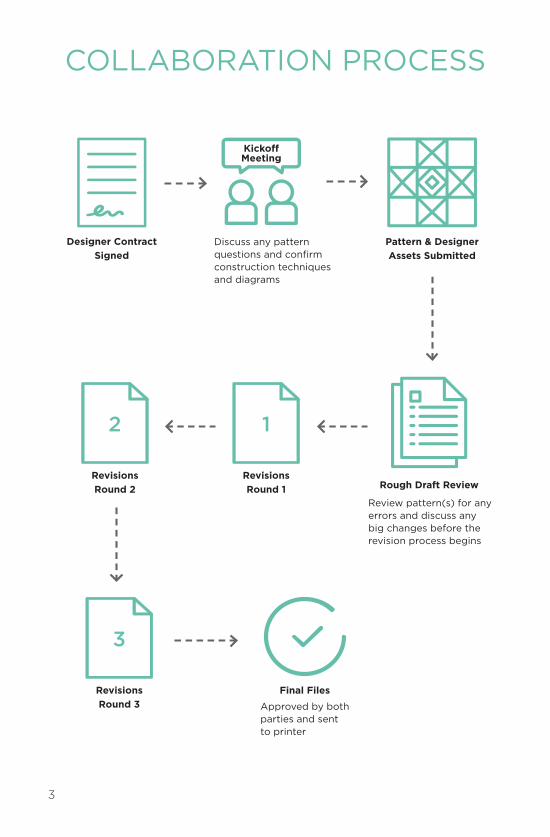
COLLABORATION PROCESS
Designer Contract Signed
Kickoff Meeting
Discuss any pattern questions and confirm construction techniques and diagrams
Rough Draft Review
12
3
Review pattern(s) for any errors and discuss any big changes before the revision process begins
Revisions Round 1
Revisions Round 2
Revisions Round 3
Final Files
Pattern & Designer Assets Submitted
Approved by both parties and sent to printer
4
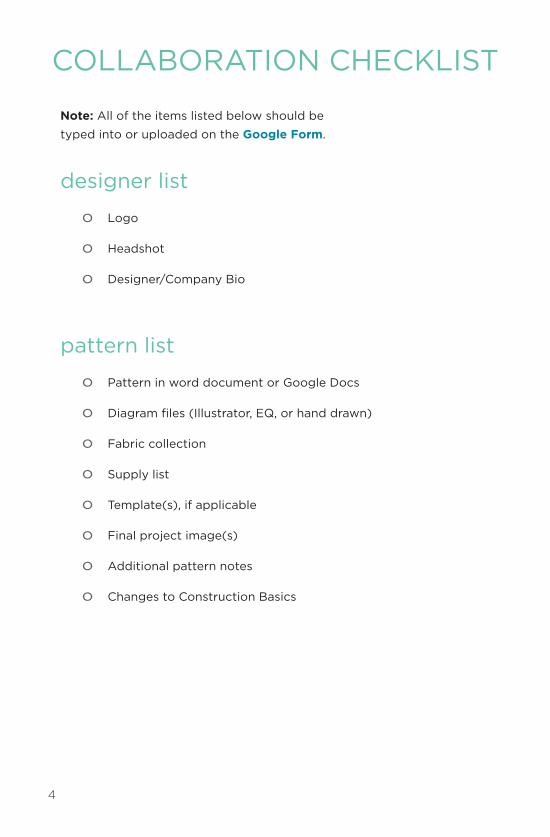
COLLABORATION CHECKLIST
designer list
o Logo
o Headshot
o Designer/Company Bio
pattern list
o Pattern in word document or Google Docs
o Diagram files (Illustrator, EQ, or hand drawn)
o Fabric collection
o Supply list
o Template(s), if applicable
o Final project image(s)
o Additional pattern notes
o Changes to Construction Basics
Note: All of the items listed below should be
typed into or uploaded on the Google Form.
5
BLOCK OF THE MONTHPROGRAM GUIDELINES
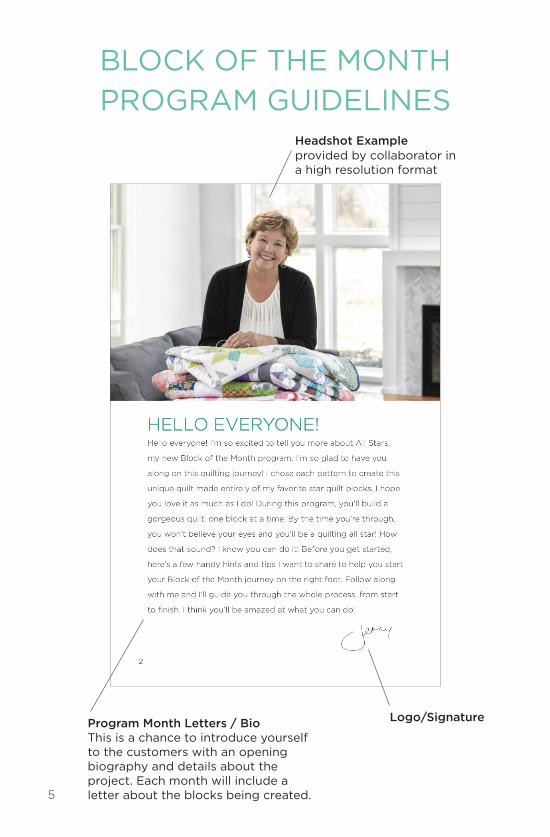
Headshot Example
Logo/SignatureProgram Month Letters / BioThis is a chance to introduce yourself to the customers with an opening biography and details about the project. Each month will include a letter about the blocks being created.
provided by collaborator in a high resolution format

6
Fabric KeyWe include a comprehesive fabric key in our Getting Started Guide that helps customers keep track of their fabric and the usage. Keep in mind how you will label the fabric utilized throughout the patterns.
Supplies / Fabric RequirementsPlease list all fabric and supply requirements needed to complete the project throughout the entire program.
7
PATTERN OVERVIEW
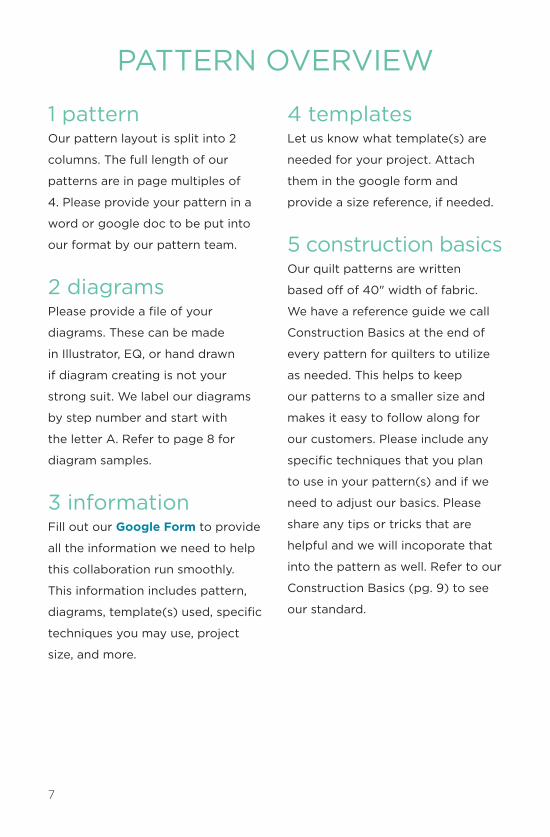
1 pattern Our pattern layout is split into 2
columns. The full length of our
patterns are in page multiples of
4. Please provide your pattern in a
word or google doc to be put into
our format by our pattern team.
2 diagrams Please provide a file of your
diagrams. These can be made
in Illustrator, EQ, or hand drawn
if diagram creating is not your
strong suit. We label our diagrams
by step number and start with
the letter A. Refer to page 8 for
diagram samples.
3 information Fill out our Google Form to provide
all the information we need to help
this collaboration run smoothly.
This information includes pattern,
diagrams, template(s) used, specific
techniques you may use, project
size, and more.
4 templates Let us know what template(s) are
needed for your project. Attach
them in the google form and
provide a size reference, if needed.
5 construction basics Our quilt patterns are written
based off of 40" width of fabric.
We have a reference guide we call
Construction Basics at the end of
every pattern for quilters to utilize
as needed. This helps to keep
our patterns to a smaller size and
makes it easy to follow along for
our customers. Please include any
specific techniques that you plan
to use in your pattern(s) and if we
need to adjust our basics. Please
share any tips or tricks that are
helpful and we will incoporate that
into the pattern as well. Refer to our
Construction Basics (pg. 9) to see
our standard.
8
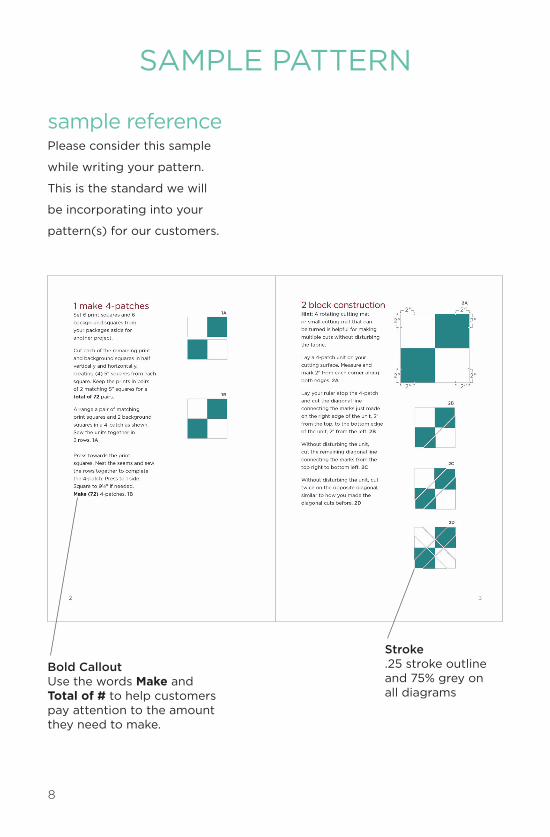
SAMPLE PATTERN
Stroke.25 stroke outline and 75% grey onall diagrams
Bold CalloutUse the words Make and Total of # to help customers pay attention to the amount they need to make.
sample reference Please consider this sample
while writing your pattern.
This is the standard we will
be incorporating into your
pattern(s) for our customers.
9
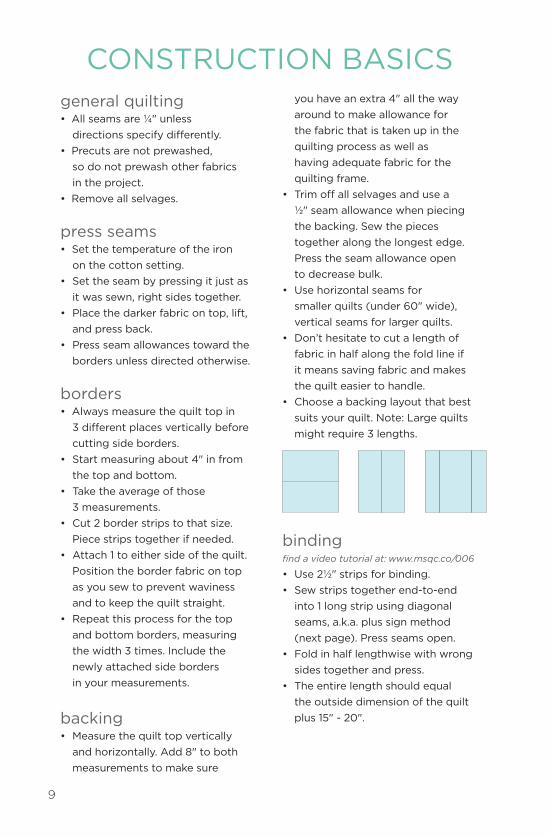
CONSTRUCTION BASICSgeneral quilting• All seams are ¼" unless
directions specify differently.• Precuts are not prewashed,
so do not prewash other fabrics in the project.
• Remove all selvages.
press seams• Set the temperature of the iron
on the cotton setting. • Set the seam by pressing it just as
it was sewn, right sides together.• Place the darker fabric on top, lift,
and press back. • Press seam allowances toward the
borders unless directed otherwise.
borders• Always measure the quilt top in
3 different places vertically before cutting side borders.
• Start measuring about 4" in from the top and bottom.
• Take the average of those 3 measurements.
• Cut 2 border strips to that size. Piece strips together if needed.
• Attach 1 to either side of the quilt. Position the border fabric on top as you sew to prevent waviness and to keep the quilt straight.
• Repeat this process for the top and bottom borders, measuring the width 3 times. Include the newly attached side borders in your measurements.
backing• Measure the quilt top vertically
and horizontally. Add 8" to both measurements to make sure
you have an extra 4" all the way around to make allowance for the fabric that is taken up in the quilting process as well as having adequate fabric for the quilting frame.
• Trim off all selvages and use a 1/2" seam allowance when piecing the backing. Sew the pieces together along the longest edge. Press the seam allowance open to decrease bulk.
• Use horizontal seams for smaller quilts (under 60" wide), vertical seams for larger quilts.
• Don’t hesitate to cut a length of fabric in half along the fold line if it means saving fabric and makes the quilt easier to handle.
• Choose a backing layout that best suits your quilt. Note: Large quilts might require 3 lengths.
bindingfind a video tutorial at: www.msqc.co/006
• Use 21/2" strips for binding. • Sew strips together end-to-end
into 1 long strip using diagonal seams, a.k.a. plus sign method (next page). Press seams open.
• Fold in half lengthwise with wrong sides together and press.
• The entire length should equal the outside dimension of the quilt plus 15" - 20".
10
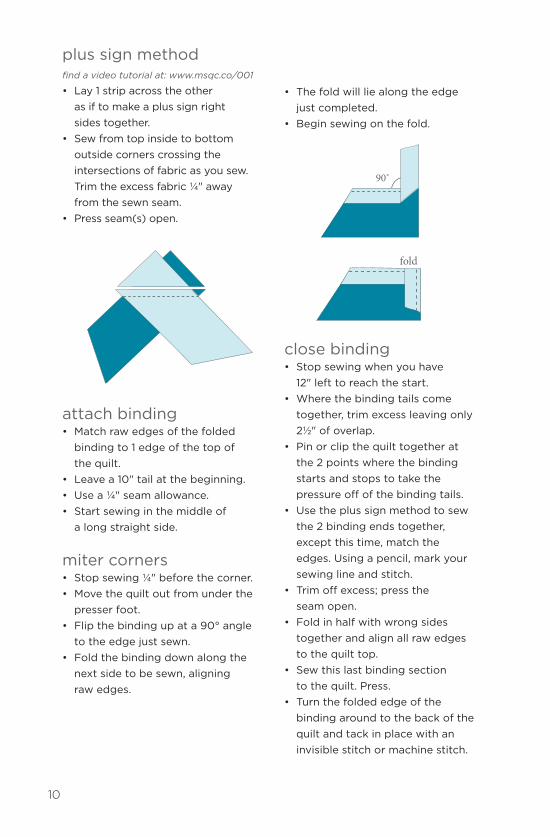
plus sign methodfind a video tutorial at: www.msqc.co/001
• Lay 1 strip across the other as if to make a plus sign right sides together.
• Sew from top inside to bottom outside corners crossing the intersections of fabric as you sew. Trim the excess fabric ¼" away from the sewn seam.
• Press seam(s) open.
attach binding• Match raw edges of the folded
binding to 1 edge of the top of the quilt.
• Leave a 10" tail at the beginning. • Use a ¼" seam allowance.• Start sewing in the middle of
a long straight side.
miter corners• Stop sewing ¼" before the corner. • Move the quilt out from under the
presser foot.• Flip the binding up at a 90° angle
to the edge just sewn.• Fold the binding down along the
next side to be sewn, aligning raw edges.
close binding• Stop sewing when you have
12" left to reach the start. • Where the binding tails come
together, trim excess leaving only 21/2" of overlap.
• Pin or clip the quilt together at the 2 points where the binding starts and stops to take the pressure off of the binding tails.
• Use the plus sign method to sew the 2 binding ends together, except this time, match the edges. Using a pencil, mark your sewing line and stitch.
• Trim off excess; press the seam open.
• Fold in half with wrong sides together and align all raw edges to the quilt top.
• Sew this last binding section to the quilt. Press.
• Turn the folded edge of the binding around to the back of the quilt and tack in place with an invisible stitch or machine stitch.
• The fold will lie along the edge just completed.
• Begin sewing on the fold.
90˚
fold