pantera heater box removal and disassembly procedure dumoulin heater box.pdf · pantera heater box...
TRANSCRIPT

Pantera Heater Box Removal and Disassembly Procedure By Rob DuMoulin
These instructions, illustrations, and pictures depict the heater box removal of a 1971 Pantera #1488 with some pillaged pics from
John Buckman. In order to do this, you must first remove the dashboard as described in a separate document. The process from
start to physical removal from the car took about 2 hours to remove the dash and about an hour to remove the heater box and clean
up the mess it made. I removed the heater box to upgrade the evaporator and better seal my fresh air vent. When I got into the
disassembly, I noticed that all of the original insulation foam was deteriorated and needed to be replaced. Also, this is a good time
to replace the cabin heater hoses and evaporator drain tubes. There are horror stories about drivers getting scalded when their in-
cabin heater hose ruptures on their feet and does not enable them to hit brakes without further scalding. You may also want to
consider upgrading the blower motor to a modern one that pulls less current and blows much harder.
Heater Box Removal Start on the Driver’s Side
1. Follow coolant supply lines up from the center console to the heater box on the driver’s side of the cabin. Notice there are a few
brackets that hold the coolant flow valve. Remove the bolt that attaches the coolant flow valve bracket to the car.
2. Loosen the fastener that secures the cable connecting the valve to the Off/Heat slide control and slide coiled cable end off of its
connect shaft on the valve.
3. There are 2 additional climate control cables attached to the driver’s side of the heater box. The one towards the rear of the car
operates the Car/Defrost control to open the defrost vent and the one towards the front of the car operates the Air/Off control
that allows air from the windshield wiper grill area to enter the heater box top. Disconnect them both.
4. Remove the flex vent hose that connects the driver side defroster port on the heater box to the defrost vent base.
5. You do not have to drain the radiator, but will have to use vice grips or QuickGrips to clamp the heater hoses so you do not get
excessive water in your cabin. If you plan to replace the cabin hoses, clamp the heater hoses between the water pump and the
firewall in the engine bay. Otherwise, you can just clamp the cabin side hoses.
6. As you remove the hose clamps from the cabin heater hoses, coolant will leak out. Have a few large towels handy. I also had
two small plastic screw container drawers that I swapped out and drained into a bucket until the hemorrhaging stopped. I
would guess about 24 ounces came out. If you have spare heater hose, connect the two lines together with it to ensure no
engine coolant goes into the cabin area.
Passenger Side
7. Disconnect the evaporator drain tube that goes from the bottom of the evaporator and drains out of the passenger front foot
well. Consider replacing this if it is still original. You should be able to pull the drain tube up through the foot well. Mine had a
metal 90 degree tube clamped to the end to help direct the water downwards.
8. Disconnect the control wire that operates the “Pull for Floor” control.
9. There is a coil on the passenger side of the
heater box that has three terminal posts,
but the center post is not connected. The
wires feeding these terminals snake around
the fan motor. Note the color and location
below and remove them.
10. Disconnect the refrigerant lines. This was very difficult in my case and it took heavy soaking of penetrant to allow disconnecting.
Rear of Car Front of Car
Wire Color Wire Color
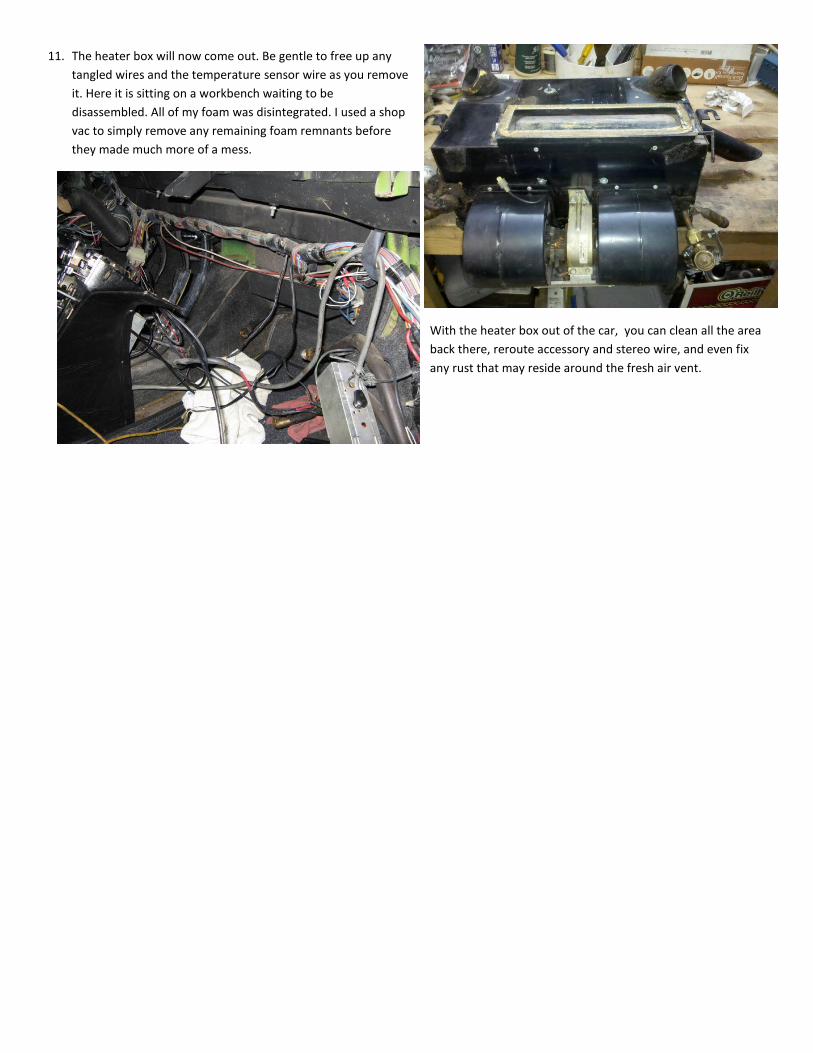
11. The heater box will now come out. Be gentle to free up any
tangled wires and the temperature sensor wire as you remove
it. Here it is sitting on a workbench waiting to be
disassembled. All of my foam was disintegrated. I used a shop
vac to simply remove any remaining foam remnants before
they made much more of a mess.
With the heater box out of the car, you can clean all the area
back there, reroute accessory and stereo wire, and even fix
any rust that may reside around the fresh air vent.
Heater Box Disassembly and Reassembly
My project involved upgrading the evaporator and blow motor which I purchased from one of the vendors. Sadly, the
blower motor was not a great fit but I was able to drill new mounting holes in both my heater box and the blower base,
trim away some extra plastic, and make it work. More disappointing was the evaporator which required a large increase
in heater box hole where the refrigerant tubes enter and leave the box. Another disappointment was the connector on
the heater core. One had the correct tube to hook up the return hose with a clamp but the other had a flare fitting that
is not compatible with the connector on the water shutoff valve.
As stated previously, all of my original foam insulation had disintegrated. I used a 3 ½ inch roll of Owens Corning Ridge
Sill foam, which is nearly the perfect width for all the places I used it. I used liquid nails to secure it. When installing this
foam, make sure you glue the flat side of the foam and not the ridged side. Don’t worry about making the pieces just the
right size. Make them a little larger than you need because you can melt them down with a lighter to finish them. Be
careful though because they will catch fire and burn if you put the flame too close.
These instructions and illustrations show the evaporator replacement and forming of new insulation foam.
1. With the heater box on a working bench or table, remove the 4 screws that attach the fan shrouds to the heater box
and the 3 screws that mount the fan center to the heater box. Remove fan.
2. Peel back the rubber insulation that seals the box edges and seals where the plumbing enters the heater box. Place
the rubber aside. It is reusable.
3. Remove the 4 screws on either end of the heater box. If the box were in the car still, these screws would be on the
top and front sides of the box.
4. Remove the 3 screws at the top of the main cabin vent. These may be hidden by foam.
5. Use a pry bar and screwdriver to gently separate the
cover which spans the top and back half of the heater
box then gently remove the cover.
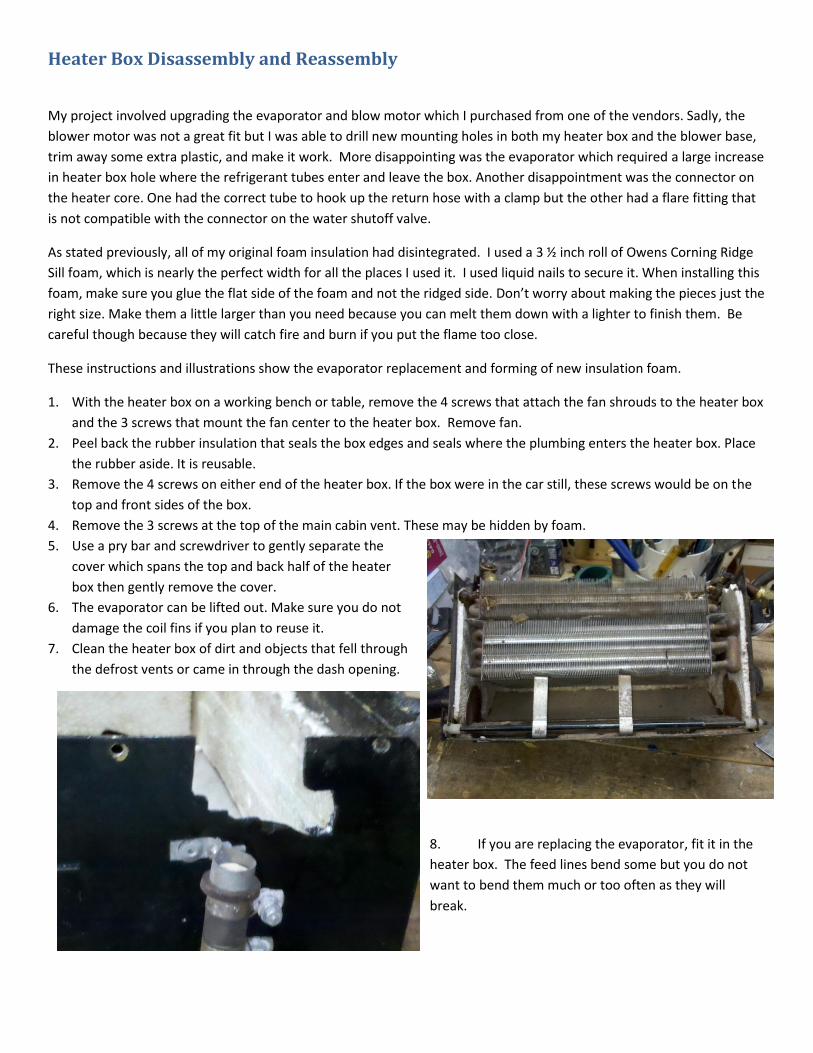
6. The evaporator can be lifted out. Make sure you do not
damage the coil fins if you plan to reuse it.
7. Clean the heater box of dirt and objects that fell through
the defrost vents or came in through the dash opening.
8. If you are replacing the evaporator, fit it in the
heater box. The feed lines bend some but you do not
want to bend them much or too often as they will
break.
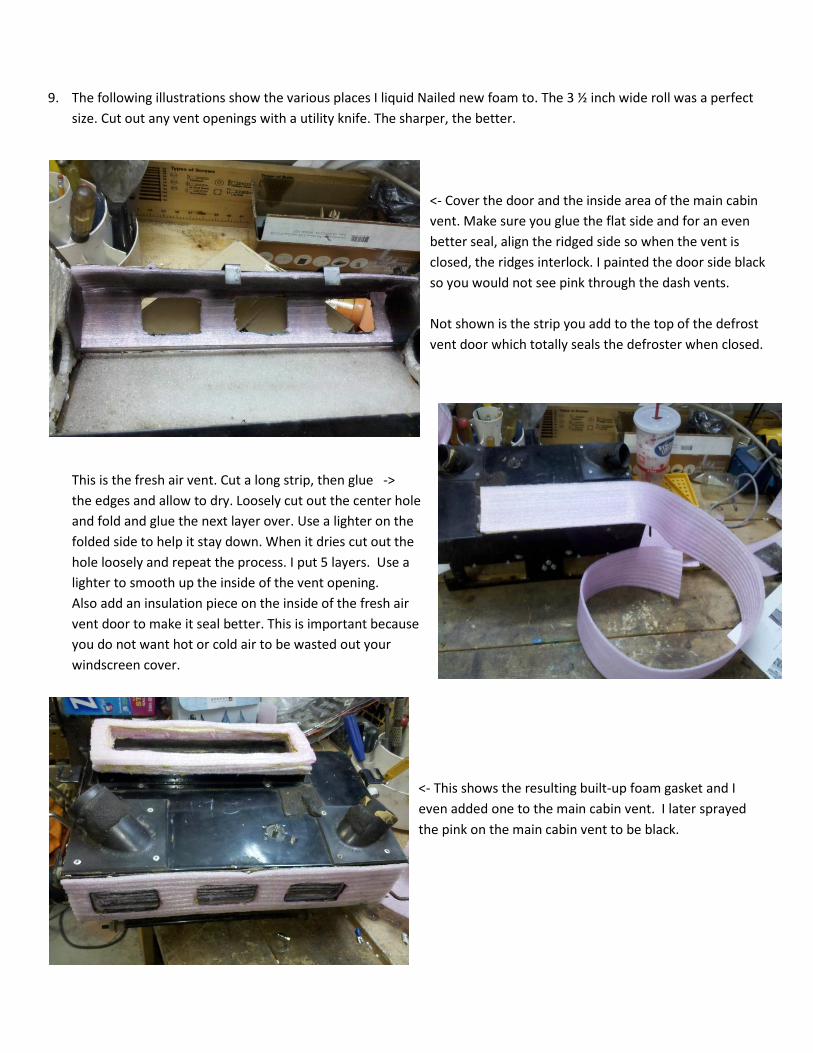
9. The following illustrations show the various places I liquid Nailed new foam to. The 3 ½ inch wide roll was a perfect
size. Cut out any vent openings with a utility knife. The sharper, the better.
<- Cover the door and the inside area of the main cabin
vent. Make sure you glue the flat side and for an even
better seal, align the ridged side so when the vent is
closed, the ridges interlock. I painted the door side black
so you would not see pink through the dash vents.
Not shown is the strip you add to the top of the defrost
vent door which totally seals the defroster when closed.
This is the fresh air vent. Cut a long strip, then glue ->
the edges and allow to dry. Loosely cut out the center hole
and fold and glue the next layer over. Use a lighter on the
folded side to help it stay down. When it dries cut out the
hole loosely and repeat the process. I put 5 layers. Use a
lighter to smooth up the inside of the vent opening.
Also add an insulation piece on the inside of the fresh air
vent door to make it seal better. This is important because
you do not want hot or cold air to be wasted out your
windscreen cover.
<- This shows the resulting built-up foam gasket and I
even added one to the main cabin vent. I later sprayed
the pink on the main cabin vent to be black.
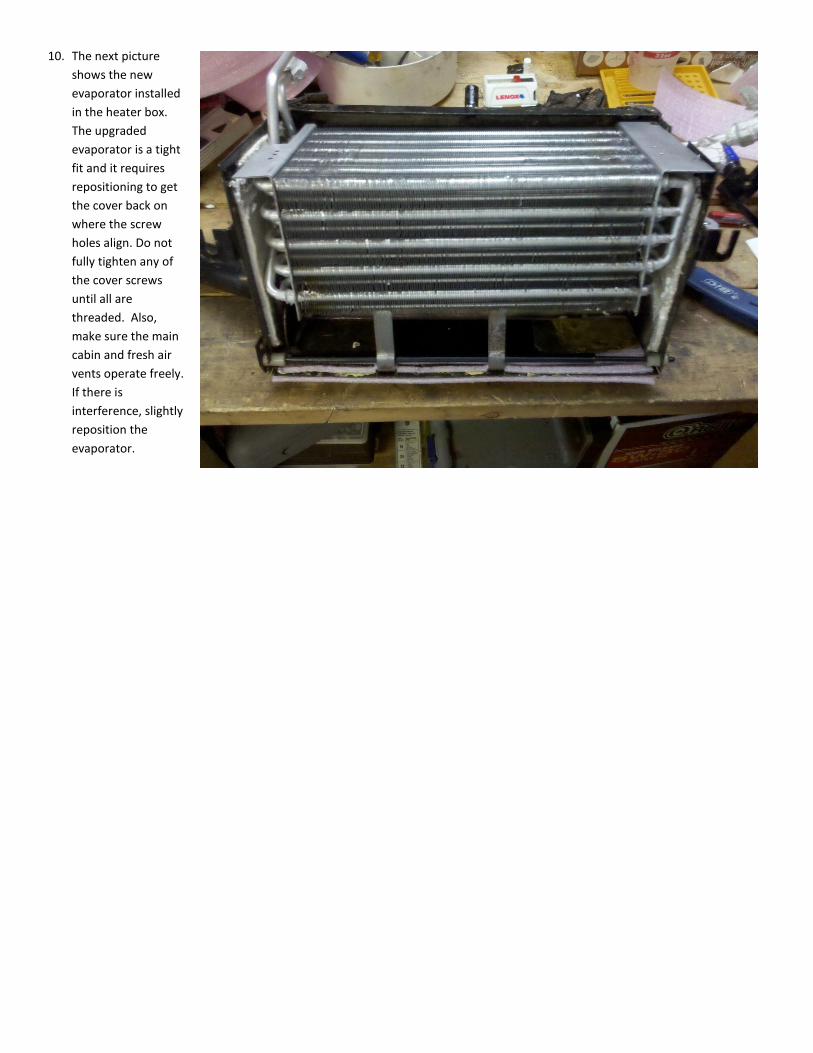
10. The next picture
shows the new
evaporator installed
in the heater box.
The upgraded
evaporator is a tight
fit and it requires
repositioning to get
the cover back on
where the screw
holes align. Do not
fully tighten any of
the cover screws
until all are
threaded. Also,
make sure the main
cabin and fresh air
vents operate freely.
If there is
interference, slightly
reposition the
evaporator.
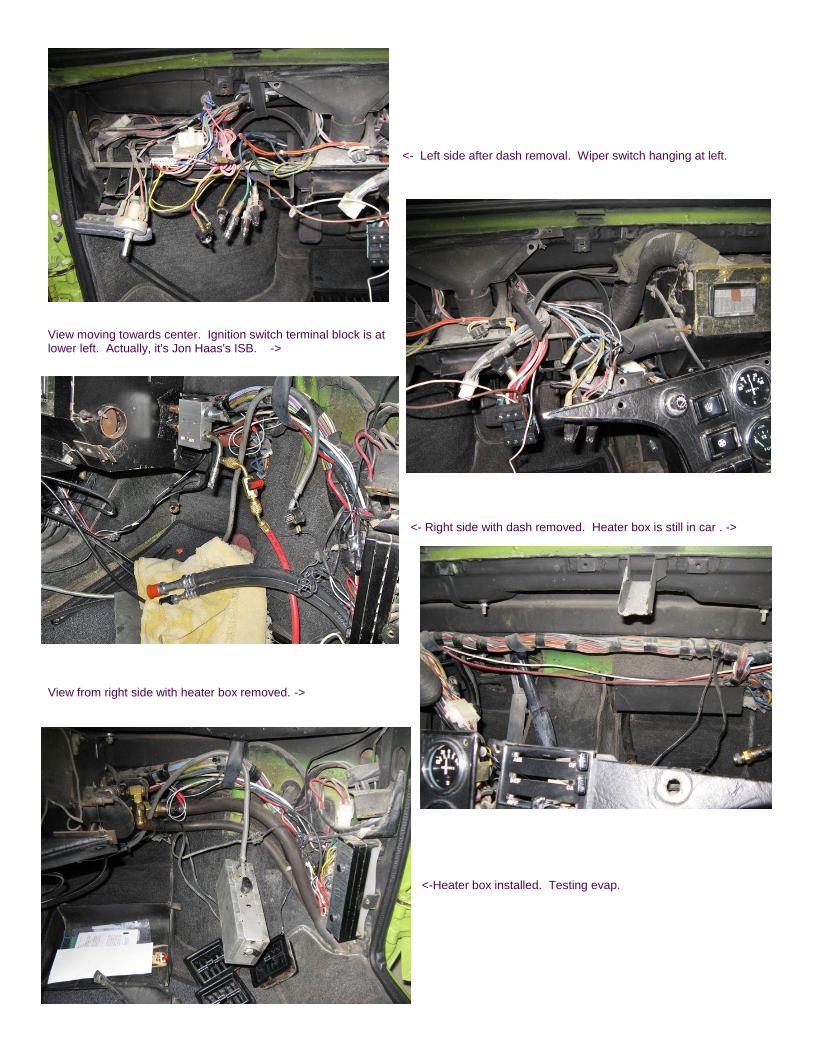
<- Left side after dash removal. Wiper switch hanging at left.
View moving towards center. Ignition switch terminal block is at lower left. Actually, it's Jon Haas's ISB. ->
<- Right side with dash removed. Heater box is still in car . ->
View from right side with heater box removed. ->
<-Heater box installed. Testing evap.