owner’s manual - thane direct usa ti m e b u t t o n power button timer button input pad dome...
TRANSCRIPT
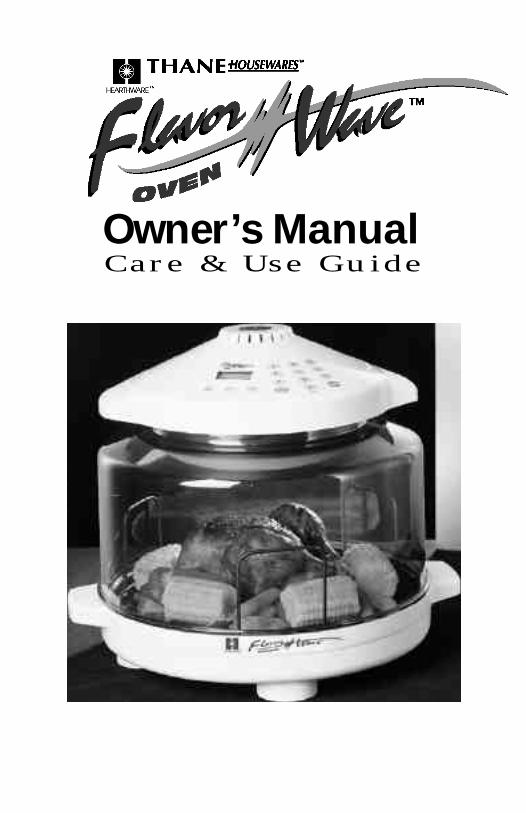
Owner’s ManualC a re & Use Guide

1
Thank You…On behalf of the entire team at Thane Housewares, weappreciate your recent purchase of your Flavor Wave Oven.
This cooking system will provide you with healthy and tastymeals for many years to come. We worked long and hard tomake this the best cooking appliance available and, only afterextensive testing, added it to our family of quality products forthe home.
Enjoy your new Flavor Wave Oven.
… and, once again, thank you.

2
IMPORTANT SAFEGUARDSWhen using electrical products, especially when children are present, basic safetyp recautions should always be followed, including the following:
READ ALL INSTRUCTIONS BEFORE USINGDANGER – To reduce the risk of electrocution:
1 . Read all instructions, safeguards, and warnings before using the appliance. 2 . Do not place appliance where it can fall or be pulled into water or other liquid. 3. Do not reach for an appliance that has fallen into water.
Unplug immediately!4. Do not immerse cord, plug, or heater/control assembly of the appliance in water
or other liquids.
WARNING – To reduce the risk of burns, electrocution,fire, or injury to persons.
1 . This appliance should not be used by children. Close supervision is necessary whenthis product is used near children or invalids.
2 . Use this appliance for its intended use as described in this bro c h u re. Do not use anyother accessories or attachments not recommended by the manufacture r. They mayresult in fire, electrical shock, or personal injury.
3 . Never operate this appliance if it has a damaged cord or plug, if it is not working properly, if it has been dropped or damaged, or dropped into water.Return the appliance to an authorized customer service center for inspection,repair, or adjustment.
4 . Keep the cord away from heated surf a c e s .5 . Always grab by the plug to remove charger from outlet. DO NOT pull
on cord .6 . Never force the plug into an outlet.7 . Do not use outdoors or operate where aerosol (spray) products are being used or
w h e re oxygen is being administere d .8 . Do not let the cord hang over the edge of the table or counter, or touch hot surf a c e s .9 . Do not place on or near a hot gas or electric burner or in a heated oven.
1 0 . Do not move the appliance while it contains hot food. Use extreme caution whenremoving hot liner pan or cooking racks.
1 1 . B e f o re removing plug from wall, turn control to OFF by pressing the PA U S E / C L E A Rbutton twice.
1 2 . Do not use this appliance for anything other than it is intended.1 3 . Check all electrical wiring. Beware of damaged cord or plug.1 4 . This appliance is for household use only; it is designed to process normal household
quantities. It is not suitable for continuous or commercial operation.

1 5 . Do not disassemble the product. There are no user serviceable part s .1 6 . Do not leave the appliance unattended while in use.1 7 . Use the handles when lifting the dome from the base.1 8 . Do not touch hot surfaces. Use the handles pro v i d e d .1 9 . Place the unit on standby before removing the dome to check or turn food. The
dome and heater/control assembly should be placed on the counter resting ontheir side.
20. Always remove the dome away from you so the escaping steam is channeled awayf rom your face.
21. If the power cord is damaged, it should be replaced by a special cord or assemblyf rom the manufacturer or its service agent.
2 2 . Use caution when disposing of hot gre a s e .2 3 . Keep this manual handy for easy future re f e re n c e .
SAVE THESE INSTRUCTIONSElectrical Information
The cord length of this appliance was selected to reduce Safety Hazards that mayoccur with a long cord. Extension cords are available and may be used if care ise x e rcised in their use. If an extension cord is used, (1) the marked electrical rating of theextension cord should be at least as great as the electrical rating of the appliance, and(2) the longer cord should be arranged so that it will not drape over the counter or tabletop where it could be pulled on by children or tripped over.
C e rtain models of the appliances may have a polarized plug (one blade is wider thanthe other). To reduce the risk of an electric shock, this plug is intended to fit into apolarized outlet only one way. If the plug does not fit fully into the outlet, reverse theplug. If it still does not fit pro p e r l y, contact a qualified electrician. Do not attempt tomodify the plug in any way.
3
WARNINGElectric shock hazard. Use with adequate electricalsystem. Do not use if cord or plug is damaged.

PARTS/ASSEMBLY DIAGRAM
TransparentDome
Cooking Grid
Liner Pan
Base
Heater ControlAssembly
Handles
Digital Display
Cook Ti m eB u t t o n
Power Button
Timer Button
INPUT PAD
DomeHolder
4

Before Using• B e f o re using, wash cooking dome,
liner pan, base pan, and cooking grid in hot soapy water or clean in your dishwasher.
• I M P O RTA N T: DO NOT WASH OR IMMERSEH E ATER/CONTROL ASSEMBLY IN WATER ORIN DISHWASHER. THE OUTER SURFACE CANBE CLEANED BY WIPING CAREFULLY WITH A DAMP DISHCLOTH OR SPONGE.
• Remove the thin vinyl film on the control panel before operating. After the vinylfilm is removed you may notice an appearance of unknown images on thedisplay panel. Please do not be alarmed. This is caused by static electricityf rom the vinyl film and will disappear after 15-20 seconds.
Assembly• Place base pan on a firm stable surf a c e .• Place liner pan inside base. When placing
liner pan inside the base, make sure thehandles are positioned at the dropped downposition. If the handles are not fully dro p p e ddown, the cooking dome may not fit overthe base pro p e r l y. (see illustration)
• Place dual level cooking grid on the linerpan according to cooking re q u i re m e n t s .
• Place food on the cooking grid.• Place cooking dome over food and onto
base. The dome should fit into the basee v e n l y.
• Place heater/control assembly intodome and lock it into place byrotating the heater/control assemblyclockwise until the locking lugs a re engaged.
• Set time and power according tocooking re q u i re m e n t s .
5

General Use Instructions• Make sure the unit is safely plugged into a properly grounded outlet and
that the cord is not touching any hot object.• Make sure that the liner pan has been placed within the base.• Protect the non-stick surfaces - use plastic utensils on the nonstick
surfaces, metal tools should be avoided.• Do not place the liner pan directly onto a stove burner or direct heat
source. It will warp.• Metal and glass dishes, pans, and foil may be safely used within the
Flavor Wave Oven.
How to Open Heat Control Assembly andDome Assembly
Make sure the heater control assembly is tightly locked into the dome,then the whole assembly can be easily opened and put aside as shown insteps 1, 2 and 3: Place dome holder under either side of base handle. Makes u re both feet of the dome holder are placed inside the handle and the domeholder is resting horizontally on a flat surface. Then the power head anddome assembly can be placed on the dome holder as shown in step 3.
Cooking InstructionsLift dome only by the handles onthe heater/control assembly. Oncethe heater/control assembly and thecooking dome is locked in place, theheater/control assembly handles willallow you to lift them all togetherwhen removing and/or checking onfood. When removing the liner panwhile it is still hot, be extremelycareful and always use oven mitts.The retractable handles are providedfor your convenience and safety. Forbest results, follow the time, power, and cooking grid height instructionsgiven in the cooking chart and the recipe book. No preheating required.
WARNING
Do not touch thecooking dome or anys u rfaces on the heaterassembly duringoperation. The air insidethe cooking domereaches a temperature of170C/338F which makesthe surface very hot andmay cause burn s .
6

Setting Cooking TimePress COOK TIME button. The MINindicator will flash in the lowerright corner of the display panel.Enter the required time in hoursand minutes by pressing thenumeric buttons. If 3 numbers areentered, it will register H M M inthis order. Example: 2 hours and 30minutes would be entered bypressing 230. The display panel willshow 2:30. If required time is inminutes, you only need to entertwo numbers. Example: 54 minuteswould be entered by pressing 54.The display panel will show :54.Verify the correct time setting in thedisplay panel. If the number needsto be corrected, clear by pressingpause/clear button twice thenreenter the correct two or threedigit numbers.
Setting Cooking Power Level• Press the POWER button.• The default "Hi" setting is indicated in the display panel.• PWR indicator flashes in the upper right corner of the display panel. To
override the default press the required cookingpower. Choices are 1 (lowest, display will show 10as in 10% of maximum power) to 9 (second highest,90% of maximum power). The power is entered as asingle digit like 9 or 3. To reset “Hi”, press 0.
• Verify the correct power setting in the control panel.• If the power setting needs to be corrected, reenter the required power.
NOTE : MAXIMUM ALLOWED TIME FOR “Hi” POWER IS 2HRS. IFCOOKING TIME IS SET FOR MORE THAN 2HRS, IT WILLAUTOMATICALLY REVERT TO 2:00 HRS. FOR POWER SETTINGSBETWEEN 1 - 9, MAXIMUM ALLOWED TIME IS 9 HOURS 99 MINUTES.
7

To Start CookingP ress S TA RT to begin cooking. The remaining cooking time will appear inthe display panel and the colon between the hours and minutes will blink onand off. The unit will automatically stop when cooking time has expired.
To Pause CookingPress PAUSE/CLEAR once to pause cooking. Theremaining cooking time will be visible, and the colonwill not blink.
NOTE: For some models, when the power head is liftedduring cooking, the unit may automatically go to PAUSE mode. Fan andheater will stop working, but the remaining cook time and power settingare still in the memory. Once the power head is put back on, you need topush START to resume cooking.
To end cookingTo manually shut off, press PAUSE/CLEAR two times. The remainingcooking time will be fully cleared and a "0" will appear.
Checking Time RemainingThe remaining cooking time will be visible in the display panel. Checkingpower settings while the unit is cooking. To confirm power settings,press POWER once. The power settings will appear on the display panelfor a few seconds. Remaining cooking time will then reappear.
Timer FunctionThis unit has been equipped with a timer only function. The timer functionwill only work when the unit is not cooking.
To activate the timer functionP ress pause/clear twice to clear any re m a i n i n gp rogramming, then press T I M E R button. A flashing bell willappear above M I N in the lower right hand corner of thedisplay panel. Enter re q u i red time in hours and minutes asH M M. Press S TA RT. When the time has expired, an alarm will sound.
WARNINGDo not place the power head on or close to any flammablesor combustibles. It may cause fire or explosion.
WARNINGDo not press the STA RT button after you lift the power head unlessyour oven is completely assembled as shown in the manual.
8

CLEANING AND CARE INSTRUCTIONSGeneral InstructionsUnplug the unit before cleaning.
Cooking dome and all other parts, other than theheater/control assembly are dishwasher safe. Protectthe metal and plastic surfaces; do not use abrasivecleaners or scouring pads.
Clean after each use.The outer surface of the heater/control assembly can be cleaned by wiping itwith a damp cloth. In the event that the grid on the heater/control assemblyneeds to be cleaned, the grid can be removed as follows:1. Remove the grid locking screw (see right figure).2. Slide the grid toward the side where the screw
was removed.3. When the opposite end is free, lift and remove.4. Use a damp cloth to clean.5. Do not use abrasives or scouring pads.6. Do not insert screwdriver or other object inside the
control unit.7. Reassemble before using.
IMPORTANT TIPS:1. Check the power source for proper operation. Do not operate the unit
with other major appliances in the same power outlet. Check powerlevel if the unit cooks too slow.
2. Check to see if electrical plug is properly plugged into the outlet.3. Always clear the display panel and unplug the unit before washing.4. Ve ry rare l y, you may see some vapor/moisture built up in the display
panel. Do not be alarmed. The vapor will disappear after a few minutes.5. Moisture may build up inside the Cooking Dome when cooked food is
not removed soon after cook time has expired. The steam/moisturebuild up can be avoided by doing the following:• Remove food soon after it is done cooking.• If it is desirable to keep the food warm until served, reset cooking
time at low power (1 or 2) then press start.
9

10
The Flavor Wave Ove nI N F R A R E D C O O K I N G S Y S T E M
To obtain warranty service, contact Thane Housewares at this toll free number:
1-800-762-4427
ONE YEAR LIMITED WA R R A N T YThe Flavor Wave is warranted, to the original owner, for one (1) year
from the date of purchase against defects in material and workmanshipunder normal use and service. Should your Flavor Wave prove defectivewithin one (1) year from date of purchase, return the defective part orunit, freight prepaid along with an explanation of the claim to FlavorWave. Please package your Flavor Wave carefully to avoid damage intransit. Under this warranty, Thane Housewares will repair or replaceany parts found to be defective. This warranty extends only to personaluse and does not extend to any product that has been used for which itis not intended. There are no warranties other than that expressly setforth herein. This warranty is not transferable. After the expiration ofthe warranty, the cost of the labor, and parts will be the responsibilityof the original retail purchaser.

11
Thane Housewares is not responsible or liable for indirect, specialor consequential damages arising out of or in connection with the useor performance of the product or other damages with respect to anyeconomic loss, loss of property, loss of revenues or profits, loss of enjoyments or use, costs of removal, installation, other consequentialdamages of whatsoever nature, failure to follow instructions or warnings in owners manual or use of products in a manner for whichthey were not designed. Some states do not allow the exclusion or limitation of incidental or consequential damages. Accordingly, theabove limitation may not apply to you.
This warranty gives you specific legal rights. You may also haveother rights which vary from state to state.
THIS WARRANTY DOES NOT APPLY TO THE FOLLOWING:1. Damage due to accident, misuse, abuse, alteration, acts of God
(such as lightning or fluctuations in electric power), commerical useor vandalism.
2. I m p roper or inadequate maintenance.
3. Unauthorized modification or commercial use.
4. Damage in re t u rn transit.
5. U n s u p e rvised use by children under 18 years of age
6. Nonstick coatings on any part of the Flavor Wave Oven.
7. Repairs made by an unauthorized service technician or the serialn u m ber data plate is removed or defaced.
Customer Service: 1-800-762-4427
THANE HOUSEWARES™ products are brought to you by Thane International, Inc.

NOTES:

FOR HOUSEHOLD USE ONLYModels 20007, 20008, and 20009: 120 V, 60 Hz, 1225 Watts
Models 20010 and 20012: 230 V, 50 Hz, 1200 WattsModel 20011: 240 V, 50 Hz, 1200 Watts
Model 20013: 100 V, 50/60 Hz, 1200 WattsModel 20014: 220 V, 60 Hz, 1220 Watts
www.thane.comDistributed by: Thane International, Inc. • La Quinta, CA 92253 USA
1-800-762-4427Manufactured by Hearthware Home Products, Inc.
Protected under U.S. Patent Number 6,201,217 andother U.S.A. and international patents pending. • All rights reserved.
TDG 2/02