owner's manual mpg dynamic power system · mobile power generator (mpg) manual page 7 of 26...
TRANSCRIPT

Owner's Manual
MPG Dynamic Power System
VANNER INCORPORATED 4282 Reynolds Drive • Hilliard, Ohio 43026 Tel (614) 771-2718 • Fax (614) 771-4904
1-800-AC POWER
Mobile Power Generator Dynamic Power System OWNER'S MANUAL
© Copyright 2007, Vanner, Inc.

Mobile Power Generator (MPG) Manual Page 2 of 26 Part #D911793 Rev. A

Mobile Power Generator (MPG) Manual Page 3 of 26 Part #D911793 Rev. A
Table of Contents
TABLE OF CONTENTS ...................................................................................................................................... 3
FIGURE LOCATIONS ......................................................................................................................................... 4
INFORMATION TABLES ................................................................................................................................... 4
SECTION 1 – GENERAL ..................................................................................................................................... 5
SPECIFICATIONS .................................................................................................................................................. 6
STANDARD FEATURES OF THE MPG .................................................................................................................. 6
SECTION 2 – CONFIGURATION DRAWINGS AND DIMENSIONS .......................................................... 7
MOBILE POWER GENERATOR MOUNT ............................................................................................................... 7
MOBILE POWER GENERATOR SHELF MOUNT ................................................................................................. 10
SECTION 3 – OPERATION .............................................................................................................................. 12
PRINCIPLES OF OPERATION .............................................................................................................................. 12
The Mobile Power Generator ........................................................................................................................ 12
The Alternator ................................................................................................................................................ 14
BATTERY PRECAUTIONS ................................................................................................................................... 15
SECTION 5 – INSTALLATION OF MOBILE POWER GENERATOR ...................................................... 15
SHELF MOUNT INSTALLATION ......................................................................................................................... 16
Ventilation Requirements ............................................................................................................................... 16
ALTERNATOR HARNESS:................................................................................................................................... 16
General Cable Installation Tips: ................................................................................................................... 17
DC WIRING INSTALLATION .............................................................................................................................. 19
Procedure ...................................................................................................................................................... 19
AC WIRING ....................................................................................................................................................... 19
Preliminary Considerations ........................................................................................................................... 19
AC Wiring Procedure .................................................................................................................................... 20
MANUAL ENGINE IDLE RPM ADJUSTMENT .................................................................................................... 20
SYSTEM START-UP AND TESTING ..................................................................................................................... 20
SECTION 6 – SERVICE AND TROUBLESHOOTING ................................................................................. 21
MOBILE POWER GENERATOR BLINK CODES ................................................................................................... 21
TROUBLESHOOTING .......................................................................................................................................... 22
GENERAL ........................................................................................................................................................... 22
ALTERNATOR CHECKOUT PROCEDURE ........................................................................................................... 23
ALTERNATOR PULLEY SELECTION .................................................................................................................. 23
SECTION 7: PARTS AND CABLING .............................................................................................................. 24
PARTS: ............................................................................................................................................................... 24
CABLING RECOMMENDATIONS: ....................................................................................................................... 24

Mobile Power Generator (MPG) Manual Page 4 of 26 Part #D911793 Rev. A
Figure Locations
FIGURE 1 - MPG MOUNT TOP VIEW ......................................................................................................................... 7
FIGURE 2 – MPG BOTTOM VIEW AND HOLE LOCATIONS ......................................................................................... 8
FIGURE 3 – MPG SIDE VIEW .................................................................................................................................... 8
FIGURE 4 – MPG BACK VIEW................................................................................................................................... 9
FIGURE 5 – MPG FRONT VIEW ................................................................................................................................. 9
FIGURE 6 - SHELF MOUNT TOP VIEW AND HOLE LOCATIONS ................................................................................. 10
FIGURE 7 – MPG SHELF MOUNT SIDE VIEW .......................................................................................................... 10
FIGURE 8 – MPG SHELF MOUNT REAR VIEW ......................................................................................................... 11
FIGURE 9 - MPG SHELF MOUNT FRONT VIEW ........................................................................................................ 11
FIGURE 10 – MPG SHELF MOUNT BOTTOM VIEW .................................................................................................. 12
FIGURE 11: AC DERATING CURVE ......................................................................................................................... 13
FIGURE 12: DC DERATING CURVE ......................................................................................................................... 14
FIGURE 13 - CUBE FUSE WIRING ............................................................................................................................ 18
Information Tables
TABLE 1 – SPECIFICATIONS ...................................................................................................................................... 6
TABLE 2 – DC CABLE AND FUSE CHART ................................................................................................................ 18
TABLE 3 - VANNER MPG PART NUMBERS.............................................................................................................. 24
TABLE 4 - CABLE RECOMMENDATIONS .................................................................................................................. 24

Mobile Power Generator (MPG) Manual Page 5 of 26 Part #D911793 Rev. A
PLEASE NOTE YOUR MODEL AND SERIAL NUMBER HERE FOR FUTURE REFERENCE
Model Number
Serial Number
Date of Installation
Section 1 – General
The Mobile Power Generator is a power inversion system designed with “state-of-the-art” technology,
which incorporates innovative engineering techniques for long-term reliable performance.
The MPG Dynamic Power System incorporates an inverter with Trusine technology, and a custom
designed Leece-Neville three-phase alternator. Internally, the Mobile Power Generator converts the
three-phase AC output of the alternator into 120 Volts AC RMS at 60 Hertz, supplying 3000 Watts at a
speed of 2400-RPM (Alternator), 916-RPM (Engine), assuming a 2.62:1 Alternator to Crankshaft
pulley diameter ratio. Furthermore, it provides up to 100 Amps of DC charging capability for the
battery and provides power to the 12-Volt accessories. The overall MPG system can output a total of
4100-Watts (combination of the DC and AC power outputs).
The Vanner Incorporated Trusine Mobile Power Generator’s technology incorporates high frequency
switching techniques to achieve a pure sine wave output. This means that even waveform sensitive
instruments can be used with the MPG. When operating inductive loads such as a motor, Trusine
technology actually recycles the reactive energy from the reactive load so that it operates at a higher
efficiency.
Note
Important Information
Warning
Failure to observe
Warning could cause
damage to equipment
or personal injury

Mobile Power Generator (MPG) Manual Page 6 of 26 Part #D911793 Rev. A
Specifications
AC OUTPUT:
Voltage (RMS) 120 VAC +5%/-10%
Current (RMS) 25 Amps
Overload Protection 30 Amp Circuit Breaker
Frequency 60 Hz ± 0.1%
AC Waveform Sine Wave
Total Harmonic Distortion (THD) Less than 5.0%
Power Factor Allowed -1 to 1
Continuous Output Rating @ 40ºC 25 Amps (note 1)
Surge Capacity @ 40ºC 4,500 Watts (2 Seconds)
DC OUTPUT:
Voltage 14.0 Volts +2%/-8%
Current 100 Amps (note 1)
ALTERNATOR PORTS:
3-phase Input Voltage 42 Volts Line-Line
3-phase Input Current 26 Amps
Field output voltage (nominal) Up to 24 Volts DC
Field output voltage (surge) Up to 48 Volts DC for 2 seconds
SYSTEM PERAMETERS:
Ambient Operating Temperature -40°C to +40°C (-40°F to +104°F)
Cooling Exhaust Fan 120 CFM Thermostatically Controlled
Chassis Heavy-duty Aluminum
Dimensions 10" W x 9.9" H x 15" D
Weight Mobile Power
Generator/Alternator
45 Pounds
Specified alternator Vanner Part # 011812
Note 1 – Total output power (DC load plus AC load) should not exceed 4,100 Watts.
Table 1 – Specifications
Standard Features of the MPG
1. Pure Sine Wave Output - Vanner’s exclusive Trusine technology maintains constant-peak and
constant-width pure sine wave output with less than 5% total harmonic distortion and no power
factor limitation on load operation.
2. Vehicle integration - The Mobile Power Generator integrates directly into the vehicle’s electrical
system.
3. Mounting Versatility - The Mobile Power Generator comes in two mounting configurations,
Frame Rail Box Mount, and Shelf Mount. The MPG can mount directly inside a Frame Rail box
freeing up valuable cab and compartment space. The Shelf Mount configuration allows the MPG
to be mounted wherever there is available space for the unit and cables. See Section 5 for all
mounting requirements.
4. Over-Current Protection - The Mobile Power Generator System is protected by a 30-Amp
circuit breaker located on the Mobile Power Generator enclosure and also by internal solid-state
current limiting circuitry, which limits the DC output current to 100 Amps.

Mobile Power Generator (MPG) Manual Page 7 of 26 Part #D911793 Rev. A
5. Precise AC Voltage Regulation - The Mobile Power Generator regulates the 120 VAC output to
be within +5/-10% tolerance under all load conditions.
6. Increased Reliability - The Mobile Power Generator incorporates the regulator electronics
normally located inside the alternator or inside the engine compartment. This relocation allows for
better environmental conditions for the circuitry, and thus better reliability.
7. High Temperature Protection - The Mobile Power Generator’s AC output automatically shuts
off when the internal ambient temperature reaches a predetermined undesirable level.
8. CAN Bus capable - The Mobile Power Generator is controlled by and communicates with the
vehicle via CAN bus (J1939 protocol).
9. Robust Enclosure - The Mobile Power Generator is protected by a rugged aluminum water-
resistant enclosure, which stands up to extreme road conditions and indirect power cleaning.
(DO NOT DIRECTLY POWER CLEAN THIS UNIT!)
Section 2 – Configuration Drawings and Dimensions
Mobile Power Generator Mount
NOTE: All dimensions are in inches.
Figure 1 - MPG Mount Top View
10.0

Mobile Power Generator (MPG) Manual Page 8 of 26 Part #D911793 Rev. A
Figure 2 – MPG Bottom View and Hole Locations
14.9
5/16 Negative
DC Input Post5/16 Positive
DC Input Post
Ventilation
Output
Ventilation Input
13.1
Figure 3 – MPG Side View

Mobile Power Generator (MPG) Manual Page 9 of 26 Part #D911793 Rev. A
3 Phase AC Input
3 Phase AC Input
3 Phase AC Input
Field Voltage to
Alternator
120Vac
30Amp Output
Shielded
CANbus
Ignition
Figure 4 – MPG Back View
30 Amp Resettable
Circuit Breaker
Figure 5 – MPG Front View

Mobile Power Generator (MPG) Manual Page 10 of 26 Part #D911793 Rev. A
Mobile Power Generator Shelf Mount
Note: The MPG Shelf Mount
Figure 6 - Shelf Mount Top View and Hole Locations
Figure 7 – MPG Shelf Mount Side View
11.74
11.0
Ø 0.323
10.125
Location of
Specification Label
14.3
5/16
Negative
DC Input
Post 5/16
Positive
DC Input
PostVentilation
Output
Ventilation
Input
13.1

Mobile Power Generator (MPG) Manual Page 11 of 26 Part #D911793 Rev. A
Figure 8 – MPG Shelf Mount Rear View
Figure 9 - MPG Shelf Mount Front View
3 Phase AC Input
3 Phase AC Input
3 Phase AC Input
Field Voltage toAlternator
120Vac
30Amp Output
Shielded
CANbus
Ignition
Rear Mounting M8 stud
30AMP
RESETTABLE
CIRCUIT BREAKER

Mobile Power Generator (MPG) Manual Page 12 of 26 Part #D911793 Rev. A
Figure 10 – MPG Shelf Mount Bottom View
Section 3 – Operation
Principles of Operation
The Vanner Mobile Power Generator Dynamic Power System consists of two major components;
� Mobile Power Generator
� Trusine® Power Inverter
� Battery Voltage Regulator
� Alternator (with wiring harness)
The Mobile Power Generator
When the engine starts and supplies an ignition signal, the Mobile Power Generator system will turn
on the field control that energizes the alternator. This allows the alternator to immediately produce
power for the Mobile Power Generator and begin recharging the battery to 14 Volts. When AC power
is needed, the user can turn the inverter on via the ON/OFF switch on the dashboard. If the MPG shuts
down for any faults, the user must turn off the inverter then turn it back on again using the switch. A
light on the dash switch will indicate Mobile Power Generator status. If the inverter is working
properly the light will remain solidly ON. If an error condition exists, the light on the switch will blink
a code to indicate the error condition that has occurred. (See page 21 for MPG Blink Codes)
The Mobile Power Generator is rated for 25 Amps AC at 120 Volts and 100 Amps at 12 Volts (when a
large amount of AC power is required for starting a load, the battery voltage will drop because all of
the available power is being diverted to the 120Volts AC. Once the AC load is reduced, more power
will be available for battery charging and the battery voltage will return to normal. The MPG is
comprised of two separate but distinct controls, the Inverter and the Voltage Regulator.

Mobile Power Generator (MPG) Manual Page 13 of 26 Part #D911793 Rev. A
Inverter The Inverter is responsible for providing 120-Volt AC, 60-Hertz power. Whenever the vehicle is
running at 916 RPM (engine RPM using a 2.62:1 pulley ratio), or above, the inverter can provide
3,000 Watts (25 Amps AC RMS at 120 V AC) of clean, AC sine wave power. The MPG system will
provide these values of AC and DC power, previously mentioned, even while the vehicle is in motion.
The output is protected from short circuit and overload conditions. As with all power electronics
operating in extremely high ambient temperatures, the AC and DC output currents derate (see figures
11 and 12). The inverter will shut down to protect the internal circuitry from excessively high
temperatures. Once the inverter cools down, cycling of the dash mounted ON/OFF switch will restart
the inverter.
MPG AC Output
0
500
1000
1500
2000
2500
3000
3500
-40 -25 -10 5 20 35 50 65
Ambient Temperature (C)
Pow
er (W
)
Figure 11: AC Derating Curve

Mobile Power Generator (MPG) Manual Page 14 of 26 Part #D911793 Rev. A
MPG DC Output
0
200
400
600
800
1000
1200
1400
1600
-40 -25 -10 5 20 35 50 65
Ambient Temperature (C)
Pow
er (W
)
Figure 12: DC Derating Curve
Voltage Regulator The Voltage Regulator is responsible for maintaining the battery voltage, which is used for all 12-Volt
vehicle loads. The internal MPG controls regulate the alternator’s output to maintain the charging
voltage to the battery and provide up to 100 Amps of DC load power. If load conditions cause the
internal temperature of the MPG to reach an unsafe temperature, the MPG will shut down to protect its
internal circuitry. Once the system cools down, the regulator will resume operation, and cycling of the
On/Off switch will restart the inverter.
The Alternator The alternator used with this system supplies three-phase AC power directly to the MPG. The Leece-
Neville alternator is designed to supply full power at an engine speed of 916 RPM (or higher) and
provide surge power at a slightly higher engine speed. System reliability is increased because the
electronics for the voltage regulator are mounted in the water-resistant Mobile Power Generator box
and not inside the alternator. Alternators with internalized voltage regulators are exposed to all of the
elements and elevated temperatures under the hood, which greatly reduces the longevity of the
regulator electronics.
Section 4 – Pre-Installation Precautions
General Precautions
1. Do not expose the Mobile Power Generator to direct water spray (i.e. power washing), snow, rain,
or direct inclement weather conditions.
2. Do not cover or obstruct the bottom ventilation opening. Doing this will increase the risk of
overheating and diminished performance.

Mobile Power Generator (MPG) Manual Page 15 of 26 Part #D911793 Rev. A
3. Do not install the Mobile Power Generator in a zero clearance compartment. This may result in
overheating or diminished performance.
4. Do not use wiring or fixtures not recommended or sold by Vanner Incorporated or Vanner
approved suppliers. This may increase the risk of fire, electrical shock, or injury to personnel.
5. All AC and DC electrical wiring must be performed by a certified technician to ensure compliance
with all applicable national and local wiring regulations.
6. Verify wiring connections are in good electrical condition to avoid a risk of fire and/or electrical
shock.
7. All external conductors must use proper wire size to avoid overheating or diminished performance.
See page 18 for Wire size chart.
8. Do not operate the Mobile Power Generator unit if it has been dropped or damaged in any way
until it has been verified to be safe by Vanner Incorporated.
9. Always disconnect the AC and DC connections to the Mobile Power Generator before attempting
any vehicle electrical maintenance. This reduces the risk of electrical shock. Turning the
inverter off DOES NOT prevent electrical shock. 10. The Mobile Power Generator must be properly grounded in accordance with local and national
codes and ordinances before operation. For most installations, the negative (ground) conductor
should be bonded to the grounding system at one and only one point in the system.
11. Battery temperature should be above 32° Fahrenheit (0° Celsius) for optimum Mobile Power
Generator performance.
12. Do not disassemble the Mobile Power Generator. See the service section of this manual for
instructions on obtaining service. Attempting to service the Mobile Power Generator unit or
alternator may result in a risk of electrical shock, fire and will void warranty.
13. Periodically, check connections for proper electrical connectivity and remove any corrosive build-
up.
Battery Precautions
1. Always have someone within hearing range of your voice to come to your aid when you work near
a lead acid battery.
2. Have close access to plenty of fresh water and soap in case battery acid contacts skin, clothing, or
eyes.
3. Always wear complete eye protection and clothing protection. Avoid touching eyes while working
near batteries.
4. If battery acid contacts skin or clothing, wash immediately with soap and water. If acid enters eye,
immediately flood eye with running cold water for at least 20 minutes. Get medical attention
immediately.
5. NEVER smoke or allow a spark or flame near a battery. Gases produced by batteries are highly
explosive.
6. Always take proper precautions when working with power tools around batteries. Potential exists
for sparks, short-circuit of the battery or other electrical parts that could cause hazardous
conditions.
Section 5 – Installation of Mobile Power Generator
WARNING: Before doing any work in, or around, the MPG do one of the following:
1. Turn the vehicle battery disconnect switch (if equipped) to the “OFF” position. 2. Disconnect the main negative (-) battery cable.
Mobile Power Generator (MPG) Manual Page 16 of 26 Part #D911793 Rev. A
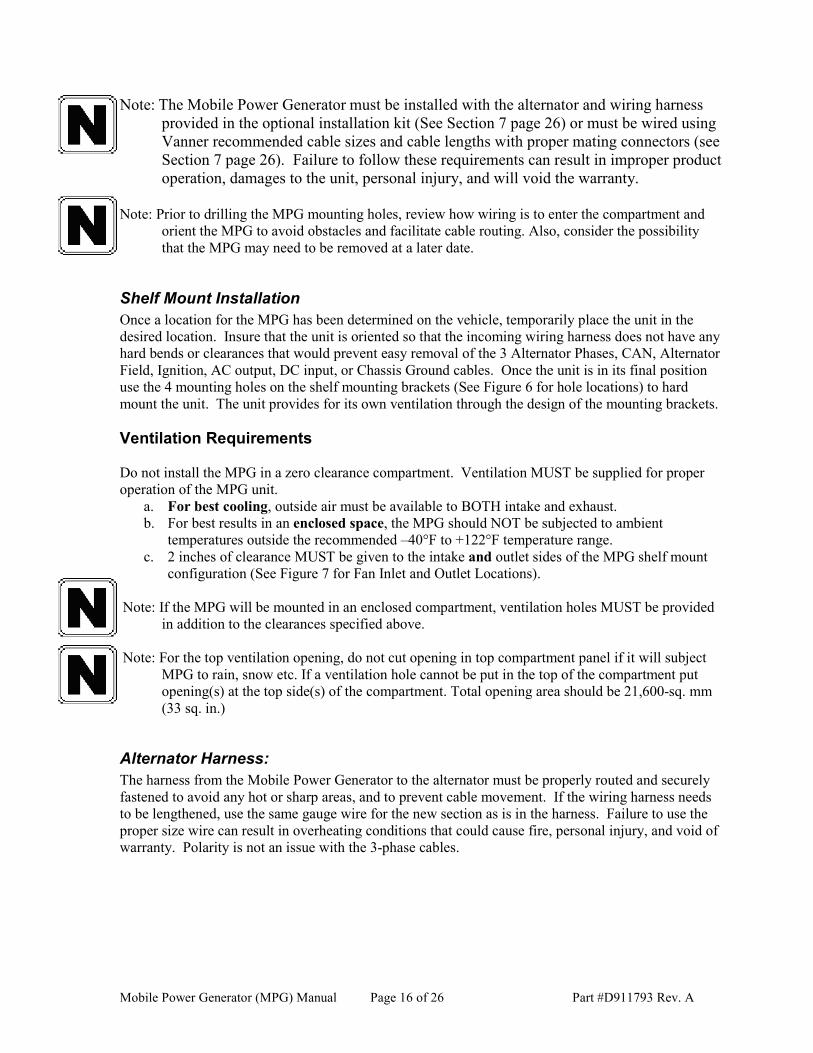
Note: The Mobile Power Generator must be installed with the alternator and wiring harness
provided in the optional installation kit (See Section 7 page 26) or must be wired using
Vanner recommended cable sizes and cable lengths with proper mating connectors (see
Section 7 page 26). Failure to follow these requirements can result in improper product
operation, damages to the unit, personal injury, and will void the warranty.
Note: Prior to drilling the MPG mounting holes, review how wiring is to enter the compartment and
orient the MPG to avoid obstacles and facilitate cable routing. Also, consider the possibility
that the MPG may need to be removed at a later date.
Shelf Mount Installation
Once a location for the MPG has been determined on the vehicle, temporarily place the unit in the
desired location. Insure that the unit is oriented so that the incoming wiring harness does not have any
hard bends or clearances that would prevent easy removal of the 3 Alternator Phases, CAN, Alternator
Field, Ignition, AC output, DC input, or Chassis Ground cables. Once the unit is in its final position
use the 4 mounting holes on the shelf mounting brackets (See Figure 6 for hole locations) to hard
mount the unit. The unit provides for its own ventilation through the design of the mounting brackets.
Ventilation Requirements
Do not install the MPG in a zero clearance compartment. Ventilation MUST be supplied for proper
operation of the MPG unit.
a. For best cooling, outside air must be available to BOTH intake and exhaust.
b. For best results in an enclosed space, the MPG should NOT be subjected to ambient
temperatures outside the recommended –40°F to +122°F temperature range.
c. 2 inches of clearance MUST be given to the intake and outlet sides of the MPG shelf mount
configuration (See Figure 7 for Fan Inlet and Outlet Locations).
Note: If the MPG will be mounted in an enclosed compartment, ventilation holes MUST be provided
in addition to the clearances specified above.
Note: For the top ventilation opening, do not cut opening in top compartment panel if it will subject
MPG to rain, snow etc. If a ventilation hole cannot be put in the top of the compartment put
opening(s) at the top side(s) of the compartment. Total opening area should be 21,600-sq. mm
(33 sq. in.)
Alternator Harness:
The harness from the Mobile Power Generator to the alternator must be properly routed and securely
fastened to avoid any hot or sharp areas, and to prevent cable movement. If the wiring harness needs
to be lengthened, use the same gauge wire for the new section as is in the harness. Failure to use the
proper size wire can result in overheating conditions that could cause fire, personal injury, and void of
warranty. Polarity is not an issue with the 3-phase cables.

Mobile Power Generator (MPG) Manual Page 17 of 26 Part #D911793 Rev. A
General Cable Installation Tips:
WARNING: POSITIVE AND NEGATIVE DC CABLES FROM THE
MPG TO THE BATTERIES MUST NOT EXCEED 14 FEET
IN LENGTH! ALL DC CABLES FOR THE MPG MUST BE
TIED TOGETHER AT NO LONGER THAN 6-INCH
INTERVALS FOR THE ENTIRE DC CABLE LENGTH!
1. WARNING: DC cables should be as short as possible. The optional installation kit
includes all DC cables. The Mobile Power Generator is polarity sensitive and careful attention
must be paid to the polarity. The black DC cable must be connected to the battery negative (-)
and the negative (-) Mobile Power Generator terminal, located under the top cover (blue). (See
Figure 3 – Side View) The red DC cable must be connected to the fuse which is connected to
the positive (+) battery connection and the positive (+) Mobile Power Generator terminal,
located under the red cover. (See Figure 3 – Side View)
2. Route the DC positive and negative cables as close together as possible, use cable ties at no
greater than 6-inch intervals to keep them together. This will reduce electromagnetic radiation
that could interfere with sensitive electronics and damage to the MPG system.
3. Route the AC power wiring separately from the DC wiring and low voltage wiring such as
audio and video signal wires with as much physical separation, from the AC wires, as
possible.
4. AC power cables, which need to pass through steel or other ferrous metal walls, need to pass
through the same hole. If two holes are required cut a slot connecting the two holes to prevent
a transformer effect that can generate excessive heat within the metal. Ensure that cables
passing through bulkheads have proper protection from edges that could cause the insulation
to wear off through normal vibration or slice into the cables producing risk of short circuit,
high heat, or personal injury.
5. WARNING: Do not connect the Mobile Power Generator to the battery at this
time. Final battery connections will be made after all installation issues have been
inspected.
6. WARNING: Poorly made high current connection may cause fire and/or personal
injury and damage due to improper connections are not covered under warranty.
7. WARNING: Be sure of the polarity of the DC input wiring. Reverse polarity may
severely damage your Mobile Power Generator. Damage resulting from this condition
is not covered under warranty. Fire and/or explosion of batteries may occur due to
very high currents.

Mobile Power Generator (MPG) Manual Page 18 of 26 Part #D911793 Rev. A
8. WARNING: An inline 150 Amp DC fuse is REQUIRED (See Section 7 – Page
26) on the positive (+) battery cable to properly protect the Mobile Power Generator
and batteries. Failure to properly fuse the input leads to the MPG can result in damage
to the unit and will void the warranty.
150A "Cube" Fuse
(3/4 x 3/4 x 1/2")
M8 Lock Nut
Battery
Positive Cable
From Inverter
Busbar Stud M8
���
Figure 13 - Cube Fuse Wiring
9. Table 2 (below) shows the minimum cable size to be used when wiring the DC input
to the MPG. Wire sizing charts published in the NEC may allow a greater Amperage
capacity than we recommend. We have sized the cable for a minimum voltage drop to
maintain better performance of your Mobile Power Generator installation. Failure to
use cable of large enough gauge may result in over temperature conditions or
performance degradation which could result in fire or personal injury. Damage due to
improper cable size is not covered under the warranty.
Mobile Power Generator – DC Cable and Fuse Chart
Model Number Mobile Power Generator
Cable Size
Distance from battery to unit in feet
(multiply distance by two to allow for Positive and Negative
cables)
4 gauge. 3 Feet
2 gauge. 6 Feet
1/0 6 to 14 Feet
Fuse – Cube Fuse 150 Amp Assy. Vanner 011268
Table 2 – DC Cable and Fuse Chart

Mobile Power Generator (MPG) Manual Page 19 of 26 Part #D911793 Rev. A
DC Wiring Installation
The DC input terminals are located on the top of the Mobile Power Generator unit. The negative
terminal is located under the top cover (blue), which must be removed for cable installation. The MPG
DC input terminals require cables with a 5/16” (max size) ring lug. The positive terminal protective
cover is installed with (2) 6-32 Phillips machine screws.
WARNING:
Never make electrical connections to a "live" unit. Make the connections to the Mobile
Power Generator first and the batteries last.
Procedure Step 1: Make sure that the batteries are disconnected from the vehicle. (See WARNING Page 15)
Step 2: Route, but DO NOT connect, the negative DC (black) input cable from the Mobile Power
Generator to the battery. Make sure to protect all cables from where they can touch hard or
sharp edges.
Step 3: Install the in-line fuse on the positive battery terminal, or within 18 inches of the battery or
DC wiring bus system.
Step 4: Route, but DO NOT connect, the positive DC (red) input cable from the Mobile Power
Generator to the in-line fuse on the battery or DC wiring bus system. Make sure to protect
all cables from where they contact hard or sharp edges.
Step 5: Connect the Mobile Power Generator to the battery in THIS order.
A) Remove the protective cover on the DC positive terminal (red) and the Mobile
Power Generator top cover (blue) to reveal the negative DC terminal.
B) Install cables with 5/16” ring lugs to terminals.
C) Install washers and nuts and torque terminal nuts to a MAXIMUM of 120 in.
Pounds (10 ft/lb.).
D) Reinstall the protective cover onto positive DC terminal (red) and reinstall the
Mobile Power Generator top cover (blue).
E) Connect cables to the battery noting proper polarity Black to negative, Red to
positive.
Step 6: Verify all connections are tight and that the cables are secure.
AC Wiring
Preliminary Considerations 1. Output Voltage: The AC output voltage of the MPG is 120 VAC, 25 Amps, 60Hz, single phase, 3
wire.
AC wire size selection: To properly size the AC output wiring, use wire that is rated for 30 Amps.
Failure to use cable of large enough gauge may result in over temperature conditions, fire or
personal injury and damage due to improper cable size is not covered under the warranty.
2. The AC output is located on the backside of the MPG at the end of a 4-foot pigtail. (See Figure 4
page 9)

Mobile Power Generator (MPG) Manual Page 20 of 26 Part #D911793 Rev. A
3. To connect to the AC output plug, you will need a Watertight and weather proof connection,
Vanner recommends the following Watertight Safety-Shroud plug and socket:
Hubbell part No. HBL2611SW 125-Volt 30-Amp Twist Lock Male Inline Plug
Hubbell part No. HBL2613SW 125-Volt 30-Amp Twist Lock Female Inline Plug
Using this part combination will allow for a weather resistant connection to the MPG unit.
4. WARNING: Feeding AC Voltage into the Mobile Power Generator will cause damage to
the unit! The power distribution circuits must be designed to prevent AC power feeding back
from an external source (shore power or a generator) into the Mobile Power Generator's AC
output. Failure to appropriately safeguard this condition is not covered under warranty.
5. The Ground terminal in the AC output-wiring compartment should be tied to chassis ground for
safety to prevent possible shock hazards. Connect a #8 AWG (minimum) wire to this terminal and
then to chassis of the vehicle, or the installation's grounding system. Damage due to improper
grounding will void the warranty.
WARNING: Failure to connect the chassis bonding lug on the MPG to the chassis of
the vehicle, or the installation's grounding system may result in a lethal
shock hazard.
AC Wiring Procedure Step 1: Connect to the AC output using a #10 AWG or larger copper conductor.
Step 2: Connect Bonding Lug to ground. Use a #10 AWG or larger copper conductor to connect the
ground terminal to the chassis of the vehicle, the installation’s grounding system, or to earth
ground.
Step 3: Verify Installation making sure all connections are tight and secure for maximum
performance.
Manual Engine Idle RPM Adjustment
In situations where more power might be required for loads that pull a large surge when starting.
Raising the engine idle speed may allow the load to start. Look in the vehicle owner’s manual to see if
there is an idle adjustment available. Usually this feature is called a PTO override and typically uses
the cruise control buttons to increase the engine idle speed.
System Start-up and Testing
Step 1: Completely install the Mobile Power Generator System following the system design
considerations and instructions provided previously in this manual.
Step 2: Verify the System ON/OFF switch located on the vehicle dash is in the OFF position.
Step 3: Connect the battery to the Mobile Power Generator.
Step 4: If the Vehicle is equipped with a Battery Disconnect switch turn it to the “ON” position.

Mobile Power Generator (MPG) Manual Page 21 of 26 Part #D911793 Rev. A
Step 5: Turn ignition to the ON but NOT running position. You should measure approximately 0.5-
Volts DC across the 2 field wires on the Alternator, and +12 to +14-Volts DC on the
Ignition cable.
Step 6: Start engine and let it run at normal idle.
Step 7: Verify battery voltage is rising and there is charging current.
Step 8: Place the System ON/OFF switch located on the vehicle dash to the ON position.
Step 9: The AC output light (located on the rocker switch) should be ON, indicating the presence of
AC power. If so equipped, the dash mounted AC voltmeter should indicate 120 Volts.
Step 10: At this point raise the engine speed to 916 RPM, apply AC loads up to 3000 Watts to verify
full-power operation.
Step 11: Turn off engine and battery current should go to zero Amps providing doors are shut, lights
off, etc.
Step 12: System is now ready for operation.
Section 6 – Service and Troubleshooting
Before calling, determine and record the following information:
1. Mobile Power Generator model number and serial number.
2. Alternator model number and pulley diameters of Alternator AND crankshaft.
3. Vehicle year, make, model, and engine.
4. Auto throttle model (if equipped) and engine RPM setting or manual engine idle rpm set.
5. AC load Wattage and description of load.
6. DC charging current and voltage measured across the Mobile Power Generator positive and
negative DC cables.
Vanner Customer Service: 1-800-AC POWER
Mobile Power Generator Blink codes
The LED in the dash mounted switch flashes a number of times during a two-second period to indicate
the error status of the MPG. The LED flash codes are defined as follows:
• LED Off – Power Pak 3 AC output is off.
• LED On solid – Power Pak 3 AC output is on.
• LED flashes once in two seconds – High battery cutout
• LED flashes twice in two seconds – Low battery cutout
• LED flashes three times in two seconds – Overload (over current)
• LED flashes four times in two seconds – Over temp

Mobile Power Generator (MPG) Manual Page 22 of 26 Part #D911793 Rev. A
Troubleshooting
Note: Troubleshoot the Mobile Power Generator while the Mobile Power Generator is still in the
vehicle. Do not attempt to run the dynamic Mobile Power Generator from a DC power supply
or battery charger.
General
The following are the most common questions heard by Vanner service professionals. If your situation
does not apply to the following categories, please contact your local Vanner Service Center.
Equipment Required: Volt/Ohm Meter (Fluke 87 or higher recommended), Clamp-on Ampere Meter
(Extech 382080 or equal), and a small flat blade screwdriver.
SYMPTOM: Mobile Power Generator is turned on but no output power is available.
SOLUTION: A. Verify that the vehicle is running.
B. Verify 30-Amp breaker is not tripped on the side of the Mobile Power Generator
enclosure. (See Figure 5 or Figure 9)
C. Verify Mobile Power Generator switch is turned on.
D. Verify Mobile Power Generator is getting 12 Volts on the Ignition wire.
E. Verify CAN bus cable is connected to both the Mobile Power Generator and
the vehicle connectors.
SYMPTOM: Mobile Power Generator won’t support the desired load.
SOLUTION: A. Verify the idle adjustment is working (See page 21 – Manual Throttle Adjustment)
if equipped.
B. Increase engine/alternator RPM.
C. Verify total Mobile Power Generator load (AC Watts plus DC Watts) is less than
approximately 4100 total Watts. (AC Volts x AC Amps = AC Watts, DC Volts x
DC Amps = DC Watts. Total Watts = AC Watts + DC Watts.)
D. Verify that all 3 AC input cables from alternator are securely connected to Mobile
Power Generator and alternator.
E. Verify that the alternator field cables are securely connected to Mobile Power
Generator and alternator.
F. Verify alternator is working properly. See Section on Alternator Checkout
Procedure (page 23).
G. Make sure Mobile Power Generator is rated for desired load.
WARNING: DO NOT OPEN THE Mobile Power Generator. Potentially fatal electric
shock and/or serious Mobile Power Generator damage may result even after the Mobile
Power Generator is removed from the vehicle. Only a Vanner Qualified Technician
may perform service inside the Mobile Power Generator. Failure to comply will void
the warranty.

Mobile Power Generator (MPG) Manual Page 23 of 26 Part #D911793 Rev. A
Alternator Checkout Procedure
The following tests will verify if the alternator is working properly and should uncover most alternator
problems. Readings should be taken at the alternator, while the engine is running.
WARNING: Use extreme care around the alternator while engine is running.
The 3 Phase Input Power Harness is made up of the three heavy wires running from the alternator AC
taps and connected through three water tight connectors entering the Mobile Power Generator.
1. Verify the three AC taps are working and are balanced by taking the following readings with the
Mobile Power Generator ON while running a 1000-Watt AC load with 20 Amps of DC load.
a. Using the multimeter AC scale, note the three voltages between the three AC taps, 1 to 2, 2
to 3, and 1 to 3.
- Proper readings will be between 35 and 45 Volts AC.
- All three readings should be equal or within 1.0 Volt of each other.
b. Using the clamp-on Amp meter read the AC current in each of the three AC tap wires.
- The readings should be equal or within 2 Amps of each other.
2. To check the alternator field control wire measure the DC voltage between the two field wires.
Note: The Field Voltage measurement MUST be made ACROSS the two terminals.
Correct readings are:
Mobile Power Generator OFF _________________ 2 to 24 VDC
Mobile Power Generator ON under load _________ 4 to 24 VDC
Under surge conditions, the field control voltage can go as high as 30 Volts DC (for 3 seconds).
The field voltage should decrease as RPM increases while running a constant load. The DC current
through the field control wire should measure 1 to 6 DC Amps whenever the engine is running.
Alternator Pulley Selection
For optimal performance the alternator pulley needs to be the correct diameter. A crankshaft pulley to
alternator pulley ratio of 2.62:1 is recommended. For example, if the crankshaft pulley diameter is
8.25 inches then the alternator pulley diameter should be 3.15 inches (8.25 / 2.62 = 3.15).
By having the correct size alternator pulley the system will be able to provide the full 3000-Watts of
AC, and 1000-Watts of DC power at 916 RPM (engine RPM).

Mobile Power Generator (MPG) Manual Page 24 of 26 Part #D911793 Rev. A
Section 7: Parts and Cabling
Parts:
Vanner Part Number Item Description
012168 Pad Mount Alternator
011812 J-180 Mount Alternator
012718 T-Mount Alternator
011889 Alternator Belt
011888 Alternator Pulley (2.4" Diameter)
D013028 3-Phase Alternator and Field cable Harness
MPG-SMSW Smart Switch and CAN/ Ignition Cable Harness
D012892 Cube Fuse Assembly
MPG-CMK Kit - MPG Shelf Mount Bracket
MPG-RMB Kit - MPG Frame Rail Mounted 15" Box
D012890 Alternator Phase Mating Connector (10 pack)
D012891 Alternator Field Mating Connector (10 pack)
D911793 Mobile Power Generator (MPG) Manual
Table 3 - Vanner MPG Part Numbers
Cabling Recommendations:
Cable Purpose Vanner Recommended
Cable Length
Vanner Recommended
Cable Gage
MPG Required Lug Size
Vanner Connector Required
Alternator Phase Cable
20 Feet ea. (no more, no less)
4 AWG 5/16" Ring Lug D012890
Field Wire 20 Feet 14 AWG 8 Stud Ring D012891
Battery Cable As short as possible but NO Longer than 14 feet
(See pg. 20 Table 2) 5/16” Ring Lug N/A
Table 4 - Cable Recommendations

Mobile Power Generator (MPG) Manual Page 25 of 26 Part #D911793 Rev. A
Vanner Incorporated
4282 Reynolds Drive
Hilliard, Ohio 43026
1-800-AC POWER
Tel (614) 771-2718
Fax (614) 771-4904
Specifications Subject to Change
© Copyright 2006, Vanner, Inc.
Printed in the U.S.A.