output
TRANSCRIPT

Windows 2003 Server Installation Guide
Revision 1.7 May 13, 2010

Licenses
This manual is the exclusive property of Prometric, Inc. This manual is licensed for use with restrictions to authorized centers and Agents. Information herein is proprietary in nature and may not be disclosed to unauthorized persons without the expressed consent of Prometric. Microsoft©, Windows© and MS-DOS© are registered trademarks of Microsoft Corporation. Copyright© 2010 Prometric ALL RIGHTS RESERVED. No part of this work covered by the copyright hereon may be reproduced or used in any form or by any means—graphic, electronic, or mechanical, including photocopying, recording, taping, Web distribution, or information storage and retrieval systems, or in any other manner—without the written permission of the publisher.
Windows 2003 Server Installation Guide 1�
General ...................................................................................................................................... 1�Minimum Testing Center Hardware/Software Specifications ................................................... 1�Network Requirements .............................................................................................................. 2�Additional Network Configurations .......................................................................................... 2�IP Addresses and Ranges ........................................................................................................... 2�Host Names ............................................................................................................................... 3�Installation ................................................................................................................................. 4�Setting IP Configuration ............................................................................................................ 5�Install Window Updates ............................................................................................................ 5�Configure Your Server as a Domain Controller ........................................................................ 6�Turning on the Firewall ............................................................................................................. 7�Setting Up a Printer ................................................................................................................... 7�Antivirus Software ..................................................................................................................... 8�Pre-Configuration Check ........................................................................................................... 8�Adding Prometric URLs ............................................................................................................ 8�Downloading APTC Installation Software ................................................................................ 9�APTC Installation Software ..................................................................................................... 12�Polaris/Pulse – Installation ...................................................................................................... 19�Joining Test Workstations to the Domain ................................................................................ 23�Seat Set-Up .............................................................................................................................. 23�

Prometric Revision 1.7 � 13-May-2010
Copyright �2010 Prometric. Information herein is proprietary and company confidential.
Windows 2003 Server Installation Guide - 1
Windows 2003 Server Installation Guide
General This guide explains how to build a common network infrastructure beginning with the installation and configuration of the Microsoft Windows Server 2003 operating system as a domain controller.
Minimum Testing Center Hardware/Software Specifications Table 1. APTC Windows Server Requirements.
Components Requirement
Computer and Processor
PC with a Pentium III, 1GHZ Processor (To be exceeded if possible.)
Memory 512 MB of RAM required (1GB strongly advised for servicing more than 4-6 client machines.)
Hard disk 8 GB available hard disk space formatted for NTFS
(Intended as minimum free space available after OS + service pack installation.)
Drive CD-ROM (8X minimum) or DVD-ROM drive
Display Super VGA supporting 800 x 600 (or higher) resolution monitor
Network Ethernet 100 MB network interface card
Connectivity Internet connection
Other • Antivirus Software (updated) • MS compatible mouse • Internet Explorer 7 with all security updates installed.
Prometric Revision 1.7 � 13-May-2010
Copyright �2010 Prometric. Information herein is proprietary and company confidential.
Windows 2003 Server Installation Guide - 2
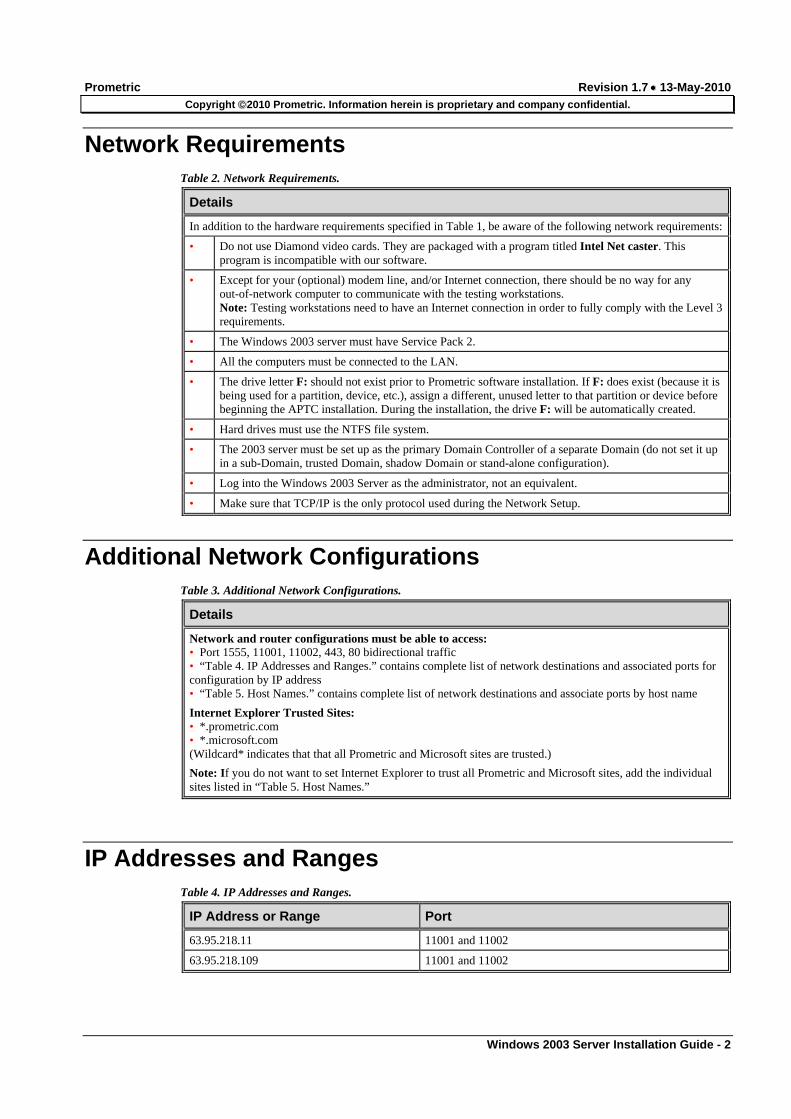
Network Requirements Table 2. Network Requirements.
Details
In addition to the hardware requirements specified in Table 1, be aware of the following network requirements:
• Do not use Diamond video cards. They are packaged with a program titled Intel Net caster. This program is incompatible with our software.
• Except for your (optional) modem line, and/or Internet connection, there should be no way for any out-of-network computer to communicate with the testing workstations. Note: Testing workstations need to have an Internet connection in order to fully comply with the Level 3 requirements.
• The Windows 2003 server must have Service Pack 2.
• All the computers must be connected to the LAN.
• The drive letter F: should not exist prior to Prometric software installation. If F: does exist (because it is being used for a partition, device, etc.), assign a different, unused letter to that partition or device before beginning the APTC installation. During the installation, the drive F: will be automatically created.
• Hard drives must use the NTFS file system.
• The 2003 server must be set up as the primary Domain Controller of a separate Domain (do not set it up in a sub-Domain, trusted Domain, shadow Domain or stand-alone configuration).
• Log into the Windows 2003 Server as the administrator, not an equivalent.
• Make sure that TCP/IP is the only protocol used during the Network Setup.
Additional Network Configurations Table 3. Additional Network Configurations.
Details
Network and router configurations must be able to access: • Port 1555, 11001, 11002, 443, 80 bidirectional traffic • “Table 4. IP Addresses and Ranges.” contains complete list of network destinations and associated ports for configuration by IP address • “Table 5. Host Names.” contains complete list of network destinations and associate ports by host name
Internet Explorer Trusted Sites: • *.prometric.com • *.microsoft.com (Wildcard* indicates that that all Prometric and Microsoft sites are trusted.)
Note: If you do not want to set Internet Explorer to trust all Prometric and Microsoft sites, add the individual sites listed in “Table 5. Host Names.”
IP Addresses and Ranges Table 4. IP Addresses and Ranges.
IP Address or Range Port
63.95.218.11 11001 and 11002
63.95.218.109 11001 and 11002
Prometric Revision 1.7 � 13-May-2010
Copyright �2010 Prometric. Information herein is proprietary and company confidential.
Windows 2003 Server Installation Guide - 3
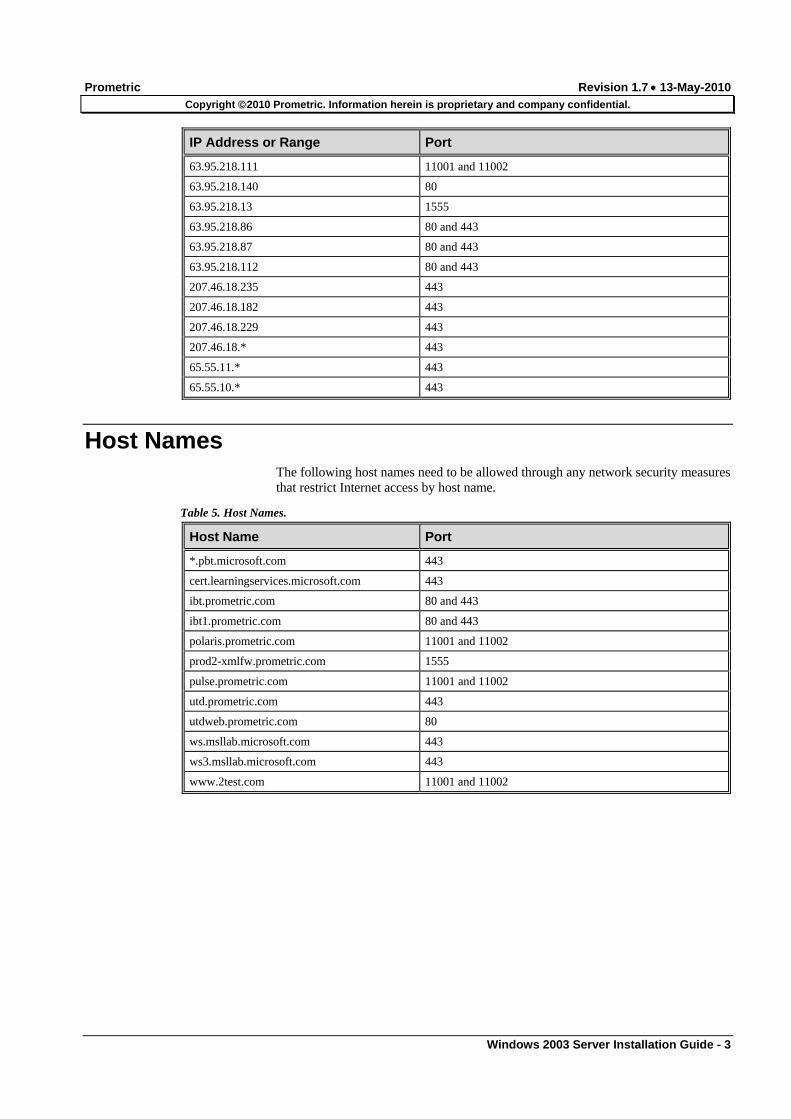
IP Address or Range Port
63.95.218.111 11001 and 11002
63.95.218.140 80
63.95.218.13 1555
63.95.218.86 80 and 443
63.95.218.87 80 and 443
63.95.218.112 80 and 443
207.46.18.235 443
207.46.18.182 443
207.46.18.229 443
207.46.18.* 443
65.55.11.* 443
65.55.10.* 443
Host Names The following host names need to be allowed through any network security measures that restrict Internet access by host name.
Table 5. Host Names.
Host Name Port
*.pbt.microsoft.com 443
cert.learningservices.microsoft.com 443
ibt.prometric.com 80 and 443
ibt1.prometric.com 80 and 443
polaris.prometric.com 11001 and 11002
prod2-xmlfw.prometric.com 1555
pulse.prometric.com 11001 and 11002
utd.prometric.com 443
utdweb.prometric.com 80
ws.msllab.microsoft.com 443
ws3.msllab.microsoft.com 443
www.2test.com 11001 and 11002

Prometric Revision 1.7 � 13-May-2010
Copyright �2010 Prometric. Information herein is proprietary and company confidential.
Windows 2003 Server Installation Guide - 4
Installation
Server Installation Basics Table 6. Server Installation Basics.
Details
• To begin the installation procedure, boot directly from the Windows Server 2003 SP2 CD. • The set-up creates disk partitions on the computer running Windows Server 2003, formats the drive, and then copies installation files from the CD to the server. • Prometric does not allow the use of Virtual Machine (VM) technology for test delivery.
Notes: • Your CD-ROM must support bootable CDs. • When you configure partitions and format drives, all data on the server hard drive is destroyed. • These instructions assume that you are installing Windows Server 2003 on a computer that is not already running Windows. Avoid upgrading from an existing Operating System by installing a fresh version of Windows Server 2003.
Installation Procedures Table 7. Installation Procedures.
Step Details
1 Insert the Windows Server 2003 SP2 CD in the CD-ROM drive of the computer you will be using as a server.
2 Restart the computer. If prompted, press any key to boot from the CD. The Windows Server 2003 installation begins.
3 On the Welcome to Setup screen, press Enter. The License Agreement screen appears.
4 Review and, if acceptable, agree to the agreement by pressing F8.
Note: If you had a previous version of Windows Server 2003 installed on the server, you might get a message asking if you want to repair the drive. Press Esc to continue and do not repair the drive.
5 Follow the instructions to delete all existing disk partitions. The exact steps will differ based on the number and type of partitions already on the computer. Continue to delete partitions until all disk space is labeled as Unpartitioned Space.
6 After all disk space has been labeled as Unpartitioned Space, press C to create a partition in the Unpartitioned Space on the first disk drive (size as applicable, ex: 25000 MB).
7 Delete the total space default value. Type the value of your total disk space (in MB) at the Create Partition of Size prompt. Press Enter. Note: The total disk space available is displayed when you format the drive. You determine how much you want to allocate to the new partition.
8 After the New <Raw> partition is created, press Enter.
9 Select Format the Partition using the NTFS file system <Quick>. Press Enter.
10 The Windows Server 2003 Setup formats the partition and then copies the files from the Windows Server 2003 Server CD to the hard drive.
11 The server will restart.
12 The Windows Server 2003 Setup Wizard appears. It will detect and install devices. Note: This can take several minutes. During the process, your screen may flicker.
13 In the Regional and Language Options dialog box, be sure that your Regional Options are set to English US and the short date format - MM/dd/yyyy. In addition, ensure that the Language for non-Unicode Programs on the Advanced Tab is set to English US. Click Next.
Prometric Revision 1.7 � 13-May-2010
Copyright �2010 Prometric. Information herein is proprietary and company confidential.
Windows 2003 Server Installation Guide - 5
Step Details
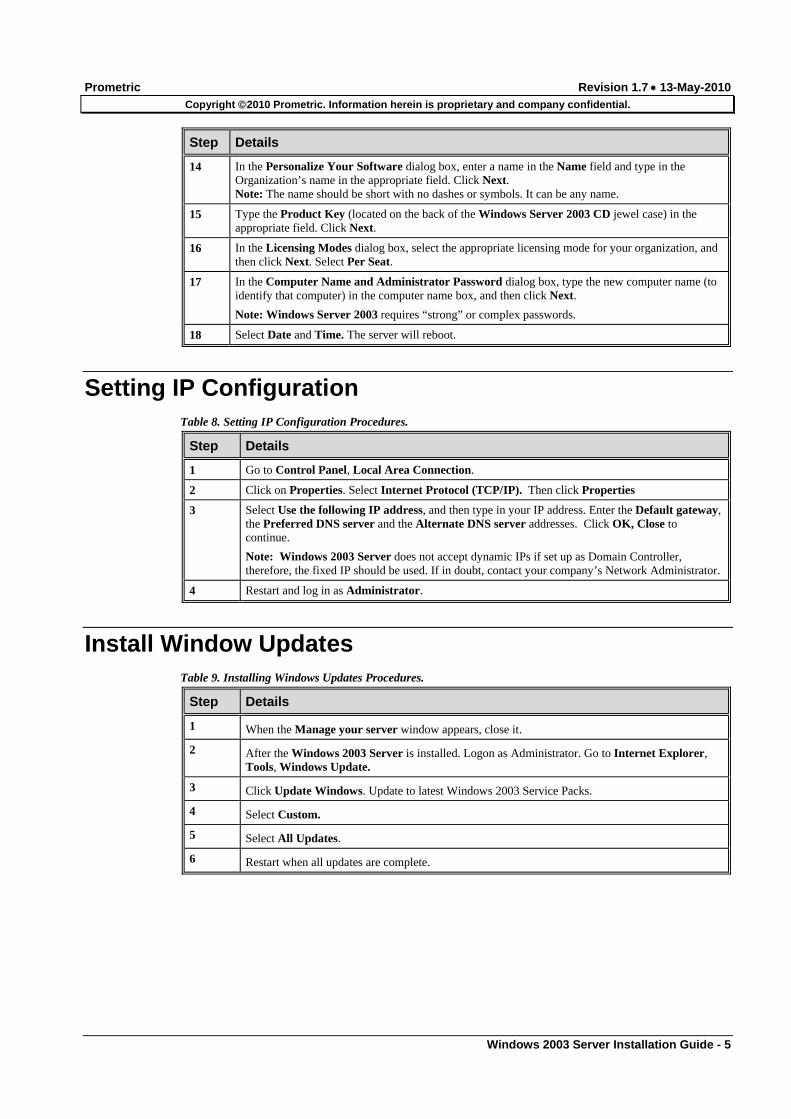
14 In the Personalize Your Software dialog box, enter a name in the Name field and type in the Organization’s name in the appropriate field. Click Next. Note: The name should be short with no dashes or symbols. It can be any name.
15 Type the Product Key (located on the back of the Windows Server 2003 CD jewel case) in the appropriate field. Click Next.
16 In the Licensing Modes dialog box, select the appropriate licensing mode for your organization, and then click Next. Select Per Seat.
17 In the Computer Name and Administrator Password dialog box, type the new computer name (to identify that computer) in the computer name box, and then click Next.
Note: Windows Server 2003 requires “strong” or complex passwords.
18 Select Date and Time. The server will reboot.
Setting IP Configuration Table 8. Setting IP Configuration Procedures.
Step Details
1 Go to Control Panel, Local Area Connection.
2 Click on Properties. Select Internet Protocol (TCP/IP). Then click Properties
3 Select Use the following IP address, and then type in your IP address. Enter the Default gateway, the Preferred DNS server and the Alternate DNS server addresses. Click OK, Close to continue.
Note: Windows 2003 Server does not accept dynamic IPs if set up as Domain Controller, therefore, the fixed IP should be used. If in doubt, contact your company’s Network Administrator.
4 Restart and log in as Administrator.
Install Window Updates Table 9. Installing Windows Updates Procedures.
Step Details
1 When the Manage your server window appears, close it.
2 After the Windows 2003 Server is installed. Logon as Administrator. Go to Internet Explorer, Tools, Windows Update.
3 Click Update Windows. Update to latest Windows 2003 Service Packs.
4 Select Custom.
5 Select All Updates.
6 Restart when all updates are complete.
Prometric Revision 1.7 � 13-May-2010
Copyright �2010 Prometric. Information herein is proprietary and company confidential.
Windows 2003 Server Installation Guide - 6
Configure Your Server as a Domain Controller Table 10. Configuring Your Server as a Domain Controller Procedures.
Step Details
The IT server must be set up as a Domain Controller (not a member server). Domain Name Service (DNS) and DCPromo (the command-line tool that creates DNS and Active Directory) can be installed manually or by using the Windows Server 2003 Manage Your Server Wizard. This section uses the manual tools to complete the installation.
Note: It is best to join the workstations to the Domain after installing all the required APTC testing software on the 2003 Domain Controller To install DNS and Active Directory using the manual tools:
1 Click Start, Run. Type DCPROMO, and then click OK.
2 When the Active Directory Installation Wizard appears, click Next to begin the installation.
3 Review the Operating System Compatibility information. Click Next.
4 Select Domain Controller for a New Domain (default), and then click Next.
5 Select Domain in a New Forest (default). Click Next.
6 For Full DNS Name, type the Domain Name (for example TestDom.com), and then click Next. (This represents a fully qualified name = includes a .com at the end of the name.) Note: The Domain name is created by the person setting up the network. It should be short with no dashes or symbols. Examples: APTC or center number.
7 Click Next to accept the default Domain NetBIOS Name. (NetBIOS names provide for down-level compatibility.)
8 On the Database and Log Folders screen, point the Active Directory Log Folder to the suggested default location, and then click Next to continue.
9 Leave the default folder location for Shared System Volume. Click Next.
10 On the DNS Registration Diagnostics screen, click Install and configure the DNS server on this computer. Click Next to continue.
11 Select Permissions Compatible only with Windows 2000 or Windows Server 2003 (default), and then click Next.
12 Type the password for Restore Mode Password and Confirm Password. , and then click Next to continue.
Note: Always use complex passwords when creating Directory Services Restore passwords.

Prometric Revision 1.7 � 13-May-2010
Copyright �2010 Prometric. Information herein is proprietary and company confidential.
Windows 2003 Server Installation Guide - 7
Step Details
13 The screenshot below shows a summary of the Active Directory Installation Options. Click Next to start the installation of Active Directory. If prompted, insert the Windows Server 2003 Installation CD. After the CD is inserted, a window comes up. Close it.
14 Click Finish once the Active Directory Installation is complete.
15 Click Restart Now to reboot the computer.
Turning on the Firewall Table 11. Turning on the Firewall Procedures.
Details
• Go to Start, Control Panel, Windows Firewall. • Click Yes to turn on the firewall.
Setting Up a Printer Table 12. Printer Set-up Procedures.
Details
• Go to Start, Control Panel, Printers and Faxes, Add Printer.
Note: It is a contractual requirement that APTCs have a “dedicated” laser printer capable of at least 600 dpi and that only LPT and IP printers are supported. The printer must be set up as a network printer and shared on the network.

Prometric Revision 1.7 � 13-May-2010
Copyright �2010 Prometric. Information herein is proprietary and company confidential.
Windows 2003 Server Installation Guide - 8
Antivirus Software Table 13. antivirus Software.
Details
• Antivirus software should be installed on all APTC computers. • Avoid software such as McAfee with an “update agent” because the Agent will revert the regional options on the computer to match the ones on the local distribution requirements. This will prevent most UTD exams from running on your workstations.
Pre-Configuration Check Table 14. Pre-Configuration Check.
Details
• Ensure that Server 2003 w/SP2 is set-up as a Domain Controller.
Adding Prometric URLs Table 15. Adding Prometric URLs Procedures.
Step Details
1 From the Control Panel, select Internet Options. Click the Security tab. Highlight the Trusted Sites icon. Click on Sites.

Prometric Revision 1.7 � 13-May-2010
Copyright �2010 Prometric. Information herein is proprietary and company confidential.
Windows 2003 Server Installation Guide - 9
Step Details
2 Add these URLs by typing them into the Add this Web Site to the Zone in the Trusted Sites dialog box: • https://www.prometric.com • http://www.prometric.com • https://www.2test.com • http://www.2test.com
Downloading APTC Installation Software Table 16. Downloading APTC Installation Software Procedures.
Step Details
1 Go to http://prometric.com/aptc. Select APTC Sites, type in your Center Code and Password. Click Submit to continue.

Prometric Revision 1.7 � 13-May-2010
Copyright �2010 Prometric. Information herein is proprietary and company confidential.
Windows 2003 Server Installation Guide - 10
Step Details
2 From the light purple Regions menu on the left-hand side of the screen, select your Region.
3 From the sub-menu under your Region on the left-hand side of the screen, click on the Downloads link.
Prometric Revision 1.7 � 13-May-2010
Copyright �2010 Prometric. Information herein is proprietary and company confidential.
Windows 2003 Server Installation Guide - 11
Step Details
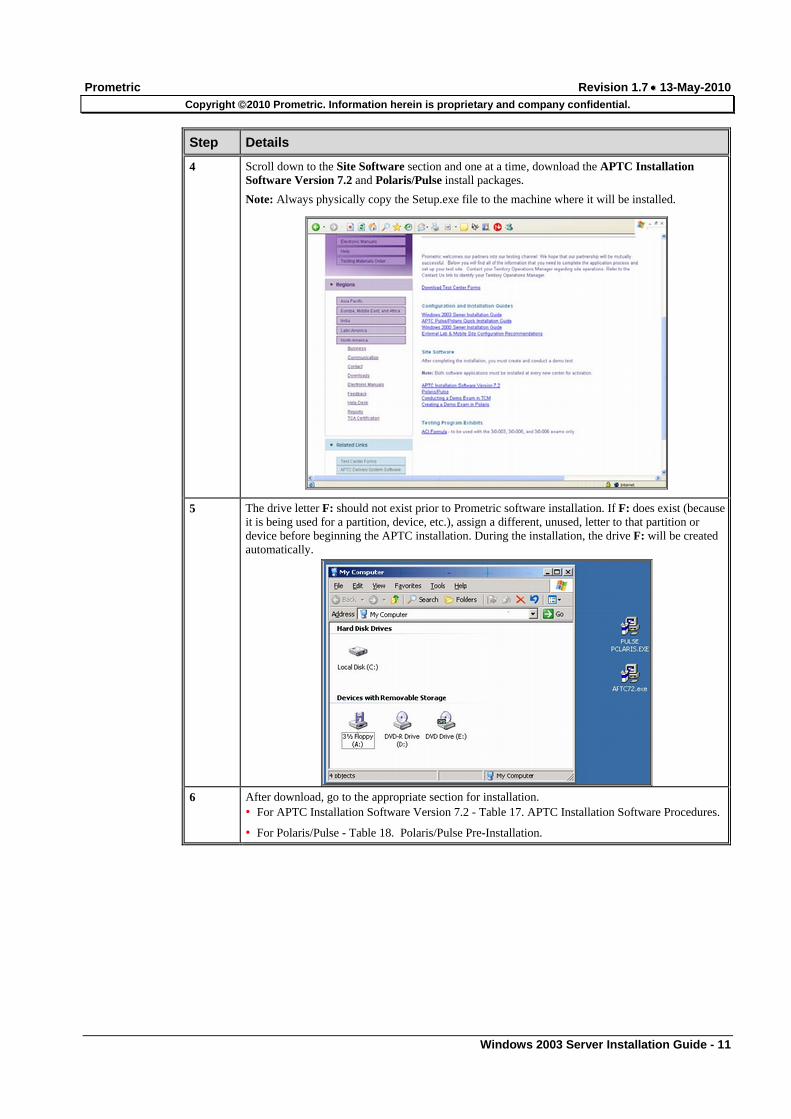
4 Scroll down to the Site Software section and one at a time, download the APTC Installation Software Version 7.2 and Polaris/Pulse install packages.
Note: Always physically copy the Setup.exe file to the machine where it will be installed.
5 The drive letter F: should not exist prior to Prometric software installation. If F: does exist (because it is being used for a partition, device, etc.), assign a different, unused, letter to that partition or device before beginning the APTC installation. During the installation, the drive F: will be created automatically.
6 After download, go to the appropriate section for installation. • For APTC Installation Software Version 7.2 - Table 17. APTC Installation Software Procedures.
• For Polaris/Pulse - Table 18. Polaris/Pulse Pre-Installation.

Prometric Revision 1.7 � 13-May-2010
Copyright �2010 Prometric. Information herein is proprietary and company confidential.
Windows 2003 Server Installation Guide - 12
APTC Installation Software Table 17. APTC Installation Software Procedures.
Step Details
1 Run the APTC 7.2 Install Wizard.
2 Click Next.

Prometric Revision 1.7 � 13-May-2010
Copyright �2010 Prometric. Information herein is proprietary and company confidential.
Windows 2003 Server Installation Guide - 13
Step Details
3 The License Agreement screen appears. Click I Agree, Next.
4 Select your Region. Click Next.

Prometric Revision 1.7 � 13-May-2010
Copyright �2010 Prometric. Information herein is proprietary and company confidential.
Windows 2003 Server Installation Guide - 14
Step Details
5 The Select Operating System screen appears. Highlight your server type on the list. Click Next.
6 The Password Required screen appears. Type in the Installation Key and password (provided by the Global Help Desk). Click Next.

Prometric Revision 1.7 � 13-May-2010
Copyright �2010 Prometric. Information herein is proprietary and company confidential.
Windows 2003 Server Installation Guide - 15
Step Details
7 The Site Information screen appears. Type in your Site Code and remaining Site information (i.e. Site administrator’s name, e-mail address, etc.). Click Next. Important: You cannot proceed with the installation unless your Site Code is entered in the appropriate field. If your location is a new APTC, you should have received an e-mail containing your Site Code. If needed, contact Channel Communications for assistance.
8 The Verify Site Information screen appears. Confirm all information is correct and then click Next.

Prometric Revision 1.7 � 13-May-2010
Copyright �2010 Prometric. Information herein is proprietary and company confidential.
Windows 2003 Server Installation Guide - 16
Step Details
9 The ISP Method screen appears. Highlight the correct method and click Next.
10 The Administrator Password screen appears. Create an Administrator password and type it in the first box. Type it again in the second box to confirm and click Next. The password: • field cannot be left blank. • will be used to perform administrative functions within the Test Center Manager (TCM). • is a different password than the Server’s Administrator password. • must be at least 5 characters in length. • can consist of letters and numbers. Important: Do not give this password to anyone other than an administrator. Do not forget your password.
Prometric Revision 1.7 � 13-May-2010
Copyright �2010 Prometric. Information herein is proprietary and company confidential.
Windows 2003 Server Installation Guide - 17
Step Details
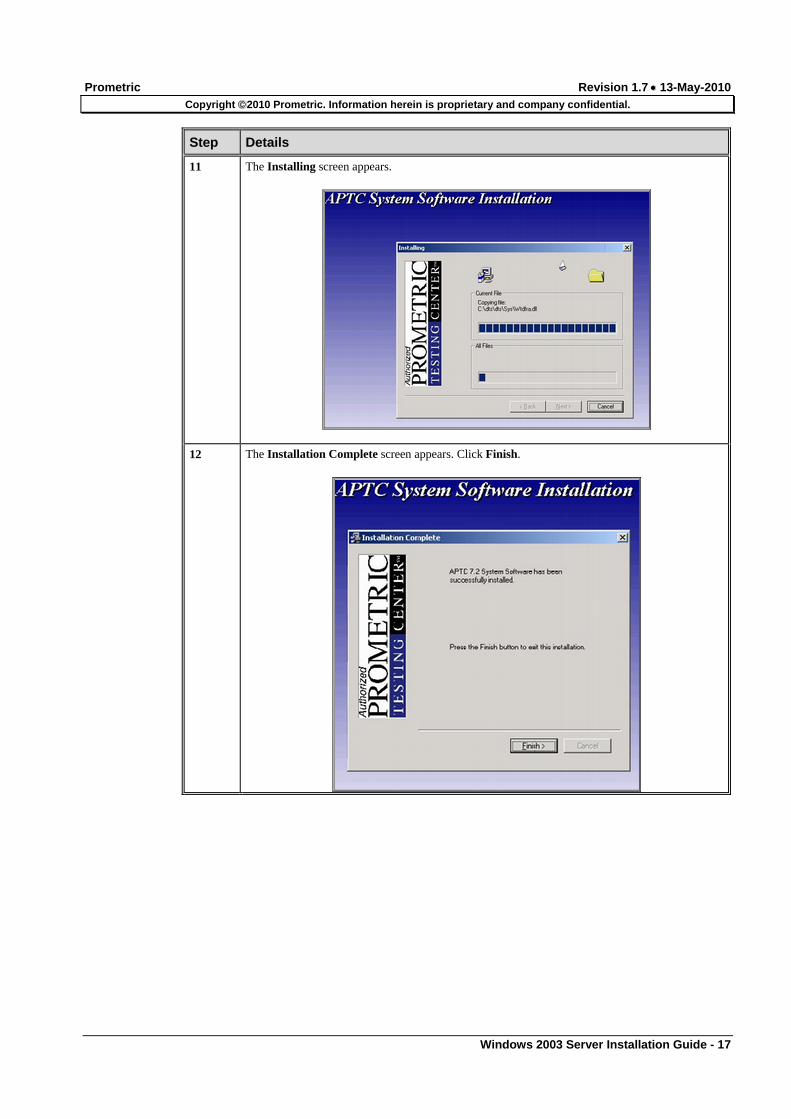
11 The Installing screen appears.
12 The Installation Complete screen appears. Click Finish.
Prometric Revision 1.7 � 13-May-2010
Copyright �2010 Prometric. Information herein is proprietary and company confidential.
Windows 2003 Server Installation Guide - 18
Step Details
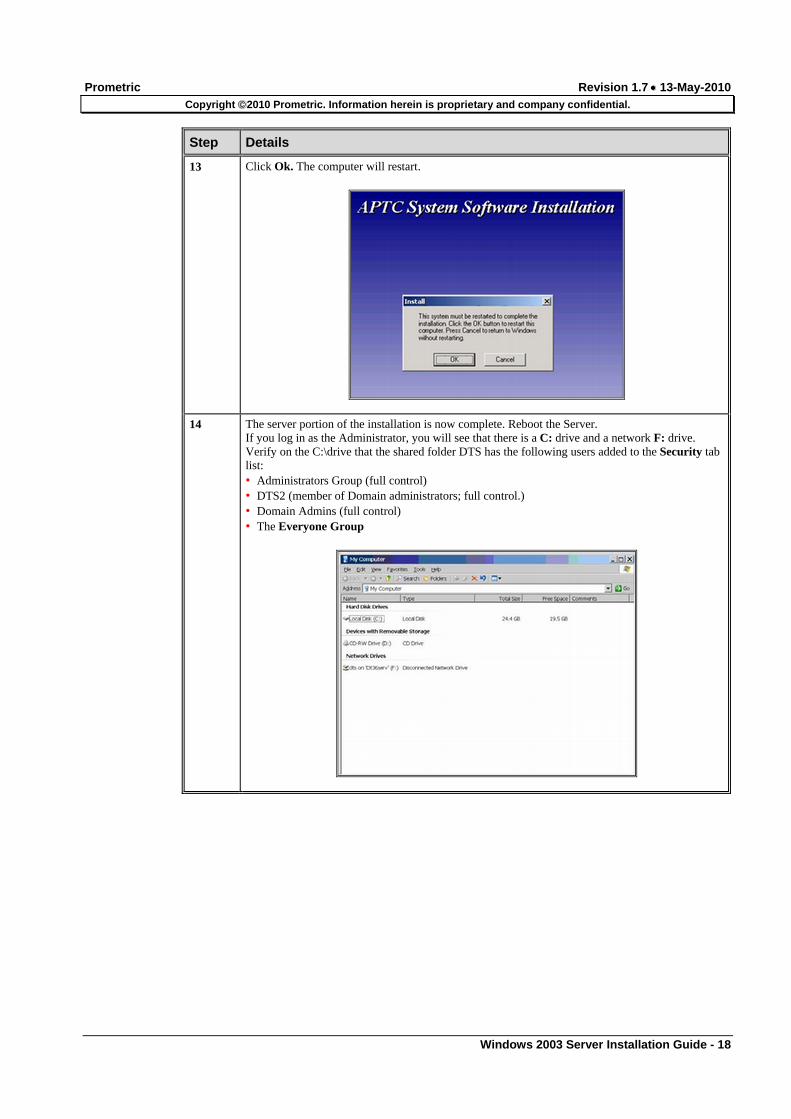
13 Click Ok. The computer will restart.
14 The server portion of the installation is now complete. Reboot the Server. If you log in as the Administrator, you will see that there is a C: drive and a network F: drive. Verify on the C:\drive that the shared folder DTS has the following users added to the Security tab list: • Administrators Group (full control) • DTS2 (member of Domain administrators; full control.) • Domain Admins (full control) • The Everyone Group
Prometric Revision 1.7 � 13-May-2010
Copyright �2010 Prometric. Information herein is proprietary and company confidential.
Windows 2003 Server Installation Guide - 19
Step Details
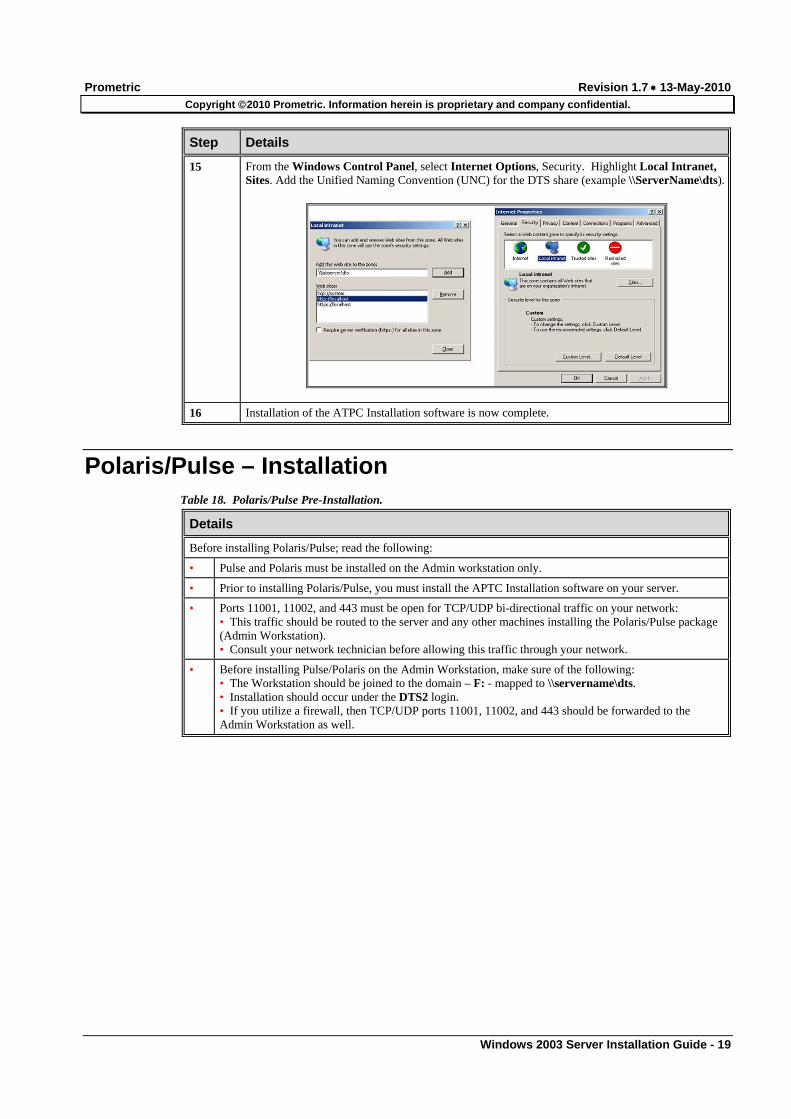
15 From the Windows Control Panel, select Internet Options, Security. Highlight Local Intranet, Sites. Add the Unified Naming Convention (UNC) for the DTS share (example \\ServerName\dts).
16 Installation of the ATPC Installation software is now complete.
Polaris/Pulse – Installation Table 18. Polaris/Pulse Pre-Installation.
Details
Before installing Polaris/Pulse; read the following:
• Pulse and Polaris must be installed on the Admin workstation only.
• Prior to installing Polaris/Pulse, you must install the APTC Installation software on your server.
• Ports 11001, 11002, and 443 must be open for TCP/UDP bi-directional traffic on your network: • This traffic should be routed to the server and any other machines installing the Polaris/Pulse package (Admin Workstation). • Consult your network technician before allowing this traffic through your network.
• Before installing Pulse/Polaris on the Admin Workstation, make sure of the following: • The Workstation should be joined to the domain – F: - mapped to \\servername\dts. • Installation should occur under the DTS2 login. • If you utilize a firewall, then TCP/UDP ports 11001, 11002, and 443 should be forwarded to the Admin Workstation as well.

Prometric Revision 1.7 � 13-May-2010
Copyright �2010 Prometric. Information herein is proprietary and company confidential.
Windows 2003 Server Installation Guide - 20
Installing Polaris/Pulse Table 19. Polaris/Pulse Installation Procedures.
Step Details
1 Locate the Setup-exe file on the hard drive. Double-click on it to begin installation. The Welcome screen appears. Check the Install Polaris … box and then click Next. Note: This will install both Polaris and Pulse.
2 If a warning appears asking you to continue, click Yes. If asked, choose Local Area Network and click Next.
3 If, you receive the Open File – Security Warning dialog box below, you did not correctly add \\servername\dts to the Local Intranet. See “Table 17. APTC Installation Software Procedures.” -step 15. You must correct this problem before continuing.

Prometric Revision 1.7 � 13-May-2010
Copyright �2010 Prometric. Information herein is proprietary and company confidential.
Windows 2003 Server Installation Guide - 21
Step Details
4 The Port Checker … screen appears. This indicates that Polaris can communicate successfully with Prometric’s data center. Click OK. A popup warning box appears. Click OK to continue.
5 The system will begin to copy files to your local hard drive. At the end of this process, you may be asked to reboot the Administrative Workstation. Reboot and log in as DTS2 user
For Pulse install:
6 From your desk top, click on the Pulse Icon. Type in the User ID (this is your Site Code) and Password (you received an e-mail with the initial standard password). Click Update to download all necessary updates to the testing software.

Prometric Revision 1.7 � 13-May-2010
Copyright �2010 Prometric. Information herein is proprietary and company confidential.
Windows 2003 Server Installation Guide - 22
Step Details
7 The srsupdate screen appears. Click OK to continue.
8 Restart the Admin workstation. If an EDM error box – EDMMsgMgr.exe not found – appears, click OK to continue.
Note: This error will only appear the first time you run Pulse after the installation.�
9 Enter your Pulse User ID and Password. Select Today’s Processes to run a full Pulse session. During the session, some additional updates might have been queued for your Site. If the pulse software is already updated, this window will appear.
10 Restart the Admin Workstation. Run Pulse (no EDM error should display).�
For Polaris install:
11 From your desktop, click on the Polaris Icon. Enter your User ID and Password. Run the Polaris applications to download all necessary updates to the testing software. Process any required updates.
12 The Pulse/Polaris installation is now complete. Reboot the Admin Workstation.

Prometric Revision 1.7 � 13-May-2010
Copyright �2010 Prometric. Information herein is proprietary and company confidential.
Windows 2003 Server Installation Guide - 23
Joining Test Workstations to the Domain Table 20. Joining Test Workstations to the Domain Procedures.
Step Procedure
• Join the Test Workstations to the Domain only after you have installed the APTC Site software. • Build workstations with the Operating Systems Windows 2000 Pro sp4 or Windows XP Pro sp2 or sp3. • Be sure that the DTS2 user is listed on the server’s AD and it is a member of the Domain Administrators. If not, create the user and assign it to the Domain Admins Group. Follow the Windows 2003 Server rules for creating complex passwords. • To avoid unnecessary delays during seat set-up, install the Windows Service Pack, Internet Explorer 7, MDAC 2.8 sp1 and msxml4.0 parser before you start the seat set-up.
1 Log in as Administrator. Click Start, Control Panel, and then double-click the System icon.
2 Click the Computer Name tab, and then click Change.
3 Check the Domain radio button. Under Member of: type in the domain name of your APTC server. Click OK.
4 The Domain Username and Password dialog box appears. Note: The Username you enter must be an account that has privileges to join the domain.
5 The message Welcome to the xxxx Domain appears. The workstation has been successfully joined to the Domain. Click OK.
6 Click OK to reboot the computer. Click OK to close the System Properties window.
7 The System Settings Change dialog box appears. Click Yes to restart the workstation.
8 Map to the network drive F: and add the network printer.
Seat Set-Up Table 21. Seat Set-Up Procedures.
Step Procedure
Important: Ensure that Internet Explorer 7 is installed on the workstations prior to Seat Set-Up. This will help to avoid an unnecessary reboot in step 5.
1 At the workstation, reboot the system. After reboot is complete, logon as DTS2. Note: There is now a network drive F:.

Prometric Revision 1.7 � 13-May-2010
Copyright �2010 Prometric. Information herein is proprietary and company confidential.
Windows 2003 Server Installation Guide - 24
Step Procedure
2 Open the DTS directory.
3 Open the Seat directory.
4 Double-click the SeatSetup.exe program. Note: If SeatSetup was installed on the workstation previously, this error message might appear – Internal Error 2753.UTDCore.exe. Click OK and proceed.
5 The system will perform a series of tests, check the version of Internet Explorer installed on the workstation and check for the latest Service Packs for the Operating System. When finished, it will automatically install any needed updates and reboot. If no reboot, skip to step 7.
6 After the reboot, logon as DTS2. Start the installation process again.
7 On the Welcome screen, click Next.
8 Choose I agree on the License Agreement screen. Click Next.

Prometric Revision 1.7 � 13-May-2010
Copyright �2010 Prometric. Information herein is proprietary and company confidential.
Windows 2003 Server Installation Guide - 25
Step Procedure
9 The Start Installation window will show you the seat number. By default, it will be the seat number you are working on. If you are setting up an Administration station, you will need to type ADMIN in the box. For testing stations, type S1, S2, etc. Click Next.
Follow these naming conventions: • Do not give two seats the same name. • Do not include spaces, dashes, leading or trailing characters. For example do not use: S 1, S-1, S001. S1000.
10 Files will be copied to the seat. When complete, the Installation Complete screen appears. Click Finish, OK. The computer will restart.
11 After the restart, logon as DTS2 and the APTC test software will perform a Level check. Press OK. The Prometric Testing System Activity screen appears, select Start Application.
Note: If an error message appears after you logon as DTS2, contact the Global Help Desk.
12 Repeat all steps in this table on each workstation you are adding.