os clustering win
DESCRIPTION
clusteringTRANSCRIPT

7/17/2019 OS Clustering WIN
http://slidepdf.com/reader/full/os-clustering-win 1/36
Pre- Install Checklist
• On both the nodes, ensure that the local Administrator s group has the following
privileges:
Act as part of the operating systemLog on as a service
Replace a process level token
Click on Start!rogramsAdministrative "oolsLocal Security !olicy,
#nder the Local !olicies $older, click on #sers Rights Assignment
%ouble Click on each of the rights mentioned above and confirm that
Administrator group has been assigned this right& 'lse assign the rights to the
Administrator group

7/17/2019 OS Clustering WIN
http://slidepdf.com/reader/full/os-clustering-win 2/36
• 'nsure that the following accounts have been set up in the A(% domain and that
they are part of the local Administrators group on each clustered node
)S*%+cluadm eg sbtcluadm
)S*%+sladm eg sbtsladm
)S*%+adm eg sbtadmSA!Service)S*%+ eg SA!ServiceS-"
• 'nsure that the following groups have been set up in the A(% domain
SA!.)S*%+./lobalAdmin eg SA!.S-"./lobalAdmin"he )S*%+adm , SA!Service)S*%+ , )SA!S*%+cluadm, )SA!S*%+sladm
should be a part of the SA!.)S*%+./lobalAdmin group
• Add the SA!.)S*%+./lobalAdmin to the local Administrators group
• On both nodes logon as SA!)S*%+ and map 00SA#SSA!10SA!C% to the * drive
• 'nsure that the *! address for the following servers are there in the %2S:
!hysical 2ode A eg ausr3sbtdc4a
!hysical 2ode - eg ausr3sbtdc4b5irtual Server for Cluster eg ausr3sbtcl44
5irtual S6L Server 2ame eg ausr3sbtdb44
5irtual SA! Server 2ame eg ausr3sbtci44
"he following *!7s need not be in the %2S:
8eartbeat for 2ode A: : *! 14&14&14&18eartbeat for 2ode -: : *! 14&14&14&9
• 'nsure that each node can see only its own drive
• 'nsure that both nodes have access to the ;, (, L, 2, O,6 drives &
"o confirm this right click on the (y Computer *con on the desktop < it might becalled )8OS"2A('+ instead of (y Computer=& Click on (anage and click on
%isk (anagement & "he following screen should appear

7/17/2019 OS Clustering WIN
http://slidepdf.com/reader/full/os-clustering-win 3/36
Drive Letter Assignments for Node A and Node B
7/17/2019 OS Clustering WIN
http://slidepdf.com/reader/full/os-clustering-win 4/36
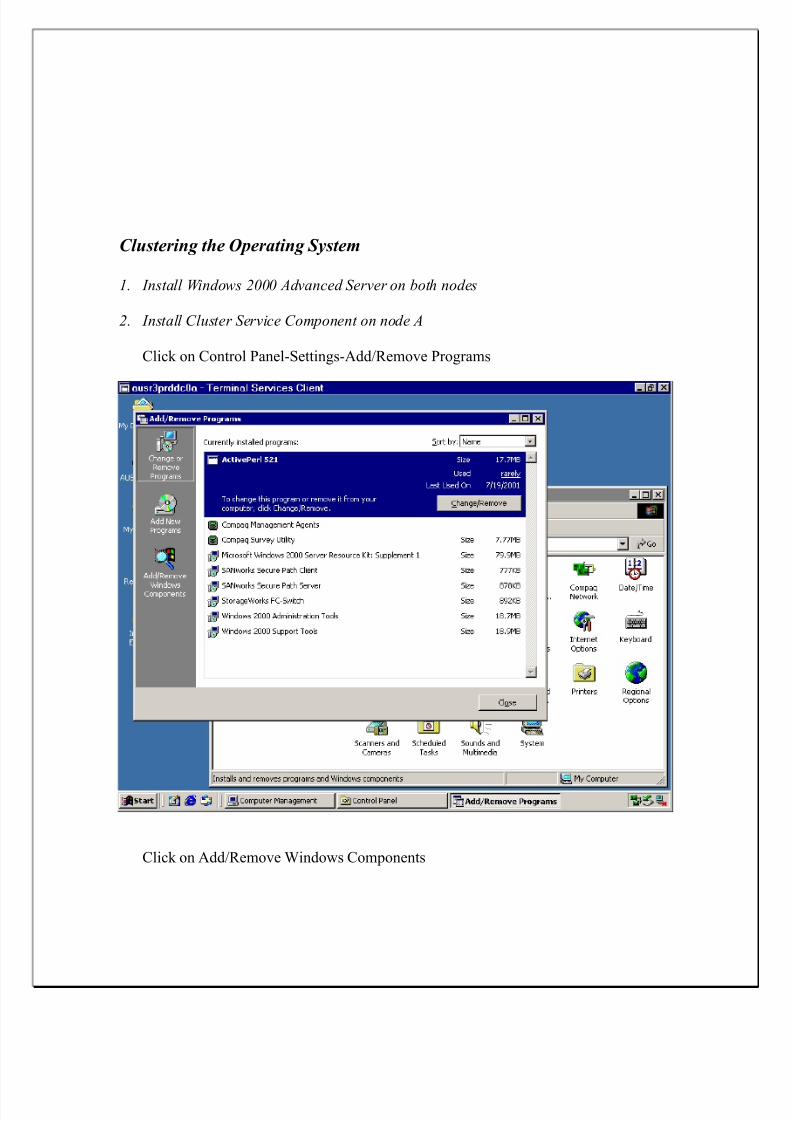
Clustering the Operating Sstem
1. Install Windows 2000 Advanced Server on both nodes
2. Install Cluster Service Component on node A
Click on Control !anelSettingsAdd>Remove !rograms
Click on Add>Remove ?indows Components

7/17/2019 OS Clustering WIN
http://slidepdf.com/reader/full/os-clustering-win 5/36
Click on Clustering Service and then click 2e@t& "ake care not to uncheck any otherchecked bo@es& On the ne@t screen click on Remote Administration

7/17/2019 OS Clustering WIN
http://slidepdf.com/reader/full/os-clustering-win 6/36
Click O; and browse to the *3B directory on the ?in9; Advanced Server C% and click
O;& *n case you don7t have the C% browse to the *3B directory on \\ausxxris00\Win2K.
ou will be prompted for the location once more& -rowse to the the *3B directory on the
?in9; Advanced Server C% and click O; again& *n case you don7t have the C% browse
to the *3B directory on \\ausxxris00\Win2K.
7/17/2019 OS Clustering WIN
http://slidepdf.com/reader/full/os-clustering-win 7/36
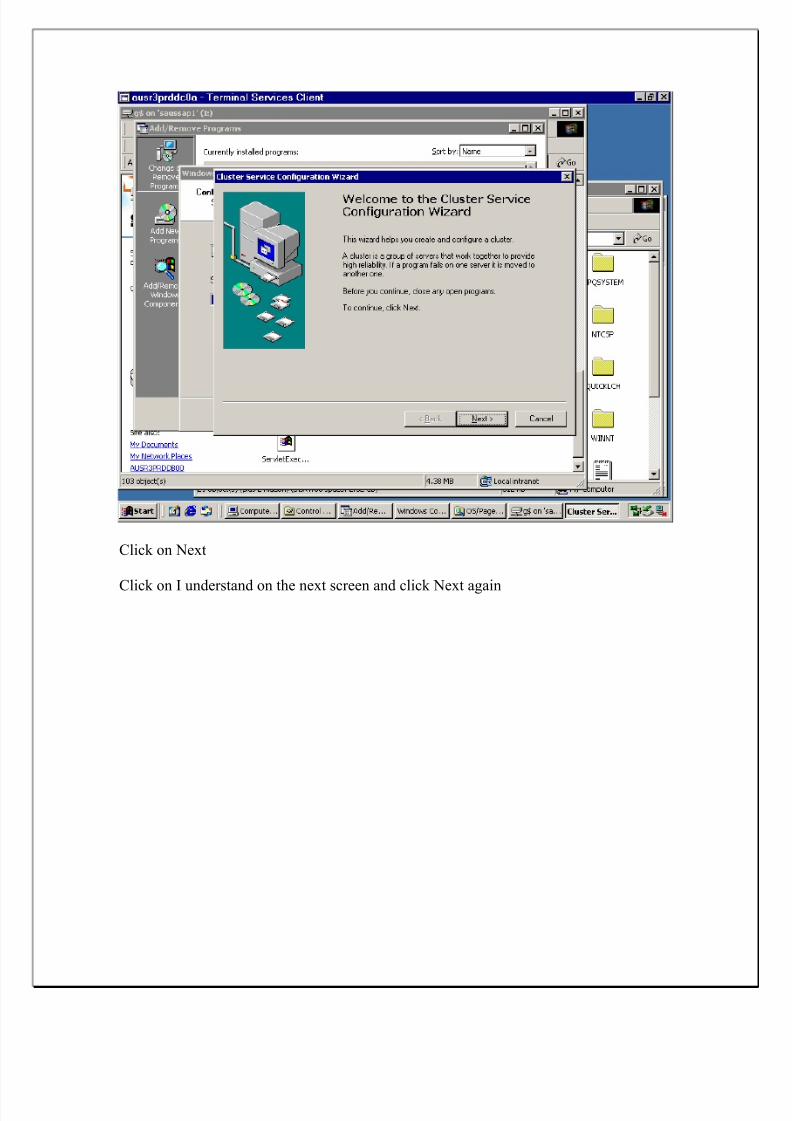
Click on 2e@t
Click on * understand on the ne@t screen and click 2e@t again
7/17/2019 OS Clustering WIN
http://slidepdf.com/reader/full/os-clustering-win 8/36
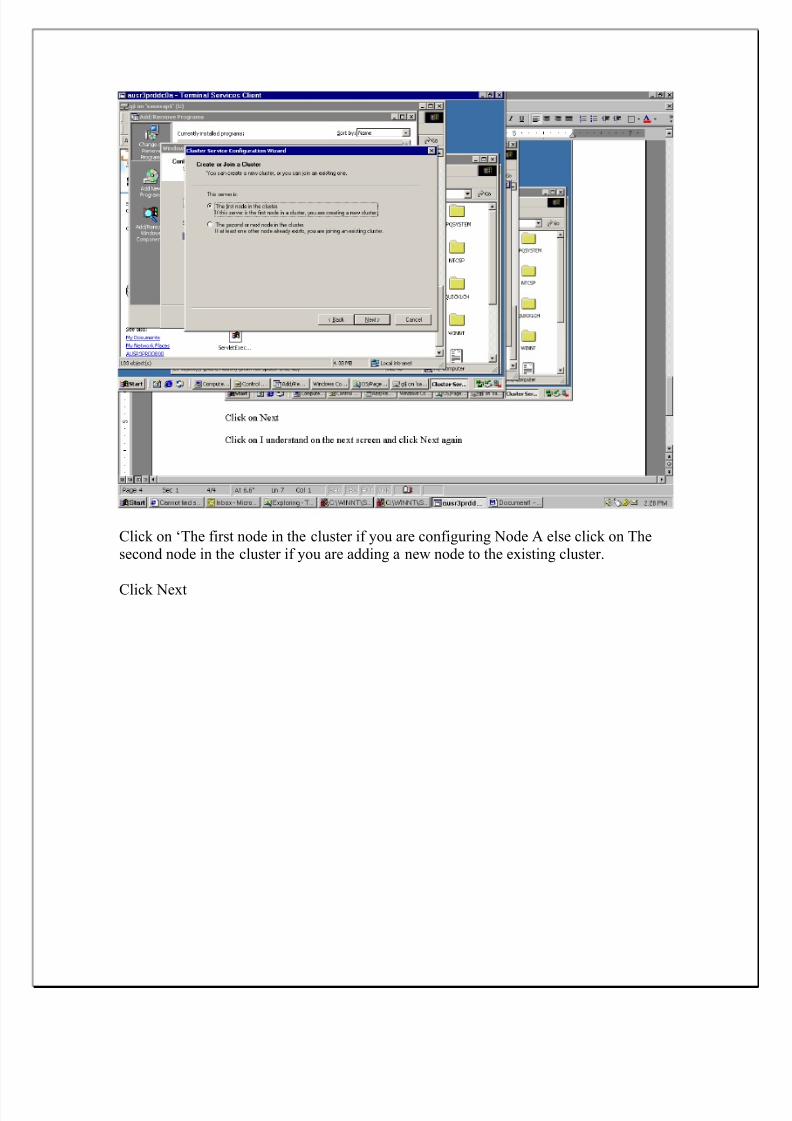
Click on D"he first node in the cluster if you are configuring 2ode A else click on "hesecond node in the cluster if you are adding a new node to the e@isting cluster&
Click 2e@t
7/17/2019 OS Clustering WIN
http://slidepdf.com/reader/full/os-clustering-win 9/36
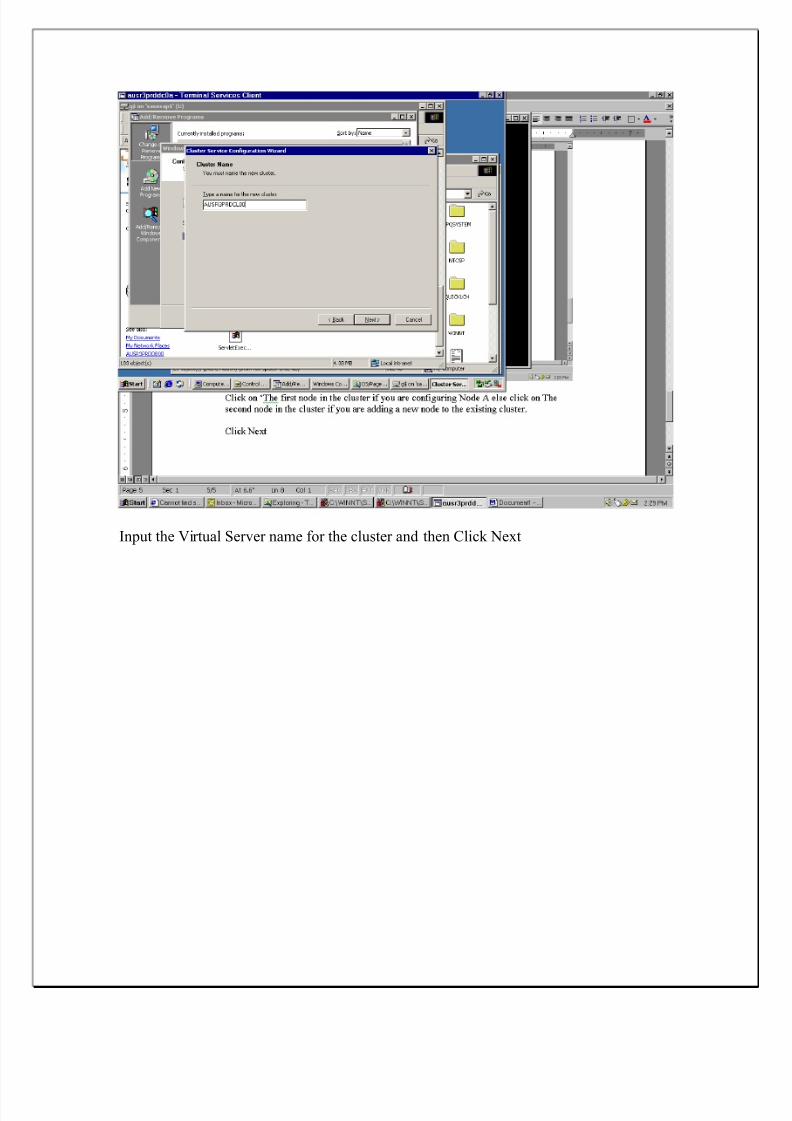
*nput the 5irtual Server name for the cluster and then Click 2e@t

7/17/2019 OS Clustering WIN
http://slidepdf.com/reader/full/os-clustering-win 10/36
*nput the )S*%+cluadm account and password and then click 2e@t

7/17/2019 OS Clustering WIN
http://slidepdf.com/reader/full/os-clustering-win 11/36
Select the disk for : < S6L '@ecutables= and click on Remove& "his implies that all other disks e@cept the drive are shared disks to be seen by both nodes& 'ach node will have its
own drive

7/17/2019 OS Clustering WIN
http://slidepdf.com/reader/full/os-clustering-win 12/36
Click 2e@t

7/17/2019 OS Clustering WIN
http://slidepdf.com/reader/full/os-clustering-win 13/36
On the ne@t screen you need to input the drive letter that corresponds to the 6uorum disk< generally 6= and then Click 2e@t
7/17/2019 OS Clustering WIN
http://slidepdf.com/reader/full/os-clustering-win 14/36
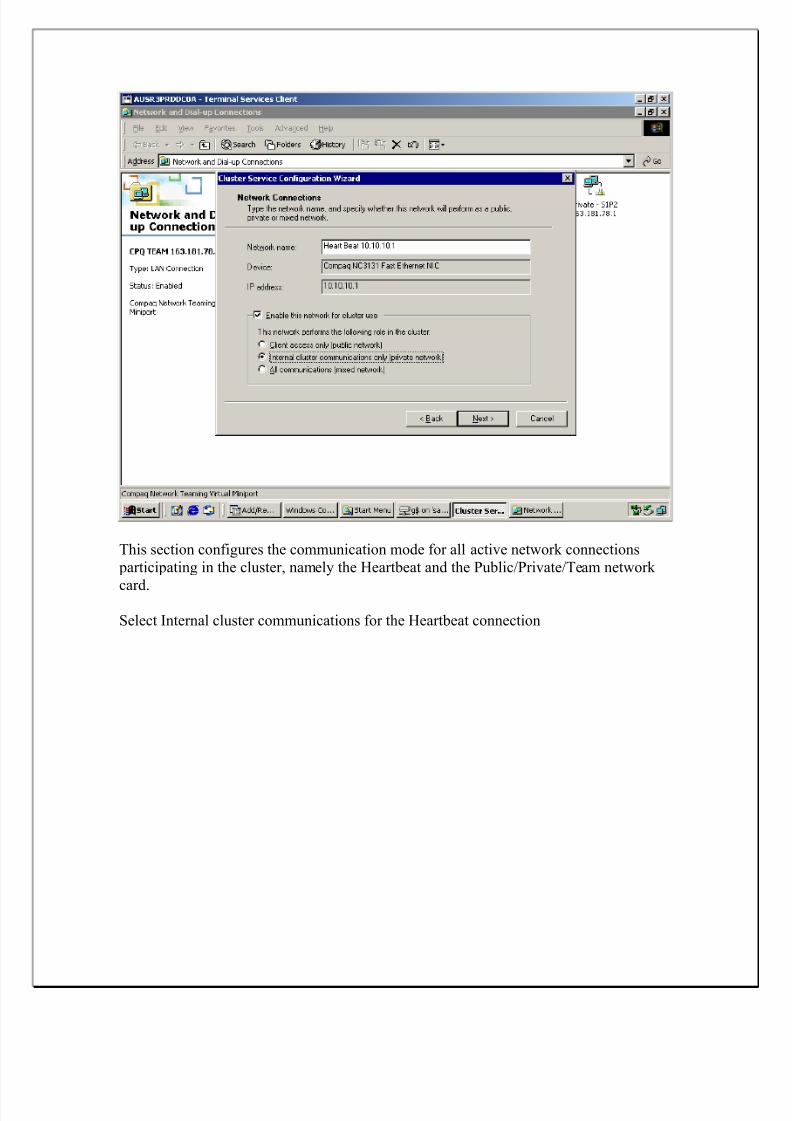
"his section configures the communication mode for all active network connections
participating in the cluster, namely the 8eartbeat and the !ublic>!rivate>"eam network
card&
Select *nternal cluster communications for the 8eartbeat connection
7/17/2019 OS Clustering WIN
http://slidepdf.com/reader/full/os-clustering-win 15/36
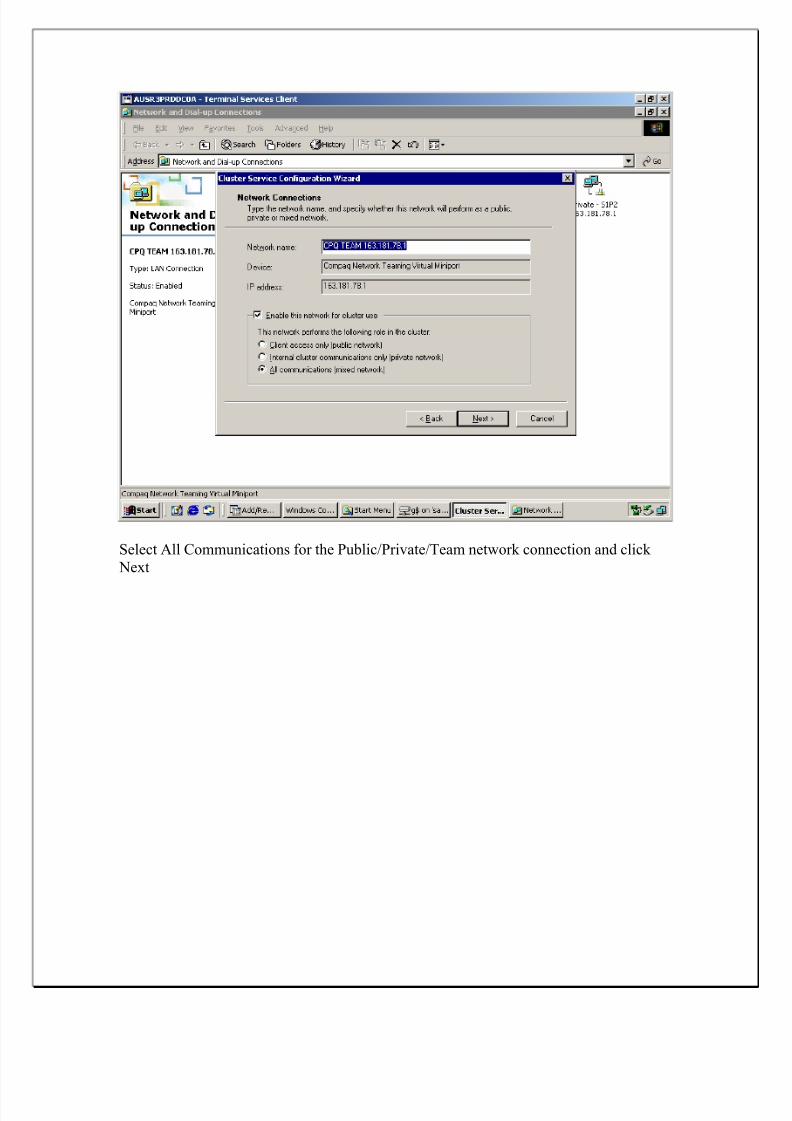
Select All Communications for the !ublic>!rivate>"eam network connection and click
2e@t
7/17/2019 OS Clustering WIN
http://slidepdf.com/reader/full/os-clustering-win 16/36
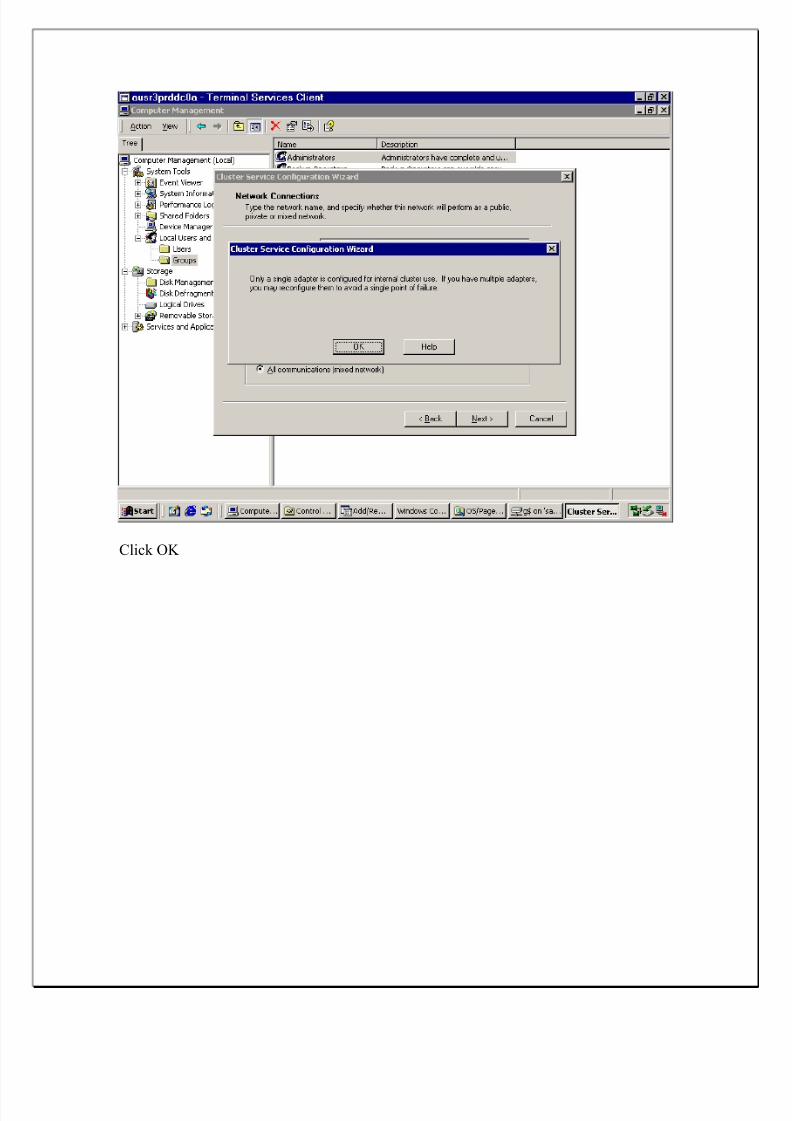
Click O;
7/17/2019 OS Clustering WIN
http://slidepdf.com/reader/full/os-clustering-win 17/36
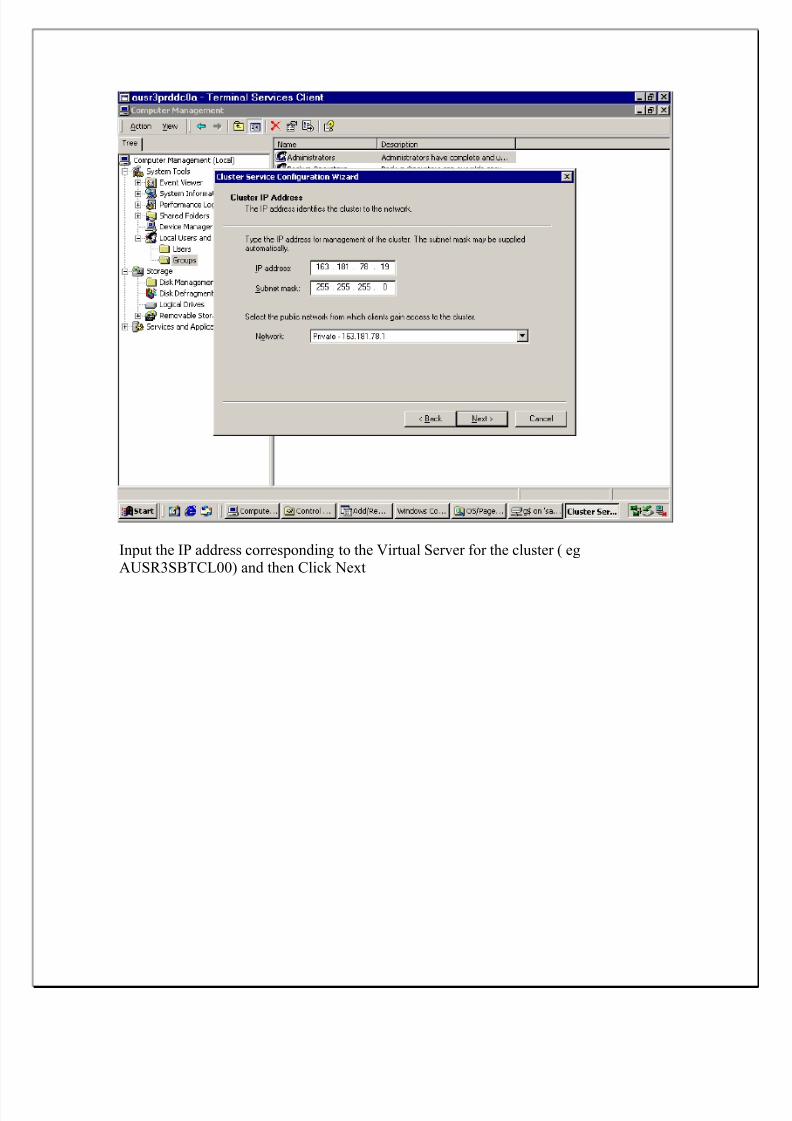
*nput the *! address corresponding to the 5irtual Server for the cluster < egA#SR3S-"CL44= and then Click 2e@t

7/17/2019 OS Clustering WIN
http://slidepdf.com/reader/full/os-clustering-win 18/36
Click $inish to finish the Cluster Service *nstallation

7/17/2019 OS Clustering WIN
http://slidepdf.com/reader/full/os-clustering-win 19/36
Click Ok
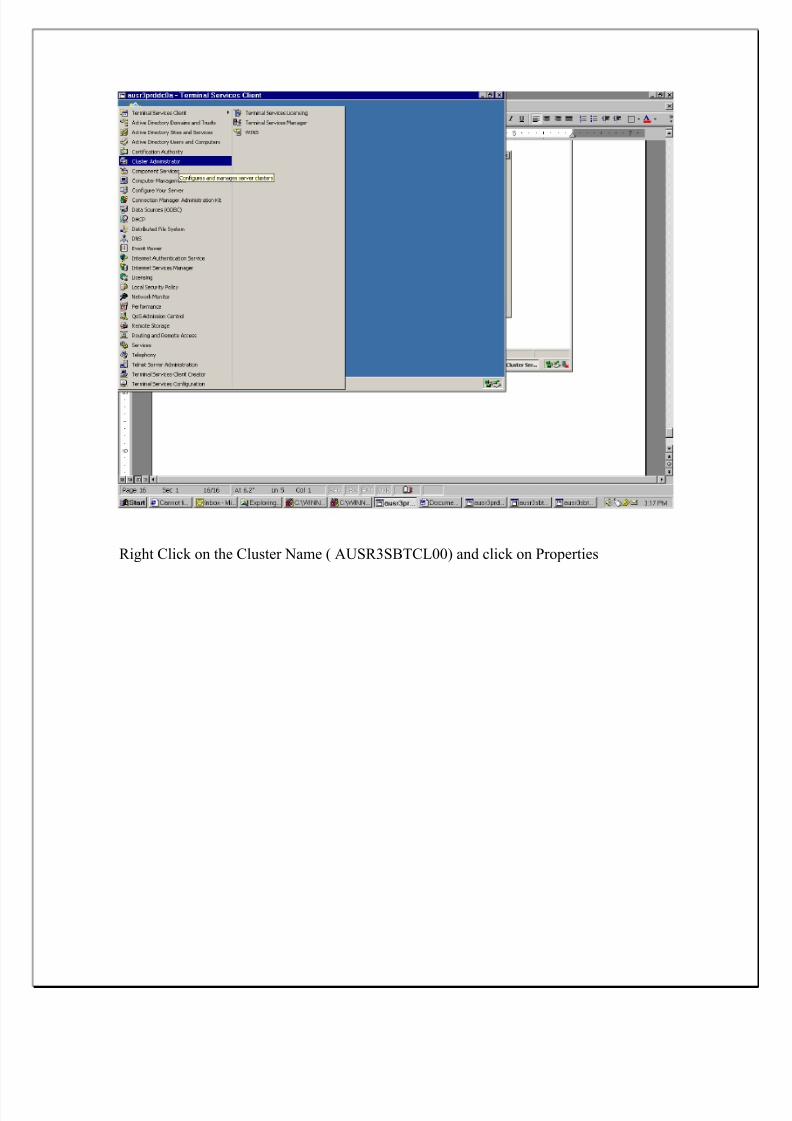
Click on Start!rogramsAdmin "oolsCluster Admin
7/17/2019 OS Clustering WIN
http://slidepdf.com/reader/full/os-clustering-win 20/36
Right Click on the Cluster 2ame < A#SR3S-"CL44= and click on !roperties
7/17/2019 OS Clustering WIN
http://slidepdf.com/reader/full/os-clustering-win 21/36
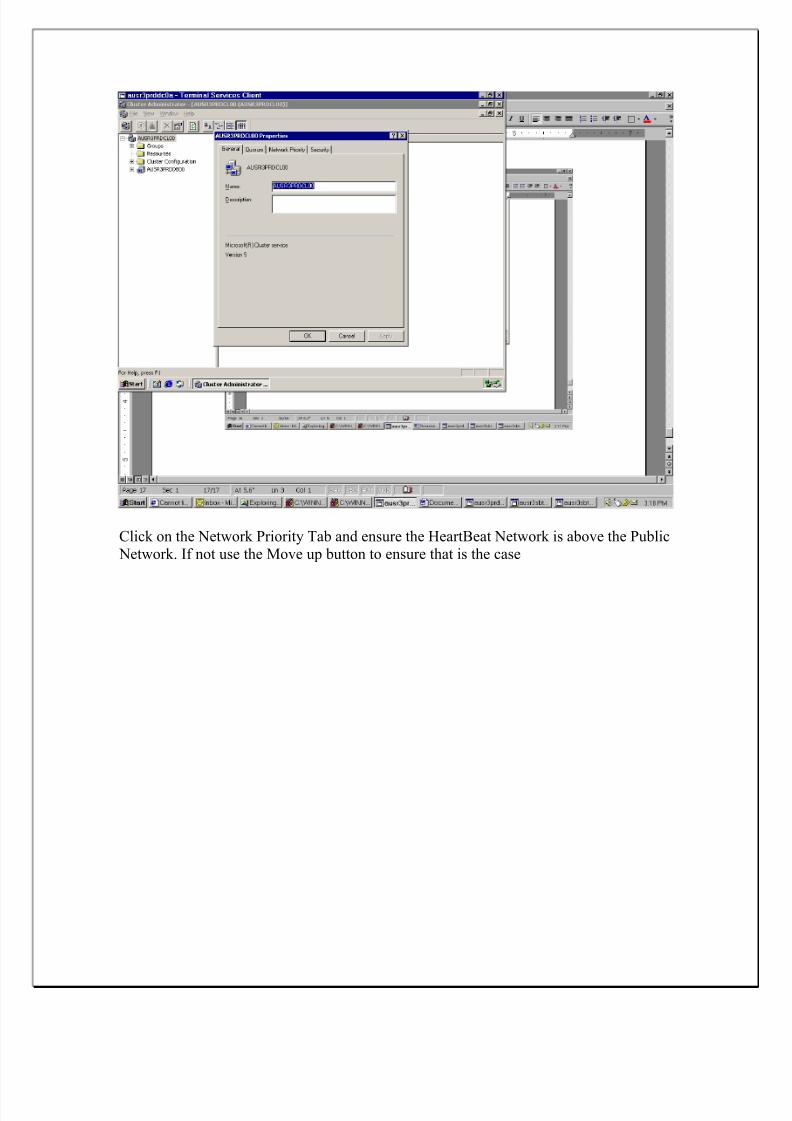
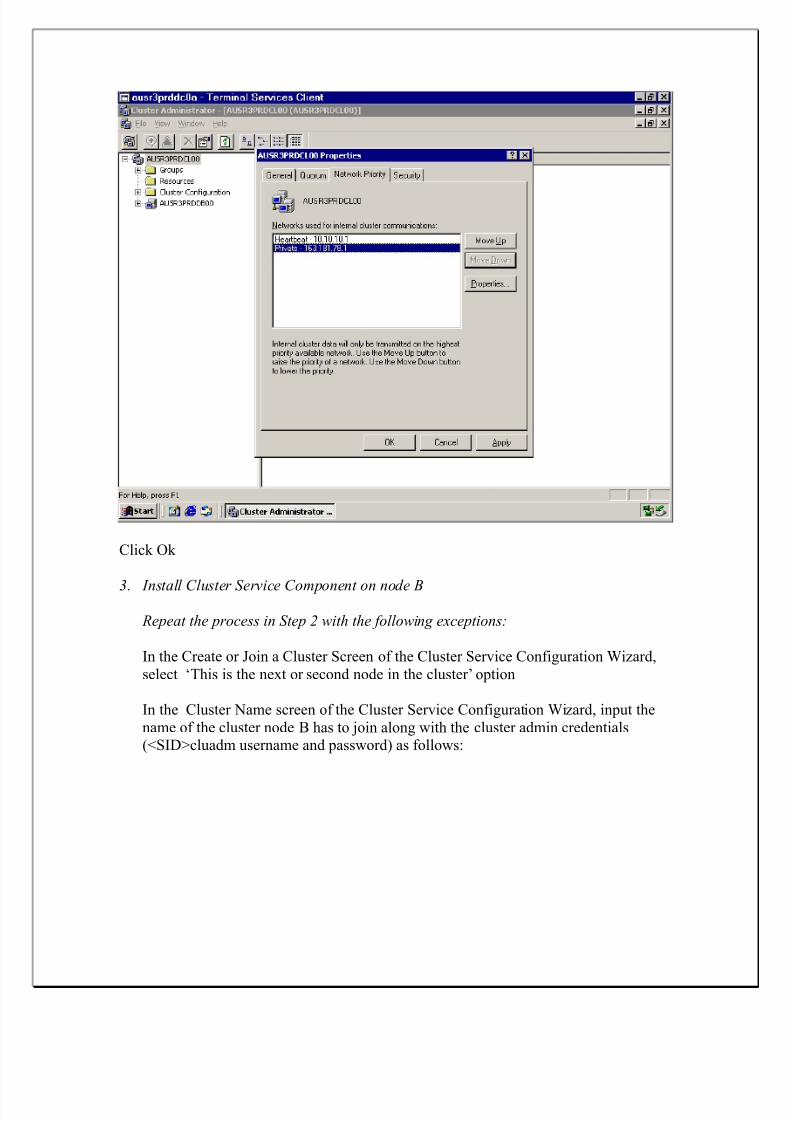
Click on the 2etwork !riority "ab and ensure the 8eart-eat 2etwork is above the !ublic 2etwork& *f not use the (ove up button to ensure that is the case
7/17/2019 OS Clustering WIN
http://slidepdf.com/reader/full/os-clustering-win 22/36
Click Ok
3. Install Cluster Service Component on node B
Repeat the process in Step 2 with the ollowin! e"ceptions#
*n the Create or oin a Cluster Screen of the Cluster Service Configuration ?iEard,
select D"his is the ne@t or second node in the cluster7 option
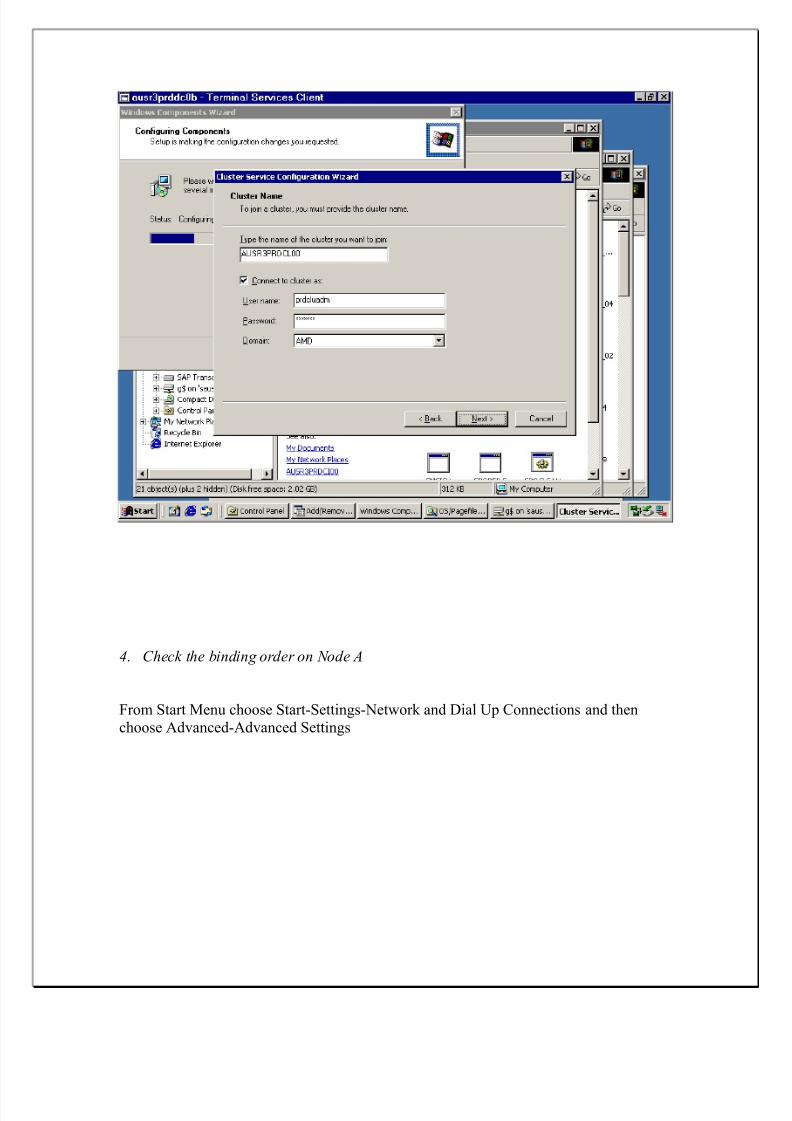
*n the Cluster 2ame screen of the Cluster Service Configuration ?iEard, input the
name of the cluster node - has to Foin along with the cluster admin credentials<)S*%+cluadm username and password= as follows:
7/17/2019 OS Clustering WIN
http://slidepdf.com/reader/full/os-clustering-win 23/36
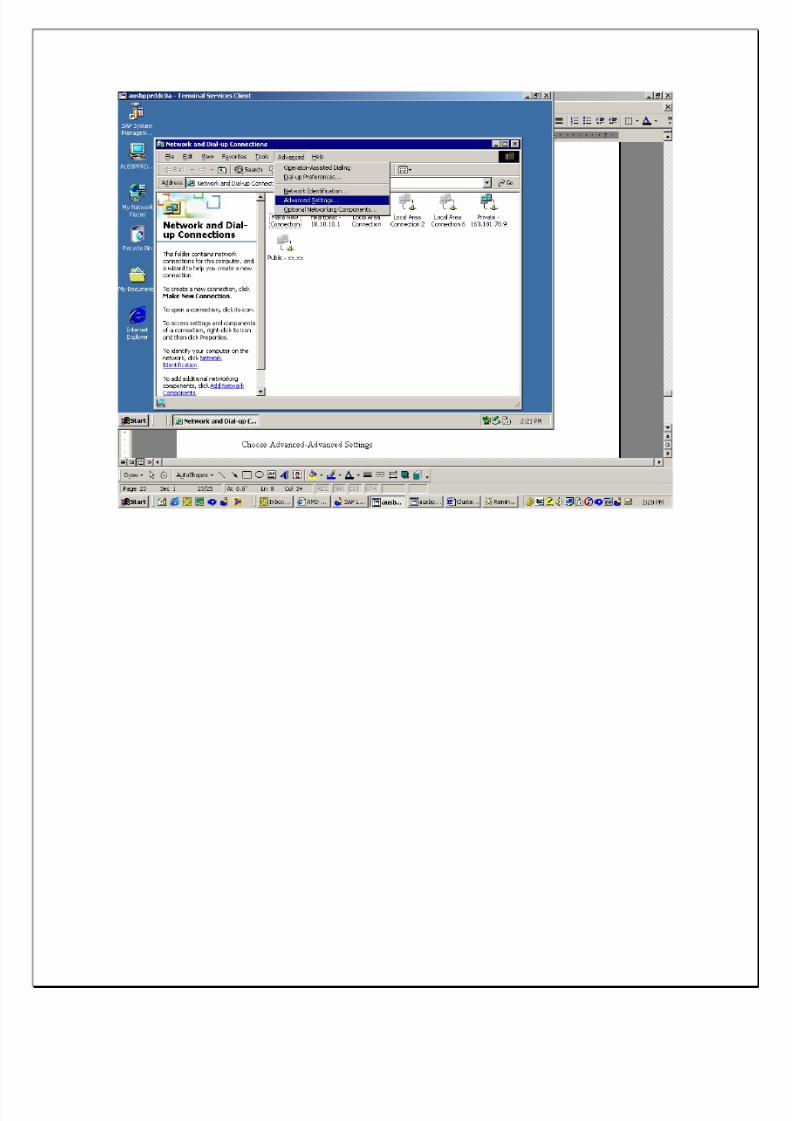
$. Chec% the bindin! order on &ode A
$rom Start (enu choose StartSettings2etwork and %ial #p Connections and then
choose AdvancedAdvanced Settings
7/17/2019 OS Clustering WIN
http://slidepdf.com/reader/full/os-clustering-win 24/36
7/17/2019 OS Clustering WIN
http://slidepdf.com/reader/full/os-clustering-win 25/36
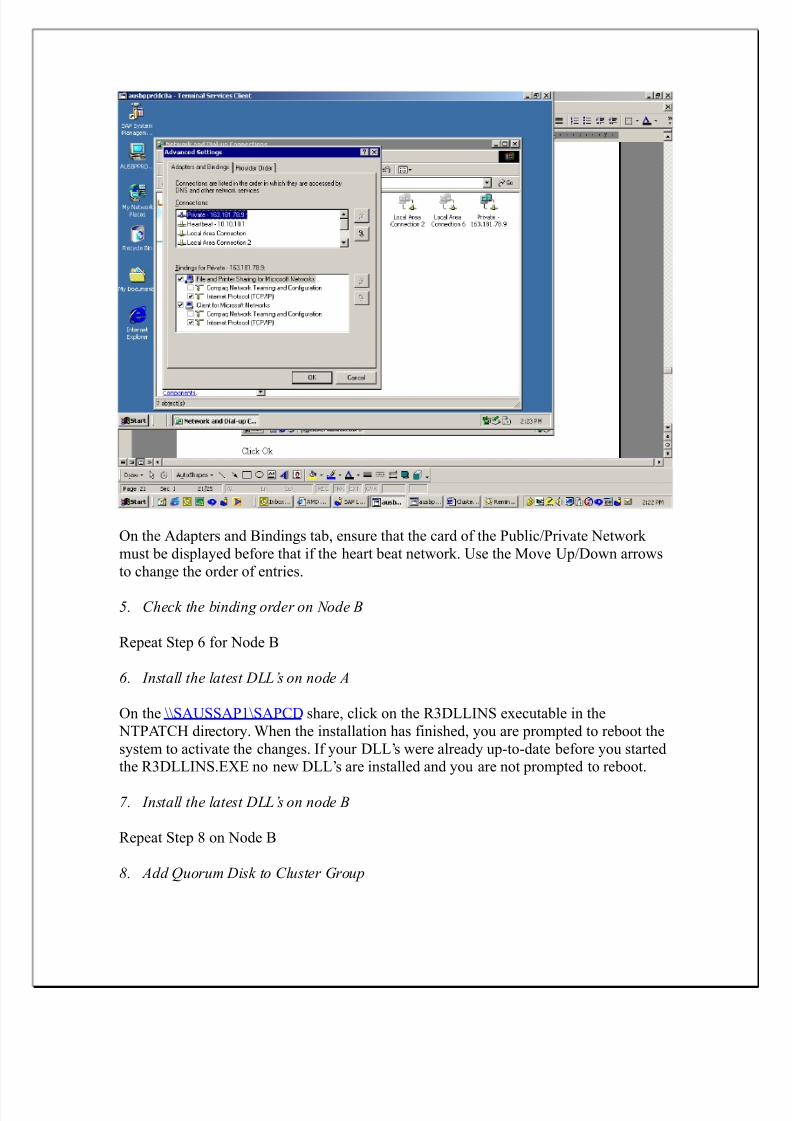
On the Adapters and -indings tab, ensure that the card of the !ublic>!rivate 2etwork
must be displayed before that if the heart beat network& #se the (ove #p>%own arrows
to change the order of entries&
'. Chec% the bindin! order on &ode B
Repeat Step B for 2ode -
(. Install the latest )**+s on node A
On the 00SA#SSA!10SA!C% share, click on the R3%LL*2S e@ecutable in the
2"!A"C8 directory& ?hen the installation has finished, you are prompted to reboot the
system to activate the changes& *f your %LL7s were already uptodate before you startedthe R3%LL*2S&'G' no new %LL7s are installed and you are not prompted to reboot&
,. Install the latest )**+s on node B
Repeat Step on 2ode -
-. Add uorum )is% to Cluster /roup
7/17/2019 OS Clustering WIN
http://slidepdf.com/reader/full/os-clustering-win 26/36
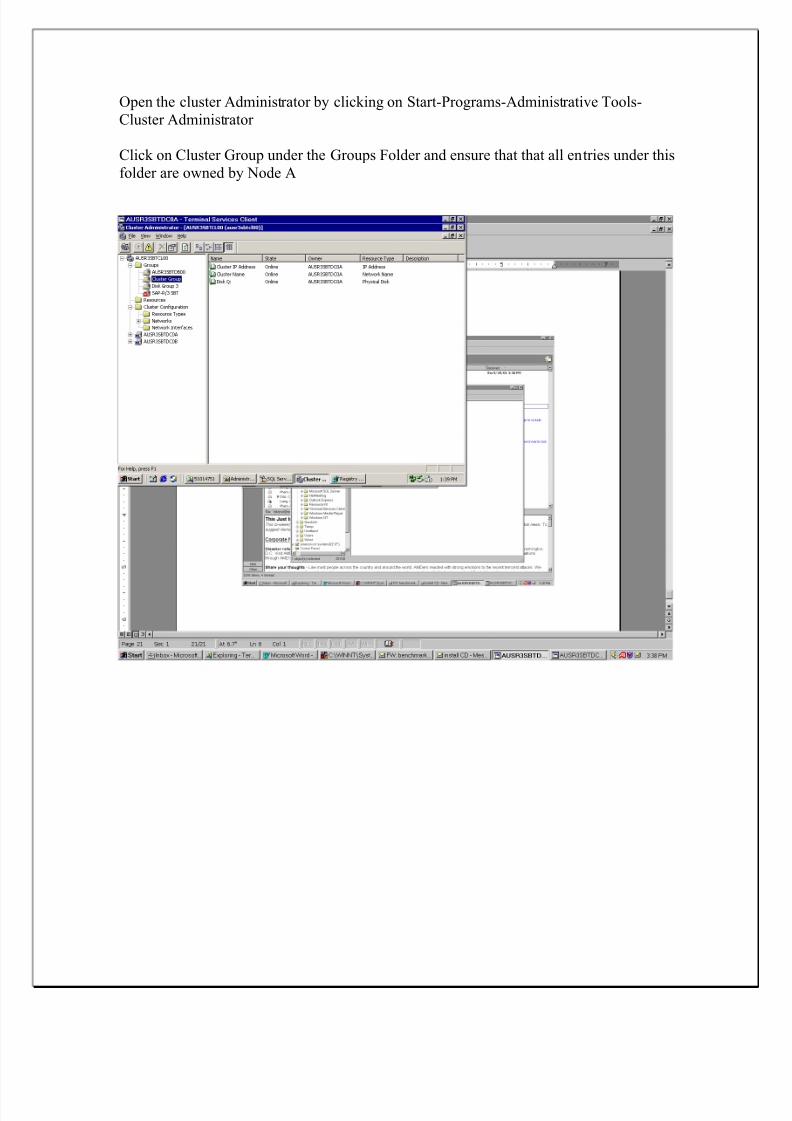
Open the cluster Administrator by clicking on Start!rogramsAdministrative "ools
Cluster Administrator
Click on Cluster /roup under the /roups $older and ensure that that all entries under this
folder are owned by 2ode A

7/17/2019 OS Clustering WIN
http://slidepdf.com/reader/full/os-clustering-win 27/36
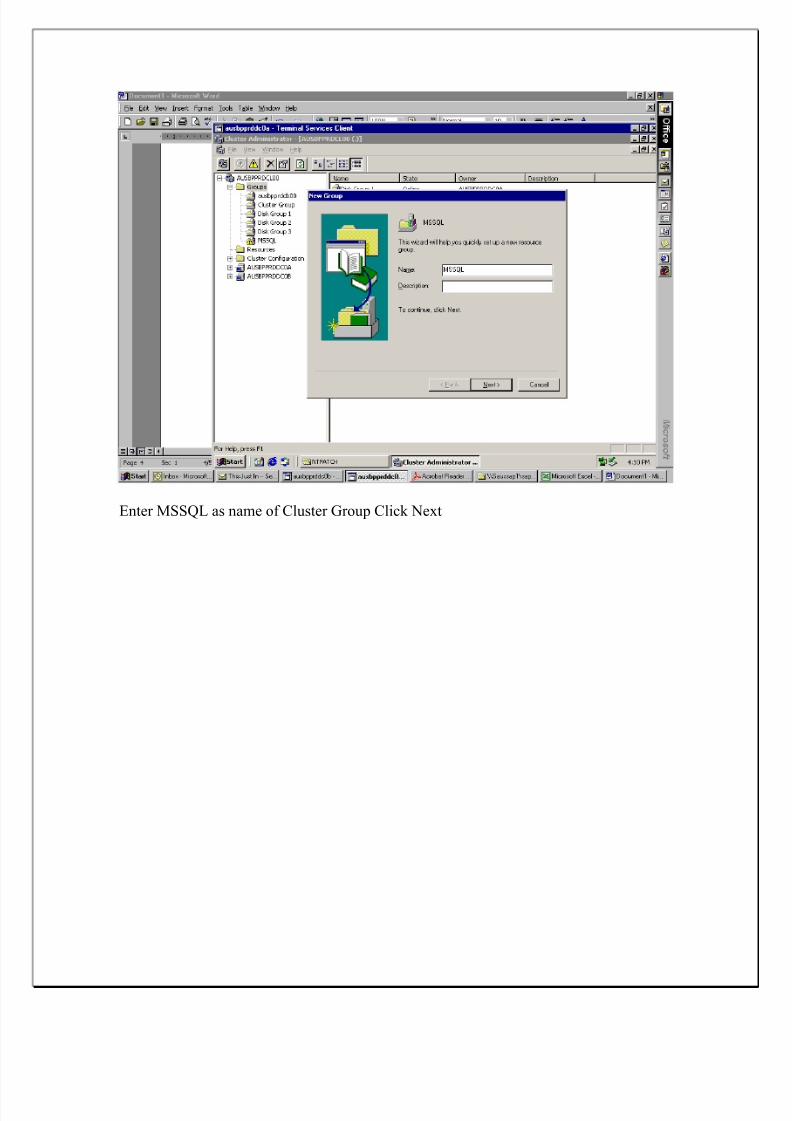
. Create )atabase Cluster /roup
*n the Cluster Administrator right click on 2ew/roup
7/17/2019 OS Clustering WIN
http://slidepdf.com/reader/full/os-clustering-win 28/36
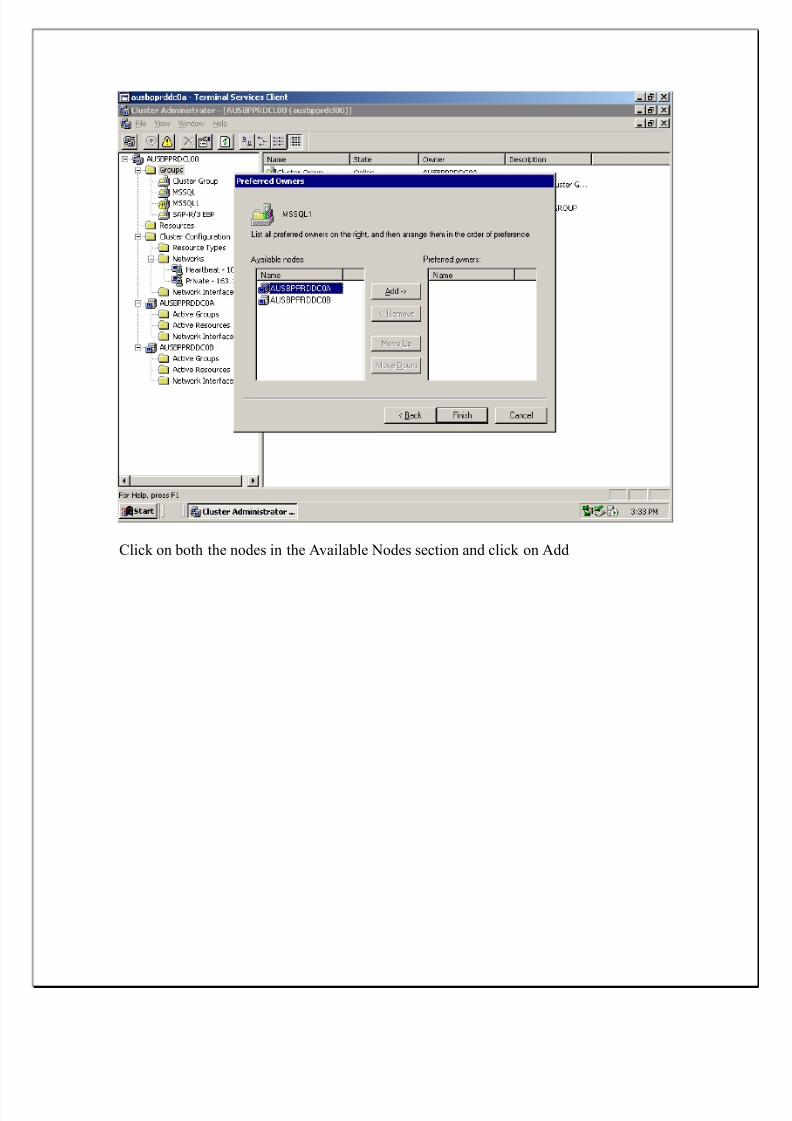
'nter (SS6L as name of Cluster /roup Click 2e@t
7/17/2019 OS Clustering WIN
http://slidepdf.com/reader/full/os-clustering-win 29/36
Click on both the nodes in the Available 2odes section and click on Add

7/17/2019 OS Clustering WIN
http://slidepdf.com/reader/full/os-clustering-win 30/36
Click $inish&

7/17/2019 OS Clustering WIN
http://slidepdf.com/reader/full/os-clustering-win 31/36
Click on O;&
7/17/2019 OS Clustering WIN
http://slidepdf.com/reader/full/os-clustering-win 32/36
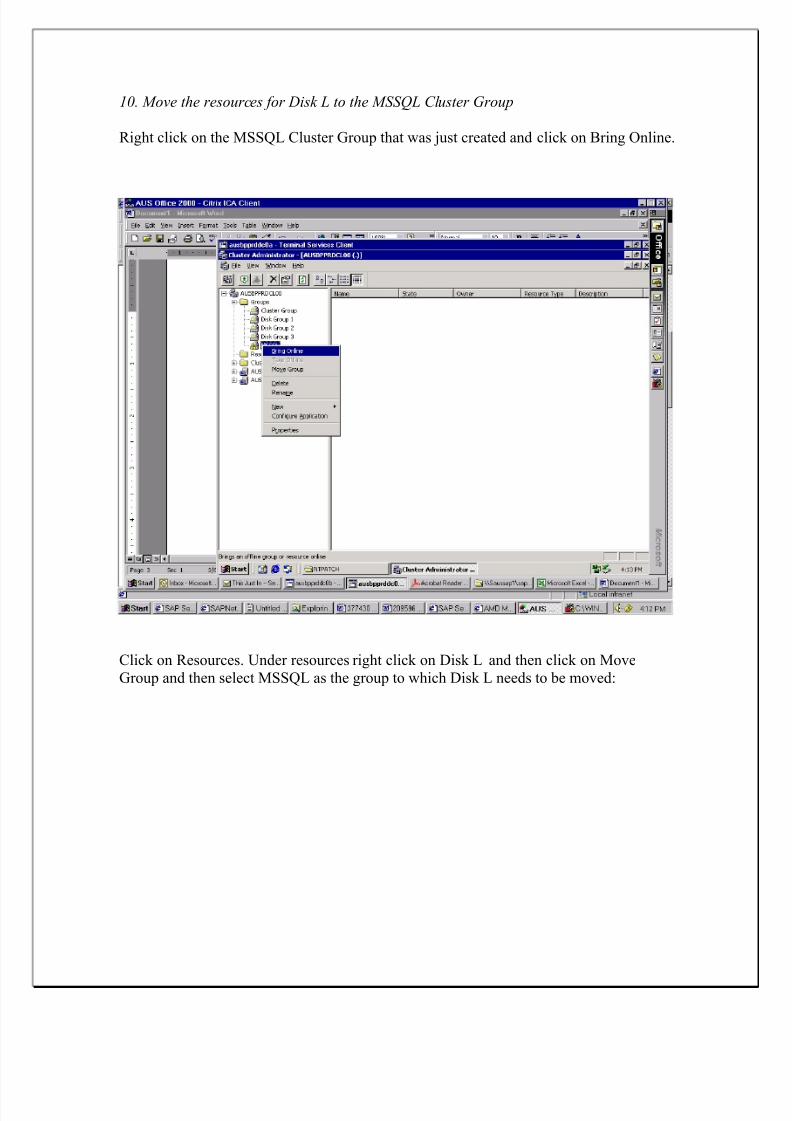
10. ove the resources or )is% * to the SS* Cluster /roup
Right click on the (SS6L Cluster /roup that was Fust created and click on -ring Online&
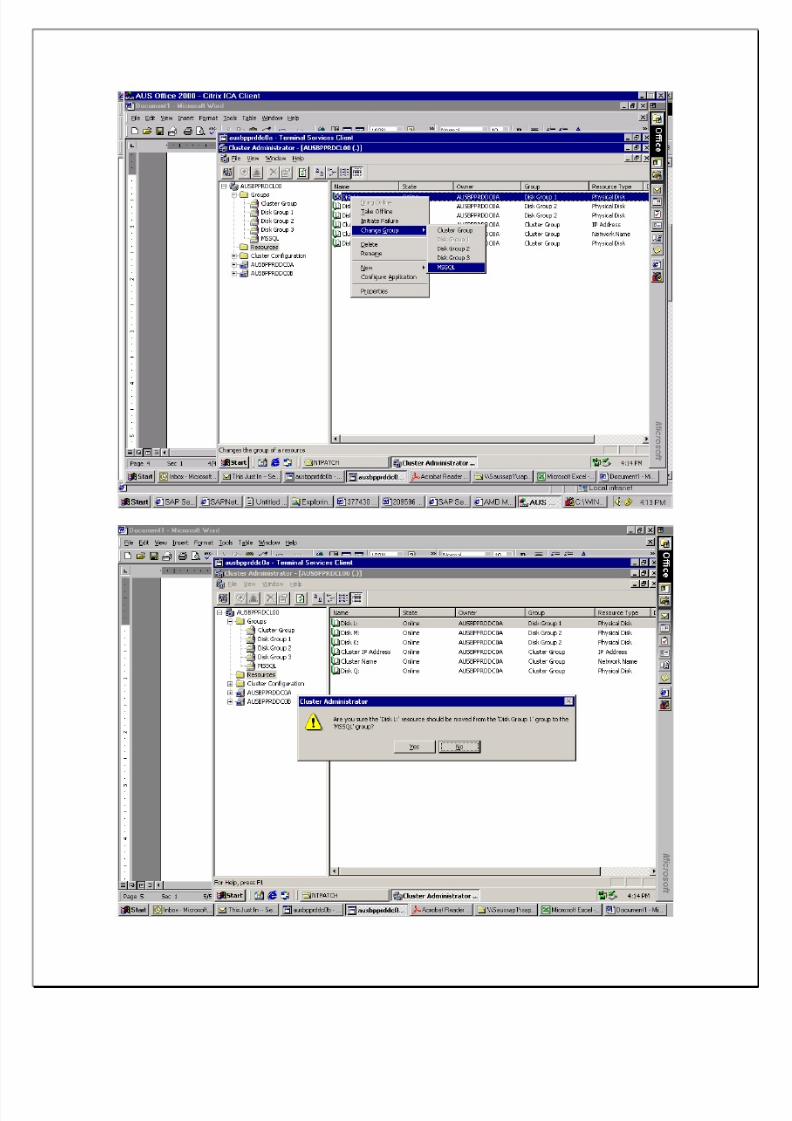
Click on Resources& #nder resources right click on %isk L and then click on (ove
/roup and then select (SS6L as the group to which %isk L needs to be moved:
7/17/2019 OS Clustering WIN
http://slidepdf.com/reader/full/os-clustering-win 33/36
7/17/2019 OS Clustering WIN
http://slidepdf.com/reader/full/os-clustering-win 34/36
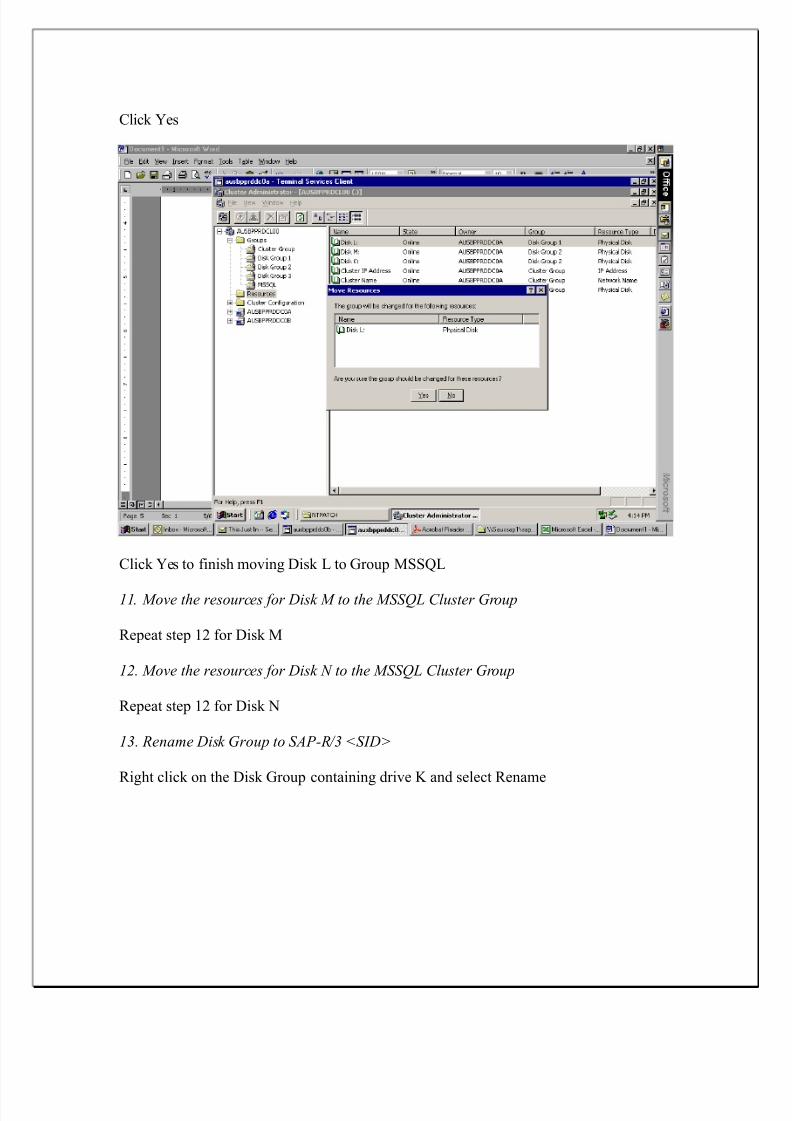
Click es
Click es to finish moving %isk L to /roup (SS6L
11. ove the resources or )is% to the SS* Cluster /roup
Repeat step 19 for %isk (
12. ove the resources or )is% & to the SS* Cluster /roup
Repeat step 19 for %isk 2
13. Rename )is% /roup to SAR43 5SI)6
Right click on the %isk /roup containing drive ; and select Rename

7/17/2019 OS Clustering WIN
http://slidepdf.com/reader/full/os-clustering-win 35/36
"ype in SA!R>3 )S*%+ and press 'nter&
1B %elete the other three %isk /roups that no longer contain resources&

7/17/2019 OS Clustering WIN
http://slidepdf.com/reader/full/os-clustering-win 36/36