origami bunny challenge - crafts council · origami bunny challenge begin with a square fold (see...
TRANSCRIPT
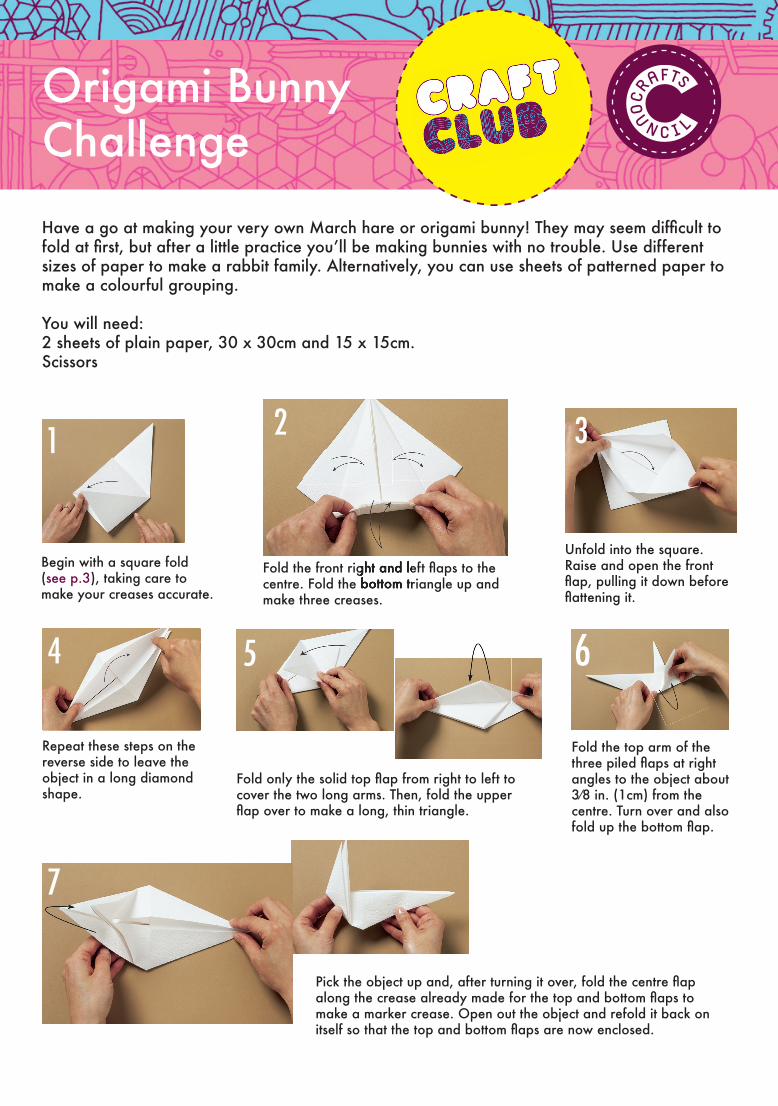
Origami BunnyChallenge
Begin with a square fold (see p.3), taking care to make your creases accurate.
Fold the front right and left fl aps to the centre. Fold the bottom triangle up and make three creases.
Unfold into the square. Raise and open the front fl ap, pulling it down before fl attening it.
Repeat these steps on the reverse side to leave the object in a long diamond shape.
Fold only the solid top fl ap from right to left to cover the two long arms. Then, fold the upper fl ap over to make a long, thin triangle.
Fold the top arm of the three piled fl aps at right angles to the object about 3⁄8 in. (1cm) from the centre. Turn over and also fold up the bottom fl ap.
1 2 3
4 5 6
Pick the object up and, after turning it over, fold the centre fl ap along the crease already made for the top and bottom fl aps to make a marker crease. Open out the object and refold it back on itself so that the top and bottom fl aps are now enclosed.
7
Fold the front right and left fl aps to the centre. Fold the bottom triangle up and
Have a go at making your very own March hare or origami bunny! They may seem diffi cult to fold at fi rst, but after a little practice youʼll be making bunnies with no trouble. Use different sizes of paper to make a rabbit family. Alternatively, you can use sheets of patterned paper to make a colourful grouping.
You will need:2 sheets of plain paper, 30 x 30cm and 15 x 15cm.Scissors
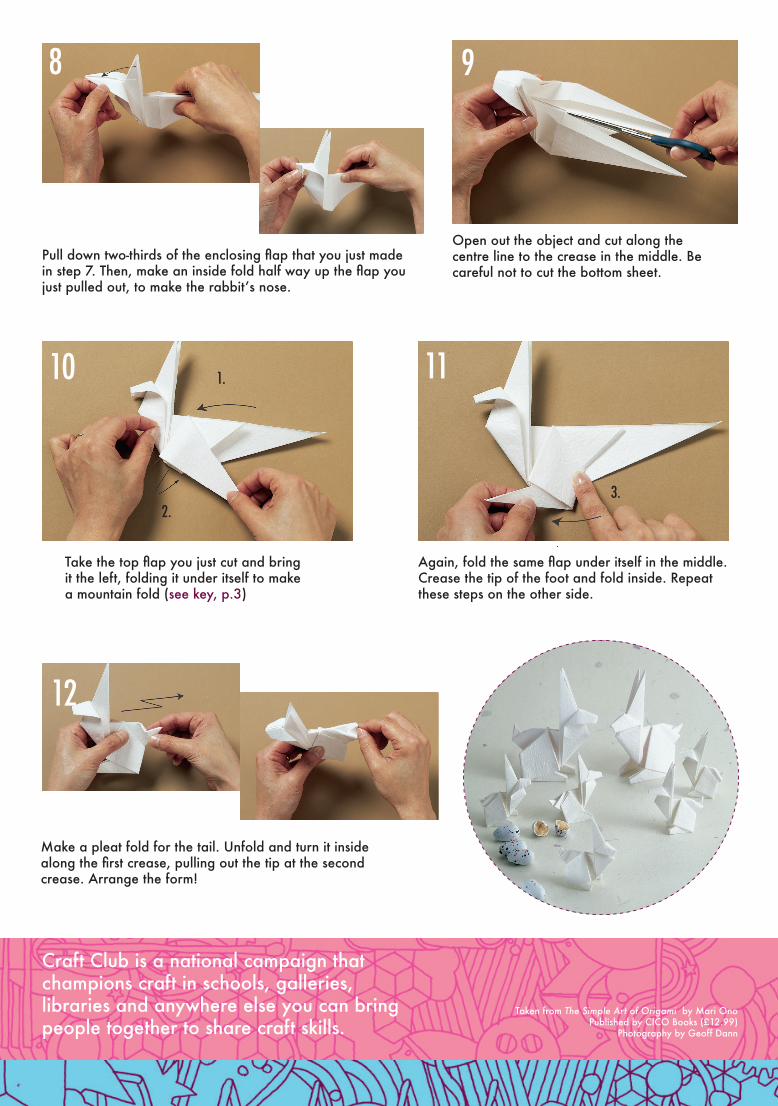
Open out the object and cut along the centre line to the crease in the middle. Be careful not to cut the bottom sheet.
Take the top fl ap you just cut and bring it the left, folding it under itself to make a mountain fold (see key, p.3)
Again, fold the same fl ap under itself in the middle. Crease the tip of the foot and fold inside. Repeat these steps on the other side.
Make a pleat fold for the tail. Unfold and turn it inside along the fi rst crease, pulling out the tip at the second crease. Arrange the form!
9
10 11
Craft Club is a national campaign that champions craft in schools, galleries, libraries and anywhere else you can bring people together to share craft skills.
Taken from The Simple Art of Origami by Mari OnoPublished by CICO Books (£12.99)
Photography by Geoff Dann
Pull down two-thirds of the enclosing fl ap that you just made in step 7. Then, make an inside fold half way up the fl ap you just pulled out, to make the rabbitʼs nose.
8
12
Again, fold the same fl ap under itself in the middle.
1.
2.3.
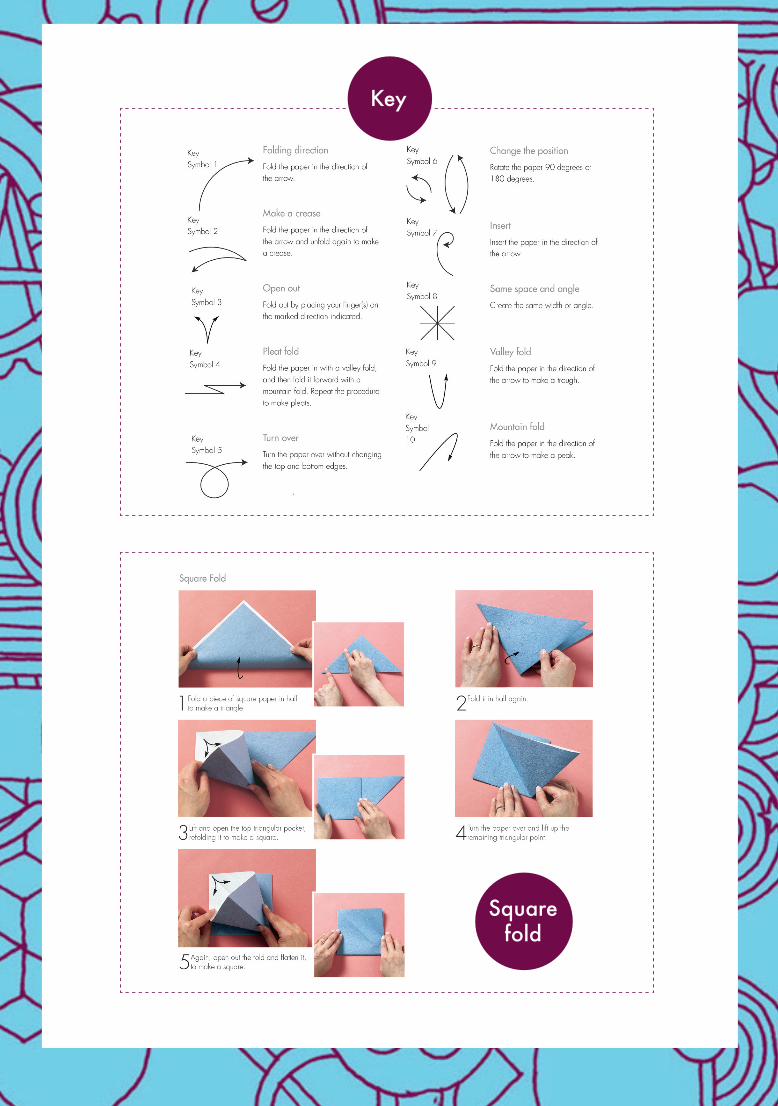
Squarefold
Key