oral history project handbook · 2016-02-01 · recording interviews, administrative tasks (record...
TRANSCRIPT
2014
ORAL HISTORY PROJECT HANDBOOK
ITIE CONFERENCE 2014 Changsha, China
EVERGREEN EDUCATION FOUNDATION
CONTRIBUTORS
Faith Chao, EEF Executive Director
Lauren Kata, EEF Archival Consultant
Nancy MacKay, EEF Oral History Consultant
Jo Bell Whitlatch, EEF Assessment Specialist
Zhang Yu, EEF Oral History Program Coordinator
This work is licensed under a Creative Commons Attribution-
NonCommercial-ShareAlike 4.0 International License.
Creative Commons China
Crea
ORAL HISTORY PROJECT HANDBOOK Page | 1
About Evergreen Education Foundation Evergreen Education Foundation (EEF), a U.S.-based non-profit organization, was founded in 2001
to provide opportunities for students and local residents in rural China to gain free access to information
resources, improve information literacy and capacity, and exchange ideas and experience with
information science professionals outside China. The EEF mission includes “improving educational
opportunities for children and young adults in rural China by providing books, computers, relevant
equipment and supplies, workshops, conferences and seminars to schools and libraries.”
One long-term objective is to initiate school and county library projects in rural China. For the
past dozen years, EEF has sponsored more than 40 school and public libraries in seven provinces,
including the most under-developed provinces of Qinghai, Gansu, Shaanxi, Guizhou and Yunnan. Today
these libraries serve a combined student population of over 50,000 and a combined community
population of about one million.
Each year, EEF awards approximately 100 scholarships. In addition, it funds, guides, and manages
30 - 40 library based projects initiated at the local level by teachers and librarians. These projects benefit
both students and the local community.
Many of EEF’s community initiated projects involve oral history. Six oral history projects are
complete and a dozen more are in progress. These projects span seven provinces and document local
ethnic culture, school history, family history, and local culinary practices. Three of the projects have
resulted in presentations at international oral history conferences in the United States, Spain and
England.
To support the oral history projects, EEF provides workshops, conferences, and other training
programs to prepare teachers and librarians to learn oral history best practices for researching,
interviewing, and archiving interviews.
--Dr. Faith Chao, EEF Executive Director
About the Handbook This handbook was developed by the EEF Oral History Team to introduce conference
participants to oral history best practices. The handbook is part of an ongoing documentation effort by
EEF, which includes forms, assessment tools, training curricula, and outside resources. Documentation
in English and Chinese is continually updated at the EEF wiki,
http://evergreeneducation.org/wikipub/tiki-index.php.
The Creative Commons license encourages wide distribution of the handbook for educational
purposes, with attribution to Evergreen Education Foundation. Please cite as follows:
MacKay, N., Kata, L., Whitlatch, J. B., Zhang, Y. (2014). Oral History Project Handbook. Evergreen
Education Foundation. Unpublished.
ORAL HISTORY PROJECT HANDBOOK Page | 2
1. ABOUT ORAL HISTORY Oral history is a methodology for documenting recent history, traditions, and customs by means
of recorded interviews of those who lived this history. It gives voice to underrepresentated populations
and complements the official written history through the stories of everyday citizens, offering an
alternative perspective to the official account. Oral history is an excellent tool for documenting
vanishing cultures in a time of rapid social change.
Because of its effectiveness as historical documentation, oral history should be planned and
conducted with the same rigor as any history research, understanding the importance of carefully
composed questions, high quality recording, and archiving. Oral histories currently in archives are used
by researchers as a window into life from another era, and these personal accounts may be the only
record of a way of life gone by.
Oral history best practices include:
A well designed project plan;
Interviewer expertise in the topic;
A project team trained in research methods, recording, interviewing, and archiving;
A recording plan appropriate to the topic and circumstances;
Consideration of legal and ethical issues;
A good record keeping system;
Interviews properly archived for future use;
Giving back to the community.
Assessing project strengths and weaknesses to improve future oral history projects
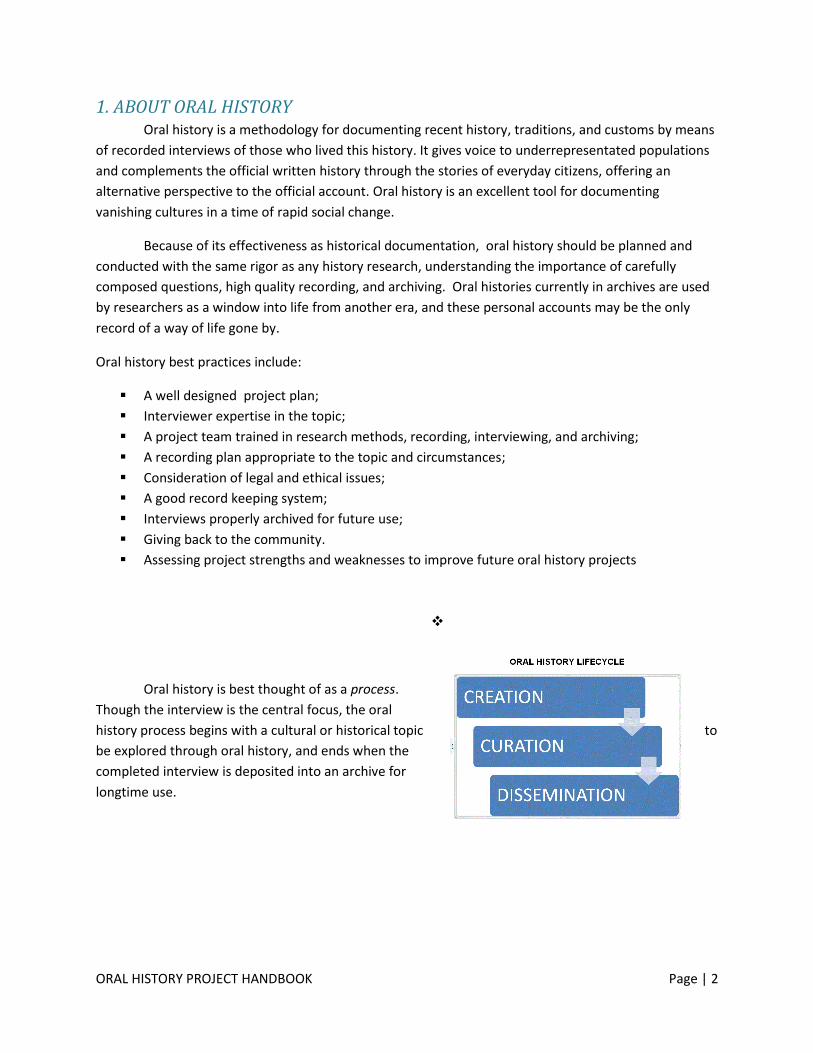
Oral history is best thought of as a process.
Though the interview is the central focus, the oral
history process begins with a cultural or historical topic to
be explored through oral history, and ends when the
completed interview is deposited into an archive for
longtime use.
ORAL HISTORY PROJECT HANDBOOK Page | 3
2.. PLANNING AN ORAL HISTORY PROJECT Every oral history project should begin long before the interviews take place, with a plan. The
plan should include a clear research statement, a set of goals, a well-trained project team, a plan for
recording interviews, administrative tasks (record keeping and preparing interviews for archiving), and
designated repositories for local and broader access to the interviews.
We recommend the project leader, in conjunction with the team, create a written plan. This
plan will serve as the roadmap for implementing the project.
2.1. Research Statement Begin with an idea – some special aspect of your community that has social, cultural, or
historical significance, such as customs or traditions that are disappearing. The research idea can be
based on:
A person – life history. The person could be any figure who has an interesting life story;
A community, culture, or way of life, such as a folk custom of a minority village;
A subject area, such as the folk music, food, art, or textile traditions of a local community;
A historical event or a period of time, such as the impact of an earthquake or a war upon a
community.
Then turn the idea into a clear research statement. Express this idea in several levels of detail:
1. Describe your topic in a single statement explaining what you will study and why it is
important.
2. Define geographical and chronological scope.
3. Explain the details of your research question in 1-2 paragraphs.
4. Define 3-5 general topics that will be addressed in all the interviews.
2.2. Project Goals Using the SMART tips below, define three goals that speak to the following areas:
1. Give back to the community (exhibition, festival, educational program).
2. Make interviews available to a wider public (website, local library, national library).
3. Topic related goal, such as music classes taught by a master musician interviewed.
SMART TIPS
Specific.Target a specific area.
Measurable. Quantify or suggest an indicator of progress.
Assignable. Specify who will complete the task.
Realistic. Determine realistic results, given available resources.
Time-related. Specify when the result(s) can be achieved.
ORAL HISTORY PROJECT HANDBOOK Page | 4
2.3. Project Team Designate one person as project leader. This person will initiate and direct all phases of the
project. Then, develop a team which should include:
Librarian or teacher;
Local scholars or practitioners with subject expertise;
Community members;
People with technical skills.
Under the project leader’s direction the team will plan and implement the oral history project.
2.4. Administration Administrative oversight and meticulous record keeping is essential in doing oral history. Project
leaders are responsible for the following tasks.
2.4.1 Record keeping
Develop a (preferably computerized) system for keeping project records, including:
Project documentation and correspondence,
Contact information for everyone involved in the project,
The details of each interview,
Calendar indicating significant dates,
Workflow for preparing the interview for archiving.
2.4.2. Legal Release Agreement
The legal release agreement is an agreement which explicitly states the narrator’s consent and
understanding of the circumstances of the interview, including why it is being conducted and how it wil
be used. This is a legal form that should be customized for the project, in conjunction with the
sponsoring agency and the designated archive. The agreement must be signed by the narrator and will
become part of the permanent documentation.
2.4.3. Equipment and physical space
Space needs include office, meeting, and research space; interview space; storage space for
equipment; secure and environmentally friendly space for interview media. Though not every project
can find space for each function, the project leader should plan for how each of these needs will be met.
2.5. Recording Technology Choosing the right recording equipment is important and will affect the outcome of the project.
In creating a recording plan, consider the following:
Project goals,
Project budget,
Existing equipment available for loan or use,
Technical skills of team members,
Archival plan and requirements of designated repository.
ORAL HISTORY PROJECT HANDBOOK Page | 5
Audio or video? A big question is whether to record in audio or video. Though video technology
is more complex and expensive for recording and archiving, it has obvious advantages especially for
documenting the narrator’s environment, objects the narrator is describing, or skills she is
demonstrating. Consider the above factors in this decision.
2.6. Voice to Text Options Text is currently the most favored way for researchers to navigate through an oral history
interview. A verbatim transcription is considered the best practice, but is also the most labor and
resource intensive. Consider any of the following voice-to-text options by themselves or in conjunction
with each other, and include your decision in the plan.
Transcript. A word for word rendition of the spoken word.
Time-stamped index. A notation of the topic indexed by the point it is mentioned in the
recording.
Abstract. A narrative summary from several paragraphs to several pages.
Name list. A list of proper names, verified and properly spelled, for quick assess.
TIP: About Translation. Interviews should be conducted in the language in which the narrator is most
comfortable. Sometimes that language is different from the primary user group. If this is the case
consider planning for translation. Best practice is to create a verbatim transcript in the language of the
interview, and an additional transcript translated into in the second language, though there are
variations that require fewer resources.
2.7. Give Back to the Community Plan to share completed oral histories with the community of origin. A community can refer to
any group with something in common--an artisan group, ethnic group, as well as a geographic
community. Best practice is to give back to the community in two ways:
Deposit oral histories in the local library for preservation and future use,
Plan a public event such as a festival, banquet, or a educational program.
2.8. Archiving Plan Depositing completed oral histories into a library or archive will make them available to a wide
audience far into the future. A plan for archiving interviews should be made at the beginning of the
project. Identify a repository that will accept the oral histories and include the archivist in decisions
about copies, formats, metadata, and delivery schedule. Redundancy at many levels is best practice.
2.9. Assessment Every oral history project can learn from experience. Use the reflective questions at the end of
each chapter to build an assessment component into each stage of the project. Then, apply the lessons
learned to improve your work. Be sure to include the entire team in the assessment.
ORAL HISTORY PROJECT HANDBOOK Page | 6
2.10. Planning an Oral History Project: Assessment Discuss the following questions for project planning:
1. How will progress toward creating this project plan be measured? 2. Are the allocated project resources adequate to create and implement the plan? 3. Is the timeline for the project realistic to complete the plan? 4. If the project plan timeline is not met, what steps will be required to complete the work?
3. BACKGROUND RESEARCH There are two good reasons to do background research on the project topic. First, interviewers can
prepare questions better if they have a deep understanding of the topic. Second, if the research is
compiled into a Research Portfolio, that document will become a valuable supplementary research tool.
Two kinds of research are helpful, research on the topic of study and research on the narrator.
3.1. Research on the Topic
Often the topics oral historians investigate are not well documented in print, so the team must be
creative in doing research. Here are some examples of research sources:
Books and encyclopedias;
Old newspapers, magazines, or other ephemera;
Photographs and letters belonging to community members;
Internet;
Conversations with community members;
Conversations with the narrator or family members;
Physical objects relating to the topic (foods, textiles, animals, etc.).
Use whatever sources relate to the topic and include the best ones in an annotated bibliography.
3.2 Research On the Narrator Often the people we choose to interview are not well-known and there isn’t much written about
them. If this is the case, it is fine to learn about the narrator directly at the pre-interview meeting. Ask
about ethnic background, religion, place and date of birth, occupation, relation to the topic at hand, and
significant life experiences.
3.3. The Research Portfolio We recommend that background research be organized into a Research Portfolio including:
An annotated bibliography,
A timeline,
A narrative essay.
Organizing the material this way will not only help the team understand the context but will also
help develop collaboration skills, ensure deeper understanding of the background material, and create a
valuable research tool.
ORAL HISTORY PROJECT HANDBOOK Page | 7
3.3.1. Annotated Bibliography
An annotated bibliography makes an excellent research tool. It should include the resources
most important for the project topic, including the following components for each resource:
Full bibliographic citation using APA style and Guidelines for Documenting Sources available on the EEF wiki.
Summary. Topics covered. Assessment. How timely? How biased? How relevant? How scholarly? Reflection. How can this resource contribute to your oral history project?
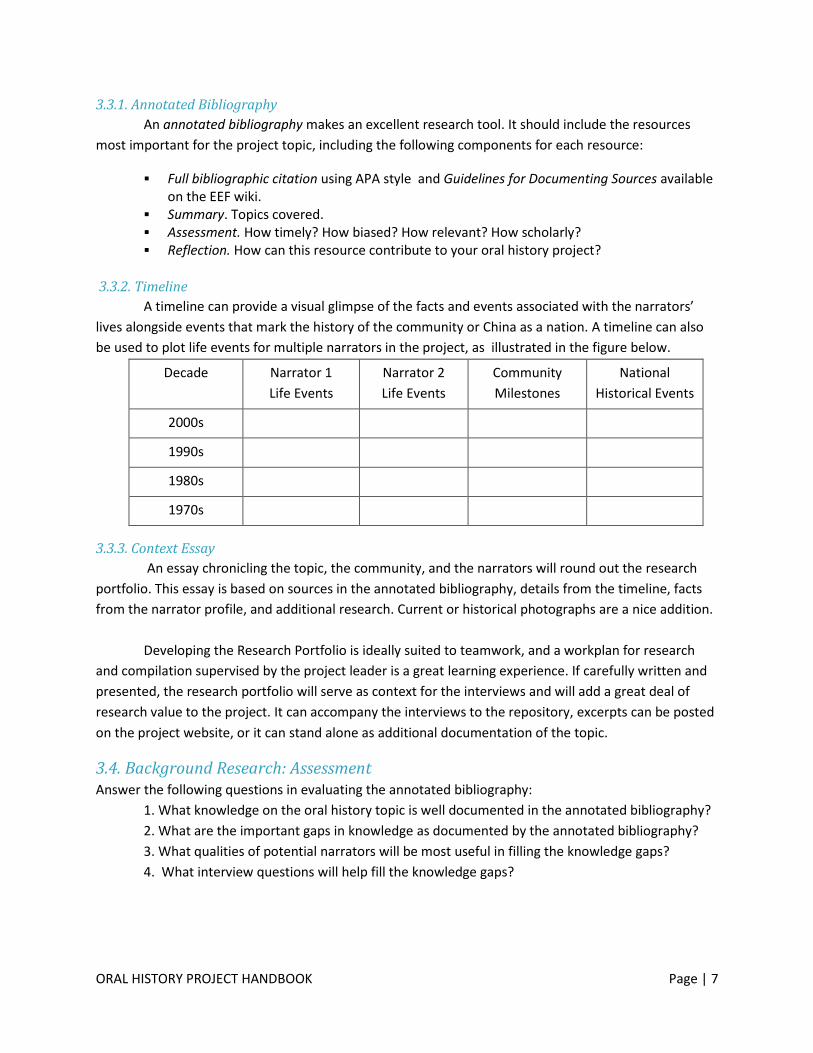
3.3.2. Timeline
A timeline can provide a visual glimpse of the facts and events associated with the narrators’
lives alongside events that mark the history of the community or China as a nation. A timeline can also
be used to plot life events for multiple narrators in the project, as illustrated in the figure below.
Decade Narrator 1
Life Events
Narrator 2
Life Events
Community
Milestones
National
Historical Events
2000s
1990s
1980s
1970s
3.3.3. Context Essay
An essay chronicling the topic, the community, and the narrators will round out the research
portfolio. This essay is based on sources in the annotated bibliography, details from the timeline, facts
from the narrator profile, and additional research. Current or historical photographs are a nice addition.
Developing the Research Portfolio is ideally suited to teamwork, and a workplan for research
and compilation supervised by the project leader is a great learning experience. If carefully written and
presented, the research portfolio will serve as context for the interviews and will add a great deal of
research value to the project. It can accompany the interviews to the repository, excerpts can be posted
on the project website, or it can stand alone as additional documentation of the topic.
3.4. Background Research: Assessment Answer the following questions in evaluating the annotated bibliography:
1. What knowledge on the oral history topic is well documented in the annotated bibliography?
2. What are the important gaps in knowledge as documented by the annotated bibliography?
3. What qualities of potential narrators will be most useful in filling the knowledge gaps?
4. What interview questions will help fill the knowledge gaps?
ORAL HISTORY PROJECT HANDBOOK Page | 8
4. PREPARING FOR THE INTERVIEWS
4.1. Train Oral History Team Effective training is essential to good oral history. The project should organize and oversee
effective training, including hands on practice where appropriate, in the following areas:
Historical research,
Interview techniques,
Recording techniques,
Ethical and legal considerations in oral history,
Processing and archiving essentials.
4.2. Select Narrator and Match with Interviewer There are many ways to determine whom to interview. Sometimes word gets out about the
project and many people come forward, wanting to participate. Other times the community is more
reticent and potential narrators need to be coaxed. In either case narrators should be chosen objectively
for what they can contribute to the project.
TIP QUALITIES OF A GOOD NARRATOR:
Eager to participate,
Good memory,
Knowledge of the topic,
Speaks clearly .
4.3. Contact the Narrator Oral historians acknowledge that the interview is shaped by the relationship between the
interviewer and the narrator. The success of an oral history interview depends on trust and rapport, and
it is the interviewer’s responsibility to cultivate this rapport. An unrecorded, face-to-face pre-interview
meeting is the best practice.
Sometimes, it is impractical for the narrator and interviewer to meet in person before the
recorded interview. If this is the case, contact the narrator by phone, email, or letter. Introduce yourself
and explain the project and what is expected of the narrator. This conversation can be continued at the
interview before the recorder is turned on.
4.4. Prepare Interview Questions The interviewer should prepare 20-30 narrator-specific questions based on the topics
determined in the the research statement and the pre-interview meeting. Construct questions based on
the question types below.

ORAL HISTORY PROJECT HANDBOOK Page | 9
When to Use Examples
Factual Beginning of the interview, and throughout when facts are needed
What year were you born? How many siblings do you have?
Descriptive Body of the interview. Most questions will be descriptive.
Describe the interior of the home you lived in as a child.
Analytical Body of the interview. To delve deeper into the issues raised by descriptive questions.
What are some of the differences between the home you grew up in and the home you live in today?
Reflective Towards the end of the interview or the conclusion of a topic discussed.
Considering your vast life experience, what would you most like your grandchildren to remember you for?
Follow-up Throughout. Not all questions can be determined ahead of time. An oral history interview has elements of a conversation, where dialog is spontaneous where one person responds to what another person says. One of the most valuable kinds of questions is the follow-up question, when a deeper question is asked in response to a narrator’s answer.
Interviewer: Where did you live before you moved
here?
Narrator: I lived in Beichuan, Sichuan Province
from 2001 – 2011.
Interviewer: You must have been there during the Wenchuan earthquake. How did that affect your life?
4.5. Practice, Practice, Practice Interviewing is a skill, and like any skill the best way to become proficient is to practice. We
suggest the team interviewers practice by conducting full length interviews with each other, both
unrecorded and then recorded, very much like the dress rehearsal of a big performance. Play back the
interviews and discuss the strong points and areas where improvement is needed. Repeat this exercise
till interviewers feel comfortable with the process.
4.6. Interview Preparation: Assessment Evaluate practice interviews using questions in Section 5.4 to guide your discussion.
5. CONDUCTING INTERVIEWS The day has arrived when the interviewer and the narrator meet for the interview,
understanding that what is recorded will be used and enjoyed by others in the short term and the long
term. Be sure to come prepared.
5.1 Arrange for Interview The interviewer, supervised by the project leader, is responsible for the following:
Schedule interview at a time and place convenient for the narrator.
ORAL HISTORY PROJECT HANDBOOK Page | 10
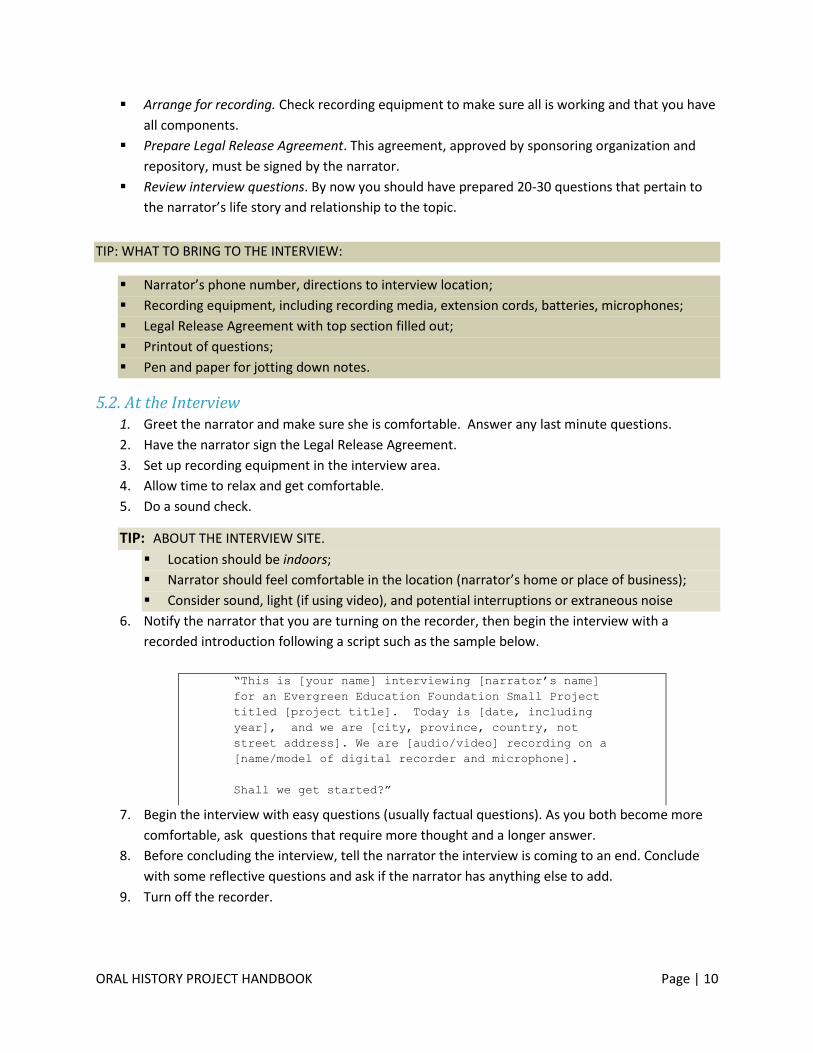
Arrange for recording. Check recording equipment to make sure all is working and that you have
all components.
Prepare Legal Release Agreement. This agreement, approved by sponsoring organization and
repository, must be signed by the narrator.
Review interview questions. By now you should have prepared 20-30 questions that pertain to
the narrator’s life story and relationship to the topic.
TIP: WHAT TO BRING TO THE INTERVIEW:
Narrator’s phone number, directions to interview location;
Recording equipment, including recording media, extension cords, batteries, microphones;
Legal Release Agreement with top section filled out;
Printout of questions;
Pen and paper for jotting down notes.
5.2. At the Interview 1. Greet the narrator and make sure she is comfortable. Answer any last minute questions.
2. Have the narrator sign the Legal Release Agreement.
3. Set up recording equipment in the interview area.
4. Allow time to relax and get comfortable.
5. Do a sound check.
TIP: ABOUT THE INTERVIEW SITE. Location should be indoors;
Narrator should feel comfortable in the location (narrator’s home or place of business);
Consider sound, light (if using video), and potential interruptions or extraneous noise
6. Notify the narrator that you are turning on the recorder, then begin the interview with a
recorded introduction following a script such as the sample below.
“This is [your name] interviewing [narrator’s name]
for an Evergreen Education Foundation Small Project
titled [project title]. Today is [date, including
year], and we are [city, province, country, not
street address]. We are [audio/video] recording on a
[name/model of digital recorder and microphone].
Shall we get started?”
7. Begin the interview with easy questions (usually factual questions). As you both become more
comfortable, ask questions that require more thought and a longer answer.
8. Before concluding the interview, tell the narrator the interview is coming to an end. Conclude
with some reflective questions and ask if the narrator has anything else to add.
9. Turn off the recorder.

ORAL HISTORY PROJECT HANDBOOK Page | 11
5.3. Immediately After the Interview Usually the interview is a satisfying experience, and when it is complete, everyone feels good.
Take cues from the narrator as to whether to linger and visit, or to be on your way. In either case:
If the Legal Release Agreement was not signed before the interview, have it signed now.
Pack up recording equipment and restore the room to its original order.
Label files and recording media according to specifications of the project.
Photos: Take a photo of the narrator, the narrator with the interviewer, and the narrator in
their natural environment.
Thank the narrator and describe the next steps, as determined by the project plan.
Verify spellings of people or place names mentioned in the interview.
TIP: The most vulnerable time for an oral history interview is the point from when the recorder is
turned off to the point when the finished oral history arrives in a repository. An enormous amount of
our cultural heritage has vanished due to careless handling of interviews before they are archived. Each
of these common oversights below prevents the interview from becoming available in the public record.
Legal release agreement is misplaced or not signed correctly,
Information about the interview (metadata) is not recorded correctly or completely,
Recording media not labeled correctly or completely.
Recording is not properly copied and/or cannot be played.
5.4. Conducting Interviews: Assessment Use the following questions to discuss the interview experience:
1.Was this person a good subject for the interview? Why or why not?
2. Were the interview questions and outline adequate? What type of questions produced the
most useful answers?
4. Was the equipment used adequate?
5. What stood out as something really positive about the interview? Negative?
7. What new information does the interview provide about the topic?
8. How much of the interview can be verified by the background research?
9. What facts should be checked to verify the factual reliability of the narrator?
10. What topics does the narrator speak about most enthusiastically? What might this suggest?
11. Does narrator seem to not answer some question? What might be the reason for this?
12. How does the narrator’s account fit with other sources?
6.. PREPARING THE INTERVIEWS FOR ARCHIVING
“Oral historians need to recognize that doing the interviews is not the end but the beginning of the
process.” – Don Ritchie
ORAL HISTORY PROJECT HANDBOOK Page | 12
Dr. Ritchie reminds us that whatever our short-term goal in conducting oral history, such as
community building or education, there exists an overarching long-term goal: we are creating primary
source documents that will sit alongside scholarly books, legal documents, government reports and all
the other documents saved in repositories which make up the public record. We are contributing to the
cultural heritage of our communities and our nation.
Community oral historians tend to underestimate the importance of their work. They may
think it is such a small part of the world it doesn’t matter. In fact, the opposite is true. Local members
of a community are best positioned to document what they know best, their own community. All of
the good work of community oral historians can be preserved only if interviews are properly archived.
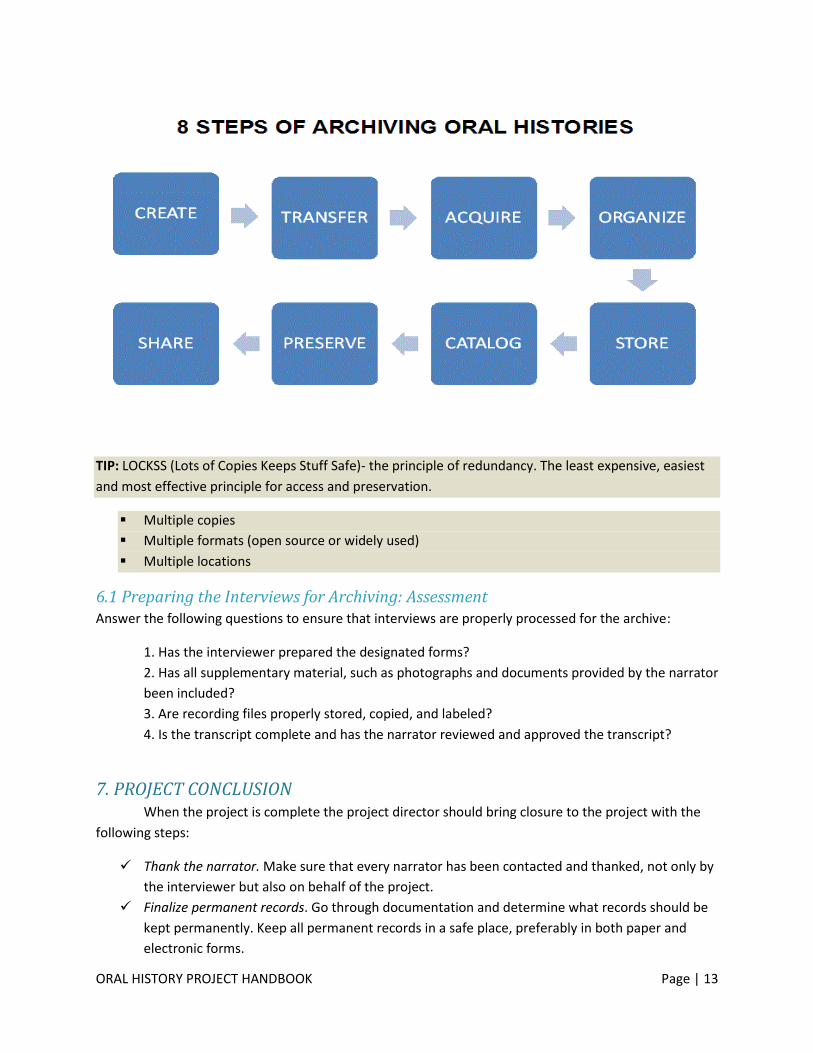
Archiving involves curating interviews for long-term preservation, in order to ensure future use
and access. In a well-planned oral history project, a partnership with an archival repository is ideal, and a
series of steps should be followed:1
● create interviews in open, sustainable formats, and create documentation during and
immediately following interviews
● carefully transfer interviews by keeping files intact from camera/recorder to computer, and
from computer to separate device
● acquire files from devices intact, in original formats and with all accompanying metadata;
acquire original and all edited files
● organize all interviews in named file folder directories and with documentation
● store interviews in multiple places, both onsite and offsite
● catalog interviews with descriptive metadata and inventories so they may be accessed and
understood
● create a plan for refreshment and migration of technology to preserve interviews for the long-
term
● share interviews in a variety of ways and media, online and in the classroom.
1 The "8 Steps" to archiving are introduced by the WITNESS human rights archive in "Activist's Guide to Archiving Video," and
provide a practical and useful model for small oral history projects. http://archiveguide.witness.org/ Last accessed 2014/09/08.
ORAL HISTORY PROJECT HANDBOOK Page | 13
TIP: LOCKSS (Lots of Copies Keeps Stuff Safe)- the principle of redundancy. The least expensive, easiest
and most effective principle for access and preservation.
Multiple copies
Multiple formats (open source or widely used)
Multiple locations
6.1 Preparing the Interviews for Archiving: Assessment Answer the following questions to ensure that interviews are properly processed for the archive:
1. Has the interviewer prepared the designated forms?
2. Has all supplementary material, such as photographs and documents provided by the narrator
been included?
3. Are recording files properly stored, copied, and labeled?
4. Is the transcript complete and has the narrator reviewed and approved the transcript?
7. PROJECT CONCLUSION When the project is complete the project director should bring closure to the project with the
following steps:
Thank the narrator. Make sure that every narrator has been contacted and thanked, not only by
the interviewer but also on behalf of the project.
Finalize permanent records. Go through documentation and determine what records should be
kept permanently. Keep all permanent records in a safe place, preferably in both paper and
electronic forms.
ORAL HISTORY PROJECT HANDBOOK Page | 14
Archiving follow-up. Contact the archivist in the designated repository to make sure that
materials have arrived safely, and that cataloging and preservation is complete.
Givie back to the community. Plan a public event to honor the narrators, publicize the project,
and bring the community together around the oral history project.
7.1. Project Conclusion: Assessment Discuss the entire project with the team. Build the discussion around these questions:
1. What did you learn about the community from your oral history project?
2. What new networks and contacts did you develop as a result of the project?
3. What kinds of support did you get from the community?
4. What would you do differently if your were to do the project again?
5. What future opportunities are related to this project?
6. What did you learn about the project topic from doing this project?
7. How did your research change your views about the topic?
8. What are you most proud of learning about the topic?