oracle policy automation...working with the oracle policy automation product line for 10 years, and...
TRANSCRIPT

ORACLE POLICY AUTOMATION
GUIDE TO DESIGNING A POLICY MODEL
Author: Fiona Guy
Last Updated: 5 April 2012
Copyright © 2011, 2012 Oracle and/or its affiliates. All rights reserved.
OPA Guide to Designing a Policy Model
Page 2
ABOUT THE AUTHOR
Fiona Guy is an expert in advanced Oracle Policy Automation rule design and implementation topics. She has been
working with the Oracle Policy Automation product line for 10 years, and was instrumental in OPA’s approach to
policy modeling. After many years in OPA consulting, Fiona is now a product manager in the Oracle Policy
Automation development team. She is currently based in Canberra, Australia.

OPA Guide to Designing a Policy Model
Page 3
DOCUMENT PROPERTIES
Author Fiona Guy
VERSION HISTORY
Date Name Comments
24 Nov 2011 Fiona Guy Released for internal review
4 Jan 2012 Sue Novak, Jasmine Lee Updated following internal review
5 March 2012 Sue Novak Updated headings, table of contents and fixed typo
7 March 2012 Matt Sevin Updated course and lesson links and references. Updated to latest help and user guide links.
5 April 2012 Sue Novak Updated cover page
ACRONYMS AND ABBREVIATIONS
OPA Oracle Policy Automation
OPM Oracle Policy Modeling
OPM Help Oracle Policy Modeling Help

OPA Guide to Designing a Policy Model
Page 4
CONTENTS
About the Author................................................................................................................................................... 2
Document Properties ............................................................................................................................................. 3
Version History .......................................................................................................................................................... 3
Acronyms and Abbreviations ..................................................................................................................................... 3
Chapter 1. Introduction ...................................................................................................................................... 6
1.1 Key Principles ............................................................................................................................................... 6
Chapter 2. Creating a Design Document ............................................................................................................. 7
2.1 Document Name .......................................................................................................................................... 7
2.2 Templates ..................................................................................................................................................... 7
2.3 Headings ....................................................................................................................................................... 7
2.4 Policy Model Overview ................................................................................................................................ 7
Chapter 3. Policy Model Goals ........................................................................................................................... 9
3.1 Identifying Substantive Goals ....................................................................................................................... 9
3.2 Identifying Screen Order or Procedural Goals/Flows ................................................................................. 10
3.3 Identifying Additional Goals/Flows ............................................................................................................ 10
Chapter 4. Source Material .............................................................................................................................. 11
4.1 Identifying Source Material ........................................................................................................................ 11
4.2 Multiple Source Documents ....................................................................................................................... 11
4.3 Reconciling Source Material ....................................................................................................................... 11
Chapter 5. Scope .............................................................................................................................................. 13
Chapter 6. Additional Functionality .................................................................................................................. 14
6.1 Source Material for Additional Functionality ............................................................................................. 15
Chapter 7. Perspective, Tense, Entities and Relationships ................................................................................ 16
7.1 Primary Perspective ................................................................................................................................... 16
7.2 Tense .......................................................................................................................................................... 17
7.3 Entities and Relationships .......................................................................................................................... 18
Chapter 8. Design Constraints .......................................................................................................................... 20
8.1 Identifying Design Constraints ................................................................................................................... 20
8.2 Documenting Design Constraints ............................................................................................................... 20
8.3 Designing within Constraints ..................................................................................................................... 21
Chapter 9. Design Components ........................................................................................................................ 22
Chapter 10. Detailed Design ........................................................................................................................... 25
10.1 When to Create Detail................................................................................................................................ 25

OPA Guide to Designing a Policy Model
Page 5
10.2 Rule Templates and Precedents ................................................................................................................. 26
Chapter 11. Other Design Documents ............................................................................................................ 28
11.1 User Interface Design ................................................................................................................................. 28
11.2 Physical Policy Model Structure ................................................................................................................. 30
11.3 Policy Model Naming Conventions ............................................................................................................ 33
11.4 Updating Policy Model Naming Conventions............................................................................................. 35
Chapter 12. Conclusions ................................................................................................................................. 36
12.1 Reviewing the Design ................................................................................................................................. 36
12.2 Adding to the Design .................................................................................................................................. 36
12.3 Changing the Design................................................................................................................................... 36
12.4 Learning from the Design ........................................................................................................................... 36
Useful Links ......................................................................................................................................................... 37

OPA Guide to Designing a Policy Model
Page 6
CHAPTER 1. INTRODUCTION
This document describes what needs to be considered when designing the policy model for an Oracle Policy
Automation project.
This document is not intended for training someone who is new to Oracle Policy Automation. Ideally, anyone
responsible for designing a policy model should have prior OPA implementation experience. At a minimum,
anyone who is working on the design of an OPA policy model should complete the following Oracle University
courses:
Oracle Policy Modeling Rel 10.2: Essentials Part 1
http://education.oracle.com/pls/web_prod-plq-dad/db_pages.getCourseDesc?dc=D72146GC10
Oracle Policy Modeling Rel 10.2: Essentials Part 2
http://education.oracle.com/pls/web_prod-plq-dad/db_pages.getCourseDesc?dc=D72144GC10
This document does not provide descriptions of Oracle Policy Modeling functionality, nor is it intended to provide
‘how to’ advice for using OPM features and functionality. For descriptions of OPM functionality and information
about how to use the features and functionality of OPM, please refer to the OPM Help.
The guidance in this document is not specific to a particular version of Oracle Policy Modeling. It is general
guidance which is relevant to any version of OPM from recent years. Examples provided are just that: examples to
help illustrate a design practice. They are not intended to illustrate the correct way to design any specific policy
model under development.
1.1 KEY PRINCIPLES
The key principles you should already know are:
Policy model design and development fits in with any software development methodology. Oracle Policy
Automation is well-suited to being used on agile projects, but works equally well with traditional waterfall
methodologies.
Roles on an OPA project team typically include: rule architect, rule author, technical architect, technical
developer (for any customizations/deployment), test manager and tester. One person may fill more than
one role, though at minimum the rule author and tester roles are usually filled by separate individuals.
The rule architect creates the design for the policy model component. The technical architect creates the
design for any components outside of the compiled policy model. The test manager creates the test
strategy.
The physical file structure of the folders, documents etc within Oracle Policy Modeling can be organized
independently of the rule content.
If you are unfamiliar with these concepts, you should review the lesson Planning a Policy Automation Project from
the course Oracle Policy Modeling Rel 10.2: Essentials Part 2 course before continuing.
OPA Guide to Designing a Policy Model
Page 7
CHAPTER 2. CREATING A DESIGN DOCUMENT
Before you get into the core of your design, some good practices will assist your team (and anyone working on the
policy model after you) to find and apply your design.
2.1 DOCUMENT NAME
Give your document a simple but descriptive name so that the development team can easily identify it once other
project documentation has been created. If there are (or will be) other design documents, such as designs for
other system components, make it clear that your design refers to the policy model. Also remember to include the
policy model name.
For example, "Flood Assistance Policy Model Design".
2.2 TEMPLATES
If you find a design template you can use, be prepared to add (and delete if appropriate) sections from the
template. Every design is different so it is important that you capture all relevant details, not just the ones that are
suggested in your template.
2.3 HEADINGS
While it is important to design key aspects of a policy model upfront, a good design will be used as a reference
throughout the lifecycle of a project, and will be updated to reflect key design decisions as the project progresses.
Using headings throughout your design document will assist the reader to quickly find the sections most relevant
to them.
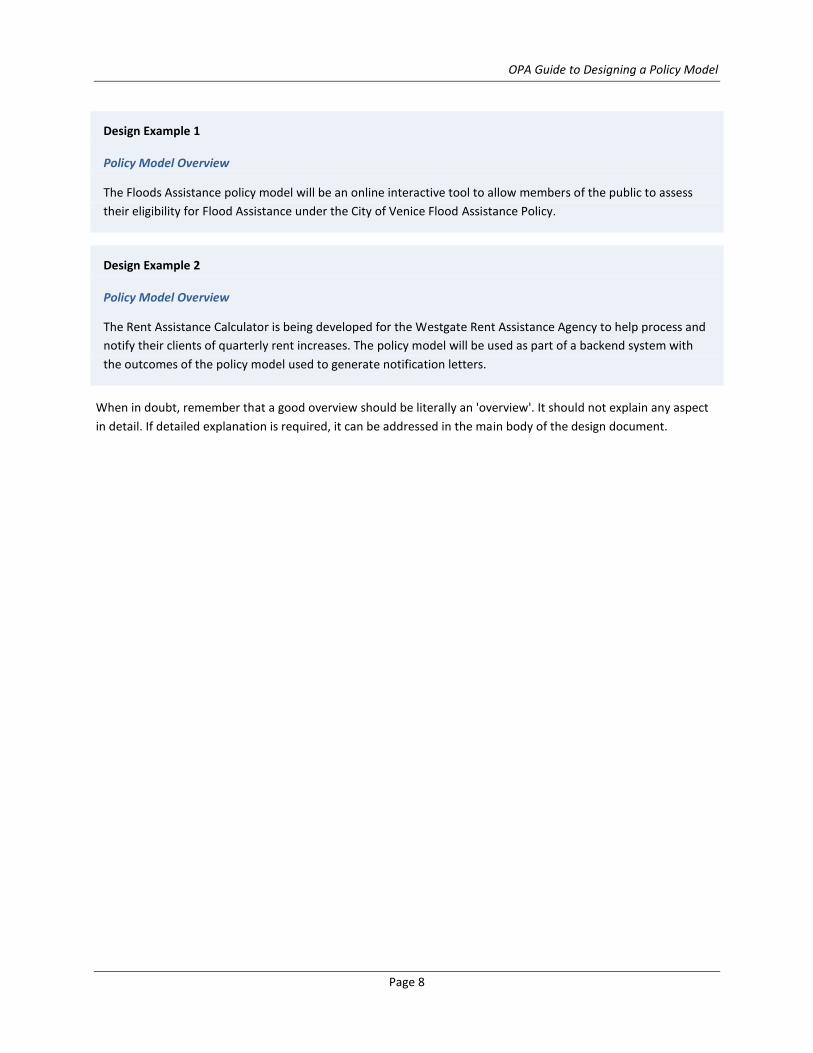
2.4 POLICY MODEL OVERVIEW
The first paragraph in your design document should explain the purpose of the policy model. This gives the reader
some idea of perspective and understanding of the solution as a whole.
A good overview will:
Name the policy model.
Mention why the policy model is being developed.
Mention how the policy model will be used or accessed.
Mention the source material (only if it is a key driver for building the policy model).
Be concise (1-2 paragraphs).
OPA Guide to Designing a Policy Model
Page 8
Design Example 1
Policy Model Overview
The Floods Assistance policy model will be an online interactive tool to allow members of the public to assess
their eligibility for Flood Assistance under the City of Venice Flood Assistance Policy.
Design Example 2
Policy Model Overview
The Rent Assistance Calculator is being developed for the Westgate Rent Assistance Agency to help process and
notify their clients of quarterly rent increases. The policy model will be used as part of a backend system with
the outcomes of the policy model used to generate notification letters.
When in doubt, remember that a good overview should be literally an 'overview'. It should not explain any aspect
in detail. If detailed explanation is required, it can be addressed in the main body of the design document.

OPA Guide to Designing a Policy Model
Page 9
CHAPTER 3. POLICY MODEL GOALS
Before you begin detailing your design you will need to have a clear idea of what the policy model needs to do.
This includes:
1. Determining the goals. The policy model goals (also called substantive goals) are the outcomes the policy
model is created to determine, calculate or report, once all input data (also called base attributes) have
been provided. In other words, the key inferred attributes in the policy model.
2. Determining any screen order or procedural goals/flows. The screen order or procedural goals/flows are
concerned with the process by which base attributes are collected.
Not every policy model will have both substantive policy model goals and screen order or procedural goals/flows.
For example, a policy model calculating a person's tax concession may not require the information in any particular
order so it would have only a substantive goal. A policy model collecting data for a survey may require the data to
be collected in a particular order but not use that data to infer an outcome so it would have a procedural goal/flow
but no substantive goal.
3.1 IDENTIFYING SUBSTANTIVE GOALS
Some questions you can ask to determine the substantive goals include:
What outcomes would the user expect from the policy model?
What outcomes are provided by existing systems or processes?
Will the policy model need to contain information on any related topics?
What supporting information or advice should the policy model provide at the end of the interview?
Remember the substantive goals are about giving an answer in response to the information provided. They are not
concerned with what, or how, the information is collected.
Design Example 1
Policy Model Goals
The Floods Assistance policy model will determine the following:
Whether or not the applicant is eligible for Flood Assistance.
The amount of Flood Assistance payable (if eligible).

OPA Guide to Designing a Policy Model
Page 10
Design Example 2
Policy Model Goal
The Rent Assistance Calculator will determine the household's current rate of rent assistance.
3.2 IDENTIFYING SCREEN ORDER OR PROCEDURAL GOALS/FLOWS
Some questions you can ask to determine the procedural requirements include:
Is there any requirement that information be collected in a particular order?
In what order is information collected by existing systems or processes?
Is there any information or base data that needs to be collected even though it is not used to infer an
outcome? (Such as name, address, product ID).
Is there a logical order in which to collect data which will feel more sensible to the end user? For example,
it will generally feel more natural to collect general data (e.g. date of birth) before very specific data (e.g.
obscure details about medical conditions).
Design Example 1
Screen Order / Procedural Rules / Flows
The Floods Assistance policy model will collect information in the same order as the existing Flood Assistance
Claim Form.
Design Example 2
Screen Order/Procedural Rules/Flows
As the Rent Assistance Calculator will be run in the rule server and all data is expected to be known at the start
of the interview, no procedural rules or flows are required.
3.3 IDENTIFYING ADDITIONAL GOALS/FLOWS
You may identify additional goals or flows as you continue to develop your design document (for example, during
the Scoping stage, discussed later) or as your project progresses. Remember to keep the 'Policy Model Goals' and
'Screen Order / Procedural Goals / Flows' sections of your design document up-to-date as your design develops.
OPA Guide to Designing a Policy Model
Page 11
CHAPTER 4. SOURCE MATERIAL
4.1 IDENTIFYING SOURCE MATERIAL
Now that you've identified what the policy model needs to do, you should document what sources of information
you will use in order to build the policy model. This source material may include:
Policy
Legislation
Existing forms
Spreadsheets
Flow charts
Workshops
4.2 MULTIPLE SOURCE DOCUMENTS
Where you have multiple source documents, include a short summary of what the document is primarily about to
help the reader identify what type of information the document contains and to what part of the policy model it
relates.
At this stage, keep this list at a high-level, rather than listing specific sections or parts. You can come back to add
more detail later.
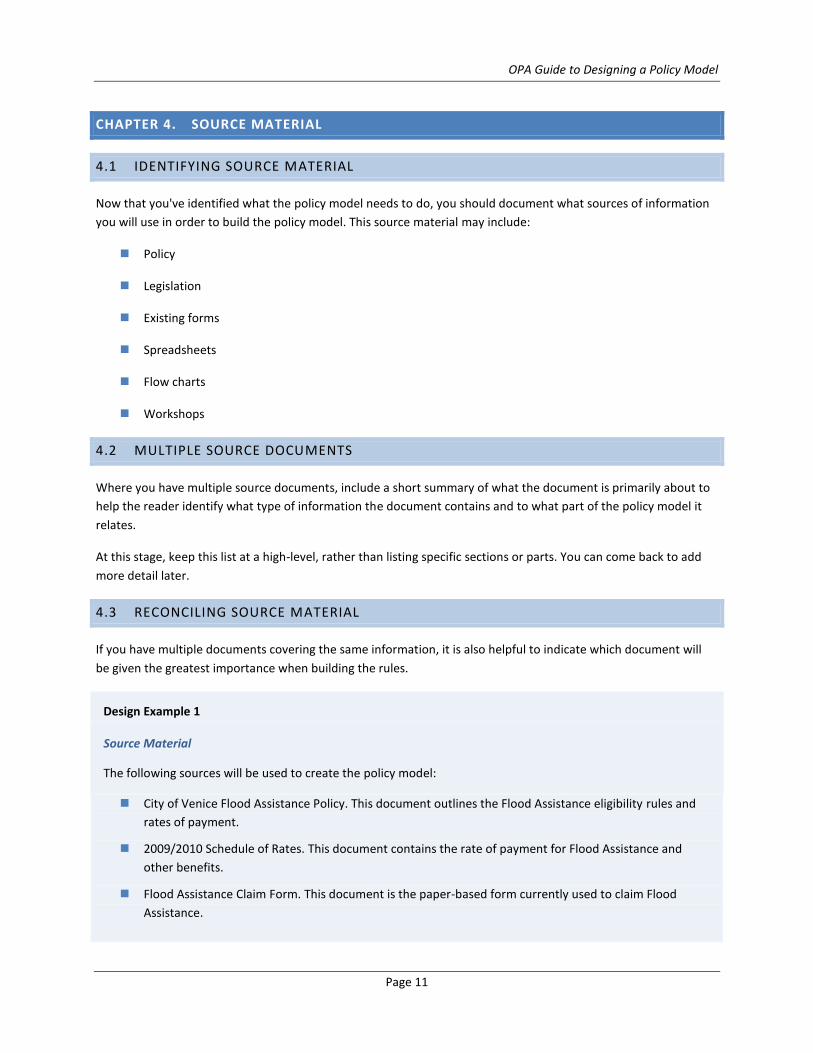
4.3 RECONCILING SOURCE MATERIAL
If you have multiple documents covering the same information, it is also helpful to indicate which document will
be given the greatest importance when building the rules.
Design Example 1
Source Material
The following sources will be used to create the policy model:
City of Venice Flood Assistance Policy. This document outlines the Flood Assistance eligibility rules and
rates of payment.
2009/2010 Schedule of Rates. This document contains the rate of payment for Flood Assistance and
other benefits.
Flood Assistance Claim Form. This document is the paper-based form currently used to claim Flood
Assistance.
OPA Guide to Designing a Policy Model
Page 12
Design Example 2
Source Material
The policy model will model the rule tables specified in the spreadsheets rates.xls and updates.xls.

OPA Guide to Designing a Policy Model
Page 13
CHAPTER 5. SCOPE
Once you have identified your policy model goals and your source material, take a moment to compare the two. It
is common for:
Source material to not provide enough information to prove your goals. If this happens you will need to
find additional sources of information from which to create your rules, reduce your goals or provide
design guidance on how to simplify your rules to work with the information provided.
Source material to include more information than is covered in the goals. While not an issue in itself, if
the source material proves additional goals or indicates there is a preferred procedure when collecting
information, it may indicate you have missed a requirement in the 'Policy Model Goals' section of your
design.
Either of these situations may require you to clarify and update the 'Source Material' or 'Policy Model Goals'
sections of your design.
EXAMPLE
Assume you are asked to model the Flood Assistance Policy in order to determine the following policy model goals:
The applicant is eligible for flood assistance, and
The amount of Flood Assistance payable (if eligible)
To do so, you are only provided with the Flood Assistance Policy provided below.
Flood Assistance Policy
A person is eligible for Flood Assistance if during the December 2008 Venice floods the person was
seriously injured or their principal place of residence was destroyed or uninhabitable for a period of
48 hours or more.
A person eligible for Flood Assistance is also automatically entitled to Emergency Relief Payment.
Once you compare your policy model goals to your source material, you should notice that:
You have no source material to determine the amount of Flood Assistance payable. You should clarify
whether this goal is actually required by the policy model and either remove it from the goals or add
source material which can be used to determine the goal.
You have additional information in the source material – in addition to the goals stated, you can also
determine whether or not the applicant is entitled to Emergency Relief payment. You may want to clarify
whether this is to be included in the policy model and, if so, add it to your list of goals. If the additional
information is not to be included, you do not need to mention this in your design unless doing so would
be helpful to avoid ambiguity in this area.

OPA Guide to Designing a Policy Model
Page 14
CHAPTER 6. ADDITIONAL FUNCTIONALITY
In addition to your rules and procedural goals/flows, an Oracle Policy Modeling project often consists of additional
functionality such as:
Generated documents
Commentary (help text)
Customizations
Functionality specifically added to assist testing (for example, additional rules, screens or public names).
Functionality specifically added to guide the user experience (for example, validation rules).
If your project includes any of these you will need to create a section in your design document explaining what is
required for that specific area of functionality. Depending on the complexity of the functionality, the design for
each area of additional functionality may require a paragraph, a whole chapter or even a separate specific design
document detailing the approach.
Design Example 1
Commentary (help text)
Commentary will be provided for every base level attribute. Each commentary page will be created in the form
<public name>.html to clearly identify which base level attribute the commentary page relates to.
Each commentary page will use the commentary.css stylesheet.
Each commentary page will include the following information:
Attribute question text
Why the question is being asked
Meaning of specific words (if required)
Examples of how to answer the question
Links to additional information
This information will be primarily sourced from the ABC Policy Manual.
Design Example 2
Generated Documents
Once a decision has been reached, the deciding officer would usually complete either a HRC2 form or a HRC3
form. These documents will be automatically produced by the application.
OPA Guide to Designing a Policy Model
Page 15
These forms will be available on the summary screen once the interview has been concluded. That is, once it is
known whether or not the claimant is eligible. A link to the HRC2 form will appear if the claimant is eligible,
otherwise a link to the HRC3 form will appear.
Once clicking on this link, the deciding officer will be asked whether or not they want to open this file in a web
browser (the deciding officer can view the document and save it using this method) or to save the document to
the local machine.
The forms will, as far as possible, match the style, content and layout of the existing HRC2 and HRC3 forms.
Where the forms include information not otherwise collected in the interview, an additional screen will be
inserted at the end of the interview to collect this information (see the section on Screen Order / Procedural
Goals / Flows earlier in this design document).
6.1 SOURCE MATERIAL FOR ADDITIONAL FUNCTIONALITY
Remember to list any source material used to create the additional functionality in the Source Material section of
your design. If the source material for your additional functionality is different to the source material for the main
body of your rules, it may be helpful to document this.
OPA Guide to Designing a Policy Model
Page 16
CHAPTER 7. PERSPECTIVE, TENSE, ENTITIES AND RELATIONSHIPS
Once you have identified all of your rules and requirements, you need to make some decisions about how the rules
will be authored. Specifically, there are decisions you need to make upfront that will affect rule structure and
attribute wording.
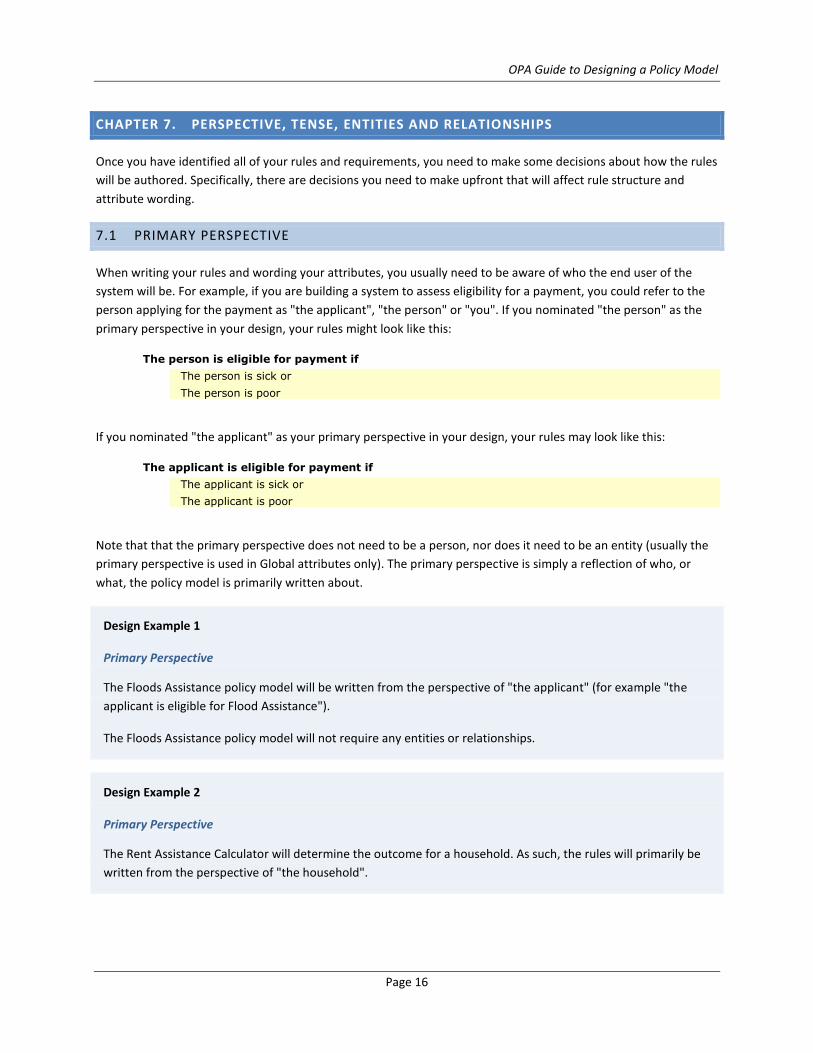
7.1 PRIMARY PERSPECTIVE
When writing your rules and wording your attributes, you usually need to be aware of who the end user of the
system will be. For example, if you are building a system to assess eligibility for a payment, you could refer to the
person applying for the payment as "the applicant", "the person" or "you". If you nominated "the person" as the
primary perspective in your design, your rules might look like this:
The person is eligible for payment if
The person is sick or
The person is poor
If you nominated "the applicant" as your primary perspective in your design, your rules may look like this:
The applicant is eligible for payment if
The applicant is sick or
The applicant is poor
Note that that the primary perspective does not need to be a person, nor does it need to be an entity (usually the
primary perspective is used in Global attributes only). The primary perspective is simply a reflection of who, or
what, the policy model is primarily written about.
Design Example 1
Primary Perspective
The Floods Assistance policy model will be written from the perspective of "the applicant" (for example "the
applicant is eligible for Flood Assistance").
The Floods Assistance policy model will not require any entities or relationships.
Design Example 2
Primary Perspective
The Rent Assistance Calculator will determine the outcome for a household. As such, the rules will primarily be
written from the perspective of "the household".
OPA Guide to Designing a Policy Model
Page 17
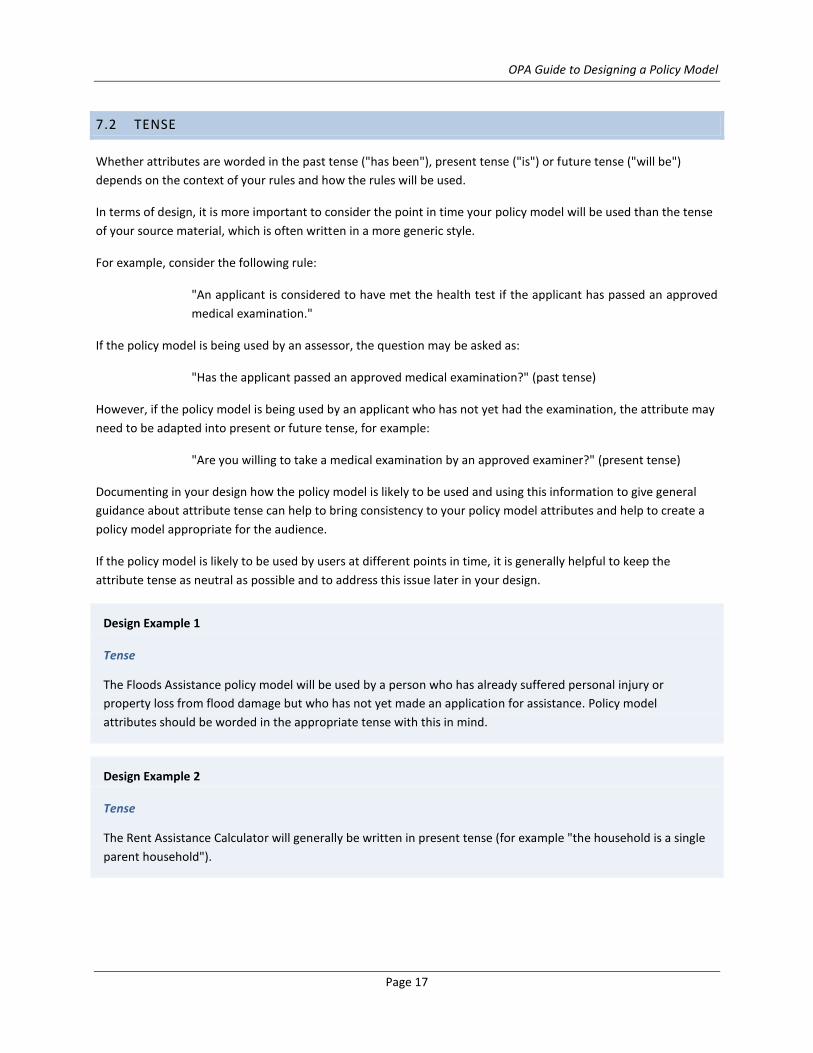
7.2 TENSE
Whether attributes are worded in the past tense ("has been"), present tense ("is") or future tense ("will be")
depends on the context of your rules and how the rules will be used.
In terms of design, it is more important to consider the point in time your policy model will be used than the tense
of your source material, which is often written in a more generic style.
For example, consider the following rule:
"An applicant is considered to have met the health test if the applicant has passed an approved
medical examination."
If the policy model is being used by an assessor, the question may be asked as:
"Has the applicant passed an approved medical examination?" (past tense)
However, if the policy model is being used by an applicant who has not yet had the examination, the attribute may
need to be adapted into present or future tense, for example:
"Are you willing to take a medical examination by an approved examiner?" (present tense)
Documenting in your design how the policy model is likely to be used and using this information to give general
guidance about attribute tense can help to bring consistency to your policy model attributes and help to create a
policy model appropriate for the audience.
If the policy model is likely to be used by users at different points in time, it is generally helpful to keep the
attribute tense as neutral as possible and to address this issue later in your design.
Design Example 1
Tense
The Floods Assistance policy model will be used by a person who has already suffered personal injury or
property loss from flood damage but who has not yet made an application for assistance. Policy model
attributes should be worded in the appropriate tense with this in mind.
Design Example 2
Tense
The Rent Assistance Calculator will generally be written in present tense (for example "the household is a single
parent household").
OPA Guide to Designing a Policy Model
Page 18
7.3 ENTITIES AND RELATIONSHIPS
In order for the rule developer to know how to phrase and structure the rules, and for testing and data integration
purposes (to know which attributes can have multiple values), your design needs to specify the entities and
relationships you expect to appear in the completed policy model (i.e. a basic data model).
For more information on how to identify entities and relationships in your source material, refer to the OPM Help.
7.3.1 DOCUMENTING ENTITIES AND RELATIONSHIPS
Describe your entities and relationships by whatever means will make the most sense to the readers of your design
document, including:
A description of each entity and relationship.
A table of entities and relationships.
A diagram (such as a high level data model).
Using a combination of these techniques to describe your entities and relationships can also be helpful.
Design Example 1
Entities and Relationships
The Floods Assistance policy model will not require any entities or relationships.
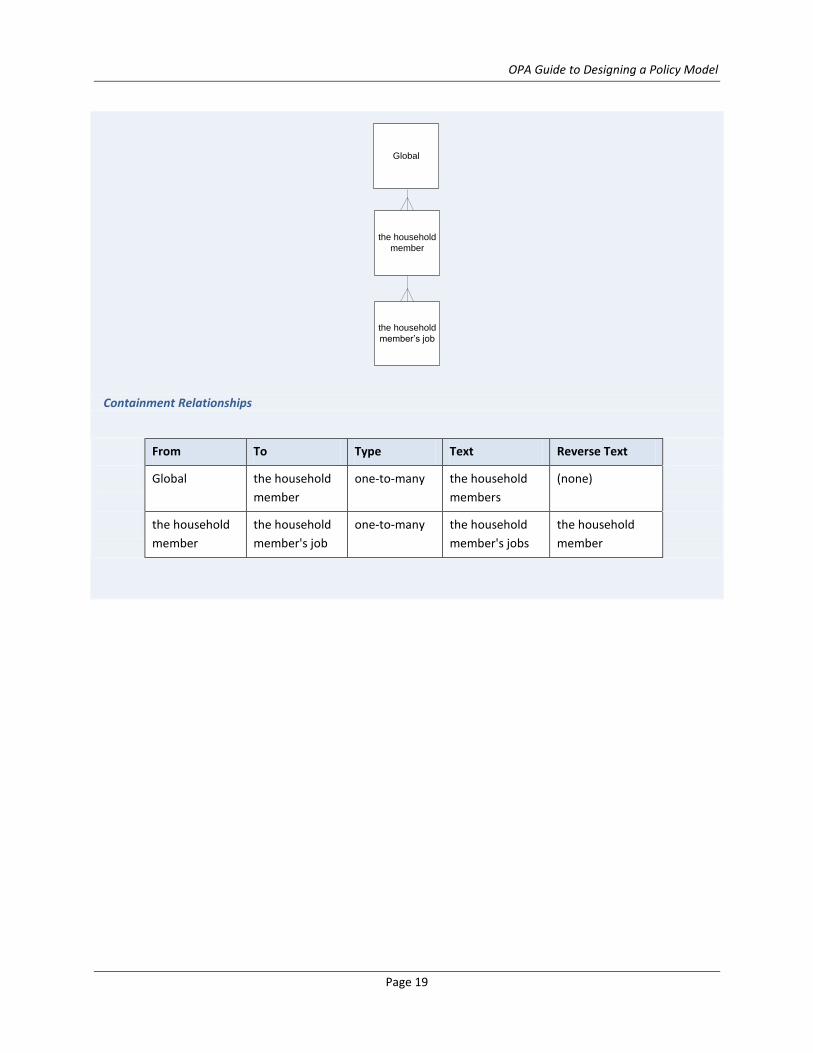
Design Example 2
Entities
The Rent Assistance Calculator will require an entity for "the household member" (note that "the household" is
Global). There may be many household members. The entity “the household member” will be contained by
Global.
The Rent Assistance Calculator will also have an entity for “the household member's job”. Each household
member may have multiple jobs. The entity “the household member’s job” will be contained by the entity “the
household member”.
OPA Guide to Designing a Policy Model
Page 19
the household
member
Global
the household
member’s job
Containment Relationships
From To Type Text Reverse Text
Global the household
member
one-to-many the household
members
(none)
the household
member
the household
member's job
one-to-many the household
member's jobs
the household
member
OPA Guide to Designing a Policy Model
Page 20
CHAPTER 8. DESIGN CONSTRAINTS
8.1 IDENTIFYING DESIGN CONSTRAINTS
Design constraints are anything that influences the options you have available to you when building a policy
model. They can include:
The user. The level of education, subject matter knowledge and familiarity the end user has with similar
systems, may affect the complexity, outcomes, look or procedural flow of the policy model. For example,
if you are modeling complex tax law, you may need to simplify the language of base level attributes if you
are expecting a person without tax law knowledge to use the policy model.
An existing data model. If your system is integrating with an existing data model, you may find that the
policy model needs to include more, or fewer, attributes than you originally intended. For example, if your
source material contains two pages of rules describing what constitutes a valid document, and the
existing data model simply supplies two pieces of data to prove this, then you may not be able to model
the detail in your source rules.
Skill-sets. The skills and experience your team bring may allow you different levels of creativity in your
policy model design.
Information. The information you have available to you at the start of the project is usually the
information on which you base your design. When you know you are likely to receive additional
information (such as a missing component or updated rules for the following year) your design needs to
be flexible enough to accommodate this.
Timeframe. Once you have finished your design you may find that it is simply not possible to complete
everything within the required timeframe. If your design cannot be achieved within the desired
timeframe, you may need to revisit your design to see where you can improve efficiency in your design or
remove non-essential components.
Every project is different. It is important to ask yourself on every project "What is influencing my design?" and
"How do I need to accommodate this?"
8.2 DOCUMENTING DESIGN CONSTRAINTS
Documenting your design constraints serves to:
1. Clarify for yourself what factors you need to consider when building your design.
2. Verify with your team/stakeholders that the constraints exist.
3. Indicate that you have considered these constraints.
4. Explain why your design has taken a particular approach.
5. Inform and educate anyone who needs to apply and/or adapt your design.

OPA Guide to Designing a Policy Model
Page 21
Design Example 1
Design constraints
As the system is a pilot at this stage, it is constrained in its development time. This means that it will not be
highly customized from the default Oracle Web Determinations functionality.
Design Example 2
Design constraints
Constraint Effect
Limited development
time
The policy model will be built in components, allowing some components
to be delayed to a later release if required.
Existing data model / data
collection
The policy model will only be modeled to the extent possible given the
level of information available in the existing data model. This may mean
some sections of the source material cannot be modeled.
Users are expected to
complete the interview in
less than 2 minutes
The policy model will be constructed with streaming questions and some
questions will be defaulted and only able to be changed at the end of the
interview, in an effort to reduce the length of a policy model interview.
8.3 DESIGNING WITHIN CONSTRAINTS
While constraints can be confronting at first, often they can result in some creative design outcomes. They may
prevent you from designing the policy model in the way you originally envisaged, but often there is more than one
approach that can be taken to achieve the same result.
Once you have identified your design constraints, consider whether the approach to building your policy model is
still valid and, if not, consider whether an alternative approach can be taken to achieve the same result. In
considering this, remember you are not limited to built-in or default functionality; you may need policy model
customizations and/or custom properties to achieve the desired result.
Finally, if it is not possible to design a policy model which meets all of the requirements within the constraints, it is
better to speak up and address this than to continue on to development only to discover that the policy model
cannot be completed. It may be that some of the requirements or constraints can be removed in order to satisfy
your project objectives.
OPA Guide to Designing a Policy Model
Page 22
CHAPTER 9. DESIGN COMPONENTS
At this point in the design process, you should have a good overview of what needs to go into the policy model to
produce a complete system. Once you have this high-level overview, you will generally need to break this down
into smaller, more manageable components so that:
The design includes a general skeleton of the completed solution.
The work can be split among the development team.
The work can be prioritized.
The policy model can be created and tested incrementally.
Areas requiring specific detailed design can be addressed individually (this is covered in more detail in the
next section).
Breaking your design down into smaller components also allows you as the designer to consider each aspect of
your design on a more micro level, allowing you to think through every aspect of the design to ensure you have not
missed any important considerations and consider whether your overall solution is workable.

OPA Guide to Designing a Policy Model
Page 23
Design Example 1
Calculating Income Tax
The following diagram represents the discrete components of the Income Tax calculation.
Collect Gross
income amounts
Apply applicable deductions
to gross income amounts
Aggregate gross income amounts
Apply personal allowances, in required order, if
applicable
Apply transferred allowances if
applicable
Calculate tax due on income
Income tax
OPA Guide to Designing a Policy Model
Page 24
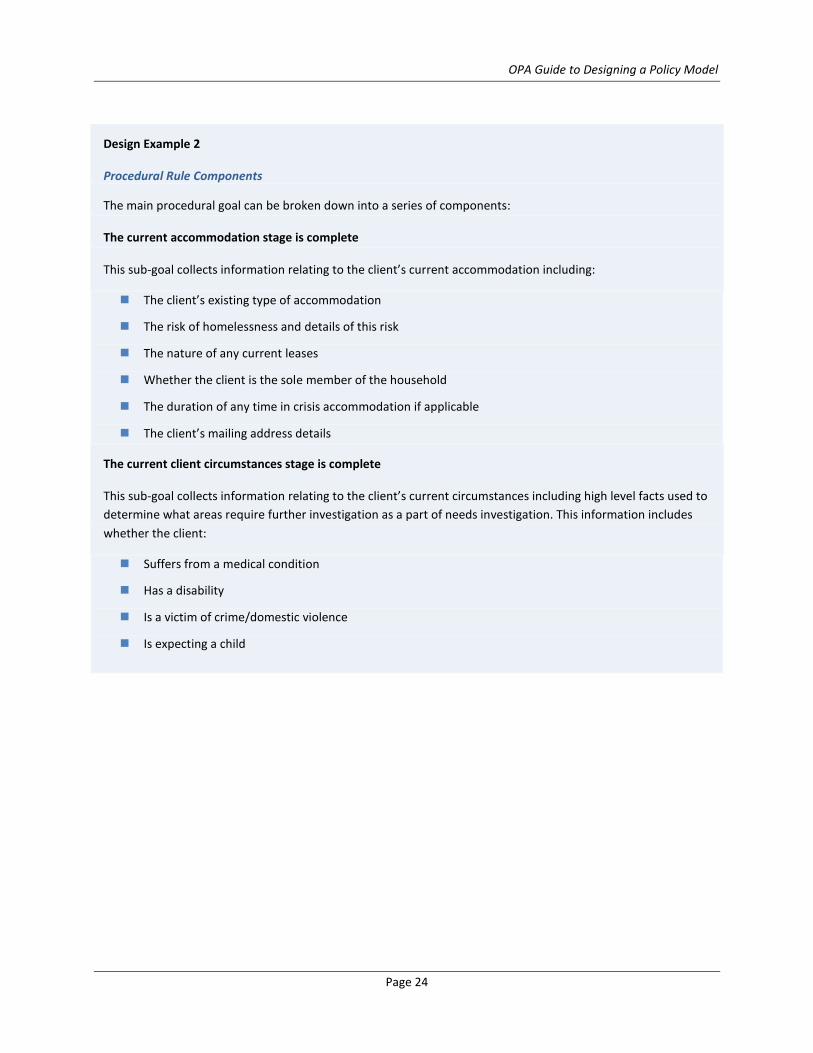
Design Example 2
Procedural Rule Components
The main procedural goal can be broken down into a series of components:
The current accommodation stage is complete
This sub-goal collects information relating to the client’s current accommodation including:
The client’s existing type of accommodation
The risk of homelessness and details of this risk
The nature of any current leases
Whether the client is the sole member of the household
The duration of any time in crisis accommodation if applicable
The client’s mailing address details
The current client circumstances stage is complete
This sub-goal collects information relating to the client’s current circumstances including high level facts used to
determine what areas require further investigation as a part of needs investigation. This information includes
whether the client:
Suffers from a medical condition
Has a disability
Is a victim of crime/domestic violence
Is expecting a child

OPA Guide to Designing a Policy Model
Page 25
CHAPTER 10. DETAILED DESIGN
Once you have created the basic building blocks and foundation principles guiding your design, the last area you
need to consider is whether you have provided sufficient detail for your design to be followed. In some areas, you
may need to add more detail.
10.1 WHEN TO CREATE DETAIL
While it can be helpful to go into detail in some areas of the policy model design, going into detail in every area can
be overly time-consuming and lead to large, unreadable design documents that become impossible to maintain. A
good design will find a balance, creating a detailed design in areas where detail is required and leaving open areas
which are fairly self-explanatory. As a general rule, you will need to create a detailed design where:
1. There are multiple ways of modeling a particular area and the approach taken will impact the overall
functionality or quality of the policy model.
2. You had to put considerable thought into how a particular requirement can be addressed.
3. Your design's complexity is such that a person looking at the policy model afresh would not easily
understand how the policy model is functioning.
4. You have included any custom functionality that is specific to your policy model.
You may find it helpful to think through each component identified in the section above separately to test whether
any aspect of that component requires a detailed design. Two examples of additional detailed design follow.
Design Example 1
Detailed Design
Working Week
Where the applicant's normal working week can include weekends, this information will be collected as a series
of checkboxes on a single screen requiring the user to select the days of the week on which the applicant is
usually engaged in paid employment. Monday-Friday would be checked by default so for most applicants, the
user can simply progress past the screen. This method of data collection would allow for saved data to be later
analyzed in order to determine how many applicants work a 6 or 7 day week.
Where the applicant's normal working week does not need to be considered, this information will not be
collected.

OPA Guide to Designing a Policy Model
Page 26
Design Example 2
Areas Requiring Specific Attention
Stop Messages
Stop messages will need to be displayed midway through the interview on a question screen so that users can
determine whether they have sufficient privileges to continue on to the next question. As the user's permissions
are not available to the policy model, the policy model will notify the user that a stop point has been reached
and trust the user to manually terminate the interview if required.
These stop messages need to contain the appropriate image and hyperlink to relevant materials so cannot be
achieved using a standard warning rule. Instead, combination of warning rules (to stop the interview) and labels
(to display the text) will be used.
There are therefore 3 steps to creating a stop message:
1. Prove a visibility attribute for each stop message
2. Use the visibility attribute to generate a warning
3. Use the visibility attribute to display a stop message label on each relevant question screen.
Each of these steps is explained in more detail below… (additional detail omitted from example).
10.2 RULE TEMPLATES AND PRECEDENTS
Providing examples of rules in your detailed design can be a good way to ensure consistency across similar rule
types. A Rule Template is simply a rule structure that other rule developers can copy when modeling similar rules.
When a complete, workable rule is provided as an example, it is usually called a Rule Precedent. Regardless of
which you use, creating examples of key rules in the design can be an excellent way of conveying your intention in
detail.
OPA Guide to Designing a Policy Model
Page 27
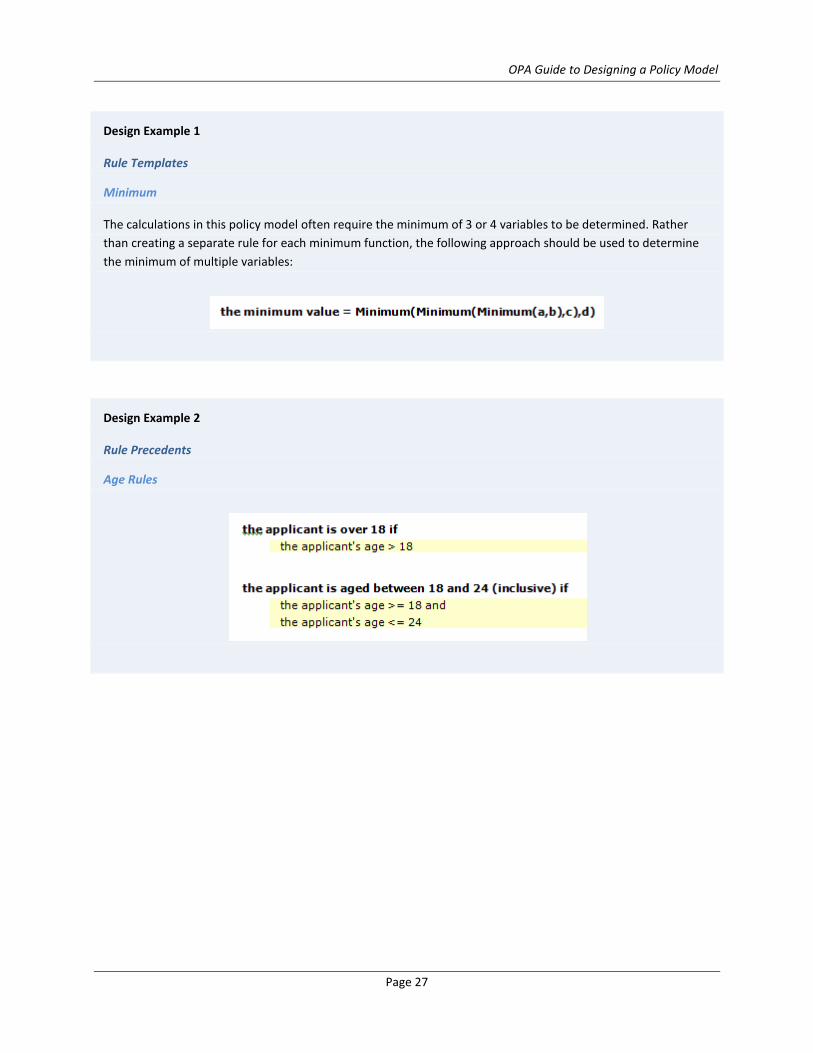
Design Example 1
Rule Templates
Minimum
The calculations in this policy model often require the minimum of 3 or 4 variables to be determined. Rather
than creating a separate rule for each minimum function, the following approach should be used to determine
the minimum of multiple variables:
Design Example 2
Rule Precedents
Age Rules

OPA Guide to Designing a Policy Model
Page 28
CHAPTER 11. OTHER DESIGN DOCUMENTS
11.1 USER INTERFACE DESIGN
If you are creating the screens for your policy model, you will also need to create a basic design for how these
screens are going to look. The level of detail required for this User Interface Design will vary, depending on the
importance of your user interface requirements. In some instances, a few words at the end of your design
document will be sufficient, in other cases a separate user interface design will need to be created and agreed to
before your project can commence.
11.1.1 WHAT TO INCLUDE
Your user interface design may include:
A listing of the contents of key screens, such as the summary screen.
The order in which screens should appear on the Data Review Screen.
Advice on when to use substitution text in screen headings, labels etc.
Advice on what heading styles to use.
Advice on when to use capitalization in screen headings, labels, question text, drop-down list entries.
Advice on visibility attributes.
Advice for additional links on the summary screen or question screens.
Advice on how to collect multiple monetary amounts.
Advice on how to collect a list of items.
Advice on how and when to collect uncertain answers.
Advice on the content and location of any commentary.
Example screenshots.
Examples of commonly-used screen structures.
Example html (such as how to insert html tags in free from question text to make a word bold).
Explanations of any custom screen functionality.
The examples provided below show only extracts of a complete user interface design.

OPA Guide to Designing a Policy Model
Page 29
Design Example 1
Screen Contents
Summary Screen
At the start of an inquiry the summary screen will show:
Welcome label - a label indicating the name and version of the application
Link to investigate the amount of payment
At the completion of an inquiry the summary screen will show:
Eligibility for payment
The total amount of payment due (if eligible)
A warning indicating if the calculation period spans a rate update (to appear if the specific warning is
required)
Document heading
Link to generate an application form
Personal Screen
The Personal screen will be used to collect information about the user designed to tailor the interview. For
example, questions can be asked using the customer’s name "Is James a student?". At this stage, it is likely that
the screen will collect the following information:
Investigation Date
Client Name
Client Gender
Client Address
Client Age
Design Example 2
Question Screen Design
Screen Names
Screen names are important to convey meaning on question screens and make sense of the data review screen.
Screen names should:
be written in sentence case, with proper nouns capitalized (e.g. ‘Prior employment in Smithville)

OPA Guide to Designing a Policy Model
Page 30
use variable substitution if it will add meaning for the user.
Wherever a question screen is specifically about a member of the household, the screen name should end in
“for %relevant_person_details%” (the relevant person) or “for %relevant_other_person_details%” (the relevant
other person). This provides consistent information to the user to identify easily who the questions are about,
e.g. “Billy (customer, 51 years)”, “Jane (partner, 50 years)”, “Mary (dependant, 15 years)”, “Jack (non-
dependant 73 years)”. Question screens about the household in general should not use substitution in the
screen name.
Question Screen Layout
Generally, each screen should contain a maximum of four questions. However, more questions per screen are
acceptable where the questions are simple and take less than one line (e.g. Title, First Name, Last Name, Date of
Birth, Address), or if a screen collects a group of related questions which will all be defaulted (e.g. asking about
a set of uncommon exceptions).
Question Screen Headings
The customized application will use the screen name as the first heading on the screen. Additional headings are
an important mechanism for conveying meaning about the screen. Variable substitution, for example,
%client_details%, may be used in headings. The following heading levels are to be used:
Heading 1 for major headings (e.g. "Period of Service of %client_details%")
Heading 2 for short labels (e.g. "If so...")
Heading 3 for long labels (e.g. where the screen is asking a question split into a common start and
different ends)
Heading 4 for sentences of explanatory text
Mandatory Input Controls
By default all questions should be mandatory, unless there is compelling reason to allow uncertainty.
Default Values
All input controls should contain default values if a sensible default value exists. Statements should be defaulted
to yes or no depending on which is the more likely answer. Number and money variables should be defaulted to
zero. Text and date variables should be left blank unless a sensible default value exists.
11.2 PHYSICAL POLICY MODEL STRUCTURE
Within Oracle Policy Modeling rules, you can organize and structure your documents in whatever way makes it
easiest to structure your work. However, design guidance in this area can be most useful where:
The project contains a large number of rule documents
OPA Guide to Designing a Policy Model
Page 31
Multiple rule developers are working on the project
Multiple rule developers are likely to be adding documents
Some documents need to be re-used across another project
Multiple policy models are expected to have similar structures.
Creating a predictable, organized file structure will allow other rule developers to more quickly and easily find the
documents they are looking for.
Similarly, you may also want to give guidance on how to structure individual rule documents.
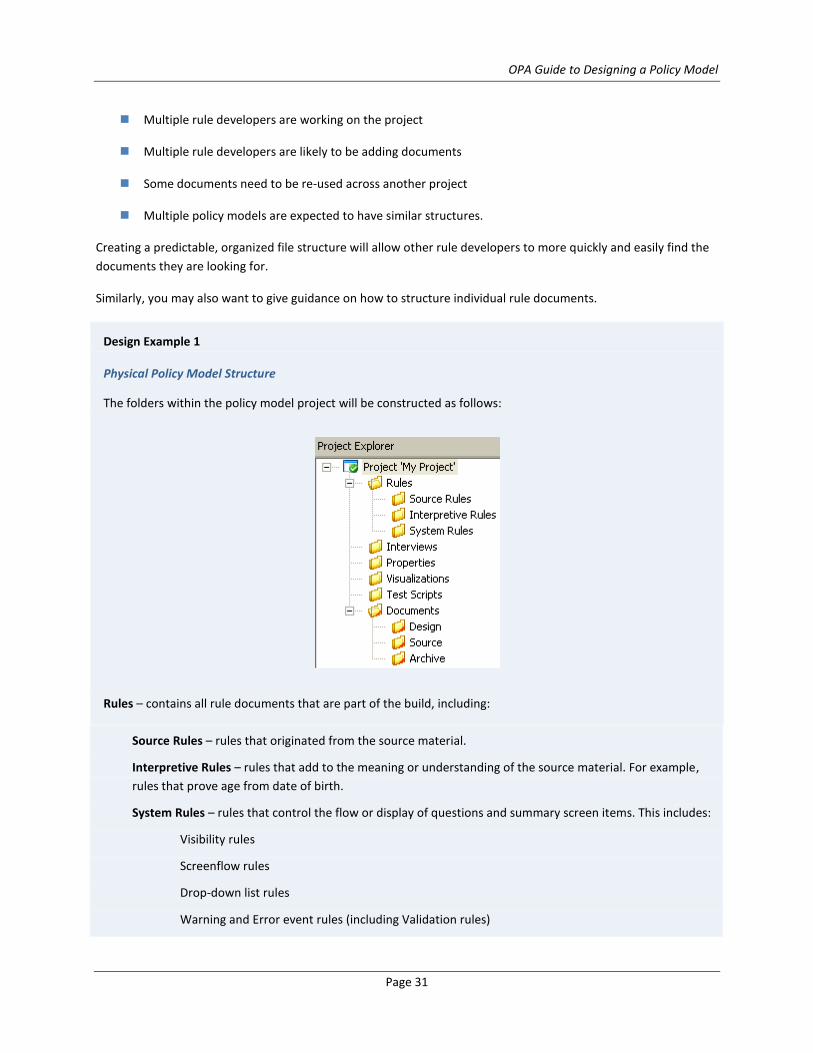
Design Example 1
Physical Policy Model Structure
The folders within the policy model project will be constructed as follows:
Rules – contains all rule documents that are part of the build, including:
Source Rules – rules that originated from the source material.
Interpretive Rules – rules that add to the meaning or understanding of the source material. For example,
rules that prove age from date of birth.
System Rules – rules that control the flow or display of questions and summary screen items. This includes:
Visibility rules
Screenflow rules
Drop-down list rules
Warning and Error event rules (including Validation rules)

OPA Guide to Designing a Policy Model
Page 32
Interviews – contains a single screens file and any screen flows.
Properties – contains a single properties file.
Visualizations – contains any visual browser files created for the project (optional).
Test Scripts – contains all test scripts and test cases created for the project.
Documents – contains all document that are not part of the build and do not rely on policy model data. For
example:
Design – contains all documents that describe the design or structure of the policy model (including any
analysis of the source material).
Source – contains the source material i.e. the information from which the policy model was built. This
should include older versions of the source rules if the policy model has been updated over time.
Archive – contains any rules or rule documents which no longer form part of the policy model but for one
reason or another are helpful to keep for reference.
Refer to the Policy Model Naming Conventions document for more information on how to name each of the
documents within these folders.
Design Example 2
Document Structure
All Word rule documents should contain headings which layout the structure of the document. This makes it
much faster for rule developers after you to work with and understand the document, and will assist anyone
printing the document to put the rules in context.
As a general guide:
OPM – Heading 1 style should be used once only at the top of the document stating the type of rules.
OPM – Heading 2 style should be used once only, below the first heading to state the source of the rules
(if applicable).
OPM – Heading 3 and other heading styles can then be used to divide the information into logical
groupings. The OPM – Rule Name style can also be used to mark individual rules as having particular
importance or significance, such as the top-level goal.
OPA Guide to Designing a Policy Model
Page 33
11.3 POLICY MODEL NAMING CONVENTIONS
Policy model naming conventions assist policy authors to use consistent wording across the policy model. Typically,
policy model naming conventions primarily provide advice on how to word attributes and public names, but can
also include advice on the wording of:
Document names
Folder names
Screen names
Test cases
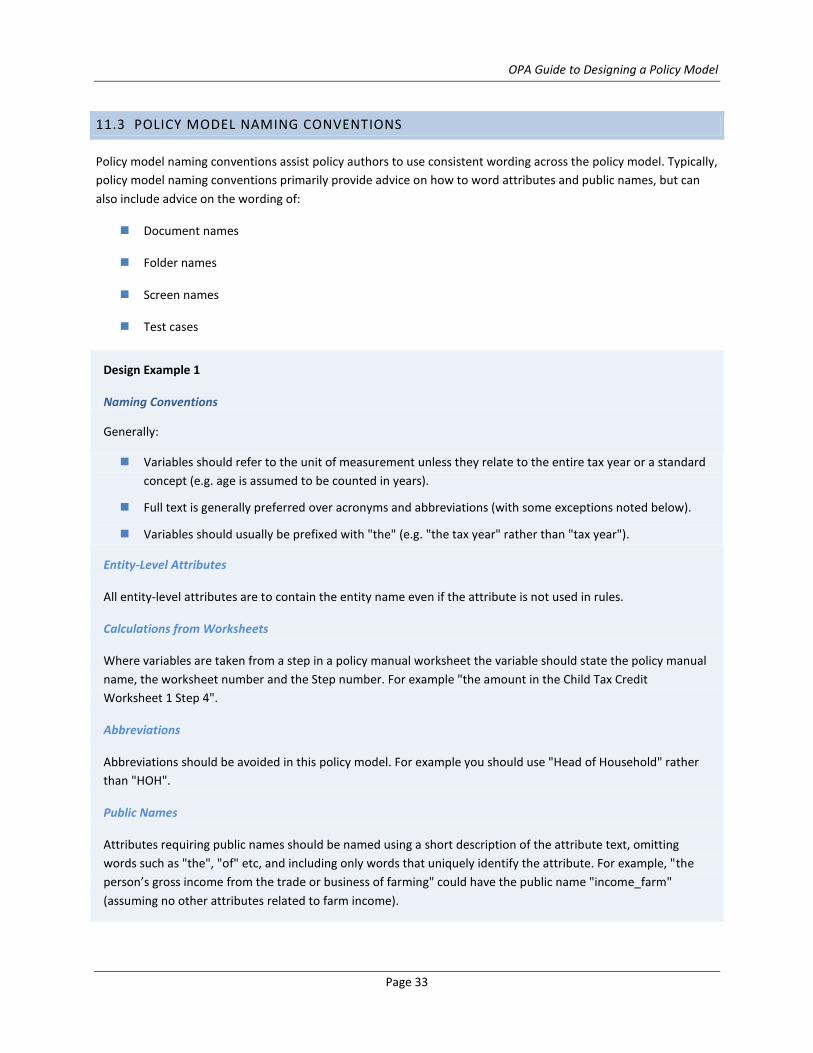
Design Example 1
Naming Conventions
Generally:
Variables should refer to the unit of measurement unless they relate to the entire tax year or a standard
concept (e.g. age is assumed to be counted in years).
Full text is generally preferred over acronyms and abbreviations (with some exceptions noted below).
Variables should usually be prefixed with "the" (e.g. "the tax year" rather than "tax year").
Entity-Level Attributes
All entity-level attributes are to contain the entity name even if the attribute is not used in rules.
Calculations from Worksheets
Where variables are taken from a step in a policy manual worksheet the variable should state the policy manual
name, the worksheet number and the Step number. For example "the amount in the Child Tax Credit
Worksheet 1 Step 4".
Abbreviations
Abbreviations should be avoided in this policy model. For example you should use "Head of Household" rather
than "HOH".
Public Names
Attributes requiring public names should be named using a short description of the attribute text, omitting
words such as "the", "of" etc, and including only words that uniquely identify the attribute. For example, "the
person’s gross income from the trade or business of farming" could have the public name "income_farm"
(assuming no other attributes related to farm income).

OPA Guide to Designing a Policy Model
Page 34
It is helpful to put the more generic word at the start of the public name and any specific words at the end of
the public name, to make it easier to sort attributes by name. Hence "income_farm" is preferred over
"farm_income" (assuming multiple attributes refer to income).
Public names on entity-level attributes should begin with "entity_". For example "child_age",
"contribution_type").
All public names for visibility attributes should begin with "visibility_".
All public names related to income should begin with "income_".
All public names related to deductions should begin with "deduction_".
All public names related to totals should begin "total_".
Design Example 2
Acceptable attribute naming conventions for legislation
Convention Description Examples
Default
structural logic
<legislation abbreviation> [s. / sch]
<provision number> applies
SSCBA s.130(1)(c)(ii) applies
Basic
structural logic
<primary perspective> [satisfies / is
excluded by] <legislation abbreviation> [s. /
sch] <provision number> and <provision
number>
the claimant is excluded by SSCBA
s.130(1)(c)(ii)
the claimant satisfies SSCBA s.1(a) and (b)
Structural logic
with sub-
requirement
description
<primary perspective> [satisfies/is excluded
by] the <requirement description>
requirement(s) in <legislation abbreviation>
[s. / sch] <provision number>
the claimant’s profits satisfy the tax
requirements in SSCBA s.18 sch D(1)(a)(i)
and (ii)
Structural logic
with entities
<primary perspective> [satisfies / is
excluded by] <legislation abbreviation> [s. /
sch] <provision number> in respect of
<entity>
the claimant satisfies SSCBA s.2(1)(a) in
respect of the relevant other person
Variables Either:
an explicit description excluding the clause
number; or
a description of the calculation that
populates the variable.
the partnered maximum basic rate
the sum of SSCBA s.132(1)(a) and (b)

OPA Guide to Designing a Policy Model
Page 35
11.4 UPDATING POLICY MODEL NAMING CONVENTIONS
The policy model naming conventions are one of the areas of design most likely to change as the project develops,
simply because more similarities are found between attributes in the policy model as the attributes are created,
and therefore more decisions are being made about how to word the attributes and their public names.
For this reason, policy model naming conventions are often stored in a separate document. Regardless of where
your naming conventions are recorded, be sure to keep the document up to date as new naming conventions are
developed.
OPA Guide to Designing a Policy Model
Page 36
CHAPTER 12. CONCLUSIONS
The guidelines in this document have provided you with the foundation for building a design document.
Remember that a good design will go beyond this – documenting all key aspects of the policy model solution,
detailing areas that require further analysis and being adapted and updated as requirements change.
12.1 REVIEWING THE DESIGN
The first step once your design is completed is to have it reviewed. It may seem daunting at first to have your work
scrutinized, but it will be far more embarrassing, and costly, if a significant change is needed once the policy model
is partially-completed. Good reviewers will also identify where further clarification is needed and/or show you a
better approach.
12.2 ADDING TO THE DESIGN
Do not be afraid to add to your design as you discover clarification is needed on a more detailed level. Often an
area of ambiguity is not discovered until after development begins. Creating a change log at the start of the
document can help others quickly identify areas that have been added since they last reviewed the document.
12.3 CHANGING THE DESIGN
If your design takes a change in direction, it is helpful to record the approach taken before and after the design
change, particularly if stakeholders have agreed to the original design or where the decision to change the design
may be reversed later. You can keep a record of the changes by:
Creating a new version of the design document with higher version number
Creating a change log at the start of the design document
Creating an appendix at the end of the design document which includes the original text of the design
The important point is not to be afraid to make changes to your design document if you are changing the policy
model. It is better to keep the design document as an accurate reflection of the policy model than to keep it in its
original pristine state!
12.4 LEARNING FROM THE DESIGN
Once you have completed the rule project, pause to consider whether there is anything you could have done
differently during the design stages so that you can build on your experience for next time.

OPA Guide to Designing a Policy Model
Page 37
USEFUL LINKS
Online Help Guides
Oracle Policy Modeling 10.3.1 User’s Guide: http://download.oracle.com/docs/html/E27551_01/toc.htm
Oracle Policy Automation 10.3.1 Developer’s Guide:
http://download.oracle.com/docs/html/E27555_01/toc.htm
General Information
Oracle Policy Automation on the Oracle Technology Network: http://www.oracle.com/technetwork/apps-
tech/policy-automation/overview/index.html
Oracle Policy Automation 10.3 Features and Benefits: http://www.oracle.com/technetwork/apps-
tech/policy-automation/documentation/opa10-3-features-benefits-451968.pdf
Oracle Policy Automation 10.3.1 System Requirements: http://www.oracle.com/technetwork/apps-
tech/policy-automation/documentation/opa10-3-1-systemreqs-1544140.pdf
Forums
Oracle Policy Automation public forum: https://forums.oracle.com/forums/forum.jspa?forumID=828
Oracle Policy Automation internal product forum:
http://myforums.oracle.com/jive3/forum.jspa?forumID=3918 (accessible by Oracle employees only)