oracle® communications tekelec platform recovery.pdf · a redundant pm&c server or a netbackup...
TRANSCRIPT

Oracle® Communications Tekelec Platform
PM&C Disaster Recovery
Release 6.5
E91173-01
October 2017

E91173 Version 1.0 2 of 31
Oracle Communications Tekelec Platform PM&C Disaster Recovery, Release 6.5
Copyright © 2010, 2018, Oracle and/or its affiliates. All rights reserved.
This software and related documentation are provided under a license agreement containing restrictions on use and disclosure and are protected by intellectual property laws. Except as expressly permitted in your license agreement or allowed by law, you may not use, copy, reproduce, translate, broadcast, modify, license, transmit, distribute, exhibit, perform, publish, or display any part, in any form, or by any means. Reverse engineering, disassembly, or decompilation of this software, unless required by law for interoperability, is prohibited.
The information contained herein is subject to change without notice and is not warranted to be error-free. If you find any errors, please report them to us in writing.
If this is software or related documentation that is delivered to the U.S. Government or anyone licensing it on behalf of the U.S. Government, the following notice is applicable:
U.S. GOVERNMENT END USERS: Oracle programs, including any operating system, integrated software, any programs installed on the hardware, and/or documentation, delivered to U.S. Government end users are "commercial computer software" pursuant to the applicable Federal Acquisition Regulation and agency-specific supplemental regulations. As such, use, duplication, disclosure, modification, and adaptation of the programs, including any operating system, integrated software, any programs installed on the hardware, and/or documentation, shall be subject to license terms and license restrictions applicable to the programs. No other rights are granted to the U.S. Government.
This software or hardware is developed for general use in a variety of information management applications. It is not developed or intended for use in any inherently dangerous applications, including applications that may create a risk of personal injury. If you use this software or hardware in dangerous applications, then you shall be responsible to take all appropriate fail-safe, backup, redundancy, and other measures to ensure its safe use. Oracle Corporation and its affiliates disclaim any liability for any damages caused by use of this software or hardware in dangerous applications.
Oracle and Java are registered trademarks of Oracle and/or its affiliates. Other names may be trademarks of their respective owners.
Intel and Intel Xeon are trademarks or registered trademarks of Intel Corporation. All SPARC trademarks are used under license and are trademarks or registered trademarks of SPARC International, Inc. AMD, Opteron, the AMD logo, and the AMD Opteron logo are trademarks or registered trademarks of Advanced Micro Devices. UNIX is a registered trademark of The Open Group.
This software or hardware and documentation may provide access to or information on content, products, and services from third parties. Oracle Corporation and its affiliates are not responsible for and expressly disclaim all warranties of any kind with respect to third-party content, products, and services. Oracle Corporation and its affiliates will not be responsible for any loss, costs, or damages incurred due to your access to or use of third-party content, products, or services, except as set forth in an applicable agreement between you and Oracle.
CAUTION: Use only the Upgrade procedure included in the Upgrade Kit. Before upgrading any system, please access My Oracle Support (MOS) (https://support.oracle.com) and review any MOS Notes that relate to this upgrade. My Oracle Support (MOS) (https://support.oracle.com) is your initial point of contact for all product support and training needs. A representative at Customer Access Support (CAS) can assist you with MOS registration.
Call the CAS main number at 1-800-223-1711 (toll-free in the US), or call the Oracle Support hotline for your local country from the list at http://www.oracle.com/us/support/contact/index.html.
See more information on MOS in 1.2, My Oracle Support.

E91173 Version 1.0 3 of 31
TABLE OF CONTENTS
1. INTRODUCTION ................................................................................................................................................ 4
1.1 Purpose and Scope .......................................................................................................................................... 4
1.2 My Oracle Support .......................................................................................................................................... 4
1.3 References ....................................................................................................................................................... 4
2. PREREQUISITES ................................................................................................................................................ 6
2.1 Required actions to enable Disaster Recovery ................................................................................................ 6
2.2 Required Tools for PM&C Disaster Recovery procedure ............................................................................... 6
2.3 Network Connections ...................................................................................................................................... 6
3. PM&C DISASTER RECOVERY PROCEDURE ................................................................................................ 7
3.1 Restore PM&C Server From Backup Media ................................................................................................... 7
3.2 Making the Redundant Management Server Primary ................................................................................... 12
3.3 Restore PM&C Server From Backup Server ................................................................................................ 16
APPENDIX A. POST-RESTORATION VERIFICATION ........................................................................................ 23
APPENDIX B. ACCESSING THE PM&C COMMAND PROMPT FROM THE MANAGEMENT SERVER
TVOE CONSOLE ....................................................................................................................................................... 28
APPENDIX C. RESTORE PM&C GUEST DEVICES .............................................................................................. 29

E91173 Version 1.0 4 of 31
1. INTRODUCTION
1.1 Purpose and Scope
In a disaster scenario in which the PM&C application has been lost, the procedures contained herein can be used to recover
the PM&C application to its state at the time of the last backup. The PM&C application backup facility supports backup to
a redundant PM&C Server or a NetBackup Server. If neither of these destinations are available, the backup data can be
manually copied to a generic remote server. This document includes a section covering the additional option of restoring
PM&C functionality on a redundant PM&C Server.
These procedures are intended to be run by Oracle personnel. This document assumes that the user has basic knowledge of
the Management Server hardware, and at least an intermediate skill set with the LINUX environment.
1.2 My Oracle Support
Web portal (preferred option): My Oracle Support (MOS) at https://support.oracle.com/
Phone: +1.800.223.1711 (toll-free in the US),
Or retrieve your local hotline from Oracle Global Customer Support Center at
http://www.oracle.com/us/support/contact/index.html
Make the following selections on the Support telephone menu:
Select 2 for New Service Request
Then select 3 for Hardware, Networking, and Solaris Operating System Support
Then either
Select 1 for Technical Issues,
When talking to the agent, please indicate that you are an existing Tekelec
customer.
Note: Oracle support personnel performing installations or upgrades on a customer site must obtain the
customer Support Identification (SI) number prior to seeking assistance.
OR
Select 2 for Non-Technical Issues, for example, for My Oracle Support (MOS) registration.
When talking to the agent, mention that you are a Tekelec customer new to MOS.
1.3 References
1. PM&C 6.5 Oracle Communications Tekelec Platform Configuration Guide E91175-01, Current Revision.
2. PM&C 6.5 Incremental Upgrade Procedure, E91174-01, Current Revision.
3. TVOE 3.5.x Disaster Recovery Procedure, E80609, Current Revision

E91173 Version 1.0 5 of 31
Table 1: Glossary
Acronym/Term Meaning
Backup Server Server providing backup and recovery services (NetBackup)
iLO Integrated Lights Out (HP RMS remote management port)
ILOM Integrated Lights Out Manager (Oracle RMS remote management port)
IPM Initial Product Manufacturing
ISO The name ISO is taken from the ISO 9660 file system used with CD-ROM media, but an ISO image might also contain a UDF (ISO/IEC 13346) file system.
Management Server The server on which the TVOE environment is installed. This could be:
HP ProLiant DL 360
HP ProLiant DL 380
Oracle RMS (including Netra)
Management Server TVOE
The TVOE running on the Management Server and hosting the PM&C guest.
NetBackup Feature Feature that provides support of the Symantec NetBackup client utility on an application server.
OSDC Oracle Software Delivery Cloud
PM&C Platform Management and Configuration application
RMS Rack Mount Server
Redundant PM&C Server
An optional configuration of a second PM&C Server (Guest) running on the TVOE hypervisor on separate hardware from the Management Server
TPD Tekelec Platform Distribution
TVOE Tekelec Virtualization Operating Environment
E91173 Version 1.0 6 of 31
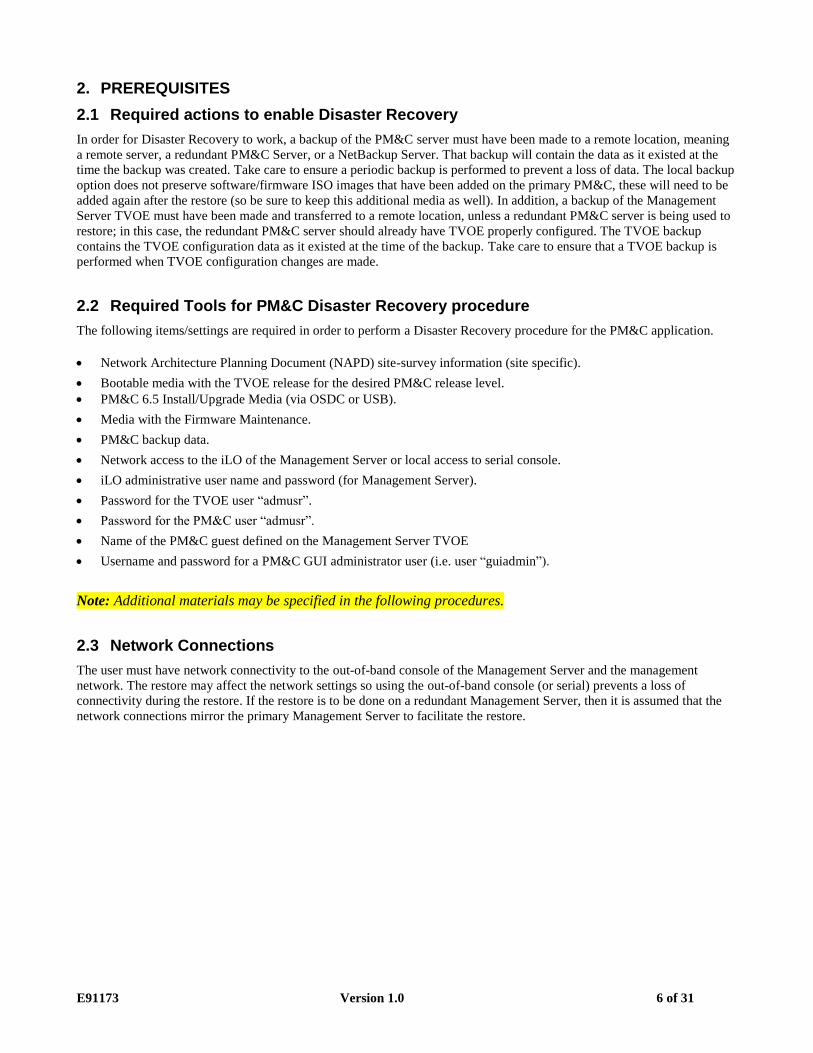
2. PREREQUISITES
2.1 Required actions to enable Disaster Recovery
In order for Disaster Recovery to work, a backup of the PM&C server must have been made to a remote location, meaning
a remote server, a redundant PM&C Server, or a NetBackup Server. That backup will contain the data as it existed at the
time the backup was created. Take care to ensure a periodic backup is performed to prevent a loss of data. The local backup
option does not preserve software/firmware ISO images that have been added on the primary PM&C, these will need to be
added again after the restore (so be sure to keep this additional media as well). In addition, a backup of the Management
Server TVOE must have been made and transferred to a remote location, unless a redundant PM&C server is being used to
restore; in this case, the redundant PM&C server should already have TVOE properly configured. The TVOE backup
contains the TVOE configuration data as it existed at the time of the backup. Take care to ensure that a TVOE backup is
performed when TVOE configuration changes are made.
2.2 Required Tools for PM&C Disaster Recovery procedure
The following items/settings are required in order to perform a Disaster Recovery procedure for the PM&C application.
Network Architecture Planning Document (NAPD) site-survey information (site specific).
Bootable media with the TVOE release for the desired PM&C release level.
PM&C 6.5 Install/Upgrade Media (via OSDC or USB).
Media with the Firmware Maintenance.
PM&C backup data.
Network access to the iLO of the Management Server or local access to serial console.
iLO administrative user name and password (for Management Server).
Password for the TVOE user “admusr”.
Password for the PM&C user “admusr”.
Name of the PM&C guest defined on the Management Server TVOE
Username and password for a PM&C GUI administrator user (i.e. user “guiadmin”).
Note: Additional materials may be specified in the following procedures.
2.3 Network Connections
The user must have network connectivity to the out-of-band console of the Management Server and the management
network. The restore may affect the network settings so using the out-of-band console (or serial) prevents a loss of
connectivity during the restore. If the restore is to be done on a redundant Management Server, then it is assumed that the
network connections mirror the primary Management Server to facilitate the restore.
E91173 Version 1.0 7 of 31
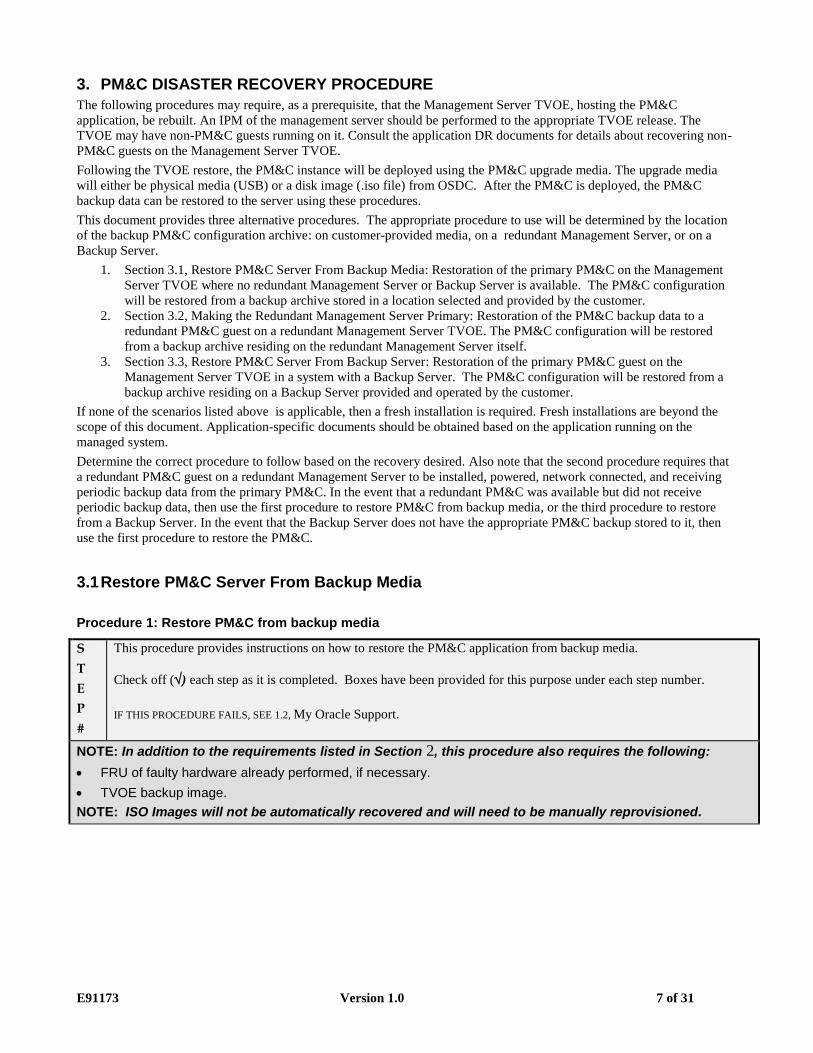
3. PM&C DISASTER RECOVERY PROCEDURE
The following procedures may require, as a prerequisite, that the Management Server TVOE, hosting the PM&C
application, be rebuilt. An IPM of the management server should be performed to the appropriate TVOE release. The
TVOE may have non-PM&C guests running on it. Consult the application DR documents for details about recovering non-
PM&C guests on the Management Server TVOE.
Following the TVOE restore, the PM&C instance will be deployed using the PM&C upgrade media. The upgrade media
will either be physical media (USB) or a disk image (.iso file) from OSDC. After the PM&C is deployed, the PM&C
backup data can be restored to the server using these procedures.
This document provides three alternative procedures. The appropriate procedure to use will be determined by the location
of the backup PM&C configuration archive: on customer-provided media, on a redundant Management Server, or on a
Backup Server.
1. Section 3.1, Restore PM&C Server From Backup Media: Restoration of the primary PM&C on the Management
Server TVOE where no redundant Management Server or Backup Server is available. The PM&C configuration
will be restored from a backup archive stored in a location selected and provided by the customer.
2. Section 3.2, Making the Redundant Management Server Primary: Restoration of the PM&C backup data to a
redundant PM&C guest on a redundant Management Server TVOE. The PM&C configuration will be restored
from a backup archive residing on the redundant Management Server itself.
3. Section 3.3, Restore PM&C Server From Backup Server: Restoration of the primary PM&C guest on the
Management Server TVOE in a system with a Backup Server. The PM&C configuration will be restored from a
backup archive residing on a Backup Server provided and operated by the customer.
If none of the scenarios listed above is applicable, then a fresh installation is required. Fresh installations are beyond the
scope of this document. Application-specific documents should be obtained based on the application running on the
managed system.
Determine the correct procedure to follow based on the recovery desired. Also note that the second procedure requires that
a redundant PM&C guest on a redundant Management Server to be installed, powered, network connected, and receiving
periodic backup data from the primary PM&C. In the event that a redundant PM&C was available but did not receive
periodic backup data, then use the first procedure to restore PM&C from backup media, or the third procedure to restore
from a Backup Server. In the event that the Backup Server does not have the appropriate PM&C backup stored to it, then
use the first procedure to restore the PM&C.
3.1 Restore PM&C Server From Backup Media
Procedure 1: Restore PM&C from backup media
S
T
E
P
#
This procedure provides instructions on how to restore the PM&C application from backup media.
Check off () each step as it is completed. Boxes have been provided for this purpose under each step number.
IF THIS PROCEDURE FAILS, SEE 1.2, My Oracle Support.
NOTE: In addition to the requirements listed in Section 2, this procedure also requires the following:
FRU of faulty hardware already performed, if necessary.
TVOE backup image.
NOTE: ISO Images will not be automatically recovered and will need to be manually reprovisioned.

E91173 Version 1.0 8 of 31
Procedure 1: Restore PM&C from backup media
1.
Upgrade the Management Server firmware.
Check each box as it is completed.
Using the sections listed below from reference 1 [ E91175-01], upgrade the Management Server firmware in accordance with the checklist shown:
□ “Upgrade Management Server Firmware / DL360/DL380 Server”
-OR-
□ “Upgrade Management Server Firmware / Oracle Rack Mount Server”
2.
Restore the Management Server TVOE.
Check each box as it is completed.
Using the sections listed below from reference 3 [E80609], restore the Management Server TVOE in accordance with the checklist shown:
□ “Restore TVOE configuration from backup media”
When asked to verify the correct storage pools, ensure “vgguests” appears in the list as shown below:
[admusr@tvoe ~]$ sudo virsh -c "qemu:///system" pool-list Name State Autostart
-----------------------------------------
vgguests active yes
[admusr@tvoe ~]$

E91173 Version 1.0 9 of 31
Procedure 1: Restore PM&C from backup media
3.
Deploy the PM&C guest application.
Check each box as it is completed.
Using the sections listed below from reference 1 [ E91175-01], deploy the PM&C guest application in accordance with the checklist shown.
To deploy the PM&C guest:
□ Procedure “Deploy PM&C Guest”
NOTE: If this is a dual-stack (IPv4 / IPv6) installation, you can use either IPv4 or IPv6 addresses in the pmac-deploy command. The subsequent restoration of the PM&C database will re-establish both IPv4 and IPv6 addresses.
To verify the deployment:
□ Procedure “Setup PM&C” Step “TVOE Management Server iLO: Login to the management server on the remote console”
□ Procedure “Setup PM&C” Step “Log in with PM&C admusr credentials”
□ Procedure “Setup PM&C” Step “Verify the PM&C configured correctly on first boot.”
□ Procedure “Setup PM&C” Step “Perform a system healthcheck on PM&C”
□ Procedure “Setup PM&C” Step “Verify the PM&C application release”
□ Procedure “Setup PM&C” Step “Logout of the virsh console”
□ Procedure “Setup PM&C” Step “Management Server iLO: Exit the TVOE console.”
4.
Connect to the iLO/ILOM of the Management Server
Using the Appendix “How to Access a Server Console Remotely” in reference 1 [E91175-01], establish a connection to the iLO console of the Management Server.
5.
Log in to the TVOE host on the Management Server.
Log in to the TVOE console as user “admusr”:
login as: admusr
Password:
Last login: Thu Sep 24 19:40:52 2015 from 10.154.124.23
[admusr@tvoe ~]$
6.
Log in to the PM&C guest.
Using 3.3Appendix B of this document, “Accessing the PM&C Command Prompt from the Management Server TVOE Console”, log in to the PM&C guest console.

E91173 Version 1.0 10 of 31
Procedure 1: Restore PM&C from backup media
7.
Copy the PM&C backup file to the /var/TKLC/smac /backup/ directory on the PM&C guest.
Copy the appropriate backup file from the remote backup location to the deployed PM&C. There are too many possible backup scenarios to cover them all here.
The example below is a simple scp from a remote backup location.
NOTE: The remote user must have proper permissions to read the file on the remote server.
If using IPv6 addresses, command requires shell escapes, e.g. admusr@[<ipV6addr>]:/<file>
[admusr@pmac-07360004-a ~]$ sudo /usr/bin/scp -p \
user@remoteserver:/backup/<backup_file.pef> \
/var/TKLC/smac/backup/
[admusr@pmac-07360004-a ~]$
NOTE: It is important to copy the correct backup file to use in the restore.
NOTE: By default, PM&C restore uses the most recent file in /var/TKLC/smac/backup that starts with “backupPmac_”. If the name of the file copied to the system uses a different name or is not the most recent, then provide the name using the --fileName parameter.
8.
Run alarmMgr. The alarmMgr, command output should display no failures.
NOTE: Output similar to that shown will appear on the terminal window.
[admusr@pmac ~]$ sudo /usr/TKLC/plat/bin/alarmMgr --alarmStatus
[admusr@pmac ~]$
NOTE: If the output of alarmMgr is not empty, see 1.2, My Oracle Support.
9.
From the command prompt of the PM&C guest, restore the PM&C data from backup.
NOTE: Output similar to that shown will appear on the terminal window.
[admusr@pmac-07360004-a ~]$ sudo /usr/TKLC/smac/bin/pmacadm restore
PM&C Restore been successfully initiated as task ID 1
NOTE: The restore runs as a background task. To check the status of the background task, issue the command “sudo /usr/TKLC/smac/bin/pmaccli getBgTasks”. The result should eventually be PM&C Restore successful.
NOTE: If more than one backup archive exists in the “/var/TKLC/smac/backup” directory, and the operator does not wish to restore from the latest backup, the operator must use the “--fileName” option to identify the backup archive of interest. When using the “--fileName” option, the directory path of the backup should be included in the file name.
10.
Verify the status of the PM&C application.
Perform steps in Appendix A Post-Restoration Verification to verify the successful restoration of the data.
NOTE: If after the restoration of the PM&C, provisioned data does not represent the correct data, see 1.2, My Oracle Support.

E91173 Version 1.0 11 of 31
Procedure 1: Restore PM&C from backup media
11.
Re-add required Software Images.
If needed, use the Adding ISO Images to the PM&C Image Repository procedure in reference 1 [E91175-01] to provision any required ISO images.
Procedure 1 has been completed.
E91173 Version 1.0 12 of 31
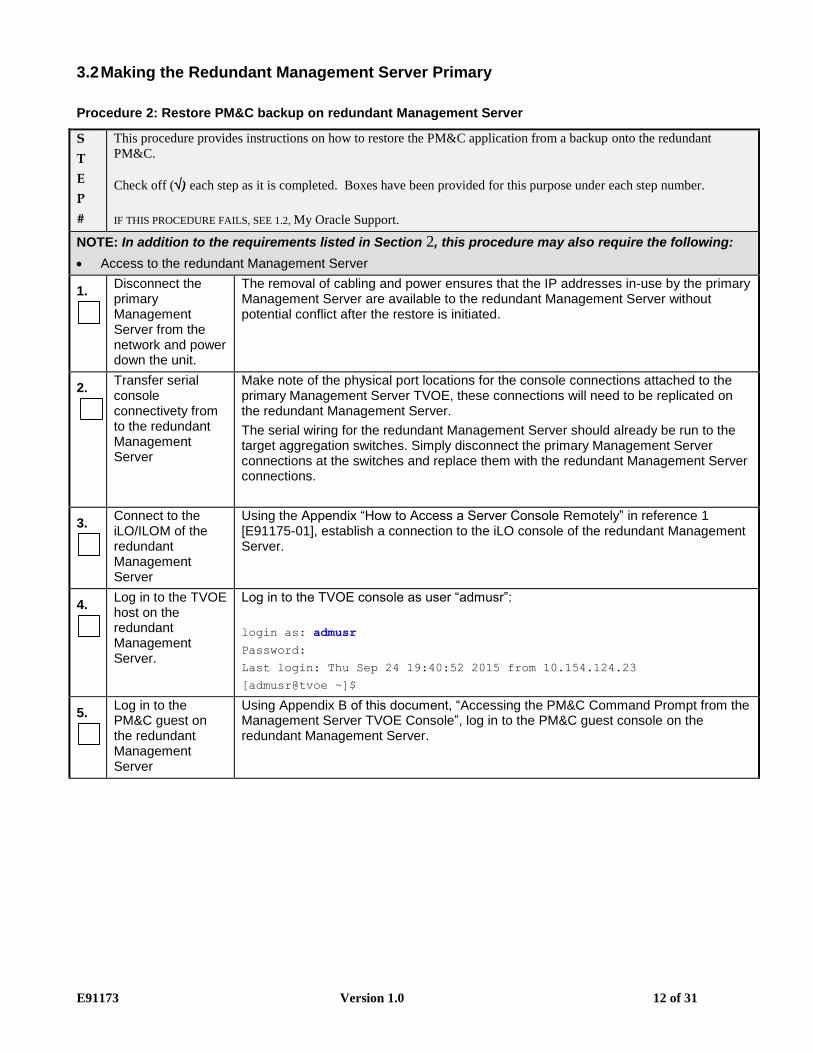
3.2 Making the Redundant Management Server Primary
Procedure 2: Restore PM&C backup on redundant Management Server
S
T
E
P
#
This procedure provides instructions on how to restore the PM&C application from a backup onto the redundant
PM&C.
Check off () each step as it is completed. Boxes have been provided for this purpose under each step number.
IF THIS PROCEDURE FAILS, SEE 1.2, My Oracle Support.
NOTE: In addition to the requirements listed in Section 2, this procedure may also require the following:
Access to the redundant Management Server
1.
Disconnect the primary Management Server from the network and power down the unit.
The removal of cabling and power ensures that the IP addresses in-use by the primary Management Server are available to the redundant Management Server without potential conflict after the restore is initiated.
2.
Transfer serial console connectivety from to the redundant Management Server
Make note of the physical port locations for the console connections attached to the primary Management Server TVOE, these connections will need to be replicated on the redundant Management Server.
The serial wiring for the redundant Management Server should already be run to the target aggregation switches. Simply disconnect the primary Management Server connections at the switches and replace them with the redundant Management Server connections.
3.
Connect to the iLO/ILOM of the redundant Management Server
Using the Appendix “How to Access a Server Console Remotely” in reference 1 [E91175-01], establish a connection to the iLO console of the redundant Management Server.
4.
Log in to the TVOE host on the redundant Management Server.
Log in to the TVOE console as user “admusr”:
login as: admusr
Password:
Last login: Thu Sep 24 19:40:52 2015 from 10.154.124.23
[admusr@tvoe ~]$
5.
Log in to the PM&C guest on the redundant Management Server
Using Appendix B of this document, “Accessing the PM&C Command Prompt from the Management Server TVOE Console”, log in to the PM&C guest console on the redundant Management Server.

E91173 Version 1.0 13 of 31
Procedure 2: Restore PM&C backup on redundant Management Server
6.
Validate the release.
NOTE: Output similar to that shown will appear on the terminal window.
NOTE: It is expected that the redundant Manager Server is kept in sync with the primary Management Server as a regular part of the upgrade procedure.
Verify the redundant Management Server release matches what the primary Management Server had installed. If not, then the redundant Management Server needs upgrading.
[admusr@pmac ~]$ sudo /usr/TKLC/plat/bin/appRev
Install Time: Tue Sep 15 12:50:26 2015
Product Name: PMAC
Product Release: 6.5.0.0.0_65.9.0
Base Distro Product: TPD
Base Distro Release: 7.5.0.0.0_88.44.0
Base Distro ISO: TPD.install-7.5.0.0.0_88.44.0-OracleLinux6.9-
x86_64.iso
ISO name: PMACBLD-6.5.0.0.0_65.9.0.iso
OS: OracleLinux 6.9
Verify that the displayed release number matches that of the primary Management Server, if not, follow steps below:
Using the sections listed below from the PM&C 6.5 Incremental Upgrade procedure [E91173-01], upgrade the Management Server PM&C application in accordance with the checklist shown:
□ “PM&C Upgrade Procedure on the redundant PM&C”
□ “Post Upgrade Verification on the redundant PM&C”

E91173 Version 1.0 14 of 31
Procedure 2: Restore PM&C backup on redundant Management Server
7.
Set the hostname to match that of the primary PM&C server.
Reconfigure the hostname of this server to be the same as that of the PM&C guest it is replacing.
Log in to the CLI of the redundant PM&C guest server as the user “admusr”, using the PM&C admusr password. Run the following command:
[admusr@pmac ~]$ sudo /bin/su - platcfg
Highlight the “Server Configuration“ option and press enter.
Highlight the “Hostname“ option and press enter.
Select “Edit“ and press enter.
Change the hostname and select “OK“.
Exit the platcfg tool.
In this case, the hostname has been set to “pmac-07360004-a“ to match the hostname saved with the backup.
8.
Run alarmMgr. The alarmMgr, command output should display no failures.
NOTE: Output similar to that shown will appear on the terminal window.
[admusr@pmac ~]$ sudo /usr/TKLC/plat/bin/alarmMgr --alarmStatus
[admusr@pmac ~]$
NOTE: If the output of alarmMgr is not empty, see 1.2, My Oracle Support.
E91173 Version 1.0 15 of 31
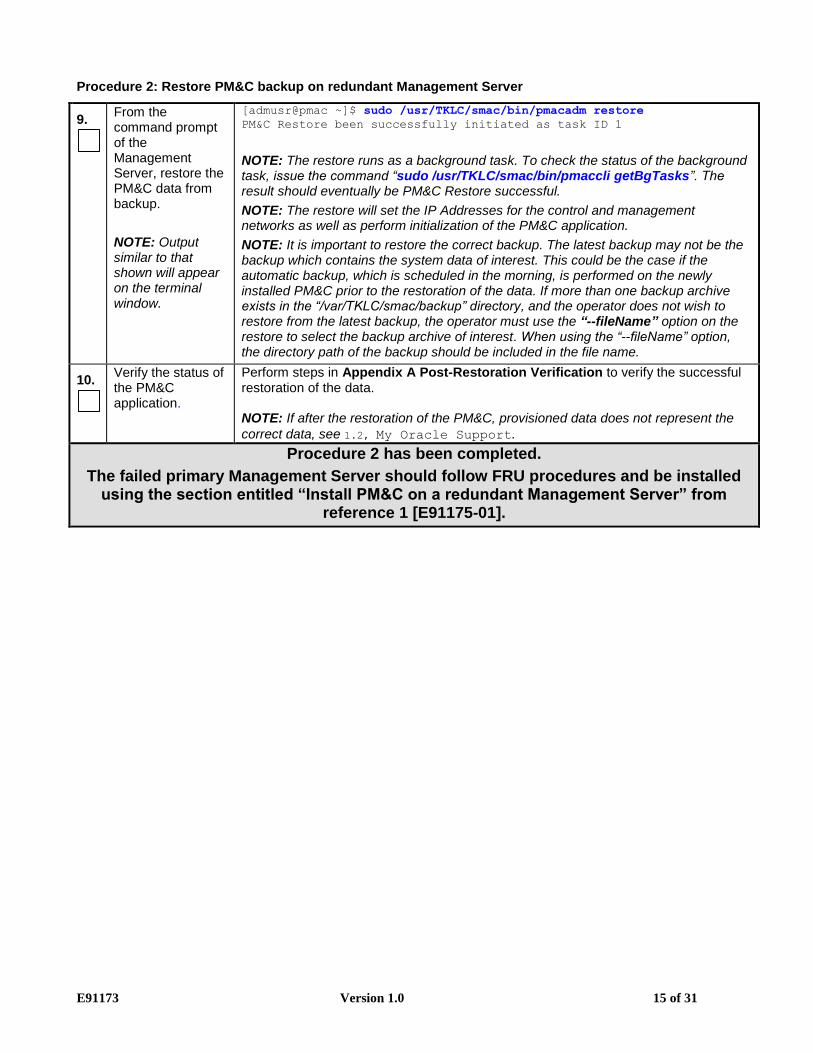
Procedure 2: Restore PM&C backup on redundant Management Server
9.
From the command prompt of the Management Server, restore the PM&C data from backup.
NOTE: Output similar to that shown will appear on the terminal window.
[admusr@pmac ~]$ sudo /usr/TKLC/smac/bin/pmacadm restore
PM&C Restore been successfully initiated as task ID 1
NOTE: The restore runs as a background task. To check the status of the background task, issue the command “sudo /usr/TKLC/smac/bin/pmaccli getBgTasks”. The result should eventually be PM&C Restore successful.
NOTE: The restore will set the IP Addresses for the control and management networks as well as perform initialization of the PM&C application.
NOTE: It is important to restore the correct backup. The latest backup may not be the backup which contains the system data of interest. This could be the case if the automatic backup, which is scheduled in the morning, is performed on the newly installed PM&C prior to the restoration of the data. If more than one backup archive exists in the “/var/TKLC/smac/backup” directory, and the operator does not wish to restore from the latest backup, the operator must use the “--fileName” option on the restore to select the backup archive of interest. When using the “--fileName” option, the directory path of the backup should be included in the file name.
10.
Verify the status of the PM&C application.
Perform steps in Appendix A Post-Restoration Verification to verify the successful restoration of the data. NOTE: If after the restoration of the PM&C, provisioned data does not represent the
correct data, see 1.2, My Oracle Support.
Procedure 2 has been completed.
The failed primary Management Server should follow FRU procedures and be installed using the section entitled “Install PM&C on a redundant Management Server” from
reference 1 [E91175-01].

E91173 Version 1.0 16 of 31
3.3 Restore PM&C Server From Backup Server
Procedure 3: Restore PM&C Server From Backup Server
S
T
E
P
#
This procedure provides instructions on how to restore the PM&C application from a Backup Sever.
Check off () each step as it is completed. Boxes have been provided for this purpose under each step number.
IF THIS PROCEDURE FAILS, SEE 1.2, My Oracle Support.
NOTE: In addition to the requirements listed in Section 2, this procedure also requires the following:
FRU of faulty hardware already performed, if necessary.
Backup Server configured to service PM&C Management Server backup client, the backup server network data, and appropriate backup server user and user password.
TVOE backup image.
1.
Upgrade the Management Server firmware.
Check each box as it is completed.
Using the sections listed below from reference 1 [E91175-01], upgrade the Management Server firmware in accordance with the checklist shown:
□ “Upgrade Management Server Firmware / DL360/DL380 Server”
-OR-
□ “Upgrade Management Server Firmware / Oracle Rack Mount Server”
2.
Restore the Management Server TVOE.
Check each box as it is completed.
Using the sections listed below from reference 2, [E91174-01], restore the Management Server TVOE in accordance with the checklist shown:
□ “Restore TVOE configuration from backup media”

E91173 Version 1.0 17 of 31
Procedure 3: Restore PM&C Server From Backup Server
3.
Deploy the PM&C guest application.
Check each box as it is completed.
Using the sections listed below from reference 1 [E91175-01], deploy the PM&C guest application in accordance with the checklist shown.
To deploy the PM&C guest:
□ “Deploy PM&C Guest”
NOTE: If this is a dual-stack (IPv4 / IPv6) installation, you can use either IPv4 or IPv6 addresses in the pmac-deploy command. The subsequent restoration of the PM&C database will re-establish both IPv4 and IPv6 addresses.
NOTE: This procedure is for restoring from a NetBackup server, so specify the appropriate options when deploying PM&C for use with NetBackup.
To verify the deployment:
□ Procedure “Setup PM&C” Step “TVOE Management Server iLO: Login to the management server on the remote console”
□ Procedure “Setup PM&C” Step “Log in with PM&C admusr credentials”
□ Procedure “Setup PM&C” Step “Verify the PM&C configured correctly on first boot.”
□ Procedure “Setup PM&C” Step “Perform a system healthcheck on PM&C”
□ Procedure “Setup PM&C” Step “Verify the PM&C application release”
□ Procedure “Setup PM&C” Step “Logout of the virsh console”
□ Procedure “Setup PM&C” Step “Management Server iLO: Exit the TVOE console.”
4.
Connect to the iLO/ILOM of the Management Server
Using the Appendix “How to Access a Server Console Remotely” of reference 1 [E91175-01], establish a connection to the iLO console of the Management Server.
5.
Log in to the TVOE host on the Management Server.
Log in to the TVOE console as user “admusr”:
login as: admusr
Password:
Last login: Thu Sep 24 19:40:52 2015 from 10.154.124.23
[admusr@tvoe ~]$

E91173 Version 1.0 18 of 31
Procedure 3: Restore PM&C Server From Backup Server
6.
Log in to the PM&C guest.
Using Appendix B of this document, “Accessing the PM&C Command Prompt from the Management Server TVOE Console”, log in to the PM&C guest console.
E91173 Version 1.0 19 of 31
Procedure 3: Restore PM&C Server From Backup Server
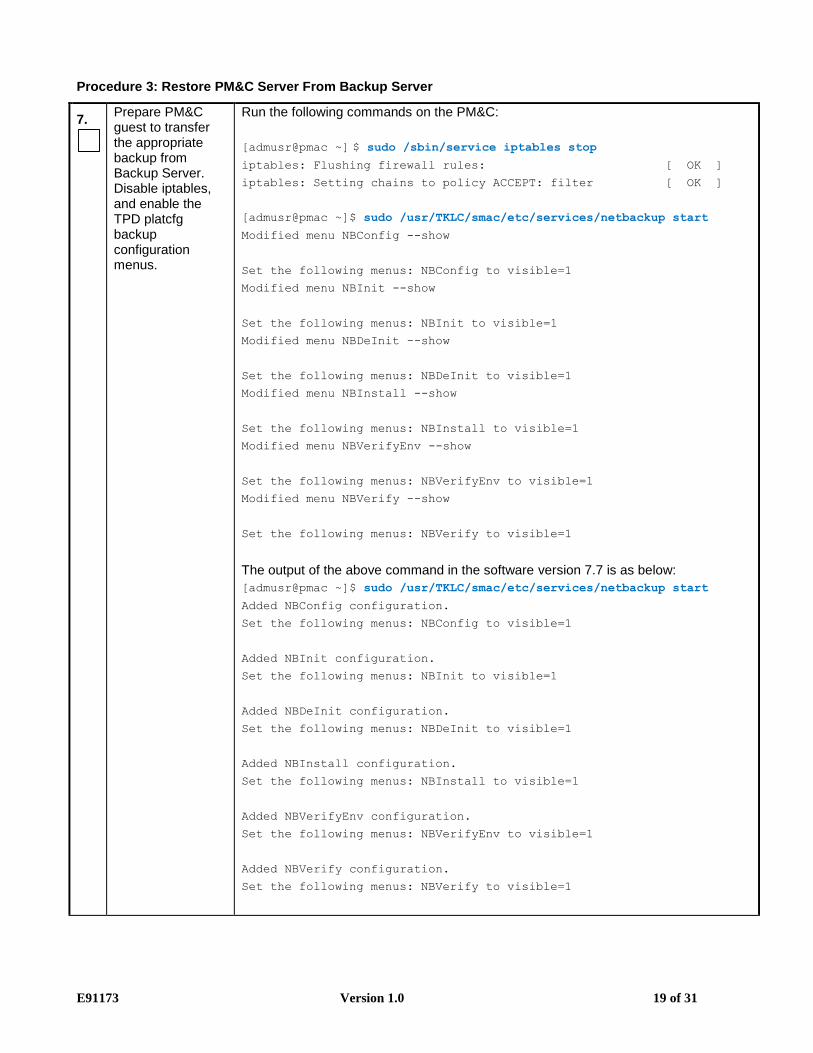
7.
Prepare PM&C guest to transfer the appropriate backup from Backup Server. Disable iptables, and enable the TPD platcfg backup configuration menus.
Run the following commands on the PM&C:
[admusr@pmac ~] $ sudo /sbin/service iptables stop
iptables: Flushing firewall rules: [ OK ]
iptables: Setting chains to policy ACCEPT: filter [ OK ]
[admusr@pmac ~]$ sudo /usr/TKLC/smac/etc/services/netbackup start
Modified menu NBConfig --show
Set the following menus: NBConfig to visible=1
Modified menu NBInit --show
Set the following menus: NBInit to visible=1
Modified menu NBDeInit --show
Set the following menus: NBDeInit to visible=1
Modified menu NBInstall --show
Set the following menus: NBInstall to visible=1
Modified menu NBVerifyEnv --show
Set the following menus: NBVerifyEnv to visible=1
Modified menu NBVerify --show
Set the following menus: NBVerify to visible=1
The output of the above command in the software version 7.7 is as below:
[admusr@pmac ~]$ sudo /usr/TKLC/smac/etc/services/netbackup start
Added NBConfig configuration.
Set the following menus: NBConfig to visible=1
Added NBInit configuration.
Set the following menus: NBInit to visible=1
Added NBDeInit configuration.
Set the following menus: NBDeInit to visible=1
Added NBInstall configuration.
Set the following menus: NBInstall to visible=1
Added NBVerifyEnv configuration.
Set the following menus: NBVerifyEnv to visible=1
Added NBVerify configuration.
Set the following menus: NBVerify to visible=1

E91173 Version 1.0 20 of 31
Procedure 3: Restore PM&C Server From Backup Server
8.
Verify the TPD platcfg backup menus are visible, then exit the TPD platcfg utility.
[admusr@pmac-07360004-a ~]$ sudo /bin/su – platcfg
NOTE: In the example image above of the TPD platcfg utility Main Menu the backup menu is identified as “NetBackup Configuration”.
[admusr@pmac ~]$
9.
Verify the iptables rules are disabled on the PM&C guest.
[admusr@pmac ~]$ sudo /sbin/iptables –nL
Chain INPUT (policy ACCEPT)
target prot opt source destination
Chain FORWARD (policy ACCEPT)
target prot opt source destination
Chain OUTPUT (policy ACCEPT)
target prot opt source destination
10.
Install backup utility client software on the PM&C guest.
Using the sections listed below from the reference 1, E91175-01, configure the Management Server and reinstall the NetBackup client in accordance with the checklist shown:
□ “PM&C NetBackup Client Installation and Configuration”
NOTE: When executing the “PM&C NetBackup Client Installation and Configuration” procedure, start at step 4. The “Initialize PM&C Application” and “Configure PM&C application” prerequisites can be ignored.

E91173 Version 1.0 21 of 31
Procedure 3: Restore PM&C Server From Backup Server
11.
At Backup Server, verify the appropriate PM&C backup exists.
This step will likely be executed by customer IT personnel.
Log in to the Backup Server as the appropriate user, using the user password.
Execute the appropriate commands to verify the PM&C backup exists for the desired date.
NOTE: If the appropriate backup does not exist on the Backup Server, perform the restore using 3.1, Restore PM&C Server From Backup Media.
NOTE: The actions and commands required to verify that the PM&C backups exist and the commands required to perform backup and restore on the Backup Server are the responsibility of the site customer.
NOTE: It is important to choose the correct backup file to use in the restore. The latest backup may not be the backup which contains the system data of interest. This could be the case if the automatic backup, which is scheduled in the morning, is performed on the newly installed PM&C prior to the restoration of the data.
12.
At the Backup Server restore the PM&C backup file to the /var/TKLC/smac
/backup/
directory on the PM&C.
This step will likely be executed by customer IT personnel.
Log in to the Backup Server as the appropriate user, using the user password.
Execute the appropriate commands to restore the PM&C Management Server backup for the desired date.
NOTE: The actions, and commands, required to verify the PM&C backups exist, and the commands required to perform backup and restore on the Backup Server are the responsibility of the site customer.
13.
Run alarmMgr. The alarmMgr, command output should display no failures.
NOTE: Output similar to that shown will appear on the terminal window.
[admusr@pmac ~]$ sudo /usr/TKLC/plat/bin/alarmMgr --alarmStatus
[admusr@pmac ~]$
E91173 Version 1.0 22 of 31
Procedure 3: Restore PM&C Server From Backup Server
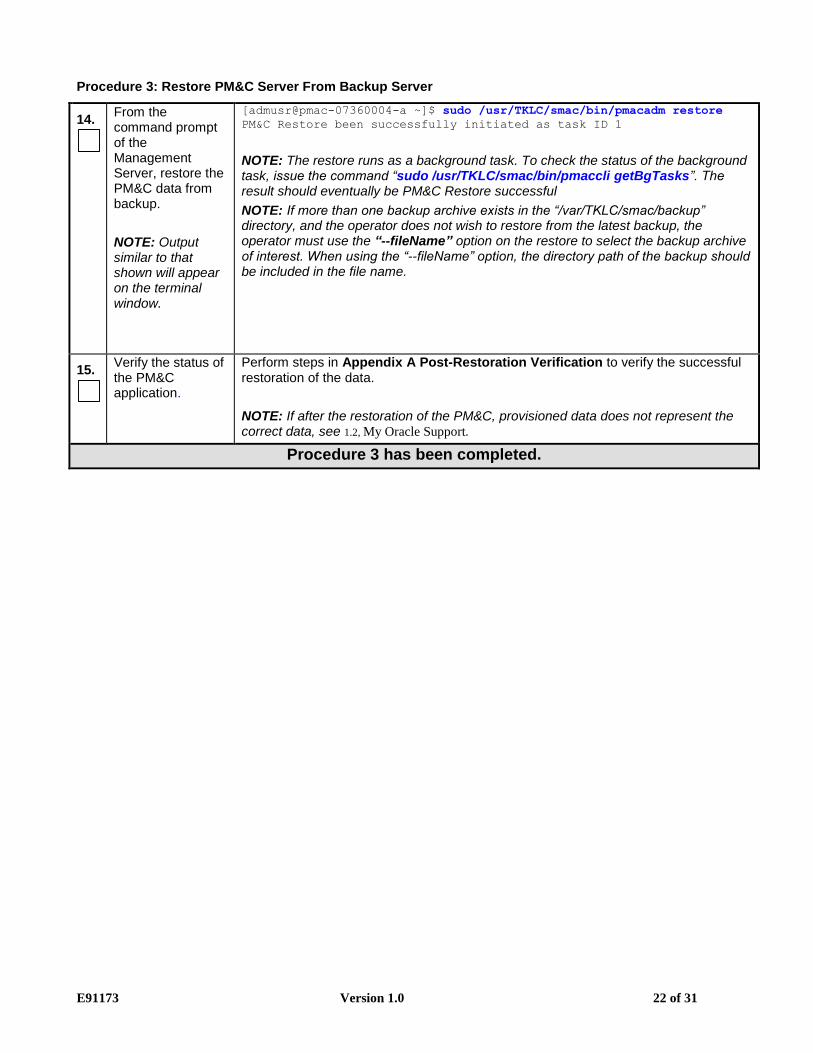
14.
From the command prompt of the Management Server, restore the PM&C data from backup.
NOTE: Output similar to that shown will appear on the terminal window.
[admusr@pmac-07360004-a ~]$ sudo /usr/TKLC/smac/bin/pmacadm restore
PM&C Restore been successfully initiated as task ID 1
NOTE: The restore runs as a background task. To check the status of the background task, issue the command “sudo /usr/TKLC/smac/bin/pmaccli getBgTasks”. The result should eventually be PM&C Restore successful
NOTE: If more than one backup archive exists in the “/var/TKLC/smac/backup” directory, and the operator does not wish to restore from the latest backup, the operator must use the “--fileName” option on the restore to select the backup archive of interest. When using the “--fileName” option, the directory path of the backup should be included in the file name.
15.
Verify the status of the PM&C application.
Perform steps in Appendix A Post-Restoration Verification to verify the successful restoration of the data.
NOTE: If after the restoration of the PM&C, provisioned data does not represent the correct data, see 1.2, My Oracle Support.
Procedure 3 has been completed.

E91173 Version 1.0 23 of 31
Appendix A. Post-Restoration Verification
Procedure 4: Post-restoration verification
S
T
E
P
#
This procedure provides instructions on how to verify the PM&C configuration following the restoration procedure.
Check off () each step as it is completed. Boxes have been provided for this purpose under each step number.
IF THIS PROCEDURE FAILS, SEE 1.2, My Oracle Support.
NOTE: This procedure assumes the restoration steps have been completed.
1.
Log in to the PM&C GUI.
If necessary, open web browser and enter: https://{PM&C Guest Server ip}
Login with administrator credentials.
2.
Verify the Restore Task completes.
Navigate to the Task Monitoring page on the menu. Verify that the restore background task completes successfully. NOTE: After the restore is complete, you should see “Add Enclosure” tasks start for all previously provisioned enclosures. These should be allowed to complete before continuing. NOTE: After the restore is complete, you may see some tasks mentioning ISO images being deleted. This is normal behavior when executing Procedure 1. These ISO images may be re-provisioned manually.

E91173 Version 1.0 24 of 31
3.
Connect to the iLO/ILOM of the Management Server
Using the Appendix “How to Access a Server Console Remotely” in reference 1 [E91175-01], establish a connection to the iLO console of the Management Server.
4.
Log in to the TVOE host on the Management Server.
Log in to the TVOE console as user “admusr”:
login as: admusr
Password:
Last login: Thu Sep 24 19:40:52 2015 from 10.154.124.23
[admusr@tvoe ~]$
5.
Log in to the PM&C guest.
Using Appendix B of this document, “Accessing the PM&C Command Prompt from the Management Server TVOE Console”, log in to the PM&C guest console.
6.
Check for missing interfaces
If interfaces other than the control and management interfaces existed, they must be manually recreated. From the PM&C guest, verify no configured but not active devices exists, such as the highlighted example below. Typically, this is a netBackup dedicated device.
[admusr@pmac ~]$ sudo /sbin/service network status Configured devices:
lo control management otherdevice
Currently active devices:
lo control management
[admusr@pmac ~]$
Use Appendix C of this document if a missing device must be recreated. Note the name shown, it must be used as the guest device name.
7.
Verify the status of the PM&C application.
NOTE: Output similar to that shown will appear on the terminal window.
[admusr@pmac ~]$ sudo /usr/TKLC/smac/bin/sentry status
sending status command...
PM&C Sentry Status
------------------
sentryd started: Thu May 31 13:56:47 2012
Current activity mode: ACTIVE
Process PID Status StartTS NumR
------------------ ------ ----------- ------------------------- ----
smacTalk 21423 running Thu May 31 13:56:47 2012 1
smacMon 21448 running Thu May 31 13:56:47 2012 1
hpiPortAudit 21471 running Thu May 31 13:56:47 2012 1
snmpEventHandler 21494 running Thu May 31 13:56:47 2012 1
Mon Jun 11 13:26:50 2012
Command Complete.
[admusr@pmac ~]$
8.
Run alarmMgr. The alarmMgr, command output should display no failures.
NOTE: Output similar to that shown will appear on the terminal window.
[admusr@pmac ~]$ sudo /usr/TKLC/plat/bin/alarmMgr --alarmStatus
[admusr@pmac ~]$

E91173 Version 1.0 25 of 31
9.
Verify the connectivity to the aggregate switches.
Execute Procedure 5: Post-Restoration Verification for Aggregate Switches in Appendix A to verify the connectivity to the aggregate switches.
10.
Exit the command line session
[admusr@pmac ~]$ exit
11.
Verify the System Inventory looks correct through the PM&C GUI.
NOTE: Output similar to that shown will appear on the terminal window.
NOTE: The hardware discovery may take some time to complete. The screen capture assumes discovery is complete for all enclosures.
Select the System Inventory node and verify the previously provisioned enclosures are present.
12.
Verify Software Images
NOTE: Output similar to that shown will appear on the terminal window.
Navigate to the Manage Software Images GUI to verify all images that you wish to have are available for installation/upgrade.
NOTE: If this was a restore performed by following Procedure 1, ISO images will need to be added manually.
13. Verify the Software Inventory looks
Using the main menu, navigate to Software → Software Inventory page.

E91173 Version 1.0 26 of 31
correct through the PM&C GUI.
NOTE: The software discovery may take some time to complete. The screen capture assumes discovery is complete.
Verify that all the servers (blades, RMS, VMs) are listed and have the details filled in (assuming TVOE or TPD is installed on the server).
Procedure complete, return to calling procedure.
Procedure 5: Post-Restoration Verification for Switches
S
T
E
P
#
This procedure provides instructions on how to verify the connectivity to the switches, and console access to aggregation switches following the restoration procedure.
Check off () each step as it is completed. Boxes have been provided for this purpose under each step number.
IF THIS PROCEDURE FAILS, SEE 1.2, My Oracle Support.
NOTE: This procedure assumes the restoration steps have been completed, and the netConfig repository for the switches are accurate.
1.
From the PM&C login, test network access to all switches
The netConfig validate command will test netConfig access to all managed switches. The command should display 1 “Validating …” line per device showing the switch hostname.
[admusr@pmac ~]$ sudo netConfig --repo validate
Validating aggA...
Validating aggB...
Validating bay1R...
Validating bay2R...
[admusr@pmac ~]$
NOTE: If any “Failed to connect” error messages are displayed, see 1.2, My Oracle
Support.
2.
List aggregation switches
If the system has aggregation switches with console access, continue with this step. Otherwise this procedure is complete.
The netConfig listDevices command displays all devices. Only the 4948 “Model” aggregation devices need to be identified
1. The “Device” names will be used in the
next step. The example below identifies “aggA”.
[admusr@pmac ~]$ sudo netConfig --repo listDevices
Device: aggA
Vendor: Cisco
1 If there are many devices, the output may be reduced by appending “ | grep –B2 4948” to the command
E91173 Version 1.0 27 of 31
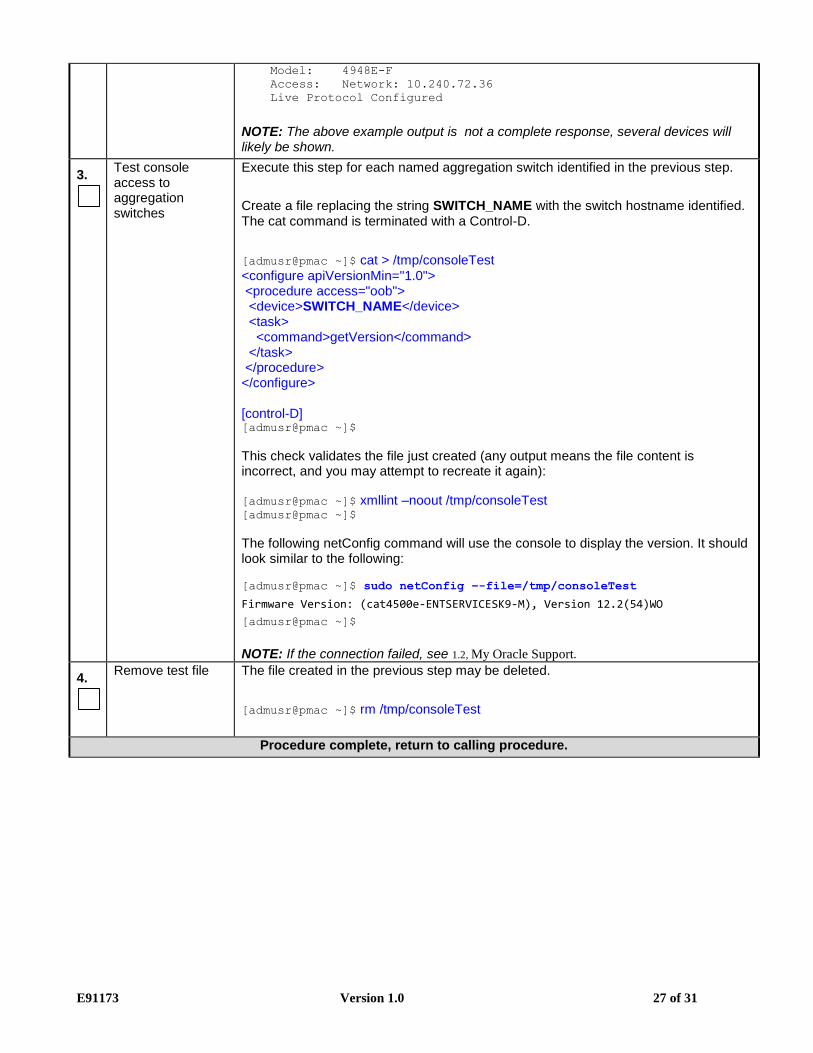
Model: 4948E-F
Access: Network: 10.240.72.36
Live Protocol Configured
NOTE: The above example output is not a complete response, several devices will likely be shown.
3.
Test console access to aggregation switches
Execute this step for each named aggregation switch identified in the previous step.
Create a file replacing the string SWITCH_NAME with the switch hostname identified. The cat command is terminated with a Control-D.
[admusr@pmac ~]$ cat > /tmp/consoleTest
<configure apiVersionMin="1.0"> <procedure access="oob"> <device>SWITCH_NAME</device> <task> <command>getVersion</command> </task> </procedure> </configure> [control-D] [admusr@pmac ~]$
This check validates the file just created (any output means the file content is incorrect, and you may attempt to recreate it again):
[admusr@pmac ~]$ xmllint –noout /tmp/consoleTest [admusr@pmac ~]$
The following netConfig command will use the console to display the version. It should look similar to the following:
[admusr@pmac ~]$ sudo netConfig –-file=/tmp/consoleTest
Firmware Version: (cat4500e-ENTSERVICESK9-M), Version 12.2(54)WO
[admusr@pmac ~]$
NOTE: If the connection failed, see 1.2, My Oracle Support.
4.
Remove test file The file created in the previous step may be deleted.
[admusr@pmac ~]$ rm /tmp/consoleTest
Procedure complete, return to calling procedure.

E91173 Version 1.0 28 of 31
Appendix B. Accessing the PM&C Command Prompt from the Management Server TVOE Console
Procedure 6. Accessing the PM&C Command Prompt from the Management Server TVOE Console
S
T
E
P
#
This procedure provides instructions on how to access the PM&C command prompt from the TVOE command prompt.
NOTE: Be sure to capture a log of all lines appearing on the screen on the laptop, desktop, or other computer used when executing this procedure.
Check off () each step as it is completed. Boxes have been provided for this purpose under each step number.
IF THIS PROCEDURE FAILS, SEE 1.2, My Oracle Support.
1. 1
Determine the
name of the
PM&C guest
At the TVOE console, list the guests and locate the one representing the PM&C:
[admusr@tvoe ~]$ sudo /usr/bin/virsh list
Id Name State
----------------------------------------------------
11 pmac-07360004-a running
[admusr@tvoe ~]$
2. 1
Log in to the
PM&C guest At the TVOE console, log in to the console of the PM&C guest using the guest name from the previous step. It may be necessary to press return to get a login prompt. Log in to the PM&C console as usr “admusr”:
[admusr@tvoe]$ sudo /usr/bin/virsh console pmac-07360004-a
Connected to domain pmac-07360004-a
Escape character is ^]
Oracle Linux Server release 6.6
Kernel 2.6.32-504.23.4.el6prerel7.2.0.0.0_88.6.0.x86_64 on an
x86_64
pmac-07360004-a login: admusr
Password:
Last login: Fri Sep 25 16:04:57 from 10.25.81.98
[admusr@pmac-07360004-a ~]$
3. 1
Return to the
procedure which
referred you.
Return to the next step in the referring procedure.
The procedure has been completed.
E91173 Version 1.0 29 of 31
Appendix C. Restore PM&C Guest Devices
Procedure 7. Create guest interface
S
T
E
P
#
This procedure provides instructions on how to create the guest device on a PM&C
NOTE: Be sure to capture a log of all lines appearing on the screen on the laptop, desktop, or other computer used when executing this procedure.
Check off () each step as it is completed. Boxes have been provided for this purpose under each step number.
IF THIS PROCEDURE FAILS, SEE 1.2, My Oracle Support.
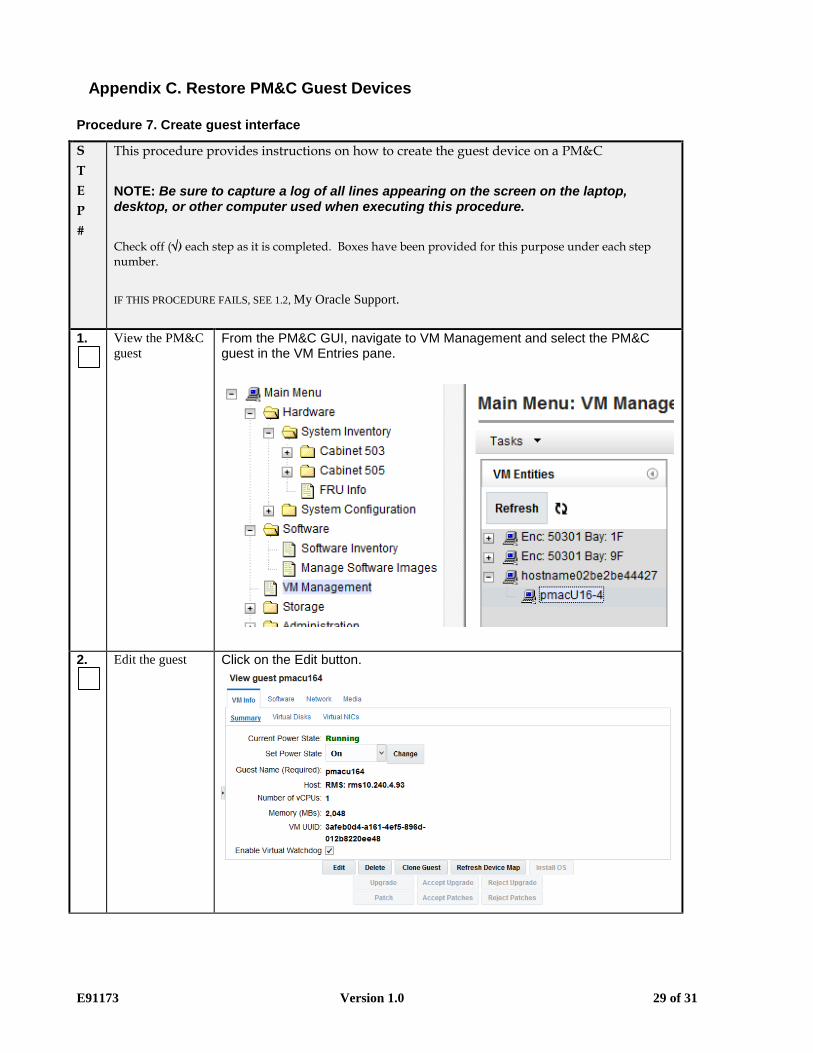
1. 1
View the PM&C
guest From the PM&C GUI, navigate to VM Management and select the PM&C guest in the VM Entries pane.
2. 1
Edit the guest Click on the Edit button.

E91173 Version 1.0 30 of 31
Procedure 7. Create guest interface
3.
Add the device Click Virtual NICs, then click the Add button in the Virtual NICs list. For the Host Bridge, use the drop down menu to select the TVOE bridge name. For The Guest Dev Name, enter the name from the “service network status” output in the calling procedure.
4.
Save the device Click on the Save button, and respond to the pop-up confirmation:
5.
From the TVOE
login, restart the
guest
Shutdown and restart the PM&C guest to get the new guest device.
[admusr@tvoe]$ sudo /usr/bin/virsh destroy pmac57
Domain pmac57 destroyed
[admusr@tvoe]$ sudo /usr/bin/virsh start pmac57
Domain pmac57 started
[admusr@tvoe]$
6. 1
Return to the
procedure which
referred you.
Return to the verification procedure and execute the procedure from the beginning. The device should now be seen.
The procedure has been completed.

E91173 Version 1.0 31 of 31
Appendix D. Locate Product Documentation on Oracle Help Center Site
Oracle Communications customer documentation is available on the web at the Oracle Help Center (OHC) site,
http://docs.oracle.com.You do not have to register to access these documents. Viewing these files requires Adobe Acrobat
Reader, which can be downloaded at http://www.adobe.com.
1. Access the Oracle Help Center site at http://docs.oracle.com.
2. Click Industries.
3. Under the Oracle Communications subheading, click the Oracle Communications documentation link.
The Communications Documentation page appears. Most products covered by these documentation sets will appear
under the headings “Network Session Delivery and Control Infrastructure” or “Platforms.”
4. Click on your Product and then the Release Number.
A list of the entire documentation set for the selected product and release appears.
To download a file to your location, right-click the PDF link, select Save target as (or similar command based on your
browser), and save to a local folder.