operating instructions for the one
TRANSCRIPT

Operating Instructions for the Pilot One
AbleNet 2625 Patton Road Roseville, MN 55113 (800) 322‐0956 www.ablenetinc.com

2Operating Instructions
Table of contents: 1. Introducing Pilot One……....……………….………………………………………4 2. What you get…………….……….……………………………………………………..5 3. Safety notes……………….………..……………………………………………………5 4. Equipment description………..…………………………………………………….6 4.1. Power supply..……………….……..……………………………………………………6 5. Preparation…….……………….…..……………………………………………………8 6. Settings……………………………..…..…………………………………………………9 6.1. Selecting user language…………………………………………….……………..9 6.2. Selecting appliances…………………………………………………………………10 6.2.1 AbleNet Telephone control…….………………………….…………………….11 6.3. Learning infrared signals………………………………………………………….13 6.4. Training Pilot One …………………………………………………………………...15 6.5. Setting speech sensitivity ………………………………………………………..17 6.6. Setting the volume of Pilot One (Confirmation)………………………18 6.7. Setting the volume of Pilot One (Prompt)………………………………18 6.8. Single and Dual Switch mode ………………………………………………….19 6.9. External display…………………………………………………………………………19 6.10. Eight‐keys mode……………………………………………………………………….19 7. Operation………………………………………………………………………………….20 7.1 General……………………………………………………………………………………..20 7.2. Recording with video and cassette recorders………………………….20 7.3. Telephone calls ………………………………………………………………………..21 7.4. Sleep – Wake up……………………………………………………………………….22 7.5. Using the keys or the commands “Next” and “Do it” ……………..23 7.6. Erasing saved settings ……………………………………………………………..24 8. Care and Maintenance…………………..……………………………….………..26 9. What if …………………………………………………………………….……………...27 10. Command words………………………………………………………………………28 11. Technical Data………………………………………………………………………….29 12. Warranty………………………………………………………………………………..…30 13. Appendix………………………………………………………………………………..….31

3Operating Instructions
1 9 2 3 8 4 7 5 6 (See page 6)

4Operating Instructions
IntroducingPilotOne The Pilot One is a high quality, easy‐to‐use ECU enabling the user to operate equipment using spoken commands or switch control. Pilot One is the premier voice‐recognition ECU in the world! The Pilot One can control devices such as TV’s, cable boxes, lights, electrical appliances, hospital beds, nurse calls, door openers and AbleNet Telephones. The Pilot One offers “direct‐to‐unit” infrared (IR) learning making remote control training fast and easy. Control IR in one room with the Pilot One or have the freedom to roam your home and control IR anywhere! The Pilot One can replace most all of your other remote controls. The Pilot One features larger display fonts, new voice playbacks and an updated word list to reflect our North American market. We think you will like these new and improved features! Pilot One and Pilot Pro differ from each other as follows: Pilot One: Control up to 15 different devices and appliances via a fixed menu structure. Menu contains the following: Television, Video, Satellite, Amp, Tuner, Tape, CD, DVD, Telephone, Six speed dials, Light, Lamp, Device, Bed, Book (page turner) and Alarm (nurse call.) Menu items cannot be changed. Four X‐10 controls are part of the Light II menu structure. Pilot Pro: The Pilot Pro controls unlimited devices and appliances. Its menu is customized and can be modified and configured to the customer’s specific needs. The Pilot Pro can operate 256 X‐10 devices via RF, complete infrared control for most audio and visual components, hospital room/bed control, and AbleNet Telephones.

5Operating Instructions
What you get Purchase includes: Pilot One 2 rechargeable batteries Holder with base Operating instructions Power adapter Connecting cable (to PC)
SafetynotesFor your own safety, please observe the following points: General
• Please follow the notes in these operating instructions. • Pilot One should not be used in the bathroom. • Pilot One must not be used or stored in damp or hot rooms. • Pilot One should not be used in life‐or‐death or safety‐related situations. However a
nurse call system can be operated by the Pilot One. • Repairs should only be performed by your dealer or AbleNet. • NEVER replace batteries without contacting your dealer or AbleNet. • If the Pilot One will not be uses for a prolonged period of time removal of the
batteries is suggested to prevent unit damage.
Batteries • Keep batteries out of reach of children.

6Operating Instructions
Equipmentdescription The illustration is on page 3.
1 Infrared transmitter 2 Function keys
With the two red keys, most programming and usage functions can be activated. Select different functions by keeping the keys pressed briefly or for more than one second. l : press the left key r : ok press the right key L : keep the left key pressed (>1sec) R : ok keep the right key pressed (>1sec) lr : ok press both keys at the same time
LR: ok keep both keys pressed (>1sec) 3 Jack for external switch 4 Jack for external microphone and external loudspeaker 5 Built‐in loudspeaker 6 Jack for Power Supply or PC Connection 7 Built‐in microphone 8 On/Off‐switch 9 Display
Powersupply There are two power supply options for your Pilot One:
Two batteries – Ni‐MH rechargeable batteries AA, 1.2V, R6 Power adapter (included in delivery)
Your settings remain stored when batteries are removed even though the power supply remains disconnected. Fitting batteries (Only after contacting AbleNet Technical Support):
1. Remove Pilot One from the holder. 2. Open battery compartment cover: push button and lift cover. 3. Note illustration inside battery compartment (+ and ‐) when fitting batteries. 4. Close battery compartment.
Pilot One rechargeable batteries should last 2‐3 years under regular use. Please contact AbleNet if you require assistance with replacing rechargeable batteries.

7Operating Instructions
Note: Set the battery switch to the appropriate position (A or B) A B Position A: Select this position when using rechargeable batteries. Rechargeable batteries are automatically charged. Charging stops once full. Position B: Select this position when using regular batteries. Position B prevents regular batteries from being recharged and thus avoids danger of damaging. The Pilot One MUST be in holder to recharge batteries. Connecting Power Adapter
1. Plug the Power Adaptor into the holder. 2. Plug the power adaptor into a wall socket.

8Operating Instructions
Preparation Now that you have purchased the Pilot One it’s always a good idea to prepare a list of devices and appliances you want to control with your ECU. With the Pilot One you have a limited range of options to control. Example ‐ one TV, one cable box, one DVD, etc. Note: Consider which appliances you would like to operate with your Pilot One and make a list for your installer. You should also include the brand name of the appliances if possible.
Important ‐ It is very important to NOT try and download any other Menu Configuration other than the Pilot One default menu. Do not try and add or delete menu tree words from the Pilot One. Downloading other menus or changes to the Pilot One can cause severe damage to the unit and may require manufacturer for repair. There is NO re‐set in this case.

9Operating Instructions
Settings
Selectinguserlanguage
1. Switch on: Set the slide switch on the left side of your Pilot One to position ON and press one of the red function keys briefly. Pilot One starts. The display shows:
2. Press LR to enter the setup menu. The display shows: 3. Press key r to move to bottom line. Continue pressing l until the desired language
appears. Press LR to save the settings.
Pilot One sleep
language English

10Operating Instructions
Selectingappliances 1. Press LR to enter the set‐up mode.
2. Continue pressing l until the desired appliance type (e.g. television) appears in the
display.
3. Press key r to move to bottom line. With l select the desired setting. You can select
setting (‐‐01) and by selecting this you can then copy signals from the device remote control directly into your Pilot One unit (see 6.3.)
Note: In the Pilot One, selecting menu options for Infrared devices offers only the setting (‐‐01) to copy infrared signals into. The other appliance types (i.e., Light, Lamp, Device and Alarm) offer pre‐programmed X‐10 signals. Simply choose the corresponding X‐10 UNIT CODE signal. (Unit code 1 to 8.)
4. To select a new appliance type, move back to top line by pressing r and press l to
continue to the next appliance type.
televisio -

11Operating Instructions
Video Text
This setting can be used in the Pilot to send favourite, three‐digit television channels as a macro. News, Politics, Sport and Weather can be set‐up to send a three‐digit channel from 100 to 899. These channel digits correspond to the 0 ‐ 9 digits trained into Television (‐‐01). Call AbleNet for a detailed explanation of this function.
1. Repeat the procedure for other channels.
2. Press LR to save the settings.
6.2.1. – AbleNet Telephones with speed dial. (Also see 7.3)
The Pilot One will operate AbleNet Telephones seamlessly. While the Pilot One offers less telephone options than the Pilot Pro, both units will operate six speed dial functions for AbleNet Telephones. 10 speed dials is possible with the Pilot Pro ONLY. Tip: Make a list of the names and numbers, from one to six, that you want to speed dial. A great feature of the Pilot One is that the six speed dial names can be RECORDED AND PLAYED BACK in the user’s voice. For example, if speed dial 1 is to be “mom”, the playback word will be “mom” in the user’s voice.
news 100

12Operating Instructions
After you have decided the speed dials, proceed with:
1. Switch on: Set the slide switch on the left side of your Pilot One to position ON and press one of the red function keys briefly.
2. Press LR to enter the set‐up mode. 3. Continue pressing l until the “telephone” menu appears. 4. Press key r to move to bottom line. 5. Select the corresponding telephone with key l. 6. Move back to top line with key r and press l. The display shows:
7. If you wish to assign a name for the first speed dial number in Telephone, press key r
to move to the bottom line. Change the symbol ‐ to + with key l. Now the Pilot is set to assign a name to the storage space called “name 1.” Record the appropriate name for “name 1” (i.e., mom). During this first training session Pilot One will prompt you for “name 1” TWICE by beeps only. Record “mom” and Pilot will learn that name. During the second training session, Pilot One prompts you to repeat the name “mom” in the users voice this time. Now the storage space called “name 1” will respond to the voice command “mom”. Repeat the same procedure for “name 2” to “name 6.”
8. Press LR to save the settings.
name 1 -

13Operating Instructions
Learninginfraredsignals If you have chosen the setting (‐‐01) with a device, e.g. “television“ (see 6.2.) you can copy functions of other remote controls into your Pilot One. Then proceed as follows:
1. Press key R to enter the Learning Mode.
Note: *** YOU MUST USE THE APPENDIX ON PAGE 28 and 31 FOR THESE STEPS TO INSURE PROPER OPERATION .
2. Place your Pilot One and your original “teaching” remote control nose‐to‐nose. (Eye‐to‐eye.) They should be at the same height to ensure good reception.
3. To read the signal, push a button on the remote control. Keep the button pressed
while slowly moving the remote control left and right to find the best position in front of the Pilot. When optimum reception is reached up to 6 bars appear in the display. However three bars are enough to start the learning process.
on
televisio --01
on

14Operating Instructions
Note: The Pilot One IR receiving area is in the middle of the infrared lens. As the other remote control is probably thinner than your Pilot you can place it on top of a magazine or a book or hold in both hands horizontally.
4. To start the copying process, release the button on the remote control. The bars in
the display disappear. 5. Now press key r and then the button on the remote control whose function you are
copying (e.g. “on”). The display says: “Please wait.”
6. Next to on a dot appears in the display. The command has been learned. If the dot does not appear, the copying process was not successful. Please repeat steps 1‐5.
7. Pressing l you switch to the next function of your menu (e.g. “off”). Repeat steps 1‐5. 8. Press LR to save the settings. NOTE – To erase a signal during a re‐scanning process (assuming the first scan did not work or the signal was to long or to short) you will need to press and hold R to erase the signal. After you press R the black dot will disappear indicating you have successfully erased the signal. Re‐scanning a signal into a word with the black dot will NOT overwrite it however.
on
15Operating Instructions
TrainingthePilotOneEvery person pronounces the same words slightly different. To ensure the Pilot understands the end users voice commands you will “voice train” the Pilot Onecommands. Make sure that no loud noises occur near to you during training (door banging, voices, television.) Note: For best results carry out the training at the same place and at the same distance as the Pilot One will be used on a regular basis (e.g., at the bedside, on the wheelchair). Pronounce the commands the same way you will pronounce them later. The first training session is automatically carried out TWICE.
1. Switch on: Set the slide switch on the left side of your Pilot to position ON and press one of the red function keys briefly. 2. Press LR to enter the set‐up mode.
3. Continue pressing l until the “training” menu appears. 4. Press key r to move to bottom line.
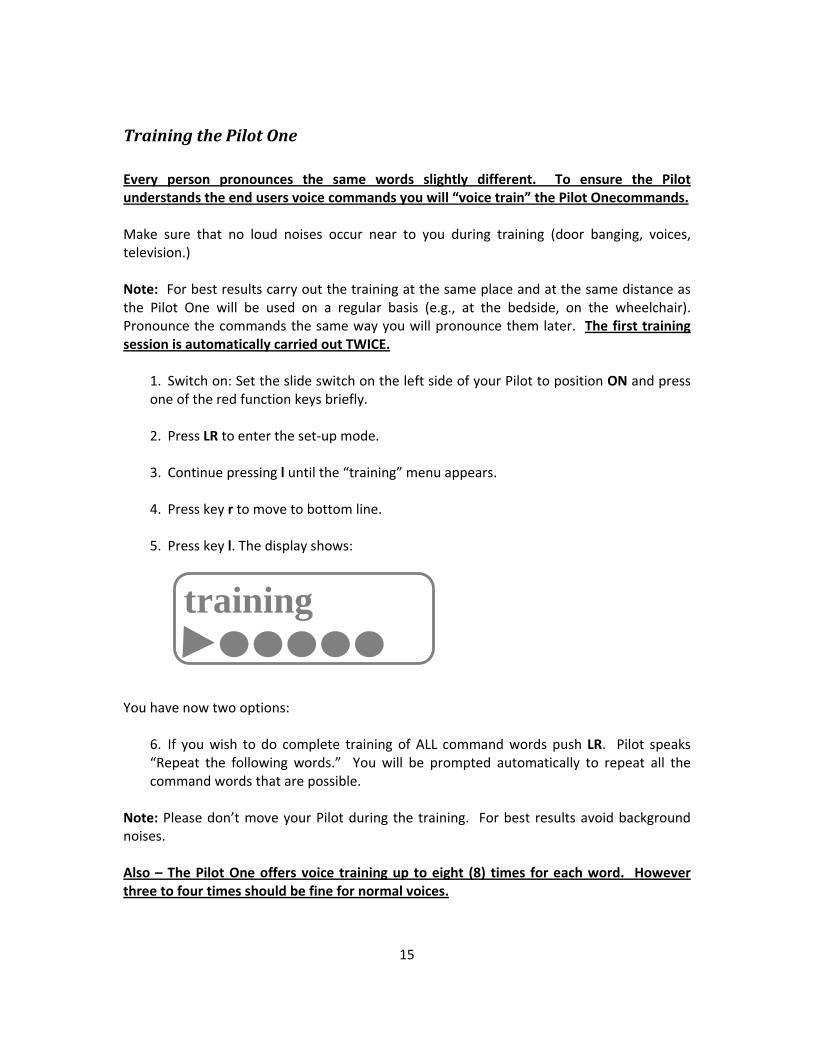
5. Press key l. The display shows:
You have now two options:
6. If you wish to do complete training of ALL command words push LR. Pilot speaks “Repeat the following words.” You will be prompted automatically to repeat all the command words that are possible.
Note: Please don’t move your Pilot during the training. For best results avoid background noises. Also – The Pilot One offers voice training up to eight (8) times for each word. However three to four times should be fine for normal voices.
training

16Operating Instructions
The Pilot One is ready to record after having said the command word. Pilot One confirms every single recording with a tone or repeats the word to say again.
7. If only individual commands are to be trained, press key l. The display changes to
8. Press LR. Your Pilot One speaks: “Repeat the following words“ and the display shows:
9. Move down to the desired command with key l. 10. Press key r. Pilot One speaks the command. Say the command as prompted. A tone sounds if your unit understands the command correctly.
11. Repeat steps 9 and 10 for all desired commands.
12. Press LR. Pilot One saves the learned command words.
NOTE: To erase (edit or retrain) a voice pattern for a SINGLE WORD only go to that word, press and hold “R.” To erase ALL voice recordings see section 7.6. ** Be sure to have at least one (1) device enabled (‐‐01) for voice training to work according to the instructions in section 6.4
training next

17Operating Instructions
Settingspeechsensitivity You now have the option of setting the speech sensitivity for your Pilot One. The setting for normal voice volume should be about three (3) bars. You may have to experiment with the sensitivity setting to find the correct level for the user.
1. Switch on: Set the slide switch on the left side of your Pilot One to position ON and press one of the red function keys briefly.
2. Press LR to enter the set‐up mode.
3. Continue pressing l until the display shows: 4. Press key r.
5. Adjust the sensitivity with key l.
= Pilot reacts to quietly spoken commands (not recommended.)
= Pilot reacts only to loudly spoken commands. = Pilots reacts only to key operation. . . = By choosing this setting the Pilot automatically
adjusts the sensitivity of the built‐in microphone to the surrounding noises. This is helpful if you intend to use your unit outdoors or with a Ventilator.
6. Press LR to save the settings. 7. After re‐setting the sensitivity the saved command words might have to be erased
and a new training session of commands words performed. (see 6.4.)
sensitivi

18Operating Instructions
SettingthevolumeofPilotOne(Confirmation) You can set the volume for the spoken confirmation, or playback, of Pilot One according to your requirements.
1. Switch on: Set the slide switch on the left side of your Pilot One to position ON and press one of the red function keys briefly.
2. Press LR to enter the set‐up mode 3. Continue pressing l until the display shows:
4. Press key r.
5. Set the volume with key l. = Pilot One answers loudly. (Recommended.) = Pilot One answers quietly. = Pilot One carries out commands without spoken confirmation
6. Press LR to save the settings.
SettingthevolumeofPilotOne(Prompt)You can set the Pilot One to PROMPT the end user according to your requirements when in Switch/Scan mode. Select the menu item Prompt and repeat steps to set volume. The general rule is: 1. In Voice Mode ‐ “Prompt” Off and “Confirmation” On. 2. In Switch/Scan ‐ “Prompt” On and “Confirmation” On.
confirmat

19Operating Instructions
SingleandDualSwitchmode You have the option to operate your Pilot One with a switch. (Call AbleNet for info.) In this mode your Pilot automatically scans through the menu, pausing for a certain amount time at every command word waiting for confirmation. Voice activation is still usable!!
1. Switch on: Set the slide switch on the left side of your Pilot One to position ON and press one of the red function keys briefly.
2. Press LR to enter the set‐up mode.
3. Continue pressing l until the display shows: “repititio”
4. Press key r to move to bottom line and select a number (1…5). Determine how often
you want your Pilot One to scan through the menu before it stops again.
5. Move back to top line with key r and press l to get to the next appliance type “duration.”
6. Press key r to move back to bottom line and select with l how many seconds you
want your Pilot One to linger on each menu item.
7. Move back to top line with key r. Press LR to save the settings. Dual Switch Mode: The Pilot is designed to seamlessly accept Dual Switch scanning without having to re‐set or re‐program the unit. Simply plug in your Pilot‐compatible Dual Switch and you’re done! Voice and Switch can now be used simultaneously. (Call AbleNet to ask about modifying your Switch to work with the Pilot One.)
Externaldisplay–Notcurrentlyavailable
Eight‐keysmode–Notcurrentlyavailable

20Operating Instructions
Operation General After voice training, and scanning in all your Infrared signals, you are now ready to operate your Pilot One.
1. Switch on: Set the slide switch on the left side of your Pilot One to position ON and press one of the red function keys briefly.
2. Speak a command (e.g. “television”). Pilot One repeats the word.
3. Speak the next command (e.g. “open“). Pilot One repeats the command and sends
the signal.
4. Say all of the commands under that main menu word (e.g. “television.”)
5. Jump to the next command word by simply saying the next choice. Tips:
To select channels above 9, first say “nine“ and then the command “forwards“ with short pauses until the desired channel is reached. With certain Television types it is possible to select channels directly by giving two digits commands (e.g. “three” then “five” for “thirty‐five”). In Satellite it’s possible to go to three and four digit cable/satellite channels. Practice and timing is key!
With the command ”Scan forwards“ and “Scan backwards“ you have the opportunity to channel surf channels. Every five seconds your Pilot automatically scans to the next channel. Finish with “Stop“ or “Sleep.”
Saying“Record”withvideoandcassetterecorders As a safety measure when recording with video and cassette recorders you will be prompted by the Pilot One to confirm the command “Record” twice.

21Operating Instructions
TelephonecallsusingtheSeroTelephone(Basictipsonly) Call AbleNet or refer to your AbleNet Telephone Manual for operation details. Number Dialing for the Pilot One: 1. Make sure Pilot is awake. 2. Say “Telephone” then “Number. “ 3. Say the first digit. Pilot One repeats this and sends the IR digit to the telephone. 4. Repeat step 3 for the rest of the digits. If Pilot One misunderstands a digit or you make a mistake with the number say the command “delete.” If you want to completely terminate a dialing process say “exit”. 5. Once your numbers are correct on the telephone display say “Dial“. IMPORTANT ‐Sero dials the number and the Pilot switches to sleep mode to avoid receiving unintended commands during the phone call. 6. To terminate the call say “Wake up“ then “Hang Up” and then “exit.” Speed Dial for the Pilot One: If in the settings menu you have assigned names to the (Name 1 to 6) speed dial section in the Pilot One proceed as follows to dial these numbers:
1. Make sure Pilot is awake. 2. Say “Telephone” and the name of the person you have voice recorded. Sero speed
dials that name and the Pilot goes to sleep. You can speed dial up to six (6) names in the Sero Telephone.
3. To hang up the call say ‘Wake Up” and then “Hang Up”.
Directory Dialling in the Pilot One:
1. Say “Telephone” then say “Menu.” This brings up the Directory on the Sero Telephone. You can say “Up” or “Down” to move around the Directory. When the number you want to dial is on the display, or you hear it, say “Dial”.

22Operating Instructions
2. NOTE ‐ To jump to a specific alphabetical area in the Directory list. After you say
“Menu”, and the first name in the list comes up, say “Number” and the digits that correspond to the alphabetical listing. (Example – You want to dial a number in the Directory that is in slot #35. You say “Telephone”, “Menu”, “Number”, “3”, then “5”, then “Dial.” These steps allow you to jump around a large directory list without having to say “up” or “down” multiple times.
(YOU MUST SAY “EXIT” TO GET OUT OF THE NUMBER DIALING MENU TREE IF YOU CHANGE YOUR MIND AND WAN’T TO STOP THE CALL PROCESS.) Receiving calls 1. When your telephone rings say “Telephone“ then “Answer.” 2. Pilot One switches to the sleep mode. Enjoy your call. To Hang Up say “Wake Up” and then “Hang Up”. ** Note – The Pilot Pro operates the Sero Telephone in the same basic way as the Pilot One however the Pro has more features and can be customized to the user’s specific Telephone requirements.
“Sleep“–“Wakeup“ To prevent the Pilot One from receiving unintended commands ALWAYS put it into Sleep Mode with the command “Sleep.” (BACKLIGHT GOES OFF IF PLUGGED INTO A/C POWER.) The display shows: Pilot One now only reacts to the command word “Wake Up“ that reactivates the unit.
wake up

23Operating Instructions
OperatingPilotOnewith theKeys or the commandwords “Next”and“DoIt.” Key Mode (for caregivers and family to use the Pilot.) Use your left red button to scroll through the menu. When your Pilot displays, or speaks in Prompt mode, the desired command confirm it with:
1. The “OK“ key (r) on your Pilot. 2. The default Pilot One command word “Do It.“ Pilot One carries out your command. Operation with the command words “Next“ and “Do It“ Operating your Pilot One with the command words “Next“ and “Do It“ is always available as a DEFAULT.
1. Say the command word “Next” to move to the next word in your menu tree.
2. To get to the next menu item repeat this until you have reached the desired menu item.
3. Say “Do It” to execute this command.
24Operating Instructions
Erasingsavedsettings Erasing commands: If the command words are poorly understood you have the option of erasing all trained command words. For erasing individual commands see 6.4 steps 7‐10 and press R. If you erase all words a new training session must be done however the devices and IR signals are retained.
1. Switch on: Set the slide switch on the left side of your Pilot One to position ON and press one of the red function keys briefly.
2. Press LR to enter the set‐up mode.
3. Continue pressing l until the display shows: “clear tra” 4. Press key r to move to bottom line.
5. Change the symbol – to + with key l.
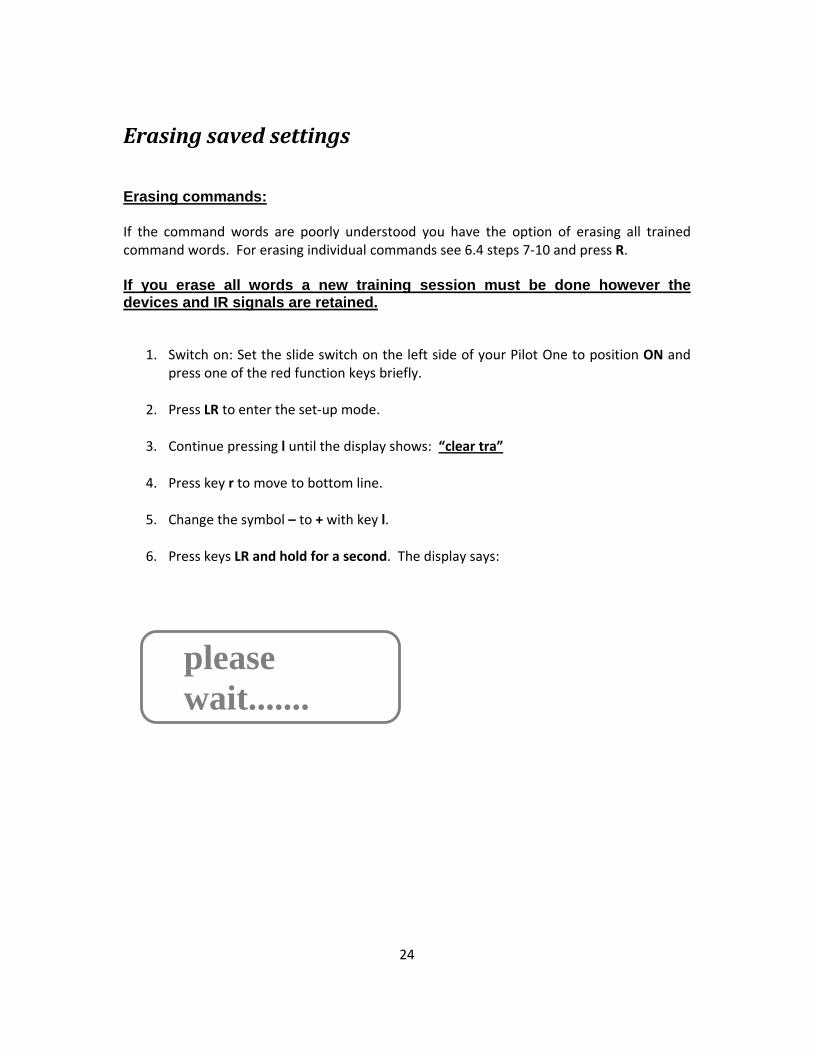
6. Press keys LR and hold for a second. The display says:
please
wait.......

25Operating Instructions
PLEASE NOTE – PREVIOUSLY SAVED INFRARED (IR) SIGNALS WILL NOT BE ERASED WHEN YOU USE THE “CLEAR ALL” METHOD BELOW. YOU WILL NEED TO GO INTO EACH INDIVIDUAL SCAN (STEP 6.3) AND DELETE THE SIGNAL BY PUSHING AND HOLDING THE RIGHT BUTTON “R.” Erasing all: To erase all commands as well as all previously selected appliances proceed as follows:
1. Switch on: Set the slide switch on the left side of your Pilot One to position ON and press one of the red function keys briefly. 2. Press LR to enter the set‐up mode.
3. Continue pressing l until the display shows: “clear all” 4. Press key r to move to bottom line. 6. Change the symbol ‐ to + with key l.
6. Press keys LR and hold for a second. The display says:
please wait.......

26Operating Instructions
CareandMaintenance
• Pilot One is primarily maintenance‐free.
• Before cleaning the unit switch it off and if necessary disconnect it from the power supply.
• Clean the unit using a dry cloth. If heavily soiled use a cloth slightly dampened with
mild soap. Attention! Liquids must not get inside the unit!
• Do not use any strong cleaner or solvent that could harm the plastic surface or lens.

27Operating Instructions
Whatif...?
Problem Cause Remedy
I say a command word but my Pilot does not react?
Your Pilot is not switched on Switch on your Pilot Your Pilot is in sleep mode (the display shows: “wake up“)
Reactivate your Pilot with the command word “wake up“
The mic sensitivity of your Pilot is set too low
Set the mic sensitivity higher until your Pilot reacts as desired
Your Pilot is set to switch operation
Switch your Pilot back to voice operation
Your Pilot is in the settings mode
Switch your Pilot back to the operating mode
The command word is not trained
Do a new training session
The appliance has not been selected
Select the desired appliance
My Pilot correctly repeats the command word but does not carry out the operation
You previously operated a different appliance
Select the desired appliance with the appropriate command word and issue the command again
The appliance is switched off Switch on the appliance or put it in the standby mode
The appliance type is not correctly selected
Select a different appliance type and test it
The appliance can not carry out this function via remote control
Re‐scan the remote control signals into the Pilot
Problem Cause Remedy
My Pilot repeats an incorrect command word
Your Pilot interprets the command incorrectly
Do a new training session or alter the speech sensitivity
The ambient noise level is to high
Set the speech sensitivity of your Pilot lower and speak the commands louder
You are pronouncing the commands differently than during the training
Pronounce the commands the way you did during the training or repeat the training

28Operating Instructions
CommandwordsforPilotOneONLYYou can directly select the different appliances at any time. However operational commands can only be accessed once you have entered into the corresponding Pilot One appliance. Appliance Available command words Default sleep, wake up Television switch on, switch off, zero, one, two, three,
four, five, six, seven, eight, nine, volume up, volume down, forwards, backwards, scan forward, scan backward, stop, AV, mute
Video switch on, switch off, zero – nine, forwards, backwards, record, play, stop, volume up, volume down, mute, hold
Satellite switch on, switch off, zero – nine, forwards, backwards, scan forward, scan backward, stop, volume up, volume down, mute,
Amplifier switch on, switch off, volume up, volume down, mute
Tuner switch on, switch off, zero‐nine, forwards, backwards, scan forward, scan backward, stop, volume up, volume down, mute,
Tape switch on, switch off, forwards, backwards, volume up, volume down, mute, hold, record, play, stop
CD Player switch on, switch off, zero – nine, forwards, backwards, volume up, volume down, mute, hold, play, stop
DVD switch on, switch off, zero – nine, forwards, backwards, play, stop, record, volume up, volume down, mute, hold, menu, up, down, left, right, ok
Telephone answer, hang up, menu, up, down, dial, number, name 1‐ name 6, zero ‐ nine, delete, exit, dial
Light switch on, switch off, brighter, darker, dim
Lamp switch on, switch off, brighter, darker, dim Device switch on, switch off, stop, open, close Bed head up, head down, foot up, foot down, bed
up, bed downBook directory, forwards, right, left Alarm switch on

29Operating Instructions
TechnicalData Power supply: Rechargeable battery operation: 2 rechargeable batteries (1.2 V AA NiMH) Power Supply: Power adapter, stabilised, at least 750 mA with 9,18 V Infrared range: approx. 10 m / 30 feet Temperature range: Storage and handling: ‐10°C ‐ +40°C, 5 – 85 % rel. humidity FCC Class B Digital Device or Peripheral – User’s Notice NOTE: This equipment has been tested and found to comply with the limits for a Class B digital device, pursuant to part 15 of the FCC rules. These limits are designed to provide reasonable protection against harmful interference in a residential installation. This equipment generates, uses, and can radiate radio frequency energy and, if not installed and used in accordance with the instruction manual, may cause harmful interference to radio communications. However, there is no guarantee that interference will not occur in a particular installation. If this equipment does cause harmful interference to radio or television reception, which can be determined by turning the equipment off and on, the user is encouraged to try to correct the interference by one or more of the following measures:
- Reorient or relocate the receiving antenna - Increase the separation between the equipment and receiver - Connect the equipment into an outlet on a circuit different from that to which the
receiver is connected - Consult the dealer or an experienced radio/TV technician for help
WARNING: Changes or modifications not expressly approved by Tash International Inc., could void the user’s authority to operate the equipment. This device complies with Part 15 of the FCC Rules: Operation is subject to the following two conditions:
(1) This device may not cause harmful interference and (2) This device must accept any interference received,
including interference that may cause undesired operation.
Industry Canada ICES‐003 Label Requirements This digital apparatus does not exceed the Class A/B limits for radio noise emissions from digital apparatus as set out in the interference‐causing equipment standard entitled “Digital Apparatus”, ICES‐003 of Industry Canada.

30Operating Instructions
Warranty
- Warranty is null and void if the silver serial number label, located on the back of the unit is removed or tampered with in any manner.
- AbleNet warrants each of its products to be free from defects in material, and/or workmanship for a period of 12 months from the date purchased by the customer. This warranty is expressly in lieu of all warranties expressed or implied. This warranty shall not apply to AbleNet equipment which shall have been repaired or altered by unauthorized service personnel, or which has been subject to misuse or damage or operated in any other way than its intended use. This warranty does not cover damage in transit. AbleNet liability shall be limited to consequential or incidental damage or transportation costs. AbleNet, its employees and officers shall not be responsible for any special, consequential or incidental damages, however caused.
- Claims for warranty repair must be accompanied by a cost of the bill of sale as proof of date of purchase and a AbleNet return authorization number.
AbleNet Inc. 2808 Fairview Ave N Roseville, MN 55113
Toll Free 1‐800‐322‐0956
651‐294‐2200 – Phone 651‐294‐2222
Web: www.ablenetinc.com

31Operating Instructions
Appendix Learning infrared signals - (Where to scan them into for usage.)
Appliance type User Command word Installer Display
All
Please note – not all of the Command Words listed to the right are linked or
“activated” for use. Please be careful as they are listed for reference only and don’t do anything in the Pilot.
Refer to page 28 to view the available Command Words for each appliance that you can store IR signals into.
switch on switch off
zero one two three four five six
seven eight nine 10 up 20 up
two digits av
forwards backwards Volume up
Volume down mute
switch on switch off
red green yellow blue hold record play stop
forwards backwards name 1 name 2 name 3 name 4 name 5 name 6 name 7 name 8
on off 0 1 2 3 4 5 6 7 8 9
10 up 20 up
two digs av next
previous vol. Plus vol. minus mute ttxt. On ttxt. Off red green yellow blue hold record play stop
fast frwd fast bkwd direct 1 direct 2 direct 3 direct 4 direct 5 direct 6 direct 7 direct 8

32Operating Instructions
Appliance type User Command Installer Display
name 9 name 10
up down left right menu ok dim speak
direct 9 direct 10
up down left right menu ok dim speak
TV forwards backwards
next previous
Video forwards backwards
fast‐frwd fast‐bkwd
Satellite forwardsbackwards
next Previous
Radio forwards backwards
next previous
Tape Forwards backwards
fast‐frwd fast‐bkwd
CD forwards backwards
next previous
DVD forwards backwards
fast‐frwd fast‐bkwd
Appliance type User Command Installer Display
Bed
bed up bed down foot up
foot down head up
head down
1 2 3 4 5 6
Book
directory forwards
left right
1 2 3 4