operating instructions en mode d’emploi ... - hilti.com.au
TRANSCRIPT

2029
46
Operating instructions enMode d’emploi frManual de instrucciones es
DX860-ENP
Printed: 10.04.2017 | Doc-Nr: PUB / 5126862 / 000 / 00Printed: 10.04.2017 | Doc-Nr: PUB / 5126862 / 000 / 01

1
�
�
�
�
�
�
�
�
�
�
�
Printed: 10.04.2017 | Doc-Nr: PUB / 5126862 / 000 / 00Printed: 10.04.2017 | Doc-Nr: PUB / 5126862 / 000 / 01

hh
h
hh
max.min.
max.min.
2 3
4 5
6 7
8 9
12
4x
1 2
2
1
A B C
D E F
2
1
2 1
3
4
3
2
2/4 1
Printed: 10.04.2017 | Doc-Nr: PUB / 5126862 / 000 / 00Printed: 10.04.2017 | Doc-Nr: PUB / 5126862 / 000 / 01

Standardsteel
S 235, S275E 36, ST 37,
340-470 N/mm2
4
3
43
High-strengthsteel
S 355, S275E 42, ST 52,
490-630 N/mm2
Base
mat
eria
l thi
ckne
ss (m
m)
4
3
43
20
15
10
8
6
X-ENP
red
blac
k
blue red
10
11
2
1
3
7
4
511
10
98
Printed: 10.04.2017 | Doc-Nr: PUB / 5126862 / 000 / 00Printed: 10.04.2017 | Doc-Nr: PUB / 5126862 / 000 / 01

12
13
14
3
2
1
4
5
6
7
8
910 11 11
1213
1415
16
17
Printed: 10.04.2017 | Doc-Nr: PUB / 5126862 / 000 / 00Printed: 10.04.2017 | Doc-Nr: PUB / 5126862 / 000 / 01

1
enIt is essential that the operating instructionsare read before the tool is operated for thefirst time.
Always keep these operating instructionstogether with the tool.
Ensure that the operating instructionsare with the tool when it is given to other persons.
DX 860-ENP powder-actuated fastening tool1. General information1.1 Safety notices and their meaning
-WARNING-Draws attention to a potentially dangerous situation thatcould lead to severe personal injury or death.
-CAUTION-Draws attention to a potentially dangerous situation thatcould lead to minor personal injury or damage to theequipment or other property.
-NOTE-Indicates instructions and other useful information. Notused to indicate potentially dangerous situations or sit-uations where damage may occur.
1.2 Pictograms
Contents Page1. General information 12. Description 23. Fasteners, consumables and accessories 24. Technical data 35. Safety precautions 36. Before use 47. Operation 58. Care and maintenance 79. Troubleshooting 9
10. Disposal 1111. Manufacturer's warranty – DX Tools 1112. Health and safety of the operator 27
Parts of the tool �
DX 860-ENP powder-actuated fastening tool� Cartridge loading channel� Catch� Base plate � Grip and trigger mechanism� Cartridge strip exit point� Magazine� Carrying handle Release button Fastener transport system� Power regulation wheel� Rotating sleeve Stop piece
Wearing parts� Piston with piston stopper� Piston stopper
� The numbers refer to the illustrations. The illustra-tions can be found on the fold-out cover pages. Keepthese pages open while you read the operating instruc-tions.In these operating instructions, the designation “ thetool ” always refers to the DX 860-ENP.
Location of identification data on the toolThe type designation and serial number are printed onthe type plate on the tool. Make a note of this informa-tion in your operating instructions and always refer toit when making an enquiry to your Hilti representativeor service department.
Type: DX 860-ENP
Serial no.:
Warning signs
Obligation signs
Wear earprotection
Wear protective
gloves
Wear eye protection
Read the operating
instructionsbefore use.
Symbols
General warning
Warning: explosivesubstance
Warning: hotsurface
Wear ahard hat
Printed: 10.04.2017 | Doc-Nr: PUB / 5126862 / 000 / 00Printed: 10.04.2017 | Doc-Nr: PUB / 5126862 / 000 / 01

2
en
2. DescriptionThe tool is designed exclusively for use in steel roofingand composite decking applications for fastening trape-zoidal profile metal sheets to steel substructures. The
3.1 Fasteners
Ordering designation CommentsX-ENP-19 L15 MXR 10 nails per magazine strip
3. Fasteners, consumables and accessories
3.2 Cartridges
Ordering designation Comments6.8/18 M40 black
6.8/18 M40 red
6.8/18 M40 blue
Magnum(=.27 CAL long, purple)Extra heavy(=.27 CAL long, red)Heavy(=.27 CAL long, blue)
3.3 Wearing parts
Ordering designation CommentsX-76-PSX-76-P-ENP
Piston stopperPiston
3.4 Accessories
Ordering designation CommentsCleaning setDX 76 / 860-ENPI-VO 805 PSI-VO 808 PSEar protectorsHilti lubricant spray
Flat brush, 25 mm dia. round brush, 8 mm dia. round brush,scraper, cleaning clothProtective glasses, clearProtective glasses, tintedSmall
fastening is achieved by driving special fasteners (steelnails) through the metal sheet and into the underlyingsteel substructure.
Printed: 10.04.2017 | Doc-Nr: PUB / 5126862 / 000 / 00Printed: 10.04.2017 | Doc-Nr: PUB / 5126862 / 000 / 01

3
en
5. Safety precautions
5.1 Basic safety instructionsIn addition to the safety precautions listed in the indi-vidual sections of these operating instructions, the fol-lowing points must be strictly observed at all times.
5.2 Use of the tool as directedThe tool is designed for professional use in constructionand the associated trades for driving fasteners into steel.
5.3 Misuse of the tool
● Tampering with or modification of the tool is not per-missible.
● Use of the tool in an explosive or inflammable atmos-phere is not permissible unless it has been approvedfor this application.
● To avoid the risk of injury, use only genuine Hilti fas-teners, cartridges, accessories and spare parts orthose of equivalent quality.
● Observe the information printed in the operating instruc-tions concerning operation, care and maintenance.
● Never point the tool at yourself or at any bystander.● Never press the nosepiece of the tool against your
hand or other part of your body (or other person'shand or parts of their body).
● Driving fasteners into materials other than steel is notpermissible. Do not attempt to drive fasteners intoother materials or into hardened or brittle steel, castiron or spring steel.
● Pull the trigger only when the nosepiece of the tool isin contact with the work surface.
● Never redrive a fastener. This may cause the fastenerto break or shatter.
● Do not drive fasteners into existing holes.● Always observe the application guidelines.
5.4 State-of-the-art technology● The tool is designed and built using state-of-the-art
technology.
● The tool and its accessories may present hazards whenused incorrectly by untrained personnel or when usedother than as directed.
5.5 Take the necessary precautions at the workplace
● Ensure that the working area is well lit.● Operate the tool only in well-ventilated working areas.● The tool is for hand-held use only.● Keep other persons away from the working area, espe-
cially children.● Before driving fasteners, check that no one is present
immediately behind or below the work surface.● Keep the workplace tidy. Objects which could cause
injury should be removed from the working area.Untidiness at the workplace can lead to accidents.
● Keep the grips of the tool clean, dry and free form oiland grease.
5.6 General safety precautions● Use the right tool for the job. Do not use the tool for
purposes for which it was not intended. Use the toolonly as directed and when it is in faultless condition.
● Never leave a loaded tool unattended.● Always remove all cartridges and fasteners from the
tool before carrying out cleaning, servicing or main-tenance and before storing the tool.
● Never pull the magazine back with the hand. Undercertain circumstances, this could cock the tool, makingit ready to fire. When the tool is ready to fire, a fastenercould be driven inadvertently into a part of the body.
● When not in use, the tool must be unloaded and storedin a dry place where it is locked up or out of reach ofchildren.
● Check that moving parts function correctly withoutsticking and that no parts are damaged. All parts mustbe fitted correctly and fulfill all conditions necessaryfor correct operation of the tool.
4. Technical dataToolWeightDimensions (L×W×H)Magazine capacityContact movementContact pressureOperating/ambient temp. rangeMaximum fastener driving rate ** For trouble-free operationRight of technical changes reserved.
DX 860-ENP powder-actuated fastening tool12.02 kg (26.50 lbs)
970 mm×320 mm×145 mm (38.2″×12.6″×5.7″)40 nails/40 cartridges
89 mm (3.5″)approx. 360 N
–15 °C bis +50 °C (5 °F bis 122 °F)
1000 per hour
Printed: 10.04.2017 | Doc-Nr: PUB / 5126862 / 000 / 00Printed: 10.04.2017 | Doc-Nr: PUB / 5126862 / 000 / 01

4
● Check the tool for possible damage. Protective devicesand any parts that may have suffered slight damageshould be checked for correct operation and func-tionality before further use. Damaged safety devicesor other damaged parts must be replaced or repairedproperly by an authorized repair workshop unless oth-erwise indicated in the operating instructions.
● Always hold the tool securely and at right angles tothe working surface. This will reduce the risk of thefastener being deflected by the working surface.
● Never use a tool that is incomplete, damaged or mal-functioning.
5.7 Mechanical hazards
● Select the correct fastener guide, piston and fastenercombination for the job on hand. Failure to use thecorrect combination of these items may result in dam-age to the tool and/or unsatisfactory fastening quality.
● Never use worn or damaged pistons and do not tam-per with or modify the piston.
● Use only fasteners of a type approved for use with thetool.
5.8 Thermal hazards
● Allow the tool to cool down. Always wear gloves if thetool is dismantled for cleaning or maintenance beforeit has been allowed to cool down.
● Do not exceed the recommended fastener driving rate.The tool may otherwise overheat.
● The tool must be allowed to cool down if melting ofthe plastic cartridge strip is observed.
● Do not dismantle the tool while it is still hot. If thiscannot be avoided, wear protective gloves when dis-mantling the tool.
5.9 Danger of explosion
● Use only cartridges of a type approved for use withthe tool.
● Remove the cartridge strip from the tool carefully.● If a cartridge fails to fire or misfires, always proceed
as follows:1.Keep the tool pressed at right angles against the work-
ing surface for 30 seconds.2. If the cartridge still fails to fire, lift the tool away from
the working surface, taking care to avoid pointing itat yourself or other persons.
3.Load the next cartridge on the strip by cycling the tool.Use up the remaining cartridges on the strip and removethe used cartridge strip from the tool. The (partly) usedcartridge strip must then be disposed of suitably inorder to prevent further use or misuse of any unfiredcartridges.
● Do not attempt to forcibly remove cartridges from themagazine strip or tool.
● Unused cartridges must be stored in a dry, high place,locked up or out of reach of children.
5.10 Requirements to be met by users● The tool is intended for professional use.● The tool may be operated, serviced and repaired only
by authorized, trained personnel. This personnel mustbe informed of any special hazards that may be encoun-tered.
● Always concentrate on your work. Proceed carefullyand do not use the tool if your full attention is not onthe job.
● Wear non-slip shoes when working outdoors.● Avoid unfavorable body positions. Work from a secure
stance and stay in balance at all times.● Keep the arms flexed while using the tool (do not
straighten the arms). If you experience pain or feelunwell, stop using the tool immediately.
5.11 Personal protective equipment● The operator and other persons in the immediate vicin-
ity must always wear suitable protective glasses, ahard hat, ear protectors and protective gloves whilethe tool is in use or when checking the tool in case ofa malfunction.
en
6. Before use
6.1 Check the tool● Check that no cartridge strip is loaded in the tool. If a
cartridge strip is present in the tool, push it forwardin the direction of cartridge transport until it can be
gripped at the cartridge exit opening and pulled outof the tool.
● Check all external parts of the tool for damage at reg-ular intervals and check that all controls operate prop-erly. Do not operate the tool when parts are damagedor when the controls do not function correctly. If nec-essary, have the tool repaired at a Hilti service centre.
● Check the piston stopper and piston for wear andensure that the parts have been fitted correctly.
Printed: 10.04.2017 | Doc-Nr: PUB / 5126862 / 000 / 00Printed: 10.04.2017 | Doc-Nr: PUB / 5126862 / 000 / 01

5
en
7.2 Driving fasteners
7.2.1 Loading MXR fastener strips �1. Insert 4 fastener strips in the magazine from above.2. Press the last fastener strip into the magazine as far
as it will go.
7.2.2 Selecting the cartridge ��1. Determine the thickness of the material to be fastened
and the strength of the supporting steel.2. Select a suitable type of cartridge and power setting
for normal steel or high-strength steel (according tocartridge recommendations).
7.2.3 Loading a strip of Hilti 6.8/18 M40 (=.27 CAL long) cartridges �
1. Slide the cartridge strip into the cartridge loading chan-nel from above.
2. Press the cartridge strip into the cartridge loadingchannel until flush with the top edge of the channel.
7.2.4 Driving fasteners �-CAUTION-Never attempt to redrive a fastener that has already beendriven. Use the tool only in an upright position with thetool nosepiece (fastener exit aperture) pointing down-wards.
-WARNING-Never point the tool toward other persons.
1. Press the tool against the work surface at right angles.2. Drive the fastener by pressing the trigger on the hand
grip.
7.2.5 Checking and adjusting fastener stand-off � ��
Fastener stand-off (an indication of depth of penetra-tion) can be adjusted by turning the power regulationwheel on the tool (6).Setting 1 = minimumSetting 4 = maximum1. Check the fastener stand-off. (5A)2. If a fastener is not driven deeply enough, driving power
must be increased. Adjust the power regulation wheelto the next higher setting. (5D) If a fastener is driventoo deeply, driving power must be decreased. (5E)Adjust the power regulation wheel to the next lowersetting.
3. Drive a fastener.4. Check the stand-off. (5A)5. If the fastener is still not driven deeply enough or,
respectively, is driven too deeply, steps 2 to 4 mustbe repeated until the correct depth is achieved. If nec-essary, use a cartridge with a higher or lower powerrating.
7.1 Using the tool-NOTE-Fastening instructionsThese instructions must be observed at all times.For detailed information, please ask your local Hilti rep-resentative for a copy of the applicable technical guide-lines or national technical regulations.
7. Operation
-WARNING-
● Driving the fastener may cause flying fragments (i.e. fragments ofthe material fastened, the fasteneror cartridge strip etc.).
● Flying fragments may injure partsof the body or the eyes.
● The operator and bystanders mustwear protective glasses and a hardhat.
-WARNING-
● Making the tool ready to fireby pressing it against a part ofthe body (e.g. the foot) is not permissible.
● This could cause a fastener to bedriven into a part of the body.
● Never press the tool against a partof the body.
-CAUTION-
● The fastener is driven by the energyreleased when a cartridge is fired.
● An excessively high noise level maydamage the hearing.
● The operator and bystanders mustwear ear protectors.
Printed: 10.04.2017 | Doc-Nr: PUB / 5126862 / 000 / 00Printed: 10.04.2017 | Doc-Nr: PUB / 5126862 / 000 / 01
6
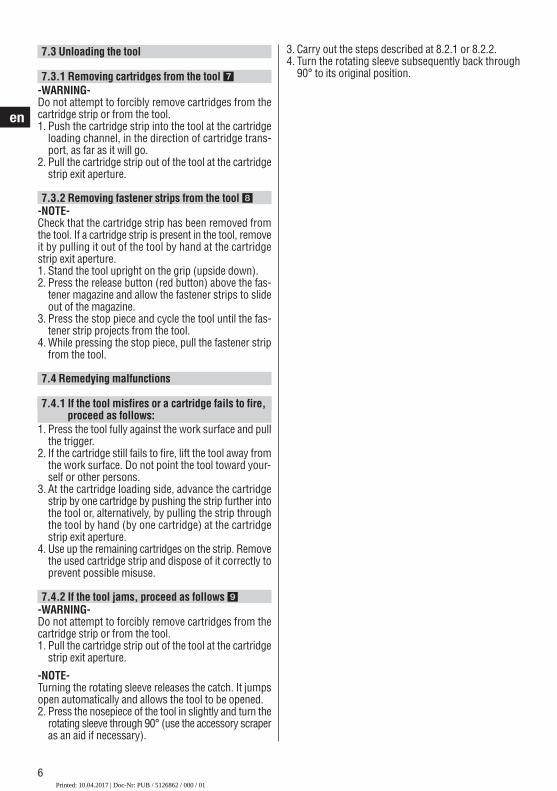
7.3 Unloading the tool
7.3.1 Removing cartridges from the tool -WARNING-Do not attempt to forcibly remove cartridges from thecartridge strip or from the tool.1. Push the cartridge strip into the tool at the cartridge
loading channel, in the direction of cartridge trans-port, as far as it will go.
2. Pull the cartridge strip out of the tool at the cartridgestrip exit aperture.
7.3.2 Removing fastener strips from the tool �-NOTE-Check that the cartridge strip has been removed fromthe tool. If a cartridge strip is present in the tool, removeit by pulling it out of the tool by hand at the cartridgestrip exit aperture.1. Stand the tool upright on the grip (upside down).2. Press the release button (red button) above the fas-
tener magazine and allow the fastener strips to slideout of the magazine.
3. Press the stop piece and cycle the tool until the fas-tener strip projects from the tool.
4. While pressing the stop piece, pull the fastener stripfrom the tool.
7.4 Remedying malfunctions
7.4.1 If the tool misfires or a cartridge fails to fire,proceed as follows:
1. Press the tool fully against the work surface and pullthe trigger.
2. If the cartridge still fails to fire, lift the tool away fromthe work surface. Do not point the tool toward your-self or other persons.
3. At the cartridge loading side, advance the cartridgestrip by one cartridge by pushing the strip further intothe tool or, alternatively, by pulling the strip throughthe tool by hand (by one cartridge) at the cartridgestrip exit aperture.
4. Use up the remaining cartridges on the strip. Removethe used cartridge strip and dispose of it correctly toprevent possible misuse.
7.4.2 If the tool jams, proceed as follows �-WARNING-Do not attempt to forcibly remove cartridges from thecartridge strip or from the tool.1. Pull the cartridge strip out of the tool at the cartridge
strip exit aperture.
-NOTE-Turning the rotating sleeve releases the catch. It jumpsopen automatically and allows the tool to be opened.2. Press the nosepiece of the tool in slightly and turn the
rotating sleeve through 90° (use the accessory scraperas an aid if necessary).
en
3. Carry out the steps described at 8.2.1 or 8.2.2.4. Turn the rotating sleeve subsequently back through
90° to its original position.
Printed: 10.04.2017 | Doc-Nr: PUB / 5126862 / 000 / 00Printed: 10.04.2017 | Doc-Nr: PUB / 5126862 / 000 / 01

7
en
8. Care and maintenance
When this type of tool is used under normal operatingconditions, dirt and residues build up inside it and func-tionally relevant parts are subject to wear. Regular inspec-tions and maintenance are thus essential in order toensure reliable operation.
Recommended interval for cleaning the tool and check-ing the condition of the piston and piston stopper:
● At least daily when the tool is subjected to inten-sive use.
● After driving 5,000 fasteners, at the latest.
-WARNING-The tool must be unloaded before carrying out care andmaintenance.
– Keep the dust or dirt away from foodstuffs.– Wash your hands after cleaning the tool.
8.2.1 Checking and replacing the piston and pistonstopper ��
-NOTE-– If the tool is used incorrectly (e.g. no fastener loaded
in the tool before firing or the fastener is driven intounsupported sheet metal), the piston may becomejammed against the piston stopper. Should the pistonand piston stopper become fully seized in this way,these parts have reached the end of their life. The toolcannot be cycled when in this status.
– The condition of the piston and piston stopper mustbe checked at regular intervals and at least daily.
-WARNING-The tool must be unloaded.1. Stand the tool on its grip (upside down).2. Press the red button above the magazine and allow
the fastener strips to slide out of the magazine.
-CAUTION-Parts of the tool may become very hot after a period ofuse. Protective gloves must be worn if the followingmaintenance procedure is carried out before the toolhas been allowed to cool down.3. Unscrew the base plate with the fastener transport
system in a counter-clockwise direction until it isreleased from the tool. Lift the base plate and fas-tener transport system away from the tool.
4. Pull the piston out of the piston guide.5. Also pull the piston stopper out of the base plate
(with the aid of the piston, if necessary).6. Check the piston and piston stopper for damage. If
signs of damage are found or the piston is jammedagainst the piston stopper, the piston and pistonstopper must be replaced.
-NOTE-Check the piston for straightness by rolling it on a smoothsurface.Never use a worn or damaged piston and do not tam-per with or modify the piston in any way.7. Pull out the catch before inserting the piston. Hold
the catch in this position until the piston is fullyinserted and its tip no longer projects from the tool.
8. Insert the piston stopper the right way round in thebase plate (rubber part toward the front).
9. Press the base plate and the fastener transport sys-tem against the threaded section on the tool androtate it in a clockwise direction until it is screwedon as far as it will go.
10.Turn the base plate with the fastener transport sys-tem back to its original position over the magazine.
11.Push the magazine back until it engages with the fas-tener transport system.
-CAUTION-
● The tool may become hot duringoperation.
● You could burn your hands.● Wear protective gloves before
carrying out care and maintenance.
8.1 Care of the toolClean the casing of the tool at regular intervals with adamp cloth.
-NOTE-Do not use a spray or steam-cleaning system for clean-ing. Never operate the tool when the ventilation slots areobstructed. Do not permit foreign objects to enter theinterior of the tool.
8.2 MaintenanceCheck all external parts of the tool for damage at regu-lar intervals and check that all controls operate prop-erly. Do not operate the tool when parts are damaged orwhen the controls do not operate properly. If necessary,have the tool repaired at a Hilti service centre.Use the tool only with the recommended cartridges andpower settings. Use of the wrong cartridges or use ofexcessively high power settings may lead to prematurefailure of parts of the tool.
-CAUTION- when cleaning:Never use grease for the maintenance/lubrication ofparts of the tool. This may lead to malfunctions. Useonly Hilti lubricant spray or a product of comparablequality.The residues deposited inside DX tools contain sub-stances that may be injurious to your health:– Do not inhale any dust or dirt while cleaning.
Printed: 10.04.2017 | Doc-Nr: PUB / 5126862 / 000 / 00Printed: 10.04.2017 | Doc-Nr: PUB / 5126862 / 000 / 01

8
en
8.2.2 Cleaning the piston guide � �� �� -NOTE-Check that no cartridges are present in the tool. If nec-essary, unload the tool as described at section 7.3.1.1. Stand the tool on its grip (upside down).2. Press the red button above the magazine and allow
the fastener strips to slide out of the magazine.
-CAUTION-Parts of the tool may become very hot after a period ofuse. Protective gloves must be worn if the followingmaintenance procedure is carried out before the toolhas been allowed to cool down.3. Unscrew the base plate with the fastener transport
system in a counter-clockwise direction until it isreleased from the tool. Lift the base plate and fas-tener transport system away from the tool.
4. Pull the piston out of the piston guide.5. Pull out the catch and hold it securely in this posi-
tion.6. Pull the piston guide upwards and out of the tool and
then release the catch.7. Use the large wire brush (accessory) to clean the
outside and inside surfaces of the piston guide, includ-ing the threaded section.
8. Use the small round brush to clean the cartridgechamber and the adjacent bore for the power regu-lating pin.
9. Lubricate the slider and the piston guide collar withHilti spray.
-NOTE-Use of lubricants other than Hilti lubricant spray maycause damage to rubber parts of the tool, especially thepiston stopper.10.Lubricate the moving part of the fastener transport
system with Hilti lubricant spray.11.Lubricate the guide channels in the tool with Hilti
lubricant (accessible through the ventilation slots).12.Slide the piston guide into the tool from above until
the catch engages.13.Pull out the catch before inserting the piston. Hold
the catch in this position until the piston is fullyinserted and its tip no longer projects from the tool.
14.Press the base plate and the fastener transport sys-tem against the threaded section on the tool androtate it on in a clockwise direction until it is screwedon as far as it will go.
15.Turn the base plate with the fastener transport sys-tem back to its original position over the magazine.
16.Push the magazine back until it engages with the fas-tener transport system.
8.3 Checking the tool after care and maintenanceAfter carrying out care and maintenance and before load-ing the cartridges, check that all safety devices havebeen fitted and that they function faultlessly.
-NOTE-Use of lubricants other than Hilti lubricant spray maycause damage to rubber parts of the tool, especially thepiston stopper.
Printed: 10.04.2017 | Doc-Nr: PUB / 5126862 / 000 / 00Printed: 10.04.2017 | Doc-Nr: PUB / 5126862 / 000 / 01

9
en
9. Troubleshooting-WARNING-The tool must be unloaded before taking any steps to remedy faults. FaultCartridge is not transported.
Cartridge strip cannot beremoved from the tool.
Cartridge doesn't fire.
Fastener penetrates toodeeply (inadequate fastener stand-off). �E
Fastener does not penetrate deeply enough(excessive fastenerstand-off). �D
Possible causeDamaged cartridge strip.
The tool is damaged.The tool is damaged or has overheated due to an excessivelyhigh fastener driving rate.
Misfire.The tool needs to be cleaned.The base plate and fastener transportsystem section are not screwed onfully.The tool is not pressed down fully.
All cartridges on the strip have beenused up.Fastener transport malfunction.
A single cartridge is defective.
The tool or cartridges are defective.Fastener missed the steel beam.
Power setting too high.
The piston is worn.The wrong piston has been fitted.
Fastener driven into the rib of thebeam.Different thickness and/or strength ofsupporting material.
Fastener driving power is too low.
The tool needs to be cleaned.The piston is broken.The tool is damaged.The wrong piston has been fitted.
RemedyChange the cartridge strip. (see 7.3.1and 7.2.3)Contact Hilti.Allow the tool to cool down and then tryagain to carefully remove the cartridgestrip. If still not possible, contact Hilti.-NOTE-Do not attempt to forcibly remove cartridges from the strip or from the tool.See “Remedying malfunctions” (7.4).Clean the tool.Screw the base plate and fastener transport system on fully.
Press the tool down fully before pullingthe trigger.Remove the cartridge strip and reloadwith a new strip.Check the movement of the fasteners;unload defective fasteners if necessary.Advance the cartridge strip manuallyby one cartridge at the cartridge loadingside by pushing it further into thetool and then use up the remaining cartridges.Contact Hilti.Mark the position of the beam.Drive another fastener into the beam.Reduce fastener driving power accordingto the recommendations for the cartridge�� or use a less powerful cartridge.Replace the piston and piston stopper.Check that the right combination of piston and fastener is used.Reposition the tool and drive anotherfastener.Increase fastener driving power in accordance with recommendations ��or use a more powerful cartridge.Increase fastener driving power in accordance with recommendations ��or use a more powerful cartridge.Clean the tool.Change the piston and piston stopper.Contact Hilti.Check that the right combination of piston and fastener is used.
Printed: 10.04.2017 | Doc-Nr: PUB / 5126862 / 000 / 00Printed: 10.04.2017 | Doc-Nr: PUB / 5126862 / 000 / 01

10
en
If these measures fail to remedy the problem, please contact Hilti.
Fastener stand-off variesconsiderably. �F
Shear breakage. �C
The tool remains compressed (does notextend when pressureis released).
The tool cannot be fired.
No fastener is driven.
The base plate cannot bescrewed on to the toolfully.
The piston cannot be fitted.The piston guide cannotbe fitted.
Stiff cycling action (highforce required to pressthe tool down).
Irregular driving power.
Fastener driven into the rib of thebeam.The supporting material is thickerand/or of higher strength.
The piston is jammed against the piston stopper.The tool needs to be cleaned.The cartridge strip has jammed, thetool has overheated.
Trigger pulled before the tool is fullypressed down.Fastener transport malfunction.
The tool needs to be cleaned.The base plate and fastener transportsystem are not screwed on fully.The tool is damaged.Fastener strip transport mechanism isdefective.No piston in the tool.The piston is broken.The base plate needs to be cleaned.
Fasteners are jammed in the baseplate.
The piston stopper has been insertedthe wrong way round.
The piston guide needs to be cleanedat the end of the threaded section.The tool, the piston guide in particular,needs to be cleaned.The catch remains in the closed position.The piston guide is incorrectly positioned.The tool needs to be cleaned.
Clean the tool. Replace the wearingparts. Contact Hilti if irregular drivingpower is still experienced.Reposition the tool and drive anotherfastener.Check that the recommended type of fastener is being used and then increasedriving power in accordance with recommendations for the cartridge or,respectively, use a more powerful cartridge.Replace the piston and piston stopper.(7.4.2)Clean the tool. (8.2.2)Please refer to “Cartridge strip cannotbe removed.”Do not exceed the maximum recommended fastener driving rate.Press the tool down fully and then pullthe trigger.Load fastener strip (7.2.1); check thatstrip is free to move; remove any dam-aged or distorted fasteners (7.3.2).Clean the tool. (8.2.2)Screw the base plate and fastener transport system on fully.Contact Hilti.Contact Hilti.
Fit the piston.Replace the piston and piston stopper.Use the brushes provided to clean thebase plate and associated parts. Lubricate with Hilti spray.Remove the jammed fasteners. Avoid shear breakage (see above).Avoid missing the beam (driving the fastener into unsupported sheet metal);mark the position of the beams accurately if necessary.Unscrew and remove the base plate. Fitthe piston stopper the right way roundand screw on the base plate.Clean and lubricate the thread.
Clean the piston guide and refit the piston.Open the catch. (8.2.2)Position the piston guide correctly wheninserting it. (8.2.2)Clean the piston guide. Check the pistonfor straightness.Clean the tool. (8.2.1 and 8.2.2)
Printed: 10.04.2017 | Doc-Nr: PUB / 5126862 / 000 / 00Printed: 10.04.2017 | Doc-Nr: PUB / 5126862 / 000 / 01

11
en
10. DisposalMost of the materials from which Hilti powder-actuated tools are manufactured can be recycled. The materialsmust be correctly separated before they can be recycled. In many countries, Hilti has already made arrangementsfor taking back your old powder-actuated tools for recycling. Please ask your Hilti customer service departmentor Hilti sales representative for further information. Should you wish to return the tool yourself to a disposal facilityfor recycling, proceed as follows: Dismantle the tool as far as possible without the need for special tools. Nationaland international directives and regulations must be observed.
Separate the individual parts as follows:
Part/assemblyToolboxOuter casingPistonPiston stopperScrews, small partsUsed/partly-used cartridge strips
Main materialPlasticPlastic/synthetic rubberSteelSteel/plasticSteelSteel/plastic
Recycling Plastics recyclingPlastics recyclingScrap metalScrap metalScrap metalIn accordance with local regulations
11. Manufacturer's warranty – DX ToolsHilti warrants that the tool supplied is free of defectsin material and workmanship. This warranty is valid solong as the tool is operated and handled correctly,cleaned and serviced properly and in accordance withthe Hilti Operating Instructions, and the technical sys-tem is maintained. This means that only original Hilticonsumables, components and spare parts, or otherproducts of equivalent quality, may be used in the tool.
This warranty provides the free-of-charge repair orreplacement of defective parts only over the entire lifes-pan of the tool. Parts requiring repair or replacementas a result of normal wear and tear are not covered bythis warranty.
Additional claims are excluded, unless stringentnational rules prohibit such exclusion. In particular,Hilti is not obligated for direct, indirect, incidentalor consequential damages, losses or expenses inconnection with, or by reason of, the use of, or inabil-ity to use the tool for any purpose. Implied warrantiesof merchantability or fitness for a particular purposeare specifically excluded.
For repair or replacement, send tool or related partsimmediately upon discovery of the defect to the addressof the local Hilti marketing organization provided.
This constitutes Hilti's entire obligation with regard towarranty and supersedes all prior or contemporane-ous comments and oral or written agreements con-cerning warranties.
Confirmation of CIP testingThe Hilti DX 860-ENP has been system and type tested.As a result, the tool bears the rectangular PTB approvalmark showing approval number S814. Hilti thus guar-antees compliance with the approved type. Unaccept-able defects or deficiencies, etc. determined during useof the tool must be reported to the person responsibleat the approval authority (PTB) and to the Office of thePermanent International Commission (C.I.P.).
Printed: 10.04.2017 | Doc-Nr: PUB / 5126862 / 000 / 00Printed: 10.04.2017 | Doc-Nr: PUB / 5126862 / 000 / 01

12
en
12. Health and safety of the operator
12.1 Noise information
Powder-actuated fastening toolType DX 860-ENPModel SeriesCaliber 6.8/18 redPower regulation 2Application Fastening to 8 mm steel (390 MPa)
with X-ENP 19L15MX R
Declared measured values of noise characteristics according to 2006/42/EC Machinery Directive in conjunction with E DIN EN 15895Noise (power) level: LWA, 1s
1 115 dB(A)Emission noise-pressure level in the work station: LpA, 1s
2 104 dB(A)Peak sound pressure emission level: LpC, peak
3 137 dB(C)Operation and set-up conditions:Set-up and operation of the pin driver in accordance with E DIN EN 15895-1 in the semi-anechoic test room ofMul̈ler-BBM GmbH. The ambient conditions in the test room conform to DIN EN ISO 3745.Testing procedure:Enveloping surface method in anechoic room on reflective surface area in accordance with E DIN EN 15895, DINEN ISO 3745 and DIN EN ISO 11201.NOTE: The noise emissions measured and the associated measurement uncertainty represent the upper limit forthe noise values to be expected during the measurements.Variations in operating conditions may cause deviations from these emission values.1 ± 2 dB (A) 2 ± 2 dB (A) 3 ± 2 dB (C)
12.2 VibrationTotal vibration in accordance with 2006/42/EC does notexceed 2.5 m/s².
Further information about user health and safety can befound at www.hilti.com/hse.
Printed: 10.04.2017 | Doc-Nr: PUB / 5126862 / 000 / 00Printed: 10.04.2017 | Doc-Nr: PUB / 5126862 / 000 / 01

*202946*
2029
46
Hilti CorporationLI-9494 SchaanTel.: +423 / 234 21 11Fax:+423 / 234 29 65www.hilti.com
Hilti = registered trademark of Hilti Corp., Schaan W 2973 | 1112 | 00-Pos. 2 | 1 Printed in Liechtenstein © 2012Right of technical and programme changes reserved S. E. & O. 202946 / A2
Printed: 10.04.2017 | Doc-Nr: PUB / 5126862 / 000 / 00Printed: 10.04.2017 | Doc-Nr: PUB / 5126862 / 000 / 01