openshift container platform 3 - red hat customer portal · is available on red hat enterprise...
TRANSCRIPT

OpenShift Container Platform 3.11
Using Images
OpenShift Container Platform 3.11 Guide to Using Images
Last Updated: 2020-04-13


OpenShift Container Platform 3.11 Using Images
OpenShift Container Platform 3.11 Guide to Using Images

Legal Notice
Copyright © 2020 Red Hat, Inc.
The text of and illustrations in this document are licensed by Red Hat under a Creative CommonsAttribution–Share Alike 3.0 Unported license ("CC-BY-SA"). An explanation of CC-BY-SA isavailable athttp://creativecommons.org/licenses/by-sa/3.0/. In accordance with CC-BY-SA, if you distribute this document or an adaptation of it, you mustprovide the URL for the original version.
Red Hat, as the licensor of this document, waives the right to enforce, and agrees not to assert,Section 4d of CC-BY-SA to the fullest extent permitted by applicable law.
Red Hat, Red Hat Enterprise Linux, the Shadowman logo, the Red Hat logo, JBoss, OpenShift,Fedora, the Infinity logo, and RHCE are trademarks of Red Hat, Inc., registered in the United Statesand other countries.
Linux ® is the registered trademark of Linus Torvalds in the United States and other countries.
Java ® is a registered trademark of Oracle and/or its affiliates.
XFS ® is a trademark of Silicon Graphics International Corp. or its subsidiaries in the United Statesand/or other countries.
MySQL ® is a registered trademark of MySQL AB in the United States, the European Union andother countries.
Node.js ® is an official trademark of Joyent. Red Hat is not formally related to or endorsed by theofficial Joyent Node.js open source or commercial project.
The OpenStack ® Word Mark and OpenStack logo are either registered trademarks/service marksor trademarks/service marks of the OpenStack Foundation, in the United States and othercountries and are used with the OpenStack Foundation's permission. We are not affiliated with,endorsed or sponsored by the OpenStack Foundation, or the OpenStack community.
All other trademarks are the property of their respective owners.
Abstract
Use these topics to find out what different S2I (Source-to-Image), database and Docker imagesare available for OpenShift Container Platform 3.11 users.

. . . . . . . . . . . . . . . . . . . . . . . . . . . . . . . . . . . . . . . . . . . . . . . . . . . . . . . . . . . . . . . . . . . . . . . . . . . . . . . . . . . . . . . . . . . . . . . . . . . . . . . . . . . . . . . . . . . . . . . . . . . . . . . . . . . . . . . . . . . . . . . . . . . . . . . . . . . . . . . . . . . . . . . . . . . . . . . . . . . . . . . . . . . . . . . . . . . . . . . . . . . . . . . . . . . . . . . . . . . . . . . . . . . . . . . . . . . . . . . . . . . . . . . . . . . . . . . . . . . . . . . . . . . . . . . . . . . . . . . .
. . . . . . . . . . . . . . . . . . . . . . . . . . . . . . . . . . . . . . . . . . . . . . . . . . . . . . . . . . . . . . . . . . . . . . . . . . . . . . . . . . . . . . . . . . . . . . . . . . . . . . . . . . . . . . . . . . . . . . . . . . . . . . . . . . . . . . . . . . . . . . . . . . . . . . . . . . . . . . . . . . . . . . . . . . . . . . . . . . . . . . . . . . . . . . . . . . . . . . . . . . . . . . . . . . . . . . . . . . . . . . . . . . . . . . . . . . . . . . . . . . . . . . . . . . . . . . . . . . . . . . . . . . . . . . . . . . . . . . . .
Table of Contents
CHAPTER 1. OVERVIEW
CHAPTER 2. SOURCE-TO-IMAGE (S2I)2.1. OVERVIEW2.2. .NET CORE
2.2.1. Benefits of Using .NET Core2.2.2. Supported Versions2.2.3. Images2.2.4. Build Process2.2.5. Environment Variables2.2.6. Quickly Deploying Applications from .NET Core Source2.2.7. .NET Core Templates
2.3. NODE.JS2.3.1. Overview2.3.2. Versions2.3.3. Images2.3.4. Build Process2.3.5. Configuration2.3.6. Hot Deploying
2.4. PERL2.4.1. Overview2.4.2. Versions2.4.3. Images2.4.4. Build Process2.4.5. Configuration2.4.6. Accessing Logs2.4.7. Hot Deploying
2.5. PHP2.5.1. Overview2.5.2. Versions2.5.3. Images2.5.4. Build Process2.5.5. Configuration
2.5.5.1. Apache Configuration2.5.6. Accessing Logs2.5.7. Hot Deploying
2.6. PYTHON2.6.1. Overview2.6.2. Versions2.6.3. Images2.6.4. Build Process2.6.5. Configuration2.6.6. Hot Deploying
2.7. RUBY2.7.1. Overview2.7.2. Versions2.7.3. Images2.7.4. Build Process2.7.5. Configuration2.7.6. Hot Deploying
2.8. CUSTOMIZING S2I IMAGES
5
666666779
10101010101111
121212121313131414151515151516181818181818181919
202121212122222324
Table of Contents
1

. . . . . . . . . . . . . . . . . . . . . . . . . . . . . . . . . . . . . . . . . . . . . . . . . . . . . . . . . . . . . . . . . . . . . . . . . . . . . . . . . . . . . . . . . . . . . . . . . . . . . . . . . . . . . . . . . . . . . . . . . . . . . . . . . . . . . . . . . . . . . . . . . . . . . . . . . . . . . . . . . . . . . . . . . . . . . . . . . . . . . . . . . . . . . . . . . . . . . . . . . . . . . . . . . . . . . . . . . . . . . . . . . . . . . . . . . . . . . . . . . . . . . . . . . . . . . . . . . . . . . . . . . . . . . . . . . . . . . . . .
2.8.1. Overview2.8.2. Invoking Scripts Embedded in an Image
CHAPTER 3. DATABASE IMAGES3.1. OVERVIEW3.2. MYSQL
3.2.1. Overview3.2.2. Versions3.2.3. Images3.2.4. Configuration and Usage
3.2.4.1. Initializing the Database3.2.4.2. Running MySQL Commands in Containers3.2.4.3. Environment Variables3.2.4.4. Volume Mount Points3.2.4.5. Changing Passwords
3.2.5. Creating a Database Service from a Template3.2.6. Using MySQL Replication
3.2.6.1. Creating the Deployment Configuration for the MySQL Master3.2.6.2. Creating a Headless Service3.2.6.3. Scaling the MySQL Slaves
3.2.7. Troubleshooting3.2.7.1. Linux Native AIO Failure
3.3. POSTGRESQL3.3.1. Overview3.3.2. Versions3.3.3. Images3.3.4. Configuration and Usage
3.3.4.1. Initializing the Database3.3.4.2. Running PostgreSQL Commands in Containers3.3.4.3. Environment Variables3.3.4.4. Volume Mount Points3.3.4.5. Changing Passwords
3.3.5. Creating a Database Service from a Template3.4. MONGODB
3.4.1. Overview3.4.2. Versions3.4.3. Images3.4.4. Configuration and usage
3.4.4.1. Initializing the database3.4.4.2. Running MongoDB commands in containers3.4.4.3. Environment Variables3.4.4.4. Volume mount points3.4.4.5. Changing passwords
3.4.5. Creating a database service from a template3.4.6. MongoDB replication
3.4.6.1. Limitations3.4.6.2. Using the example template3.4.6.3. Scale up3.4.6.4. Scale down
3.5. MARIADB3.5.1. Overview3.5.2. Versions3.5.3. Images
2424
26262626262627272727303031323235353536363637373737373839394141414141
42424243444445464747484849494949
OpenShift Container Platform 3.11 Using Images
2

. . . . . . . . . . . . . . . . . . . . . . . . . . . . . . . . . . . . . . . . . . . . . . . . . . . . . . . . . . . . . . . . . . . . . . . . . . . . . . . . . . . . . . . . . . . . . . . . . . . . . . . . . . . . . . . . . . . . . . . . . . . . . . . . . . . . . . . . . . . . . . . . . . . . . . . . . . . . . . . . . . . . . . . . . . . . . . . . . . . . . . . . . . . . . . . . . . . . . . . . . . . . . . . . . . . . . . . . . . . . . . . . . . . . . . . . . . . . . . . . . . . . . . . . . . . . . . . . . . . . . . . . . . . . . . . . . . . . . . . .
3.5.4. Configuration and Usage3.5.4.1. Initializing the Database3.5.4.2. Running MariaDB Commands in Containers3.5.4.3. Environment Variables3.5.4.4. Volume Mount Points3.5.4.5. Changing Passwords
3.5.5. Creating a Database Service from a Template3.5.6. Troubleshooting
3.5.6.1. Linux Native AIO Failure
CHAPTER 4. OTHER IMAGES4.1. OVERVIEW4.2. JENKINS
4.2.1. Overview4.2.2. Images4.2.3. Configuration and Customization
4.2.3.1. Authentication4.2.3.1.1. OpenShift Container Platform OAuth authentication4.2.3.1.2. Jenkins Standard Authentication
4.2.3.2. Environment Variables4.2.3.3. Cross Project Access4.2.3.4. Volume Mount Points4.2.3.5. Customizing the Jenkins Image through Source-To-Image4.2.3.6. Configuring the Jenkins Kubernetes Plug-in
4.2.3.6.1. Permission Considerations4.2.4. Usage
4.2.4.1. Creating a Jenkins Service from a Template4.2.4.2. Using the Jenkins Kubernetes Plug-in4.2.4.3. Memory Requirements
4.2.5. Jenkins Plug-ins4.2.5.1. OpenShift Container Platform Client Plug-in4.2.5.2. OpenShift Container Platform Pipeline Plug-in4.2.5.3. OpenShift Container Platform Sync Plug-in4.2.5.4. Kubernetes Plug-in
4.3. JENKINS AGENTS4.3.1. Overview4.3.2. Images4.3.3. Configuration and Customization
4.3.3.1. Environment Variables4.3.4. Usage
4.3.4.1. Memory Requirements4.3.4.1.1. Gradle builds
4.3.5. Agent Pod Retention4.4. OTHER CONTAINER IMAGES
50505051
5353545555
57575757575757585859616161
636565656668686869697070707071717272727374
Table of Contents
3

OpenShift Container Platform 3.11 Using Images
4

CHAPTER 1. OVERVIEWUse these topics to discover the different Source-to-Image (S2I), database, and other container imagesthat are available for OpenShift Container Platform users.
Red Hat’s official container images are provided in the Red Hat Registry at registry.redhat.io. OpenShiftContainer Platform’s supported S2I, database, and Jenkins images are provided in the openshift3repository in the Red Hat Registry. For example, registry.redhat.io/openshift3/ose for the AtomicOpenShift Application Platform image.
The xPaaS middleware images are provided in their respective product repositories on the Red HatRegistry, but suffixed with a -openshift. For example, registry.redhat.io/jboss-eap-6/eap64-openshiftfor the JBoss EAP image.
All Red Hat supported images covered in this book are described in the Red Hat Container Catalog . Forevery version of each image, you can find details on its contents and usage. Browse or search for theimage that interests you.
IMPORTANT
The newer versions of container images are not compatible with earlier versions ofOpenShift Container Platform. Verify and use the correct version of container images,based on your version of OpenShift Container Platform.
CHAPTER 1. OVERVIEW
5

CHAPTER 2. SOURCE-TO-IMAGE (S2I)
2.1. OVERVIEW
This topic group includes information on the different S2I (Source-to-Image) supported imagesavailable for OpenShift Container Platform users.
2.2. .NET CORE
2.2.1. Benefits of Using .NET Core
.NET Core is a general purpose development platform featuring automatic memory management andmodern programming languages. It allows users to build high-quality applications efficiently. .NET Coreis available on Red Hat Enterprise Linux (RHEL 7) and OpenShift Container Platform via certifiedcontainers. .NET Core offers:
The ability to follow a microservices-based approach, where some components are built with.NET and others with Java, but all can run on a common, supported platform in Red HatEnterprise Linux and OpenShift Container Platform.
The capacity to more easily develop new .NET Core workloads on Windows; customers are ableto deploy and run on either Red Hat Enterprise Linux or Windows Server.
A heterogeneous data center, where the underlying infrastructure is capable of running .NETapplications without having to rely solely on Windows Server.
Access to many of the popular development frameworks such as .NET, Java, Ruby, and Pythonfrom within OpenShift Container Platform.
2.2.2. Supported Versions
.NET Core version 2.2
.NET Core version 2.1
.NET Core version 1.1
.NET Core version 1.0
Supported on Red Hat Enterprise Linux (RHEL) 7 and OpenShift Container Platform versions3.3 and later
For release details related to .NET Core version 2.2, see Release Notes for Containers .
For release details related to .NET Core version 2.1, see Release Notes for Containers .
Versions 1.1 and 1.0 (rh-dotnetcore11 and rh-dotnetcore10) ship with the project.json build system(1.0.0-preview2 SDK). See the Known Issues chapter in the version 1.1 Release Notes for details oninstalling this SDK on a non-RHEL system.
2.2.3. Images
The RHEL 7 images are available through the Red Hat Registry:
OpenShift Container Platform 3.11 Using Images
6

$ docker pull registry.redhat.io/dotnet/dotnet-22-rhel7$ docker pull registry.redhat.io/dotnet/dotnet-21-rhel7$ docker pull registry.redhat.io/dotnet/dotnetcore-11-rhel7$ docker pull registry.redhat.io/dotnet/dotnetcore-10-rhel7
Image stream definitions for the .NET Core on RHEL S2I image are now added during OpenShiftContainer Platform installations.
2.2.4. Build Process
S2I produces ready-to-run images by injecting source code into a container and letting the containerprepare that source code for execution. It performs the following steps:
1. Starts a container from the builder image.
2. Downloads the application source.
3. Streams the scripts and application sources into the builder image container.
4. Runs the assemble script (from the builder image).
5. Saves the final image.
See S2I Build Process for a detailed overview of the build process.
2.2.5. Environment Variables
The .NET Core images support several environment variables, which you can set to control the buildbehavior of your .NET Core application.
NOTE
You must set environment variables that control build behavior in the S2I buildconfiguration or in the .s2i/environment file to make them available to the build steps.
Table 2.1. NET Core Environment Variables
Variable Name Description Default
DOTNET_STARTUP_PROJECT
Selects projects to run. This must be aproject file (for example, csproj orfsproj) or a folder containing a singleproject file.
.
DOTNET_ASSEMBLY_NAME
Selects the assembly to run. This mustnot include the .dll extension. Set thisto the output assembly name specifiedin csproj(PropertyGroup/AssemblyName).
The name of the csproj file.
CHAPTER 2. SOURCE-TO-IMAGE (S2I)
7

DOTNET_RESTORE_SOURCES
Specifies the space-separated list ofNuGet package sources used duringthe restore operation. This overridesall of the sources specified in theNuGet.config file.
DOTNET_TOOLS Specifies a list of .NET tools to installbefore building the application. Toinstall a specific version, add @<version> to the end of thepackage name.
DOTNET_NPM_TOOLS
Specifies a list of NPM packages toinstall before building the application.
DOTNET_TEST_PROJECTS
Specifies the list of test projects totest. This must be project files orfolders containing a single project file. dotnet test is invoked for each item.
DOTNET_CONFIGURATION
Runs the application in Debug or Release mode. This value should beeither Release or Debug.
Release
DOTNET_VERBOSITY
Specifies the verbosity of the dotnetbuild commands. When set, theenvironment variables are printed atthe start of the build. This variable canbe set to one of the msbuild verbosityvalues (q[uiet], m[inimal], n[ormal], d[etailed], and diag[nostic]).
HTTP_PROXY, HTTPS_PROXY
Configures the HTTP/HTTPS proxyused when building and running theapplication.
NPM_MIRROR Uses a custom NPM registry mirror todownload packages during the buildprocess.
ASPNETCORE_URLS
This variable is set to http://*:8080 toconfigure ASP.NET Core to use theport exposed by the image. Changingthis is not recommended.
http://*:8080
DOTNET_RM_SRC When set to true, the source code isnot included in the image.
Variable Name Description Default
OpenShift Container Platform 3.11 Using Images
8

DOTNET_SSL_DIRS Used to specify a list of folders andfiles with additional SSL certificates totrust. The certificates are trusted byeach process that runs during the buildand all processes that run in the imageafter the build, including theapplication that was built. The itemscan be absolute paths starting with / orpaths in the source repository (forexample, certificates).
DOTNET_RESTORE_DISABLE_PARALLEL
When set to true, disables restoringmultiple projects in parallel. Thisreduces restore timeout errors whenthe build container is running with lowCPU limits.
false
DOTNET_INCREMENTAL
When set to true, the NuGet packagesare kept so they can be re-used for anincremental build.
false
DOTNET_PACK When set to true, creates a tar.gz fileat /opt/app-root/app.tar.gz thatcontains the published application.
Variable Name Description Default
2.2.6. Quickly Deploying Applications from .NET Core Source
IMPORTANT
The .NET image stream must first be installed. If you ran a standard installation, the imagestream will be present.
An image can be used to build an application by running oc new-app against a sample repository:
$ oc new-app registry.redhat.io/dotnet/dotnet-22-rhel7~https://github.com/redhat-developer/s2i-dotnetcore-ex#dotnetcore-2.2 --context-dir=app$ oc new-app registry.redhat.io/dotnet/dotnet-21-rhel7~https://github.com/redhat-developer/s2i-dotnetcore-ex#dotnetcore-2.1 --context-dir=app$ oc new-app registry.redhat.io/dotnet/dotnetcore-11-rhel7~https://github.com/redhat-developer/s2i-dotnetcore-ex#dotnetcore-1.1 --context-dir=app$ oc new-app registry.redhat.io/dotnet/dotnetcore-10-rhel7~https://github.com/redhat-developer/s2i-dotnetcore-ex#dotnetcore-1.0 --context-dir=app
NOTE
The oc new-app command can detect .NET Core source starting in OpenShift ContainerPlatform 3.3.
CHAPTER 2. SOURCE-TO-IMAGE (S2I)
9

2.2.7. .NET Core Templates
IMPORTANT
The .NET image templates and the .NET images streams must first be installed. If you rana standard installation, the templates and image streams will be present. This can bechecked with:
$ (oc get -n openshift templates; oc get -n openshift is) | grep dotnet
OpenShift Container Platform includes templates for the .NET Core images to help easily deploy asample application.
The .NET Core sample application running on dotnet/dotnet-22-rhel7 can be deployed with:
$ oc new-app --template dotnet-example -p DOTNET_IMAGE_STREAM_TAG=dotnet:2.2 -p SOURCE_REPOSITORY_REF=dotnetcore-2.2
The .NET Core sample application running on dotnet/dotnetcore-10-rhel7 can be deployed with:
$ oc new-app --template dotnet-example
The .NET Core MusicStore application using PostgreSQL as database can be deployed with:
$ oc new-app --template=dotnet-pgsql-persistent
2.3. NODE.JS
2.3.1. Overview
OpenShift Container Platform provides S2I enabled Node.js images for building and running Node.jsapplications. The Node.js S2I builder image assembles your application source with any requireddependencies to create a new image containing your Node.js application. This resulting image can berun either by OpenShift Container Platform or by a container runtime.
2.3.2. Versions
Currently, OpenShift Container Platform provides versions 0.10, 4, and 6 of Node.js.
2.3.3. Images
These images come in two flavors, depending on your needs:
RHEL 7
CentOS 7
RHEL 7 Based Images
The RHEL 7 images are available through the Red Hat Registry:
OpenShift Container Platform 3.11 Using Images
10

$ docker pull registry.redhat.io/openshift3/nodejs-010-rhel7$ docker pull registry.redhat.io/rhscl/nodejs-4-rhel7
CentOS 7 Based Image
This image is available on Docker Hub:
$ docker pull openshift/nodejs-010-centos7
To use these images, you can either access them directly from these image registries, or push them intoyour OpenShift Container Platform container image registry . Additionally, you can create an imagestream that points to the image, either in your container image registry or at the external location. YourOpenShift Container Platform resources can then reference the ImageStream. You can find exampleimage stream definitions for all the provided OpenShift Container Platform images.
2.3.4. Build Process
S2I produces ready-to-run images by injecting source code into a container and letting the containerprepare that source code for execution. It performs the following steps:
1. Starts a container from the builder image.
2. Downloads the application source.
3. Streams the scripts and application sources into the builder image container.
4. Runs the assemble script (from the builder image).
5. Saves the final image.
See S2I Build Process for a detailed overview of the build process.
2.3.5. Configuration
The Node.js image supports a number of environment variables, which can be set to control theconfiguration and behavior of the Node.js runtime.
To set these environment variables as part of your image, you can place them into a .s2i/environmentfile inside your source code repository, or define them in the environment section of the buildconfiguration’s sourceStrategy definition.
You can also set environment variables to be used with an existing image when creating newapplications, or by updating environment variables for existing objects such as deploymentconfigurations.
NOTE
Environment variables that control build behavior must be set as part of the s2i buildconfiguration or in the .s2i/environment file to make them available to the build steps.
Table 2.2. Development Mode Environment Variables
CHAPTER 2. SOURCE-TO-IMAGE (S2I)
11

Variable name Description
DEV_MODE When set to true, enables hot deploy and opens the debug port.Additionally, indicates to tooling that the image is in development mode.Default is false.
DEBUG_PORT The debug port. Only valid if DEV_MODE is set to true. Default is 5858.
NPM_MIRROR The custom NPM registry mirror URL. All NPM packages will bedownloaded from the mirror link during the build process.
2.3.6. Hot Deploying
Hot deployment allows you to quickly make and deploy changes to your application without having togenerate a new S2I build. In order to immediately pick up changes made in your application source code,you must run your built image with the DEV_MODE=true environment variable.
You can set new environment variables when creating new applications, or updating environmentvariables for existing objects.
WARNING
Only use the DEV_MODE=true environment variable while developing ordebugging. Using this in your production environment is not recommended.
To change the source code of a running pod, open a remote shell into the container :
$ oc rsh <pod_id>
Entering into a running container changes your current directory to /opt/app-root/src, where thesource code is located.
2.4. PERL
2.4.1. Overview
OpenShift Container Platform provides S2I enabled Perl images for building and running Perlapplications. The Perl S2I builder image assembles your application source with any requireddependencies to create a new image containing your Perl application. This resulting image can be runeither by OpenShift Container Platform or by a container runtime.
2.4.2. Versions
Currently, OpenShift Container Platform supports versions 5.16, 5.20, and 5.24 of Perl.
OpenShift Container Platform 3.11 Using Images
12
2.4.3. Images
Images comes in two flavors, depending on your needs:
RHEL 7
CentOS 7
RHEL 7 Based Images
The RHEL 7 images are available through the Red Hat Registry:
$ docker pull registry.redhat.io/openshift3/perl-516-rhel7$ docker pull registry.redhat.io/rhscl/perl-520-rhel7$ docker pull registry.redhat.io/rhscl/perl-524-rhel7
CentOS 7 Based Image
A CentOS image for Perl 5.16 is available on Docker Hub:
$ docker pull openshift/perl-516-centos7
To use these images, you can either access them directly from these image registries or push them intoyour OpenShift Container Platform container image registry . Additionally, you can create an imagestream that points to the image, either in your container image registry or at the external location. YourOpenShift Container Platformt resources can then reference the ImageStream. You can find exampleimage stream definitions for all the provided OpenShift Container Platform images.
2.4.4. Build Process
S2I produces ready-to-run images by injecting source code into a container and letting the containerprepare that source code for execution. It performs the following steps:
1. Starts a container from the builder image.
2. Downloads the application source.
3. Streams the scripts and application sources into the builder image container.
4. Runs the assemble script (from the builder image).
5. Saves the final image.
See S2I Build Process for a detailed overview of the build process.
2.4.5. Configuration
The Perl image supports a number of environment variables which can be set to control theconfiguration and behavior of the Perl runtime.
To set these environment variables as part of your image, you can place them into a .s2i/environmentfile inside your source code repository, or define them in the environment section of the buildconfiguration’s sourceStrategy definition.
You can also set environment variables to be used with an existing image when creating new
CHAPTER 2. SOURCE-TO-IMAGE (S2I)
13

You can also set environment variables to be used with an existing image when creating newapplications, or by updating environment variables for existing objects such as deploymentconfigurations.
NOTE
Environment variables that control build behavior must be set as part of the s2i buildconfiguration or in the .s2i/environment file to make them available to the build steps.
Table 2.3. Perl Environment Variables
Variable name Description
ENABLE_CPAN_TEST When set to true, this variable installs all the cpan modules andruns their tests. By default, the testing of the modules is turnedoff.
CPAN_MIRROR This variable specifies a mirror URL which cpanminus uses toinstall dependencies. By default, this URL is not specified.
PERL_APACHE2_RELOAD Set this to true to enable automatic reloading of modified Perlmodules. By default, automatic reloading is turned off.
HTTPD_START_SERVERS The StartServers directive sets the number of child serverprocesses created on startup. Default is 8.
HTTPD_MAX_REQUEST_WORKERS
Number of simultaneous requests that will be handled byApache. The default is 256, but it will be automatically lowered ifmemory is limited.
2.4.6. Accessing Logs
Access logs are streamed to standard output and as such they can be viewed using the oc logscommand. Error logs are stored in the /tmp/error_log file, which can be viewed using the oc rshcommand to access the container.
2.4.7. Hot Deploying
Hot deployment allows you to quickly make and deploy changes to your application without having togenerate a new S2I build. To enable hot deployment in this image, you must set the PERL_APACHE2_RELOAD environment variable to true. For example, see the oc new-app command.You can use the oc set env command to update environment variables of existing objects.
WARNING
You should only use this option while developing or debugging; it is notrecommended to turn this on in your production environment.
OpenShift Container Platform 3.11 Using Images
14

To change your source code in a running pod, use the oc rsh command to enter the container:
$ oc rsh <pod_id>
After you enter into the running container, your current directory is set to /opt/app-root/src, where thesource code is located.
2.5. PHP
2.5.1. Overview
OpenShift Container Platform provides S2I enabled PHP images for building and running PHPapplications. The PHP S2I builder image assembles your application source with any requireddependencies to create a new image containing your PHP application. This resulting image can be runeither by OpenShift Container Platform or by a container runtime.
2.5.2. Versions
Currently, OpenShift Container Platform provides versions 5.5, 5.6, and 7.0 of PHP.
2.5.3. Images
These images come in two flavors, depending on your needs:
RHEL 7
CentOS 7
RHEL 7 Based Images
The RHEL 7 images are available through the Red Hat Registry:
$ docker pull registry.redhat.io/openshift3/php-55-rhel7$ docker pull registry.redhat.io/rhscl/php-56-rhel7$ docker pull registry.redhat.io/rhscl/php-70-rhel7
CentOS 7 Based Images
CentOS images for PHP 5.5 and 5.6 are available on Docker Hub:
$ docker pull openshift/php-55-centos7$ docker pull openshift/php-56-centos7
To use these images, you can either access them directly from these image registries or push them intoyour OpenShift Container Platform container image registry . Additionally, you can create an imagestream that points to the image, either in your container image registry or at the external location. YourOpenShift Container Platform resources can then reference the image stream.
You can find example image stream definitions for all the provided OpenShift Container Platformimages.
2.5.4. Build Process
S2I produces ready-to-run images by injecting source code into a container and letting the container
CHAPTER 2. SOURCE-TO-IMAGE (S2I)
15
S2I produces ready-to-run images by injecting source code into a container and letting the containerprepare that source code for execution. It performs the following steps:
1. Starts a container from the builder image.
2. Downloads the application source.
3. Streams the scripts and application sources into the builder image container.
4. Runs the assemble script (from the builder image).
5. Saves the final image.
See S2I Build Process for a detailed overview of the build process.
2.5.5. Configuration
The PHP image supports a number of environment variables which can be set to control theconfiguration and behavior of the PHP runtime.
To set these environment variables as part of your image, you can place them into a .s2i/environmentfile inside your source code repository, or define them in the environment section of the buildconfiguration’s sourceStrategy definition.
You can also set environment variables to be used with an existing image when creating newapplications, or by updating environment variables for existing objects such as deploymentconfigurations.
NOTE
Environment variables that control build behavior must be set as part of the s2i buildconfiguration or in the .s2i/environment file to make them available to the build steps.
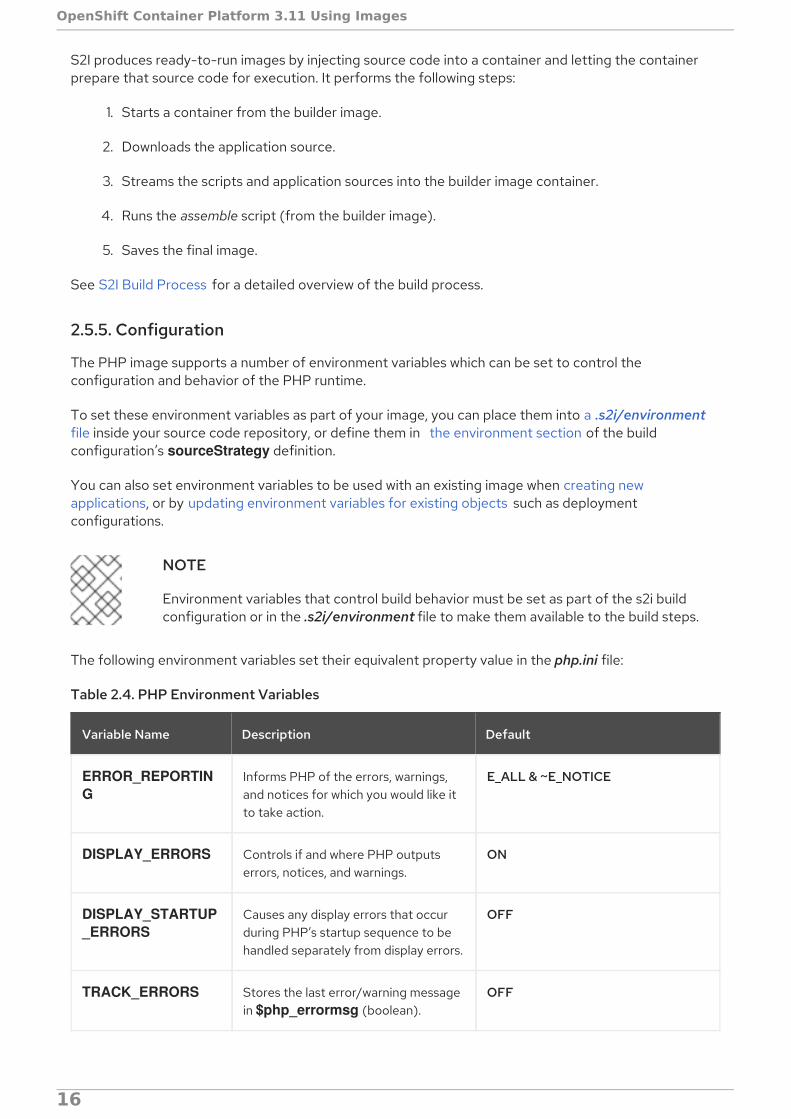
The following environment variables set their equivalent property value in the php.ini file:
Table 2.4. PHP Environment Variables
Variable Name Description Default
ERROR_REPORTING
Informs PHP of the errors, warnings,and notices for which you would like itto take action.
E_ALL & ~E_NOTICE
DISPLAY_ERRORS Controls if and where PHP outputserrors, notices, and warnings.
ON
DISPLAY_STARTUP_ERRORS
Causes any display errors that occurduring PHP’s startup sequence to behandled separately from display errors.
OFF
TRACK_ERRORS Stores the last error/warning messagein $php_errormsg (boolean).
OFF
OpenShift Container Platform 3.11 Using Images
16

HTML_ERRORS Links errors to documentation that isrelated to the error.
ON
INCLUDE_PATH Path for PHP source files. .:/opt/openshift/src:/opt/rh/php55/root/usr/share/pear
SESSION_PATH Location for session data files. /tmp/sessions
DOCUMENTROOT Path that defines the document rootfor your application (for example,/public).
/
Variable Name Description Default
The following environment variable sets its equivalent property value in the opcache.ini file:
Table 2.5. Additional PHP settings
Variable Name Description Default
OPCACHE_MEMORY_CONSUMPTION
The OPcache shared memory storage size. 16M
OPCACHE_REVALIDATE_FREQ
How often to check script time stamps for updates, in seconds. 0results in OPcache checking for updates on every request.
2
You can also override the entire directory used to load the PHP configuration by setting:
Table 2.6. Additional PHP settings
Variable Name Description
PHPRC Sets the path to the php.ini file.
PHP_INI_SCAN_DIR Path to scan for additional .ini configuration files
You can use a custom composer repository mirror URL to download packages instead of the default'packagist.org':
Table 2.7. Composer Environment Variables
Variable Name Description
COMPOSER_MIRROR Set this variable to use a custom Composer repository mirrorURL to download required packages during the build process.Note: This only affects packages listed in composer.json.
CHAPTER 2. SOURCE-TO-IMAGE (S2I)
17

2.5.5.1. Apache Configuration
If the DocumentRoot of the application is nested in the source directory /opt/openshift/src, you canprovide your own .htaccess file to override the default Apache behavior and specify how applicationrequests should be handled. The .htaccess file must be located at the root of the application source.
2.5.6. Accessing Logs
Access logs are streamed to standard out and as such they can be viewed using the oc logs command.Error logs are stored in the /tmp/error_log file, which can be viewed using the oc rsh command toaccess the container.
2.5.7. Hot Deploying
Hot deployment allows you to quickly make and deploy changes to your application without having togenerate a new S2I build. In order to immediately pick up changes made in your application source code,you must run your built image with the OPCACHE_REVALIDATE_FREQ=0 environment variable.
For example, see the oc new-app command. You can use the oc env command to update environmentvariables of existing objects.
WARNING
You should only use this option while developing or debugging; it is notrecommended to turn this on in your production environment.
To change your source code in a running pod, use the oc rsh command to enter the container:
$ oc rsh <pod_id>
After you enter into the running container, your current directory is set to /opt/app-root/src, where thesource code is located.
2.6. PYTHON
2.6.1. Overview
OpenShift Container Platform provides S2I enabled Python images for building and running Pythonapplications. The Python S2I builder image assembles your application source with any requireddependencies to create a new image containing your Python application. This resulting image can be runeither by OpenShift Container Platform or by a container runtime.
2.6.2. Versions
Currently, OpenShift Container Platform provides versions 2.7, 3.3, 3.4, and 3.5 of Python.
2.6.3. Images
OpenShift Container Platform 3.11 Using Images
18

These images come in two flavors, depending on your needs:
RHEL 7
CentOS 7
RHEL 7 Based Images
The RHEL 7 images are available through the Red Hat Registry:
$ docker pull registry.redhat.io/rhscl/python-27-rhel7$ docker pull registry.redhat.io/openshift3/python-33-rhel7$ docker pull registry.redhat.io/rhscl/python-34-rhel7$ docker pull registry.redhat.io/rhscl/python-35-rhel7
CentOS 7 Based Images
These images are available on Docker Hub:
$ docker pull centos/python-27-centos7$ docker pull openshift/python-33-centos7$ docker pull centos/python-34-centos7$ docker pull centos/python-35-centos7
To use these images, you can either access them directly from these image registries or push them intoyour OpenShift Container Platform container image registry . Additionally, you can create an imagestream that points to the image, either in your container image registry or at the external location. YourOpenShift Container Platform resources can then reference the ImageStream. You can find exampleimage stream definitions for all the provided OpenShift Container Platform images.
2.6.4. Build Process
S2I produces ready-to-run images by injecting source code into a container and letting the containerprepare that source code for execution. It performs the following steps:
1. Starts a container from the builder image.
2. Downloads the application source.
3. Streams the scripts and application sources into the builder image container.
4. Runs the assemble script (from the builder image).
5. Saves the final image.
See S2I Build Process for a detailed overview of the build process.
2.6.5. Configuration
The Python image supports a number of environment variables which can be set to control theconfiguration and behavior of the Python runtime.
To set these environment variables as part of your image, you can place them into a .s2i/environmentfile inside your source code repository, or define them in the environment section of the buildconfiguration’s sourceStrategy definition.
You can also set environment variables to be used with an existing image when creating new
CHAPTER 2. SOURCE-TO-IMAGE (S2I)
19

You can also set environment variables to be used with an existing image when creating newapplications, or by updating environment variables for existing objects such as deploymentconfigurations.
NOTE
Environment variables that control build behavior must be set as part of the s2i buildconfiguration or in the .s2i/environment file to make them available to the build steps.
Table 2.8. Python Environment Variables
Variable name Description
APP_FILE This variable specifies the file name passed to the Pythoninterpreter which is responsible for launching the application.This variable is set to app.py by default.
APP_MODULE This variable specifies the WSGI callable. It follows the pattern $(MODULE_NAME):$(VARIABLE_NAME), where themodule name is a full dotted path and the variable name refersto a function inside the specified module. If you use setup.pyfor installing the application, then the module name can be readfrom that file and the variable defaults to application. There isan example setup-test-app available.
APP_CONFIG This variable indicates the path to a valid Python file with agunicorn configuration.
DISABLE_COLLECTSTATIC Set it to a nonempty value to inhibit the execution of manage.py collectstatic during the build. Only affectsDjango projects.
DISABLE_MIGRATE Set it to a nonempty value to inhibit the execution of manage.py migrate when the produced image is run. Onlyaffects Django projects.
PIP_INDEX_URL Set this variable to use a custom index URL or mirror todownload required packages during build process. This onlyaffects packages listed in the requirements.txt file.
WEB_CONCURRENCY Set this to change the default setting for the number of workers.By default, this is set to the number of available cores times 4.
2.6.6. Hot Deploying
Hot deployment allows you to quickly make and deploy changes to your application without having togenerate a new S2I build. If you are using Django, hot deployment works out of the box.
To enable hot deployment while using Gunicorn, ensure you have a Gunicorn configuration file insideyour repository with the reload option set to true. Specify your configuration file using the APP_CONFIG environment variable. For example, see the oc new-app command. You can use the oc set env command to update environment variables of existing objects.
OpenShift Container Platform 3.11 Using Images
20

WARNING
You should only use this option while developing or debugging; it is notrecommended to turn this on in your production environment.
To change your source code in a running pod, use the oc rsh command to enter the container:
$ oc rsh <pod_id>
After you enter into the running container, your current directory is set to /opt/app-root/src, where thesource code is located.
2.7. RUBY
2.7.1. Overview
OpenShift Container Platform provides S2I enabled Ruby images for building and running Rubyapplications. The Ruby S2I builder image assembles your application source with any requireddependencies to create a new image containing your Ruby application. This resulting image can be runeither by OpenShift Container Platform or by a container runtime.
2.7.2. Versions
Currently, OpenShift Container Platform provides versions 2.0, 2.2, and 2.3 of Ruby.
2.7.3. Images
These images come in two flavors, depending on your needs:
RHEL 7
CentOS 7
RHEL 7 Based Images
The RHEL 7 images are available through the Red Hat registry:
$ docker pull registry.redhat.io/openshift3/ruby-20-rhel7$ docker pull registry.redhat.io/rhscl/ruby-22-rhel7$ docker pull registry.redhat.io/rhscl/ruby-23-rhel7
CentOS 7 Based Images
These images are available on Docker Hub:
$ docker pull openshift/ruby-20-centos7$ docker pull openshift/ruby-22-centos7$ docker pull centos/ruby-23-centos7
To use these images, you can either access them directly from these image registries or push them into
CHAPTER 2. SOURCE-TO-IMAGE (S2I)
21

To use these images, you can either access them directly from these image registries or push them intoyour OpenShift Container Platform container image registry . Additionally, you can create an imagestream that points to the image, either in your container image registry or at the external location. YourOpenShift Container Platform resources can then reference the ImageStream. You can find exampleimage stream definitions for all the provided OpenShift Container Platform images.
2.7.4. Build Process
S2I produces ready-to-run images by injecting source code into a container and letting the containerprepare that source code for execution. It performs the following steps:
1. Starts a container from the builder image.
2. Downloads the application source.
3. Streams the scripts and application sources into the builder image container.
4. Runs the assemble script (from the builder image).
5. Saves the final image.
See S2I Build Process for a detailed overview of the build process.
2.7.5. Configuration
The Ruby image supports a number of environment variables which can be set to control theconfiguration and behavior of the Ruby runtime.
To set these environment variables as part of your image, you can place them into a .s2i/environmentfile inside your source code repository, or define them in the environment section of the buildconfiguration’s sourceStrategy definition.
You can also set environment variables to be used with an existing image when creating newapplications, or by updating environment variables for existing objects such as deploymentconfigurations.
NOTE
Environment variables that control build behavior must be set as part of the s2i buildconfiguration or in the .s2i/environment file to make them available to the build steps.
Table 2.9. Ruby Environment Variables
Variable name Description
RACK_ENV This variable specifies the environment within which the Rubyapplication is deployed; for example, production, development, or test. Each level has different behavior interms of logging verbosity, error pages, and ruby geminstallation. The application assets are only compiled if RACK_ENV is set to production; the default value is production.
OpenShift Container Platform 3.11 Using Images
22
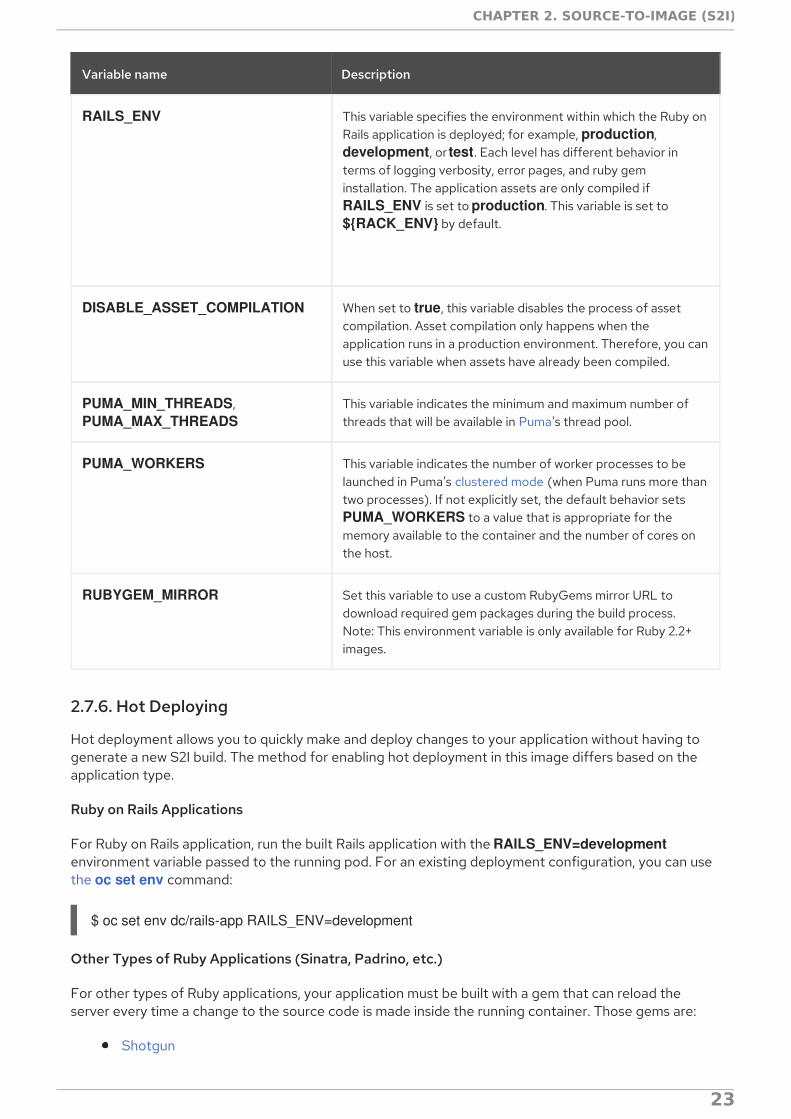
RAILS_ENV This variable specifies the environment within which the Ruby onRails application is deployed; for example, production, development, or test. Each level has different behavior interms of logging verbosity, error pages, and ruby geminstallation. The application assets are only compiled if RAILS_ENV is set to production. This variable is set to ${RACK_ENV} by default.
DISABLE_ASSET_COMPILATION When set to true, this variable disables the process of assetcompilation. Asset compilation only happens when theapplication runs in a production environment. Therefore, you canuse this variable when assets have already been compiled.
PUMA_MIN_THREADS, PUMA_MAX_THREADS
This variable indicates the minimum and maximum number ofthreads that will be available in Puma's thread pool.
PUMA_WORKERS This variable indicates the number of worker processes to belaunched in Puma’s clustered mode (when Puma runs more thantwo processes). If not explicitly set, the default behavior sets PUMA_WORKERS to a value that is appropriate for thememory available to the container and the number of cores onthe host.
RUBYGEM_MIRROR Set this variable to use a custom RubyGems mirror URL todownload required gem packages during the build process.Note: This environment variable is only available for Ruby 2.2+images.
Variable name Description
2.7.6. Hot Deploying
Hot deployment allows you to quickly make and deploy changes to your application without having togenerate a new S2I build. The method for enabling hot deployment in this image differs based on theapplication type.
Ruby on Rails Applications
For Ruby on Rails application, run the built Rails application with the RAILS_ENV=developmentenvironment variable passed to the running pod. For an existing deployment configuration, you can usethe oc set env command:
$ oc set env dc/rails-app RAILS_ENV=development
Other Types of Ruby Applications (Sinatra, Padrino, etc.)
For other types of Ruby applications, your application must be built with a gem that can reload theserver every time a change to the source code is made inside the running container. Those gems are:
Shotgun
CHAPTER 2. SOURCE-TO-IMAGE (S2I)
23

Rerun
Rack-livereload
In order to be able to run your application in development mode, you must modify the S2I run script sothat the web server is launched by the chosen gem, which checks for changes in the source code.
After you build your application image with your version of the S2I run script, run the image with the RACK_ENV=development environment variable. For example, see the oc new-app command. You canuse the oc set env command to update environment variables of existing objects.
WARNING
You should only use this option while developing or debugging; it is notrecommended to turn this on in your production environment.
To change your source code in a running pod, use the oc rsh command to enter the container:
$ oc rsh <pod_id>
After you enter into the running container, your current directory is set to /opt/app-root/src, where thesource code is located.
2.8. CUSTOMIZING S2I IMAGES
2.8.1. Overview
S2I builder images normally include assemble and run scripts, but the default behavior of those scriptsmay not be suitable for all users. This topic covers a few approaches for customizing the behavior of anS2I builder that includes default scripts.
2.8.2. Invoking Scripts Embedded in an Image
Typically, builder images provide their own version of the S2I scripts that cover the most common use-cases. If these scripts do not fulfill your needs, S2I provides a way of overriding them by adding customones in the .s2i/bin directory. However, by doing this you are completely replacing the standard scripts.In some cases this is acceptable, but in other scenarios you may prefer to execute a few commandsbefore (or after) the scripts while retaining the logic of the script provided in the image. In this case, it ispossible to create a wrapper script that executes custom logic and delegates further work to the defaultscript in the image.
To determine the location of the scripts inside of the builder image, look at the value of io.openshift.s2i.scripts-url label. Use docker inspect:
$ docker inspect --format='{{ index .Config.Labels "io.openshift.s2i.scripts-url" }}' openshift/wildfly-100-centos7image:///usr/libexec/s2i
You inspected the openshift/wildfly-100-centos7 builder image and found out that the scripts are in
OpenShift Container Platform 3.11 Using Images
24

You inspected the openshift/wildfly-100-centos7 builder image and found out that the scripts are inthe /usr/libexec/s2i directory.
With this knowledge, invoke any of these scripts from your own by wrapping its invocation.
Example 2.1. .s2i/bin/assemble script
#!/bin/bashecho "Before assembling"
/usr/libexec/s2i/assemblerc=$?
if [ $rc -eq 0 ]; then echo "After successful assembling"else echo "After failed assembling"fi
exit $rc
The example shows a custom assemble script that prints the message, executes standard assemblescript from the image and prints another message depending on the exit code of the assemble script.
When wrapping the run script, you must use exec for invoking it to ensure signals are handled properly.Unfortunately, the use of exec also precludes the ability to run additional commands after invoking thedefault image run script.
Example 2.2. .s2i/bin/run script
#!/bin/bashecho "Before running application"exec /usr/libexec/s2i/run
CHAPTER 2. SOURCE-TO-IMAGE (S2I)
25
CHAPTER 3. DATABASE IMAGES
3.1. OVERVIEW
This topic group includes information on the different database images available for OpenShiftContainer Platform users.
NOTE
Configuration for enabling clustering for database images is provided as an example andnot intended for production use.
3.2. MYSQL
3.2.1. Overview
OpenShift Container Platform provides a container image for running MySQL. This image can providedatabase services based on username, password, and database name settings provided viaconfiguration.
3.2.2. Versions
Currently, OpenShift Container Platform provides versions 5.6 and 5.7 of MySQL.
3.2.3. Images
This image comes in two flavors, depending on your needs:
RHEL 7
CentOS 7
RHEL 7 Based Images
The RHEL 7 image is available through the Red Hat Registry:
$ docker pull registry.redhat.io/rhscl/mysql-56-rhel7$ docker pull registry.redhat.io/rhscl/mysql-57-rhel7
CentOS 7 Based Images
CentOS images for MySQL 5.6 and 5.7 are available on Docker Hub:
$ docker pull centos/mysql-56-centos7$ docker pull centos/mysql-57-centos7
To use these images, you can either access them directly from these registries or push them into yourOpenShift Container Platform container image registry. Additionally, you can create an ImageStreamthat points to the image, either in your container image registry or at the external location. YourOpenShift Container Platform resources can then reference the ImageStream. You can find exampleImageStream definitions for all the provided OpenShift Container Platform images.
OpenShift Container Platform 3.11 Using Images
26
3.2.4. Configuration and Usage
3.2.4.1. Initializing the Database
The first time you use the shared volume, the database is created along with the database administratoruser and the MySQL root user (if you specify the MYSQL_ROOT_PASSWORD environment variable).Afterwards, the MySQL daemon starts up. If you are re-attaching the volume to another container, thenthe database, database user, and the administrator user are not created, and the MySQL daemon starts.
The following command creates a new database pod with MySQL running in a container:
$ oc new-app \ -e MYSQL_USER=<username> \ -e MYSQL_PASSWORD=<password> \ -e MYSQL_DATABASE=<database_name> \ registry.redhat.io/rhscl/mysql-56-rhel7
3.2.4.2. Running MySQL Commands in Containers
OpenShift Container Platform uses Software Collections (SCLs) to install and launch MySQL. If youwant to execute a MySQL command inside of a running container (for debugging), you must invoke itusing bash.
To do so, first identify the name of the pod. For example, you can view the list of pods in your currentproject:
$ oc get pods
Then, open a remote shell session to the pod:
$ oc rsh <pod>
When you enter the container, the required SCL is automatically enabled.
You can now run the mysql command from the bash shell to start a MySQL interactive session andperform normal MySQL operations. For example, to authenticate as the database user:
bash-4.2$ mysql -u $MYSQL_USER -p$MYSQL_PASSWORD -h $HOSTNAME $MYSQL_DATABASEWelcome to the MySQL monitor. Commands end with ; or \g.Your MySQL connection id is 4Server version: 5.6.37 MySQL Community Server (GPL)...mysql>
When you are finished, enter quit or exit to leave the MySQL session.
3.2.4.3. Environment Variables
The MySQL user name, password, and database name must be configured with the followingenvironment variables:
Table 3.1. MySQL Environment Variables
CHAPTER 3. DATABASE IMAGES
27

Variable Name Description
MYSQL_USER Specifies the user name for the database user that is created foruse by your application.
MYSQL_PASSWORD Password for the MYSQL_USER.
MYSQL_DATABASE Name of the database to which MYSQL_USER has full rights.
MYSQL_ROOT_PASSWORD Optional password for the root user. If this is not set, thenremote login to the root account is not possible. Localconnections from within the container are always permittedwithout a password.
MYSQL_SERVICE_HOST Service host variable automatically created by Kubernetes.
MYSQL_SERVICE_PORT Service port variable automatically created by Kubernetes.
WARNING
You must specify the user name, password, and database name. If you do notspecify all three, the pod will fail to start and OpenShift Container Platform willcontinuously try to restart it.
MySQL settings can be configured with the following environment variables:
Table 3.2. Additional MySQL Settings
Variable Name Description Default
MYSQL_LOWER_CASE_TABLE_NAMES
Sets how the table names are stored and compared. 0
MYSQL_MAX_CONNECTIONS
The maximum permitted number of simultaneous clientconnections.
151
MYSQL_MAX_ALLOWED_PACKET
The maximum size of one packet or any generated/intermediatestring.
200M
MYSQL_FT_MIN_WORD_LEN
The minimum length of the word to be included in a FULLTEXTindex.
4
MYSQL_FT_MAX_WORD_LEN
The maximum length of the word to be included in a FULLTEXTindex.
20
OpenShift Container Platform 3.11 Using Images
28

MYSQL_AIO Controls the innodb_use_native_aio setting value if the nativeAIO is broken.
1
MYSQL_TABLE_OPEN_CACHE
The number of open tables for all threads. 400
MYSQL_KEY_BUFFER_SIZE
The size of the buffer used for index blocks. 32M(or 10%ofavailablememory)
MYSQL_SORT_BUFFER_SIZE
The size of the buffer used for sorting. 256K
MYSQL_READ_BUFFER_SIZE
The size of the buffer used for a sequential scan. 8M (or5% ofavailablememory)
MYSQL_INNODB_BUFFER_POOL_SIZE
The size of the buffer pool where InnoDB caches table and indexdata.
32M(or50% ofavailablememory)
MYSQL_INNODB_LOG_FILE_SIZE
The size of each log file in a log group. 8M (or15% ofavailablememory)
MYSQL_INNODB_LOG_BUFFER_SIZE
The size of the buffer that InnoDB uses to write to the log fileson disk.
8M (or15% ofavailablememory)
Variable Name Description Default
Some of the memory-related parameters have two default values. The fixed value is used when acontainer does not have memory limits assigned. The other value is calculated dynamically during acontainer’s startup based on available memory.
CHAPTER 3. DATABASE IMAGES
29

3.2.4.4. Volume Mount Points
The MySQL image can be run with mounted volumes to enable persistent storage for the database:
/var/lib/mysql/data - This is the data directory where MySQL stores database files.
3.2.4.5. Changing Passwords
Passwords are part of the image configuration, therefore the only supported method to changepasswords for the database user (MYSQL_USER) and root user is by changing the environmentvariables MYSQL_PASSWORD and MYSQL_ROOT_PASSWORD, respectively.
You can view the current passwords by viewing the pod or deployment configuration in the web consoleor by listing the environment variables with the CLI:
$ oc set env pod <pod_name> --list
Whenever MYSQL_ROOT_PASSWORD is set, it enables remote access for the root user with thegiven password, and whenever it is unset, remote access for the root user is disabled. This does notaffect the regular user MYSQL_USER, who always has remote access. This also does not affect localaccess by the root user, who can always log in without a password in localhost.
Changing database passwords through SQL statements or any way other than through the environmentvariables aforementioned causes a mismatch between the values stored in the variables and the actualpasswords. Whenever a database container starts, it resets the passwords to the values stored in theenvironment variables.
To change these passwords, update one or both of the desired environment variables for the relateddeployment configuration(s) using the oc set env command. If multiple deployment configurationsutilize these environment variables, for example in the case of an application created from a template,you must update the variables on each deployment configuration so that the passwords are in synceverywhere. This can be done all in the same command:
$ oc set env dc <dc_name> [<dc_name_2> ...] \ MYSQL_PASSWORD=<new_password> \ MYSQL_ROOT_PASSWORD=<new_root_password>
IMPORTANT
Depending on your application, there may be other environment variables for passwordsin other parts of the application that should also be updated to match. For example, therecould be a more generic DATABASE_USER variable in a front-end pod that shouldmatch the database user’s password. Ensure that passwords are in sync for all requiredenvironment variables per your application, otherwise your pods may fail to redeploywhen triggered.
Updating the environment variables triggers the redeployment of the database server if you have aconfiguration change trigger. Otherwise, you must manually start a new deployment in order to apply thepassword changes.
To verify that new passwords are in effect, first open a remote shell session to the running MySQL pod:
$ oc rsh <pod>
OpenShift Container Platform 3.11 Using Images
30

From the bash shell, verify the database user’s new password:
bash-4.2$ mysql -u $MYSQL_USER -p<new_password> -h $HOSTNAME $MYSQL_DATABASE -te "SELECT * FROM (SELECT database()) db CROSS JOIN (SELECT user()) u"
If the password was changed correctly, you should see a table like this:
+------------+---------------------+| database() | user() |+------------+---------------------+| sampledb | [email protected] |+------------+---------------------+
To verify the root user’s new password:
bash-4.2$ mysql -u root -p<new_root_password> -h $HOSTNAME $MYSQL_DATABASE -te "SELECT * FROM (SELECT database()) db CROSS JOIN (SELECT user()) u"
If the password was changed correctly, you should see a table like this:
+------------+------------------+| database() | user() |+------------+------------------+| sampledb | [email protected] |+------------+------------------+
3.2.5. Creating a Database Service from a Template
OpenShift Container Platform provides a template to make creating a new database service easy. Thetemplate provides parameter fields to define all the mandatory environment variables (user, password,database name, etc) with predefined defaults including auto-generation of password values. It will alsodefine both a deployment configuration and a service.
The MySQL templates should have been registered in the default openshift project by your clusteradministrator during the initial cluster setup. See Loading the Default Image Streams and Templates formore details, if required.
There are two templates available:
mysql-ephemeral is for development or testing purposes only because it uses ephemeralstorage for the database content. This means that if the database pod is restarted for anyreason, such as the pod being moved to another node or the deployment configuration beingupdated and triggering a redeploy, all data will be lost.
mysql-persistent uses a persistent volume store for the database data which means the datawill survive a pod restart. Using persistent volumes requires a persistent volume pool be definedin the OpenShift Container Platform deployment. Cluster administrator instructions for settingup the pool are located in Persistent Storage Using NFS .
You can instantiate templates by following these instructions.
Once you have instantiated the service, you can copy the user name, password, and database nameenvironment variables into a deployment configuration for another component that intends to accessthe database. That component can then access the database via the service that was defined.
CHAPTER 3. DATABASE IMAGES
31

3.2.6. Using MySQL Replication
NOTE
Configuration for enabling clustering for database images is provided as an example andnot intended for production use.
Red Hat provides a proof-of-concept template for MySQL master-slave replication (clustering); youcan obtain the example template from GitHub .
To upload the example template into the current project’s template library:
$ oc create -f \ https://raw.githubusercontent.com/sclorg/mysql-container/master/examples/replica/mysql_replica.json
The following sections detail the objects defined in the example template and describe how they worktogether to start a cluster of MySQL servers implementing master-slave replication. This is therecommended replication strategy for MySQL.
3.2.6.1. Creating the Deployment Configuration for the MySQL Master
To set up MySQL replication, a deployment configuration is defined in the example template thatdefines a replication controller. For MySQL master-slave replication, two deployment configurations areneeded. One deployment configuration defines the MySQL master server and second the MySQL slaveservers.
To tell a MySQL server to act as the master, the command field in the container’s definition in thedeployment configuration must be set to run-mysqld-master. This script acts as an alternativeentrypoint for the MySQL image and configures the MySQL server to run as the master in replication.
MySQL replication requires a special user that relays data between the master and slaves. The followingenvironment variables are defined in the template for this purpose:
Variable Name Description Default
MYSQL_MASTER_USER The user name of the replication user master
MYSQL_MASTER_PASSWORD
The password for the replication user generated
Example 3.1. MySQL Master Deployment Configuration Object Definition in the ExampleTemplate
kind: "DeploymentConfig"apiVersion: "v1"metadata: name: "mysql-master"spec: strategy: type: "Recreate"
OpenShift Container Platform 3.11 Using Images
32

Since we claimed a persistent volume in this deployment configuration to have all data persisted for theMySQL master server, you must ask your cluster administrator to create a persistent volume that youcan claim the storage from.
After the deployment configuration is created and the pod with MySQL master server is started, it willcreate the database defined by MYSQL_DATABASE and configure the server to replicate thisdatabase to slaves.
triggers: - type: "ConfigChange" replicas: 1 selector: name: "mysql-master" template: metadata: labels: name: "mysql-master" spec: volumes: - name: "mysql-master-data" persistentVolumeClaim: claimName: "mysql-master" containers: - name: "server" image: "openshift/mysql-56-centos7" command: - "run-mysqld-master" ports: - containerPort: 3306 protocol: "TCP" env: - name: "MYSQL_MASTER_USER" value: "${MYSQL_MASTER_USER}" - name: "MYSQL_MASTER_PASSWORD" value: "${MYSQL_MASTER_PASSWORD}" - name: "MYSQL_USER" value: "${MYSQL_USER}" - name: "MYSQL_PASSWORD" value: "${MYSQL_PASSWORD}" - name: "MYSQL_DATABASE" value: "${MYSQL_DATABASE}" - name: "MYSQL_ROOT_PASSWORD" value: "${MYSQL_ROOT_PASSWORD}" volumeMounts: - name: "mysql-master-data" mountPath: "/var/lib/mysql/data" resources: {} terminationMessagePath: "/dev/termination-log" imagePullPolicy: "IfNotPresent" securityContext: capabilities: {} privileged: false restartPolicy: "Always" dnsPolicy: "ClusterFirst"
CHAPTER 3. DATABASE IMAGES
33

The example provided defines only one replica of the MySQL master server. This causes OpenShiftContainer Platform to start only one instance of the server. Multiple instances (multi-master) is notsupported and therefore you can not scale this replication controller.
To replicate the database created by the MySQL master, a deployment configuration is defined in thetemplate. This deployment configuration creates a replication controller that launches the MySQLimage with the command field set to run-mysqld-slave. This alternative entrypoints skips theinitialization of the database and configures the MySQL server to connect to the mysql-master service,which is also defined in example template.
Example 3.2. MySQL Slave Deployment Configuration Object Definition in the ExampleTemplate
kind: "DeploymentConfig"apiVersion: "v1"metadata: name: "mysql-slave"spec: strategy: type: "Recreate" triggers: - type: "ConfigChange" replicas: 1 selector: name: "mysql-slave" template: metadata: labels: name: "mysql-slave" spec: containers: - name: "server" image: "openshift/mysql-56-centos7" command: - "run-mysqld-slave" ports: - containerPort: 3306 protocol: "TCP" env: - name: "MYSQL_MASTER_USER" value: "${MYSQL_MASTER_USER}" - name: "MYSQL_MASTER_PASSWORD" value: "${MYSQL_MASTER_PASSWORD}" - name: "MYSQL_DATABASE" value: "${MYSQL_DATABASE}" resources: {} terminationMessagePath: "/dev/termination-log" imagePullPolicy: "IfNotPresent" securityContext: capabilities: {} privileged: false restartPolicy: "Always" dnsPolicy: "ClusterFirst"
OpenShift Container Platform 3.11 Using Images
34

This example deployment configuration starts the replication controller with the initial number of replicasset to 1. You can scale this replication controller in both directions, up to the resources capacity of youraccount.
3.2.6.2. Creating a Headless Service
The pods created by the MySQL slave replication controller must reach the MySQL master server inorder to register for replication. The example template defines a headless service named mysql-masterfor this purpose. This service is not used only for replication, but the clients can also send the queries tomysql-master:3306 as the MySQL host.
To have a headless service, the clusterIP parameter in the service definition is set to None. Then youcan use a DNS query to get a list of the pod IP addresses that represents the current endpoints for thisservice.
Example 3.3. Headless Service Object Definition in the Example Template
3.2.6.3. Scaling the MySQL Slaves
To increase the number of members in the cluster:
$ oc scale rc mysql-slave-1 --replicas=<number>
This tells the replication controller to create a new MySQL slave pod. When a new slave is created, theslave entrypoint first attempts to contact the mysql-master service and register itself to the replicationset. Once that is done, the MySQL master server sends the slave the replicated database.
When scaling down, the MySQL slave is shut down and, because the slave does not have any persistentstorage defined, all data on the slave is lost. The MySQL master server then discovers that the slave isnot reachable anymore, and it automatically removes it from the replication.
3.2.7. Troubleshooting
kind: "Service"apiVersion: "v1"metadata: name: "mysql-master" labels: name: "mysql-master"spec: ports: - protocol: "TCP" port: 3306 targetPort: 3306 nodePort: 0 selector: name: "mysql-master" clusterIP: "None" type: "ClusterIP" sessionAffinity: "None"status: loadBalancer: {}
CHAPTER 3. DATABASE IMAGES
35

This section describes some troubles you might encounter and presents possible resolutions.
3.2.7.1. Linux Native AIO Failure
Symptom
The MySQL container fails to start and the logs show something like:
151113 5:06:56 InnoDB: Using Linux native AIO151113 5:06:56 InnoDB: Warning: io_setup() failed with EAGAIN. Will make 5 attempts before giving up.InnoDB: Warning: io_setup() attempt 1 failed.InnoDB: Warning: io_setup() attempt 2 failed.Waiting for MySQL to start ...InnoDB: Warning: io_setup() attempt 3 failed.InnoDB: Warning: io_setup() attempt 4 failed.Waiting for MySQL to start ...InnoDB: Warning: io_setup() attempt 5 failed.151113 5:06:59 InnoDB: Error: io_setup() failed with EAGAIN after 5 attempts.InnoDB: You can disable Linux Native AIO by setting innodb_use_native_aio = 0 in my.cnf151113 5:06:59 InnoDB: Fatal error: cannot initialize AIO sub-system151113 5:06:59 [ERROR] Plugin 'InnoDB' init function returned error.151113 5:06:59 [ERROR] Plugin 'InnoDB' registration as a STORAGE ENGINE failed.151113 5:06:59 [ERROR] Unknown/unsupported storage engine: InnoDB151113 5:06:59 [ERROR] Aborting
Explanation
MySQL’s storage engine was unable to use the kernel’s AIO (Asynchronous I/O) facilities due toresource limits.
Resolution
Turn off AIO usage entirely by setting environment variable MYSQL_AIO to have value 0. Onsubsequent deployments, this arranges for the MySQL configuration variable innodb_use_native_aioto have value 0.
Alternatively, increase the aio-max-nr kernel resource. The following example examines the currentvalue of aio-max-nr and doubles it.
$ sysctl fs.aio-max-nrfs.aio-max-nr = 1048576# sysctl -w fs.aio-max-nr=2097152
This is a per-node resolution and lasts until the next node reboot.
3.3. POSTGRESQL
3.3.1. Overview
OpenShift Container Platform provides a container image for running PostgreSQL. This image canprovide database services based on username, password, and database name settings provided viaconfiguration.
OpenShift Container Platform 3.11 Using Images
36

3.3.2. Versions
Currently, OpenShift Container Platform supports versions 9.4 and 9.5 of PostgreSQL.
3.3.3. Images
These images come in two flavors, depending on your needs:
RHEL 7
CentOS 7
RHEL 7 Based Image
The RHEL 7 images are available through the Red Hat Registry:
$ docker pull registry.redhat.io/rhscl/postgresql-94-rhel7$ docker pull registry.redhat.io/rhscl/postgresql-95-rhel7
CentOS 7 Based Image
These images are available on Docker Hub:
$ docker pull centos/postgresql-94-centos7$ docker pull centos/postgresql-95-centos7
To use these images, you can either access them directly from these registries or push them into yourOpenShift Container Platform container image registry. Additionally, you can create an ImageStreamthat points to the image, either in your container image registry or at the external location. YourOpenShift Container Platform resources can then reference the ImageStream. You can find exampleImageStream definitions for all the provided OpenShift Container Platform images.
3.3.4. Configuration and Usage
3.3.4.1. Initializing the Database
The first time you use the shared volume, the database is created along with the database administratoruser and the PostgreSQL postgres user (if you specify the POSTGRESQL_ADMIN_PASSWORDenvironment variable). Afterwards, the PostgreSQL daemon starts up. If you are re-attaching thevolume to another container, then the database, the database user, and the administrator user are notcreated, and the PostgreSQL daemon starts.
The following command creates a new database pod with PostgreSQL running in a container:
$ oc new-app \ -e POSTGRESQL_USER=<username> \ -e POSTGRESQL_PASSWORD=<password> \ -e POSTGRESQL_DATABASE=<database_name> \ registry.redhat.io/rhscl/postgresql-95-rhel7
3.3.4.2. Running PostgreSQL Commands in Containers
OpenShift Container Platform uses Software Collections (SCLs) to install and launch PostgreSQL. If
CHAPTER 3. DATABASE IMAGES
37

OpenShift Container Platform uses Software Collections (SCLs) to install and launch PostgreSQL. Ifyou want to execute a PostgreSQL command inside of a running container (for debugging), you mustinvoke it using bash.
To do so, first identify the name of the running PostgreSQL pod. For example, you can view the list ofpods in your current project:
$ oc get pods
Then, open a remote shell session to the desired pod:
$ oc rsh <pod>
When you enter the container, the required SCL is automatically enabled.
You can now run the psql command from the bash shell to start a PostgreSQL interactive session andperform normal PostgreSQL operations. For example, to authenticate as the database user:
bash-4.2$ PGPASSWORD=$POSTGRESQL_PASSWORD psql -h postgresql $POSTGRESQL_DATABASE $POSTGRESQL_USERpsql (9.5.16)Type "help" for help.
default=>
When you are finished, enter \q to leave the PostgreSQL session.
3.3.4.3. Environment Variables
The PostgreSQL user name, password, and database name must be configured with the followingenvironment variables:
Table 3.3. PostgreSQL Environment Variables
Variable Name Description
POSTGRESQL_USER User name for the PostgreSQL account to be created. This userhas full rights to the database.
POSTGRESQL_PASSWORD Password for the user account.
POSTGRESQL_DATABASE Database name.
POSTGRESQL_ADMIN_PASSWORD
Optional password for the postgres administrator user. If this isnot set, then remote login to the postgres account is notpossible. Local connections from within the container are alwayspermitted without a password.
OpenShift Container Platform 3.11 Using Images
38

WARNING
You must specify the user name, password, and database name. If you do notspecify all three, the pod will fail to start and OpenShift Container Platform willcontinuously try to restart it.
PostgreSQL settings can be configured with the following environment variables:
Table 3.4. Additional PostgreSQL settings
Variable Name Description Default
POSTGRESQL_MAX_CONNECTIONS
Maximum number of client connections allowed. 100
POSTGRESQL_MAX_PREPARED_TRANSACTIONS
Maximum number of transactions that can be in the "prepared"state. If using prepared transactions, the value should be at leastas large as POSTGRESQL_MAX_CONNECTIONS.
0
POSTGRESQL_SHARED_BUFFERS
Amount of memory dedicated to PostgreSQL for caching data. 32M
POSTGRESQL_EFFECTIVE_CACHE_SIZE
Estimated amount of memory available for disk caching by theoperating system and within PostgreSQL itself.
128M
3.3.4.4. Volume Mount Points
The PostgreSQL image can be run with mounted volumes to enable persistent storage for thedatabase:
/var/lib/pgsql/data - This is the database cluster directory where PostgreSQL stores databasefiles.
3.3.4.5. Changing Passwords
Passwords are part of the image configuration, therefore the only supported method to changepasswords for the database user (POSTGRESQL_USER) and postgres administrator user is bychanging the environment variables POSTGRESQL_PASSWORD and POSTGRESQL_ADMIN_PASSWORD, respectively.
You can view the current passwords by viewing the pod or deployment configuration in the web consoleor by listing the environment variables with the CLI:
$ oc set env pod <pod_name> --list
Changing database passwords through SQL statements or any way other than through the environmentvariables aforementioned will cause a mismatch between the values stored in the variables and the
CHAPTER 3. DATABASE IMAGES
39

actual passwords. Whenever a database container starts, it resets the passwords to the values stored inthe environment variables.
To change these passwords, update one or both of the desired environment variables for the relateddeployment configuration(s) using the oc set env command. If multiple deployment configurationsutilize these environment variables, for example in the case of an application created from a template,you must update the variables on each deployment configuration so that the passwords are in synceverywhere. This can be done all in the same command:
$ oc set env dc <dc_name> [<dc_name_2> ...] \ POSTGRESQL_PASSWORD=<new_password> \ POSTGRESQL_ADMIN_PASSWORD=<new_admin_password>
IMPORTANT
Depending on your application, there may be other environment variables for passwordsin other parts of the application that should also be updated to match. For example, therecould be a more generic DATABASE_USER variable in a front-end pod that shouldmatch the database user’s password. Ensure that passwords are in sync for all requiredenvironment variables per your application, otherwise your pods may fail to redeploywhen triggered.
Updating the environment variables triggers the redeployment of the database server if you have aconfiguration change trigger. Otherwise, you must manually start a new deployment in order to apply thepassword changes.
To verify that new passwords are in effect, first open a remote shell session to the running PostgreSQLpod:
$ oc rsh <pod>
From the bash shell, verify the database user’s new password:
bash-4.2$ PGPASSWORD=<new_password> psql -h postgresql $POSTGRESQL_DATABASE $POSTGRESQL_USER -c "SELECT * FROM (SELECT current_database()) cdb CROSS JOIN (SELECT current_user) cu"
If the password was changed correctly, you should see a table like this:
current_database | current_user------------------+-------------- default | django(1 row)
From the bash shell, verify the postgres administrator user’s new password:
bash-4.2$ PGPASSWORD=<new_admin_password> psql -h postgresql $POSTGRESQL_DATABASE postgres -c "SELECT * FROM (SELECT current_database()) cdb CROSS JOIN (SELECT current_user) cu"
If the password was changed correctly, you should see a table like this:
current_database | current_user
OpenShift Container Platform 3.11 Using Images
40

------------------+-------------- default | postgres(1 row)
3.3.5. Creating a Database Service from a Template
OpenShift Container Platform provides a template to make creating a new database service easy. Thetemplate provides parameter fields to define all the mandatory environment variables (user, password,database name, etc) with predefined defaults including auto-generation of password values. It will alsodefine both a deployment configuration and a service.
The PostgreSQL templates should have been registered in the default openshift project by your clusteradministrator during the initial cluster setup. See Loading the Default Image Streams and Templates formore details, if required.
There are two templates available:
PostgreSQL-ephemeral is for development or testing purposes only because it usesephemeral storage for the database content. This means that if the database pod is restartedfor any reason, such as the pod being moved to another node or the deployment configurationbeing updated and triggering a redeploy, all data will be lost.
PostgreSQL-persistent uses a persistent volume store for the database data which means thedata will survive a pod restart. Using persistent volumes requires a persistent volume pool bedefined in the OpenShift Container Platform deployment. Cluster administrator instructions forsetting up the pool are located in Persistent Storage Using NFS .
You can instantiate templates by following these instructions.
Once you have instantiated the service, you can copy the user name, password, and database nameenvironment variables into a deployment configuration for another component that intends to accessthe database. That component can then access the database via the service that was defined.
3.4. MONGODB
3.4.1. Overview
OpenShift Container Platform provides a container image for running MongoDB. This image canprovide database services based on username, password, and database name settings provided viaconfiguration.
3.4.2. Versions
Currently, OpenShift Container Platform provides versions 2.6, 3.2, and 3.4 of MongoDB.
3.4.3. Images
These images come in two flavors, depending on your needs:
RHEL 7
CentOS 7
RHEL 7 Based Images
CHAPTER 3. DATABASE IMAGES
41

The RHEL 7 images are available through the Red Hat Registry:
$ docker pull registry.redhat.io/rhscl/mongodb-26-rhel7$ docker pull registry.redhat.io/rhscl/mongodb-32-rhel7$ docker pull registry.redhat.io/rhscl/mongodb-34-rhel7
CentOS 7 Based Images
These images are available on Docker Hub:
$ docker pull centos/mongodb-26-centos7$ docker pull centos/mongodb-32-centos7$ docker pull centos/mongodb-34-centos7
To use these images, you can either access them directly from these registries or push them into yourOpenShift Container Platform container image registry. Additionally, you can create an ImageStreamthat points to the image, either in your container image registry or at the external location. YourOpenShift Container Platform resources can then reference the ImageStream. You can find exampleImageStream definitions for all the provided OpenShift Container Platform images.
3.4.4. Configuration and usage
3.4.4.1. Initializing the database
You can configure MongoDB with an ephemeral volume or a persistent volume. The first time you usethe volume, the database is created along with the database administrator user. Afterwards, theMongoDB daemon starts up. If you are re-attaching the volume to another container, then the database,database user, and the administrator user are not created, and the MongoDB daemon starts.
The following command creates a new database pod with MongoDB running in a container with anephemeral volume:
$ oc new-app \ -e MONGODB_USER=<username> \ -e MONGODB_PASSWORD=<password> \ -e MONGODB_DATABASE=<database_name> \ -e MONGODB_ADMIN_PASSWORD=<admin_password> \ registry.redhat.io/rhscl/mongodb-26-rhel7
3.4.4.2. Running MongoDB commands in containers
OpenShift Container Platform uses Software Collections (SCLs) to install and launch MongoDB. If youwant to execute a MongoDB command inside of a running container (for debugging), you must invoke itusing bash.
To do so, first identify the name of the running MongoDB pod. For example, you can view the list ofpods in your current project:
$ oc get pods
Then, open a remote shell session to the desired pod:
$ oc rsh <pod>
OpenShift Container Platform 3.11 Using Images
42

When you enter the container, the required SCL is automatically enabled.
You can now run mongo commands from the bash shell to start a MongoDB interactive session andperform normal MongoDB operations. For example, to switch to the sampledb database andauthenticate as the database user:
bash-4.2$ mongo -u $MONGODB_USER -p $MONGODB_PASSWORD $MONGODB_DATABASEMongoDB shell version: 2.6.9connecting to: sampledb>
When you are finished, press CTRL+D to leave the MongoDB session.
3.4.4.3. Environment Variables
The MongoDB user name, password, database name, and admin password must be configured with thefollowing environment variables:
Table 3.5. MongoDB Environment Variables
Variable Name Description
MONGODB_USER User name for MongoDB account to be created.
MONGODB_PASSWORD Password for the user account.
MONGODB_DATABASE Database name.
MONGODB_ADMIN_PASSWORD Password for the admin user.
WARNING
You must specify the user name, password, database name, and admin password. Ifyou do not specify all four, the pod will fail to start and OpenShift ContainerPlatform will continuously try to restart it.
NOTE
The administrator user name is set to admin and you must specify its password by settingthe MONGODB_ADMIN_PASSWORD environment variable. This process is done upondatabase initialization.
MongoDB settings can be configured with the following environment variables:
Table 3.6. Additional MongoDB Settings
CHAPTER 3. DATABASE IMAGES
43

Variable Name Description Default
MONGODB_NOPREALLOC
Disable data file preallocation. true
MONGODB_SMALLFILES Set MongoDB to use a smaller default data file size. true
MONGODB_QUIET Runs MongoDB in a quiet mode that attempts to limit theamount of output.
true
NOTE
Text search is enabled by default in MongoDB versions 2.6 and higher, and therefore hasno configurable parameter.
3.4.4.4. Volume mount points
The MongoDB image can be run with mounted volumes to enable persistent storage for the database:
/var/lib/mongodb/data - This is the database directory where MongoDB stores database files.
3.4.4.5. Changing passwords
Passwords are part of the image configuration, therefore the only supported method to changepasswords for the database user (MONGODB_USER) and admin user is by changing the environmentvariables MONGODB_PASSWORD and MONGODB_ADMIN_PASSWORD, respectively.
You can view the current passwords by viewing the pod or deployment configuration in the web consoleor by listing the environment variables with the CLI:
$ oc set env pod <pod_name> --list
Changing database passwords directly in MongoDB causes a mismatch between the values stored in thevariables and the actual passwords. Whenever a database container starts, it resets the passwords to thevalues stored in the environment variables.
To change these passwords, update one or both of the desired environment variables for the relateddeployment configuration(s) using the oc set env command. If multiple deployment configurationsutilize these environment variables, for example in the case of an application created from a template,you must update the variables on each deployment configuration so that the passwords are in synceverywhere. This can be done all in the same command:
$ oc set env dc <dc_name> [<dc_name_2> ...] \ MONGODB_PASSWORD=<new_password> \ MONGODB_ADMIN_PASSWORD=<new_admin_password>
IMPORTANT
OpenShift Container Platform 3.11 Using Images
44

IMPORTANT
Depending on your application, there may be other environment variables for passwordsin other parts of the application that should also be updated to match. For example, therecould be a more generic DATABASE_USER variable in a front-end pod that shouldmatch the database user’s password. Ensure that passwords are in sync for all requiredenvironment variables per your application, otherwise your pods may fail to redeploywhen triggered.
Updating the environment variables triggers the redeployment of the database server if you have aconfiguration change trigger. Otherwise, you must manually start a new deployment in order to apply thepassword changes.
To verify that new passwords are in effect, first open a remote shell session to the running MongoDBpod:
$ oc rsh <pod>
From the bash shell, verify the database user’s new password:
bash-4.2$ mongo -u $MONGODB_USER -p <new_password> $MONGODB_DATABASE --eval "db.version()"
If the password was changed correctly, you should see output like this:
MongoDB shell version: 2.6.9connecting to: sampledb2.6.9
To verify the admin user’s new password:
bash-4.2$ mongo -u admin -p <new_admin_password> admin --eval "db.version()"
If the password was changed correctly, you should see output like this:
MongoDB shell version: 2.6.9connecting to: admin2.6.9
3.4.5. Creating a database service from a template
OpenShift Container Platform provides a template to make creating a new database service easy. Thetemplate provides parameter fields to define all the mandatory environment variables (user, password,database name, etc) with predefined defaults including auto-generation of password values. It will alsodefine both a deployment configuration and a service.
The MongoDB templates should have been registered in the default openshift project by your clusteradministrator during the initial cluster setup. See Loading the Default Image Streams and Templates formore details, if required.
There are two templates available:
mongodb-ephemeral is for development/testing purposes only because it uses ephemeral
CHAPTER 3. DATABASE IMAGES
45
storage for the database content. This means that if the database pod is restarted for anyreason, such as the pod being moved to another node or the deployment configuration beingupdated and triggering a redeploy, all data will be lost.
mongodb-persistent uses a persistent volume store for the database data which means thedata will survive a pod restart. Using persistent volumes requires a persistent volume pool bedefined in the OpenShift Container Platform deployment. Cluster administrator instructions forsetting up the pool are located in Persistent Storage Using NFS .
You can instantiate templates by following these instructions.
Once you have instantiated the service, you can copy the user name, password, and database nameenvironment variables into a deployment configuration for another component that intends to accessthe database. That component can then access the database via the service that was defined.
3.4.6. MongoDB replication
NOTE
Configuration for enabling clustering for database images is provided as an example andnot intended for production use.
Red Hat provides a proof-of-concept template for MongoDB replication (clustering) using StatefulSet.You can obtain the example template from GitHub .
For example, to upload the example template into the current project’s template library:
$ oc create -f \ https://raw.githubusercontent.com/sclorg/mongodb-container/master/examples/petset/mongodb-petset-persistent.yaml
IMPORTANT
The example template uses persistent storage. You must have persistent volumesavailable in your cluster to use this template.
As OpenShift Container Platform automatically restarts unhealthy pods (containers), it will restartreplica set members if one or more of these members crashes or fails.
While a replica set member is down or being restarted, it may be one of these scenarios:
1. PRIMARY member is down:In this case, the other two members elect a new PRIMARY. Until then, reads are not affected, butthe writes fail. After a successful election, writes and reads process normally.
2. One of the SECONDARY member is down:Reads and writes are unaffected. Depending on the oplogSize configuration and the write rate,the third member might fail to join back the replica set, requiring manual intervention to re-syncits copy of the database.
3. Any two members are down:When a three-member replica set member cannot reach any other member, it will step downfrom the PRIMARY role if it had it. In this case, reads might be served by a SECONDARYmember, and writes fail. As soon as one more member is back up, an election picks a new
OpenShift Container Platform 3.11 Using Images
46
PRIMARY member and reads and writes process normally.
4. All members are down:In this extreme case, both reads and writes fail. After two or more members are back up, anelection reestablishes the replica set to have a PRIMARY and a SECONDARY member, afterwhich reads and writes process normally.
This is the recommended replication strategy for MongoDB.
NOTE
For production environments, you must maintain as much separation between membersas possible. It is recommended to use one or more of the node selection features toschedule StatefulSet pods onto different nodes, and to provide them storage backed byindependent volumes.
3.4.6.1. Limitations
Only MongoDB 3.2 is supported.
You have to manually update replica set configuration in case of scaling down.
Changing a user and administrator password is a manual process. It requires:
updating values of environment variables in the StatefulSet configuration,
changing password in the database, and
restarting all pods one after another.
3.4.6.2. Using the example template
Assuming you already have three pre-created persistent volumes or configured persistent volumeprovisioning.
1. Create a new poject where you want to create a MongoDB cluster:
2. Create a new application using the example template:
This command created a MongoDB cluster with three replica set members.
3. Check the status of the new MongoDB pods:
After creating a cluster from the example template, you have a replica set with three members. Once the
$ oc new-project mongodb-cluster-example
$ oc new-app https://raw.githubusercontent.com/sclorg/mongodb-container/master/examples/petset/mongodb-petset-persistent.yaml
$ oc get podsNAME READY STATUS RESTARTS AGEmongodb-0 1/1 Running 0 50smongodb-1 1/1 Running 0 50smongodb-2 1/1 Running 0 49s
CHAPTER 3. DATABASE IMAGES
47

After creating a cluster from the example template, you have a replica set with three members. Once thepods are running you can perform various actions on these pods such as:
Checking logs for one of the pods:
Log in to the pod:
Log into a MongoDB instance:
3.4.6.3. Scale up
MongoDB recommends an odd number of members in a replica set. If there are sufficient availablepersistent volumes, or a dynamic storage provisioner is present, scaling up is done by using the oc scalecommand:
This creates new pods which connect to the replica set and updates its configuration.
NOTE
Scaling up an existing database requires manual intervention if the database size isgreater than the oplogSize configuration. For such cases, a manual initial sync of the newmembers is required. For more information, see Check the Size of the Oplog and theMongoDB Replication documentation.
3.4.6.4. Scale down
To scale down a replica set it is possible to go from five to three members, or from three to only onemember.
Although scaling up may be done without manual intervention when the preconditions are met (storageavailability, size of existing database and oplogSize), scaling down always require manual intervention.
To scale down:
$ oc logs mongodb-0
$ oc rsh mongodb-0sh-4.2$
sh-4.2$ mongo $MONGODB_DATABASE -u $MONGODB_USER -p$MONGODB_PASSWORDMongoDB shell version: 3.2.6connecting to: sampledbrs0:PRIMARY>
$ oc scale --replicas=5 statefulsets/mongodb
$ oc get podsNAME READY STATUS RESTARTS AGEmongodb-0 1/1 Running 0 9mmongodb-1 1/1 Running 0 8mmongodb-2 1/1 Running 0 8mmongodb-3 1/1 Running 0 1mmongodb-4 1/1 Running 0 57s
OpenShift Container Platform 3.11 Using Images
48
1. Set the new number of replicas by using the oc scale command:
If the new number of replicas still constitutes a majority of the previous number, the replica setmay elect a new PRIMARY in case one of the pods that was deleted had the PRIMARY memberrole. For example, when scaling down from five members to three members.
Alternatively, scaling down to a lower number temporarily renders the replica set to have onlySECONDARY members and be in read-only mode. For example, when scaling down from fivemembers to only one member.
2. Update the replica set configuration to remove members that no longer exist.This may be improved in the future, a possible implementation being setting a PreStop podhook that inspects the number of replicas (exposed via the downward API) and determines thatthe pod is being removed from the StatefulSet, and not being restarted for some other reason.
3. Purge the volume used by the decommissioned pods.
3.5. MARIADB
3.5.1. Overview
OpenShift Container Platform provides a container image for running MariaDB. This image can providedatabase services based on username, password, and database name settings provided in aconfiguration file.
3.5.2. Versions
Currently, OpenShift Container Platform provides versions 10.0 and 10.1 of MariaDB.
3.5.3. Images
These images come in two flavors, depending on your needs:
RHEL 7
CentOS 7
RHEL 7 Based Images
The RHEL 7 images are available through the Red Hat Registry:
$ docker pull registry.redhat.io/rhscl/mariadb-100-rhel7$ docker pull registry.redhat.io/rhscl/mariadb-101-rhel7
CentOS 7 Based Images
These images are available on Docker Hub:
$ docker pull openshift/mariadb-100-centos7$ docker pull centos/mariadb-101-centos7
To use these images, you can either access them directly from these registries or push them into your
$ oc scale --replicas=3 statefulsets/mongodb
CHAPTER 3. DATABASE IMAGES
49
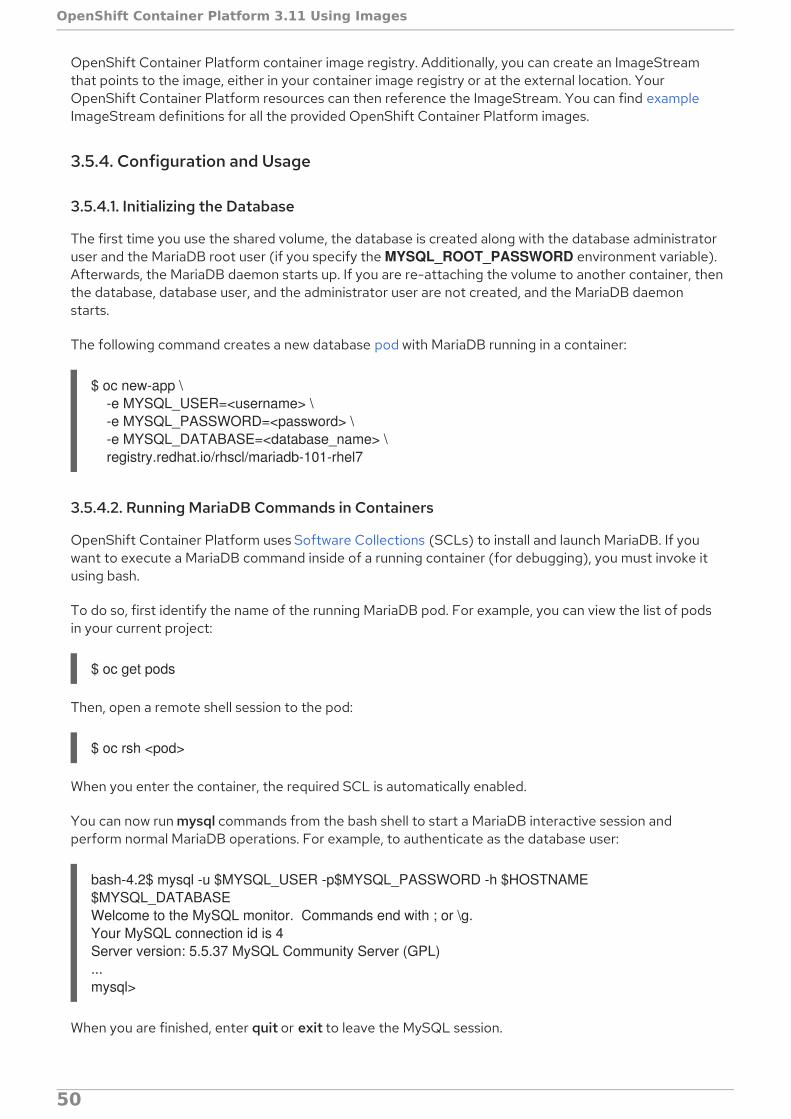
OpenShift Container Platform container image registry. Additionally, you can create an ImageStreamthat points to the image, either in your container image registry or at the external location. YourOpenShift Container Platform resources can then reference the ImageStream. You can find exampleImageStream definitions for all the provided OpenShift Container Platform images.
3.5.4. Configuration and Usage
3.5.4.1. Initializing the Database
The first time you use the shared volume, the database is created along with the database administratoruser and the MariaDB root user (if you specify the MYSQL_ROOT_PASSWORD environment variable).Afterwards, the MariaDB daemon starts up. If you are re-attaching the volume to another container, thenthe database, database user, and the administrator user are not created, and the MariaDB daemonstarts.
The following command creates a new database pod with MariaDB running in a container:
$ oc new-app \ -e MYSQL_USER=<username> \ -e MYSQL_PASSWORD=<password> \ -e MYSQL_DATABASE=<database_name> \ registry.redhat.io/rhscl/mariadb-101-rhel7
3.5.4.2. Running MariaDB Commands in Containers
OpenShift Container Platform uses Software Collections (SCLs) to install and launch MariaDB. If youwant to execute a MariaDB command inside of a running container (for debugging), you must invoke itusing bash.
To do so, first identify the name of the running MariaDB pod. For example, you can view the list of podsin your current project:
$ oc get pods
Then, open a remote shell session to the pod:
$ oc rsh <pod>
When you enter the container, the required SCL is automatically enabled.
You can now run mysql commands from the bash shell to start a MariaDB interactive session andperform normal MariaDB operations. For example, to authenticate as the database user:
bash-4.2$ mysql -u $MYSQL_USER -p$MYSQL_PASSWORD -h $HOSTNAME $MYSQL_DATABASEWelcome to the MySQL monitor. Commands end with ; or \g.Your MySQL connection id is 4Server version: 5.5.37 MySQL Community Server (GPL)...mysql>
When you are finished, enter quit or exit to leave the MySQL session.
OpenShift Container Platform 3.11 Using Images
50

3.5.4.3. Environment Variables
The MariaDB user name, password, and database name must be configured with the followingenvironment variables:
Table 3.7. MariaDB Environment Variables
Variable Name Description
MYSQL_USER User name for MySQL account to be created.
MYSQL_PASSWORD Password for the user account.
MYSQL_DATABASE Database name.
MYSQL_ROOT_PASSWORD Password for the root user (optional).
WARNING
You must specify the user name, password, and database name. If you do notspecify all three, the pod will fail to start and OpenShift Container Platform willcontinuously try to restart it.
MariaDB settings can be configured with the following environment variables:
Table 3.8. Additional MariaDB Settings
Variable Name Description Default
MYSQL_LOWER_CASE_TABLE_NAMES
Sets how the table names are stored and compared. 0
MYSQL_MAX_CONNECTIONS
The maximum permitted number of simultaneous clientconnections.
151
MYSQL_MAX_ALLOWED_PACKET
The maximum size of one packet or any generated/intermediatestring.
200M
MYSQL_FT_MIN_WORD_LEN
The minimum length of the word to be included in a FULLTEXTindex.
4
MYSQL_FT_MAX_WORD_LEN
The maximum length of the word to be included in a FULLTEXTindex.
20
CHAPTER 3. DATABASE IMAGES
51

MYSQL_AIO Controls the innodb_use_native_aio setting value if the nativeAIO is broken.
1
MYSQL_TABLE_OPEN_CACHE
The number of open tables for all threads. 400
MYSQL_KEY_BUFFER_SIZE
The size of the buffer used for index blocks. 32M(or 10%ofavailablememory)
MYSQL_SORT_BUFFER_SIZE
The size of the buffer used for sorting. 256K
MYSQL_READ_BUFFER_SIZE
The size of the buffer used for a sequential scan. 8M (or5% ofavailablememory)
MYSQL_INNODB_BUFFER_POOL_SIZE
The size of the buffer pool where InnoDB caches table and indexdata.
32M(or50% ofavailablememory)
MYSQL_INNODB_LOG_FILE_SIZE
The size of each log file in a log group. 8M (or15% ofavailablememory)
MYSQL_INNODB_LOG_BUFFER_SIZE
The size of the buffer that InnoDB uses to write to the log fileson disk.
8M (or15% ofavailablememory)
MYSQL_DEFAULTS_FILE Point to an alternative configuration file. /etc/my.cnf
Variable Name Description Default
OpenShift Container Platform 3.11 Using Images
52

MYSQL_BINLOG_FORMAT
Set sets the binlog format, supported values are row and statement.
statement
Variable Name Description Default
3.5.4.4. Volume Mount Points
The MariaDB image can be run with mounted volumes to enable persistent storage for the database:
/var/lib/mysql/data - The MySQL data directory is where MariaDB stores database files.
NOTE
When mounting a directory from the host into the container, ensure that the mounteddirectory has the appropriate permissions. Also verify that the owner and group of thedirectory match the user name running inside the container.
3.5.4.5. Changing Passwords
Passwords are part of the image configuration, therefore the only supported method to changepasswords for the database user (MYSQL_USER) and admin user is by changing the environmentvariables MYSQL_PASSWORD and MYSQL_ROOT_PASSWORD, respectively.
You can view the current passwords by viewing the pod or deployment configuration in the web consoleor by listing the environment variables with the CLI:
$ oc set env pod <pod_name> --list
Changing database passwords through SQL statements or any way other than through the environmentvariables aforementioned causes a mismatch between the values stored in the variables and the actualpasswords. Whenever a database container starts, it resets the passwords to the values stored in theenvironment variables.
To change these passwords, update one or both of the desired environment variables for the relateddeployment configuration(s) using the oc set env command. If multiple deployment configurationsutilize these environment variables, for example in the case of an application created from a template,you must update the variables on each deployment configuration so that the passwords are in synceverywhere. This can be done all in the same command:
$ oc set env dc <dc_name> [<dc_name_2> ...] \ MYSQL_PASSWORD=<new_password> \ MYSQL_ROOT_PASSWORD=<new_root_password>
IMPORTANT
Depending on your application, there may be other environment variables for passwordsin other parts of the application that should also be updated to match. For example, therecould be a more generic DATABASE_USER variable in a front-end pod that shouldmatch the database user’s password. Ensure that passwords are in sync for all requiredenvironment variables per your application, otherwise your pods may fail to redeploywhen triggered.
CHAPTER 3. DATABASE IMAGES
53

Updating the environment variables triggers the redeployment of the database server if you have aconfiguration change trigger. Otherwise, you must manually start a new deployment in order to apply thepassword changes.
To verify that new passwords are in effect, first open a remote shell session to the running MariaDB pod:
$ oc rsh <pod>
From the bash shell, verify the database user’s new password:
bash-4.2$ mysql -u $MYSQL_USER -p<new_password> -h $HOSTNAME $MYSQL_DATABASE -te "SELECT * FROM (SELECT database()) db CROSS JOIN (SELECT user()) u"
If the password was changed correctly, you should see a table like this:
+------------+---------------------+| database() | user() |+------------+---------------------+| sampledb | [email protected] |+------------+---------------------+
To verify the root user’s new password:
bash-4.2$ mysql -u root -p<new_root_password> -h $HOSTNAME $MYSQL_DATABASE -te "SELECT * FROM (SELECT database()) db CROSS JOIN (SELECT user()) u"
If the password was changed correctly, you should see a table like this:
+------------+------------------+| database() | user() |+------------+------------------+| sampledb | [email protected] |+------------+------------------+
3.5.5. Creating a Database Service from a Template
OpenShift Container Platform provides a template to make creating a new database service easy. Thetemplate provides parameter fields to define all the mandatory environment variables (user, password,database name, etc) with predefined defaults including auto-generation of password values. It will alsodefine both a deployment configuration and a service.
The MariaDB templates should have been registered in the default openshift project by your clusteradministrator during the initial cluster setup. See Loading the Default Image Streams and Templates formore details, if required.
There are two templates available:
mariadb-ephemeral is for development or testing purposes only because it uses ephemeralstorage for the database content. This means that if the database pod is restarted for anyreason, such as the pod being moved to another node or the deployment configuration beingupdated and triggering a redeploy, all data will be lost.
mariadb-persistent uses a persistent volume store for the database data which means the data
OpenShift Container Platform 3.11 Using Images
54

will survive a pod restart. Using persistent volumes requires a persistent volume pool be definedin the OpenShift Container Platform deployment. Cluster administrator instructions for settingup the pool are located in Persistent Storage Using NFS .
You can instantiate templates by following these instructions.
Once you have instantiated the service, you can copy the user name, password, and database nameenvironment variables into a deployment configuration for another component that intends to accessthe database. That component can then access the database through the service that was defined.
3.5.6. Troubleshooting
This section describes some troubles you might encounter and presents possible resolutions.
3.5.6.1. Linux Native AIO Failure
Symptom
The MySQL container fails to start and the logs show something like:
151113 5:06:56 InnoDB: Using Linux native AIO151113 5:06:56 InnoDB: Warning: io_setup() failed with EAGAIN. Will make 5 attempts before giving up.InnoDB: Warning: io_setup() attempt 1 failed.InnoDB: Warning: io_setup() attempt 2 failed.Waiting for MySQL to start ...InnoDB: Warning: io_setup() attempt 3 failed.InnoDB: Warning: io_setup() attempt 4 failed.Waiting for MySQL to start ...InnoDB: Warning: io_setup() attempt 5 failed.151113 5:06:59 InnoDB: Error: io_setup() failed with EAGAIN after 5 attempts.InnoDB: You can disable Linux Native AIO by setting innodb_use_native_aio = 0 in my.cnf151113 5:06:59 InnoDB: Fatal error: cannot initialize AIO sub-system151113 5:06:59 [ERROR] Plugin 'InnoDB' init function returned error.151113 5:06:59 [ERROR] Plugin 'InnoDB' registration as a STORAGE ENGINE failed.151113 5:06:59 [ERROR] Unknown/unsupported storage engine: InnoDB151113 5:06:59 [ERROR] Aborting
Explanation
MariaDB’s storage engine was unable to use the kernel’s AIO (Asynchronous I/O) facilities due toresource limits.
Resolution
Turn off AIO usage entirely, by setting environment variable MYSQL_AIO to have value 0. Onsubsequent deployments, this arranges for the MySQL configuration variable innodb_use_native_aioto have value 0.
Alternatively, increase the aio-max-nr kernel resource. The following example examines the currentvalue of aio-max-nr and doubles it.
$ sysctl fs.aio-max-nrfs.aio-max-nr = 1048576# sysctl -w fs.aio-max-nr=2097152
CHAPTER 3. DATABASE IMAGES
55

This is a per-node resolution and lasts until the next node reboot.
OpenShift Container Platform 3.11 Using Images
56

CHAPTER 4. OTHER IMAGES
4.1. OVERVIEW
This topic group includes information on other container images available for OpenShift ContainerPlatform users.
4.2. JENKINS
4.2.1. Overview
OpenShift Container Platform provides a container image for running Jenkins. This image provides aJenkins server instance, which can be used to set up a basic flow for continuous testing, integration, anddelivery.
This image also includes a sample Jenkins job, which triggers a new build of a BuildConfig defined inOpenShift Container Platform, tests the output of that build, and then on successful build, retags theoutput to indicate the build is ready for production. For more details, see the README.
OpenShift Container Platform follows the LTS release of Jenkins. OpenShift Container Platformprovides an image containing Jenkins 2.x. A separate image with Jenkins 1.x was previously madeavailable but is now no longer maintained.
4.2.2. Images
The OpenShift Container Platform Jenkins image comes in two flavors:
RHEL 7 Based Image
The RHEL 7 image is available through the Red Hat Registry:
$ docker pull registry.redhat.io/openshift3/jenkins-2-rhel7
CentOS 7 Based Image
This image is available on Docker Hub:
$ docker pull openshift/jenkins-2-centos7
To use these images, you can either access them directly from these registries or push them into yourOpenShift Container Platform container image registry. Additionally, you can create an ImageStreamthat points to the image, either in your container image registry or at the external location. YourOpenShift Container Platform resources can then reference the ImageStream. You can find exampleImageStream definitions for all the provided OpenShift Container Platform images.
4.2.3. Configuration and Customization
4.2.3.1. Authentication
You can manage Jenkins authentication in two ways:
OpenShift Container Platform OAuth authentication provided by the OpenShift Login plug-in.
CHAPTER 4. OTHER IMAGES
57
Standard authentication provided by Jenkins
4.2.3.1.1. OpenShift Container Platform OAuth authentication
OAuth authentication is activated by configuring the Configure Global Security panel in the Jenkins UI,or by setting the OPENSHIFT_ENABLE_OAUTH environment variable on the Jenkins Deployment Config to anything other than false. This activates the OpenShift Login plug-in, which retrieves theconfiguration information from pod data or by interacting with the OpenShift Container Platform APIserver.
Valid credentials are controlled by the OpenShift Container Platform identity provider. For example, if Allow All is the default identity provider, you can provide any non-empty string for both the user nameand password.
Jenkins supports both browser and non-browser access.
Valid users are automatically added to the Jenkins authorization matrix at log in, where OpenShiftContainer Platform Roles dictate the specific Jenkins permissions the user will have.
Users with the admin role will have the traditional Jenkins administrative user permissions. Users withthe edit or view role will have progressively less permissions. See the Jenkins image source repositoryREADME for the specifics on the OpenShift roles to Jenkins permissions mappings.
NOTE
The admin user that is pre-populated in the OpenShift Container Platform Jenkinsimage with administrative privileges will not be given those privileges when OpenShiftContainer Platform OAuth is used, unless the OpenShift Container Platform clusteradministrator explicitly defines that user in the OpenShift Container Platform identityprovider and assigns the admin role to the user.
Jenkins' users permissions can be changed after the users are initially established. The OpenShift Loginplug-in polls the OpenShift Container Platform API server for permissions and updates the permissionsstored in Jenkins for each user with the permissions retrieved from OpenShift Container Platform. If theJenkins UI is used to update permissions for a Jenkins user, the permission changes are overwritten thenext time the plug-in polls OpenShift Container Platform.
You can control how often the polling occurs with the OPENSHIFT_PERMISSIONS_POLL_INTERVALenvironment variable. The default polling interval is five minutes.
The easiest way to create a new Jenkins service using OAuth authentication is to use a template asdescribed below.
4.2.3.1.2. Jenkins Standard Authentication
Jenkins authentication is used by default if the image is run directly, without using a template.
The first time Jenkins starts, the configuration is created along with the administrator user andpassword. The default user credentials are admin and password. Configure the default password bysetting the JENKINS_PASSWORD environment variable when using (and only when using) standardJenkins authentication.
To create a new Jenkins application using standard Jenkins authentication:
OpenShift Container Platform 3.11 Using Images
58

$ oc new-app -e \ JENKINS_PASSWORD=<password> \ openshift/jenkins-2-centos7
4.2.3.2. Environment Variables
The Jenkins server can be configured with the following environment variables:
OPENSHIFT_ENABLE_OAUTH (default: false)Determines whether the OpenShift Login plug-in manages authentication when logging intoJenkins. To enable, set to true.
JENKINS_PASSWORD (default: password)The password for the admin user when using standard Jenkins authentication. Not applicablewhen OPENSHIFT_ENABLE_OAUTH is set to true.
OPENSHIFT_JENKINS_JVM_ARCHSet to x86_64 or i386 to override the JVM used to host Jenkins. For memory efficiency, bydefault the Jenkins image dynamically uses a 32-bit JVM if running in a container with amemory limit under 2GiB.
JAVA_MAX_HEAP_PARAMCONTAINER_HEAP_PERCENT (default: 0.5, or 50%)JENKINS_MAX_HEAP_UPPER_BOUND_MBThese values control the maximum heap size of the Jenkins JVM. If JAVA_MAX_HEAP_PARAM is set (example setting: -Xmx512m), its value takes precedence.Otherwise, the maximum heap size is dynamically calculated as CONTAINER_HEAP_PERCENT% (example setting: 0.5, or 50%) of the container memory limit,optionally capped at JENKINS_MAX_HEAP_UPPER_BOUND_MB MiB (example setting: 512).
By default, the maximum heap size of the Jenkins JVM is set to 50% of the container memorylimit with no cap.
JAVA_INITIAL_HEAP_PARAMCONTAINER_INITIAL_PERCENTThese values control the initial heap size of the Jenkins JVM. If JAVA_INITIAL_HEAP_PARAMis set (example setting: -Xms32m), its value takes precedence. Otherwise, the initial heap sizemay be dynamically calculated as CONTAINER_INITIAL_PERCENT% (example setting: 0.1, or10%) of the dynamically calculated maximum heap size.
By default, the initial heap sizing is left to the JVM.
CONTAINER_CORE_LIMITIf set, specifies an integer number of cores used for sizing numbers of internal JVM threads.Example setting: 2.
JAVA_TOOL_OPTIONS (default: -XX:+UnlockExperimentalVMOptions -XX:+UseCGroupMemoryLimitForHeap -Dsun.zip.disableMemoryMapping=true)Specifies options to be heeded by all JVMs running in this container. It is not recommended tooverride this.
JAVA_GC_OPTS (default: -XX:+UseParallelGC -XX:MinHeapFreeRatio=5 -XX:MaxHeapFreeRatio=10 -XX:GCTimeRatio=4 -XX:AdaptiveSizePolicyWeight=90)Specifies Jenkins JVM garbage collection parameters. It is not recommended to override this.
CHAPTER 4. OTHER IMAGES
59
JENKINS_JAVA_OVERRIDESSpecifies additional options for the Jenkins JVM. These options are appended to all otheroptions, including the Java options above, and may be used to override any of them if necessary.Separate each additional option with a space; if any option contains space characters, escapethem with a backslash. Example settings: -Dfoo -Dbar; -Dfoo=first\ value -Dbar=second\ value.
JENKINS_OPTSSpecifies arguments to Jenkins.
INSTALL_PLUGINSSpecifies additional Jenkins plug-ins to install when the container is first run or when OVERRIDE_PV_PLUGINS_WITH_IMAGE_PLUGINS is set to true (see below). Plug-ins arespecified as a comma-delimited list of name:version pairs. Example setting: git:3.7.0,subversion:2.10.2.
OPENSHIFT_PERMISSIONS_POLL_INTERVAL (default: 300000 - 5 minutes)Specifies in milliseconds how often the OpenShift Login plug-in polls OpenShift ContainerPlatform for the permissions associated with each user defined in Jenkins.
OVERRIDE_PV_CONFIG_WITH_IMAGE_CONFIG (default: false)When running this image with an OpenShift Container Platform persistent volume for theJenkins config directory, the transfer of configuration from the image to the persistent volumeis only done the first startup of the image as the persistent volume is assigned by the persistentvolume claim creation. If you create a custom image that extends this image and updatesconfiguration in the custom image after the initial startup, by default it will not be copied over,unless you set this environment variable to true.
OVERRIDE_PV_PLUGINS_WITH_IMAGE_PLUGINS (default: false)When running this image with an OpenShift Container Platform persistent volume for theJenkins config directory, the transfer of plugins from the image to the persistent volume is onlydone the first startup of the image as the persistent volume is assigned by the persistentvolume claim creation. If you create a custom image that extends this image and updatesplugins in the custom image after the initial startup, by default they will not be copied over,unless you set this environment variable to true.
ENABLE_FATAL_ERROR_LOG_FILE (default: false)When running this image with an OpenShift Container Platform persistent claim for the Jenkinsconfig directory, this environment variable allows the fatal error log file to persist when a fatalerror occurs. The fatal error file is saved at /var/lib/jenkins/logs.
NODEJS_SLAVE_IMAGESetting this value overrides the image used for the default NodeJS agent pod configuration.The default NodeJS agent pod uses docker.io/openshift/jenkins-agent-nodejs-8-centos7 or registry.redhat.io/openshift3/jenkins-agent-nodejs-8-rhel7 depending whether you arerunning the CentOS or RHEL version of the Jenkins image. This variable must be set beforeJenkins starts the first time for it to have an effect.
MAVEN_SLAVE_IMAGESetting this value overrides the image used for the default maven agent pod configuration. Thedefault maven agent pod uses docker.io/openshift/jenkins-agent-maven-35-centos7 or registry.redhat.io/openshift3/jenkins-agent-maven-35-rhel7 depending whether you arerunning the CentOS or RHEL version of the Jenkins image. This variable must be set beforeJenkins starts the first time for it to have an effect.
JENKINS_UC_INSECURE
Determines whether Jenkins plugins downloads are allowed if the Jenkins Update Center
OpenShift Container Platform 3.11 Using Images
60
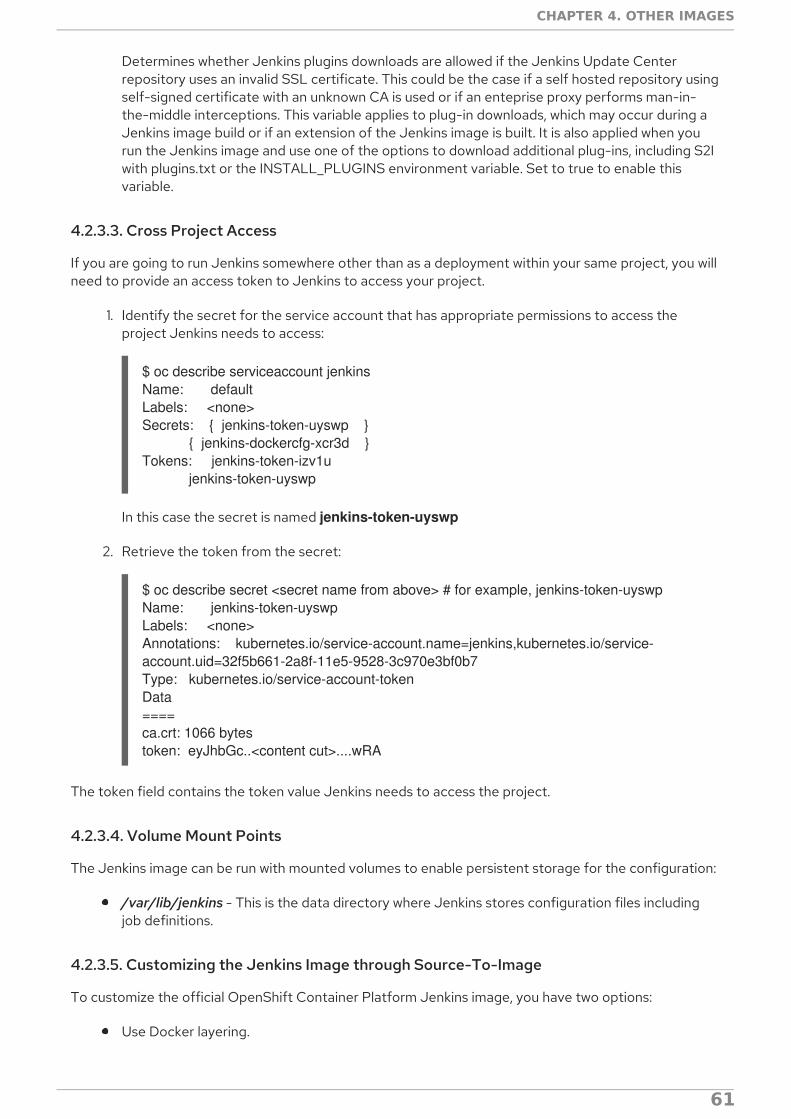
Determines whether Jenkins plugins downloads are allowed if the Jenkins Update Centerrepository uses an invalid SSL certificate. This could be the case if a self hosted repository usingself-signed certificate with an unknown CA is used or if an enteprise proxy performs man-in-the-middle interceptions. This variable applies to plug-in downloads, which may occur during aJenkins image build or if an extension of the Jenkins image is built. It is also applied when yourun the Jenkins image and use one of the options to download additional plug-ins, including S2Iwith plugins.txt or the INSTALL_PLUGINS environment variable. Set to true to enable thisvariable.
4.2.3.3. Cross Project Access
If you are going to run Jenkins somewhere other than as a deployment within your same project, you willneed to provide an access token to Jenkins to access your project.
1. Identify the secret for the service account that has appropriate permissions to access theproject Jenkins needs to access:
$ oc describe serviceaccount jenkinsName: defaultLabels: <none>Secrets: { jenkins-token-uyswp } { jenkins-dockercfg-xcr3d }Tokens: jenkins-token-izv1u jenkins-token-uyswp
In this case the secret is named jenkins-token-uyswp
2. Retrieve the token from the secret:
$ oc describe secret <secret name from above> # for example, jenkins-token-uyswpName: jenkins-token-uyswpLabels: <none>Annotations: kubernetes.io/service-account.name=jenkins,kubernetes.io/service-account.uid=32f5b661-2a8f-11e5-9528-3c970e3bf0b7Type: kubernetes.io/service-account-tokenData====ca.crt: 1066 bytestoken: eyJhbGc..<content cut>....wRA
The token field contains the token value Jenkins needs to access the project.
4.2.3.4. Volume Mount Points
The Jenkins image can be run with mounted volumes to enable persistent storage for the configuration:
/var/lib/jenkins - This is the data directory where Jenkins stores configuration files includingjob definitions.
4.2.3.5. Customizing the Jenkins Image through Source-To-Image
To customize the official OpenShift Container Platform Jenkins image, you have two options:
Use Docker layering.
CHAPTER 4. OTHER IMAGES
61

1
2
3
Use the image as a Source-To-Image builder, described here.
You can use S2I to copy your custom Jenkins Jobs definitions, additional plug-ins or replace theprovided config.xml file with your own, custom, configuration.
In order to include your modifications in the Jenkins image, you need to have a Git repository with thefollowing directory structure:
plugins
This directory contains those binary Jenkins plug-ins you want to copy into Jenkins.
plugins.txt
This file lists the plug-ins you want to install:
pluginId:pluginVersion
configuration/jobs
This directory contains the Jenkins job definitions.
configuration/config.xml
This file contains your custom Jenkins configuration.
The contents of the configuration/ directory will be copied into the /var/lib/jenkins/ directory, so youcan also include additional files, such as credentials.xml, there.
The following is an example build configuration that customizes the Jenkins image in OpenShiftContainer Platform:
The source field defines the source Git repository with the layout described above.
The strategy field defines the original Jenkins image to use as a source image for the build.
The output field defines the resulting, customized Jenkins image you can use in deploymentconfiguration instead of the official Jenkins image.
apiVersion: v1kind: BuildConfigmetadata: name: custom-jenkins-buildspec: source: 1 git: uri: https://github.com/custom/repository type: Git strategy: 2 sourceStrategy: from: kind: ImageStreamTag name: jenkins:latest namespace: openshift type: Source output: 3 to: kind: ImageStreamTag name: custom-jenkins:latest
OpenShift Container Platform 3.11 Using Images
62

4.2.3.6. Configuring the Jenkins Kubernetes Plug-in
The OpenShift Container Platform Jenkins image includes the pre-installed Kubernetes plug-in thatallows Jenkins agents to be dynamically provisioned on multiple container hosts using Kubernetes andOpenShift Container Platform.
To use the Kubernetes plug-in, OpenShift Container Platform provides five images suitable for use asJenkins agents: the Base, Maven, and Node.js images. See Jenkins Agents for more information.
NOTE
the jenkins-slave-maven-* and jenkins-slave-nodejs-* images are being marked asdeprecated during the v3.10 release cycle. The images will still exist in the interim sousers can migrate their applications to the newer jenkins-agent-maven-* and jenkins-agent-nodejs-* images.
Both the Maven and Node.js agent images are automatically configured as Kubernetes Pod Templateimages within the OpenShift Container Platform Jenkins image’s configuration for the Kubernetes plug-in. That configuration includes labels for each of the images that can be applied to any of your Jenkinsjobs under their "Restrict where this project can be run" setting. If the label is applied, execution of thegiven job will be done under an OpenShift Container Platform pod running the respective agent image.
The Jenkins image also provides auto-discovery and auto-configuration of additional agent images forthe Kubernetes plug-in. With the OpenShift Sync plug-in, the Jenkins image on Jenkins start-upsearches within the project that it is running, or the projects specifically listed in the plug-in’sconfiguration for the following:
Image streams that have the label role set to jenkins-slave.
Image stream tags that have the annotation role set to jenkins-slave.
ConfigMaps that have the label role set to jenkins-slave.
When it finds an image stream with the appropriate label, or image stream tag with the appropriateannotation, it generates the corresponding Kubernetes plug-in configuration so you can assign yourJenkins jobs to run in a pod running the container image provided by the image stream.
The name and image references of the image stream or image stream tag are mapped to the name andimage fields in the Kubernetes plug-in pod template. You can control the label field of the Kubernetesplug-in pod template by setting an annotation on the image stream or image stream tag object with thekey slave-label. Otherwise, the name is used as the label.
When it finds a ConfigMap with the appropriate label, it assumes that any values in the key-value datapayload of the ConfigMap contains XML consistent with the config format for Jenkins and theKubernetes plug-in pod templates. A key differentiator to note when using ConfigMaps, instead ofimage streams or image stream tags, is that you can control all the various fields of the Kubernetesplug-in pod template.
The following is an example ConfigMap:
kind: ConfigMapapiVersion: v1metadata: name: jenkins-agent labels: role: jenkins-slave
CHAPTER 4. OTHER IMAGES
63

After startup, the OpenShift Sync plug-in monitors the API server of OpenShift Container Platform forupdates to ImageStreams, ImageStreamTags, and ConfigMaps and adjusts the configuration of theKubernetes plug-in.
In particular, the following rules will apply:
Removal of the label or annotation from the ConfigMap, ImageStream, or ImageStreamTagwill result in the deletion of any existing PodTemplate from the configuration of the Kubernetesplug-in.
Similarly, if those objects are removed, the corresponding configuration is removed from theKubernetes plug-in.
Conversely, either the creation of appropriately labeled or annotated ConfigMap, ImageStream, or ImageStreamTag objects, or the adding of labels after their initial creation,leads to the creation of a PodTemplate in the Kubernetes-plugin configuration.
In the case of the PodTemplate via ConfigMap form, changes to the ConfigMap data for the PodTemplate will be applied to the PodTemplate settings in the Kubernetes plug-inconfiguration, and will override any changes made to the PodTemplate through the Jenkins UIin the interim between changes to the ConfigMap.
To use a container image as a Jenkins agent, the image must run the slave agent as an entrypoint. For
data: template1: |- <org.csanchez.jenkins.plugins.kubernetes.PodTemplate> <inheritFrom></inheritFrom> <name>template1</name> <instanceCap>2147483647</instanceCap> <idleMinutes>0</idleMinutes> <label>template1</label> <serviceAccount>jenkins</serviceAccount> <nodeSelector></nodeSelector> <volumes/> <containers> <org.csanchez.jenkins.plugins.kubernetes.ContainerTemplate> <name>jnlp</name> <image>openshift/jenkins-agent-maven-35-centos7:v3.10</image> <privileged>false</privileged> <alwaysPullImage>true</alwaysPullImage> <workingDir>/tmp</workingDir> <command></command> <args>${computer.jnlpmac} ${computer.name}</args> <ttyEnabled>false</ttyEnabled> <resourceRequestCpu></resourceRequestCpu> <resourceRequestMemory></resourceRequestMemory> <resourceLimitCpu></resourceLimitCpu> <resourceLimitMemory></resourceLimitMemory> <envVars/> </org.csanchez.jenkins.plugins.kubernetes.ContainerTemplate> </containers> <envVars/> <annotations/> <imagePullSecrets/> <nodeProperties/> </org.csanchez.jenkins.plugins.kubernetes.PodTemplate>
OpenShift Container Platform 3.11 Using Images
64

To use a container image as a Jenkins agent, the image must run the slave agent as an entrypoint. Formore details about this, refer to the official Jenkins documentation.
4.2.3.6.1. Permission Considerations
In the previous ConfigMap example, the <serviceAccount> element of the Pod Template XML is theOpenShift Container Platform Service Account used for the resulting Pod. The service accountcredentials mounted into the Pod, with permissions associated with the service account, control whichoperations against the OpenShift Container Platform master are allowed from the Pod.
Consider the following with service accounts used for the Pod, launched by the Kubernetes Plug-inrunning in the OpenShift Container Platform Jenkins image:
If you use the example template for Jenkins provided by OpenShift Container Platform, the jenkins service account is defined with the edit role for the project Jenkins is running in, andthe master Jenkins Pod has that service account mounted.
The two default Maven and NodeJS Pod Templates injected into the Jenkins configuration arealso set to use the same service account as the master.
Any Pod Templates auto-discovered by the OpenShift Sync plug-in as a result of Imagestreams or Image stream tags having the required label or annotations have their serviceaccount set to the master’s service account.
For the other ways you can provide a Pod Template definition into Jenkins and the Kubernetesplug-in, you have to explicitly specify the service account to use.
Those other ways include the Jenkins console, the podTemplate pipeline DSL provided by theKubernetes plug-in, or labeling a ConfigMap whose data is the XML configuration for a PodTemplate.
If you do not specify a value for the service account, the default service account is used.
You need to ensure that whatever service account is used has the necessary permissions, roles,and so on defined within OpenShift Container Platform to manipulate whatever projects youchoose to manipulate from the within the Pod
4.2.4. Usage
4.2.4.1. Creating a Jenkins Service from a Template
Templates provide parameter fields to define all the environment variables (password) with predefineddefaults. OpenShift Container Platform provides templates to make creating a new Jenkins service easy.The Jenkins templates should have been registered in the default openshift project by your clusteradministrator during the initial cluster setup. See Loading the Default Image Streams and Templates formore details, if required.
a deployment configuration and a service.
NOTE
A pod may be restarted when it is moved to another node, or when an update of thedeployment configuration triggers a redeployment.
jenkins-persistent uses a persistent volume store. Data survives a pod restart.
CHAPTER 4. OTHER IMAGES
65

must instantiate the template to be able to use Jenkins:
4.2.4.2. Using the Jenkins Kubernetes Plug-in
Creating a New Jenkins Service
In the below sample, the openshift-jee-sample BuildConfig causes a Jenkins maven agent Pod to bedynamically provisioned. The Pod clones some Java source, builds a WAR file, then causes a secondBuildConfig (openshift-jee-sample-docker) to run to layer the newly created WAR file into a containerimage.
A fuller sample which achieves a similar goal is available here.
Example 4.1. Example BuildConfig using the Jenkins Kubernetes Plug-in
kind: ListapiVersion: v1items:- kind: ImageStream apiVersion: v1 metadata: name: openshift-jee-sample- kind: BuildConfig apiVersion: v1 metadata: name: openshift-jee-sample-docker spec: strategy: type: Docker source: type: Docker dockerfile: |- FROM openshift/wildfly-101-centos7:latest COPY ROOT.war /wildfly/standalone/deployments/ROOT.war CMD $STI_SCRIPTS_PATH/run binary: asFile: ROOT.war output: to: kind: ImageStreamTag name: openshift-jee-sample:latest- kind: BuildConfig apiVersion: v1 metadata: name: openshift-jee-sample spec: strategy: type: JenkinsPipeline jenkinsPipelineStrategy: jenkinsfile: |- node("maven") { sh "git clone https://github.com/openshift/openshift-jee-sample.git ." sh "mvn -B -Popenshift package" sh "oc start-build -F openshift-jee-sample-docker --from-file=target/ROOT.war"
OpenShift Container Platform 3.11 Using Images
66

1
2
3
4
It is also possible to override the specification of the dynamically created Jenkins agent Pod. Thefollowing is a modification to the above example which overrides the container memory and specifies anenvironment variable:
Example 4.2. Example BuildConfig using the Jenkins Kubernetes Plug-in, specifying memorylimit and environment variable
A new Pod template called "mypod" is defined on-the-fly. The new Pod template name isreferenced in the node stanza below.
The "cloud" value must be set to "openshift".
The new Pod template can inherit its configuration from an existing Pod template. In this case,we inherit from the "maven" Pod template which is pre-defined by OpenShift ContainerPlatform.
We are overriding values in the pre-existing Container, therefore we must specify it by name. AllJenkins agent images shipped with OpenShift Container Platform use the Container name"jnlp".
} triggers: - type: ConfigChange
kind: BuildConfigapiVersion: v1metadata: name: openshift-jee-samplespec: strategy: type: JenkinsPipeline jenkinsPipelineStrategy: jenkinsfile: |- podTemplate(label: "mypod", 1 cloud: "openshift", 2 inheritFrom: "maven", 3 containers: [ containerTemplate(name: "jnlp", 4 image: "openshift/jenkins-agent-maven-35-centos7:v3.10", 5 resourceRequestMemory: "512Mi", 6 resourceLimitMemory: "512Mi", 7 envVars: [ envVar(key: "CONTAINER_HEAP_PERCENT", value: "0.25") 8 ]) ]) { node("mypod") { 9 sh "git clone https://github.com/openshift/openshift-jee-sample.git ." sh "mvn -B -Popenshift package" sh "oc start-build -F openshift-jee-sample-docker --from-file=target/ROOT.war" } } triggers: - type: ConfigChange
CHAPTER 4. OTHER IMAGES
67

5
6
7
8
9
The Container image must be re-specified. This is a known issue.
A memory request of 512Mi is specified.
A memory limit of 512Mi is specified.
An environment variable CONTAINER_HEAP_PERCENT, with value "0.25", is specified.
The node stanza references the name of the Pod template newly defined above.
By default the pod is deleted when the build completes. This behavior can be modified via the plug-in orwithin a pipeline Jenkinsfile - see Agent Pod Retention for further details.
For more information on Kubernetes plug-in configuration, see the Kubernetes plug-in documentation .
4.2.4.3. Memory Requirements
When deployed by the provided Jenkins Ephemeral or Jenkins Persistent templates, the defaultmemory limit is 512MiB.
See Sizing OpenJDK on OpenShift Container Platform for background information on tuning the JVMused by Jenkins.
For memory efficiency, by default the Jenkins image dynamically uses a 32-bit JVM if running in acontainer with a memory limit under 2GiB. This behavior can be overridden by the OPENSHIFT_JENKINS_JVM_ARCH environment variable.
By default the Jenkins JVM uses 50% of the container memory limit for its heap. This value can bemodified by the CONTAINER_HEAP_PERCENT environment variable. It can also be capped at anupper limit or overridden entirely. See Environment Variables for more details.
Consider that by default all other processes executed in the Jenkins container, such as shell scripts or occommands run locally from pipelines, are not likely to be able to use more than the remaining 256MiBmemory combined without provoking an OOM kill. It is therefore highly recommended that pipelines runexternal commands in a agent container wherever possible.
It is recommended to specify memory request and limit values on agent containers created by theJenkins Kubernetes Plug-in. As admin, defaults can be set on a per-agent image basis through theJenkins configuration. The memory request and limit can also be overridden on a per-container basis asdocumented above.
You can increase the amount of memory available to Jenkins by overriding the MEMORY_LIMITparamenter when instantiating the Jenkins Ephemeral or Jenkins Persistent template.
4.2.5. Jenkins Plug-ins
The following plug-ins are provided to integrate Jenkins with OpenShift Container Platform. They areavailable by default in the Jenkins image.
4.2.5.1. OpenShift Container Platform Client Plug-in
The OpenShift Container Platform Client Plug-in aims to provide a readable, concise, comprehensive,and fluent Jenkins Pipeline syntax for rich interactions with OpenShift Container Platform. The plug-inleverages the oc binary, which must be available on the nodes executing the script.
OpenShift Container Platform 3.11 Using Images
68

This plug-in is fully supported and is included in the Jenkins image. It provides:
A Fluent-style syntax for use in Jenkins Pipelines.
Use of and exposure to any option available with oc.
Integration with Jenkins credentials and clusters.
Continued support for classic Jenkins Freestyle jobs.
See the OpenShift Pipeline Builds tutorial and the plug-in’s README for more information.
4.2.5.2. OpenShift Container Platform Pipeline Plug-in
The OpenShift Container Platform Pipeline Plug-in is a prior integration between Jenkins andOpenShift Container Platform which provides less functionality than the OpenShift Container PlatformClient Plug-in. It has been deprecated but continues to work with OpenShift Container Platformversions up to v3.11. For later verions of OpenShift Container Platform, either use the oc binary directlyfrom your Jenkins Pipelines, or use the OpenShift Container Platform Client Plug-in .
See the plug-in’s README for more information.
4.2.5.3. OpenShift Container Platform Sync Plug-in
To facilitate OpenShift Container Platform Pipeline build strategy for integration between Jenkins andOpenShift Container Platform, the OpenShift Sync Plug-in monitors the API server of OpenShiftContainer Platform for updates to BuildConfigs and Builds that employ the Pipeline strategy andeither creates Jenkins Pipeline projects (when a BuildConfig is created) or starts jobs in the resultingprojects (when a Build is started).
As noted in Configuring the Jenkins Kubernetes Plug-in , this plug-in can create PodTemplateconfigurations for the Kubernetes plug-in based on specifically cited ImageStream, ImageStreamTag,or ConfigMap objects defined in OpenShift Container Platform.
This plug-in can now take Secret objects with a label key of credential.sync.jenkins.openshift.io andlabel value of true and construct Jenkins credentials which are placed in the default global domain withinthe Jenkins credentials hierarchy. The ID of the credential will be composed of the namespace the Secret is defined in, a hyphen ( -), followed by the name of the Secret.
Similar to the handling of ConfigMaps for PodTemplates, the Secret object defined in OpenShiftContainer Platform is considered the master configuration. Any subsequent updates to the object inOpenShift Container Platform will be applied to the Jenkins credential (overwriting any changes to thecredential made in the interim).
Removal of the credential.sync.jenkins.openshift.io property, setting of that property to somethingother than true, or deletion of the Secret in OpenShift Container Platform will result in deletion of theassociated credential in Jenkins.
The type of secret will be mapped to the jenkins credential type as follows:
With Opaque type Secret objects the plug-in looks for username and password in the datasection and constructs a Jenkins UsernamePasswordCredentials credential. Remember, inOpenShift Container Platform the password field can be either an actual password or the user’sunique token. If those are not present, it will look for the ssh-privatekey field and create aJenkins BasicSSHUserPrivateKey credential.
With kubernetes.io/basic-auth type `Secret`objects the plug-in creates a Jenkins
CHAPTER 4. OTHER IMAGES
69

With kubernetes.io/basic-auth type `Secret`objects the plug-in creates a JenkinsUsernamePasswordCredentials credential.
With kubernetes.io/ssh-auth type Secret objects the plug-in creates a JenkinsBasicSSHUserPrivateKey credential.
4.2.5.4. Kubernetes Plug-in
The Kubernetes plug-in is used to run Jenkins agents as pods on your cluster. The auto-configuration ofthe Kubernetes plug-in is described in Using the Jenkins Kubernetes Plug-in .
4.3. JENKINS AGENTS
4.3.1. Overview
OpenShift Container Platform provides three images suitable for use as Jenkins agents: the Base,Maven, and Node.js images.
The first is a base image for Jenkins agents:
It pulls in both the required tools (headless Java, the Jenkins JNLP client) and the useful ones(including git, tar, zip, and nss among others).
It establishes the JNLP agent as the entrypoint.
It includes the oc client tooling for invoking command line operations from within Jenkins jobs.
It provides Dockerfiles for both CentOS and RHEL images.
Two more images that extend the base image are also provided:
Maven v3.5 image
Node.js v8 image
The Maven and Node.js Jenkins agent images provide Dockerfiles for both CentOS and RHEL that youcan reference when building new agent images. Also note the contrib and contrib/bin subdirectories.They allow for the insertion of configuration files and executable scripts for your image.
IMPORTANT
Use and extend an appropriate agent image version for the version of OpenShiftContainer Platform that you are using. If the oc client version embedded in the agentimage is not compatible with the OpenShift Container Platform version, unexpectedbehavior may result. See the versioning policy for more information.
4.3.2. Images
The OpenShift Container Platform Jenkins agent images come in two flavors:
RHEL 7 Based Images
RHEL 7 images are available through the Red Hat Registry:
$ docker pull registry.redhat.io/openshift3/jenkins-slave-base-rhel7
OpenShift Container Platform 3.11 Using Images
70

$ docker pull registry.redhat.io/openshift3/jenkins-slave-maven-rhel7$ docker pull registry.redhat.io/openshift3/jenkins-slave-nodejs-rhel7$ docker pull registry.redhat.io/openshift3/jenkins-agent-maven-35-rhel7$ docker pull registry.redhat.io/openshift3/jenkins-agent-nodejs-8-rhel7
CentOS 7 Based Images
These images are available on Docker Hub:
$ docker pull openshift/jenkins-slave-base-centos7$ docker pull openshift/jenkins-slave-maven-centos7$ docker pull openshift/jenkins-slave-nodejs-centos7$ docker pull openshift/jenkins-agent-maven-35-centos7$ docker pull openshift/jenkins-agent-nodejs-8-centos7
To use these images, you can either access them directly from these registries or push them into yourOpenShift Container Platform container image registry.
4.3.3. Configuration and Customization
4.3.3.1. Environment Variables
Each Jenkins agent container can be configured with the following environment variables:
OPENSHIFT_JENKINS_JVM_ARCHSet to x86_64 or i386 to override the JVM used to host the Jenkins agent. For memoryefficiency, by default the Jenkins agent images dynamically use a 32-bit JVM if running in acontainer with a memory limit under 2GiB.
JAVA_MAX_HEAP_PARAMCONTAINER_HEAP_PERCENT (default: 0.5, i.e. 50%)JNLP_MAX_HEAP_UPPER_BOUND_MBThese values control the maximum heap size of the Jenkins agent JVM. If JAVA_MAX_HEAP_PARAM is set (example setting: -Xmx512m), its value takes precedence.Otherwise, the maximum heap size is dynamically calculated as CONTAINER_HEAP_PERCENT% (example setting: 0.5, i.e. 50%) of the container memorylimit, optionally capped at JNLP_MAX_HEAP_UPPER_BOUND_MB MiB (example setting: 512).
By default, the maximum heap size of the Jenkins agent JVM is set to 50% of the containermemory limit with no cap.
JAVA_INITIAL_HEAP_PARAMCONTAINER_INITIAL_PERCENTThese values control the initial heap size of the Jenkins agent JVM. If JAVA_INITIAL_HEAP_PARAM is set (example setting: -Xms32m), its value takes precedence.Otherwise, the initial heap size may be dynamically calculated as CONTAINER_INITIAL_PERCENT% (example setting: 0.1, i.e. 10%) of the dynamicallycalculated maximum heap size.
By default, the initial heap sizing is left to the JVM.
CONTAINER_CORE_LIMITIf set, specifies an integer number of cores used for sizing numbers of internal JVM threads.Example setting: 2.
CHAPTER 4. OTHER IMAGES
71

JAVA_TOOL_OPTIONS (default: -XX:+UnlockExperimentalVMOptions -XX:+UseCGroupMemoryLimitForHeap -Dsun.zip.disableMemoryMapping=true)Specifies options to be heeded by all JVMs running in this container. It is not recommended tooverride this.
JAVA_GC_OPTS (default: -XX:+UseParallelGC -XX:MinHeapFreeRatio=5 -XX:MaxHeapFreeRatio=10 -XX:GCTimeRatio=4 -XX:AdaptiveSizePolicyWeight=90)Specifies Jenkins agent JVM garbage collection parameters. It is not recommended to overridethis.
JNLP_JAVA_OVERRIDESSpecifies additional options for the Jenkins agent JVM. These options are appended to all otheroptions, including the Java options above, and may be used to override any of them if necessary.Separate each additional option with a space; if any option contains space characters, escapethem with a backslash. Example settings: -Dfoo -Dbar; -Dfoo=first\ value -Dbar=second\ value.
4.3.4. Usage
4.3.4.1. Memory Requirements
A JVM is used in all Jenkins agents to host the Jenkins JNLP agent, as well as to run any Javaapplications (e.g. javac, Maven or Gradle). See Sizing OpenJDK on OpenShift Container Platform forbackground information on tuning the JVM used by Jenkins agents.
For memory efficiency, by default the Jenkins image dynamically uses a 32-bit JVM if running in acontainer with a memory limit under 2GiB. This behavior can be overridden by the OPENSHIFT_JENKINS_JVM_ARCH environment variable. The JVM choice applies by default both forthe Jenkins JNLP agent as well as for any other Java processes within the agent container.
By default the Jenkins JNLP agent JVM uses 50% of the container memory limit for its heap. This valuecan be modified by the CONTAINER_HEAP_PERCENT environment variable. It can also be capped atan upper limit or overridden entirely. See Environment Variables for more details.
Consider that by default any/all other processes executed in the Jenkins agent container, e.g. shellscripts or oc commands run from pipelines, may not be able to use more than the remaining 50%memory limit without provoking an OOM kill.
By default, each further JVM process run in a Jenkins agent container will use up to 25% of thecontainer memory limit for their heap. It may be necessary to tune this for many build workloads. SeeSizing OpenJDK on OpenShift Container Platform for more information.
See the Jenkins documentation for information on specifying the memory request and limit of a Jenkinsagent container.
4.3.4.1.1. Gradle builds
Hosting Gradle builds in the a Jenkins agent on OpenShift presents additional complications, not leastbecause in addition to the Jenkins JNLP agent and Gradle JVMs, Gradle spawns a third JVM to runtests, if these are specified.
See Sizing OpenJDK on OpenShift Container Platform for background information on tuning JVMs onOpenShift.
The following settings are suggested as a starting point for running Gradle builds in a memory
OpenShift Container Platform 3.11 Using Images
72

1
The following settings are suggested as a starting point for running Gradle builds in a memoryconstrained Jenkins agent on OpenShift. Settings may be relaxed subsequently as required.
Ensure the long-lived gradle daemon is disabled by adding org.gradle.daemon=false to thegradle.properties file.
Disable parallel build execution by ensuring org.gradle.parallel=true is not set in thegradle.properties file and that --parallel is not set as a command line argument.
Set java { options.fork = false } in the build.gradle file to prevent Java compilations runningout-of-process.
Disable multiple additional test processes by ensuring test { maxParallelForks = 1 } is set in thebuild.gradle file.
Override the gradle JVM memory parameters according to Sizing OpenJDK on OpenShiftContainer Platform by the GRADLE_OPTS, JAVA_OPTS or JAVA_TOOL_OPTIONSenvironment variables.
Set the maximum heap size and JVM arguments for any Gradle test JVM by the maxHeapSizeand jvmArgs settings in build.gradle, or though the -Dorg.gradle.jvmargs command lineargument.
4.3.5. Agent Pod Retention
Jenkins agent pods (also known as slave pods) are deleted by default after the build completes or isaborted. This behavior can be changed by the Kubernetes plug-in Pod Retention setting. Pod retentioncan be set for all Jenkins builds, with overrides for each pod template. The following behaviors aresupported:
Always keeps the build pod regardless of build result.
Default uses the plug-in value (pod template only).
Never always deletes the pod.
On Failure keeps the pod if it fails during the build.
You can override pod retention in the pipeline Jenkinsfile:
Allowed values for podRetention are never(), onFailure(), always(), and default().
podTemplate(label: "mypod", cloud: "openshift", inheritFrom: "maven", podRetention: onFailure(), 1 containers: [ ... ]) { node("mypod") { ... }}
CHAPTER 4. OTHER IMAGES
73
WARNING
Pods that are kept may continue to run and count against resource quotas.
4.4. OTHER CONTAINER IMAGES
If you want to use container images not found in the Red Hat Container Catalog , you can use otherarbitrary container images in your OpenShift Container Platform instance, for example those found onthe Docker Hub.
For OpenShift Container Platform-specific guidelines on running containers using an arbitrarily assigneduser ID, see Support Arbitrary User IDs in the Creating Images guide.
IMPORTANT
For supportability details, see the Production Support Scope of Coverage as defined inthe OpenShift Container Platform Support Policy .
See also the security warning in System and Environment Requirements .
OpenShift Container Platform 3.11 Using Images
74