online purchasing overview - verizon wireless 9. enter your phone number in the “phone number”...
TRANSCRIPT

`
1
2
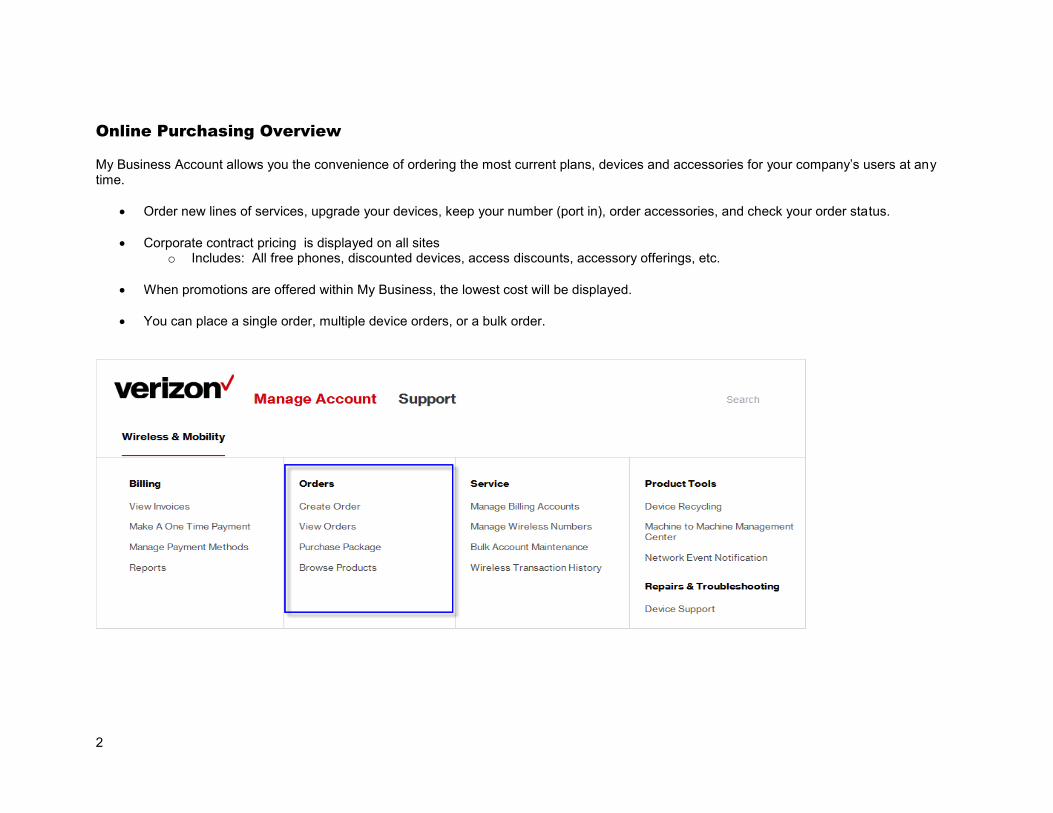
Online Purchasing Overview
My Business Account allows you the convenience of ordering the most current plans, devices and accessories for your company’s users at any time.
Order new lines of services, upgrade your devices, keep your number (port in), order accessories, and check your order status. Corporate contract pricing is displayed on all sites
o Includes: All free phones, discounted devices, access discounts, accessory offerings, etc.
When promotions are offered within My Business, the lowest cost will be displayed.
You can place a single order, multiple device orders, or a bulk order.

3
Choose Location Link The choose location link allows you to enter your work ZIP Code so that it will be pre-populated during the ordering process. To set your location:
1. Click on the “Choose Location” link.
2. “Enter you work ZIP Code”.

4
3. Click the “Continue” button. You have successfully saved your location.
Saved Addresses
The “Saved Addresses” feature in the settings dropdown allows you to save up to 25 addresses specifically for use when ordering. These addresses are specific to company users who have been assigned full buying privileges within My Business Account. To save a business address:
1. Click on the icon next to your user name.

5
2. Go to the “Saved Addresses” page.
3. Click on the “Add” button to add a new address.

6
4. Select “Business Address” from the “Address Type” dropdown.
5. Enter an easy-to-remember nickname in the “Address Nickname” field.
6. Enter a recipient’s name in the “Attention” field. This should be the person who will be receiving orders in that location.
7. Enter the company’s name in the “Company Name” field.
8. Enter the address information for the business. Note: All addresses are validated against the USPS database of known addresses. However, if your address is valid but you receive an error message, you must submit the address by clicking the continue button 4 times to override the error message. This will save the address in the system.

7
9. Enter your phone number in the “Phone Number” field. Note the number must be entered according to the following format ”xxx-xxx-xxxx”
10. Enter your email address in the “Email Address” field.
11. Verify that the information is correct, and then click the “Continue” button.
12. Confirm the information is correct, and click the “Submit” button. You have successfully saved a business address.

8
Orders Page
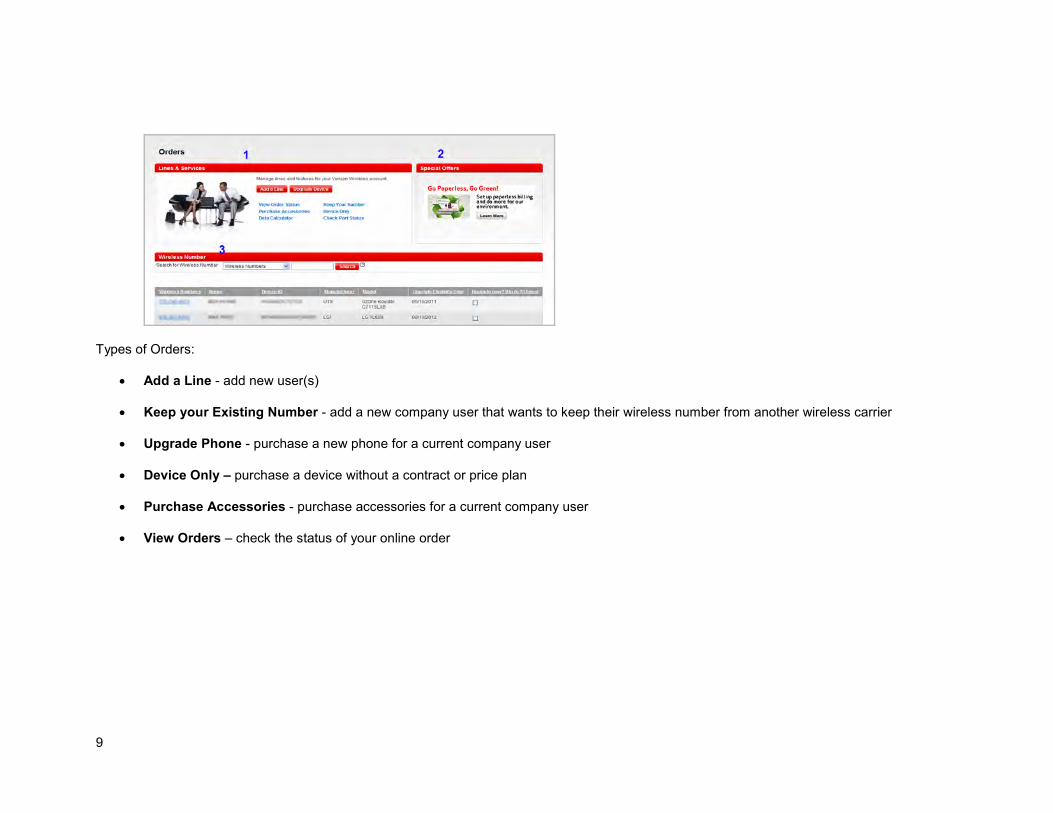
From the “Orders” page you can order new lines of services, upgrade your devices, keep your number (port in), order accessories, and check your order status. Orders Overview page The Orders “Overview” page contains three main sections:
1. Lines and Services - lists quick links to: o Purchase Device & Service o Puchase Service Only o Purchase Device Only o Purchase Accessories o Purchase Software o Data Calculator o Check Port Status o Exchange Device o Browse Products
2. Promotional Offers - contains current Wireless, Internet, and Phone promotions. Clicking on an offer will take you to a page that contains
details about the promotion, and a link to purchase the device/service being promoted.
3. Wireless Number – quick links within the mobile number that bring you to the Wireless Number Center, Wireless Number details to
include device user name, model, ID Upgrade Eligibility Date, and quick access to Upgrade Now for up to ten lines.
9
Types of Orders:
Add a Line - add new user(s)
Keep your Existing Number - add a new company user that wants to keep their wireless number from another wireless carrier
Upgrade Phone - purchase a new phone for a current company user
Device Only – purchase a device without a contract or price plan
Purchase Accessories - purchase accessories for a current company user
View Orders – check the status of your online order
10
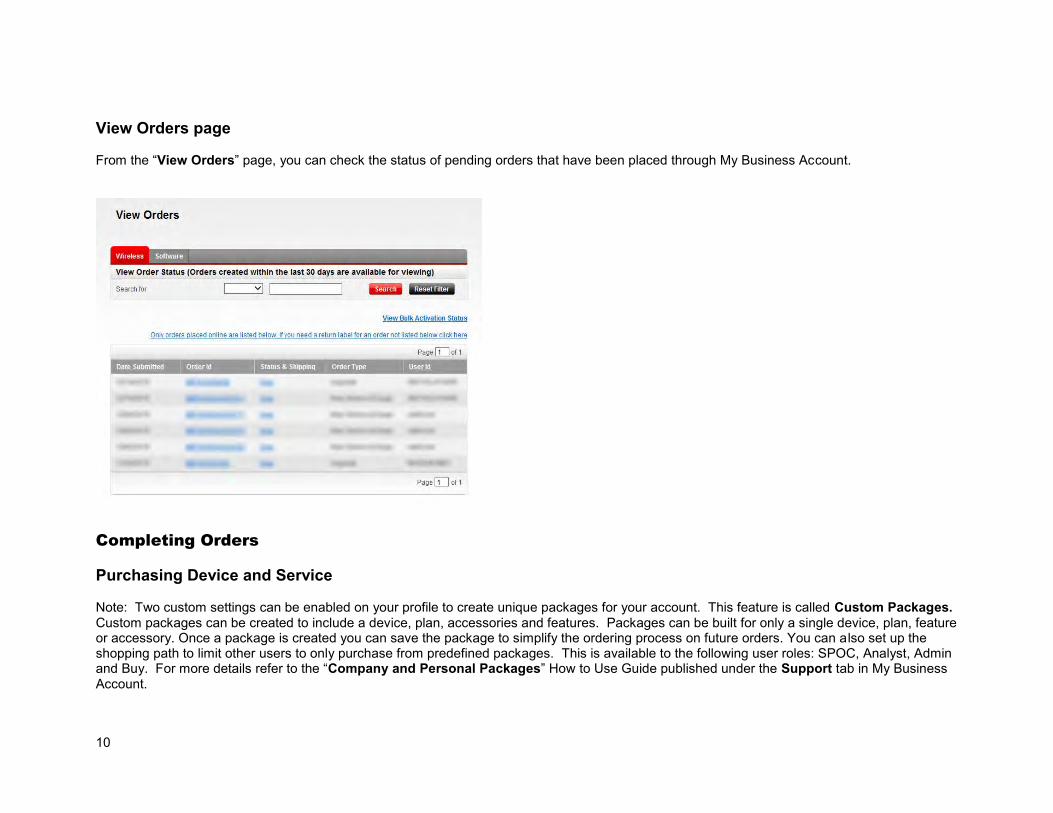
View Orders page From the “View Orders” page, you can check the status of pending orders that have been placed through My Business Account.
Completing Orders
Purchasing Device and Service Note: Two custom settings can be enabled on your profile to create unique packages for your account. This feature is called Custom Packages. Custom packages can be created to include a device, plan, accessories and features. Packages can be built for only a single device, plan, feature or accessory. Once a package is created you can save the package to simplify the ordering process on future orders. You can also set up the shopping path to limit other users to only purchase from predefined packages. This is available to the following user roles: SPOC, Analyst, Admin and Buy. For more details refer to the “Company and Personal Packages” How to Use Guide published under the Support tab in My Business Account.
11
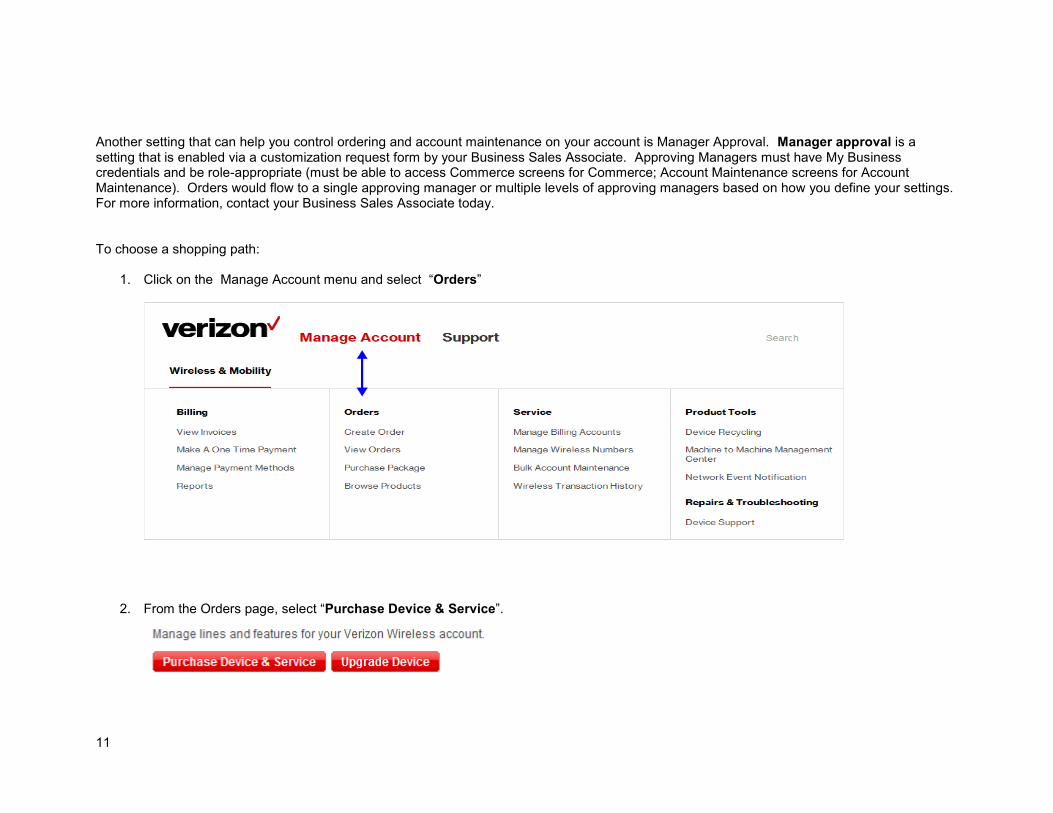
Another setting that can help you control ordering and account maintenance on your account is Manager Approval. Manager approval is a setting that is enabled via a customization request form by your Business Sales Associate. Approving Managers must have My Business credentials and be role-appropriate (must be able to access Commerce screens for Commerce; Account Maintenance screens for Account Maintenance). Orders would flow to a single approving manager or multiple levels of approving managers based on how you define your settings. For more information, contact your Business Sales Associate today. To choose a shopping path:
1. Click on the Manage Account menu and select “Orders”
2. From the Orders page, select “Purchase Device & Service”.

12
Select a Phone or Device The “Select Phone or Device” page lists and provides details for all the phones and devices available for you to order. Phone Type tabs The phone type tabs allow you to select which type of phone will display. Simply click on one of the tabs to view that type of phone or device. Note: If you have any packages saved on file, they will display as their own tab here as well. Devices are grouped in to six types:
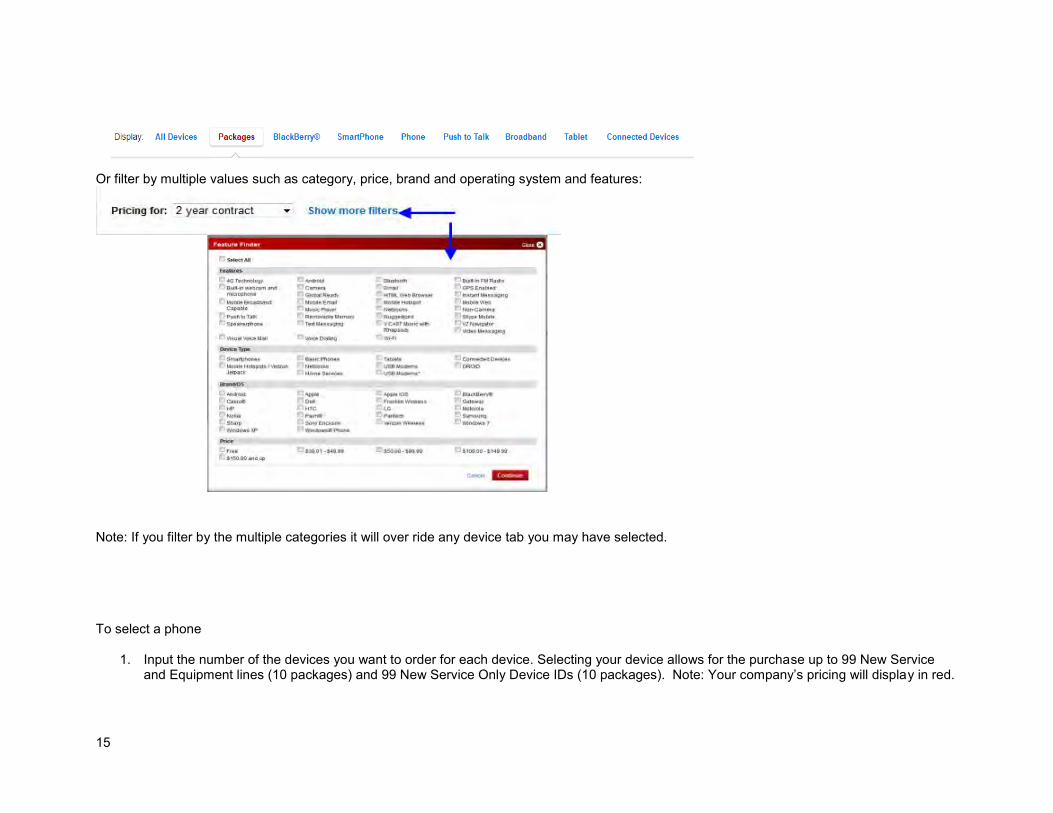
All Devices Packages BlackBerry® SmartPhone Phone Push to Talk Broadband Tablet Connected Devices
On each page, you will see a picture of the device, details about the device, and your company’s pricing for that device. Keep in mind there are some promotions that will not display until the checkout page of your order.

13
To view more in-depth details, click on the device image or the device name link.
Contract Term Options Pricing of devices will reflect the contract term selected here.

14
Feature Finder The “Feature Finder” enables you to filter which phones/devices are displayed based specific features. Click on the “Show More Filters” link to open the Feature Finder pop up.
You can filter phones using the device tabs:
15
Or filter by multiple values such as category, price, brand and operating system and features:
Note: If you filter by the multiple categories it will over ride any device tab you may have selected.
To select a phone
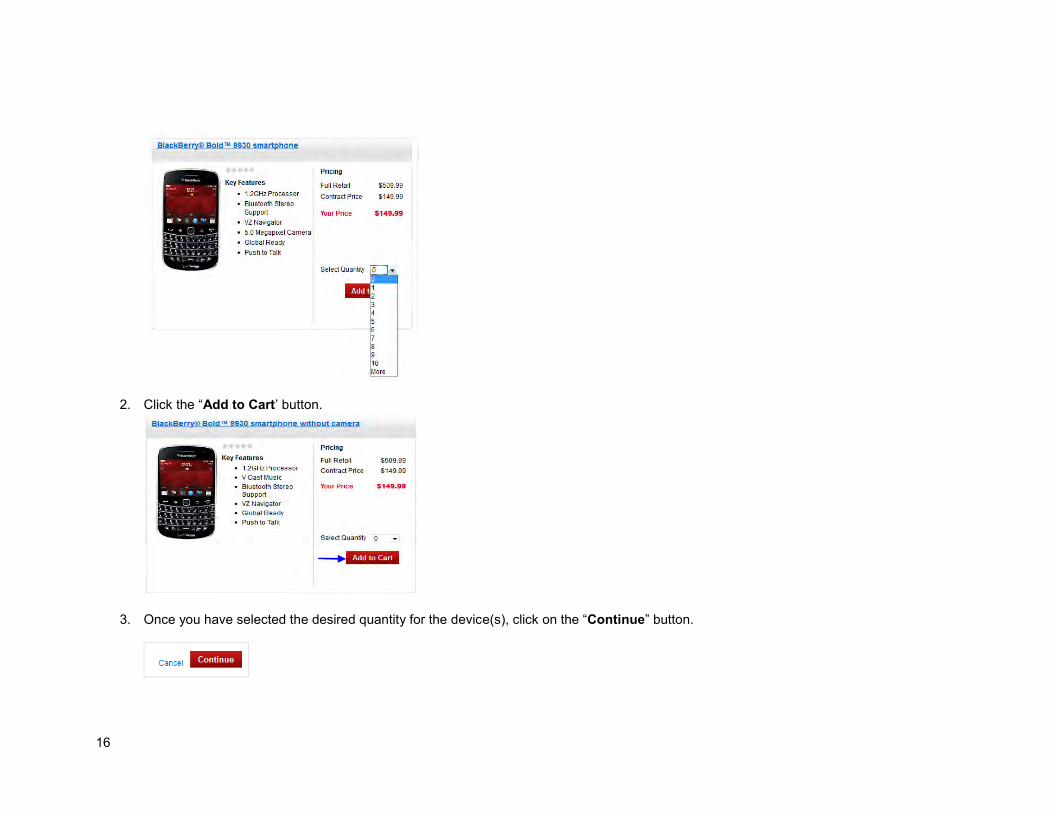
1. Input the number of the devices you want to order for each device. Selecting your device allows for the purchase up to 99 New Service and Equipment lines (10 packages) and 99 New Service Only Device IDs (10 packages). Note: Your company’s pricing will display in red.
16
2. Click the “Add to Cart’ button.
3. Once you have selected the desired quantity for the device(s), click on the “Continue” button.

17
4. After selecting Continue a pop up window will present prompting for the User Name (not required), Insurance options (required selection) and if you are keeping an existing number or service. Make your selections and click “Continue to Plans”

18
Select a Billing Account and Plan Note: The plans displayed are plans compatible with the device(s) that you selected. If you had selected plans as your path, at this point the site would only display devices that are compatible with the plan you selected. 1. Select the Billing Account best suited for your new line.
o Create a brand new billing account o Add the line to an existing account
2. Select the Plan type:
Individual, MORE Everything, Aggregate (Note: not all of these options may be available)
Make Plan Selections (multiple lines): If you have multiple lines in your cart, you will see grouping options listed here. To make multiple selections easier, you can make your selections by:
Each line will display in a blue bar. Use the plus sign to expand the line view and make your plan selections. Or use the minus to collapse your view.

19
3. Make your plan selections from the Plans shown. If applicable, select the plan allowance by clicking the radio button next to the specific plan.
Notes:
The “Monthly Charge” column will display your company’s pricing in red.
The “Allowance” column lists what the plan includes.
The “Overage Rate” column displays the overage cost.

20
Or select the plan by clicking the radial button.
Additional details for the plan can be seen by clicking the hyperlink under the plan name.
21
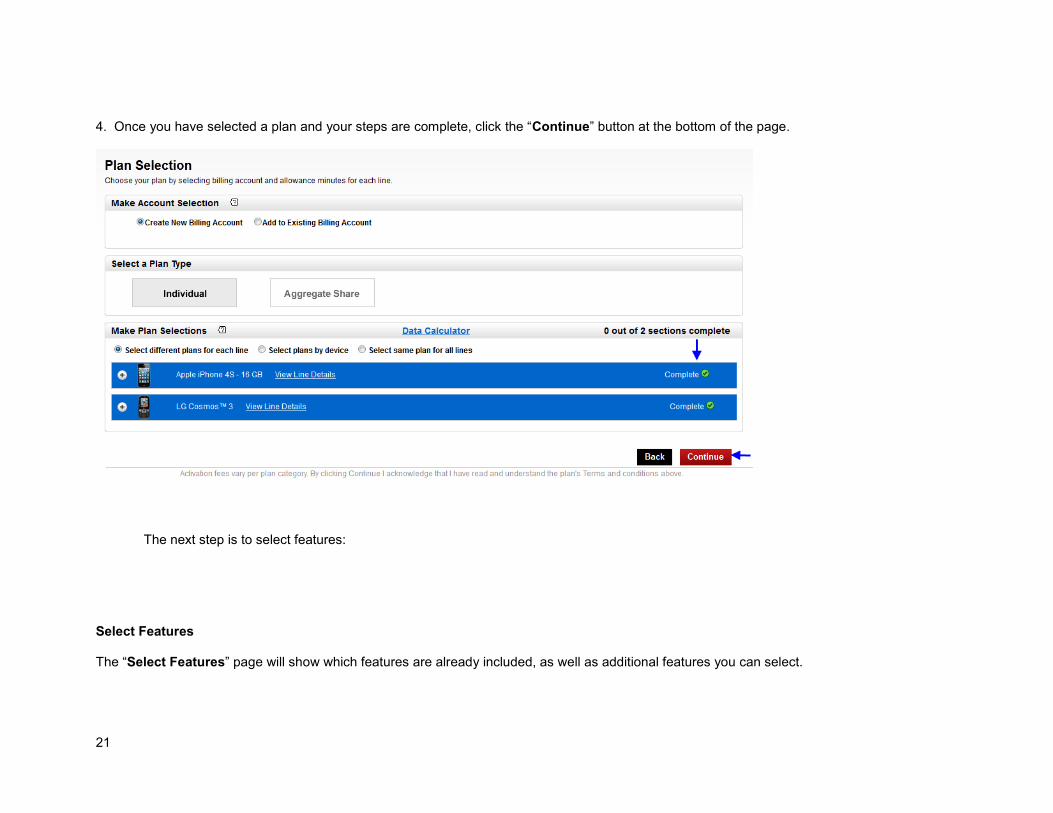
4. Once you have selected a plan and your steps are complete, click the “Continue” button at the bottom of the page.
The next step is to select features:
Select Features The “Select Features” page will show which features are already included, as well as additional features you can select.
22
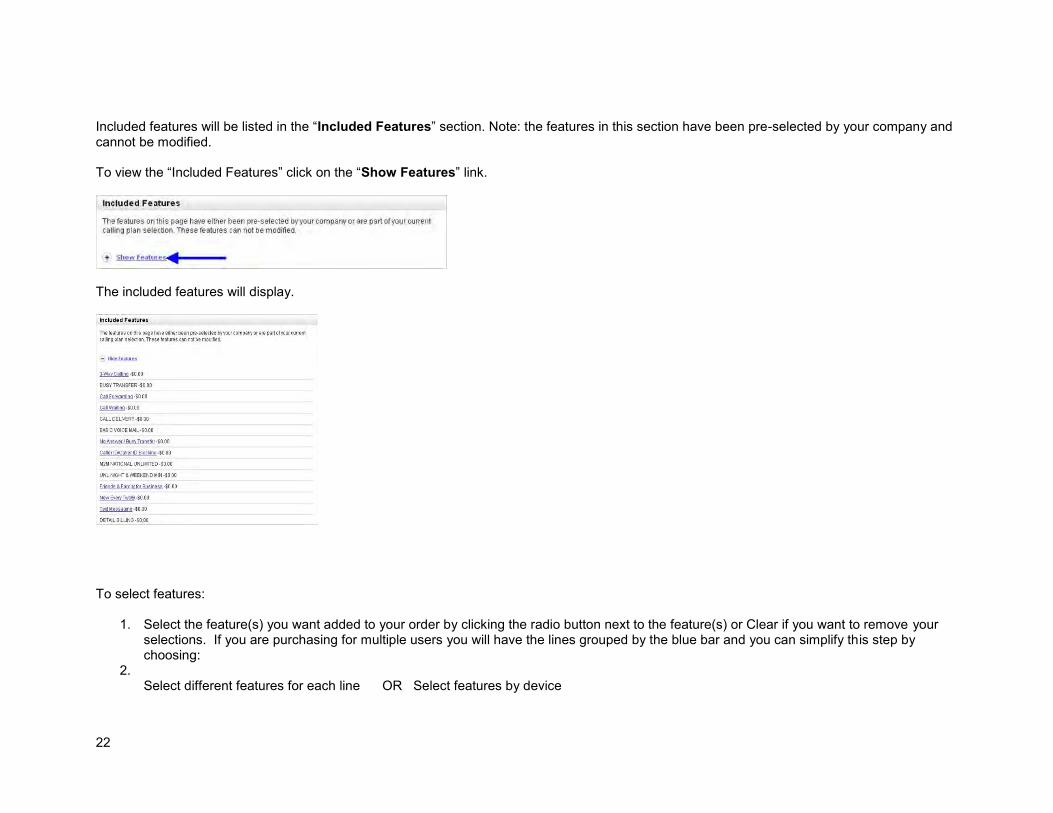
Included features will be listed in the “Included Features” section. Note: the features in this section have been pre-selected by your company and cannot be modified. To view the “Included Features” click on the “Show Features” link.
The included features will display.
To select features:
1. Select the feature(s) you want added to your order by clicking the radio button next to the feature(s) or Clear if you want to remove your selections. If you are purchasing for multiple users you will have the lines grouped by the blue bar and you can simplify this step by choosing:
2. Select different features for each line OR Select features by device

23
Note: Some categories of features require a selection in order to continue.
3. Once you have selected all required and desired features, click the “Continue” button.
Note: If you have multiple packages you can select Apply to Package or Apply to Individual Lines if you do not want all of the lines to have the same features. Next you will need to select accessories for your order.

24
Select Accessories The “Select Accessories” page will show which accessories are already included for your company, as well as additional accessories you can select. You can jump to a specific type of accessory using the quick links located below the list of included accessories. Use the Filter By option:
Or use the Show More Filters link:

25
To select accessories:
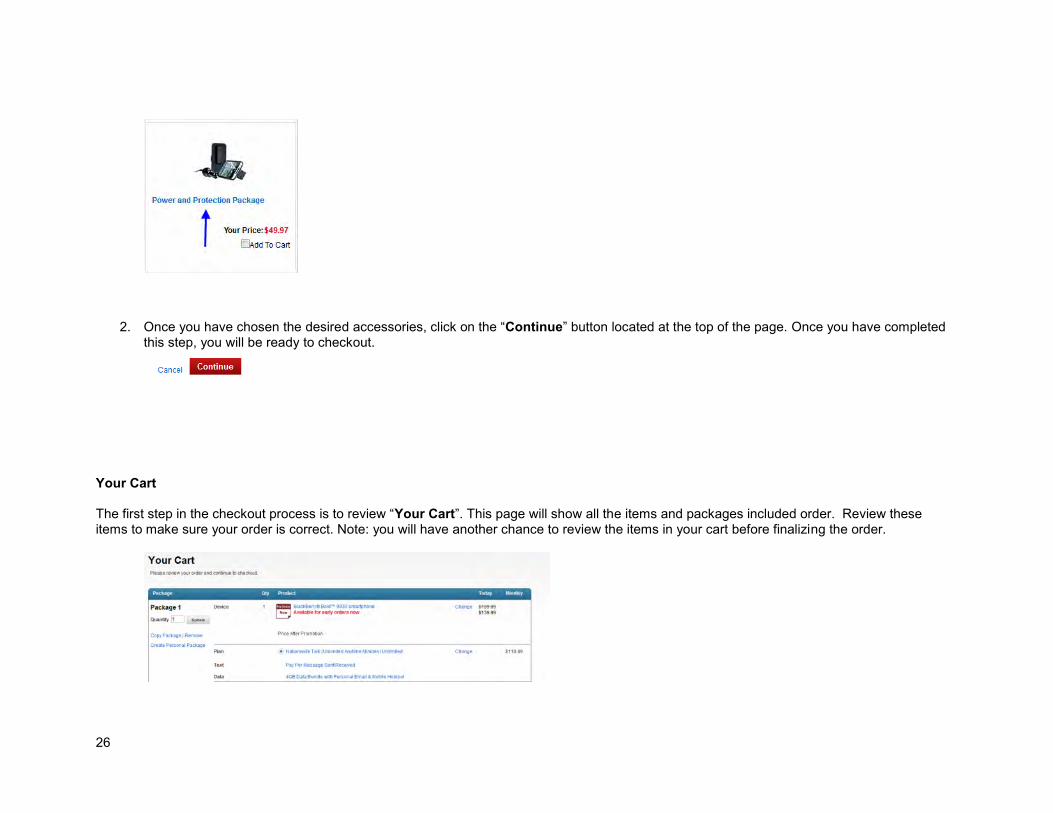
1. Enter a quantity for each accessory in the “Qty” field.
Note: you can click on the accessory name link for additional details.
26
2. Once you have chosen the desired accessories, click on the “Continue” button located at the top of the page. Once you have completed this step, you will be ready to checkout.
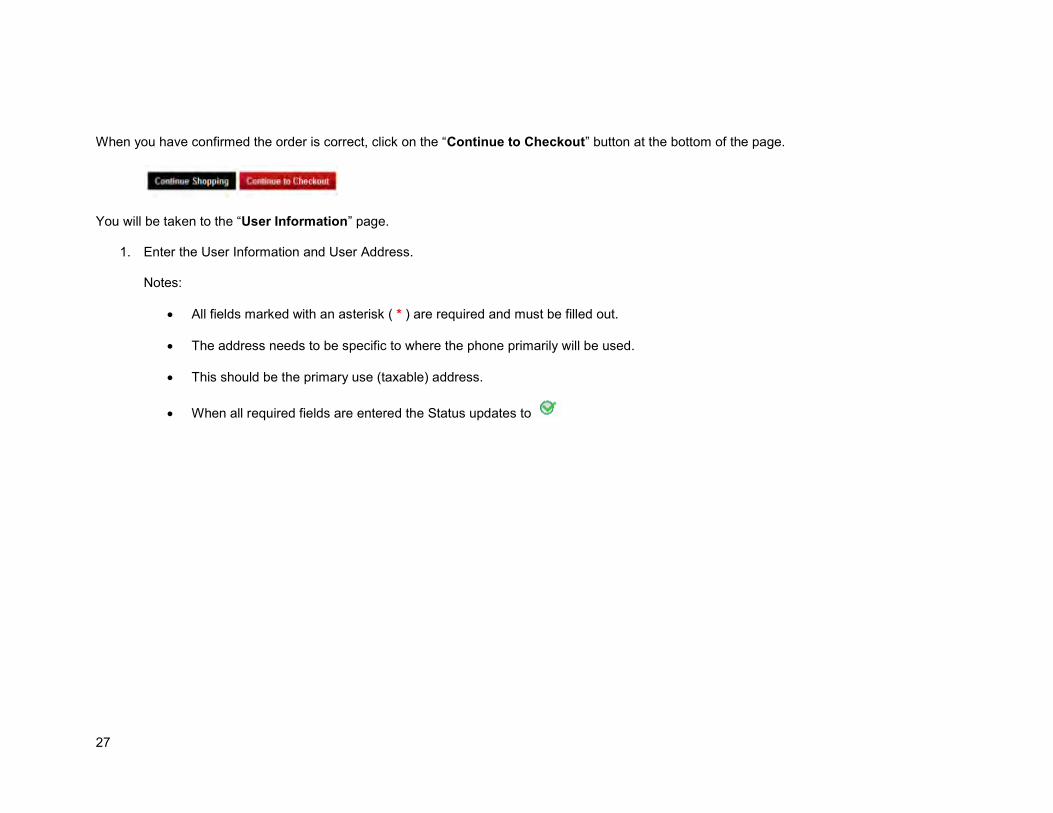
Your Cart The first step in the checkout process is to review “Your Cart”. This page will show all the items and packages included order. Review these items to make sure your order is correct. Note: you will have another chance to review the items in your cart before finalizing the order.
27
When you have confirmed the order is correct, click on the “Continue to Checkout” button at the bottom of the page.
You will be taken to the “User Information” page.
1. Enter the User Information and User Address. Notes:
All fields marked with an asterisk ( * ) are required and must be filled out.
The address needs to be specific to where the phone primarily will be used.
This should be the primary use (taxable) address.
When all required fields are entered the Status updates to

28
From the User Information page you will need to select:
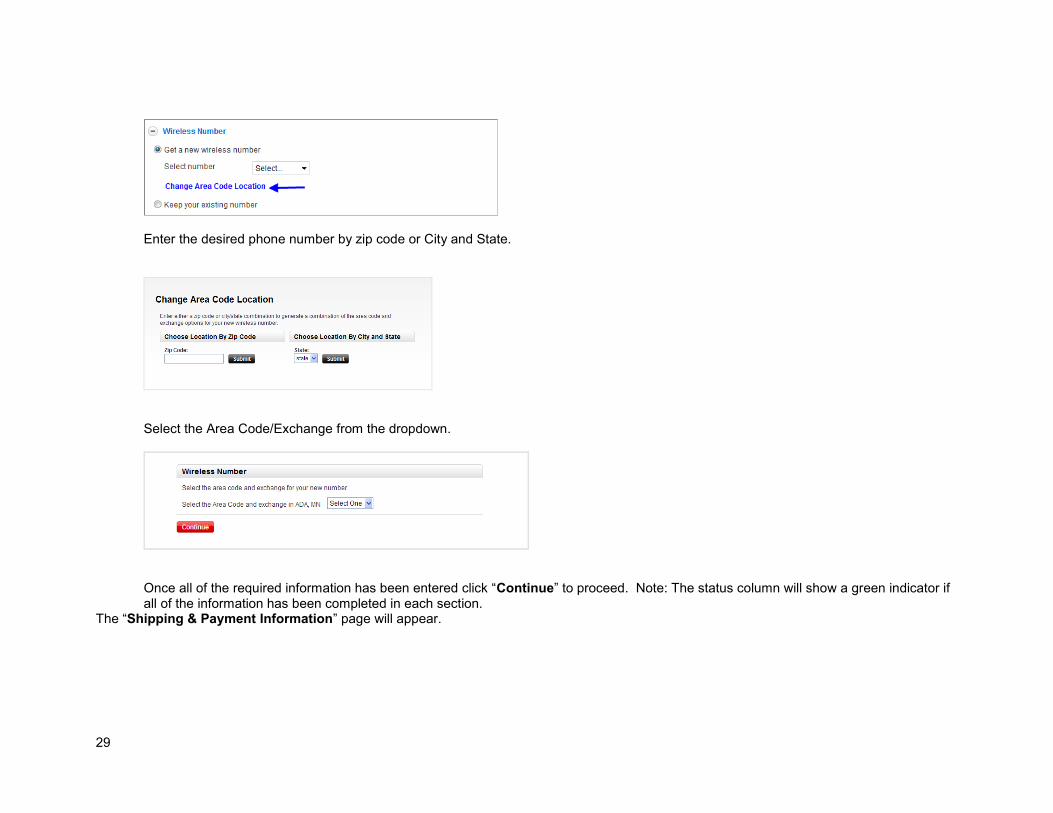
a. Get a new Number b. Select the Area Code/Exchange from another City/State c. Keep your existing number (port-in)
2. For this section we will give the user a new cell phone number in a different city/state. Select the Edit link under “Get New Number”
29
Enter the desired phone number by zip code or City and State.
Select the Area Code/Exchange from the dropdown.
Once all of the required information has been entered click “Continue” to proceed. Note: The status column will show a green indicator if all of the information has been completed in each section.
The “Shipping & Payment Information” page will appear.

30
3. In the “Billing Address” section, you can either choose a saved address from the “Saved Addresses” field, or enter in a new shipping address. Note: the “Company Name” and “Attention” fields will automatically populate based on your Billing Information.
If you are entering a new address, be sure to fill out all the required fields indicated by an asterisk ( * ). Note: you must enter a physical address here. A P.O. Box will not be accepted.
4. Select a “Shipping Address”.
5. Select an option from the “Payment Information” section. This will determine the method your company uses to pay for the equipment.
There are three options here:
Bill to Existing Account – Will be billed to an existing account.
Bill to Purchase Order Number – You will have the option to enter an existing Purchase Order (PO) number already on file with Verizon Wireless, or reference a new PO and upload an image of the PO along with the order.
Bill to Credit Card

31
Confirm all information on the “Shipping & Payment Information” page is correct and then click on the “Continue” button.
Review & Confirm The next step is to review your order one last time.
1. Confirm that all of the information on the “Review & Confirm” page is correct.

32
2. You have multiple options to send Order and Ship Confirmation. The requestor, user of the wireless device you may have placed the
order for and/or any additional notifications that need to be sent to other e mail addresses.
3. When you have confirmed that all information is correct, click the “Submit Order” button. You have successfully submitted an order for a new line.
4. A confirmation email will be sent containing the order details.

33
Purchase Service Only Use this option when adding a line for a user that already has a Verizon Wireless-compatible device. To choose a shopping path:
1. From the Orders page select “Purchase Service Only”
2. In the “Enter Device ID” section, you can enter up to five serial numbers in the “Device ID” field or, if preferred, upload the information.
Enter it again in the confirmation field. Note: you can find your device’s ESN located on the back of the device under the battery. You will need to remove the battery to see it.

34
3. Click the “Continue” button.
You will now need to follow the steps for selecting a plan, features, accessories, and checkout beginning on page 20 of this guide.

35
Keep Your Existing Number
1. Use this option when adding a line for a user who is keeping a wireless number from another carrier. There are two options below, “Purchase device and service” and “Purchase service only”, which will determine the ordering path you will take.
Purchase device and service: if you will also be purchasing a device for this new line.
Purchase service only: if you will not be purchasing a device for this new line.
2. For this example we will follow the Purches Device and Service flow. From the Orders page select “Purchase Device & Service”.
3. Select a device and click “Add to Cart”
36
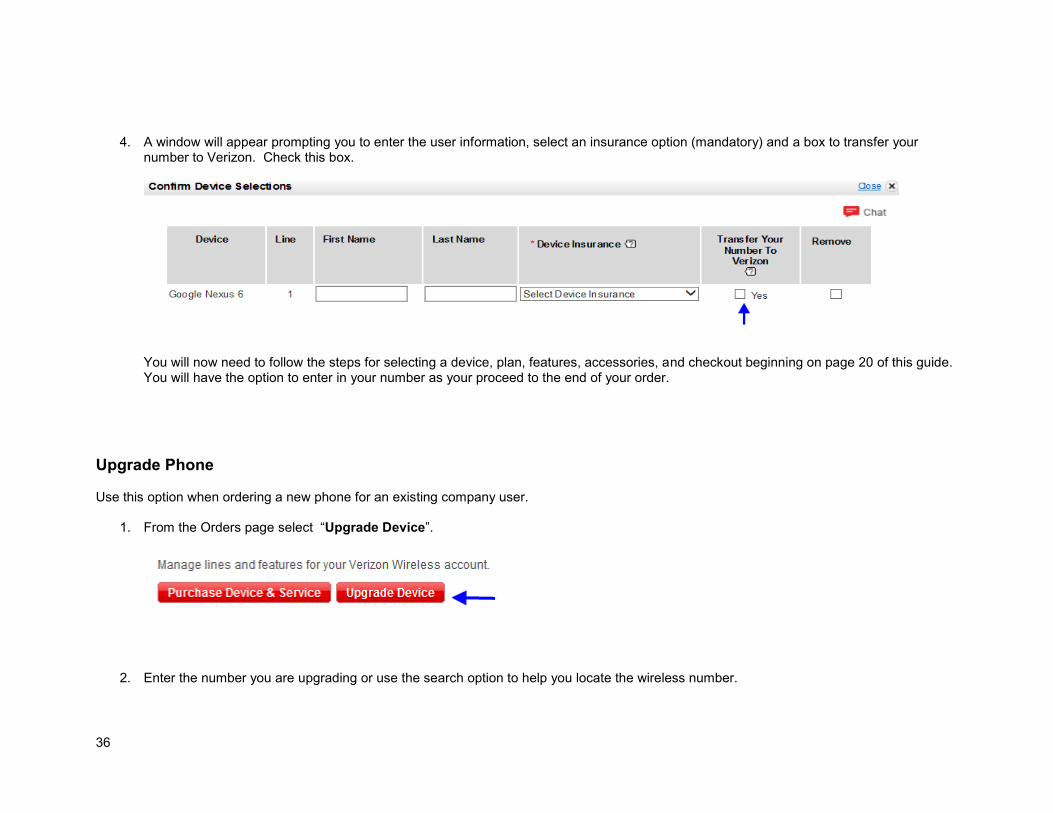
4. A window will appear prompting you to enter the user information, select an insurance option (mandatory) and a box to transfer your
number to Verizon. Check this box.
You will now need to follow the steps for selecting a device, plan, features, accessories, and checkout beginning on page 20 of this guide. You will have the option to enter in your number as your proceed to the end of your order.
Upgrade Phone Use this option when ordering a new phone for an existing company user.
1. From the Orders page select “Upgrade Device”.
2. Enter the number you are upgrading or use the search option to help you locate the wireless number.
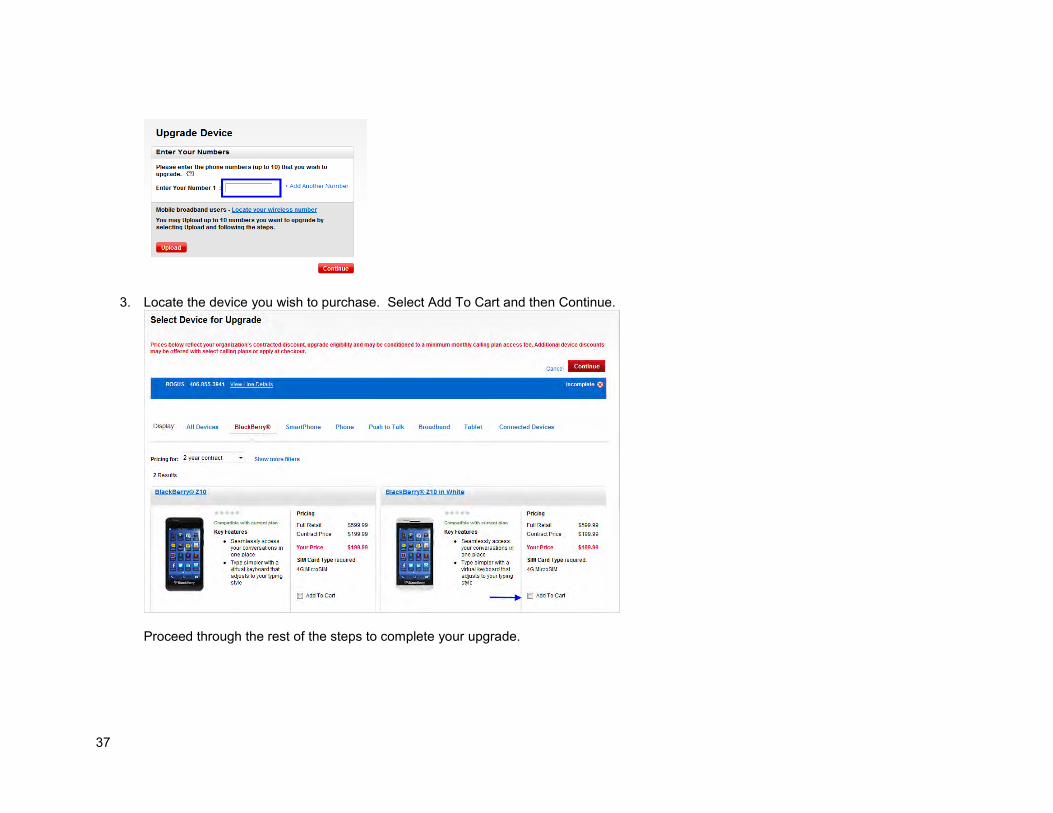
37
3. Locate the device you wish to purchase. Select Add To Cart and then Continue.
Proceed through the rest of the steps to complete your upgrade.

38
Buddy Upgrade/Alternate Upgrade Use this option when ordering a new phone for an existing company user that is not eligible for a discounted price on equipment. Buddy Upgrade allows you the flexibility of using another lines eligibility towards the number you need to upgrade.
1. From the Orders page select “Upgrade Device”.
2. Enter up to 10 wireless numbers in the “Enter Your Number” field, and click the “Continue” button.
3. If the line entered is not eligible for an upgrade you will have the option to continue and pay full retail pricing , Buddy Upgrade (using another lines eligibility for your upgrade) or ETF Waiver.

39
Note: If using Buddy Upgrade the number you choose will be billed for the equipment and any contract term that may apply for the upgrade. You will now need to follow the steps for selecting a device, plan, features, accessories, and checkout beginning on page 20 of this guide.
Purchase Accessories Use this option when only purchasing accessories.
1. From the Orders page select “Purchase Accessories”.
Or click on the Accessories link on the Wireless Number Center page:

40
2. From here you can choose to either search for accessories by wireless number, accessories that are compatible with a specific brand, or to search through universal accessories.

41
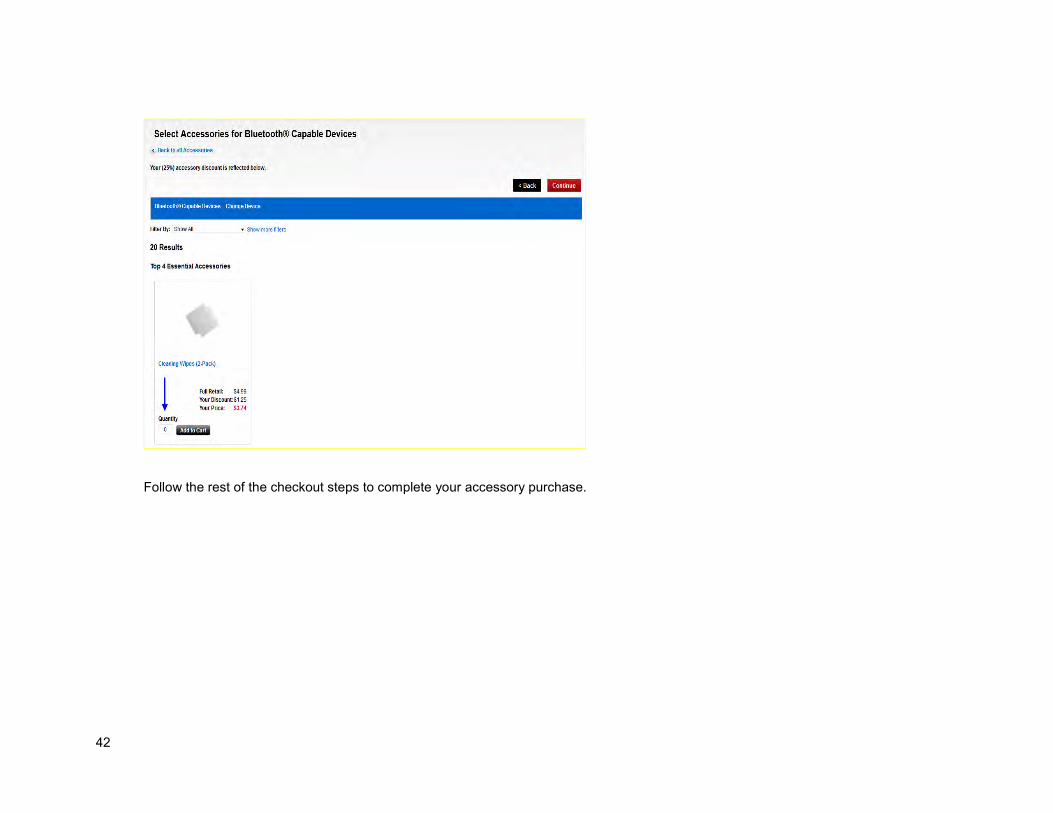
3. Locate the item you wish to purchase, input the quantity and click add to cart.
42
Follow the rest of the checkout steps to complete your accessory purchase.

43
Purchasing with a PO When completing a service or equipment order you can bill charges to a Purchase Order in My Business Account. PO is enabled by contacting your sales support team. Settings can be enabled for service orders and/or equipment orders to be billed to select PO’s. If your account is set for PO only, you would not see the Bill to Account or Credit Card option available when completing your transaction. Bill to PO required:
Bill to PO enabled and optional:
If a PO is on file, it will be presented in the dropdown menu in the payment step.
If a new one is being used, input the number in the appropriate field AND upload the PO. Note: The PO entered must match the PO uploaded for each type of order (service or equipment)

44
For details on funds remaining, expiration date or PO type click the view details link after the PO is populated as the payment type in the order:
Note: In a multi-package order If you bill service to a PO already on file and are billing equipment to another PO that isn’t on file (must be uploaded), the equipment PO will apply to all other packages, equipment charges.

45
Check Order Status From the “Order Status” page you can check the status of orders placed by your company through My Business Account. To check the status of an order:
1. From the Orders page select “View Orders”.
2. On the View Orders screen you have multiple options available to search by:

46
1 – Search with a dropdown menu by:
Order ID User ID (of who submitted the order) Date range
2 – Columns providing the following details: Order ID order details Date submitted Status & Shipping Order Type (NSE, EUP, NSO, NAO) User ID of who submitted order
3 – Link within the Order ID that provides the order detail 4 – Link within the Status & Shipping that brings you to the courier for order tracking information.

47
Packages Packages are pre defined items that can be saved for quick shopping. A personal package is a package only the creator will use. A company package is a package created and saved for others to use. This is a great option if you have a select device, accessories or plan that you want to limit your users to purchasing.
Note: The Primary Contact and Admin roles have full access to company and personal package creation and management. These roles can also purchase using personal and company packages.
Analyst and Buy roles can create personal packages and purchase using personal and company packages. However, they will not be able to create, manage or modify company packages.
There is a maximum of 20 company packages, 7 personal packages for a total of 27 possible packages. Once a package is created and saved on file and used for new purchases. The quantity can be edited if you are ordering multiple lines.
1. From the Manage Account menu select “Purchase Package”.

48
2. Click on the “Company Packages” link, if you are not already on the Company Packages page; then, click the “Create Package” button.
Note: If the Create Package button is grayed out, it is possible the maximum package amount has been reached (20 company packages, 7 personal packages).
3. On the Select Device page, choose the device you would like to include in the package. Select your desired quantity and click the “Add to Cart” button.

49
4. Click the “Continue” button .
5. On the Select Plans page, select your plan type and then make your plan selection.
50
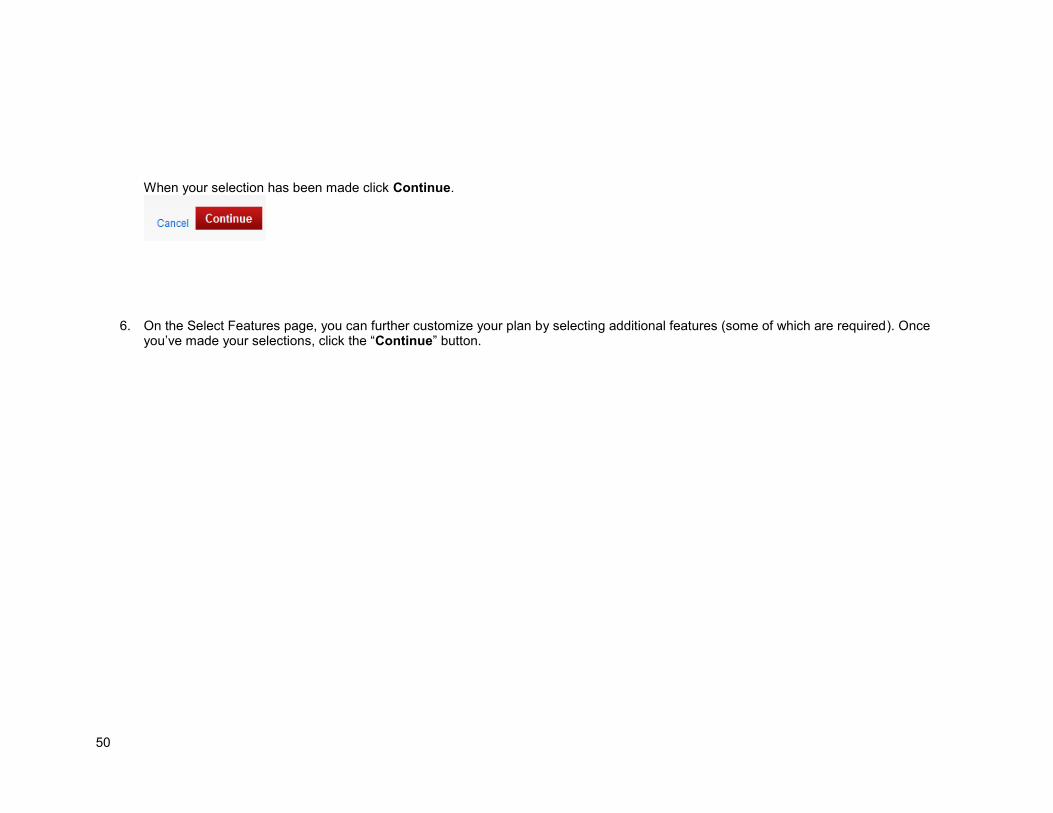
When your selection has been made click Continue.
6. On the Select Features page, you can further customize your plan by selecting additional features (some of which are required). Once
you’ve made your selections, click the “Continue” button.

51

52
7. On the Select Accessories page, choose the accessories you would like to include in your package. Click Continue.
8. On the Cart page, review your selections and make any necessary revisions. Enter a name for the new package in the Package Name field. (Package names must be unique and may contain letters, numbers, spaces, hyphens and periods, with a maximum length of 20 characters.) Then, click the “Save Package” button.

53
Your new package will now appear on the Company Packages page.