online macintosh user's guide
DESCRIPTION
TRANSCRIPT

Edition noticeEdition: July 2000
The following paragraph does not apply to any country where such provisions are inconsistent with local law: LEXMARK INTERNATIONAL, INC., PROVIDES THIS PUBLICATION “AS IS” WITHOUT WARRANTY OF ANY KIND, EITHER EXPRESS OR IMPLIED, INCLUDING, BUT NOT LIMITED TO, THE IMPLIED WARRANTIES OF MERCHANTABILITY OR FITNESS FOR A PARTICULAR PURPOSE. Some states do not allow disclaimer of express or implied warranties in certain transactions; therefore, this statement may not apply to you.
This publication could include technical inaccuracies or typographical errors. Changes are periodically made to the information herein; these changes will be incorporated in later editions. Improvements or changes in the products or the programs described may be made at any time.
Comments about this publication may be addressed to Lexmark International, Inc., Department F95/032-2, 740 West New Circle Road, Lexington, Kentucky 40550, U.S.A. In the United Kingdom and Eire, send to Lexmark International Ltd., Marketing and Services Department, Westhorpe House, Westhorpe, Marlow Bucks SL7 3RQ. Lexmark may use or distribute any of the information you supply in any way it believes appropriate without incurring any obligation to you. You can purchase additional copies of publications related to this product by calling 1-800-553-9727. In the United Kingdom and Eire, call 0628-481500. In other countries, contact your point of purchase.
References in this publication to products, programs, or services do not imply that the manufacturer intends to make these available in all countries in which it operates. Any reference to a product, program, or service is not intended to state or imply that only that product, program, or service may be used. Any functionally equivalent product, program, or service that does not infringe any existing intellectual property right may be used instead. Evaluation and verification of operation in conjunction with other products, programs, or services, except those expressly designated by the manufacturer, are the user’s responsibility.
Lexmark and Lexmark with diamond design are trademarks of Lexmark International, Inc., registered in the United States and/or other countries. Color Jetprinter is a trademark of Lexmark International, Inc.
AppleTalk, iMac, Mac OS, and Macintosh are trademarks of Apple Computer, Inc., registered in the United States and other countries.
Other trademarks are the properties of their respective owners.
© Copyright 2000 Lexmark International, Inc. All rights reserved.
UNITED STATES GOVERNMENT RESTRICTED RIGHTSThis software and documentation are provided with RESTRICTED RIGHTS. Use, duplication or disclosure by the Government is subject to restrictions as set forth in subparagraph (c)(1)(ii) of the Rights in Technical Data and Computer Software clause at DFARS 252.227-7013 and in applicable FAR provisions: Lexmark International, Inc., Lexington, KY 40550.

Home page
Lexmark™ Z12 Color Jetprinter™ User’s Guide for Mac OS 8.6 and Mac OS 9
Use this guide when you have questions about your printer or when you encounter a problem.
Tips for using this guide
• Use the buttons on the left side of the screen to navigate through the chapters of this guide.
• Click the blue text to link to another part of this guide.
• Click the left or right arrows to move forward or back through the pages. Click the house to return to the Home page.
• Click Edition notice to view edition and trademark information.
• To print this guide:1 From the Acrobat Reader File menu, choose Page
Setup....2 Select the Landscape orientation button.3 Click OK.4 From the Acrobat Reader File menu, choose Print.5 Select the pages you want to print, and then click Print.
Steps to basic printingtells you how to load paper and adjust your printer software for printing.
Troubleshootingprovides information for solving printing problems.
Maintaining your printertells you how to install, replace, and align the print cartridge.
Appendixprovides software installation instructions and safety information.
Indexprovides quick links to the information you need. Just click an index entry, and go to the information source.

3
Maintaining your printer
Troubleshooting
Appendix
Index
Steps to basic printing
Steps to basic printing
This guide describes how to use your printer with Mac OS 8.6 and 9. For help using your printer with Windows 95 or Windows 98, refer to the User’s Guide that came with your printer. For help using your printer with Windows 2000, refer to the User’s Guide button on the printer software CD.
To perform basic printing tasks, follow four simple steps:
Step 1: Insert the appropriate print cartridge
Step 2: Load the paper
Step 3: Customize the printing options
Step 4: Print your document

4
Steps to basic printing
Maintaining your printer
Troubleshooting
Appendix
Index
Steps to basic printingStep 1: Insert the appropriate print cartridge
Your printer uses one print cartridge at a time: either a color cartridge or a black cartridge. Documents that you want to print with colored text or graphics must be printed using a color print cartridge. To extend the life of your color print cartridge, you can print black and white documents using a black print cartridge.
Your printer came with a color print cartridge (Lexmark part number 17G0060). You may purchase a black print cartridge (Lexmark part number 17G0050) from your point of purchase retailer or from a Lexmark Authorized Supplies Dealer. You may also purchase a high yield color cartridge (Lexmark part number 16G0065) or a high yield black cartridge (Lexmark part number 16G0055). Where available, you may purchase supplies directly from Lexmark via the phone or the Lexmark Web site.
5
Steps to basic printing
Maintaining your printer
Troubleshooting
Appendix
Index
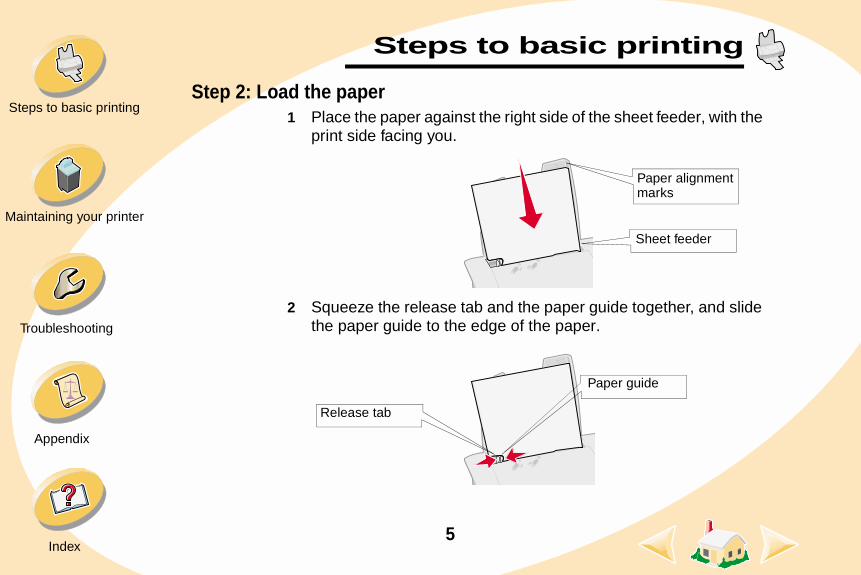
Steps to basic printingStep 2: Load the paper
1 Place the paper against the right side of the sheet feeder, with the print side facing you.
2 Squeeze the release tab and the paper guide together, and slide the paper guide to the edge of the paper.
Sheet feeder
Paper alignment marks
Release tab
Paper guide
6
Steps to basic printing
Maintaining your printer
Troubleshooting
Appendix
Index
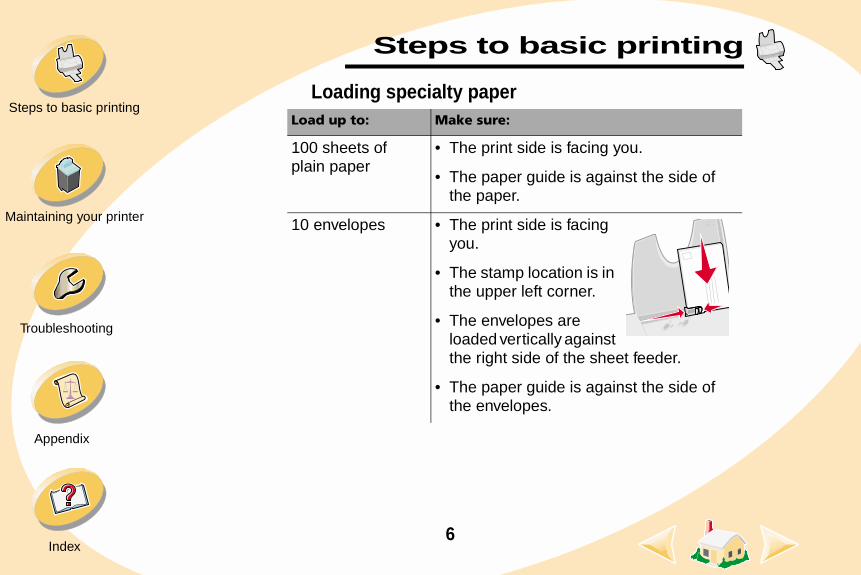
Steps to basic printingLoading specialty paper
Load up to: Make sure:
100 sheets of plain paper
• The print side is facing you.
• The paper guide is against the side of the paper.
10 envelopes • The print side is facing you.
• The stamp location is in the upper left corner.
• The envelopes are loaded vertically against the right side of the sheet feeder.
• The paper guide is against the side of the envelopes.
7
Steps to basic printing
Maintaining your printer
Troubleshooting
Appendix
Index
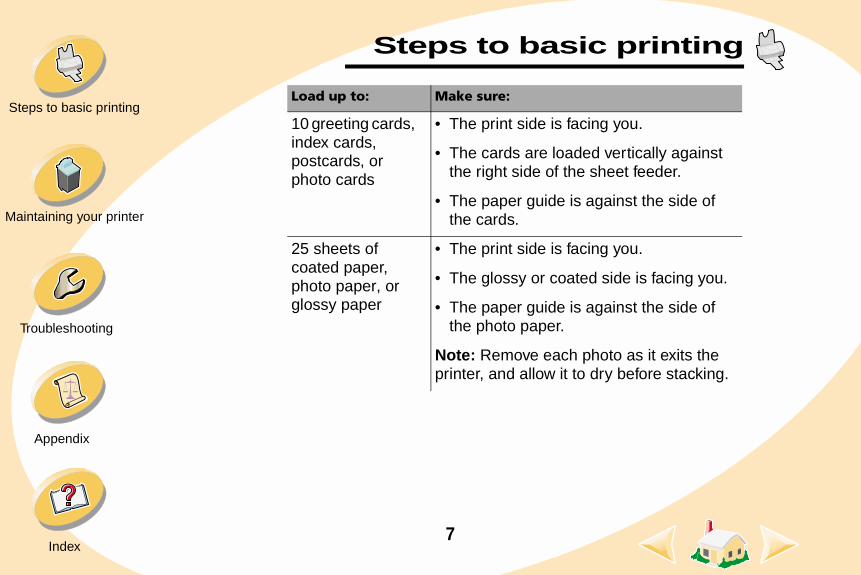
Steps to basic printing10 greeting cards, index cards, postcards, or photo cards
• The print side is facing you.
• The cards are loaded vertically against the right side of the sheet feeder.
• The paper guide is against the side of the cards.
25 sheets of coated paper, photo paper, or glossy paper
• The print side is facing you.
• The glossy or coated side is facing you.
• The paper guide is against the side of the photo paper.
Note: Remove each photo as it exits the printer, and allow it to dry before stacking.
Load up to: Make sure:
8
Steps to basic printing
Maintaining your printer
Troubleshooting
Appendix
Index
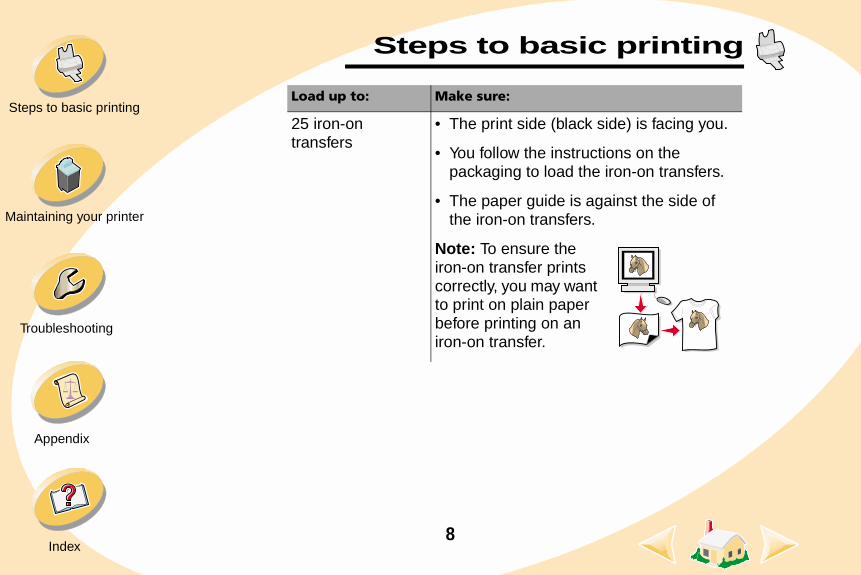
Steps to basic printing25 iron-on transfers
• The print side (black side) is facing you.
• You follow the instructions on the packaging to load the iron-on transfers.
• The paper guide is against the side of the iron-on transfers.
Note: To ensure the iron-on transfer prints correctly, you may want to print on plain paper before printing on an iron-on transfer.
Load up to: Make sure:
9
Steps to basic printing
Maintaining your printer
Troubleshooting
Appendix
Index
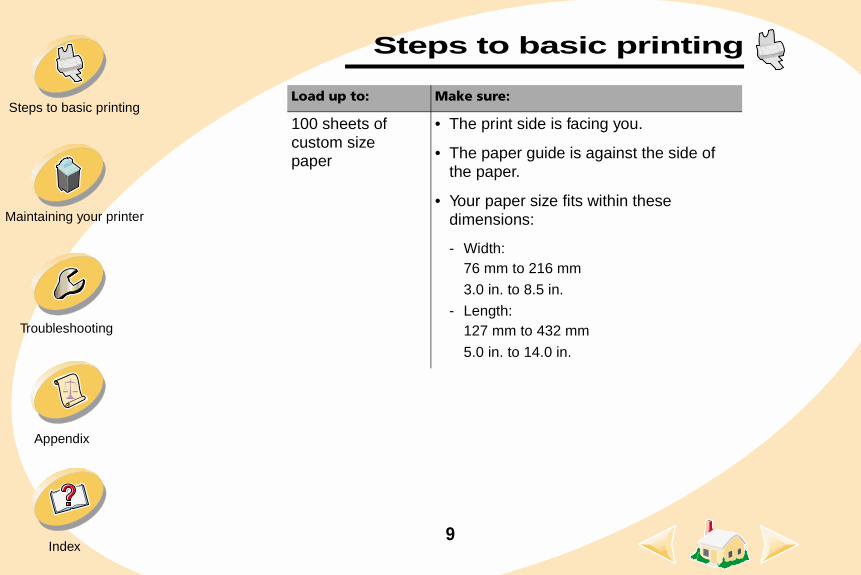
Steps to basic printing100 sheets of custom size paper
• The print side is facing you.
• The paper guide is against the side of the paper.
• Your paper size fits within these dimensions:
- Width: 76 mm to 216 mm
3.0 in. to 8.5 in.
- Length:127 mm to 432 mm
5.0 in. to 14.0 in.
Load up to: Make sure:

10
Steps to basic printing
Maintaining your printer
Troubleshooting
Appendix
Index
Steps to basic printing20 sheets of banner paper
• The print side is facing you.
• You remove any paper from the sheet feeder, and load the banner paper.
To load the banner paper:a Pull the paper
support up slightly to unlock the front tabs.
b Tilt the paper support back until it locks in the horizontal position.
Load up to: Make sure:
11
Steps to basic printing
Maintaining your printer
Troubleshooting
Appendix
Index
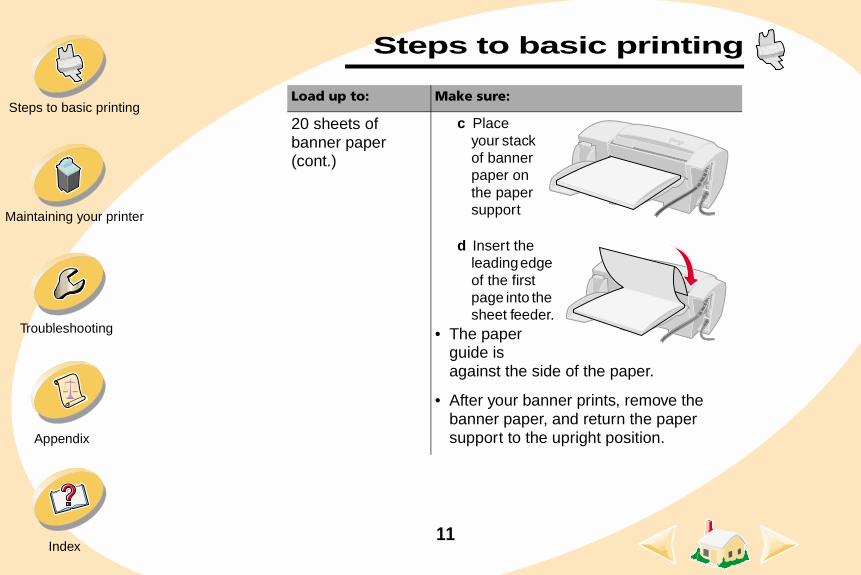
Steps to basic printing20 sheets of banner paper (cont.)
c Place your stack of banner paper on the paper support
d Insert the leading edge of the first page into the sheet feeder.
• The paper guide is against the side of the paper.
• After your banner prints, remove the banner paper, and return the paper support to the upright position.
Load up to: Make sure:
12
Steps to basic printing
Maintaining your printer
Troubleshooting
Appendix
Index
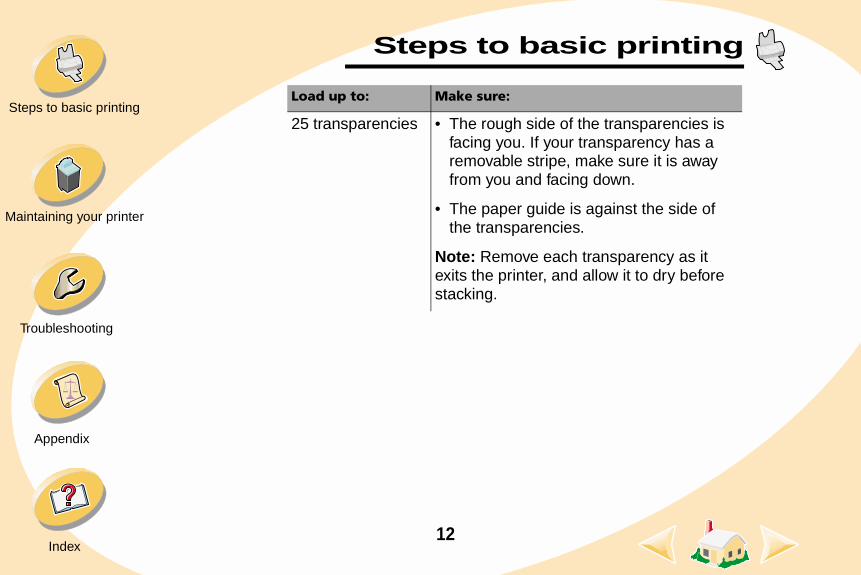
Steps to basic printing25 transparencies • The rough side of the transparencies is
facing you. If your transparency has a removable stripe, make sure it is away from you and facing down.
• The paper guide is against the side of the transparencies.
Note: Remove each transparency as it exits the printer, and allow it to dry before stacking.
Load up to: Make sure:
13
Steps to basic printing
Maintaining your printer
Troubleshooting
Appendix
Index
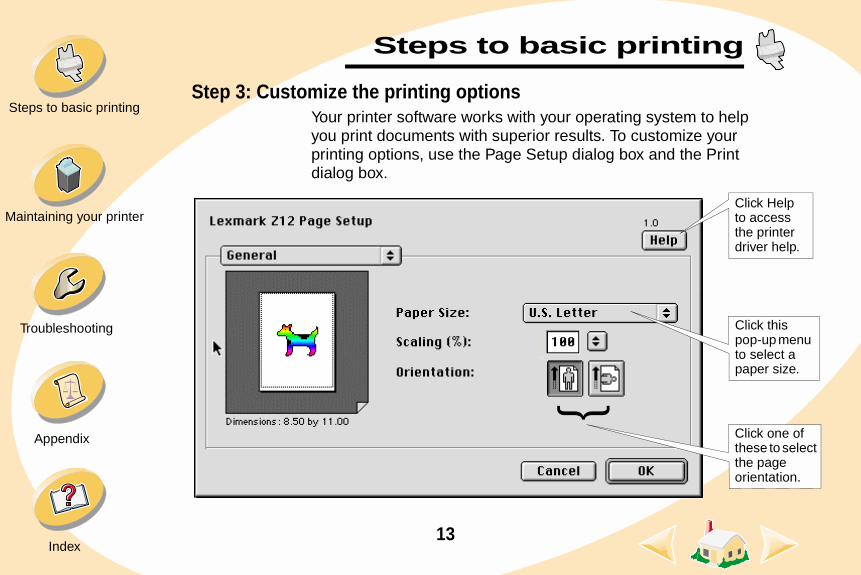
Steps to basic printingStep 3: Customize the printing options
Your printer software works with your operating system to help you print documents with superior results. To customize your printing options, use the Page Setup dialog box and the Print dialog box.
{
Click one of these to select the page orientation.
Click Help to access the printer driver help.
Click this pop-up menu to select a paper size.
14
Steps to basic printing
Maintaining your printer
Troubleshooting
Appendix
Index
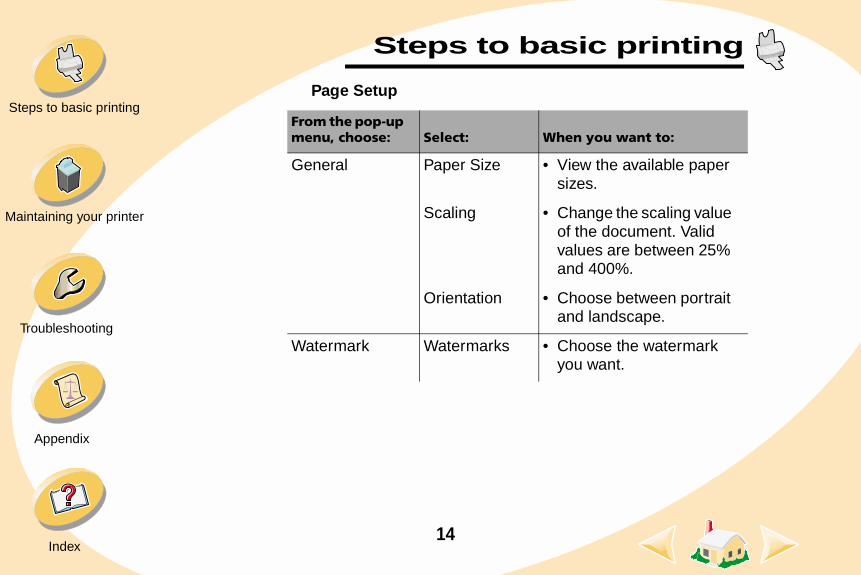
Steps to basic printingPage Setup
From the pop-up menu, choose: Select: When you want to:
General Paper Size
Scaling
Orientation
• View the available paper sizes.
• Change the scaling value of the document. Valid values are between 25% and 400%.
• Choose between portrait and landscape.
Watermark Watermarks • Choose the watermark you want.

Steps to basic printing
15
Printing beyond the basics
Maintaining your printer
Troubleshooting
Appendix
Index
Steps to basic printingClick Help to access the printer driver help.
{
Click this pop-up menu to select print settings.
This area displays a summary of the current settings.
Steps to basic printing
16
Printing beyond the basics
Maintaining your printer
Troubleshooting
Appendix
Index
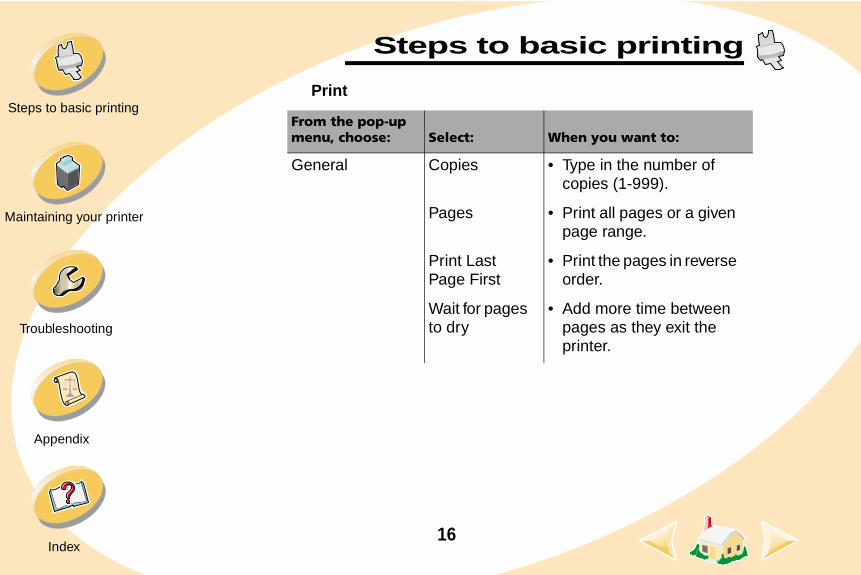
Steps to basic printingPrint
From the pop-up menu, choose: Select: When you want to:
General Copies
Pages
Print Last Page First
Wait for pages to dry
• Type in the number of copies (1-999).
• Print all pages or a given page range.
• Print the pages in reverse order.
• Add more time between pages as they exit the printer.
Steps to basic printing
17
Printing beyond the basics
Maintaining your printer
Troubleshooting
Appendix
Index
Steps to basic printing
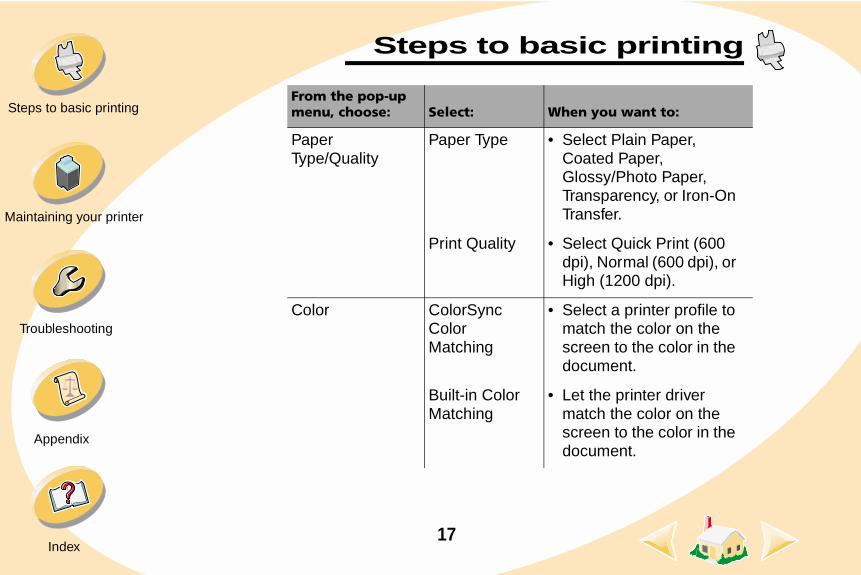
Paper Type/Quality
Paper Type
Print Quality
• Select Plain Paper, Coated Paper, Glossy/Photo Paper, Transparency, or Iron-On Transfer.
• Select Quick Print (600 dpi), Normal (600 dpi), or High (1200 dpi).
Color ColorSync Color Matching
Built-in Color Matching
• Select a printer profile to match the color on the screen to the color in the document.
• Let the printer driver match the color on the screen to the color in the document.
From the pop-up menu, choose: Select: When you want to:
Steps to basic printing
18
Printing beyond the basics
Maintaining your printer
Troubleshooting
Appendix
Index
Steps to basic printing
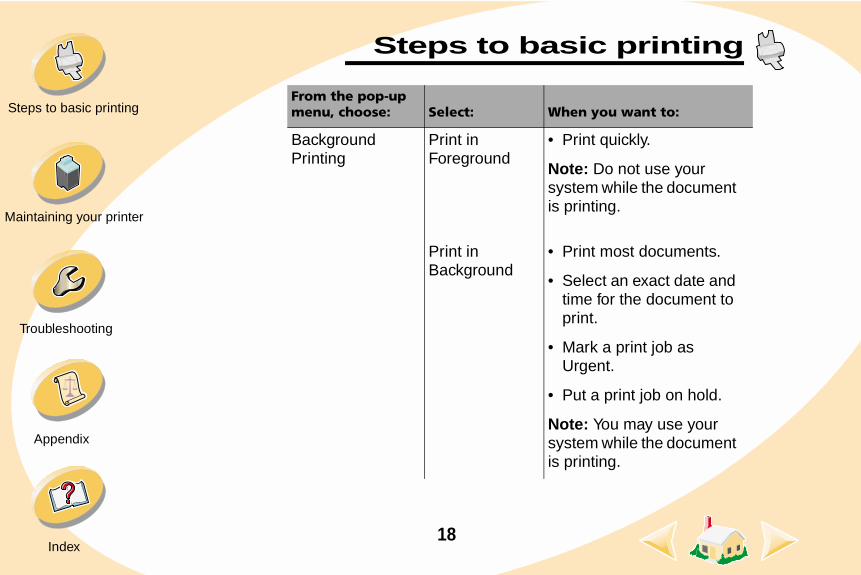
Background Printing
Print in Foreground
Print in Background
• Print quickly.
Note: Do not use your system while the document is printing.
• Print most documents.
• Select an exact date and time for the document to print.
• Mark a print job as Urgent.
• Put a print job on hold.
Note: You may use your system while the document is printing.
From the pop-up menu, choose: Select: When you want to:
Steps to basic printing
19
Printing beyond the basics
Maintaining your printer
Troubleshooting
Appendix
Index
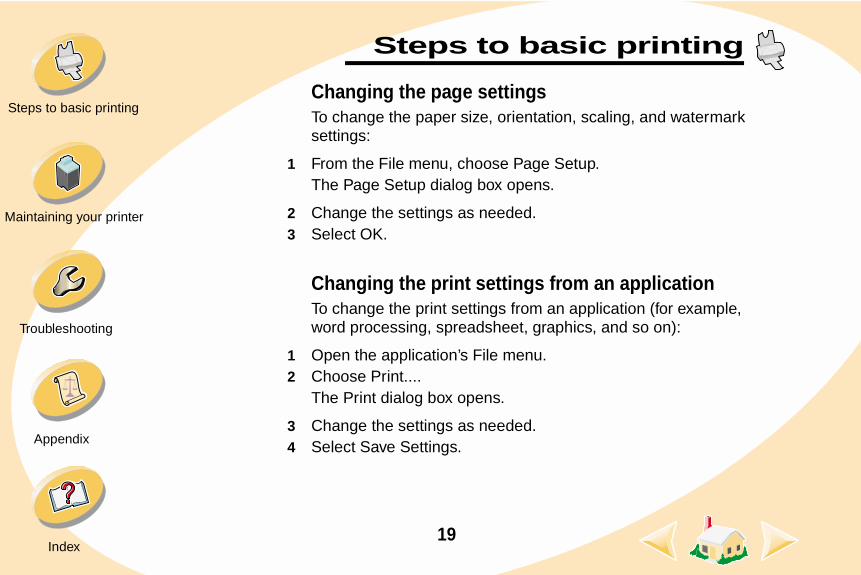
Steps to basic printingChanging the page settingsTo change the paper size, orientation, scaling, and watermark settings:
1 From the File menu, choose Page Setup.The Page Setup dialog box opens.
2 Change the settings as needed.3 Select OK.
Changing the print settings from an applicationTo change the print settings from an application (for example, word processing, spreadsheet, graphics, and so on):
1 Open the application’s File menu.2 Choose Print....
The Print dialog box opens.
3 Change the settings as needed.4 Select Save Settings.

Steps to basic printing
20
Printing beyond the basics
Maintaining your printer
Troubleshooting
Appendix
Index
Steps to basic printingChanging the print settings from the desktopTo change the print settings from the desktop:
1 From the desktop, open the File menu.2 Choose Print....
The Print dialog box opens.
3 Change the settings as needed.4 Select Save Settings.
Steps to basic printing
21
Printing beyond the basics
Maintaining your printer
Troubleshooting
Appendix
Index
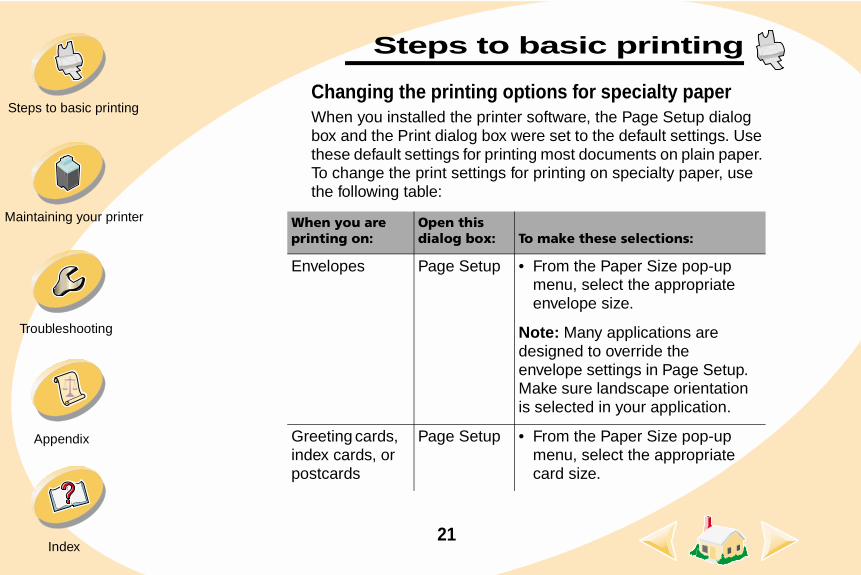
Steps to basic printingChanging the printing options for specialty paperWhen you installed the printer software, the Page Setup dialog box and the Print dialog box were set to the default settings. Use these default settings for printing most documents on plain paper. To change the print settings for printing on specialty paper, use the following table:
When you are printing on:
Open this dialog box: To make these selections:
Envelopes Page Setup • From the Paper Size pop-up menu, select the appropriate envelope size.
Note: Many applications are designed to override the envelope settings in Page Setup. Make sure landscape orientation is selected in your application.
Greeting cards, index cards, or postcards
Page Setup • From the Paper Size pop-up menu, select the appropriate card size.
Steps to basic printing
22
Printing beyond the basics
Maintaining your printer
Troubleshooting
Appendix
Index
Steps to basic printing
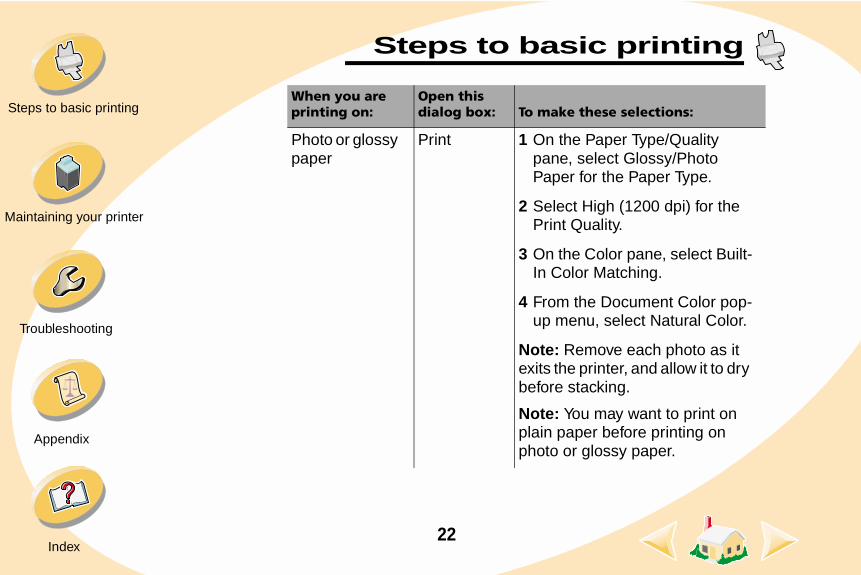
Photo or glossy paper
Print 1 On the Paper Type/Quality pane, select Glossy/Photo Paper for the Paper Type.
2 Select High (1200 dpi) for the Print Quality.
3 On the Color pane, select Built-In Color Matching.
4 From the Document Color pop-up menu, select Natural Color.
Note: Remove each photo as it exits the printer, and allow it to dry before stacking.
Note: You may want to print on plain paper before printing on photo or glossy paper.
When you are printing on:
Open this dialog box: To make these selections:
Steps to basic printing
23
Printing beyond the basics
Maintaining your printer
Troubleshooting
Appendix
Index
Steps to basic printing
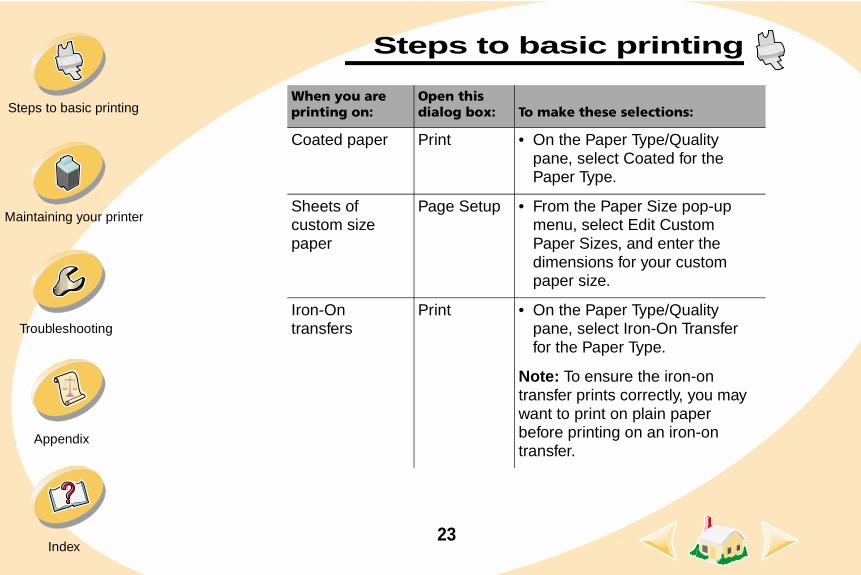
Coated paper Print • On the Paper Type/Quality pane, select Coated for the Paper Type.
Sheets of custom size paper
Page Setup • From the Paper Size pop-up menu, select Edit Custom Paper Sizes, and enter the dimensions for your custom paper size.
Iron-On transfers
Print • On the Paper Type/Quality pane, select Iron-On Transfer for the Paper Type.
Note: To ensure the iron-on transfer prints correctly, you may want to print on plain paper before printing on an iron-on transfer.
When you are printing on:
Open this dialog box: To make these selections:
Steps to basic printing
24
Printing beyond the basics
Maintaining your printer
Troubleshooting
Appendix
Index
Steps to basic printing
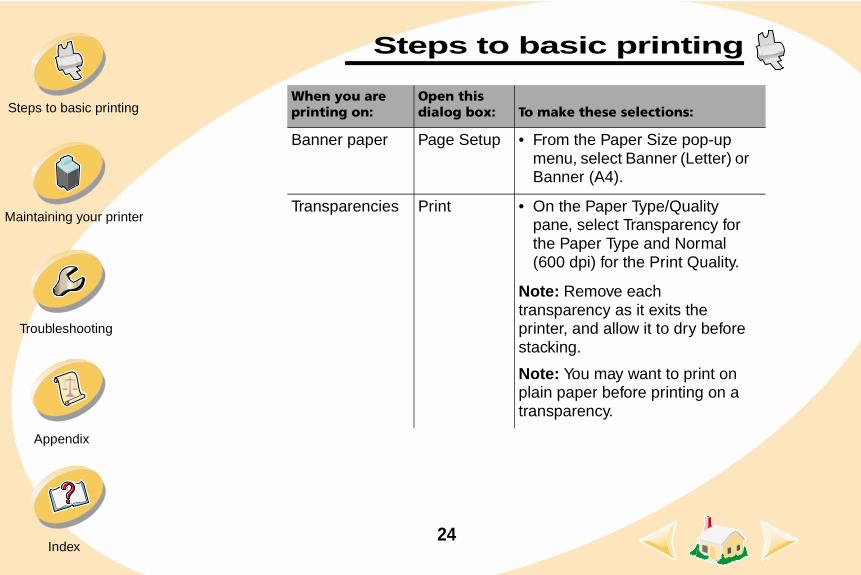
Banner paper Page Setup • From the Paper Size pop-up menu, select Banner (Letter) or Banner (A4).
Transparencies Print • On the Paper Type/Quality pane, select Transparency for the Paper Type and Normal (600 dpi) for the Print Quality.
Note: Remove each transparency as it exits the printer, and allow it to dry before stacking.
Note: You may want to print on plain paper before printing on a transparency.
When you are printing on:
Open this dialog box: To make these selections:
Steps to basic printing
25
Printing beyond the basics
Maintaining your printer
Troubleshooting
Appendix
Index
Steps to basic printingStep 4: Print your document
1 Open the File menu.2 Choose Print....
The Print dialog box opens.
3 Select Print.

26
Maintaining your printer
Troubleshooting
Appendix
Index
Steps to basic printing
Maintaining your printer
This section describes how to install, replace, and care for your print cartridge. You can use your printer’s Control Panel to help you with these tasks.
Using the Control Panel
Installing or replacing a print cartridge
Improving print quality
Aligning the print cartridge
Cleaning the print nozzles
Wiping print nozzles and contacts
Preserving print cartridges
27
Maintaining your printer
Maintaining your printer
Troubleshooting
Appendix
Index
Steps to basic printingUsing the Control Panel
The Control Panel lets you monitor your printer’s status, perform cartridge installation and maintenance, set printer options, and access driver version and copyright information. To open the Control Panel, choose:
1 The Apple menu2 Control Panels3 Lexmark Z12 Control Panel

28
Maintaining your printer
Maintaining your printer
Troubleshooting
Appendix
Index
Steps to basic printingClick the…
Help button to access printer driver help.
Cartridges tab to:• Install or change the print cartridge.
• Align the print cartridge for best print quality.
• Clean the print nozzles.
• Print a test page.
About tab to find printer software version and copyright information.

29
Maintaining your printer
Maintaining your printer
Troubleshooting
Appendix
Index
Steps to basic printingInstalling or replacing a print cartridge
1 Make sure the Power light is on.
2 Raise the front cover. The print cartridge carrier moves to the loading position unless the printer is busy.
Paper Feed lightPower light
Front cover
Print cartridge carrier in the loading position

30
Maintaining your printer
Maintaining your printer
Troubleshooting
Appendix
Index
Steps to basic printing3 Remove the old print cartridge. Store it in the print cartridge
storage unit (see page 42) or dispose of it.
Standard Black Cartridge 17G0050
Standard Color Cartridge 17G0060
High Yield Black Cartridge 16G0055
High Yield Color Cartridge 16G0065
31
Maintaining your printer
Maintaining your printer
Troubleshooting
Appendix
Index
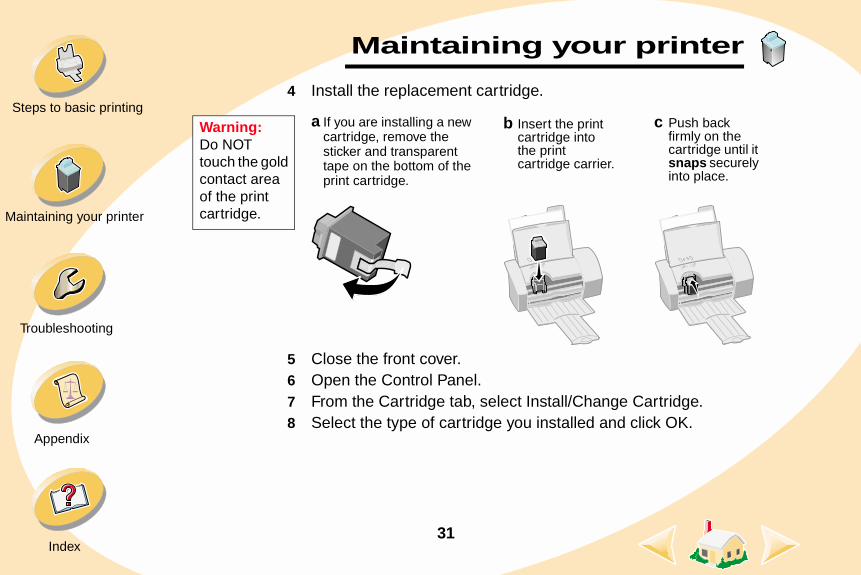
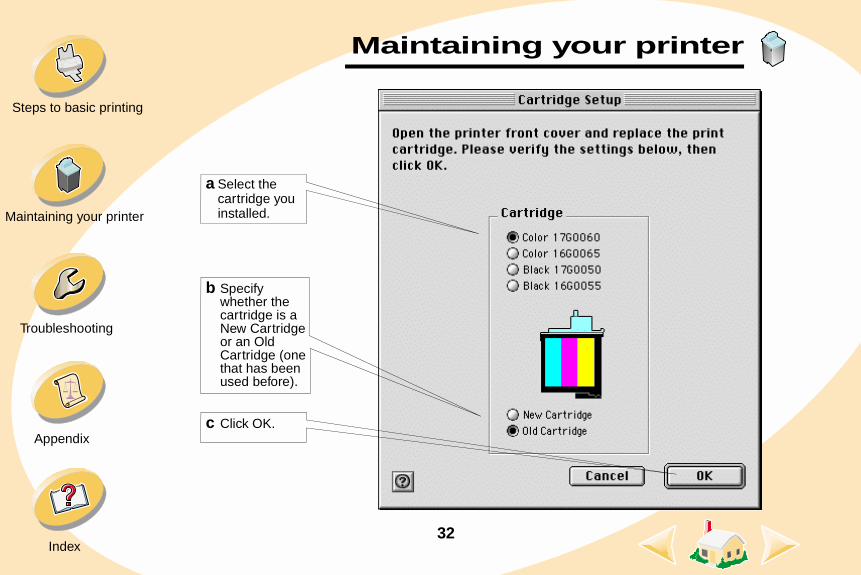
Steps to basic printing4 Install the replacement cartridge.
5 Close the front cover.6 Open the Control Panel.7 From the Cartridge tab, select Install/Change Cartridge. 8 Select the type of cartridge you installed and click OK.
a If you are installing a new cartridge, remove the sticker and transparent tape on the bottom of the print cartridge.
b Insert the print cartridge into the print cartridge carrier.
c Push back firmly on the cartridge until it snaps securely into place.
Warning: Do NOT touch the gold contact area of the print cartridge.
32
Maintaining your printer
Maintaining your printer
Troubleshooting
Appendix
Index
Steps to basic printing
a Select the cartridge you installed.
b Specify whether the cartridge is a New Cartridge or an Old Cartridge (one that has been used before).
c Click OK.

33
Maintaining your printer
Maintaining your printer
Troubleshooting
Appendix
Index
Steps to basic printing9 If you installed a new cartridge, select Yes to align the cartridge.
Follow the instructions on the alignment screen to complete the cartridge installation. For help, see page 35.

34
Maintaining your printer
Maintaining your printer
Troubleshooting
Appendix
Index
Steps to basic printing10 To see how the cartridge prints, select Print Test Page.
Select Print Test Page.
35
Maintaining your printer
Maintaining your printer
Troubleshooting
Appendix
Index
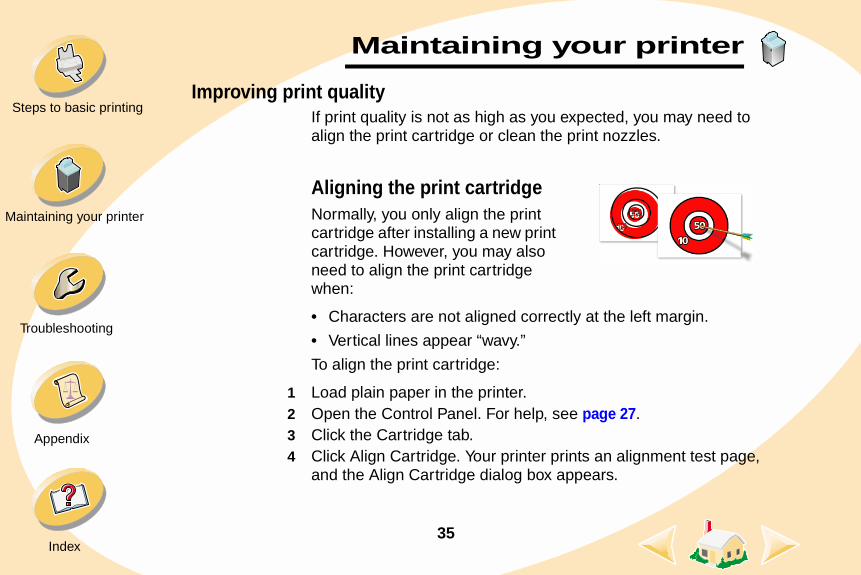
Steps to basic printingImproving print quality
If print quality is not as high as you expected, you may need to align the print cartridge or clean the print nozzles.
Aligning the print cartridge Normally, you only align the print cartridge after installing a new print cartridge. However, you may also need to align the print cartridge when:
• Characters are not aligned correctly at the left margin.
• Vertical lines appear “wavy.”
To align the print cartridge:
1 Load plain paper in the printer.2 Open the Control Panel. For help, see page 27.3 Click the Cartridge tab. 4 Click Align Cartridge. Your printer prints an alignment test page,
and the Align Cartridge dialog box appears.

36
Maintaining your printer
Maintaining your printer
Troubleshooting
Appendix
Index
Steps to basic printingThe test page looks similar to the one shown:
5 Find the number under the alignment pattern that comes closest to forming a straight line.
6 In the Align Cartridge dialog box, enter the pattern number from the printed test page that comes closest to forming a straight line, and then click OK.
An alignment test page with 30 alignment patterns prints. Each pattern has a number under it.
For example, in alignment group A, 16 comes closest to forming a straight line.
37
Maintaining your printer
Maintaining your printer
Troubleshooting
Appendix
Index
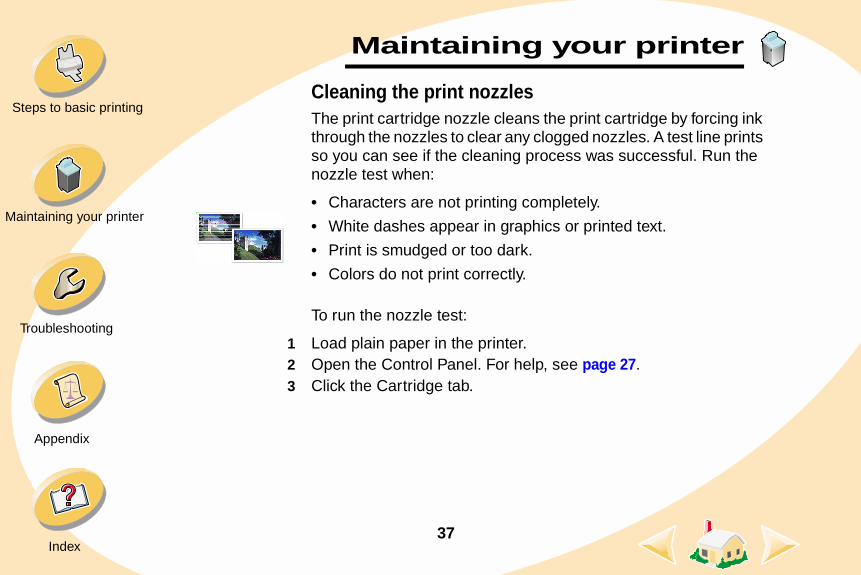
Steps to basic printingCleaning the print nozzlesThe print cartridge nozzle cleans the print cartridge by forcing ink through the nozzles to clear any clogged nozzles. A test line prints so you can see if the cleaning process was successful. Run the nozzle test when:
• Characters are not printing completely.
• White dashes appear in graphics or printed text.
• Print is smudged or too dark.
• Colors do not print correctly.
To run the nozzle test:
1 Load plain paper in the printer.2 Open the Control Panel. For help, see page 27.3 Click the Cartridge tab.
38
Maintaining your printer
Maintaining your printer
Troubleshooting
Appendix
Index
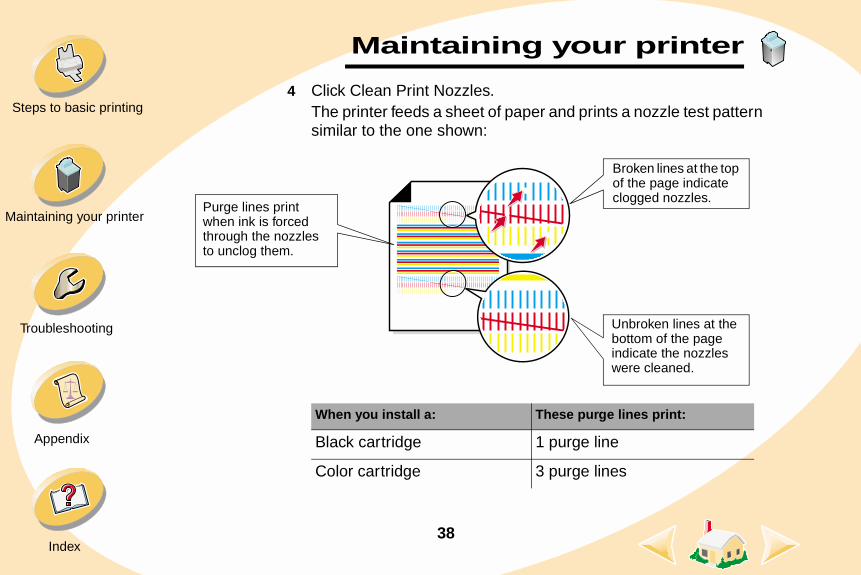
Steps to basic printing4 Click Clean Print Nozzles.
The printer feeds a sheet of paper and prints a nozzle test pattern similar to the one shown:
Purge lines print when ink is forced through the nozzles to unclog them.
Unbroken lines at the bottom of the page indicate the nozzles were cleaned.
Broken lines at the top of the page indicate clogged nozzles.
When you install a: These purge lines print:
Black cartridge 1 purge line
Color cartridge 3 purge lines
39
Maintaining your printer
Maintaining your printer
Troubleshooting
Appendix
Index
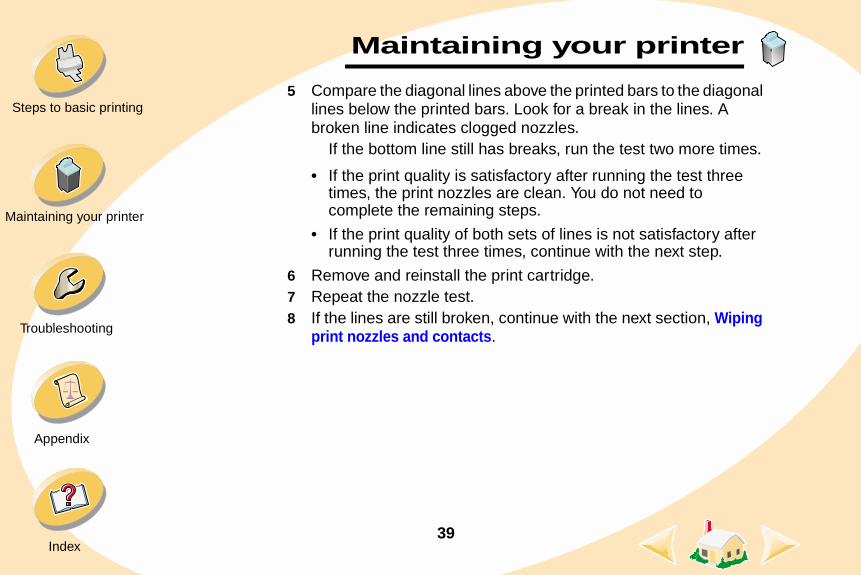
Steps to basic printing5 Compare the diagonal lines above the printed bars to the diagonal
lines below the printed bars. Look for a break in the lines. A broken line indicates clogged nozzles.
If the bottom line still has breaks, run the test two more times.
• If the print quality is satisfactory after running the test three times, the print nozzles are clean. You do not need to complete the remaining steps.
• If the print quality of both sets of lines is not satisfactory after running the test three times, continue with the next step.
6 Remove and reinstall the print cartridge. 7 Repeat the nozzle test. 8 If the lines are still broken, continue with the next section, Wiping
print nozzles and contacts.
40
Maintaining your printer
Maintaining your printer
Troubleshooting
Appendix
Index
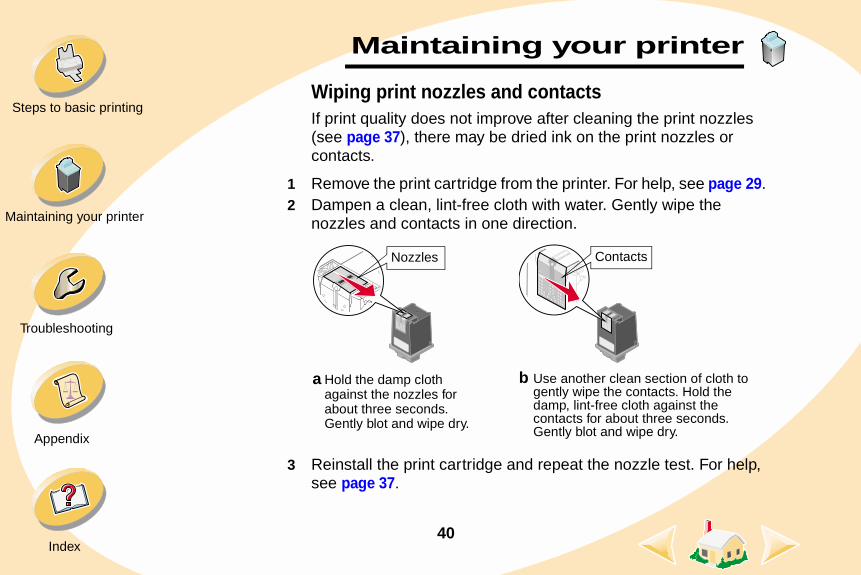
Steps to basic printingWiping print nozzles and contactsIf print quality does not improve after cleaning the print nozzles (see page 37), there may be dried ink on the print nozzles or contacts.
1 Remove the print cartridge from the printer. For help, see page 29.2 Dampen a clean, lint-free cloth with water. Gently wipe the
nozzles and contacts in one direction.
3 Reinstall the print cartridge and repeat the nozzle test. For help, see page 37.
a Hold the damp cloth against the nozzles for about three seconds. Gently blot and wipe dry.
b Use another clean section of cloth to gently wipe the contacts. Hold the damp, lint-free cloth against the contacts for about three seconds. Gently blot and wipe dry.
ContactsNozzles

Maintaining your printer
41
Printing beyond the basics
Maintaining your printer
Troubleshooting
Appendix
Index
Steps to basic printingPreserving print cartridgesTo ensure the longest life from your print cartridge and optimum performance from your printer:
• Keep a new print cartridge in its packaging until you are ready to install it.
• Do not remove a print cartridge from the printer except to replace, clean, or store it in the cartridge storage unit or other air-tight container. The print cartridge will not print correctly if removed from the printer and left exposed for an extended period of time.
Lexmark’s printer warranty does not cover repair of failures or damage caused by a refilled cartridge. Lexmark does not recommend use of refilled cartridges. Refilling cartridges can affect print quality and cause damage to the printer. For best results, use Lexmark supplies.
Maintaining your printer
42
Printing beyond the basics
Maintaining your printer
Troubleshooting
Appendix
Index
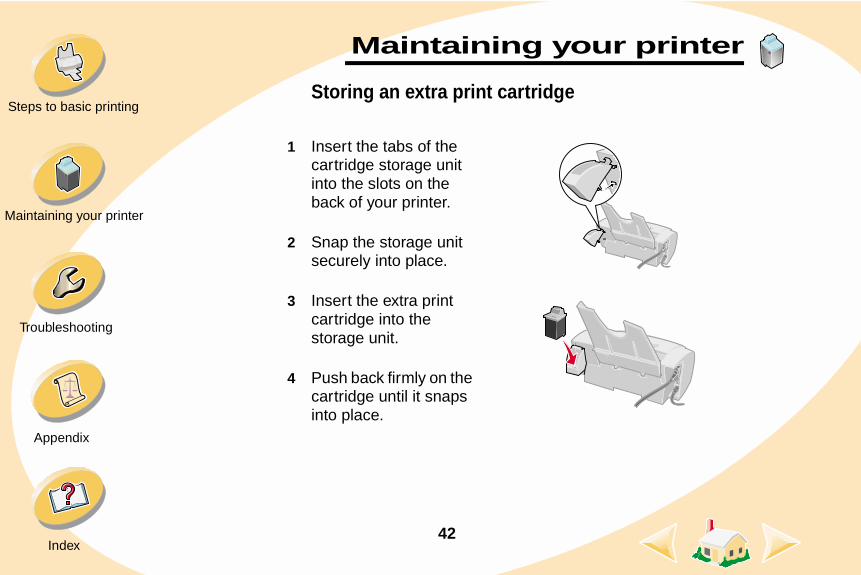
Steps to basic printingStoring an extra print cartridge
1 Insert the tabs of the cartridge storage unit into the slots on the back of your printer.
2 Snap the storage unit securely into place.
3 Insert the extra print cartridge into the storage unit.
4 Push back firmly on the cartridge until it snaps into place.
Maintaining your printer
43
Printing beyond the basics
Maintaining your printer
Troubleshooting
Appendix
Index
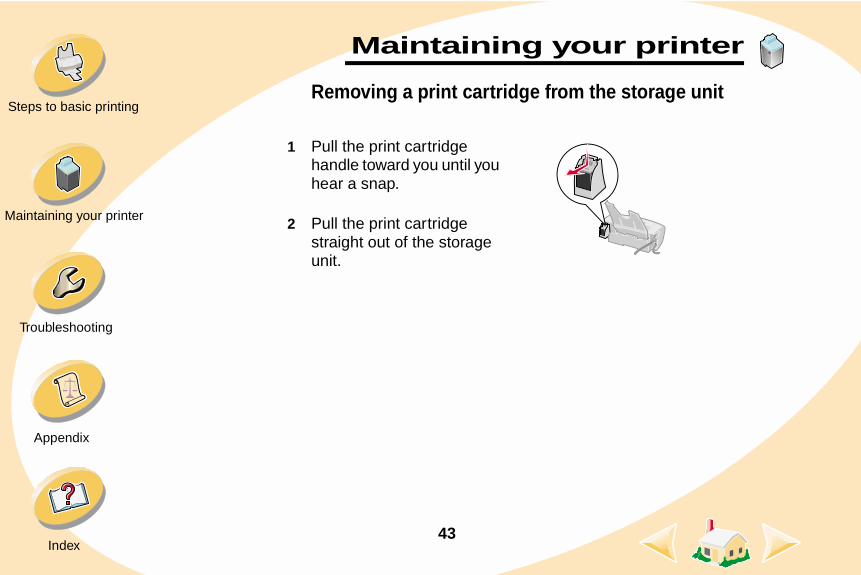
Steps to basic printingRemoving a print cartridge from the storage unit
1 Pull the print cartridge handle toward you until you hear a snap.
2 Pull the print cartridge straight out of the storage unit.

44
Maintaining your printer
Troubleshooting
Appendix
Index
Steps to basic printing
Troubleshooting
This section lists printing problems that can occur and explains what you can do to solve them.
From the following list of printing problems, select a category that describes the type of problem you are experiencing. Then search for the solution to your problem.
General printing problems
Printer doesn’t print or prints slowly
Paper misfeeds or jams
Document prints with mistakes or poor quality
Problems with transparencies, photos, or envelopes
Error messages and flashing lights
45
Troubleshooting
Maintaining your printer
Troubleshooting
Appendix
Index
Steps to basic printingGeneral printing problems
When there is a problem, first make sure:
• The power supply is plugged into the printer and a properly grounded electrical outlet.
• The printer is turned on.
• The USB cable is securely attached to both the computer and the printer.
• The printer is set as the default printer. To check the printer status:
1 Double-click the Lexmark Z12 printer icon on your desktop.2 From the menu bar, choose Printing.3 Make sure Set Default Printer is checked.
46
Troubleshooting
Maintaining your printer
Troubleshooting
Appendix
Index
Steps to basic printingPrinter doesn’t print or prints slowly
If your printer doesn’t print, your printer and your computer may not be able to communicate properly. The following events indicate bidirectional communication problems:
• A message appears on your computer screen indicating that your printer cannot establish bidirectional communication with your computer.
• Print cartridge ink level indicators on the Cartridge tab of the printer’s Control Panel are shaded.
• Error messages (such as Paper Out) and job progress information do not appear on the computer screen.
Before proceeding, verify that:
• The printer software has been installed correctly. See page 57.
• The USB cable is securely attached to both the printer and the computer.
• The printer is plugged into an outlet and is turned on.
• Remove any extra devices, such as a scanner or hub, and connect the printer directly to the USB port.
47
Troubleshooting
Maintaining your printer
Troubleshooting
Appendix
Index
Steps to basic printingPrinter is plugged in but doesn’t printMake sure:
• The printer is turned on.
• Paper is loaded correctly.
• The USB cable is completely plugged into the printer.
• The printer is set as the default printer. To check the printer status:
1 Double-click the Lexmark Z12 printer icon on your desktop.2 From the menu bar, choose Printing.3 Make sure Set Default Printer is checked.
• The print job is not being held in the print queue. To check the printer status:
1 From the desktop, double-click the Lexmark Z12 icon.2 From the menu bar, choose Printing.3 Choose Start Print Queue.
Print a test page. If the test page prints, the printer is functioning properly. If the printer still doesn’t print, check your application.
48
Troubleshooting
Maintaining your printer
Troubleshooting
Appendix
Index
Steps to basic printingTest page does not printMake sure:
• The print cartridge is properly installed. For help, see page 29.
• The Lexmark Z12 printer is set as the default printer. For help, see page 44.
Printer ejects a blank page after appearing to print Make sure:
• The Lexmark Z12 printer is set as the default printer. For help, see page 44.
• You have removed the sticker and transparent tape from the bottom of the print cartridge. For help, see page 29.
Printer prints very slowly• Close any open applications not in use.
• Check the document you are printing. Photos and graphics may take longer to print than regular text.
• Decrease the Print Quality setting to Normal (600 dpi) or Quick Print (600 dpi).
Warning: Do NOT touch the gold contact area of the print cartridge.
49
Troubleshooting
Maintaining your printer
Troubleshooting
Appendix
Index
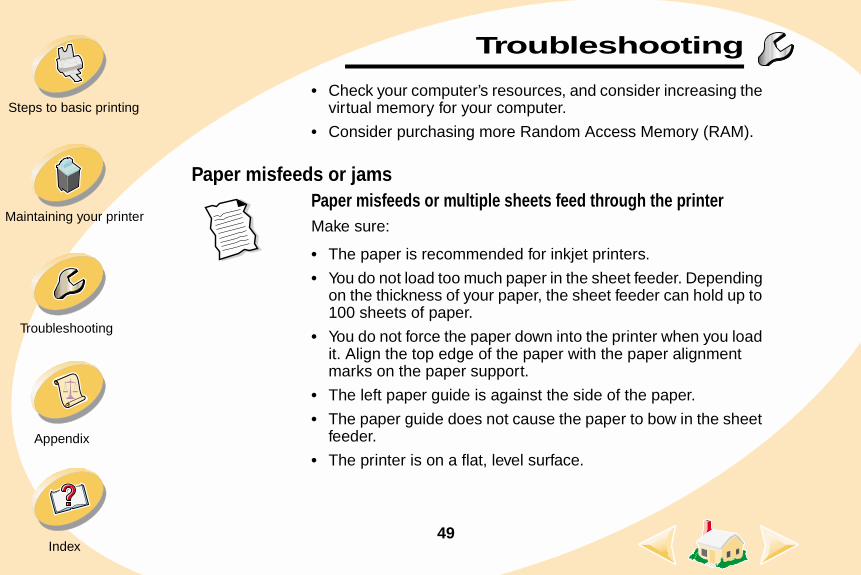
Steps to basic printing• Check your computer’s resources, and consider increasing the
virtual memory for your computer.
• Consider purchasing more Random Access Memory (RAM).
Paper misfeeds or jamsPaper misfeeds or multiple sheets feed through the printer Make sure:
• The paper is recommended for inkjet printers.
• You do not load too much paper in the sheet feeder. Depending on the thickness of your paper, the sheet feeder can hold up to 100 sheets of paper.
• You do not force the paper down into the printer when you load it. Align the top edge of the paper with the paper alignment marks on the paper support.
• The left paper guide is against the side of the paper.
• The paper guide does not cause the paper to bow in the sheet feeder.
• The printer is on a flat, level surface.

50
Troubleshooting
Maintaining your printer
Troubleshooting
Appendix
Index
Steps to basic printingPrinter does not feed envelopes or specialty papers• Make sure your printer will feed regular paper. For help loading
paper, see page 5.
• If regular paper feeds without problems, load the envelopes vertically against the right side of the sheet feeder. Make sure the paper guide is against the side of the envelopes. For help loading envelopes, see page 6.
• Make sure the appropriate envelope size or specialty paper is selected in the printer software.
• Make sure you are using a specialty paper or envelope size that is supported by your printer.
• Your application may not be designed to print envelopes. For help, check your application’s documentation.

51
Troubleshooting
Maintaining your printer
Troubleshooting
Appendix
Index
Steps to basic printingPrinter has a paper jamIf the paper is lodged too far into the printer and can’t be removed:
1 Press the Power button to turn the printer off.2 Press the Power button to turn the printer back on.3 If the printer does not eject the page, turn the printer off.4 Pull firmly on the paper to remove it. If you cannot reach the paper
because it is too far into the printer, raise the front cover and pull the paper out of the printer.
5 Close the front cover.6 Press the Power button to turn the printer on.7 Resend your document to print.
Document prints with mistakes or poor qualityPrint is too dark or smudged• Make sure the paper is straight and unwrinkled.
• Let the ink dry before handling the paper.
• Make sure the Paper Type setting in the printer software matches the type of paper loaded in the printer.

52
Troubleshooting
Maintaining your printer
Troubleshooting
Appendix
Index
Steps to basic printing• Change the Print Quality setting to Quick Print. For help, see
page 19.
• Clean the print nozzles. For help, see page 37.
Vertical straight lines are not smoothTo improve the print quality of vertical straight lines in tables, borders, and graphs:
• Select a higher Print Quality setting.
• Align the print cartridge. For help, see page 35.
• Clean the print nozzles. For help, see page 37.
Print smears on the page• The next page exiting the printer may be smearing the ink.
Remove the pages as they exit the printer and allow them to dry before stacking.
• The print nozzles may need cleaning. For help, see page 37.

53
Troubleshooting
Maintaining your printer
Troubleshooting
Appendix
Index
Steps to basic printingPrinted pages have alternating bands of light and dark print (intermittent printing)• Change the Print Quality setting to High Quality. For help, see
page 19.
• Make sure bidirectional communication exists between your printer and computer. For help, see page 46.
Print quality is poor at the left, right, top, or bottom edge of pageLike other printers, your printer cannot print on the extreme left, right, top, or bottom edges of a page.
Use these minimum settings:
• Left and right margins:
6.35 mm (0.25 in.) each for all paper sizes except A4
For A4 size paper - 3.37 mm (0.133 in.) each
• Top and bottom margins:
Top - 1.7 mm (0.067 in.)
Bottom - 12.7 mm (0.5 in.) for most jobs
19 mm (0.75 in.) for best print quality for color jobs
54
Troubleshooting
Maintaining your printer
Troubleshooting
Appendix
Index
Steps to basic printingPrinted characters are improperly formed or misaligned• Cancel any print jobs and resend your job to print.
• Align the print cartridge. For help, see page 35.
• Clean the print nozzles. For help, see page 37.
Colors on the printout differ from the colors on the screen• A print cartridge may be out of ink or low on ink. For help
changing the print cartridge, see page 29.
• Use a different brand of paper. Every paper brand accepts ink differently and prints with slight color variations.
• Remove any extra devices, such as a scanner or hub, and connect the printer directly to the USB port.
Colors on the printout are fadedTry the suggestions listed in the previous section, Colors on the printout differ from the colors on the screen. If your colors still seem faded, clean the print nozzles. For help, see page 37.

55
Troubleshooting
Maintaining your printer
Troubleshooting
Appendix
Index
Steps to basic printingCharacters are missing or unexpected• Make sure your Lexmark Z12 printer driver is selected as the
default printer.
• Your printer may have bidirectional communication problems. For help, see page 46.
Problems with transparencies, photos, or envelopesGlossy photo papers or transparencies stick together• Remove each page as it exits the printer and allow it to dry
before stacking.
• Use a photo paper or transparency designed for use with an inkjet printer.
Transparencies or photos contain white lines• From the Print Quality area, select High Quality. For help, see
page 19.
• Clean the print nozzles. For help, see page 37.
Printer does not feed envelopes or specialty papersFor help, see page 50.

Troubleshooting
56
Printing beyond the basics
Maintaining your printer
Troubleshooting
Appendix
Index
Steps to basic printingError messages and flashing lights
Paper Jam messageFor help, see page 51.
Ink Low messageA print cartridge is running out of ink. Purchase a new print cartridge.
The Power light is on and the Paper Feed light is blinking• If the printer is out of paper:
1 Load paper.2 Press the Paper Feed button.
• If the printer has a paper jam, see page 51.
The Power light and Paper Feed light are blinking The print cartridge carrier has stalled. Check your screen for any error messages.
1 Turn the printer off.2 Wait a few seconds, and turn the printer back on.
Power light
Paper Feed light

Appendix
57
Printing beyond the basics
Maintaining your printer
Troubleshooting
Appendix
Index
Steps to basic printingThis section contains information about:
• Installing printer software
• Uninstalling printer software
• Power supply
• Safety
Installing printer softwareYou can obtain the printer software using the:
• Compact disc (CD) that came with your printer
• World Wide Web
If your printer software does not install properly, a communications error message appears when you try to print. You may need to uninstall and then reinstall the printer software. For help, see page 58.
Using the CD1 Start Mac OS.
2 When the desktop appears, insert the software CD.The Lexmark Z12 software installation screen appears.
3 Click Install and Agree.
4 Click Install.
5 Select the Lexmark Z12 printer in the Chooser by following the steps on the dialog box.
Note: If your Macintosh computer locks up while printing, you may need to turn off the printer and the computer, and then turn them back on. When you turn them back on, the printer driver’s spooler may attempt to start printing the job that was in the queue before the computer locked up. This could cause your system to lock up again.
To recover from this problem:
1 Turn off the printer and the computer.
2 Hold down the Shift key and turn the computer on.
3 Continue to hold the Shift key until you see the Mac OS screen and the words Extensions Off.
4 Release the Shift key.
5 Locate the Lexmark Z12 printer icon on your desktop. The inactive printer spooler has an X over it.
6 Double-click the icon to open the Lexmark Z12 dialog box.
7 Drag your print jobs to the trash can.
8 Restart the computer to enable the extensions.

Appendix
58
Printing beyond the basics
Maintaining your printer
Troubleshooting
Appendix
Index
Steps to basic printingUsing the World Wide Web
If your computer does not have a CD-ROM drive, you can download the printer software from the World Wide Web at www.lexmark.com.
Note: Before you begin, make sure Stuffit Expander is loaded on your system.
1 From Lexmark’s Web site, select the appropriate driver for your operating system.
2 Double-click the binhex (.hqx) file to open it.
3 Follow the instructions on your screen.
Uninstalling printer softwareIf your printer software does not install properly, you may need to uninstall and then reinstall it.
To uninstall the printer software:
1 Drag the printer icon to the trash can on the desktop.
2 Insert the software CD.The Lexmark Z12 software installation screen appears.
3 Click Install and Agree.
4 From the Easy Install pop-up menu, choose Uninstall.
5 Select Complete Uninstall.
6 Click Uninstall.
To reinstall the printer software, follow the appropriate set of instructions from “Installing printer software” on page 57.
Power supplyIf your power supply fails, replace it with the Lexmark replacement part or other UL LISTED Direct Plug-In Power Unit marked “Class 2” and rated 30 V dc at 500mA.
Safety • If your product is NOT marked
with this symbol , it MUST be connected to an electrical outlet that is properly grounded.
• The power cord must be connected to an electrical outlet that is near the product and easily accessible.
• Refer service or repairs, other than those described in the operating instructions, to a professional service person.
• This product is designed, tested and approved to meet strict global safety standards with the use of specific Lexmark components. The safety features of some parts may not always be obvious. Lexmark is not responsible for the use of other replacement parts.
59
A B C D E F G H I J K L M N O P Q R S T U V W X Y Z Index
AAbout tab 28aligning print cartridge 35
BBackground Printing 18banding 53banner paper
loading 10, 11settings 24
bidirectional communica-tion problems 46black cartridge
part number 30blinking lights
Paper Feed 56Power 56
Ccards
loading 7settings 21
cartridge storage unit 41cartridge, print
aligning 35installing 29part numbers 4, 30preserving 41removing 30replacing 29
characters, misformed 54coated paper
loading 7settings 23
color cartridgepart number 30
Color options 17contacts, print
wiping 40Control Panel 27
opening 27using 27
Control Program 27, 28custom size paper
loading 9settings 23
customizingPage Setup dialog 19Print dialog box 15
Ddark or smudged print 51default settings, changing 21downloaded printer driver, installing 58
Eenvelopes
loading 6settings 21
error messagesInk Low 56Paper Jam 56
Fflashing lights 56

60
A B C D E F G H I J K L M N O P Q R S T U V W X Y Z Index
foilsloading 12settings 24
front cover 29
GGeneral options 14, 16glossy paper
loading 7settings 22
greeting cardsloading 7settings 21
Hhigh yield black cartridge 30high yield color cartridge 30
Iimproving print quality 35
index cardsloading 7settings 21
Ink Low message 56installing
cartridge 29printer software 58
intermittent printing 53iron-on transfers
loading 8settings 23
Llast page first 16lights
locating 56Paper Feed 56patterns 56Power 56
loadingpaper 5
loading specialty paper 6
Mmargins, minimum set-tings 53messages, error
Ink Low 56Paper Jam 56
Nnotices
safety information 58nozzle test 37nozzles, print
cleaning 37wiping 40
Ppage settings, changing 19Paper Feed light 29, 56paper guide
locating 5using 5
paper loading 5

61
A B C D E F G H I J K L M N O P Q R S T U V W X Y Z Index
Paper Type/Quality options 17part numbers 4, 30
black cartridge 4, 30color cartridge 4, 30high yield black cartridge
30high yield color cartridge
30photo cards
loading 7settings 21
photo paperloading 7settings 22
pop-up menusBackground Printing 18Color 17General, Page Setup 14General, Print 16Paper Type/Quality 17Watermark 14
postcardsloading 7settings 21
Power light 29, 56power supply 58print cartridge
aligning 35cleaning 37installing 29part numbers 4, 30preserving 41removing 30replacing 29
print cartridge contacts, wiping 40Print dialog box 15print nozzles
cleaning 37wiping 40
print qualityimproving 35troubleshooting 51
print settings, specialty pa-per 21
printer driverdownloading 58installing 57, 58uninstalling 58
printer driver Help 13, 15printer setup 58printer software
installing 57Print dialog box 15uninstalling 58
printer software installa-tion 58printing options
customizing 13Printing Preferences
customizing 13printing problems
color quality 54error messages 56general 45paper feeding 49poor quality 51specialty media 55
purge lines 38
62
A B C D E F G H I J K L M N O P Q R S T U V W X Y Z Index
Rrelease tab
locating 5using 5
resolving problems 58reverse page order 16
Ssafety information 58setting recommendations
banner paper 24coated paper 23custom size paper 23envelopes 21glossy paper 22greeting cards 21index cards 21iron-on transfers 23photo cards 21photo paper 22postcards 21transparencies 24
sheet feeder
locating 5using 5
software applicationsControl Panel 27
software, printerinstalling 57uninstalling 58
specialty paperloading 6
Status tab 28
Ttest page
alignment 35does not print 48
transparenciesloading 12settings 24
troubleshootingerror messages 56flashing lights 56paper feed problems 49poor print quality 51
specialty print jobs 55
Uuninstalling printer soft-ware 58USB cable 46
WWatermark options 14