one to one instructions installing and configuring samba on ubuntu linux to enable linux to share...
TRANSCRIPT

One to One instructions
Installing and configuring samba on Ubuntu Linux to enable Linux
to share files and documents with Windows XP.
Installing Ubuntu Linux
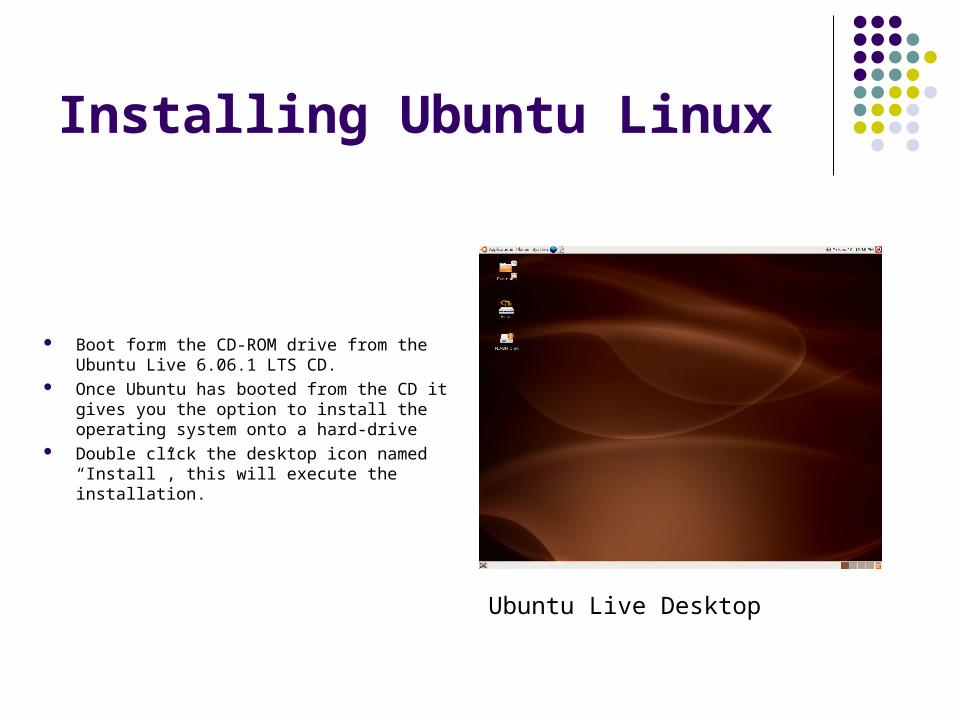
Boot form the CD-ROM drive from the Ubuntu Live 6.06.1 LTS CD.
Once Ubuntu has booted from the CD it gives you the option to install the operating system onto a hard-drive
Double click the desktop icon named “Install”, this will execute the installation.
Ubuntu Live Desktop
Step 1 of the setup
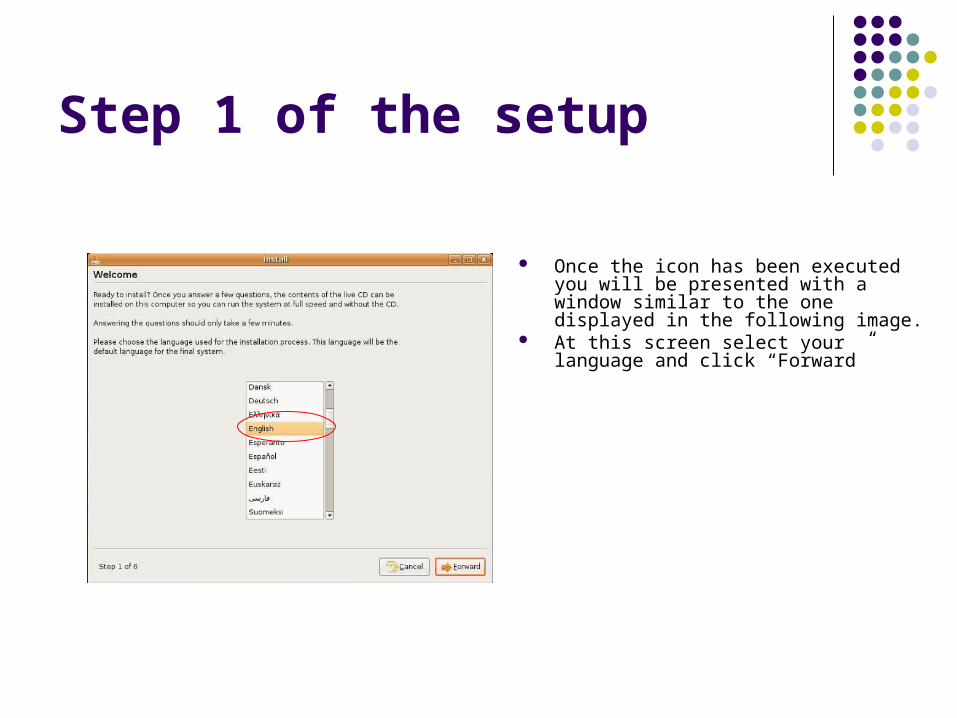
Once the icon has been executed you will be presented with a window similar to the one displayed in the following image.
At this screen select your language and click “Forward”

Step 2 of the setup
Next click on the “Set time” button that’s located at the bottom right corner of the window.
Select the time and date settings and the click “ok”
After clicking forward the next step is to select the time zone, this is done by just pointing to the location which you are from on the world map and pinpointing your location.
Alternately you can use the drop down box located at the bottom of the window if you already know what time zone you are located in and do not require the use of a visual aid.

Step 3 and 4 of the setup
At the next screen you will be asked to input information such as your name, login name, password and computer name.
The screen should look like this when you are done, click “Forward”
Click “Forward” At the next screen you will be asked to
select your keyboard layout, after doing so click “Forward” again

Step 5 of the setup
At the next screen you can select whether to have the Linux installer set up the partitions automatically or to set then up your self, in this manual we are going to let Linux do it for us, so select the top option and the click “Forward”

Final Step of the setup
This is the final screen of the setup, check to see that all options selected are correct and the click the “Install button”
Once Ubuntu has installed you are given the option to restart and boot Ubuntu from the hard-drive or Continue to use the Live CD.
Click “Restart Now”

IP addresses and Internet Next go to System
Administration Networking You be asked for a password,
Type in the password you use to login with
Under the Connections tab select the Ethernet connection and click the “properties” button
Input a static IP that is on the same subnet as your router, and insert the IP address of your router as the Gateway address.
IP addresses and Internet
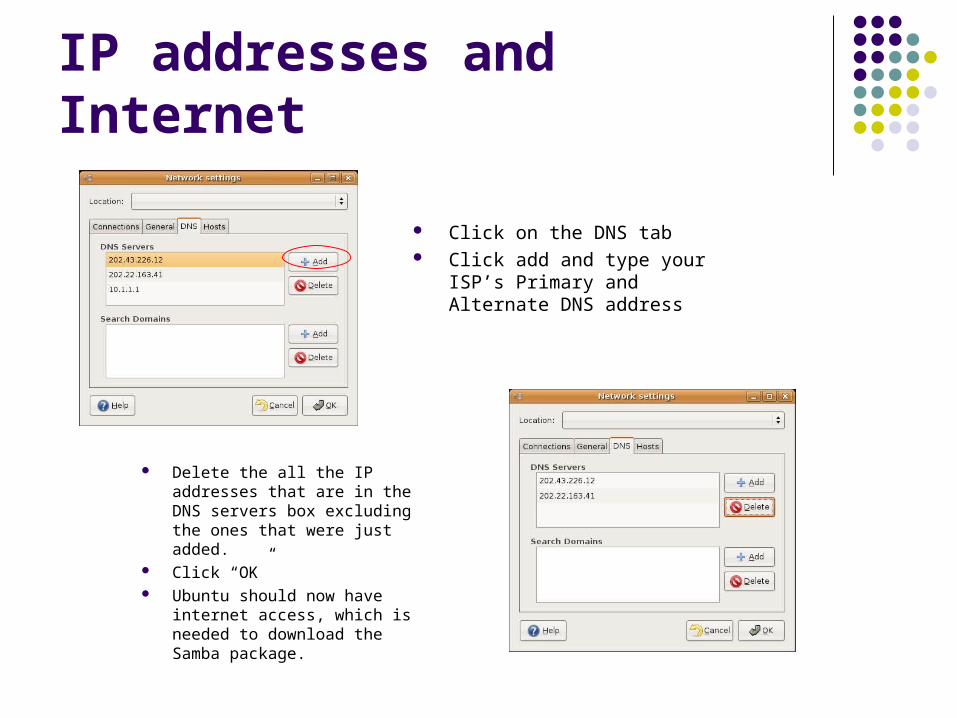
Delete the all the IP addresses that are in the DNS servers box excluding the ones that were just added.
Click “OK” Ubuntu should now have
internet access, which is needed to download the Samba package.
Click on the DNS tab Click add and type your ISP’s
Primary and Alternate DNS address
Installing and configuring samba
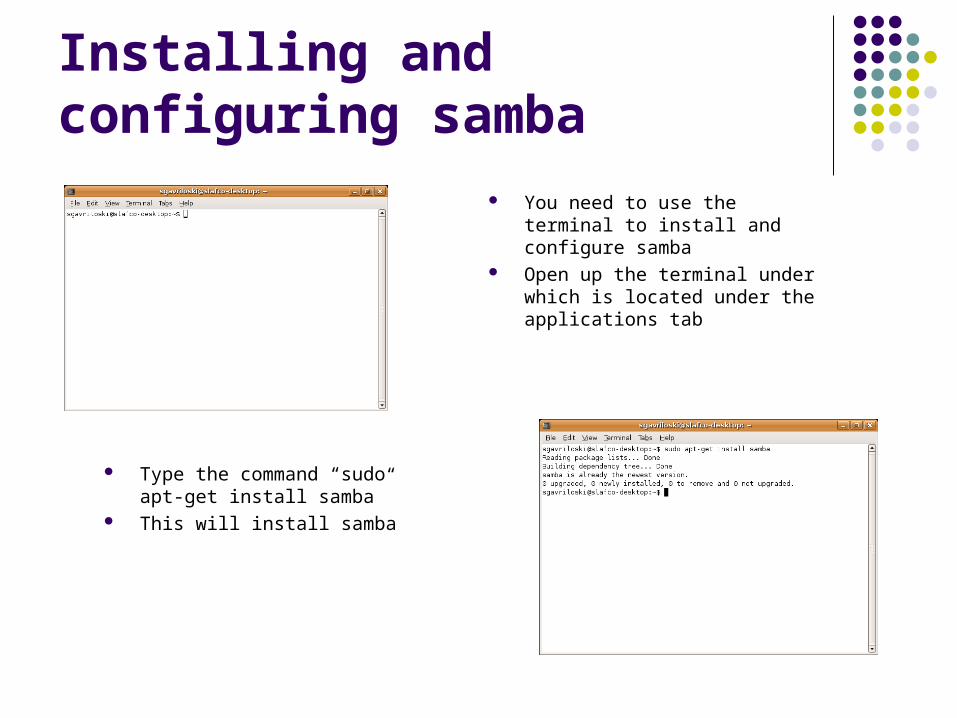
You need to use the terminal to install and configure samba
Open up the terminal under which is located under the applications tab
Type the command “sudo apt-get install samba”
This will install samba
Installing and configuring samba
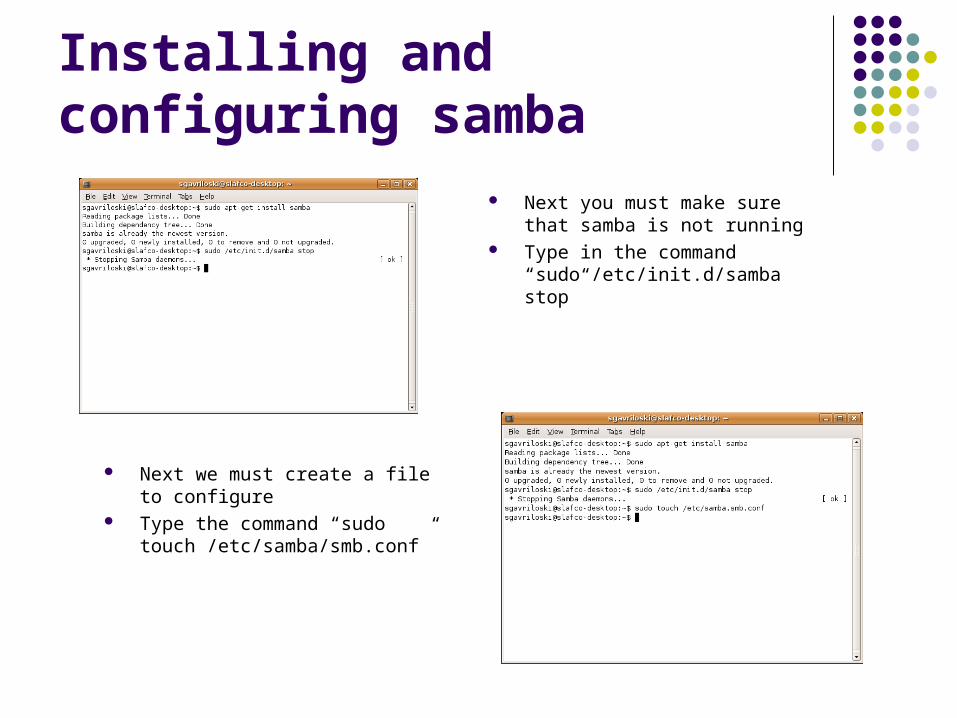
Next you must make sure that samba is not running
Type in the command “sudo /etc/init.d/samba stop”
Next we must create a file to configure
Type the command “sudo touch /etc/samba/smb.conf”

Installing and configuring samba
Next you must edit the file that was just created
Use the command “sudo gedit /etc/samba/smb.conf”
Open the file smb.conf.template and copy it’s content into the file that was just created.
Replace "YOUR_HOSTNAME" with your desired hostname (don't use spaces). Best practice would be to use the same name you configured upon installation.
Replace "YOUR_WORKGROUP" with the name of your workgroup, but make sure you're using the same as configured in Windows.
Well, this should say it all. Replace "YOUR_USERNAME" with the name you use for login
That completes the configuration of samba, save and close gedit.
Setting permissions and starting up samba
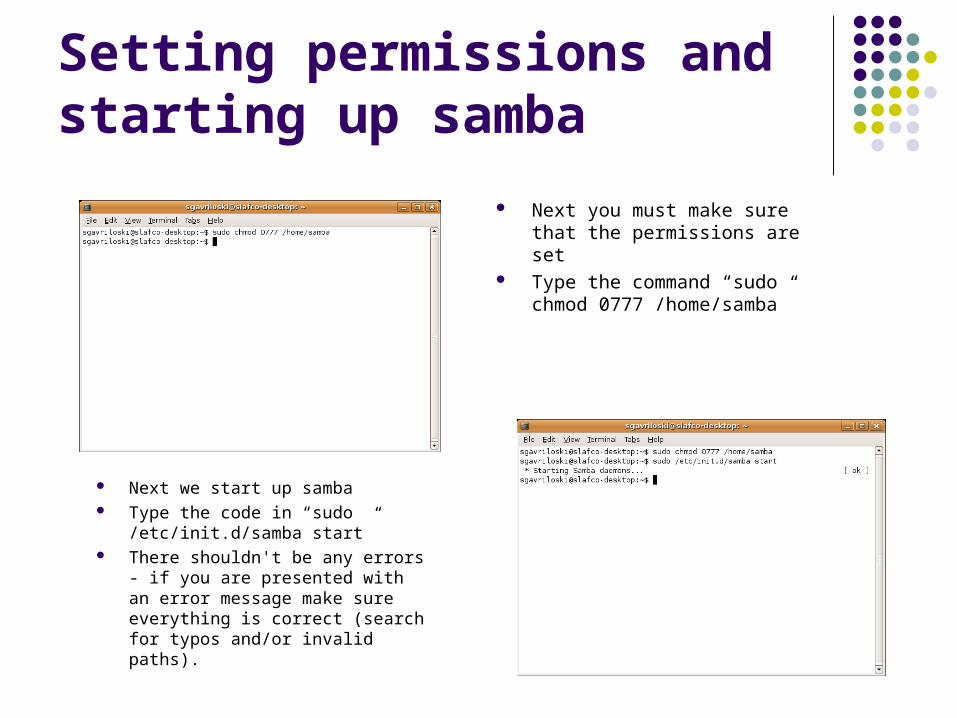
Next we start up samba Type the code in “sudo
/etc/init.d/samba start” There shouldn't be any errors - if
you are presented with an error message make sure everything is correct (search for typos and/or invalid paths).
Next you must make sure that the permissions are set
Type the command “sudo chmod 0777 /home/samba”
Adding users to samba
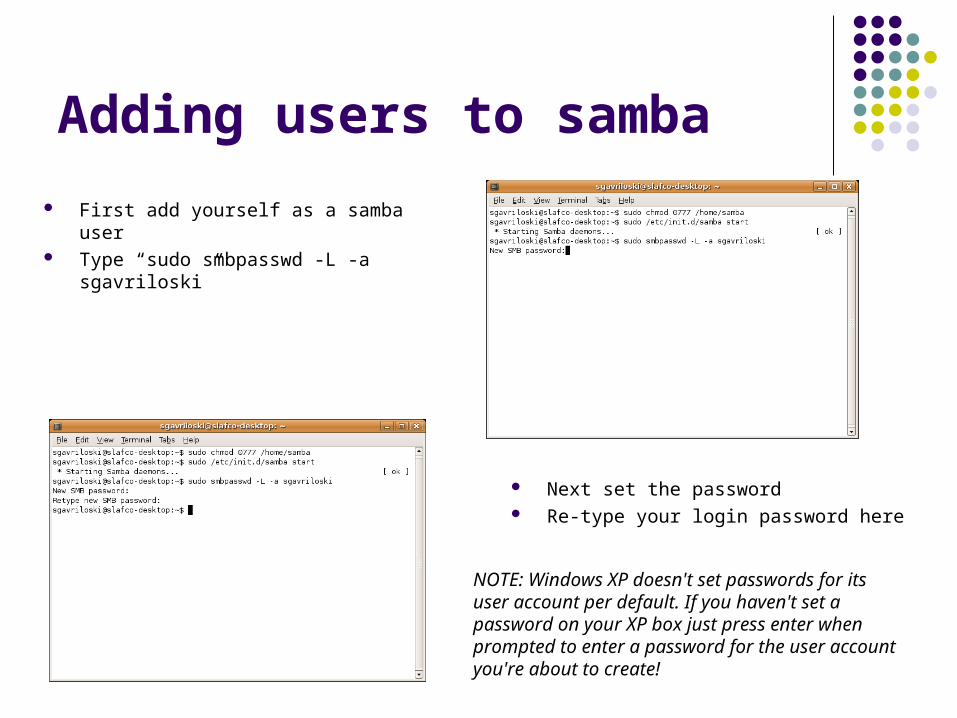
First add yourself as a samba user Type “sudo smbpasswd -L -a sgavriloski”
Next set the password Re-type your login password here
NOTE: Windows XP doesn't set passwords for its user account per default. If you haven't set a password on your XP box just press enter when prompted to enter a password for the user account you're about to create!

Adding users to samba
Type the code “sudo smbpasswd -L -a Aleksander”
If your XP user account has a password type it in here, if not just press enter twice.
Next add the XP machine user, in this case the XP user is Aleksander
Type the code Type the code “sudo useradd -s /bin/true
Aleksander”

Setting up Windows XP machine
Select the "TCP/IP" Protocol and click the "Properties" button
Click "START" Click "Control Panel" Click "Network Connections" Find your "LAN Connection" Right-click the icon and select "Properties"

Setting up Windows XP machine
Select the third Tab entitled "WINS“ Click "Add"
Click "Advanced"
Setting up Windows XP machine
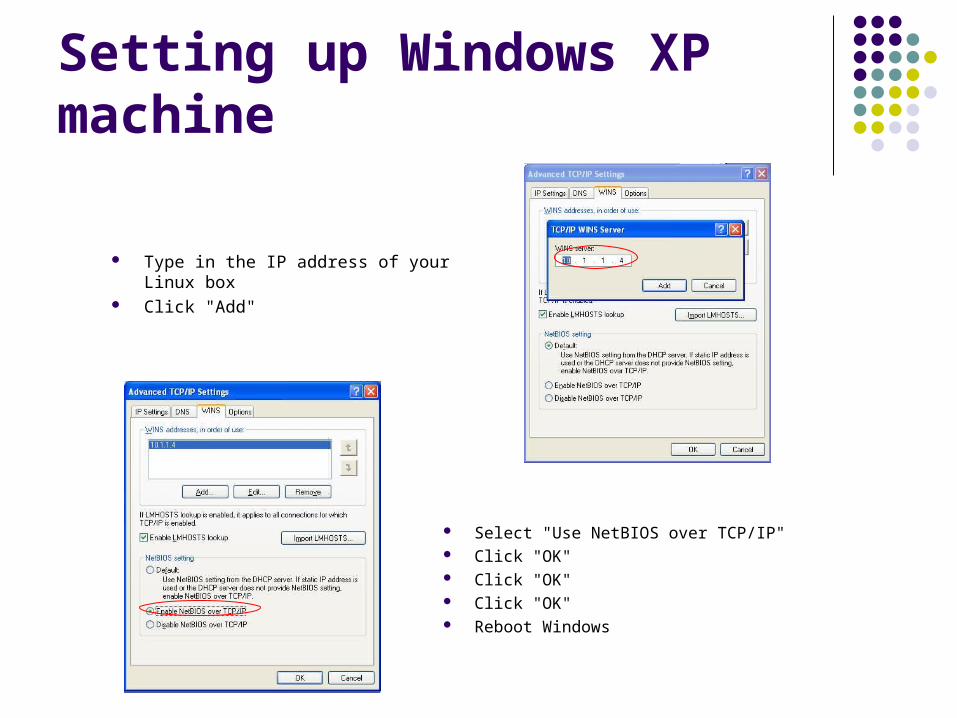
Select "Use NetBIOS over TCP/IP" Click "OK" Click "OK" Click "OK" Reboot Windows
Type in the IP address of your Linux box
Click "Add"
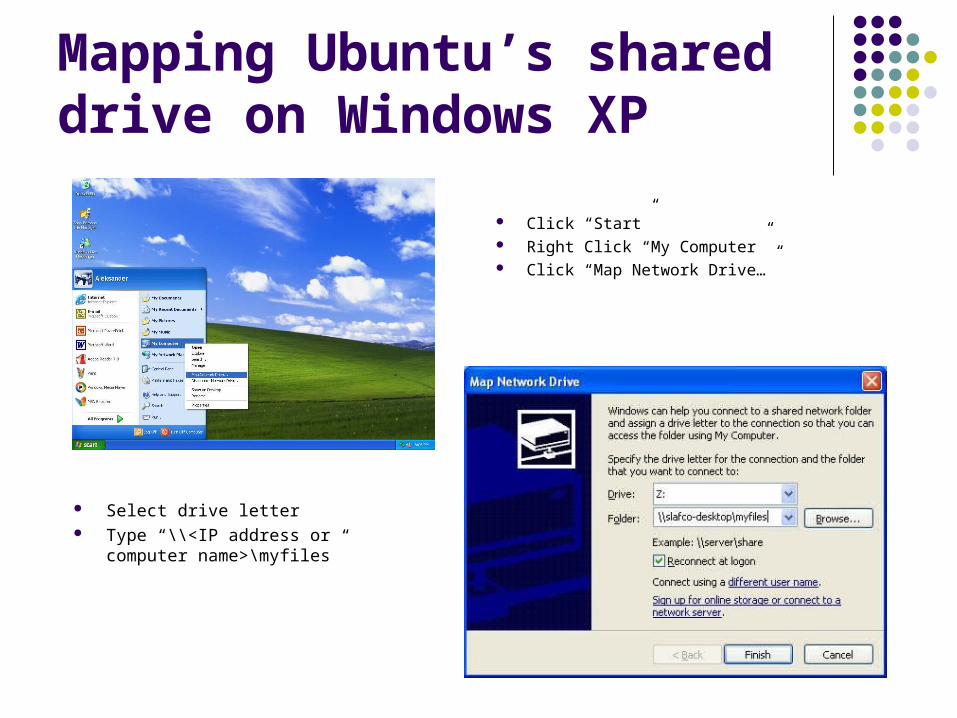
Mapping Ubuntu’s shared drive on Windows XP
Click “Start” Right Click “My Computer” Click “Map Network Drive…”
Select drive letter Type “\\<IP address or computer
name>\myfiles”

Screen shots of Ubuntu’s shared drive
The shared drive mappedThe Ubuntu machine
Files being accessed