omnilynx’s basic cg tutorial - apache2 ubuntu default...
TRANSCRIPT

omnilynx’s Basic CG Tutorial
This is an exhaustive tutorial on the basics of CGing. It won’t make you a good CGer, only practice can do that. It’s based on my style; many other CGers do things very differently, but this is what works for me. You will only need the GIMP to do the CGing: you can find it at www.GIMP.org. For the optional line-art portion, you will need a color printer, a scanner, a good pen, and Inkscape (which you can find at www.inkscape.org). Let’s get started!
0. Preparation
We’ll be using page #439, Megadustrial:Remix, as an example:
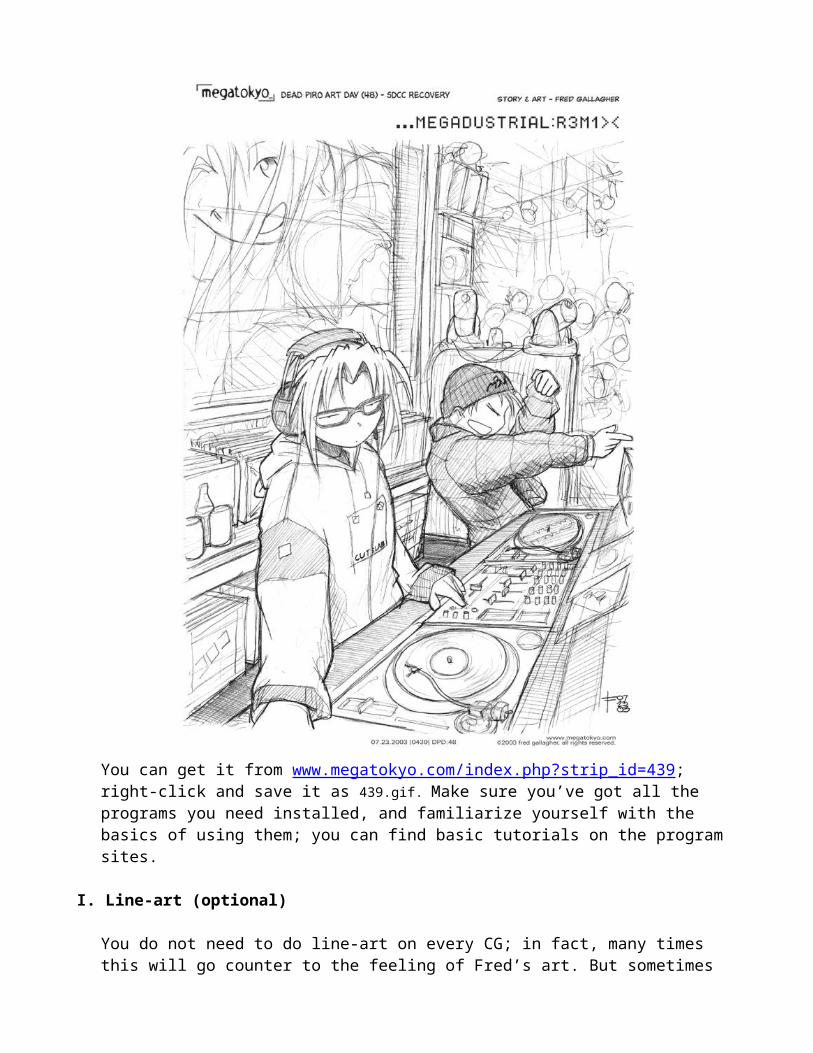
You can get it from www.megatokyo.com/index.php?strip_id=439; right-click and save it as 439.gif. Make sure you’ve got all the programs you need installed, and familiarize yourself with the basics of using them; you can find basic tutorials on the program sites.
I. Line-art (optional)
You do not need to do line-art on every CG; in fact, many times this will go counter to the feeling of Fred’s art. But sometimes it can be helpful, depending on your style, so to be complete I’ll show you how it works.
First, Open 439.gif in the GIMP. Set Image->Mode to RGB:

Then, open the Tools->Colour Tools->Colourize dialog box:
In the Colourize dialog, set the image to a light, cool color:
The exact color doesn’t matter, so feel free to use my settings or whatever scans well (see below).Next, you’ll need to resize it so it prints well. I hate doing this in the GIMP, so I actually use another program usually, like paint or word, but I’ll show you how in the GIMP anyway.
Open the Image->Scale Image dialog and set the resolution to 103 pixels/in. You can do the math yourself if you want, but unless Fred changes sizes that’s about right.

Then open the File->Page Setup dialogue and set all the margins to .75”. That should be possible on pretty much all modern printers. Again, you can play with these settings to maximize the size.
Finally, print your image. It should come out something like this: (mine’s darker so you can see it)

Then trace the lines with a good pen. I recommend Pigma Microns. Observe the difference:
That’s a Micron 02, you can get them much finer if you want.I’m really bad at tracing, so I’m not gonna tell you how to do that. Basically, do it a lot. You should vary the thickness of your lines depending on how much you want the edge to stand out, but I don’t do that much because I’m stupid and lazy. So here’s what you should get:
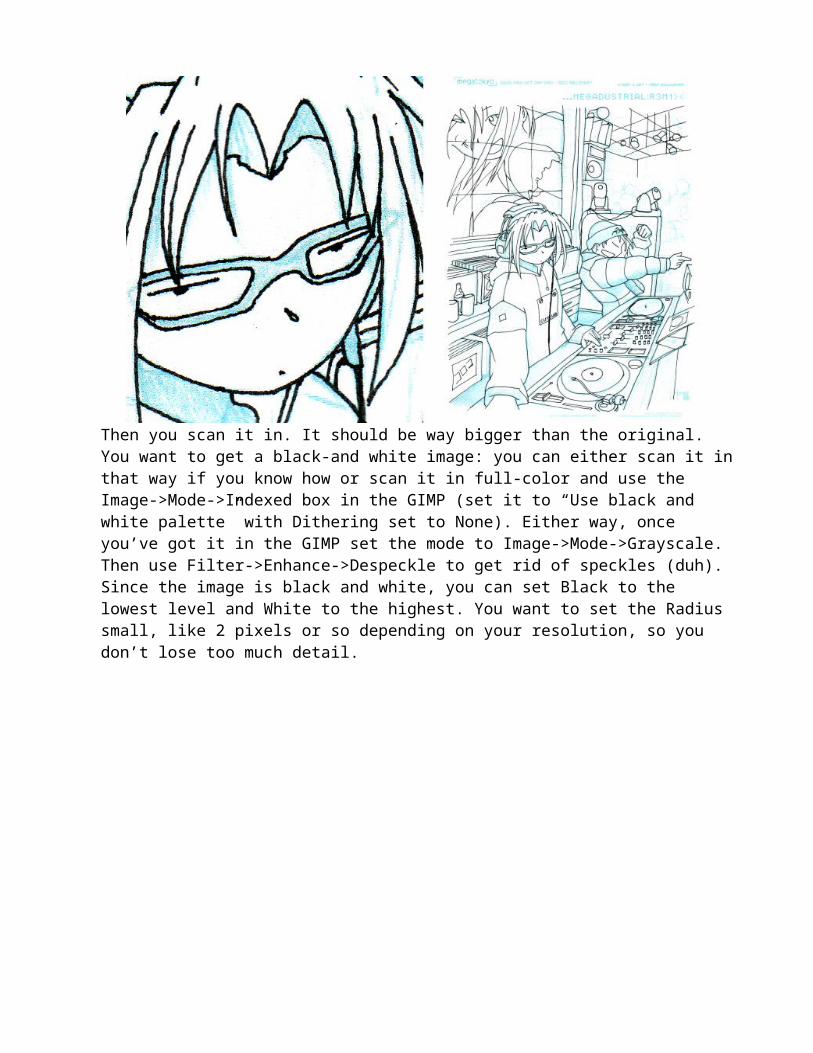
Then you scan it in. It should be way bigger than the original. You want to get a black-and white image: you can either scan it in that way if you know how or scan it in full-color and use the Image->Mode->Indexed box in the GIMP (set it to “Use black and white palette” with Dithering set to None). Either way, once you’ve got it in the GIMP set the mode to Image->Mode->Grayscale. Then use Filter->Enhance->Despeckle to get rid of speckles (duh). Since the image is black and white, you can set Black to the lowest level and White to the highest. You want to set the Radius small, like 2 pixels or so depending on your resolution, so you don’t lose too much detail.
You can use this opportunity to do some clean-up as well; especially make sure the lines connect where they should, and there aren’t any ‘holes’ in the lines. Then File->Save it as a BMP, and fire up InkScape. Open the file in File->Import. Don’t worry about the size (Hint: it’s a vector graphics program, size doesn’t matter). Then open the Path->Trace Bitmap dialog. Use the Brightness method; you’ll have to play with the threshold a little, I generally use something around 0.4. Then delete the bitmap and you’ll be left with a vector graphics trace. You can double-click on it to manipulate the paths; make sure everything is straight and smooth. Unfortunately, the Path->Simplify option doesn’t work very well (no settings :( ) so you’ll have to do it manually. You can also adjust line widths here. Basically, this is final editing on the line-art. Basically, what you’re trying to do is get it looking way better than this:
Finally, File->Export Bitmap. Use the “Drawing” button to make sure you get everything.

1. Flats
OK, it’s time to get started actually coloring this thing. Open it up in the GIMP (if you did the lineart, open that; it’ll be bigger than the original, but we can resize it later). Make sure Image->Mode is set to RGB. Then use Layer->Duplicate Layer to make a copy in another layer. You can rename the copy “Line-art” or something if you want. Set the Mode to Multiply.
Then switch to the Background layer, Select->All, and Edit->Clear (Note: sometimes for unknown reasons I have to fill the background with white to get the lines to show up. Sometimes I don’t. Whatever works...). Now you’ve got your lines and a background, it’s time to add colors.
A word on colors, because a lot of people overlook this or don’t know how to go about choosing colors. Colors are very important, obviously; since you’ve already got the art supplied by Fred, they’re the only things that set your CG apart. They draw the eye, determine the mood, and enhance realism. And often these goals are conflicting, so choosing them correctly can be a balancing act. But don’t worry, there are some simple concepts that can make it much easier.First, know the color wheel. You should either use colors from the same part of the color wheel (for reinforcement), or directly opposite it (for contrast). This is a loose rule, but look for a precedent before breaking it (ie. either a fashion or nature shot that’s based on the colors you want). Note as well that each primary color (red, yellow, and blue) has a warm side and a cool side. Using warm sides adds vibrancy, while cool sides give a more subdued aura.Natural colors don’t stick out like neon signs: they’re usually partly washed out. Backgrounds, especially, are clustered around a sort of grey, unless you’re going for a specific mood. Things that are far away get lighter in the day and darker at night.Finally, there is a specific set of colors for each character (hair, eyes, skin, etc.) that you should be aware of. I’m not one of the people who insists on canon colors for every CG, but you should at least break canon consciously if you choose to do so. The chart on the next page is courtesy of coryrain. Note that Ping has since changed her hair color to bright pink.

OK, now back to the picture. The next step is to separate the parts of the picture onto different layers. The number of layers depends on the drawing and your preferences, but especially when starting out err on the side of more layers. The advantage of splitting it up like this is that you can work on one part of the drawing without fear of messing up any others. This will be a godsend when you’re shading and tweaking later.
In this particular drawing, I made the following layers:
You would probably want to do more. Anyway, what you need to do now is select each area and fill it with the proper color. This part is a lot easier if you’re working with line-art: just use the magic wand to select the areas you want (on the line-art layer), and Select->Grow the selection by a couple of pixels. Then switch to the proper layer and Edit->Fill with FG color (assuming you’ve chosen the proper color).
Sometimes that won’t work. Either you didn’t do the line-art, or it’s an area that doesn’t connect, or something. In that case, you’ll have to do it by hand. Just choose a large hard brush (that’s one that’s not fuzzy) and fill it in, switching to smaller brushes for details. Alternatively, you can use the lasso tool to select by hand. But I usually have to touch up by hand anyway, so it doesn’t really save time. By the way, you should probably work at 200% zoom when doing details. Just continue filling in areas like this to finish the flats. Congratulations, you’re about halfway done!


2. Textures
Yay, now it’s actually starting to look like a CG! But wait, at this point pretty much everyone’s will look about the same, except for color choices (duh). Here’s where you can really start to get into your own style. Before you do, there’s one last bit of cleanup from the flats: go through and make sure all your layers are set to preserve transparency. That way any effects or changes won’t bleed over.
To tell you the truth, I can’t help you much with textures, just because it’s really getting into your own style. I do have some tips, though. First of all, most things don’t need textures. In fact, the only thing I’m going to use textures for is the hair, which I’ll explain below. Part of that is the picture I chose: most of the stuff in this picture is smooth and glossy, even the clothing. Had I chosen a different picture, say one from Endgames, there would be a lot more reason for rougher textures.
If you do decide to go with a texture, here’s an easy way do it. Make a new layer, and fill the layer with the texture. Now, depending on exactly what your texture may be, you’ll need to mess with it: it should be black and white, texture and base. You can do that by selecting colors and filling, or using the emboss filter. Then use Color to Alpha on the white, and Alpha to Selection. You can then apply that selection to the proper layer in whatever way you see fit.
That’s all the advice I have about that. If you’ve got some suggestions, let me know and I’ll try to incorporate them.
OK, now hair textures are different. You can’t just slap something on. Some people skip it altogether, but hair can be a great way to add a personal touch and make the drawing really stand out. Here’s how I do it.
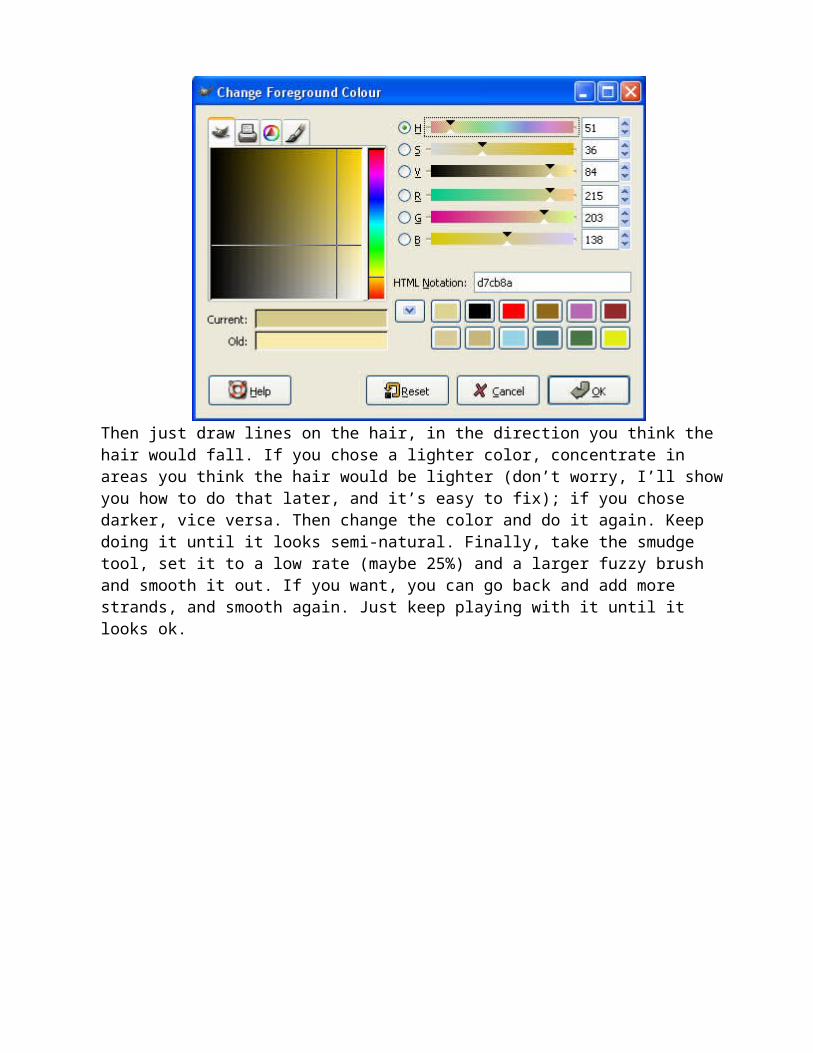
Use the smallest brush possible. Take the base hair color and jiggle the hue, saturation, and value bars. Set the opacity to something like 50%.

Then just draw lines on the hair, in the direction you think the hair would fall. If you chose a lighter color, concentrate in areas you think the hair would be lighter (don’t worry, I’ll show you how to do that later, and it’s easy to fix); if you chose darker, vice versa. Then change the color and do it again. Keep doing it until it looks semi-natural. Finally, take the smudge tool, set it to a low rate (maybe 25%) and a larger fuzzy brush and smooth it out. If you want, you can go back and add more strands, and smooth again. Just keep playing with it until it looks ok.
3. Shading
Shading is what separates beginning CGers from those with more experience. I believe I can say that categorically. I have seen very few new CGers willing to be as bold as they should with shading, and those that do often try to emulate someone else’s without understanding the principles. So let’s learn about shading. We’ll start with the basics and build up.
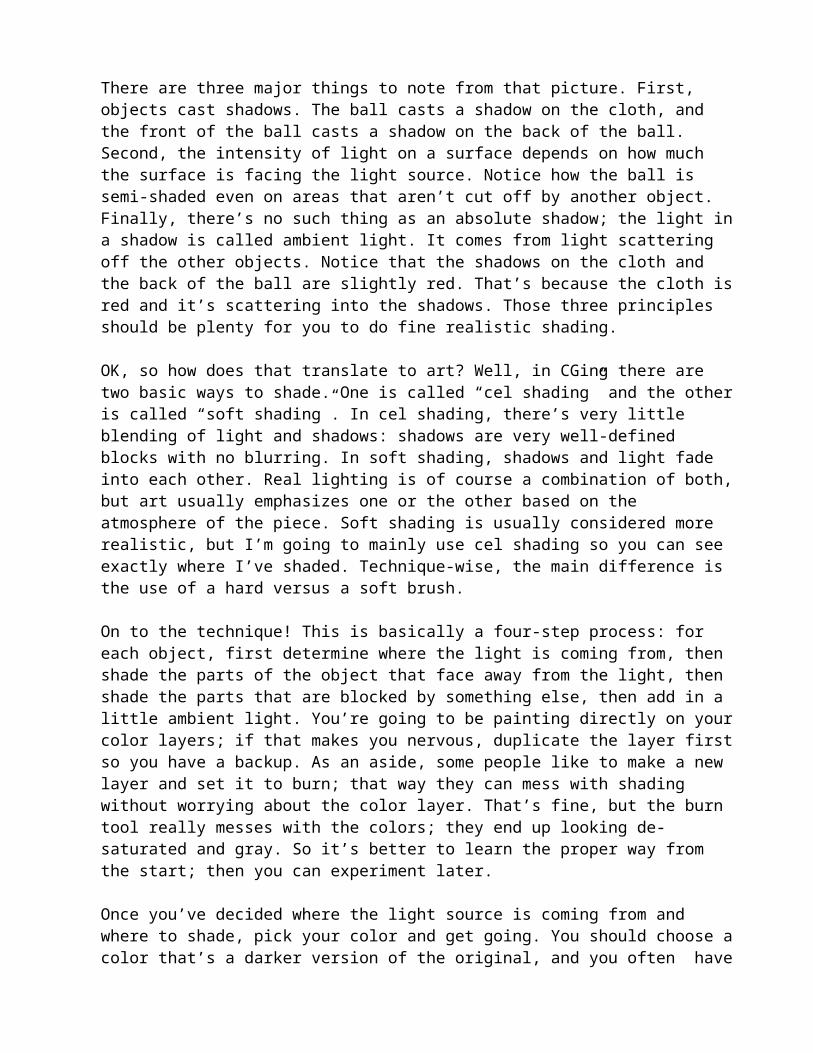
Shading is the absence of light on a surface. It’s caused by two things: no light is aimed at the surface, or something else is blocking the light from reaching it. Here’s a quick example.

There are three major things to note from that picture. First, objects cast shadows. The ball casts a shadow on the cloth, and the front of the ball casts a shadow on the back of the ball. Second, the intensity of light on a surface depends on how much the surface is facing the light source. Notice how the ball is semi-shaded even on areas that aren’t cut off by another object. Finally, there’s no such thing as an absolute shadow; the light in a shadow is called ambient light. It comes from light scattering off the other objects. Notice that the shadows on the cloth and the back of the ball are slightly red. That’s because the cloth is red and it’s scattering into the shadows. Those three principles should be plenty for you to do fine realistic shading.
OK, so how does that translate to art? Well, in CGing there are two basic ways to shade. One is called “cel shading” and the other is called “soft shading”. In cel shading, there’s very little blending of light and shadows: shadows are very well-defined blocks with no blurring. In soft shading, shadows and light fade into each other. Real lighting is of course a combination of both, but art usually emphasizes one or the other based on the atmosphere of the piece. Soft shading is usually considered more realistic, but I’m going to mainly use cel shading so you can see exactly where I’ve shaded. Technique-wise, the main difference is the use of a hard versus a soft brush.
On to the technique! This is basically a four-step process: for each object, first determine where the light is coming from, then shade the parts of the object that face away from the light, then shade the parts that are blocked by something else, then add in a little ambient light. You’re going to be painting directly on your color layers; if that makes you nervous, duplicate the layer first so you have a backup. As an aside, some people like to make a new layer and set it to burn; that way they can mess with shading without worrying about the color layer. That’s fine, but the burn tool really messes with the colors; they end up looking de-saturated and gray. So it’s better to learn the proper way from the start; then you can experiment later.
Once you’ve decided where the light source is coming from and where to shade, pick your color and get going. You should choose a color that’s a darker version of the original, and you often have to increase the saturation some as well. Remember that there are canon colors for shaded skin and hair: you don’t have to use them (your lighting situation is probably different) but they make good guides. Good luck; this is probably the part that requires the most skill, but it shouldn’t take nearly as long. Then, once you’re done, choose a darker color and go over the areas that are deeper in shadow. You can take this as far as you want, especially if you’re doing soft shading, but for hard shading you usually only use two or three levels. By the time you’re done, the picture should start looking more like a finished product.

4. Highlights and EffectsThis is kind of a catch-all for everything else necessary (and unnecessary) to finish up. Basically, it’s what gives the picture that little kick to catch the eye. It’s especially important for the example I’ve chosen, since unique lighting is obviously a big part of the atmosphere. But first, we need to take care of something that’ll probably be in every picture you do: the highlights.
Highlights are basically the opposite of shading, so everything that I taught you there also applies here, only you’re going for the bright spots instead of the shadows. However, highlights are different in that they reveal the surface material: smooth, shiny surfaces have well-defined highlights whereas rough, dull surface highlights are much more diffuse, and may not even be there at all. One thing that almost always has highlights is hair. There are more advanced things you can do with highlights as well, such as showing bumpiness, but I’m not going to get into those in this tutorial.
OK, so how do we do highlights? I’m going to start with a simple skin highlight, because hair has its own special method (as always). Again, the principle is very simple. The highlight should be directly between the viewer and the light. Here’s what I mean.
The light is off to the right, nearly making a right angle with the viewpoint (I know, if it really was they’d cast shadows on each other. Work with me). So the shine marks are at about a three-quarter mark. You can see from this picture what I mean by shine determining material, as well. The far left ball has no shine at all, and you can tell something’s missing. The second ball has a soft shine on it, similar to what you’d see on real flesh or cloth. The third ball has a hard, reflective shine on it, like brushed metal. Notice, however, there’s still quite a bit of diffusion of the highlight. The last ball has what’s called a specular highlight, because it’s basically a reflection of the light source. This is what you’d expect to find on plastic or very highly polished metal. It’s also used a lot in cel shading, and again I’ll use it for this tutorial so you can see exactly where I put the highlights.
Once you’ve got that in mind, you just start in, proceeding very much like you did with the shading. I usually only use one layer of highlights, because you should be more stingy on where exactly you put them (note that unlike shadows, objects don’t case highlights on each other, with the exception of the ambient lighting I talked about earlier, and which we’ll come to in a bit).
Hair is special because it’s composed of strands; what that means is that there’s effectively no diffusion of the highlight perpendicular to the hair strand. So there should be a band of highlight stretching all the way across the hair; of course, it can be shaded or broken up by the individual clumps. This is one place where you may want to be a little more exact with your highlights and do several layers; do some experimenting to see what comes out best for you. I usually use a semi-thick hard brush and then go back with an eraser and sharpen the ends, with two layers. Be sure to remember the angles the highlights should be at. Once you’re done with the highlights, congratulate yourself. At this point much of the work is done; everything that follows is just fun stuff.

OK, finally, special effects. The big thing here is you’re gonna model how light interacts with the atmosphere itself. Remember the ambient light I talked about earlier? Well, part of that is because light scatters off molecules in the air, especially bright lights against dark backgrounds. I won’t go into the mechanics of this, because they’re pretty advanced, but it’s very easy to fudge. The basic idea is that light things give off a kind of glow. Now, there’s a really easy trick to do this for basic lighting situations. Just put the whole picture so far into a new layer on top (you can save a copy as a flattened file, then copy & paste into a new layer). Then select the areas you want to glow and Select->Invert selection. Finally, do a big Filters->Blur->Gaussian blur and set the layer opacity really low. This will make the bright areas bleed into the shadows. Be warned, however, this will make your picture quite a bit lighter, so you may have to do some brightness & contrast tweaking.
If you want to do more specific lighting effects than that, you’ll have to do it by hand. In general, you should keep such effects very diffuse and translucent so they enhance the scene rather than distracting from it. In my case, I’d like to simulate spotlights, so I’m going to take a very large, soft brush, set it to low opacity, and paint the lights in on a top layer, making them more intense near the light source. Now we’re pretty much done, but I’m going to wait until after the next section to show the final version.
5. Finishing UpThis isn’t so much an actual creative step so much as just an evaluation. Look over your picture with a critical eye; try to see if you’ve missed anything or made a mistake that needs to be corrected. If you’ve saved all your layers, it should be relatively easy to go back and edit something (assuming you can find the right layer! Use the visibility buttons a lot). I had to add shadows to Piro’s eyes. Also, do any final clean-up steps; in my case, since the image was scanned in, it needs to be cropped. Finally, resize if needed and save as something bandwidth-safe (I suggest .png). Then upload to your favorite image server and post for all to see!
Now that you’re done, there’s one more very important thing to do. Look over your picture and think about what you did right, what you did wrong, and what you learned. Try to come up with something you can improve in your next CG. Just doing the CGs will help you improve over time, but actually thinking about it can speed up that process considerably. Don’t be discouraged if at first you find yourself unimpressed with the quality of your work; remember, we all had to start somewhere; and chances are if you took the time to read this guide you’ll be starting off better than most of the people whose CGs you admire (definitely better than I did, that’s for sure). My advice is, don’t get discouraged and quit until after you’ve done ten CGs. By that time, you’ll have either realized you’re improving and become addicted or realized it just isn’t your thing. Either way, there won’t be that lingering thought that you could have done it if you hadn’t given up. Good luck CGing, and get to it!
omnilynx
