nyas-asp. web viewinvestigation 2: can enzymes speed a ... diagramming the different parts. ......
TRANSCRIPT

Life Sciences 101
Program DeliveryLesson deliveries are meant to be treated as a guide. As a mentor with The New York Academy of Science’s Afterschool Workshops, you are going into the program as a scientist in training, making, and/or practice. Your well of knowledge runs deep and the amount of information that you might know could possibly surpass the tidbits of information provided within this curriculum packet. We encourage you to use your skills and abilities to inspire inquiry, imagination, and innovation to the world of budding young scientists.
Have fun!
The teaching strategy that will best enhance the lessons is called POE or Predict, Observe, and Explain. Click here for more information. Not all activities will require the POE handout, but using it throughout the curriculum will help the students familiarize themselves with the practice of predicting, observing, and explaining in a scientific setting.
To help facilitate the POE method, we encourage the use of journals in the Afterschool setting. To better understand how to utilize the journals click here. Each lesson will also contain hints on when and how to use the journal.
Session 1: Nature of Science
Session 2: Think Like a Scientist
Session 3: Cellular Organization, Structure, Function, and Metabolism
Session 4: DNA - The Chemical Basis of Life
Session 5: Enzymes
Session 6: Earthworms and Digestion
Session 7: Blood - The Types
Session 8: Snot and the Immune System
Session 9: Chicken Leg Dissection Connection
Session 10: Patient Zero
Session 11: Ethics in Science

Session 1: Nature of Science
“Draw a Scientist”
Lesson Overview:
The views of middle-school students are often shaped by their experiences through popular culture. Whether it’s from a comic book or a movie, certain professionals are stereotyped and pigeonholed into having certain characteristics.
In this lesson, students are asked to draw what they perceive a scientist to look like. They will then meet a non-stereotypical scientist and will then reevaluated their perceptions.
Lesson Objectives:Students will be able to…
Formulate opinions about scientists. Analyze and evaluate stereotypes
Lesson Inquiry Question:
"Who is a scientist?" If we asked "what?" instead of "who" there would probably be a more straight-forward answer from your students.
But we're more interested in their perceptions of who a scientist is as a fellow person. What do they think they do at home? What do they look like? What may their personalities by like?
Materials Needed:
Drawing paper Crayons Markers “Draw a Scientist” checklist Journals
Activity Plan:
1. Students are asked: When you hear the word scientist, what is the first thought that comes to your mind?2. Students write responses on their journals.
1. If the children are struggling for a response, encourage them to imagine what the scientist looks like.2. Example questions: What is the scientist doing? What does his or her clothes look like? Where are
they?3. Once the students have had enough time to jot down some ideas, give them a sheet of drawing paper
and ask them to draw a picture of the scientist at work.4. Students will then trade pictures and use the “Draw a Scientist” checklist to evaluate the drawing without
talking to the artist.5. Class discussion of drawings. Calculate checklist on board or overheard.6. Discuss what students think scientists do.7. Introduce students to a scientist, who will make a brief presentation to the class.8. Have the students interview the scientist.
1. Encourage the students to write the answers in their journals.9. Students will draw a second picture of the scientist at work.10. End with class discussion:
1. How is the second picture different from your first picture?

2. How have your perceptions about scientists changed?3. HINT: Make sure to use prompts to help guide the students' responses. (Guide on using
Prompt Words)
Journal Activity:
1. Have students imagine themselves as a scientist.2. Ask them to write in their journals what kind of scientist they would be.3. Have them answer: Why would I want to be this kind of scientist?4. Ask them to describe what their daily routine would be if they were that kind of scientist.5. If time permits allow the students to share their entries with the rest of the class. If time runs out feel free to
continue during your next scheduled date or whenever you might have time again.1. Tip: Only let two or three kids to go during any given session. If a student changes their mind after a few
ways, discuss the reasons why.
Additional Resources:
Draw a Scientist Checklist Provided Images from the internet of “Mad Scientist” Images from the internet of “Chemist, Biologist, Physicist, and/or Scientist, etc.”

Session 2: Think Like a Scientist
“Do Mystery Samples Contain Life?”
Lesson Overview:Students explore the properties of threes mystery samples and try to find out which one contains life. Then they review what they have learned so far about the characteristics of living things.
Core Concepts:
All living organisms conform to the "7 Characteristics of Life:"o Living things are composed of cellso Living things have different levels of organization (both cellular and molecular)o Living things use energyo Living things respond to their environmento Living things growo Living things reproduceo Living things adapt to their environment
Lesson Objectives:Students will be able to:
Predict the outcome of an experiment with a control. Make an inference based on evidence.
Lesson Inquiry Question:
How do we know something is alive?
Materials Needed:(per group of 3-4 participants)
3 clear containers 1 container of warm tap water 3 tablespoons of sand 3 teaspoons of sugar ½ packet of active dry yeast 1 fizzing antacid tablet, crushed Hand lenses 3 small sheets of paper 1 spoon White board, chalk board, or large piece of chart paper and chalk or markers
Pre- Activity Preparation:
1. Label three jars for each group and fill them with the dry ingredients as listed on the chart below:
Jar Sand Other Ingredients

|| #1 || 3 Tablespoons || None |||| #2 || 2 Tablespoons, 2 tsp || ½ pkg. Active Dry Yeast |||| #3 || 2 Tablespoons, 2 tsp || 1 fizzing antacid tablet, crushed ||
1. Have a small cup with several teaspoons of sugar or several packets of sugar ready for each group.2. Fill one container of warm tap water for each group, but do not distribute it yet. (See Step 4 in the Activity.)3. Set out hand lenses, sheets of paper, and spoons at each station.4. Write prompt words on board or easel.
Journal Utilizations:
This lesson requires for students to collect data as well as making their predictions, observations, and explanations.
Encourage the students to keep notes during the experiment. "Explain what you did. Imagine your explaining this to your best friend or someone who has never seen this experiment before."
Write Discovery Words on board or easel:o Reactiono Carbon Dioxide
Activity Plan:
1. Focus the activity with a brief discussion.1. Explain that sometimes it is difficult to tell whether or not something is alive. If appropriate, quickly review
what participants have discovered about the characteristics of living things.2. Perhaps you can introduce the seven requirements of life using this video with silly song--if you have the
means to do so: http://www.youtube.com/watch?v=aynclw6TXeE2. Introduce the three mystery samples.
1. Invite students to observe the mystery samples in the three jars to find out if they contain anything living. Use these prompts to encourage close observations:
1. You may use all of your senses except taste. Be sure to look closely with the hand lenses, touch, listen, and smell.
2. Take a small sample out of each jar, one jar at a time, and put it on the small piece of paper. After you observe, put the sample back in the right jar.
3. Discuss conclusions.1. After participants have made their observations, ask:
1. Do any of the mystery samples contain living things?2. Why do you think so?
4. Add sugar to the mystery samples.1. Give each group the small cup or several packets of sugar. Have them add one teaspoon or one packet
of sugar to each sample.2. Ask:
1. You’ve just added a food source to the sample. Do you see any changes to any sample yet?2. Have them predict what they think might happen.3. Always follow up with “why?” and ask them if they could be more specific for their reasoning
behind their predictions.4. Let the students discuss their ideas among themselves but keep the topic in order and be mindful
of the time.5. Add warm water to the mystery samples. Look for changes.
1. Give one container of hot water to each group and tell them to pour enough water into each jar to just cover the mystery samples. Then ask to observe changes.
2. What to expect:1. Jar 1: no activity2. Jar 2: will begin to show activity after about 5 minutes, and will continue to bubble3. Jar 3: will fizz vigorously at first, slow down, and finally stop

6. Discuss new conclusions.1. Ask:
1. Now do you think that any of the mystery samples contain living things?1. (Always follow up with why or why not?)
2. What else might you want to know about the samples in order to figure out if they contain living things?
7. Add more sugar to each jar.1. Ask: Does adding more food (sugar) re-start the fizzing in Jar 3?2. Ask: What is happening in Jar 2?
8. Try adding more water to Jar 3.1. Ask: Does that restart the reaction you saw before?2. Ask: Has your opinion about which jar contains the living thing changed at all?
1. Why or why not?3. What to expect:
1. Jar 1: Still no activity.2. Jar 2: Activity will continue.3. Jar 3: Once the fizzing has stopped, it can’t be restarted by the addition of either sugar or water.
The fizzing antacid tablet has completely dissolved in the water.9. Reveal the contents of the jars.
1. Tell students what was in Jars 1 and 3. Then talk about Jar 2.1. Ask: Have any of you ever used yeast? What for?
1. Explain that yeast is a tiny living thing that stays dormant until it is given water and food – in this case, sugar. Yeast is used to make bread rise, as it grows on the ingredients and makes bubbles and air pockets, just as it did in your jars.
2. Ask: How was the yeast activity different from the fizzy antacid activity?1. Explain that the antacid fizzed because it combined in a chemical reaction with the water.
Once the chemicals got used up and all the bubbles escaped, the fizzing stop, just like when you leave a can of soda out and it goes flat. There was nothing alive in the chemicals. But with yeast, the bubbling will continue as long as there is food for it to eat.
Journal Activity:
1. Have students write their answer to: How can you tell if something is alive?2. Encourage them to use the information learned in the class.3. After a few minutes, have a student give one example as to how they know something is alive.
1. Record the response on a board or easel.2. Allow for other students to add more details.3. Promote the use of the prompt words student when discussing.4. Record further responses on board and easel.
4. Encourage students to go home a make a list of all living things they can find in their refrigerator and explain how they know they are alive.
5. Discuss the outcomes of their hunt and exploration at the beginning of the next class.
Design your own experiment!
1. Give students a hypothetical scenario that their teacher said it seems like something’s living in Locker Q down the hall. If they can’t open the locker, have students design a few steps of an experiment to determine if something is living in Locker Q, with the understanding that they also have to test Locker C, which had nothing reported about it.
2. Ask: Why is it important to test Locker C as well?3. Ask students to share what they have learned so far about how to tell if something is living or non-living.
Encourage everyone to contribute, and record their responses on the board or chart.

Session 3: Cellular Organization, Structure, Function, and Metabolism
“Cell Bag Model”
Lesson Overview:Students will study and discuss the major organelles and features of animal cells. They will build a model animal cell using common materials to represent animal cell components. In addition, students will explore cell specialization and the concept that cellular “form fits function.”
Core Concepts:
Cells contain organelles. Organelles have specific functions.
Lesson Objectives:Students will be able to:
Recognize recurring structures in different kinds of animal cells. Compare shape of an organelle and its function in the cell.
Lesson Inquiry Question:
What is in an animal cell?
Materials Needed: (For a class of 16 students)
16 plastic cups (10 oz) 16 plastic bags (6” × 9”) 16 plastic plates 16 plastic measuring cups 16 plastic eggs 1 spool of green yarn 1 spool of white string 1 pack of pipe cleaners 8 packs of kidney beans 1 bag of Alaska peas (1/4 lb) 1 bag of colored beads 1 box of flat toothpicks 16 small binder clips 100 g sodium polyacrylate 1 measuring scoop
Pre-Class Preparation:
Cut the white string (DNA) into pieces approximately 6 to 8 feet long, enough for each student pair to have one piece of string.
Cut the green yarn (Golgi apparatus) into pieces approximately 6 inches long, enough for each student pair to have three pieces of yarn.
Create a measuring station where students can dispense 2 scoops of sodium polyacrylate and fill their measuring cup with 6 oz of water.
Photocopy one set of the Student Instructions for each student. Write prompt words on board or easel.

Journal Utilizations:
This lesson does not require students to collect data. Encourage students to add a journal entry for every organelle as they get to it in the model creation.
o Have them first draw a picture of what they think the organelle looks like.o Then have them describe what the organelle is and its function.
Write Discovery Words on board or easel:o Organelleo DNAo Structure
Activity Plan:
Warm up:
1. Hand out pictures of unlabeled cells (both photos and illustrations) to groups of students. (These illustrations include both the muscle and liver cells that students will encounter in later lessons.)
2. Have students work together to figure out what these pictures are depicting. How were these images taken? (illicit from students: Electron Microscopes, artists’ drawings.) Have students draw in their notebooks structures that seem to be the same in more than one drawing.
3. We don’t know what to call these yet, but if cells are alive, how do we know they are alive? (Have students recall the 7 signs of life.)
4. How does your own body do those 7 things? (Illicit from students: different parts of the body do different things. Name the big body parts responsible for each of the 7 things.)
5. Ask students if they can predict why there are so many small parts they observed in the cell that are repeated from cell to cell?
6. Ask students what they observe about the different small parts of the cell? (illicit from students that they can visually observe different shapes from the photos)
7. Ask students to explain why the different shapes might be important to the life of the cell?
Activity:
1. Place the plastic bag (cell membrane) inside the plastic cup. 1. Fold the edges of the plastic bag over and around the lip of the cup, like a bag inside a garbage can.2. Ask the students what they believe the cell membrane is? What are its functions? What do they think they
are made of?3. Once the students are given a chance to share what they might know, explain the organelle further (if
necessary) before moving on to the next step.2. Ask, “what’s an organelle?”
1. If they struggle for an answer: (What is an organ?)2. Compare organelles to organs.3. Explain further if necessary.4. “Okay, we’re going to begin to place the organelles inside of our cells.
3. Place the Alaska peas (lysosomes) in the bag.1. After inserting a type of organelle in the bag always ask the class if anybody knows what its function is.
(Comparing a Cell to a Factory is always an effective and simple way of making the functions of the organelles easier to understand for the students)
1. Lysosomes are the maintenance crew of the factory. They are responsible for breaking down and absorbing materials taken in by the cell.

2. Then place the kidney beans (mitochondria):1. First find out what the students might know then explain if necessary.2. Mitochondria are the power plants of the cell. They transform one form of energy into another that is
usable by the cell.3. Place toothpicks (microtubules) in the bag:
1. Microtubules help the cell maintain its shape. (Like the beams inside a factory.) But they also act as a railway system that molecules travel on when moving through the cell.
4. Place green yarn (Golgi apparatus) in the bag:1. The Golgi apparatus is the finishing or packing department in the factory. It prepares the proteins for use
or export.5. This next step will require 10 colored beads (ribosomes) and 1 pipe cleaner (endoplasmic reticulum).
1. The ribosomes are the workers on the assembly line. They build proteins. 2. The assembly line is the endoplasmic reticulum. Where ribosomes do their work. (Without the ribosomes
they can be soft endoplasmic reticulum, which function as storage for things like steroids.)3. Take 10 of the colored beads (ribosomes) and thread them onto 1 pipe cleaner (endoplasmic reticulum).4. Space the beads apart evenly. Bend the pipe cleaner to resemble the shape of endoplasmic reticulum by
folding it back and forth. 5. Now we have a Rough endoplasmic reticulum: (The works with the assembly line, synthesizing and
packaging proteins.6. Place the bent pipe cleaner with colored beads (rough endoplasmic reticulum) inside the plastic bag in the
cup.6. Bend the remaining pipe cleaner to resemble the shape of endoplasmic reticulum. Place this bent pipe cleaners
(smooth endoplasmic reticulum) inside the plastic bag in the cup.7. Place the remaining colored beads (ribosomes) inside the plastic bag in the cup.8. Bring your cup (with the plastic bag inside) to the measuring station. Using the measuring scoop, put two level
scoops of sodium polyacrylate (nutrients/amino acids) inside the plastic bag in the cup.9. Take the white string (DNA) and place it inside the plastic egg (nucleus). (The nucleus is the boss or brain of the
factory. It controls all cell activity and determines what proteins will be made. 10. Close the plastic egg tightly and set it aside. 11. Fill the measuring cup with 6 oz of water.
1. Carefully pour the water inside the plastic bag in the cup. The sodium polyacrylate you added in Step 10 will swell in the presence of water to give the water a gel-like consistency.
12. Place the plastic egg (nucleus containing DNA) inside the plastic bag in the cup. It will float on top of the water.13. Carefully remove the plastic bag from the cup.
1. Close the bag slowly, pushing all of the air out of the bag as you seal it.14. Gently massage the bottom of the bag to aid in gelling the water.
1. Be very careful not to puncture the bag with the toothpicks or pipe cleaners. The gelled water represents the cytoplasm of the cell.
2. The cytoplasm can be considered the factory floor, where the organelles do most of their work. It is the site of most cell activity.
15. Roll up the extra plastic at the top of the bag by folding it over repeatedly. Attach a binder clip to the folded portion of the plastic bag.
16. Review the different organelles and their functions with the class:1. What is the power plant of the cell?2. Who are the workers on the assembly line? And what do we call that assembly line?3. What are they assembling?4. Which cell organelle decides what is being made?
Journal Activity and Assessments:
1. Question to Answer: Do you think all cells in the human body look the same? Why or why not? 2. Show students pictures of the different types of cells.3. Question to Answer: Why do you think these cells, all of which are found in our body, look different?4. CREATE YOUR OWN CELL:
1. Explain that during an “away” mission to Saturn’s moon Titan, a small furry creature is found swimming in a lake made of liquid methane. They take a humane tissue sample in the field, and release the creature
back into the lake. After preparing a muscle tissue slide, they look at a cell in the microscope. They must draw a cell as they see it in the microscope. BE CREATIVE!
2. Remind them to include all the organelles they feel their cell will need, and what each organelle does—which might be different from what water-based life needs to do.
5. If time permits have the students explain their cells, how they work, and why the designed them how they did to the rest of the class.
6. Start the next class with the cell creation explanations.
Session 4: DNA - The Chemical Basis of Life

“DNA Extraction”
Lesson Overview:A simple extraction of DNA using household items allows us to teach kids about the “Building Blocks” of life: what they are, how they work, and what they’re made of.
Core Concept:
Deoxyribonucleic acid is a molecule that encodes the genetic instructions used in the development and functioning of all known living organisms and many viruses.
Lesson Objectives:Students will understand:
How to extract DNA from wheat germ. Observe what DNA looks like to the naked eye. Learn that DNA is found in every living and once living things.
Lesson Inquiry Question:
How can we extract DNA? This question is not intended to illicit the step by step instructions of how to extract DNA from wheat germ, but
about what is occurring during each of those steps that allows for the extraction of the DNA. Example: "Detergent contains sodium laurel sulfate, which cleans dishes by removing fats and proteins. It acts the same way in the DNA extraction protocol, pulling apart the fats (lipids) and proteins that make up the membranes surrounding the cell and nucleus. Once these membranes are broken apart, the DNA is released from the cell."
Materials Needed: (Per Group)
Raw Wheat Germ – 1 gram or 1 teaspoon Liquid detergent – 1 ml or about ¼ teaspoon
o Detergents proven to work: Lemon Fresh Joy, Woolite, Ivory, Shaper, Arm & Hammer, Herbal Essence shower gel by Clairol, Tide, Dish Drops, Kool Wash, Cheer, Sunlight Dish Soap, Dawn, Delicate, All, and Ultra Dawn.
70% or 95% isopropyl alcohol – 14 ml or 1 tablespoono 95% preferred as it contains less water. Other alternative is Everclear grain alcohol which is also 95%
alcohol. Hot Tap Water – 20ml or 1 tablespoon
o Water should be no hotter than 50 – 60 degrees Celsius 50 ml test tube Graduated cylinder Stirring rod Pipette 9 oz plastic cups
Pre-Activity:
Write prompt words on the board or easel.
Journal Utilization:

1. This activity allows for the Predict, Observe, and Explain strategy to be effectively utilized.2. Before any step have the students write down their predictions with explanations, their observations after
completing the step, and finally their explanation as to what might have happened.3. Write Discovery Words on board or easel:
1. Cell Membrane2. Lipid3. Protein
Activity Plan:
1. Place 1 teaspoon of raw wheat germ into plastic up.1. The source for our DNA today comes from wheat germ. Wheat germ comes from wheat seeds. The
"germ" is the embryo, which is the part of the seed that can grow into a new wheat plant. When wheat seeds are milled into white flour, the wheat germ and wheat bran are removed, leaving only starch. Wheat germ contains many nutrients while wheat bran consists of fiber. Whole wheat flour contains all parts of the wheat seed and is therefore more nutritious than white flour while also providing important fiber for
digestion2. Add 20 ml or 1 tablespoon of hot tap water and mix constantly for 3 minutes.
1. The heat softens the phospholipids (fats) in the membranes that surround the cell and the nucleus. It also inactivates (denatures) the deoxyribonuclease enzymes (DNase) which, if present, would cut the DNA into such small fragments that it would not be visible. Denatured enzymes and DNA unravel, lose their shape, and thus become inactive. Enzymes denature at 60° Celsius, and DNA denatures at 80° Celsius.
3. Add 1 ml (squirt) of detergent and mix gently every minute for 5 minutes. 1. Try not to create foam. 2. Detergent contains sodium laurel sulfate, which cleans dishes by removing fats and proteins. It acts the
same way in the DNA extraction protocol, pulling apart the fats (lipids) and proteins that make up the membranes surrounding the cell and nucleus. Once these membranes are broken apart, the DNA is released from the cell.
3. Soap molecules and grease molecules are made of two parts:
Heads, which like water Tails, which hate water.

1. Both soap and grease molecules organize themselves in bubbles (spheres) with heads outside to face the water and tails inside to hide from the water.
2. When soap comes close to grease, it captures it, forming a greasy soapy ball.3. A cell’s membranes have two layers of lipid (fat) molecules with proteins going through them.
4. When detergent comes close to the cell, it captures the lipids and proteins and releases the DNA.
1. Using a pipette remove the water/detergent solution and place it into a test tube, leaving behind the wheat germ. (You will want to skim off the top, trying to avoid the wheat germ.
2. Tilt the test tube at an angle. SLOWLY pour 14 ml or 1 tablespoon of alcohol down the side so that it forms a layer on top of the water/detergent solution. Do not mix the two layers together.
1. DNA precipitates at the water-alcohol interface (the boundary between the water and the alcohol). Therefore, it is crucial to pour the alcohol very slowly so that it forms a layer on top of the water solution. If the alcohol mixes with the water, it will become too dilute and the DNA will not precipitate.
2. The DNA released from the cell nucleus is dissolved in the water/detergent/wheat germ solution and cannot be seen. DNA precipitates out of solution in alcohol, where it can be seen. Besides allowing us to see the DNA, the alcohol separates the DNA from the other cell components, which are left behind in the water solution.
3. Let the test tube sit for a few minutes. 1. White, stringy, filmy DNA will begin to appear where the water and alcohol meet. You will usually see
DNA precipitating from the solution at the water-alcohol interface as soon as you pour in the alcohol. If you let the preparation sit for 15 minutes or so, the DNA will float to the top of the alcohol.

4. You can usually get more DNA to precipitate from the solution by using a stirring rod to gently lift the water solution up into the alcohol. This allows more DNA to come in contact with the alcohol and precipitate.
Journal Activity and Assessments:
1. Ask students to write a letter to their best friend, explaining the activity they just did.2. Also have them pretend that their friend doesn't understand why a scientist would extract DNA:
1. Have your students explain to their friend why a scientist might extract DNA in their field.3. Allow the students to share the second part of the journal activity with each other. Continue at the beginning of the
next class if necessary.4. Remember to encourage the use of prompt words when in discussions.
“DNA The Pasta Model”
Lesson Overview:Making models can be an informative and fun way of introducing DNA. In this lesson, our students will be constructing a DNA model using pasta and other household items. Through the building process we will discuss what different components which make up DNA.
Core Concepts:
The DNA sequence is the consecutive order of bases on one side, or strand, of the twisted ladder. The other strand has a complementary sequence determined by the base pairing rules.
DNA's unique structure enables the molecule to copy itself during cell division
Lesson Objectives:Students will be able to understand:
Chromosomes are structures in the nucleus of a cell that carry genes. Genes are smaller units that contain the hereditary code, DNA. Understand that the genetic code is transmitted biochemically through molecules called deoxyribonucleic acid
(DNA). Understand the structure of the DNA molecule
Lesson Inquiry Question:
What role do the different bases found in DNA carry?
Materials Needed:(Per Student)
Two 24-inch pieces of string Eight 2-inch pieces of blue pipe cleaners Eight 2-inch pieces of green pipe cleaners Eight 2-inch pieces of purple pipe cleaners Eight 2-inch pieces of orange pipe cleaners

Eighteen pieces of dried pinwheel pasta Sixteen pieces of dried ziti cut pasta
Pre-Activity:
Write prompt words on the board or easel
Journal Utilizations:
This lesson does not require students to collect data. Encourage students to add a journal entry for every component as they get to it in the model creation.
o What is it?.o What does it do?
Write Discovery Words on board or easel:o Baseo Codeo Molecule
Activity Plan:
1. Ask students to brainstorm traits they have that are passed on from their parents, such as eye color, hair texture, and facial characteristics. Then ask them how these traits are passed on from one generation to the next.
1. The answer is DNA, or deoxyribonucleic acid.2. Explain that all organisms carry an elaborate blueprint containing the information necessary to develop
and maintain life. 3. This “manual of instructions” is located in a chemical molecule called DNA.4. DNA is found within a person’s genes. 5. Genes are small structures found in chromosomes, structures within the nucleus of cells.
2. Tell students that DNA works something like the alphabet: 1. While the alphabet has 26 letters, DNA’s “alphabet” has only four letters.2. These letters are guanine (G), adenine (A), cytosine (C), and thymine (T). 3. Just as the 26 letters of the alphabet can be used to form millions of words for communication, DNA’s
alphabet can be combined to form codes with more than five billion combinations of G’s, A’s, T’s, and C’s. 4. The differences in these combinations result in differences among human beings.
3. The DNA molecule consists of two strands that form a double helix, a spiraling shape much like a twisted ladder. The DNA molecule has a sugar component, a phosphate component, and four different bases—adenine, thymine, cytosine, and guanine.
1. To help students understand how these components fit together to form DNA, have each student make a model of DNA with string, dried pasta, and different-colored pipe cleaners.
4. First, give each student:1. 2 pieces of string2. 18 pieces of pinwheel pasta3. 16 pieces of ziti pasta4. and different-colored pipe cleaners.5. Explain that the pinwheel pasta represents the sugar component, the ziti pasta the phosphate, and the
chenille stems each of the bases.5. Tell students to start with the pinwheel pasta and alternate with the ziti pasta as they thread the pasta on the
string.6. On each line, they should string nine pieces of pinwheel pasta alternating with eight pieces of ziti. 7. Wrap the string around the final piece of pasta at the end of each string so that the pasta does not fall off.
1. After pasta has been strung on both strings, each string should have a total of 17 alternating pieces of pasta.
2. Have students lay the two lines side by side.

8. At this point give students the “code” for the pieces of pipe cleaner1. Blue stem represents adenine2. Green stem, thymine3. Purple stem, cytosine4. Orange stem, guanine. 5. Explain that the bases in DNA are found in pairs and that adenine always pairs with thymine and cytosine
always pairs with guanine.9. Have students represent these base pairs with twisted pipe stems:
1. First, have them twist the eight blue stems and eight green stems together, making a total of eight blue-green stems about 2 inches long.
2. Likewise, have them twist the eight purple and eight orange stems together, making a total of eight purple-orange stems, about 2 inches long.
3. Students will find that the stems twist together easily.10. Now, have students create a “ladder” using the pasta lines as the sides and the twisted stems as steps. 11. Beginning at the top, students should connect the two ends of a twisted stem to the top pasta pieces on the two
lines. 1. Then use a second stem to connect the next two pasta pieces directly across from each other.2. They should continue building their ladder, one step at a time, until they have connected the bottom two
pieces of pasta.3. Remind them that they can place the twisted stems in any order.4. The blue-green stems do not have to alternate with the orange-purple stems.
12. After all the stems have been woven, the DNA model is complete.
Assessment Questions:Using the DNA models, discuss the following questions with the class.
1. How do the bases pair up in a DNA molecule?2. How does your model help you figure this out?3. What makes one DNA molecule different from another?4. How could you change your DNA model to reflect changes among DNA molecules?5. How do you think a DNA molecule makes an exact copy of itself? 6. How does its structure help it do so?
Journal Activity:
Each base is part of a code. Assign a vocabulary function to each base. Adenine is a Noun. Thymine is an adjective. Cytosine is a Verb. And
Guanine is a wild card. It can be anything, but remember Guanine can only be paired with Cytosine. . Example: (I will be creating an image example/ JM) Have the students draw in their journals an "8-step" DNA ladder with a coded message. Have them share their coded drawings with the rest of the class.
Terms and Concepts:DNA provides the instructions for building and operating all living things. The DNA instructions are divided into segments called genes. Each gene provides the information for making a protein, which carries out a specific function in the cell.A molecule of DNA (DeoxyriboNucleic Acid) is composed of two backbones and four types of chemical bases. The backbone is formed by a chain of alternating phosphates and sugars. Each sugar molecule in the backbone provides an attachment site for one of the chemical bases. The four types of chemical bases are: adenine, thymine, cytosine and guanine. They usually are represented by their first letters: A, T, C and G.
The bases form pairs in a very specific way: A always pairs with T, and C always pairs with G. A pair of bases is connected by hydrogen bonds. Each base in the pair is also connected to a sugar compound in the DNA backbone.

A DNA molecule is often compared to a ladder, with the two backbones forming the sides of the ladder and the base pairs forming the steps, or rungs. However, instead of a straight ladder, DNA looks like a twisted ladder, known as a double helix (“double” for the two backbones).
The DNA sequence is the consecutive order of bases on one side, or strand, of the twisted ladder. The other strand has a complementary sequence determined by the base pairing rules.
The specific matching of the base pairs, A with T and C with G, provides a way for exact copies of DNA to be made. This process is called DNA replication. In DNA replication, the double helix ladder is untwisted and the two strands are separated by breaking the hydrogen bonds between the base pairs. Next, two new strands are made by reading each side of the DNA ladder, one step (base) at a time. At each step, the matching base fillsin (with its associated sugar and phosphate) to complete the rung and lengthen the new DNA strand. When the process is complete, there are two identical DNA double helices, each containing one original and one new strand.
DNA replication is an important part of the cell division process. Before a cell divides, it first duplicates its DNA so that the new cell will have the same genetic information. The specific base pair matching during replication ensures that exact DNA copies are made.

Session 5: Enzymes
“Enyzmes”
Lesson Overview:
Digestive enzymes help your body break down your food. It’s hard to obtain many human digestive system enzymes (without vomiting, that is!), but luckily, one of them is sold as a tablet in many drug stores: lactase. Lactase breaks down a milk sugar called lactose that’s found in milk. Many people in the world don’t drink milk because their bodies don’t make any lactase. If they try to drink milk, the undigested lactose can lead to bloating, gas, and diarrhea. No fun! Lactase pills can help. Get your hands on some lactase pills so you can see how digestive enzymes work and perhaps find out ways to make them work even better.
Glucose is produced when milk sugar (lactose) is broken down by the digestive enzyme lactase. (Lactose breaks down into two component sugars: glucose and galactose.) It's pretty easy to mix up lactose and lactase. Here’s a tip to help you remember the difference: sugar names end in -ose, while enzyme names end in -ase.
Core Concepts:
Enzymes are proteins that carry out many processes within the body. One job for enzymes is the breakdown of sugars.
Lesson Objectives:Students will be able to:
describe the ways that genes, proteins and enzymes are related. understand enzymes help break down food. probe the ways enzymes and substrates function in concert. synthesize the basis of lactose intolerance and it is genetically linked measure the results of a chemical reaction that takes place in humans every day.
Lesson Inquiry Question:
Why does drinking milk make some people sick?
Pre-Activity:
Write prompt words on the board or easel.
Materials Needed:
Milk (whole) 30 or more small, clean glasses 6 or more clean spoons ½ cup measuring spoon or measuring cup 6 or more dairy digestive aid tablets, which contain fast-acting lactase

15 large oral syringes 15 plastic droppers 15 coffee filters 15 tubes of 4ml of 1% sodium alginate solution
o To prepare Sodium Alginate solution:
• In a large flask, slowly add 1g sodium alginate powder to 100mL dH20 using a stir bar and lowest possible heat setting.• Using a magnetic stir bar, let solution stir for approximately 1-1.5 hours, until the sodium alginate is completely dissolved.• Crush up lactaid tablets to a powder and add to solution.• Store covered in the refrigerator.
1 liter of 1.5% Calcium Chloride (Cacl2) solutiono To prepare Calcium Chloride solution:
• Dissolve 15g of CaCl2 salt in 1000ml (1 liter) of dH2O.• Store covered in refrigerator.
Glucose test strips (available at some drug stores in the diabetes section, or online) Teaspoon Baking soda White vinegar
Journal Utilization:
1. This activity allows for the Predict, Observe, and Explain strategy to be effectively utilized.2. Before any step have the students write down their predictions with explanations, their observations after
completing the step, and finally their explanation as to what might have happened.3. Write Discovery Words on board or easel:
1. Nutrients2. Reaction3. Solution
Activity Plan:Prior to the day’s lesson, prepare “group” sets of materials as follows:2 plastic cups, one dropper, one syringe, one coffee filter, one tube of sodium alginate, one tube of lactase and a half cup of calcium chloride solution.Part 1:
1. Begin by asking students if they have ever met an adult that can’t have milk or cheese. Ask the students what this condition is called. (try to ellicit the term “lactose intolerance” from the prior knowledge of the class.) Ask the students if the lactose intolerant adult that they know has described the experience when they accidentally eat dairy. (Students may describe bloating, cramps, irregular bowels.) Ask students how they could explain what is going wrong? (Students can eventually be lead to the fact that something isn’t happening correctly with digestion. Lead the students to thinking about the ways that the body needs to break down ingested foods in order to absorb nutrients. What we have here is an absorption problem.)
2. Ask what the body might need to do if it cannot absorb a large sugar like lactose? (Try to ellicit the fact that you have to break down the sugars with an enzyme.)
3. Pass out “group” sets of experimental materials and explain to students that we will test the effectiveness of Lactaid for use by Lactose Intolerant adults.
4. Ask students what we should observe if the Lactaid is effective? Ask students how will we know if the Lactaid works? (If we are using glucose testing strips, we should test the milk before the procedure and after. If the

Lactaid worked, there should be no glucose in the milk before, but plenty of glucose in the milk after it has been passed through the “enzyme filter.”
5. Students will combine 2 ml lactase enzyme with 6 ml sodium alginate solution.6. Pour the lactase/alginate mixture into a clean syringe, and add it one drop at a time to a calcium chloride solution.7. Ask students what they observe happening in the Calcium Chloride solution as the Lactaid/Sodium Alginate
solution drips into it.8. Separate the beads from the calcium chloride with a coffee filter.9. Pack the beads into the syringe barrel and filter milk through the beads into a clean cup.10. Test the milk. Was the experiment a success?
Part 2: Can other chemicals affect how well a digestive enzyme works?
1. Fill each of three glasses with ½ cup milk. Place a spoon inside each.2. Add 1 teaspoon baking soda to the first glass. Stir.3. Add 1 teaspoon vinegar to the second glass. Stir.4. Don’t add any vinegar or baking soda to your third glass.5. Use the spatula handle to crush three lactase tablets while they’re still encased in their foil packaging.6. Peel back the foil packaging of one crushed pill and pour the contents into your first glass. Stir the contents of the
glass.7. Peel back the foil packing of another crushed pill and pour the contents into your second glass. Stir the contents
of the glass.8. Peel back the foil packing of your third crushed pill and pour the contents into your third glass. Stir the contents of
the glass.9. Stir each glass once a minute for ten minutes.10. Use your glucose test strips according to the directions on the packaging to find the amounts of glucose present in
each of your two glasses of milk. Make sure you record your results.
Additional Resources:In the first experiment, you shouldn’t have found any glucose in the plain glass of milk, and you should have found the same amount of glucose in each of the two glasses of milk mixed with lactase. How do the results of your first experiment compare with the results of the second experiment? Were you always using enzymes in the second experiment? How would that make a difference?
Why?Normal milk doesn’t have any glucose—just lactose. This is why you didn’t find any when you tested the glass prior to passing the milk through the enzyme filter. You should have found glucose in the other two cups, but why wasn’t there more in the cup that had more lactase added to it? Remember, lactase is an enzyme, and we describe enzymes as catalysts: a substance that helps chemical reactions happen without being used up. Each bit of enzyme can break down multiple molecules of milk sugar, so as long as you stir the glass and wait long enough, even a tiny bit of the enzyme is enough to break down all the lactose in the milk!Now let’s figure out how we can explain the results of our second experiment. Lactase goes to work in your stomach and small intestine, where there is also lots of acid. The lactase enzyme is not affected by the acidy vinegar which might even help the lactase do its job better. Baking soda, on the other hand, is a base, and we don’t find a lot of basic substances in our digestive systems! Basic compounds like baking soda can damage enzymes like lactase, preventing them from working as well.
“Liver Burst!”

Lesson Overview:
All organisms rely on enzymes to catalyze chemical reactions. An enzyme is a biological catalyst that increases the rate of chemical reaction by lowering the level of activation energy necessary to start the reaction. Without enzymes, many of the chemical reactions that occur within living things would proceed slowly to be useful. Enzymes speed up these reactions by bringing the reactants into close proximity and facilitating their interaction.
Liver contains a specific enzyme called catalase. When hydrogen peroxide (H2O2) is added to liver, a chemical reaction occurs which results in the products of oxygen gas (O2) and liquid water (H2O). Core Concept:
An enzyme is a protein. The enzyme catalase breaks down hydrogen peroxide into water and oxygen. Enzymes in the liver help break down toxins that can be byproducts of digestions, or were ingested, (ie. alcohol).
Lesson Objectives:Students will be able to:
Design an experiment with a control set up Make an inference based on observations during an investigation.
Lesson Inquiry Question:
How do enzymes help the body rid itself of toxins?
Materials Needed:
Uncooked liver, fresh (1/4 lb) Uncooked beef steak, fresh (1/4 lb) Plant Catalase Source Plant Matter Knife Cutting Board Water Refrigerator (Freezer) Medicine Dropper (pipette) Large plate Hydrogen Peroxide Measuring Teaspoon Bowls Salt Vinegar Baking Soda (Optional)
Journal Utilization:
1. This activity allows for the Predict, Observe, and Explain strategy to be effectively utilized.2. Before any step have the students write down their predictions with explanations, their observations after
completing the step, and finally their explanation as to what might have happened.3. Write Discovery Words on board or easel:
1. Catalase2. Enzyme3. Acid4. Base
Pre-Activity:
Write prompt words on the board or easel
Activity Plan:
Investigation 1: Can any protein do it? (testing substances for presence of enzymes)
1. Ask students if they know how the body processes toxins which we accidentally take in? (Illicit: the body can make substances to make dangerous substances dangerous no more.)
2. Ask students to make a prediction as to whether all of the parts of the body can make these “savior substances”—in this case, we’ll just call them enzymes—or if only certain parts of the body can?
3. Explain that students will design their own experiment to determine if Mystery Sample A (the beef liver), Mystery Sample B (the beef steak), Mystery Sample C (the plant catalase), or Mystery Sample D (the plant matter), can create an enzyme that reacts with Hydrogen Peroxide. They will receive two small samples of each, four plates, a cup with hydrogen peroxide with a dropper, an empty cup with an additional dropper and a stop watch. Explain that they must use a control set up. (What liquid can they use as a control? See if you can illicit “water” as they are coming up with their design in groups.) In their journals, they must record in as much detail as possible how they designed their experiment. Before carrying out the experiment they must predict how the results will look. Observations during and at the end of the experiment are also recorded. At the end of the experiment, the students must explain their results. Remind students to be careful! They might want certain group members to pay attention to not cross-contaminating the samples.
4. Student present their findings to the class. Which samples react with Hydrogen Peroxide? (A! The Liver!)
Investigation 2: Can enzymes speed a reaction in any conditions? (testing the effect of conditions on the effectiveness of enzymes)
1. First you will need to cut some pieces of the liver.2. Test the activity of the liver.
1. Put a piece of liver on the large plate2. Add one or two drops of hydrogen peroxide to the liver.
1. Do you see anything happening? See any bubbles?2. Why do you think they are appearing?
3. Record data in provided table. 1. The liver you just tested is your “untreated” sample and it will be your positive control.2. Use a scale of 0-5, with 5 representing the “most bubbling” and 0 representing “no bubbling.”3. Write down any observations in your lab notebook.
4. Now you will take different samples of your liver and test how different conditions affect the liver enzyme's activity.1. To test the effect of heat: place a small piece of the liver in the microwave in a microwave-safe bowl. Heat
covered on high for 20 seconds. What did the heated liver look like? Remove the heated liver and put it on a clean part of the large plate. Add one drop of hydrogen peroxide to it.
1. How much did it bubble? 2. Record your results in your data table.
2. To test the effect of freezing: place a piece of liver in a bowl in the freezer for about one hour. When the sample is completely frozen, remove it from the freezer and thaw the sample before testing it for enzyme activity. On the large plate, test a drop of the treated liver with hydrogen peroxide.
1. How much did it bubble? 2. Record your results in your data table.
3. To test the effect of acid: put a piece of liver in a bowl and add one teaspoon of vinegar. Let it sit for a minute.
1. Any changes? 2. On the large plate test the treated liver with hydrogen peroxide

3. Record your results in your data table.4. To test the effect of a base: a piece of the liver in a bowl and add two teaspoons of a baking soda
solution. (1 Part of water per 1 part of baking soda).1. Make sure to let the liver “marinate” for a minute or two.2. What does it look like? 3. On the large plate, test the treated liver with hydrogen peroxide4. Record your results in your data table.
5. To test the effect of high salt conditions: put a piece liver in a bowl and add one 2 teaspoons of a table salt solution. (1 part water per 1 part salt)
1. Let it “marinate” for a minute.2. What does the mixture look like? 3. On the large plate, test the treated liver with hydrogen peroxide4. Record your results in your data table.
5. Knowing that the amount of bubbles made reflects how active the catalase enzyme is, which condition, or conditions, does it look like the enzyme works best under? Which condition, or conditions, makes it work the worst? Why do you think this is?
6. Try experimenting with any other condition you can imagine! Remember to record all of your results in your data table! When you are all done with your project, make sure that any surface that the raw liver touched has been completely disinfected.
7. Repeat the process with your “other” protein.8. Write down your observations in your journals and compare your results.
Journal Activity and Assessments:
1. In student journals, students explain how various conditions affected the performance of the enzyme. How else might the student study catalase further? What methods or variables might they use?
2. Share results in group discussion. (Remember to use the prompts to guide the discussion.)
Additional Resources:A chemical reaction is when chemicals come together and their molecules interact to form new chemicals. Sometimes chemical reactions happen by themselves. These reactions are usually very fast and spontaneous, and give off energy. Other chemical reactions need energy to happen, and without energy proceed very slowly or not at all.These types of chemical reactions can be helped to occur more quickly by using enzymes. Enzymes are made out of protein and they speed up the rate of a chemical reaction by acting as a catalyst. A catalyst provides the necessary environment for the chemical reaction to occur, which speeds up the reaction. Certain catalysts work for certain kinds of reactions. In other words, each enzyme has a particular type of reaction that it can activate.Enzymes are proteins, which are molecules that are very large and dynamic. They can be very fussy, and sometimes need to be in certain environments or conditions to work, and the ideal conditions are usually reflective of where the enzyme must normally function in the body. In other words, different tissues are home to different enzymes, and an enzyme should be able to function in the conditions that surround it in the tissue it's supposed to function in. Some enzymes can be damaged under certain conditions, such as heat. A damaged enzyme will no longer work to catalyze a chemical reaction.One source of enzymes is the liver, which needs to break down many substances in the body. Catalase is one enzyme from liver that breaks down harmful hydrogen peroxide into oxygen gas and water. When this chemical reaction occurs, you can see the oxygen gas bubbles escaping and causing the reaction to foam.
Session 6: Earthworms and Digestion
“Earthworm Dissection”

Lesson Overview:The earthworm is an ideal specimen for teaching dissection and basic anatomy.
Core Concept:
The earthworm's digestive system is similar to a humans, but varies to suit its needs. (Form fits Function)
Lesson Objectives:Students will be able to:
Learn basic dissection techniques. Identify a sequential order to organs as part of a system.
Lesson Inquiry Question:
Are humans and earthworms alike?
Materials Needed: (per group)
Dissection tray Dissection kit Preserved earthworm Gloves Paper towels
Pre-Activity:
Write prompt words on the board or easel
Journal Utilizations:
1. The journal will be used before the dissection occurs with a little warm up activity.2. Then it should be used by students to document their observations as they dissect with any necessary
explanations.3. You can also ask them to draw the different organs as they are discovered and draw or write what the human
equivalent of the organ might be.4. Write down Discovery Words on board or easel:
1. Segment2. Dorsal3. Intestine
Activity Plan:Warm-up:
1. Before getting into the earthworm dissections, have students open up their journals.2. Ask them to draw the insides of a worm according to what they think it might look like.
Activity:

1. Instruct students to put on gloves before handling the earthworm2. Ask students to make observations about the earthworm.
1. Observe the earthworm, what do you see? 2. Use the hand lens, and explain in details things that you notice. 3. Let’s take a closer look at the outer tissue of the worm:4. Is the animal exposed to the environment, or is the tissue modified to provide a covering?5. How does it compare to our (human) outer tissue?6. What do we call our (human) outer tissue?7. What’s the purpose of our skin?8. Does the earthworm have structures that could be used to capture prey or defend itself? Describe these
structures and their function.9. Does the worm have eyes?
1. Do you think the earthworm sees?2. Earthworms have no eyes, but they do have light receptors and can tell when they are in the
dark, or in the light. Why is being able to detect light so important to a worm?10. What about ears? Can we see any ears?
1. Earthworms have no ears, but their bodies can sense the vibrations of animals moving nearby.3. Make sure students still have their gloves on before they handle the earthworm.
1. Gently touch the earthworm, how does it feel? 2. Do you notice rings around the earthworm? These rings are called segments. An earthworm can have
around 100 segments in their body. Numbers in the diagrams refer to the segment number.4. Before handing out dissection kits, remind the class that the tools are not toys and can be dangerous. If a student
is dangerously mishandling one of the sharp tools ask a classroom assistant for help.5. Instruct students to place the earthworm on the dissecting tray, extended and with its dorsal surface up. The
dorsal surface or the “top” is the darker than the ventral or the “belly” of the earthworm.6. Have the students locate the clitellum, a band of tissue that covers several segments
7. Using forceps, lift the body wall about 2 to 5 cm posterior to the clitellum and cut the body wall with the scissors.1. Insert the point of the scissors shallowly into the cut and continue cutting the earthworm along the dorsal
midline toward the first segment.2. Have students be careful to cut only the body wall of the earthworm; avoid damaging the soft internal
structures.8. Gently open the body wall.
1. “Notice the many cross-walls, or septa.”9. Cut through the septa on each side with scissors and then pin the body wall to the tray.
1. Insert pins at an angle, so they will not be in the way of your observations. 10. Instruct students to use a hand lens to locate the earthworm’s digestive organs.
1. Food enters the mouth and then the pharynx.2. From there it moves through the esophagus to the crop.3. Remember to stop to ask your students if they are familiar with these terms.4. If so let them explain it to the rest of the class. 5. The Crop stores food until it enters the gizzard.6. The Gizzard is a hard organ that grinds up food. 7. “Do we humans have a crop or gizzard?” Why not? What do we humans have to help us grind up our
food?8. From there the food travels to the long intestine where nutrients are absorbed before waste is excreted
through the anus.9. If time for exploration permits continue to step 12 otherwise skip to step 14.
11. “How many hearts do you think a worm has?”

1. It actually has 5! Let’s see if we can locate them.2. They are located behind the esophagus at segments 7 through 11.3. The thin, dark line running from the hearts down the length of the body is the dorsal blood vessel, an
important part of the earthworm’s circulatory system.1. “Who can tell me why that’s true?”2. The dorsal blood vessels are responsible for carrying blood to the front of the earthworm’s body.3. The ventral blood vessels are responsible for carrying blood to the back of the earthworm’s body.
4.12. Now let’s see how a worm is able to make more worms.
1. What body system would be responsible for that?2. Reproductive system, very good!3. Let’s locate the seminal vesicles and seminal receptacles.4. These are the reproductive organs of the earthworm. Earthworms are hermaphrodites. This means they
have both male and female reproductive organs. 13. That wraps up our dissection of the earthworm so let’s wrap the worm and all its parts in a paper towel and place
it in the designated garbage can.14. Clean up your work area and wash your hands.
Journal Activity and Assessment:
1. Ask students to make a new drawing of the inside of the earthworm now that they have dissected it, diagramming the different parts.
2. Have them briefly write how it compares or differs from their first drawing.3. Share the drawings and differences with the rest of the class.
Additional Assessment Questions:

1. “Having taken a close look at the insides of an earthworm, what are some similar features in an earthworm and human?
2. Where we able to tell what earthworms eat? How can you tell?
Additional Resources:
Terms and Concepts:
Pharynx Esophagus Crop Gizzard Intestine Dorsal blood vessel Ventral vessel Seminal vesicles Seminal receptacles Hermaphrodites
An Earthworm’s digestive system is one of the most important features of the worm. It consists of mouth, pharynx, esophagus, crop, gizzard and intestine. The mouth is surrounded by strong lips that act like a hand would. He searches for dead grass and bits and pieces of leaves and weeds. Once he finds food the lips break the food down into smaller pieces. Since an earthworm does not have teeth, bits of soil particles are used to help them “chew” their food.The food particles pass from the mouth to the pharynx where the food is lubricated by mucus secretions. This makes it easier to pass along to the esophagus where calcium carbonate is added to the mixture. Calcium carbonate is used to neutralize the acids that are formed once the food matter decays.
Next, the food is temporarily stored in the crop where they will get mixed together. From the crop, the mixture enters the gizzard where the actual digestive process begins.
The powerful muscles of the gizzard churn and mix the mass of food and dirt. The mixture is reduced to a thick paste once the churning and mixture is complete. Glands in the walls of the gizzard add enzymes, which aid in the chemical breakdown of the organic material.
Next, the mixture is sent to the intestine. The intestine has friendly bacteria that eat the food mixture. While the mixture is being eaten it releases various vitamins, minerals, carbohydrates, and proteins from the organic matter; supplying everything the worm needs in order for him to absorb it into his body.
Most of the worm’s body length is intestine. It is lined with thousands of finger-like projections that are filled with small blood vessels. The blood vessels help to absorb the liquefied food.
Finally at the end of the intestine, the soil particles and undigested organic matter pass out of the worm’s body through the anus. The waste is deposited in a form called a worm cast. The worm cast is mostly just ground up soil. By the time it comes out of the worm it has become enriched, acid neutralized, and revitalized. This is why so many people want to
learn about vermiculture, or how to culture a garden/waste reduction using worms. Worms and their digestion help to fertilize the soil and grow our food!
Session 7: Blood - The Types
“Crime Solving for Blood Types”Lesson Overview:There has been a crime committed at your school. A hammer was found near the back entrance. It had allegedly been used to smash a window that allowed a robber to get inside and steal some computer equipment. Near the window was a

small pool of blood.
While examining the area, investigators noticed a bloodied bandage around one of the janitor’s hand. He said he cut himself cleaning up the mess.
Further inspection of the hammer showed signs of blood on the item.
The CSI crew needs to find out to whom the blood belongs. They have taken a blood sample from the scene, from the hammer, and from the janitor. In the meanwhile, 3 suspects had been identified. Suspect 1 was discovered in the hospital ER waiting for stitches on his arm. He said he cut himself doing yard work. The suspect is well known by detectives as being a cat burglar who doesn’t own a yard. The 2nd suspect was a homeless man who has been known to sleep outside the school’s back entrance. The 3rd suspect had been identified by a good Samaritan who said they saw the suspect running away from the school around the time the crime was committed.
Core Concept:
Blood types play a crucial role in the effectiveness and success of a forensic investigation. Antibodies are antigen specific. They are only found where the antigen has been or existed.
Lesson Objectives:Students will be able to:
Assume the role of a forensics lab technician. Examine suspected blood evidence found at a crime scene. Perform an ABO/Rh procedure to determine the blood type.
Lesson Inquiry Question:
How does the discovery of blood types help in crime scene investigations?
Materials Needed:
2 cups Milk Red and Green food coloring 18 small dropper bottles 18 small Dixie cups 6 Permanent markers 6 boxes Toothpicks Vinegar Water 6 Small plastic storage containers Labels for bottle and containers (masking tape)
Journal Utilizations:
1. A worksheet is provided for this activity but the journal can be used instead.1. Ask your students to create a page for each blood sample. (6 total)2. On each page they should create a table similar to this one:

ABRhBlood Type
1. They can add a positive + where agglutination occurs.2. Use journals for post-activity journal activities 3. Write Discovery Words on board or easel:
1. Serum2. Protein3. Agglutination
Pre-Activity:
Write prompt words on the board or easel Do Antigens and Antibodies activity.
Activity Plan:(Pre Activity Preparation)
1. Mix 2 cups of milk with 2 cups of water:1. Add enough red food coloring to get a bright red color and then add a few drops of green to make it a
deeper red to make it look more realistic.2. Label six dropper bottles to correspond to the three suspects, the victim, the crime scene sample, and the sample
from the hammer. 3. Label each of the six storage containers to correspond to the bottles of fake blood.
1. Fill each bottle with the fake blood mixture.4. Label six dropper bottles with “Anti-A Serum” labels5. Label six with “Anti-B Serum” labels.6. Label another six with “Anti-RH” labels.7. Use information below to fill the bottles with either vinegar or water:
1. You may want to code the bottles in a way so you can tell the contents easily, without being obvious to the students.
Kit Anti A Anti B Anti-Rh Blood TypeSuspect #1 Vinegar Water Vinegar A+Suspect #2 Water Vinegar Water B-Suspect #3 Vinegar Vinegar Water AB-Janitor Water Water Vinegar O+Crime Scene Vinegar Water Vinegar A+Hammer Water Water Vinegar O+
1. Create the testing kits by placing the correct bottle of fake blood in each kit along with the correct serums, a permanent marker, 3 small cups (per group of students, if you have 15 students broken up into groups of 3, then you would have 15 cups in each kit), and a box of toothpicks in a small plastic container.
2. Set up 6 stations with one kit at each station.
(Activity)

1. Tell students about the crime that was committed but don’t mention blood typing yet.Allow each group of students to move towards a station.
1. Ask: What evidence collected at the scene might we use? (Illicit a focus on the blood.)2. Ask: How might we test the blood to find out whose blood is on the hammer?
1. Most likely they will mention DNA testing, explain that DNA testing could take a long time. But there is another test they might do while they wait for the DNA test: Blood typing.
2. Allow each group of students to move towards a station.3. When they reach a station, have students label three cups in the kit as:
1. Anti-A2. Anti-B3. Anti-Rh4. Ask: Who here knows what the Rh is? (Illicit answer or prompt for an explanation.)5. If not known among any of the students:
1. Explain: Scientists sometimes study Rhesus monkeys to learn more about the human anatomy because there are certain similarities between the two species. While studying these monkeys, a certain blood protein was discovered. This protein is also present in the blood of some people. Others don’t have it. The presence of the protein, or lack of it, is referred to as the Rh (for Rhesus) factor. If your blood does contain the protein, your blood is said to be Rh positive. Write on board (Rh+) If your blood does not contain the protein, you blood is said to be Rh negative. Write on board (Rh-). This Rh factor is connected to your blood type. For example, you blood may be A+ Write on board (A+) which means you have the type A blood with a positive Rh factor. Or you might have B- Write on board (B-) which means you have type B blood with a negative Rh factor
6. Allow students to discuss4. Then have them to add 20 drops of the blood sample to each cup.Have students add 10 drops of the anti-A serum
in the A cup.1. Journals: If using journals, have students write down their predictions with an explanation, the steps they
are following, what they have observed, and an explanation of their observations.5. Have students add 10 drops of the anti-A serum in cup A.6. Then 10 drops of the anti-B serum in cup B.7. And 10 drops of the anti-Rh serum in the Rh cup.
1. Make sure they are using a clean toothpick for each, and have them stir for 30 seconds.8. Allow students to rotate to the next station as they complete their original kit.
1. Have them repeat steps 3-7 until they have tested all samples.9. Once all students have completed their worksheets and collected their data:
1. Allow for students to discuss their findings.
Conclusion:
The students should have come up with the conclusion that the crime scene sample matched suspect #1, and the hammer sample matched the janitor.
Journal Activity and Assessments:
1. Have students take a look at their individual notes and write down the answers for the following questions:1. What should be done next in the investigation?2. What possible scenario lead to the results shown in the blood typing tests.3. For what other applications do you think blood typing would be useful?4. Aside from a forensics scientist, what other professions might do blood typing regularly?

Session 8: Snot and the Immune System
“ELISA Test Simulation”
Lesson Overview:Through the ELISA simulation, students explore how the principles of antibody-based human immunity apply to a common laboratory test called ELISA (enzyme-linked immunoabsorbant assay). Core Concepts:

Antibodies are antigen specific. If we find the antigen for the virus we are looking for, then most likely the virus is present.
Lesson Objectives:Students will be able to understand:
The steps involved in performing an ELISA. How an ELISA is used as a diagnostic tool for searching viruses.
Lesson Inquiry Question:
How can we find out if someone is infected by a specific virus?
Materials Needed:(Per 2-3 students)
Test Tube Stand (6) 20 ml Test Tubes w/ caps (6) Pipettes Baking Soda Solution Phenolphthalein 1% solution 6-Well culture plate Sharpie Marker
Journal Utilization:
1. This activity allows for the Predict, Observe, and Explain strategy to be effectively utilized.2. Before any step have the students write down their predictions with explanations, their observations after
completing the step, and finally their explanation as to what might have happened.3. Write Discovery Words on board or easel:
1. Control2. Antigen3. Result
Pre-Activity:
Write prompt words on the board or easel
Activity Plan:(Pre-Activity Setup)
1. Create your baking soda solution:1. 4 tablespoons of baking soda per liter of water.

2. Prepare test tubes: (To be done for every station)1. Number and label three test tubes: 1-3.2. Add 20ml of baking soda solution to one of them. (This is your infected patient).3. Add 20ml of water to the remaining two. (These are your “healthy” patients).4. Label 1 test tube: Positive +. (This is your positive control.)5. Add 20ml of baking soda solution to test tube labeled Positive +.6. Label 1 test tube: Negative -. (This is your negative control.)7. Add 20ml of water to test tube labeled Negative -.8. Label 1 test tube: Antigen9. Add 20ml of water to test tube labeled Antigen.
(Activity)
1. Explain to students: “Today we are conducting an ELISA test. We will be finding out if our patients are infected with a virus. In this case we are looking for the H1N1 virus, once referred to as swine flu because it was similar to a flu virus found in pigs."
2. Instruct students to label wells in plate: 1,2,3 on the top row. + and - on the bottom row at opposite ends with sharpie.
1. Ask: “Why do you think we are labeling our well plates?”3. Have the students set up their controls:
1. Ask: “Who knows what controls are? Why do you think we need our controls?”2. “First set up your Positive control. Open up the test tube label positive, make sure to be careful
with it and not spill. Use your pipette to extract the fluid from the test tube and add 5 drops into the corresponding well. Which one is that?”
3. If students argue among themselves over who gets to add the fluids remind them there are enough steps for which to share and collaborate .
4. Repeat (b) with the Negative - control.5. “One thing that you want to avoid is spilling into the wrong well. Doing so is called cross
contamination.” Ask: “Why do you think that’s important?”4. Add Serum Samples:
1. “In front of you you will find three test tubes number one through three. These are our patients’ serum samples.”
2. Ask: “What do you think a serum is?” “How do you think scientists and doctors get these serum samples?”
3. Refer to the following link for information regarding plasma and serum separation: __http://www.lifetechnologies.com/us/en/home/references/protocols/cell-and-tissue-analysis/elisa-protocol/elisa-sample-preparation-protocols/plasma-and-serum-preparation.html__
4. Ask: “By looking at our samples, could we tell which one of our patients is sick? Why or why not?”
5. “Now we want to see if the virus is present. We previously learned another term for a virus, or a bacteria, anything that might enter the bloodstream which doesn’t belong. What was it called? (Antigen.)
1. Ask: What do we call the thing that our body produces which tries to destroy an antigen? (Antibody)

2. “And antibodies sort of work like a key and a lock. You can’t just use any key to open any door. A key is specific to a lock, and an antibody is specific to a virus.”
3. “Knowing this, what do you think the antibody for the (blank) virus would look for? That’s right, the (blank) virus. So what should we add to our serum to activate those antibodies?
6. Instruct students to add 2 drops from the test tube labeled Antigens to every well containing a fluid.1. Ask: “Can we see anything occurring?”
7. Instruct students to add 2 drops in each well from bottle labeled Indicator. 8. Compare your results
Journal Activity and Assessments:A Tricky Enemy: We have learned by using this ELISA simulation that an antibody that works in your immune system is created by your body for a specific antigen that it has encountered. Here’s a challenge for you to write about in your journal: Every year, millions of Americans get a flu shot at the beginning of the fall to prevent themselves from contracting and spreading Influenza- illness that causes fever, nausea, congestion, and worse. When someone gets a flu, it is caused by a virus. Even though people get a flu shot (which is a weakened form of a flu to encourage the body to generate antibodies) they can still get sick? What is happening? Why do the antibodies fail in preventing the flu sometimes?
“Snot Today Virus!”
Lesson Overview:This activity is a fun and interactive way of discussing mucus, a fluid that is characterized by a thick and gelatinous consistency. Core Concept:
The human body has evolved to protect itself from antigens: Producing mucus is one form. Excess mucus is produced in response to antigens invading or trying to invade the human body.

Lesson Objectives:Students will be able to:
Explain where, how, and why our body makes mucus.
Lesson Inquiry Questions:
How does our body protect us from getting sick? And what steps can we take to prevent ourselves from getting sick?
Materials Needed:
Borax White Elmer’s glue Water Spoons Plastic cups. Green food coloring Plastic Baggies Pipettes Confetti
Journal Utilization:
1. This activity allows for the Predict, Observe, and Explain strategy to be effectively utilized.2. Before any step have the students write down their predictions with explanations, their observations after
completing the step, and finally their explanation as to what might have happened.
Pre-Class Preparation:
1. Create borax solution:1. Mix 3 tablespoons of borax powder per 1 liter of water2. Stir until borax dissolved
Pre-Activity:
Write prompt words on the board or easel
Activity Plan:
1. Without the students seeing, take some confetti into your right hand.1. Ask one of the students to come up and shake your hand.2. Instruct student to look at their hand and then show the class.3. Before they shake off all the confetti, invite another student to shake hands with the “infected” student.
2. Tell the students the confetti represented a virus and that this particular virus is one transmitted through hand shaking.
1. Ask: “What might be other ways that we spread viruses from one person to another?”2. Briefly discuss.
3. Ask students if they have ever had a cold.1. “How do you know you had a cold?”2. Guide them towards the mentioning of a runny nose, or snot/ boogers building up.
4. Ask: Why do you think our body creates mucus?1. Brief discussion

5. “Let’s make some mucus of our own.”1. Mucus is produced by mucosa, a group of special cells that produce mucus membranes. Mucus is
primarily composed of water and mucin, which is the agent that makes the mucus sticky. This agent is composed of sugars and proteins. Much like saliva, mucus is constantly produced by the body. The excess mucus goes straight to the stomach until it gets disposed as excess waste.
6. Give each student a plastic cup, spoon, and plastic baggie.7. Add 4 tablespoons of glue to cup
1. “This glue represents mucin. That’s the stuff that makes our mucus sticky. But mucus is also contains water.”
8. Add 3 tablespoons of water to cup.1. Stir2. “What we have now looks more like milk than mucus, we’re going to add a little food coloring to make it
look more realistic.”9. Add 2-3 drops of food coloring.
1. Stir10. “Does mucus always stay watery like this (hold up glue/water solution)?”
1. “A person produces 1–2 liters of mucus a day which combines with watery secretions produced by cells in the nose and sinuses. Where do you think most of it goes?”
2. “Most of it runs down the throat unnoticed and is discarded naturally through the digestive process.”3. However, an infected person produces additional mucus, which also changes in consistency, becoming
thicker and making it more noticeable.11. Using a pipette, add drops of borax solution into cup with glue solution.
1. Stir2. Keep adding drops and continue stirring until it forms a glob
12. Remove glob from the cup and observe how it looks and feels.13. Place the snot in a plastic bag.14. Instruct students to choose a partner.
1. “Okay, let’s see how our mucus can help prevent our virus from spreading.”2. Have one student press their hand against some confetti.3. “One of you is holding on to the virus. Your partner is going to represent a nose. But not a nose that is
clean. This nose has mucus lining its walls.”4. Instruct students not holding confetti to put their “snot” in their hand.5. “Now I want you to shake hands: virus-infected hand to snot-covered nostril hand!”6. “On what has the virus collected?” Why?7. “For those of you with a virus-covered, snot-lined, nostril of a hand: Sneeze by dropping your snot onto
the table!”8. “Now look at your hand, are there any viruses left over?” Why? Where there more when we didn’t have
the mucus?15. Have students write their conclusions about the formation of mucus in the human body. Can be shared in
discussion if time allows.
Journal Activity and Assessment:
1. A Return to Titan! Recall the furry methane-lake dwelling creature that your astrobiology away team found when exploring Saturn’s moon, Titan. The furry creature does not rise out of the water to “breathe”, since Titan is covered by an icy methane crust. She’s got no nose! The furry creature does pass liquid methane through a tube in the top of her “neck”, into a central chamber where her body removes the compounds it needs to survive, and then passes the used up liquid methane out of her neck hole through the same tube. The problem is there are antigens in the methane-lake that the furry creature has to protect herself from. Describe a substance that the furry creature’s body creates around and inside her neck tube to protect her body from intrusive antigens. What is the substance made of? If you could touch it, what would the substance feel like? How does it work?
Terms and Concepts:The major importance of the nose is to breathe, in breathing it has a billion particles passing through it. Particles such as

bacteria, fungi, pollen, smoke, fuzz, sand, and everything other small lightless items, can be found in your nose from the environment around us.
Inside the nose there is tiny little hairs called ‘vibrissae’, which trap dirt and other pollutants from entering our system. Mucus or snot also protects us. The function of mucus is to coat the skin and the hair inside your nose to trap your nose hairs with all of the dirt stuck in there.
Mucus can develop from different things. Some mucus that we have occurs naturally, as a form of our bodies cleaning the nose out. Other snot can be the result of sickness, infection, allergies, sinus infections, or from too much smoking. The color of the mucus is an indication of an infection. Clear Snot- allergies & sinus infections - Green Snot- sign of infection -Brown Snot- smoking or dirty lungs or old remnants of old infections
Session 9: Chicken Leg Dissection Connection
Lesson Overview:Through various hands on activities, students will investigate human skeletal system.
Core Concepts:
A chicken's leg is physiologically similar to that of a humans. Different cells work together in forming more complex biological systems.

Lesson Objectives:Students will be able to:
Compare and contrast a chicken’s leg to a human leg. Investigate how the bone and muscles interact to move a limb.
Lesson Inquiry Question:
How does a human leg move?
Materials Needed:
A chicken leg and thigh attached dissection kit dissection tray apron (optional) gloves
Pre-Activity:
Write prompt words on the board or easel
Journal Utilizations:
1. To be used for not taking during the dissection. Students should try to draw what they are discovering through the dissection with notes pertaining to the body parts function.
Procedure:(Prepare the dissecting tray with multiple layers of paper towels! PUT ON GLOVES!!!!)
1. Ask students how many have helped out their family with cooking? Has anyone cooked meat before?2. Ask students what part of an animal “meat” is. (Illicit: muscle) Ask students how they think a muscle moves a
chicken?

3. Ask if students have ever heard of “boneless” chicken. What does that mean? DO the chickens start out boneless to begin with? Does that mean we get boneless chicken from places that look like this?
4. Probably not! Because then the chickens couldn’t move around to feed themselves or escape from predators, and that would mean natural selection is not doing its job. So ask how do the chickens become boneless? Ask if bones are important to moving the chicken?
5. Now ask students if they have ever heard of a sports star getting injured? Ask the students if they can describe the injury. Like the IT Band? Or a torn ACL? Might these be important to motion?
6. What kinds of body tissues are these? (Don’t tell if they don’t know.) Do chickens have similar tissues near their knees, too? (We will find out in our dissection today!
7. Can you predict how bones, muscles, and the mystery “third tissue” work together to form a bigger body system—like for movement?
8. During this dissection, you will observe the parts inside of a chicken leg and thigh, and draw what you see in detail in your notebook. Describe using words the different consistencies of the tissues you find, and how they are interacting with each other!
Dissection:
1. Place the chicken leg quarter on a dissecting tray2. The following parts are present in the specimen: The lower leg of the chicken is called the drumstick. It is the
equivalent of the lower leg of the human and includes the tibia and fibula. The upper leg of the chicken is called the thigh, just as it is in humans. Its bone is the femur. The bones above the thigh (if present) are part of the hip and backbone of the chicken.

3. Remove the skin by pulling it down and off the end of the lower leg. It may be cut off if it is too difficult to remove. The yellow-white material is adipose tissue (aka: fat) that lies under the skin.
4. Examine the meat. The meat is muscle, and muscles work in bundles. Separate the bundles of muscles by separating them out with your fingers. Begin by inserting your thumb into the muscle of the lower leg. You will need to push forcefully through the shiny lining (called fascia) over the muscle, but it will give way at the natural separations between the muscle bundles. If you need more help, use a blunt probe and scissors being sure to NOT cut through the muscle. Continue separating the muscle into bundles by gently forcing your thumb and fingers through the muscle until you are able to distinguish several separate bundles. Do your best NOT to tear the tendon away from the bone just yet.
5. The strong, white cords, called tendons, hold the muscle to the bones. (Some of these tendons have probably pulled away from the bone as you separated the muscle bundles.) Gently pull away the muscle from the bone without severing it completely and look for the tendon, which connects the muscle to the bone. What does it look like?
6. Using the dissection scissors, cut across the tendons at Line A (see above diagram) being careful you don't cut any ligaments that attach bone to bone. Observe the numerous tendons and pull the freed muscles down and away from the bone, as if you were peeling a banana, towards the knee joint.
7. Examine the two bones in the lower leg. The large bone (Bone A) is the tibia. The small, toothpick-like bone (Bone B) is the fibula.
8. Bend the specimen at Joint A and observe that it is a hinge joint like our knee. Can the knee joint move sideways? (don't force it!)
9. Carefully cut away the muscle over Joint A. Make the cuts parallel to the bones, so you do not cut into the capsule over the joint. Completely remove as much of the muscle tissue as possible so that you can see the shiny white of the ligaments and cartilage around Joint A. Locate one white band of ligament on each side of the joint. These exterior ligaments hold the bones of the leg together.
10. Bend the specimen at Joint B and rotate the femur in all directions. Observe that this joint is a ball and socket joint like our hip. Remove the muscle that covers Joint B by cutting parallel to the femur, upward toward the backbone. Remove muscle tissue until you see a shiny white sheet of ligament that covers the joint. This exterior ligament holds the femur in the hip socket.
11. Cut the exterior ligament over Joint B by cutting all around the head of the femur. As you cut this sheet of ligament, you will notice the joint becoming very loose. When it is completely loosened, pull out and downward on the femur, so the bone comes partly out of the socket in the hip. Look into the socket and see the ligament that holds the femur in the center of the socket. Cut this ligament so that the femur is completely removed from the hip socket.
12. Look at the cartilage that covers the head of the femur. Using the scalpel, carefully remove the cartilage from the femur head. Make a small cut into the head of the femur; what type of bone is seen there: spongy or compact?
13. At this point, there should be almost no muscle left on the leg bones. If there is any, remove it without cutting through ligaments or joints.
14. Cut onto the knee hinge Joint A by cutting into the top of the covering of the joint from the femur side. It will become apparent that you must remove the knee cap area to expose the menisci and ligaments within the joint. Pull up on the knee cap area and cut through it with the scissors. You will have cut through the bursa, a sac that acts as a shock absorber for the knee joint. These are found in every joint. Pull the covering back and look into the inside of the joint. You will see more white bands of ligaments holding the bones together. Observe the shiny, white cartilage covering the ends of the bones. It helps the bones slide smoothly when the leg bends.
15. Finally look at the bones themselves. Pick two bones to draw a diagram to show the shapes of the ends of the bones and how they fit together. Label the bones' names you have chosen to draw.
16. Using your hands, break Bone A in half. Be careful not to come in contact with the broken edges of bone. Inside is the soft red marrow where blood cells are made.
17. Probe the bone marrow with a sharp pointer and then probe the bone itself.18. Remove Bone C from the leg. Clean off all muscle tissue.19. Clean up by putting all the remaining bone and muscle tissue items in the garbage. Using soap, clean the
dissecting tray and all instruments. Leave the tray upside-down on paper towels at the lab table. Spray down the lab table with cleaner.
20. Show students the below drawing of a human knee-ligament-bone system. Lead students in a discussion to compare and contrast their own sketches of the chicken knee with the drawing of the human knee.

Journal Activity and Assessment:

1. In the student journals, have students compare the parts they observed inside the chicken with how they’d predicted the tissues of a chicken help the chicken to move.
2. FOWL PLAY: Inform students that they are an elite team of doctors who are training chicken athletes to compete for the first time in the Chicken Olympic Sprint. Explain to the personal trainers on your team in writing and sketches how the muscle, ligament, and bone in the chicken knee help the chicken to run, and how each of these parts differs from the corresponding part in the human knee.
Background Information:
A bone is a kind of body tissue which is made of both living and nonliving material. Each human body contains 206 different bones. All of the bones in the body, together with the tissues that bind them and protect them, form the skeletal system. Each bone is made up of several different parts. A typical long bone is enlarged at both ends with a shaft in between. A membrane called the periosteum covers the bone. Under that layer is compact bone. Beneath the compact bone is a material called spongy bone. Spongy bone is softer than compact bone and contains many hollow spaces. These spaces help prevent the bone from breaking, because they act as shock absorbers when the bone is hit or banged. It is most of the material at the ends of long bones. Inside the shaft is a soft tissue called marrow, where the body's blood cells are produced. There are two types of marrow: yellow marrow and red marrow. It is the red marrow that produced red blood cells, white blood cells and platelets. Just like other living tissues in the body, the bones must be supplied with blood or they will die.The skeletal system has five very important jobs. Support, protection, movement, storage, and production of blood cells. Just think, if we did not have a skeletal system we would be just like a blob of Jell-O. The bones also protect many organs, and also the brain. Our skull protects the brain and our ribs protect our internal organs.

Session 10: Patient Zero
“Agar-Ross!”
Lesson Overview: This is a simple activity to see the effectiveness of handwashing or hand cleansing productsCore Concepts:
We are covered in germs and germs can spread though physical contact. Washing hands helps reduce the spread of germs.
Lesson Objectives:Students will be able to:
Collect and prepare bacteria culture Design an experimental set up with a control set up Identify the relationship between hand washing or hand sanitizing on bacterial growth
Lesson Inquiry Question:
Does hand washing get rid of the germs from our hands?
Materials Needed:
Pre-prepped Agar Plates Cotton swabs Alcohol-based hand sanitizer (if sink is not available) Soap Water Masking tape Marker
Pre-Activity Plan:
1. Place a piece of masking tape on the lid of the Agar plates.
Pre-Activity:
Write prompt words on the board or easel
Activity Plan:
1. Ask: Who has dirty hands? Can you see if your hands are dirty? Sometimes you can. You might have dirt or grime on them. But can you see any germs?
2. Ask: Which students got sick over the winter? Did somebody else close to you get sick? Can they predict how some of this illnesses started? (Illicit: Some of those sicknesses were caused by tiny organisms called “bacteria.” Maybe they touched something another sickperson touched)

3. Show this picture:
4. Ask students what do you see in this picture? What do you recognize? Why do you think the artist colored the picture in this way? (Illicit: DNA strands, it’s a man, it looks like only the top of the man’s head is white. There is only one black DNA strand.)
5. Ask students what this picture might have to do with the topic of the class? (See if they can guess that it’s about germs and the human body.)
6. Explain that this picture actually shows how much of the DNA in our bodies is actually FROM microbes—which are tiny organisms, some of which are only one cell big. Not all of them are bad for you—they are living in you all the time. Some even help you to digest! But some can be a big problem.
7. Ask what students can do to help them prevent sickness? (Illicit: get plenty of sleep and fluids, eat right, wash your hands.)
8. Ask how you can tell if handwashing really works? (Illicit: try to observe microbes) Is there normally a problem with observing microbes? (Illicit: they are so small to see with the naked eye).
9. Show students that you can give them an agar plate, which has lots of nutrients to help microbe colonies reproduce to become visible as a group. They can also have cotton swaps for testing surfaces. They can also use the big thing of purell or the soap and water in the bathroom.
Journal Activity and Assessment:
1. Student groups must design their own experiments to find out how well cleaning their hands works to remove microbes. Explain that they must use a control set up. In their journals, they must record in as much detail as possible how they designed their experiment.
2. Before carrying out the experiment they must predict how the results will look. Observations during and at the end of the experiment are also recorded. At the end of the experiment, the students must explain their results. Remind students to be careful! They might want certain group members to pay attention to not cross-contaminating the control and experimental agar plates.
Agar Plate Activity Example:
1. Demonstrate the proper swap to agar plate technique.2. Have students take an Agar plate and a write their names on the tape.
3. Hand out some cotton swabs.4. Have student ball one of their hands into a fist and place under their arm.Have students swab sweaty hand with
cotton swab.1. “We want to make the palm of our hand a little sweaty so we can get a good swab of it.”
5.6. Have students gently run cotton swab on one side of the agar-prepped plate.Have students wash hands either
with soap and water, or hand sanitizer.1. Ask: What do you expect to happen?
7.8. Repeat steps 3-6, but make sure they run their swab on the opposite side, not already contaminated.9. Have students place lids on plates and ask them to mark the side contaminated before they washed their hands.10. Collect all the plates11. Explain that students will present on their design, predictions, observations and results for the whole group. They
must provide in their journals and out loud their own explanations for their results.
Patient Zero
Lesson Overview:This hands-on, group activity aims to get students thinking about how infectious diseases could spread. (Without the actual infectious disease.)Core Concepts:
Germs can spread through physical contact.
Lesson Objectives:Students will be able to:
Track an infection through a population Use deductive reasoning to solve a problem
Lesson Inquiry Question:
How can infectious diseases spread?
Materials Needed:
Vinegar Water
(The Following is Per Student)
One 10 ml test tube or 3 oz Dixie cups, A pipette A small centrifuge tube or small (1oz ) solo cup pH indicator or purple cabbage juice Water Snack size Ziploc baggies.
Pre-Activity:
Write prompt words on the board or easel
Activity Plan:Prep:
1. Number each test tube2. In the 10mL test tubes, pour 6 ml of water EXCEPT FOR ONE
1. select it at random but remember which one is “patient zero”)3. Prepare ONE test tube (“patient zero”) with 3 milliliters of vinegar.4. Close all test tubes.
Procedure:
1. Hand out one prepared test tube to each student.2. Hand out one clear centrifuge tube to each student.3. Hand out one pipette /dropper to each student.4. Tell the students that one of them carries a pretend infectious disease.
1. Their bodily fluids are represented by the test tubes filled with liquid.2. Do not tell them what is inside of their tubes.
5. Explain the task:1. We will simulate spreading a disease and then try to track the epidemic back to the person who initiated it
(“patient zero”).
(Sample Scenario:
Before you go off to camp in a few weeks, your mom decides to take you to visit your doctor to test you for all infectious diseases. During the weeklong wait for the results to arrive, you spend a weekend with a handful of friends and family at the beach. A day after coming back from the beach, some people appear to have symptoms: fever, hives, and never ending laugh attacks.
You and your friends must work backwards to figure out with whom each person interacted that weekend at the beach, in order to narrow down the causative agent. Was it your cousin, who you had to share a bed with? Maybe it was one of the kids with which you played beach volleyball, or your little sister who snuck a lick off your ice cream cone. You will receive the results of your initial exam to add to your evidence.)Directions for Students:
1. "Let’s start by predicting how quickly we think the infected person’s disease will spread? What role does the “blood” drawn at the doctor’s office before the beach trip perform in our experimental design? (Illicit: It is the control before the “experiment” of going to the beach and making contact with others.)
1. During this activity, observe if each of your “fluid” interactions was the same every time? How were the contacts unique?
2. Write down the number of your test tube.3. Your doctor must take a “blood sample”.
1. Remove 1 ml from your 10 ml test tube and insert it into the mini tube (micro-centrifuge tube).2. Close it and put it on a rack on the side. 3. You will not need this small tube until the end of the activity. 4. You should have 5 ml of fluid left in your original test tube.
4. You all are “heading out” to the beach. 1. Have one interaction with only one individual by carefully mixing fluids from your test tube. 2. Record their test tube number in your journal.3. Have a second interaction with a different individual by mixing fluids from your test tube again. 4. Again, record your interaction.
5. The teacher will come and place 5-6 drops of indicator into your test tubes.

1. If it turns a different brighter color, you have “symptoms”!2. If it stays a similar dark color then you are “clean”.
6. Work together using critical thinking to narrow down the causative agent to two possible individuals. 7. The teacher will write everyone’s number on the board and narrow down suspects by logic and process of
elimination.8. Your doctor must give you the results from your previous exam (pretrip).
1. The teacher (“doctor”) will add 2 drops of indicator to the small test tube you put aside at the beginning of the lab.
2. If your “bloodwork” stays a similar dark color, you were negative before the beach and not the original causative agent.
3. If your results turn a different brighter color, you were Patient Zero!
Assessment:
Explain how the disease spread-was it always at the same rate, infecting the same number of new people each round? Or did the number of infected people each round change? Explain why you think that is.
In tracking the spread of infection in modern times, computer scientists are able to see where illnesses like the flu have come from and where they will spread to by analyzing millions of users on social websites like Twitter and facebook.
In your journal, write down how you could use twitter to analyze the geographic spread of a disease. What kinds of information you would use from a tweet or what search terms you would use to find tweets could you use?
Terms and Concepts:Causative agents in an infection are pathogens.Pathogens are micro-organisms that are capable of causing diseases or infections. If micro-organisms from a person’s own body cause an infection, it is called an endogenous infection. If a micro-organism derived from sources outside a person’s own body causes an infection, it is called an exogenous infection.

Session 11: Ethics in Science
Lesson Overview:Scientists often need to make decisions before conducting certain experiments. This lesson represents an introductory approach towards ethics in science. The teaching of ethics is particularly suited to the use of illustrative case studies. Such narratives can be used to present examples of a range of significant ethical issues related to some human enterprise and many of the complexities associated with each of the issues. The cases can be either fictional or they can be based on actual events.Core Concepts:
Scientists must sometimes think of the moral and/or ethical implications of their research or actions.
Lesson Objectives:Students will be able to:
Understand the purpose for ethical reasoning in science. Interact in a debate session. Make a valid argument based on facts and observations. Weigh moral issues involved in research against potential benefits.
Lesson Inquiry Question:
Should scientists worry about the moral or ethical ramifications of their research?
Materials Needed:
Printed case: “Cloning Chico.” Print additional material from links below.
Pre-Activity:
Write prompt words on the board or easel
Activity Plan:(Before session:)
1. Write the following prompt on a blackboard or easel:1. Think about a time when you had to make a decision about doing the right thing.2. What did you choose to do?3. Do you think you made a good decision?4. Why or why not?
(During session:)
1. Start the discussion with some opening questions:1. Ask: What is genetic cloning?2. Ask: What does genetic cloning involve?
2. After a short discussion, divide the class into four equal groups.1. (Do not tell them who they represent until after you divide them.)2. One group represents Chico the Cat.3. One represents Timmy.4. Another represents Julia.
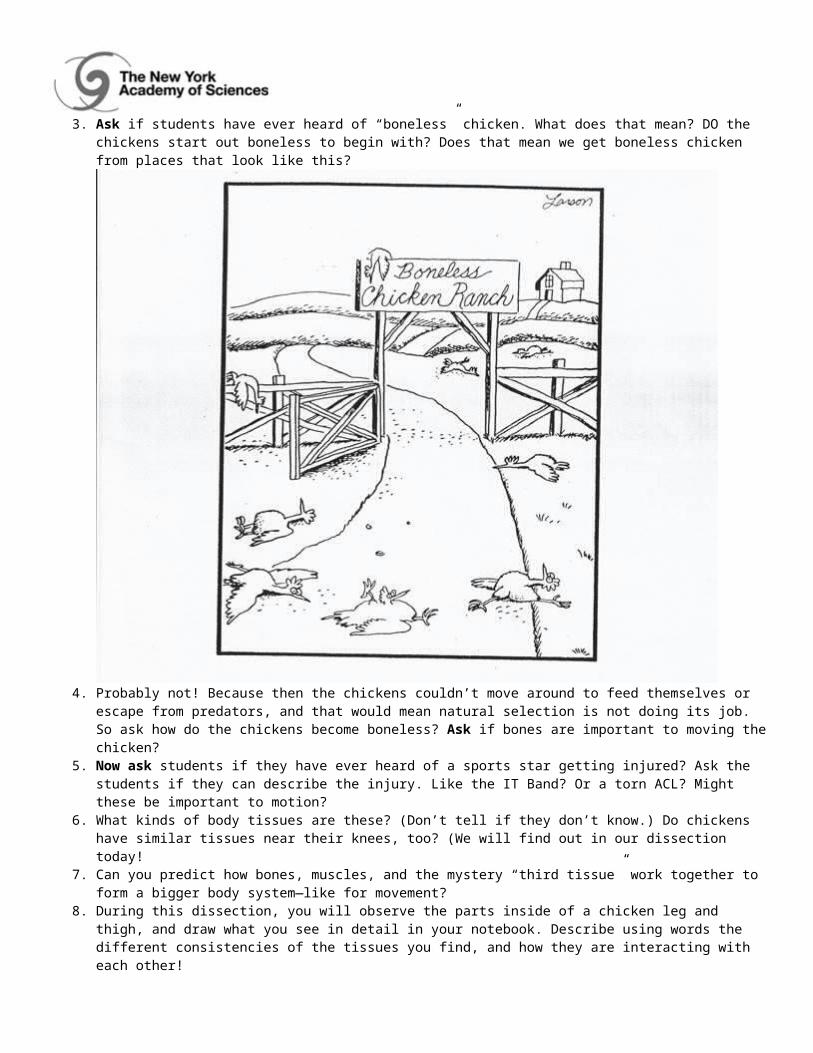
5. And another represents Jason.3. Place one group in each corner of the classroom or as separate from each other as possible.4. Once the groups have been separated, hand out the case to the groups designated as Timmy and Julia.
1. Let them read the case while instructions are given to the other group.2. Have them list pros and cons while they wait.
5. Give the group representing Jason instructions that they are to discuss the following questions and to try to come to some consensus on them:
1. Ask: How might cloning increase the quality of society, family, and overall life?2. Ask: How might it not?3. Ask: What is the likelihood that cloning will be allowed in the US and why?
6. Hand the case out to the students in the group representing Chico and explain to them their role:1. They are to discuss among themselves how they feel about being cloned.2. Explain to them that Timmy will have to make a decision about this and they need to explain their position
clearly to the other members of the class while providing good reasons for their position.7. Provide enough time for discussion among the groups. (About 20 minutes)
1. Let them know when their time is running out.8. Bring all the groups back together.9. The debate:
1. Have the group that represents Jason discuss the questions they have been working on.2. Then have the groups representing Julia and Timmy state their case trying to persuade Jason to accept
one of their respective views.3. Next introduce the Chico group to present his worries and concerns.4. Follow this with a general discussion about cloning, being sure to address any general questions from the
students.5. Finally, have the group that represents Jason have a quick discussion to make a decision whether to
clone or not based on the arguments that have been presented.
Assessment:You be the judge: Point out that ethical questions involving the funding of research are important for all citizens to understand and grapple with, because they will one day be voters and pay taxes. For now, they can still write to their member of Congress. (Find out the member of Congress for your host school’s district.) In your journal, write a three paragraph letter to your congressional representation explaining the questions you’d like him or her to ask of the research and their conscience before voting to fund or defund a given research project. You can begin by introducing yourself and explaining that you have now taken a full semester of Life Sciences 101 afterschool with a teaching research scientist, and you have a few ethical questions you think he or she should consider when looking at funding for scientific research. Use your second paragraph to introduce the questions you’d like your representative to focus on, and a reason why asking each question is important. Use your third paragraph to explain the importance of science in your own life, and why you think federal funding of ethical research is important (or why you don’t).
Additional Resources:The Process of Nuclear TransferNuclear transfer is the process of creating an embryo by fusing an adult animal cell, in Dolly's case, an udder cell from a sheep, into an enucleated egg cell.
A donor cell has to be forced into the Gap Zero, or G0 cell stage, a dormant phase, in which it shuts down its active genes and current definitions (e.g. to be a skin cell) and thus has the ability to take on another definition.The donor animal cell is put it into an unfertilised egg cell (an oocyte) whose nucleus has been removed, so that what remains provides the cellular machinery required in the formation of an embryo.An electric pulse fuses the two cells. Genes in the donor animal cell enter the egg.Another electric pulse awakens the genes. The fused cells divide and form an embryo.The embryo is implanted inside a surrogate mother to divide and grow normally. The resulting organism is a clone as it has the same genetic material as the donor body cell.

Scientists are still unsure of why an electric pulse sent to the two cells causes them to meld together and activates development in the egg, even though they have been carrying out this step for years in the process of cloning. However, they have learnt that the shock doesn't fully mimic the activation process of a sperm, which could explain why very few embryos survive beyond the first few days of formation.The Process of Nuclear Transfer (Microinjection)Microinjection can be said to be a subset of nuclear transfer (fusion). While nuclear transfer (fusion) is fusing an entire adult animal cell into an egg cell whose nucleus has been removed, the microinjection technique uses only the adult cell nucleus.The donor nucleus (in the G0 state : see The Process of Nuclear Transfer) is put it into an unfertilised egg cell whose nucleus had been removed.An electric pulse fuses the nucleus with the cell.The cell is implanted inside a surrogate mother to grow as a normal embryo. The resulting organism is a clone as it has the same genetic material as the nucleus.Artificial TwinningArtificial twinning, is the process of splitting an embryo into two or more embryos. An egg cell is fertilized by sperm, then left to grow into an embryo. The embryo is split into two or more embryos when it is still in the early cell stage.The split embryos are nurtured into new embryos, all genetically identical, then implanted into surrogate mothers to grow.This process is not the same as nuclear transfer as the born animal has biological parents, and is a clone of its brothers and sisters. In nuclear transfer, the born animal is a clone of its parent.Case Study in DNA, Privacy and Human Cloninghttp://www.nature.com/scitable/forums/genetics-generation/case-study-in-dna-privacy-and-human-106135538Cloning Case Studyhttp://home.southernct.edu/~hotta2/Activities/cloning.htmlAgainst Cloning:http://web.mit.edu/newsoffice/2001/cloning-0404.htmlCloning Animals Pros and Cons:http://www.manataka.org/page1033.htmlEvaluating the Case Against Animal Cloninghttp://repository.upenn.edu/cgi/viewcontent.cgi?article=1044&context=bioethics_papers