nport family windows xp guide 2nd edition - moxa · 1 we explain in this manual how to configure...
TRANSCRIPT

NPort Express, NPort Server Family, Async Server Windows XP Driver Installation Guide
Third Edition, June 2008
www.moxa.com/product
© 2008 Moxa Inc., all rights reserved. Reproduction without permission is prohibited.

NPort Express, NPort Server Family, Async Server Windows XP Driver Installation Guide
The software described in this manual is furnished under a license agreement and may be used only in
accordance with the terms of that agreement.
Copyright Notice
Copyright © 2008 Moxa Inc. All rights reserved.
Reproduction without permission is prohibited.
Trademarks
MOXA is a registered trademark of Moxa Inc. All other trademarks or registered marks in this manual belong to their respective manufacturers.
Disclaimer
Information in this document is subject to change without notice and does not represent a commitment on the part of Moxa.
Moxa provides this document “as is,” without warranty of any kind, either expressed or implied, including, but not limited to, its particular purpose. Moxa reserves the right to make improvements and/or changes to this manual, or to the products and/or the programs described in this manual, at any time.
Information provided in this manual is intended to be accurate and reliable. However, Moxa assumes no responsibility for its use, or for any infringements on the rights of third parties that may result from its use.
This product might include unintentional technical or typographical errors. Changes are periodically made to the information herein to correct such errors, and these changes are incorporated into new editions of the publication.
Technical Support Contact Information www.moxa.com/support
Moxa Americas: Toll-free: 1-888-669-2872 Tel: +1-714-528-6777 Fax: +1-714-528-6778
Moxa China (Shanghai office): Toll-free: 800-820-5036 Tel: +86-21-5258-9955 Fax: +86-10-6872-3958
Moxa Europe: Tel: +49-89-3 70 03 99-0 Fax: +49-89-3 70 03 99-99
Moxa Asia-Pacific: Tel: +886-2-8919-1230 Fax: +886-2-8919-1231

Table of Contents
Windows XP Driver Installation ............................................................................... 2
Installing the NPort Product...................................................................................... 2
Installing the NPort Product’s Serial Ports............................................................14
NPort Product Properties ........................................................................................17
General.....................................................................................................................23
Configuration...........................................................................................................24
NPort Product ...................................................................................................... 24
Port Status...........................................................................................................30
Driver........................................................................................................................31
TroublesShooting...................................................................................................... 32

1
We explain in this manual how to configure NPort Server Family products to operate under the Windows XP operating system. The installation and configuration procedure is substantially different than for Windows NT/95/98/ME, but is quite similar to Windows 2000. Note that there are several different NPort Server Family products available from MOXA Technologies. Listed by name and model, they are:
Product Name Model
MOXA Async Server CN2504/2508/2516
MOXA DE-309-16/8 CN2116/2108
MOXA NPort Express DE-311/311M
MOXA NPort Server Lite DE-301/302/304/331/332/334
MOXA NPort Server Pro DE-303/308
These products have either 1, 2, 4, 8, or 16 serial ports. For some products, there is only one serial interface to choose from, whereas for other products, you may be able to set one of two or three serial interfaces (from RS-232/422/485). The examples in this manual where produced using MOXA NPort Express DE-331, which is a 1-port, RS-422/485 serial device server. If you are installing a different product, then the procedures you need to follow may be slightly different, but you should be able to use this manual as a guide to see how to manage your NPort Product. The following topics are discussed in this manual:
q Windows XP Driver Intallation
• Installing the NPort Product
• Installing the NPort Product’s Serial Ports
q NPort Product Properties
• General
• Configuration
Ø NPort Product
Ø Port Status
• Driver
2
Windows XP Driver Installation Installing an NPort Product to run under Windows XP involves installing the drivers that are used to operate the NPort Product and its port(s). This is done by using Windows XP’s “Add Hardware” function. Note that for first time installations, you must use the “Add Hardware ” function twice — once to install the NPort Product itself, and then once to install NPort Product’s serial ports.
Installing the NPort Product
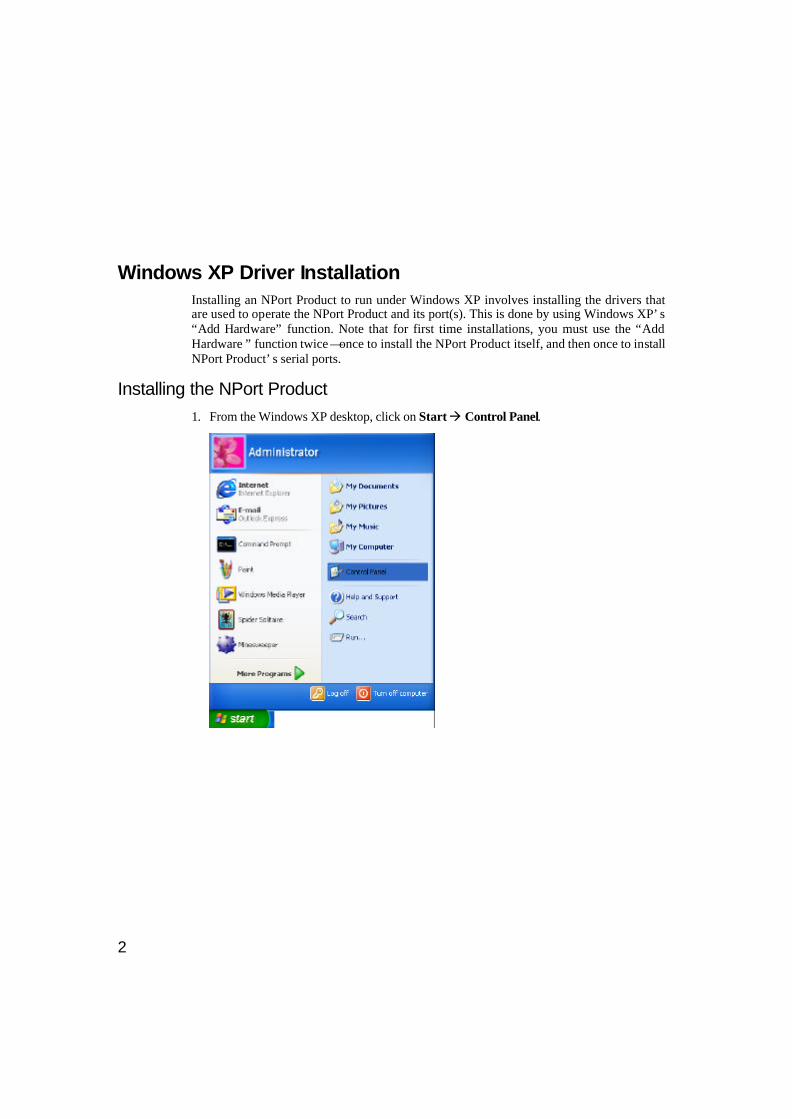
1. From the Windows XP desktop, click on Start à Control Panel.

3
2. [To work from “Classic View”, skip to step 4.] If your operating system is set to the new XP “Category View” style, click on Printers and Other Hardware.
3. [For classic view, skip to step 4.] Click on Add Hardware, found under the See Also
options.

4
4. If your operating system is set to the older “Classic view” style, double click on the Control Panel’s Add Hardware icon.
5. When the Welcome to the Add Hardware Wizard window opens, click on Next to
continue with the installation process.
5
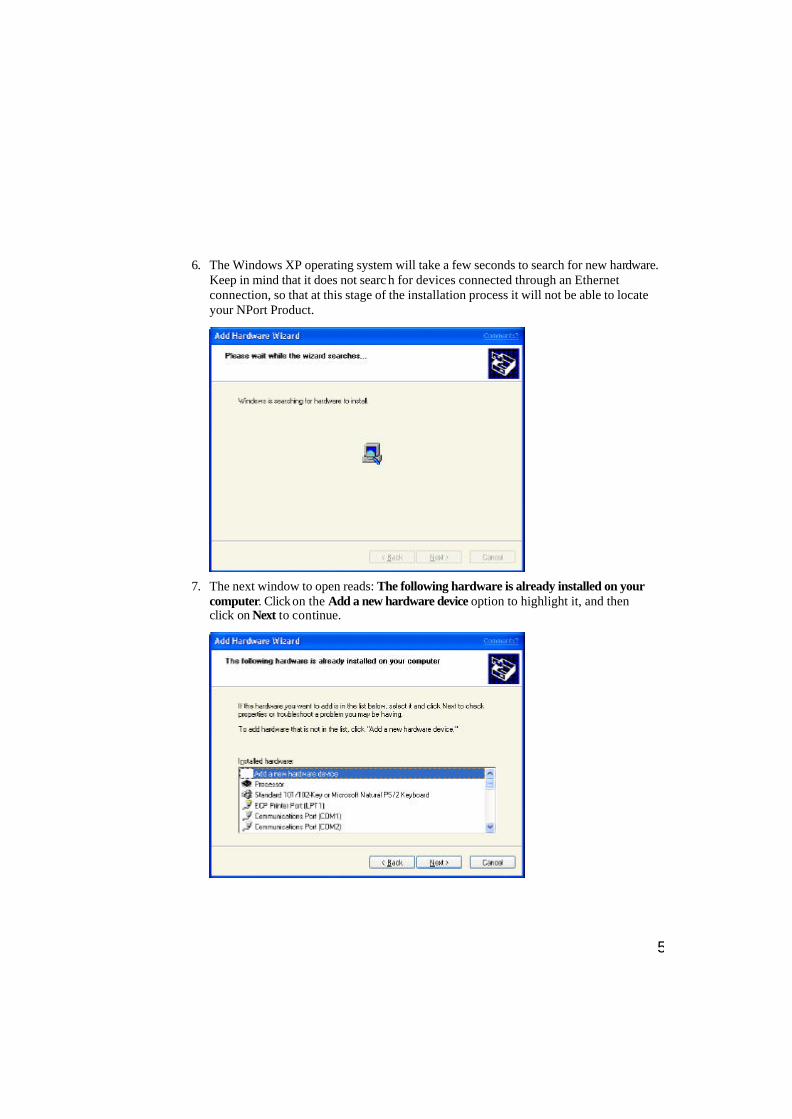
6. The Windows XP operating system will take a few seconds to search for new hardware. Keep in mind that it does not searc h for devices connected through an Ethernet connection, so that at this stage of the installation process it will not be able to locate your NPort Product.
7. The next window to open reads: The following hardware is already installed on your
computer. Click on the Add a new hardware device option to highlight it, and then click on Next to continue.

6
8. The next window to open reads: The wizard can help you install other hardware. Select the Install the hardware that I manually select from a list (Advanced) option, and then click on Next to continue.
9. The next window to open reads: From the list below, select the type of hardware you
are installing. Click on the Multiport serial adapters option to highlight it, and then click on Next to continue.

7
10. The next window to open reads: Select the device driver you want to install for this hardware. If Moxa Technologies Inc. appears in the left selection window under Manufacturers , click on the company name to highlight it, and then search for the model of your NPort Product from the right selection window under Models. If you locate the correct model, click on the model name to highlight it, and then click on Next to continue. If the company name, Moxa Technologies, Inc., is not listed, or you are unable to find the correct model name for the NPort Product you are installing, click on the Have Disk… button to continue.
. NOTE: The rest of these instructions are written assuming you are using this second option.

8
11. The next window to open gives you the ability to easily select the location of your NPort Product’s driver files. The easiest way to proceed is to click on the Browse… button.
12. Use the folder selection tool located to the right of Look in: to find the folder in which
your NPort Product driver files are located. For this explanation, we copied the files into a folder located on the computer’s hard disk, although the more normal circumstance would be for the files to be located on either a floppy disk or CD. Use the left mouse button to click on the appropriate folder.

9
13. You should next see a window that shows two files: NPORT and NPSERVER. One file is for installing the NPort Product, and the other is for installing ports—as long as you’ve chosen the correct folder, it does not really matter which file appears in the File name input box. The system will choose the correct file to use as needed. Click on the Open box to continue.
14. When the next window opens, check that the correct folder name and path is listed
under Copy manufacturer’s files from: and then click OK, located in the window’s top right corner.

10
15. Click on the correct model to highlight it (for this example, we installed MOXA NPort Server Lite DE-331, a 1-port serial device server that supports RS-422/485 serial interfaces), and then click on Next to continue.
16. The next window to open reads: The wizard is ready to install your hardware. Click
on Next to continue.

11
17. You may safely ignore any warnings from the operating system about compatibility with Whistler. Click on Continue Anyway to proceed.
18. A series of windows indicating the progress of the installation procedure will open and then close.

12
19. The next window lists all units of the NPort Product you are installing that are currently connected to your network. Click on the name of the server you wish to install to highlight it, or manually enter the IP address of your server if it does not show up in the list. Click on Next to continue.
20. The next window to open reads: NPort Servers / Async Servers installation
completed. Check to make sure that the information displayed is correct, and then click on Next to continue.

13
21. Click on Finish to complete the installation of your NPort Product. Keep in mind, however, that you may still need to install the port(s).

14
Installing the NPort Product’s Serial Ports If you or someone else has previously installed on your system a unit of the NPort Product you have just installed, then the NPort Product’s serial port(s) should install automatically. In this case, you may skip this section and continue to the section NPort Product Properties. If this is the first time that anyone has installed on your system a unit of the NPort Product you have just installed, then the window shown below under step 1. should open automatically (note that you may need to wait several seconds for the window to open). 1. When the Found New Hardware Wizard starts up, choose the option Install from a list
or specific location (Advanced), and then click on Next to continue.

15
2. Perhaps the most convenient way to proceed is to use the Browse button to locate the correct folder. This will be the same folder shown in step 14 of the previous section. Click on Next to continue.
3. Please wait while the wizard searches for the port and installs the appropriate software.
Note that when installing NPort Family products under the Windows XP Operating System, ports must be installed one by one.

16
4. The next window to open verifies the information related to your NPort Product’s port(s). Click on Finish to complete the installation procedure.

17
NPort Product Properties Your NPort Product’s configuration parameters, such as IP address, COM port number, etc., are easily changed from within the Windows XP system’s device manager. 1. From the Windows XP desktop, click on Start à Control Panel.

18
2. [To work from “Classic View”, skip to step 4.] If your operating system is set to the new XP “Category View” style, click on Printers and Other Hardware.
3. To evoke the device manager, click on System, located under the See Also options.

19
4. If your operating system is set to the older “Classic View” style, double click on the Control Panel’s System icon.

20
5. The Windows XP System Properties window opens next.
21
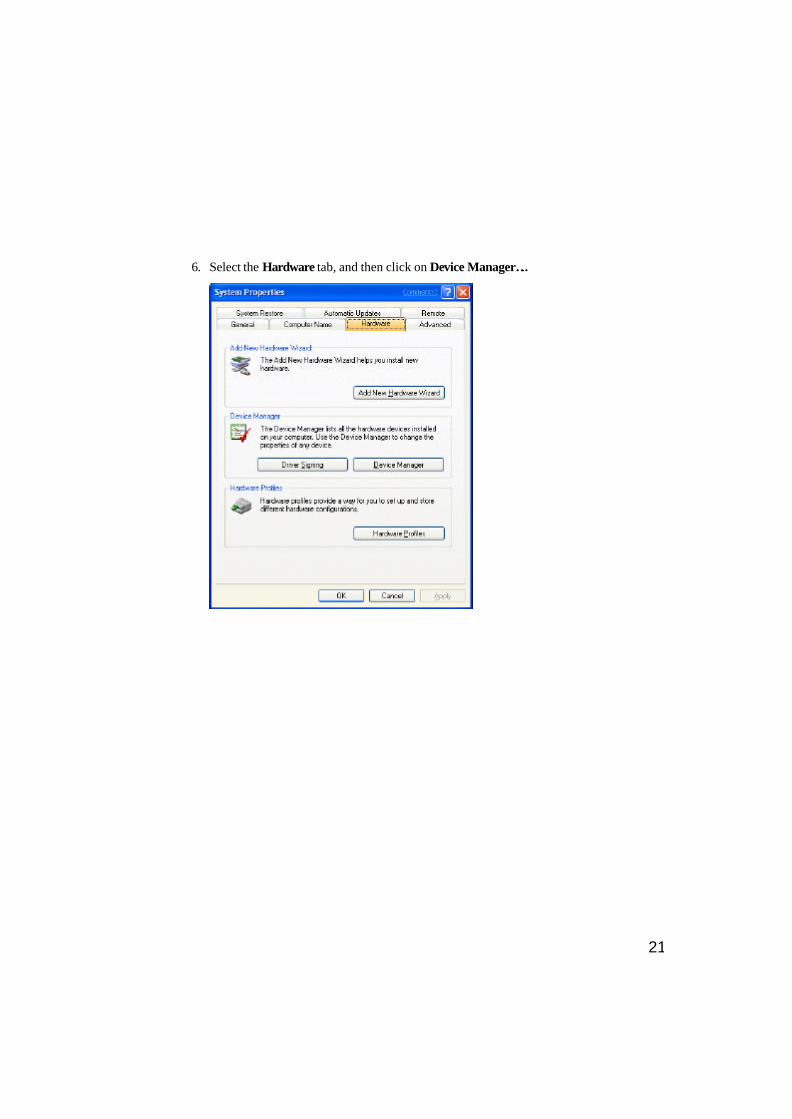
6. Select the Hardware tab, and then click on Device Manager….

22
7. Click on the plus sign to the left of Multi-port serial adapters and then double click on MOXA NPort Server Lite DE-331 (select the correct NPort Product if different from that used in this example) to open the Properties window.

23
General Information on the General page gives basic details about the NPort Product and its current status.

24
Configuration Select the Properties window’s Configuration tab to change parameter settings for your NPort Product. Most of the system settings are accessed by clicking on Settings (see the NPort Product subsection below). The COM port number can be changed by clicking on Ports Setting (see the Port Status subsection below).
NPort Product
Clicking on Settings in the above Properties window causes NPort Express’s Property Sheet to open. If prompted, enter NPort Product’s password, and then click OK to continue.

25
Basic Configuration
The Basic Configuration page that opens allows you to make changes to the following items:
Server Name Choose an appropriate name for your NPort Product. The default name is simply “NP” followed by the product’s serial number.
IP Address Check with your network administrator if you have questions about setting your NPort Product’s IP address.
Netmask 255.255.0.0 is for Class B networks. 255.255.255.0 is for Class C networks.
Gateway This is usually the IP address of the router connecting your LAN to the Internet.
DHCP Click on the DHCP box to allow NPort Product’s IP address to be chosen automatically by a DHCP server connected to your LAN.

26
Password
The Password page allows you to change the password. Click the Remember Password box to have the password automatically stored by your operating system.
A
27
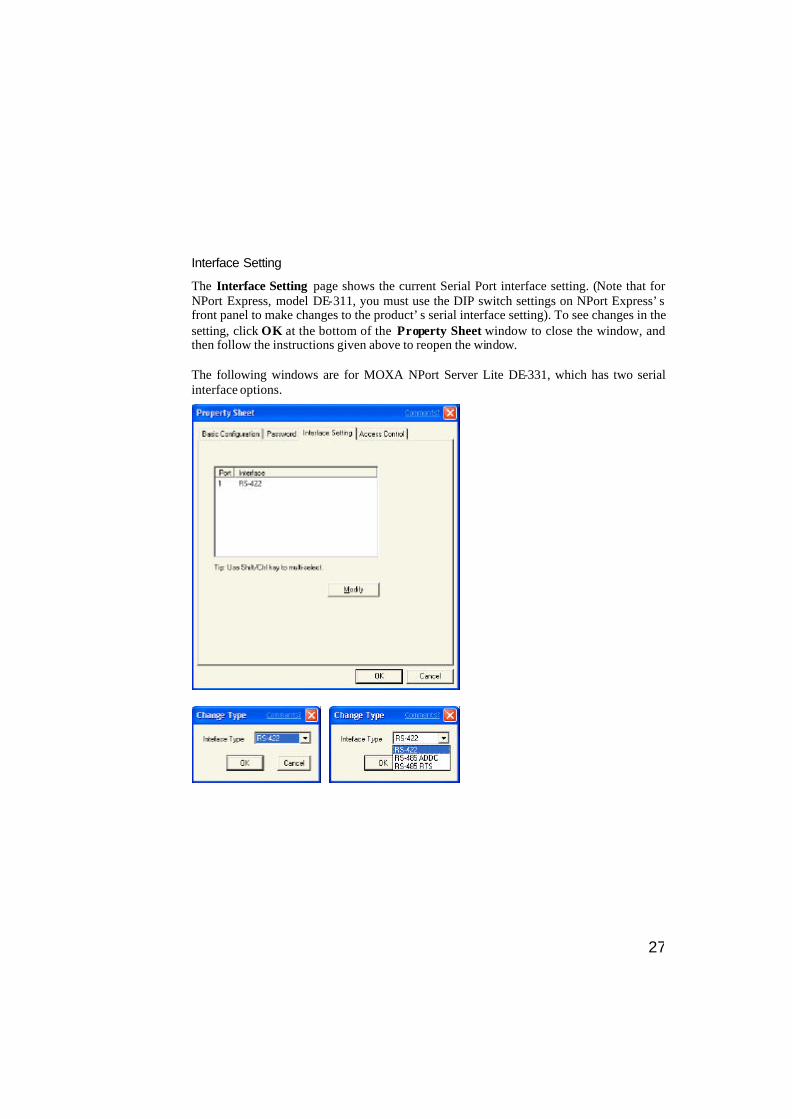
Interface Setting
The Interface Setting page shows the current Serial Port interface setting. (Note that for NPort Express, model DE-311, you must use the DIP switch settings on NPort Express’s front panel to make changes to the product’s serial interface setting). To see changes in the setting, click OK at the bottom of the Property Sheet window to close the window, and then follow the instructions given above to reopen the window. The following windows are for MOXA NPort Server Lite DE-331, which has two serial interface options.

28
Access Control
The Access Control page can be used to allow access to NPort Product’s serial port(s). The process of adding and removing IP addresses is straightforward, although three comments are in order. 1. You may add access by IP Address, as shown here.

29
2. You may add access by Port, as shown here.
3. There are two options to choose from when adding access. Choose Single Host to only
allow access to the computer with the given IP Address. Choose A Group of Host to allow access to a group of computers. In the example shown here, computers connected to the same LAN as NPort Express, and with IP addresses of the form 192.168.xxx.xxx, will all be given access. More specific types of (limited or wider) access can be granted by considering the bit -by-bit versions of both the IP Address and Netmask.

30
Port Status 1. The COM number for NPort Product’s serial port(s) can be changed by clicking on the
Ports Setting button.
2. Click on Modify Setting to make changes.

31
3. Use the following window to change Port Number, Transmission Mode, and TxFIFO.
Driver The Driver page displays important information about the driver. Use the buttons at the bottom of the window for Driver Details…, to Uninstall the driver, or Update Driver.

32
TroublesShooting Q1:why should I need to install NPort Family Product’s ports one by one under Windows XP? Ans:The Windows XP driver is a beta version which is still in the process of being authenticated, and
even though it is necessary to install each port one by one, this has no effect on the operation of the product. We are working hard to improve the installation procedure, which requires finding a way to work around the problem Microsoft Windows XP has when used with Vendor hardware and software.