notice - static-pt.com
TRANSCRIPT

CDR-115
DOUGH SHEETER
OPERATIONS MANUAL
SOMERSET INDUSTRIES, Inc.
137 PHOENIX AVE • LOWELL, MA 01852 • USA •
+1-978-667-3355 Email: [email protected]
Web: www.smrset.com
WARNING!!! DO NOT CLEAN OR SERVICE THE MACHINE WITHOUT
PRESSING THE RED BUTTON AND UNPLUGGING THE ELECTRICAL
CORD FROM THE POWER SUPPLY. KEEP YOUR FINGERS AND HANDS
FROM THE ROLLER AREA WHEN OPERATING OR SERVICING THE
MACHINE. DO NOT OPERATE THE MACHINE WITHOUT THE GUARDS
IN PLACE. IF THE MACHINE KEEPS RUNNING WITH SAFETY
GUARDS REMOVED, IMMEDIETLY PRESS THE STOP BUTTON AND
REMOVE THE PLUG FROM THE POWER SOURCE. CALL THE
FACTORY OR A QUALIFIED SERVICE REPRESENTATIVE. DO NOT
ATTEMPT TO OPERATE THE MACHINE UNTIL PERMITTED BY THE
SERVICE TECHNICIAN.
NOTICE !! READ CAREFULLY ALL INSTRUCTIONS BEFORE YOU START!!
UNCRATING AND SETUP
Cut off the Fastener wrapped around the machine. Open the box and remove the
plastic inserts. Install the machine in its final position or temporarily secure it to a solid
surface. Wipe off any dirt that may have accumulated during shipping. (Use a soft
cloth)
Check the nameplate for correct voltage and frequency. Plug the machine to the proper
power source that matches the nameplate requirements. Press the power switch “ON”
and check for proper operation of the machine.
!! WARNING !!
NEVER OPERATE THE MACHINE WITHOUT GUARDS IN PLACE
KEEP YOUR HANDS AWAY FROM CHUTE
DO NOT CLEAN THE MACHINE WHILE CONNECTED TO
ELECTRICAL SUPPLY
WATCH YOUR HANDS AND FINGERS
EMERGENCY STOP SHOULD ONLY BE USED FOR EMERGENCIES
MACHINE PREPARATION
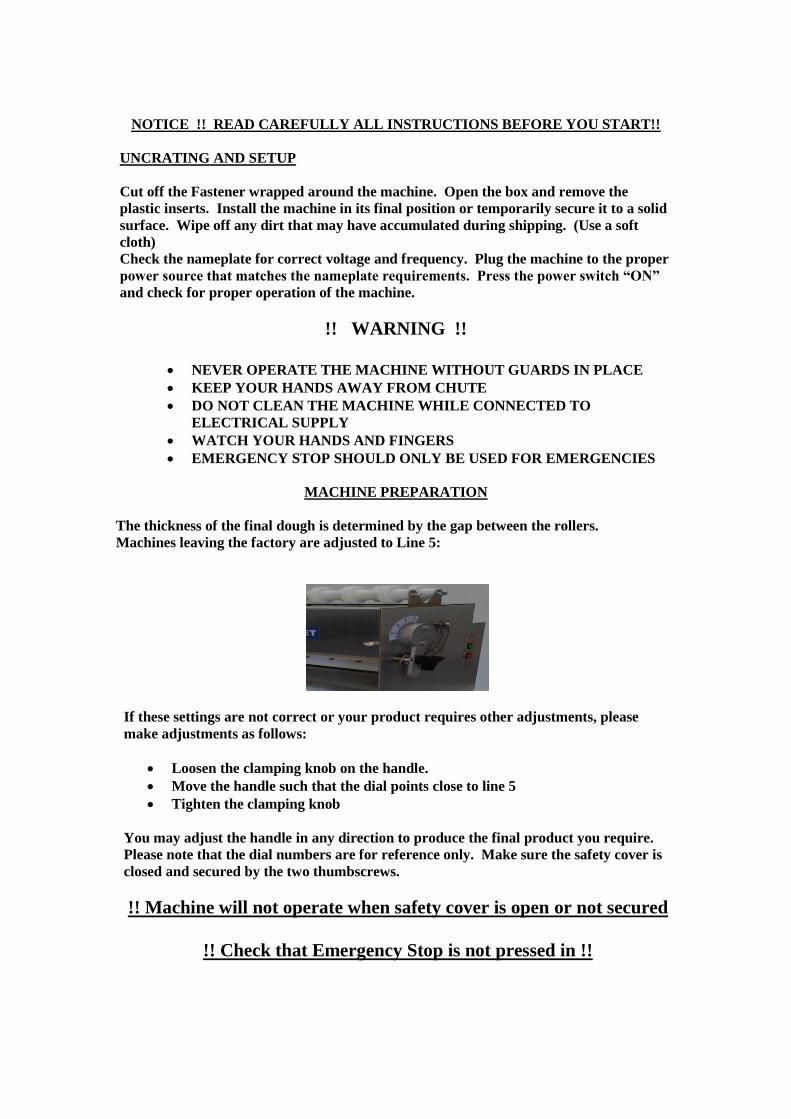
The thickness of the final dough is determined by the gap between the rollers.
Machines leaving the factory are adjusted to Line 5:
If these settings are not correct or your product requires other adjustments, please
make adjustments as follows:
Loosen the clamping knob on the handle.
Move the handle such that the dial points close to line 5
Tighten the clamping knob
You may adjust the handle in any direction to produce the final product you require.
Please note that the dial numbers are for reference only. Make sure the safety cover is
closed and secured by the two thumbscrews.
!! Machine will not operate when safety cover is open or not secured
!! Check that Emergency Stop is not pressed in !!

Dust inside the chute, front tray and discharge tray with flour before using the
machine.
DOUGH PREPARATION
For best results, the dough to be rolled should be at room temperature.
The size and shape of the dough ball affects the size and shape of the finished crust. For
round crusts, use a round piece of dough and flatten it slightly.
Dust the dough pieces with flour before putting them into the chute.
OPERATING PROCEDURE
The dough comes through the rollers oblong in shape, on the discharge tray.
The rollers are easily adjustable to any thickness of pizza dough or crust you may need
If dough does not slide easily on the discharge trays, dust the trays with flour.
If the dough tears or the machine make a thumping sound, this indicates that the dough
is too thick to go through that particular setting of the rollers, which means your roller
adjustment has to be opened more, or the dough is too cold and stiff and may require a
longer rest period before use.
OPERATION
LOAD THE DOUGH INTO THE CHUTE.

!! WARNING!!
IF THE DOUGH GETS STUCK, TURN THE POWER OFF, OPEN THE SAFETY
COVER AND REMOVE THE DOUGH.
NEVER ATTEMPT TO MOVE THE DOUGH BY HAND WHILE THE MACHINE IS
RUNNING.
The dough is rolled through the rollers.
Stretch the dough by hand to the required size

CLEANING
!! CAUTION!!
DISCONNECT THE POWER CORD OF THE MACHINE BEFORE
CLEANING!!
Open the safety cover by loosening the four thumb screws.
All scrapers are readily removable.
TOP SCRAPER
1. 2. 3.
BOTTOM SCRAPER

Quick Tips
Never use the emergency stop as an on and off switch. The emergency stop is to be used
only in emergency situations.
Clean the rolls with a dry cloth. (NEVER USE WATER)
Install the scrapers in the opposite order of their removal.
Install the safety cover and secure it with the 4 thumb screws.
Turn the power ON, and the machine is ready to use.
If rolls start to squeal due to dryness, remove and clean the scraper blades. Use a clean
towel with cooking oil, and apply a thin coat over the roller surface.
!! CAUTION !!
THIS MACHINE IS MAINTENANCE FREE.
NEVER USE OIL OR GREASE ON ANY OF THE MECHANICAL PARTS OF THE
MACHINE.
ALL MECHANICAL PARTS ARE PERMANENT SELF LUBRICATED.
SOMERSET INDUSTRIES
137 PHOENIX AVE
LOWELL MA. 01852 U.S.A.
Tel: (978) 667-3355
Fax: (978) 671-9466
Email: [email protected]
Web: www.smrset.com


CDR-115 PARTS LIST
ITEM NO. PART NUMBER DESCRIPTION QTY. ITEM NO. PART NUMBER DESCRIPTION QTY.
1 0115-125 INTAKE ROLLER GUARD 16 41 3000-204 WASHER, FLAT #4 22 0115-126 SHAFT, INTAKE ROLLER 2 42 3000-104 WASHER, LOCK SPLIT #4 23 3000-403 KNOB,ALTERNATE SAFETY COVER 4 43 3000-309 NUT, HEX 24 3000-106 WASHER, LOCK SPLIT 8 44 5000-268 CAPACITOR CLAMP 15 3000-410 SCREW, HEX HD 4 45 4000-521 SPROCKET W/ BUSHING 26 4000-150 MAGNET, SAFETY COVER 1 46 2000-630 SPROCKET IDLER W/BUSHING 17 0115-121 SHEET METAL ONLY ASSY TOP COVER 1 47 2100-428 ARM, IDLER 18 5000-313 LABEL, WARNING, "KEEP FINGERS" 1 48 3000-102 WASHER, LOCK SPLIT 79 5000-312 LABEL, "SOMERSET" 1 49 3000-405 SCREW, HEXHD 7
10 N/A N/A 0 50 5000-116 GEAR MOTOR 111 2000-330 SWITCH PLATE 1 51 4000-531 KEY, MOTOR SPROCKET 112 3000-300 NUT, FLANGE 9 52 3000-417 SCREW, HEXHD 413 5000-203 SWITCH, GREEN 1 53 4000-502 SPROCKET W/ KEY 114 5000-202 SWITCH, RED 1 54 4000-350 CHAIN 41 RIV 80 115 4000-400 KNOB, LOCKING 1 55 4000-252 SPRING, EXTENSION 116 3000-404 SCREW, HEXHD 2 56 3000-303 NUT, FLANGE 217 3000-302 NUT, ACORN 2 57 0115-231 PLATE ECCENTRIC COMPLETE 118 2000-423 HANDLE, ROLL ADJUST 1 58 3010-151 STUD, SCRAPER 119 2000-417 PLATE, ADJUST 1 59 0115-302 115 SIDE COVER 120 2000-418 SPACER TUBING 2 60 3000-101 WASHER LOCK 921 3000-408 SCREW, CARRIAGE BOLT 1 61 3000-402 SCREW, TRUSS PH SS 922 3000-409 SCREW, HEXHD SS 2 62 5000-311 LABEL, ETL 123 3000-103 WASHER, LOCK SPLIT 2 63 3000-482 NUT, HEX JAM 224 3000-201 WASHER, FLAT 2 64 3010-158 HOOK 225 0115-010 FRAME, CDR-0115 MAIN 1 65 1100-400 ROLL, ASM UPPER 126 4000-251 SPRING, SCRAPER 4 66 1100-402 ROLL, ASM MIDDLE 127 3010-100 STUD, SCRAPER BENT 4 67 5000-261 WIRE NUT 528 3000-306 NUT, HEX 4 68 3000-225 WASHER, NYLATRON 329 1100-521 SHAFT, SCRAPER #2 2 69 2000-632 HARNESS, ASSY 130 3010-202 PEM 10 70 2000-328 BRACKET, RELAY 131 0115-501 SCRAPER COMPLETE #2 2 71 5000-150 RELAY, 120V 132 0115-511 SCRAPER #2 2 72 0115-301 PANEL, LOUVERED 133 5000-314 LABEL, "DO NOT OPERATE" 1 73 5000-276 BUSHING 134 0100-034 LEG 4 74 5000-230 HARNESS,POWER MOULDED 115V 135 4000-300 LEG TIP RUBBER 4 75 0115-304 TRAY, DISCHARGE 136 5000-226 E-STOP 1 76 5000-316 LABEL, CCW INDICATOR GRADUATED 137 2000-431 SHAFT, IDLER 4 77 5000-317 STICKER, NSF 138 4000-233 SHAFT, HEX 4 11A 2000-629 SWITCH PLATE ASSY 139 5000-278 BUSHING, FINGER 2 7A 0115-120 COVER, SAFETY COMPLETE, 115 140 5000-225 SWITCH, ELECTRONIC 1