nortel dect handset 413x and 414x user guide - bt business
TRANSCRIPT

Nortel DECT Handset 413X and 414X User Guide
www.nortel.com© 2005 Nortel NetworksN0028550 01.1Printed in Denmark

Congratulations
on your new Nortel 413X/414X handset
The handset 413X/414X will provide you with the greatest possible degree of flexibility and mobility due to high battery capacity, practi-cal weight, size and design.
X represents the frequency variant of the models:
2 = (1900 - 1920 MHz frequency band)
3 = (1880 - 1895 MHz frequency band)
5 = (1880 - 1900 MHz frequency band)
Charge your handset 14 - 16 hours prior to
first use for best performance
STOP!

Please note that the handset 413X/414X is for use with the following Nortel host sys-tems:
• Norstar MICS 7.0 or greater (Modular Integrated Communications System)
• Norstar CICS 7.0 or greater (Compact Integrated Communications System)
• BCM 3.7 or greater (Business Communication Manager)

5
ContentsGetting Started. . . . . . . . . . . . . . . . . . 7
Handset information . . . . . . . . . . . . . 7 Battery information . . . . . . . . . . . . . . 8 Installing battery . . . . . . . . . . . . . . . . 9 Charging battery . . . . . . . . . . . . . . . 10 Checking battery capacity . . . . . . . 11 Battery disposal . . . . . . . . . . . . . . . 12
About your 413X/414X handset . . . 13 Handset display . . . . . . . . . . . . . . . 15 Display softkeys . . . . . . . . . . . . . . . 17 Display backlight . . . . . . . . . . . . . . 17
Basic handset options. . . . . . . . . . . 18 Turning the handset ON/OFF . . . . . 18 Adjusting speaker volume . . . . . . . 18 Changing Menu Language . . . . . . . 18 Customizing handset . . . . . . . . . . . 19
Making and answering calls . . . . . . 22 Dial directly . . . . . . . . . . . . . . . . . . . 22 On hook dialling (pre-dial) . . . . . . . 22 Dial from your phone book . . . . . . . 23 Redial . . . . . . . . . . . . . . . . . . . . . . . 23 Answering calls . . . . . . . . . . . . . . . 24 Hold a call . . . . . . . . . . . . . . . . . . . . 24 Making or answering a second call . . . . . . . . . . . . . . . . . . . 25 Mute a call . . . . . . . . . . . . . . . . . . . 25 Turn on loudspeaker . . . . . . . . . . . 25 Replying to messages . . . . . . . . . . 26
More handset options . . . . . . . . . . . 27 Moving around in the Menu . . . . . . 27 Using phone book . . . . . . . . . . . . . 30 Using text messages (MSF) . . . . . . 34 Shortcuts . . . . . . . . . . . . . . . . . . . . 38
General information. . . . . . . . . . . . . 39 Troubleshooting . . . . . . . . . . . . . . . 39 Information . . . . . . . . . . . . . . . . . . . 39

6
7
Getting StartedRead all the information in this section before you use your handset.
Handset information
Ensure that the adapter voltage is the same as the electrical outlet voltage. The 413X/414X handset uses radio signals and does not guarantee a connection in all circumstances. Do not rely on a cordless handset to make emergency calls.
Never use your handset:
• in the vicinity of electrical detonators
• in shielded rooms
• in areas where radio transmission is forbidden
• in aircraft
Do not place a handset near:
• water, moisture or damp areas
• heat sources, direct sunlight or unventilated areas
• devices which generate strong magnetic fields such as electrical appliances, fluorescent lamps, computers, radios, televisions or fax machines
• areas where the handset can be covered, its ventilation impaired, liquid spilled on the unit or objects inserted into the handset through any openings.
• areas with dust, vibration, shock or temperature extremes

8
Check for small metal objects in the handset earpiece/mouthpiece before using the handset.
Do not store or locate flammable liq-uids, gases, or explosive materials in the same compartment or vicinity as the cordless handset, its parts or accessories.
Battery information
Read the following information before you handle the batteries:
• Do not replace the batteries in potentially explosive environments, such as rooms where flammable liquids or gases are present.
• The battery will explode if disposed of in a fire.
• Do not charge the batteries unless you use the Nortel Networks approved charger and the proper batteries.
• Only use battery type NT7B65LD in the 413X/414X handset. Do not use these batteries with other products. These batteries were designed specifically for use with the 413X/414X handset and the 413X/414X charger ONLY. Improper use of the batteries may result in fire hazard.
• Do not do anything that would cause the battery to short circuit.
• Do not let the battery or the charger come into contact with conductive metal objects.

9
Installing battery
The battery is connected to the hand-set when it is shipped from the fac-tory.
1 To change the battery unscrew the plate on the rear of the handset to access the battery compartment. Use a normal screw driver.
2 Insert the screwdriver into the small crack behind the blind cover and break to open the handset.
3 Place the battery plug in the slot in the battery box.
4 Insert battery with the label readable.
5 Replace the back cover.

10
Charging battery
When charging the battery for the first time, it is necessary to leave the handset in the charger for 14-16 hours for the battery to be fully charged.
During normal operation, it takes approximately 3.5 hours to charge the handset from fully discharged to its full capacity.
• Place the handset in the charger.
For correct charging, be sure the room temperature is between 0°C and 25°C. Do not place the handset in direct sunlight. The battery has a built-in heat sensor which will stop charging if the battery temperature is too high.

11
If the handset is turned off when placed in charger, only the LED indicates the charging. When handset is turned off, the LED flashes at a low frequency while charging and lights constantly when the charging is finished. There will be no reaction for incoming calls.
If the handset is turned on when charging, the display shows the charging status. The display goes back to normal mode when fully charged. It will not vibrate. Auto-answer is inactive. The handset reacts normally for incoming calls.
It is necessary to recharge the battery when the display shows BATTERY LOW, or if the handset cannot be turned on. When the battery is fully discharged, up to 10 minutes may pass before charging begins (display lights up). When the charger begins the charging, status is shown in the display if the handset is turned on.
Checking battery capacity
In the BATTERY MENU it is possible to see the remaining battery capacity.
For reading the correct capacity, the handset has to be removed from the charger for at least one hour.
1 Press MENU ( ) and use the < or > keys to reach the BATTERY MENU.
2 Press to enter the BATTERY MENU, and see the current status of the battery capacity.

12
3 Press to return to the menu system, or press MENU ( ) to quit.
The indication on the display is not necessarily an exact reflection on the remaining speech time, but only an indication of the voltage on the bat-tery.
Battery disposal
Defective batteries must be returned to a collection point for chemical waste disposal.
Warning: Nickel metal hydride batteries must be disposed of properly. Do not dispose of the batteries in office or household waste.
Nickel metal hydride batteries are recyclable. You can help preserve the environment by returning your unwanted batteries to your nearest recycling center for recycling or proper disposal.
Contact your system administrator for more information about battery dis-posal and recycling centers in your local area.

13
About your 413X/414X handset
Message indicator lightFlashes when you have a message waiting.
Volume controlAdjusts the handset and ringer volume.
Display Shows call information, handset status icons, and guides you through features and option menus.
Headset connectorOnly available on handset 414X.
H
D
D
E
B
J
C
C
J
A
L
K
J
I
HGF
A
B
C
D

14
Microphone
Keys F to L activate different functions when your handset ison hook or off hook.On hook: Handset is idle (not in use).Off hook: Handset is active, call or feature in progress.
Menu key
On hook(idle)
Enters the Handset Options menu.
Off hook(active)
Activates a feature option.
< ( ) key
On hook(idle)
Enters the Redial List menu.
Off hook(active)
Activates a feature option.
> ( ) key
On hook(idle)
Enters the Telephone Book menu.
Off hook(active)
Activates a feature option.
( ) key
On hook(idle)
Turns the handset off with a long (four second) key press.
Off hook(active)
Turns the microphone off or on when you are on a call.
Feature key
On hook(idle)
Turns the display on for three seconds with two rapid key presses.ORStarts a feature session.
E
F
G
H
I
J

15
Handset display
There are four lines on your handset display.
Off hook(active)
Starts or ends a feature session.ORTurns the loud speaker on with a long key press (only available on handset 414X).
R ( ) key
On hook(idle)
Opens your message list with a short key press. OREnters the text message (MSF-MAIL) menu with a long (three second) key press.
Off hook(active)
Places calls on hold.
On/Off hook key
On hook(idle)
Turns the handset on.
Off hook(active)
Ends an active call.
K
L
(((.)))
JEAN 2245
PETER called
NEXT CALL ERASE
Display information example
Line 1
Line 2
Line 3
Line 4

16
The types of information shown on the display are:
• Standby text: When the handsetis on hook (idle), your extension name and number appears on the first line of the display.
• Information text: Call or feature information appears on the second line of the display.
• Feature options: Feature options appear on the third line of the display. Feature options vary, depending on the type of call or feature in use.
• Handset icons: The following icons appear on the fourth line of the display:
The radio signal icon indicates connection to system. Note: The icon flashes when the system is busy and you will not be able to make or answer calls.The envelope icon indicates a new text message (MSF-MAIL).Left and right arrow icons appear on the display when you access Handset option menus.The telephone icon indicates a call is active.Note: The icon flashes when a call connection is in progress.
(((.)))

17
Display softkeys
Three display softkeys are used to activate feature options that appear on the third line of the display.
The following graphic shows the softkey mapping for feature options on the third line of the display.
Display backlight
The display backlight automatically turns on when there is an incoming call, or if a key is pressed.
The backlight turns off after 10 seconds when the handset is idle.
You can disable the backlight to save power, refer to the “Customizing handset” section in this guide for more information.
Note: The backlight is disabled when the key lock function is activated.
NEXT CALL ERASE
Display softkey mapping example
Display sLine 3
21 3Display softkeysDisplay softkeysDisplay softkeys

18
Basic handset options
Turning the handset ON/OFF
ON Press .
When the handset is turned on the radio signal display icon is shown in the lower left corner of the display, if the handset is subscribed to a sys-tem.
OFF
Press ( ) for 4 seconds.
Adjusting speaker volume
1 Press .
2 Use the two keys placed at the upper right side of the handset for volume control.
3 Press again.
Changing Menu Language
There are eleven predefined lan-guages in the handset: English, Ger-man, French, Italian, Spanish, Dutch, Portuguese, Turkish, Danish, Swedish and Norwegian.
1 Press MENU ( ), and then press .
2 Switch to SET PROFILE LANGUAGE using the <> keys, then press .
3 Use the <> keys to choose between the predefined languages, then press to select the required language.

19
4 Press MENU ( ) to exit the menu structure.
See Figure 1 on page 45.
Customizing handset
The handset has one user-defined profile (set up), and a mode where all sounds are disabled (SILENT).
• Press MENU ( ) followed by to show the profile.
All settings have to be defined under the profile. The display shows if the SILENT mode is enabled.
Profile set-up
In the following you will find a descrip-tion of how to set up the profile.
1 Press MENU ( ) to enter the PROFILE SET UP MENU.
2 Press .
You are now able to switch between the different settings using < or >.
3 Press when you find the setting you wish to change (or see).
4 Change the setting according to your needs, confirm with and you automatically go to the next setting.
5 Press MENU ( ) to finalize profile setup.
See Figure 2 on page 46.
20
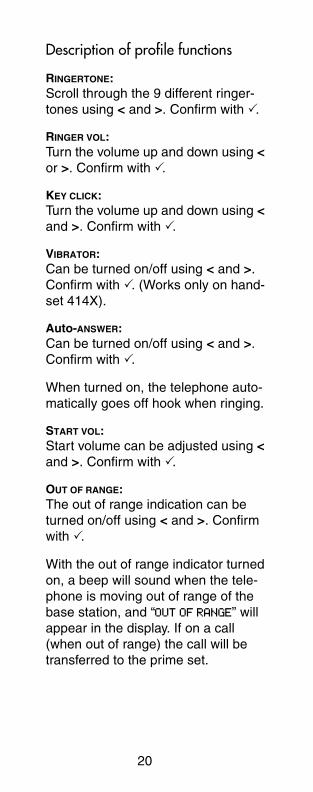
Description of profile functions
RINGERTONE: Scroll through the 9 different ringer-tones using < and >. Confirm with .
RINGER VOL: Turn the volume up and down using < or >. Confirm with .
KEY CLICK: Turn the volume up and down using < and >. Confirm with .
VIBRATOR: Can be turned on/off using < and >. Confirm with . (Works only on hand-set 414X).
Auto-ANSWER: Can be turned on/off using < and >. Confirm with .
When turned on, the telephone auto-matically goes off hook when ringing.
START VOL: Start volume can be adjusted using < and >. Confirm with .
OUT OF RANGE: The out of range indication can be turned on/off using < and >. Confirm with .
With the out of range indicator turned on, a beep will sound when the tele-phone is moving out of range of the base station, and “OUT OF RANGE” will appear in the display. If on a call (when out of range) the call will be transferred to the prime set.
21
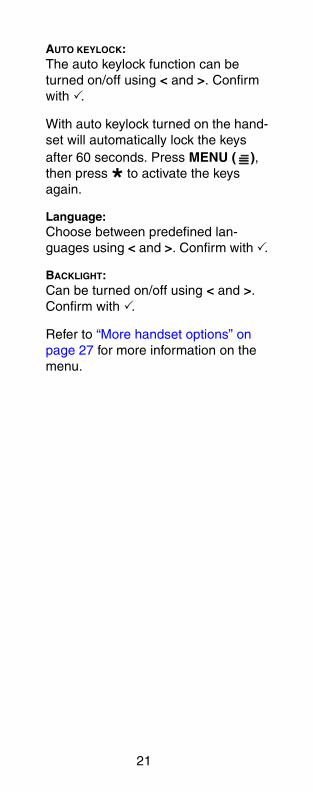
AUTO KEYLOCK: The auto keylock function can be turned on/off using < and >. Confirm with .
With auto keylock turned on the hand-set will automatically lock the keys after 60 seconds. Press MENU ( ), then press to activate the keys again.
Language:Choose between predefined lan-guages using < and >. Confirm with .
BACKLIGHT: Can be turned on/off using < and >. Confirm with .
Refer to “More handset options” on page 27 for more information on the menu.
22
Making and answering callsThe handset must be subscribed and registered to make or answer a call. (Contact your system administrator to have your handset subscribed).
For internal calls, dial the extension number. (Contact your system admin-istrator for a list of extension num-bers).
For external calls, dial the external code (or line pool code) to access an external line, then dial the external telephone number. (Contact your sys-tem administrator to confirm what external code or line pool code to use).
Dial directly
1 Press , the display icon flashes until the call is connected.
2 Dial the number.
3 Press again to end the call.
On hook dialling (pre-dial)
1 Dial the number.
A long press on will make a pause, if necessary.
2 Press .
3 Press again to end the call.

23
Dial from your phone book
1 Press > ( ) to enter the telephone book.
2 Search for the number either by using the < > -keys, or by pressing the first letter in the name by using the digits 2 – 9.
3 Press , the display icon flashes until the call is connected.
4 Press again to end the call.
Note: For more information on using your phone book, refer to “Using phone book” on page 30.
Redial
The handset has maximum 10 redial numbers. Each number is only repre-sented once.
1 Press < ( ) to enter the redial list.
You can also reach the REDIAL MENU in the main menu.
2 Search for the number by using the < > -keys.
Redial numbers are marked with “REDIAL” or name of the person who called, if present in the phone book.
3 Press , the display icon flashes until the call is connected.
4 Press again to end the call.
Note: Use the Redial list or the Last Number Redial Feature ( 5) to automatically redial the last external telephone number that you called.

24
Answering calls
Depending on the system hardware/software configuration, Call Display information (CLID) for incoming exter-nal calls will appear on the display. Your system administrator must enable the CLID feature for your handset in system programming.
To answer a call:
• Press to answer a call when your handset rings.
• If you are using headset, press any key on the handset to answer the call.
To stop the handset ringing without answering the call:
• Press and the ring signal is muted. The display shows: »RINGER MUTED«
• Alternatively, press one of the volume control buttons to mute the ringing signal.
Hold a call
1 While on a call, press R ( ).
2 To retrieve the held call, press R ( ) again.

25
Making or answering a second call
You can have two calls active at the same time. Use R ( ) to switch between calls.
To answer a second call while on another call
• Press R ( ) to answer the second call. The first call is automatically put on hold.
To hold a call and make a second call
1 Press R ( ) to put the first call on hold.
2 Dial the telephone number of the second call.
To return to the first call
• Press R ( ) again to return to the first call.
The second call is automatically put on hold.
Mute a call
1 While on a call, press .
2 To cancel mute, press again.
Turn on loudspeaker
Only available on Handset 414X.
1 While on a call, press (long key press) to turn the loudspeaker on.
2 To turn the loudspeaker off, press
(long key press) again.

26
Replying to messages
This allows you to read messages from another DN (Directory Number) in the system or to listen to voice-mail messages.
The red LED on your handset flashes when you receive a message from an internal voice message center or another telephone on your system. This is the message waiting indica-tion.
To view, reply and listen to your messages
1 While on hook, press R ( ) (short key press) to access your message list.
2 Press NEXT to view all messages in the list.
Note: The NEXT softkey only appears on the display when you have more than one message.
3 Press CALL to reply to a message in the list.
4 Press ERASE to delete a message from the list.
Note: Refer to the document provided with the internal voice message center for more information about mailbox options.

27
More handset options
Moving around in the Menu
Press MENU ( ) to enter or exit the menu structure. It has to be used if a “NO” or “CLEAR” is wanted in the menu structure.
Press to jump to a lower level in the menu. When the lowest menu level is reached, it will store the setting and jump to a higher level. It has to be used if a “YES” is wanted.
Note: If the handset is in the menu, and an incoming call arrives, then the menu will be dropped and the call handled in the normal way.
See Figure 3 on page 47.
Menu structure
The main menu consists of the follow-ing 8 menus:
MENU PROFILE SET UPFor more information, see “Customiz-ing handset” on page 19.
MENU EXT. SERVICEExternal services are only applicable to the Master handset. For more infor-mation, contact your system adminis-trator .
MENU BATTERYFor more information, see “Checking battery capacity” on page 11.
MENU PHONE BOOKFor more information, see “Using phone book” on page 30.

28
MENU REDIALThe handset has maximum 10 redial numbers. Each number is only repre-sented once.
• Press MENU ( ), press > four times from standby text to enter the REDIAL MENU, and then press .
Repeated presses at < turn backward through the dialled numbers (from newest to the oldest).
Right arrow moves in the opposite direction.
Note: It is also possible to reach the REDIAL MENU, using the < ( ) key.
• Numbers are named “REDIAL” or with the name.
• If you want to delete a ”REDIAL” use < or > to scroll to the name/number, and then press twice.
The name/number is now deleted. If the number is stored, it is moved to the telephone book.
It is possible to add prefixes to the redial numbers.
• Find the number you wish to edit and press the digits you want to add to the number, e.g. prefix = O.
See also “Redial” on page 23.
MENU MSF-MAILFor more information,see “Replying to messages” on page 26.

29
MENU LOGINFor more information on this menu option, contact your system adminis-trator.
MENU MSF FUNCTIONMSF Functions are special functions, which are based on MSF (Message Service Function). The functions require special software in the main system.
Note: The PHONE BOOK MENU, REDIAL MENU and MSF-MAIL MENU can be accessed directly. The PHONE BOOK MENU by pressing > ( ), the REDIAL MENU by pressing < ( ), and the MSF-MAIL MENU by pressing R ( ) with a long key press.

30
Using phone book
You can store telephone numbers and names in your telephone book.
The telephone book can store up to 80 numbers with name. A maximum of 23 digits, including spaces, is allowed for each number. A maximum of 24 digits, including spaces, is allowed for each name. Names are sorted alphabetically starting with their first character.
Using the alphanumeric keyboard
The normal dialling keys (0-9) are used for writing the name to be placed in the telephone book. By pressing the keys a certain number of times the related letters or digits will appear in the display.
Spaces are made by using the 0 -key.
Key changes between uppercase and lowercase letters.
The arrows will move the cursor.
Left arrow is also used for deleting (hold for 1 sec.) = delete. New letters can be inserted.
Change of key press and pauses last-ing more than 1 second automatically moves the cursor to next position.

31
Storing a number
1 While on hook, press the number to be stored (max. 23 digits), press >, and then press .
2 Enter a name (max. 24 digits), and then press to store the number.
After storing, the telephone will go back to standby mode.
Key Capital letter Small letter
1 ? ! 1 - + * / = & ( ) % ¿ ¡
? ! 1 - + * / = & ( ) % ¿ ¡
2 A B C 2 Ä Å À Á Ã Æ Ç
a b c 2 ä å à á ã æ ç
3 D E F 3 È É Ê Ë
d e f 3 è é ê ë
4 G H I 4 Ì Í Î Ï g h i 4 ì í î ï5 J K L 5 j k l 56 M N O 6 Ñ Ö
Ò Ó Ô Õ Øm n o 6 ñ ö ò ó ô õ ø
7 P Q R S 7 ß p q r s 7 ß8 T U V 8 Ü Ù Ú
Ût u v 8 ü ù ú û
9 W X Y Z 9 w x y z 90 [Space] , . 0 : ;
_ ” ‘ ^ ~[Space] , . 0 : ; _ ” ‘ ^ ~
* A a a A# # @ € $ £ ¥ § <
> { | } [ \ ]# @ € $ £ ¥ § < > { | } [ \ ]
32
3 If the display shows “MEMORY FULL”, it is necessary to delete one or more numbers from the telephone book.
See Figure 5 on page 49.
Storing from Redial list
1 While on hook, use the < -key to find the number in the redial list to be stored in the telephone book.
2 Press , then >, and then press again.
3 Enter a name, and then press to store the redial list number in the telephone book.
Storing number from last caller• While on hook, press < to store a
number from last caller, then , then press >, then to confirm.
Reading BOOK numbers
1 While on hook, press > ( ) to enter the telephone book.
2 For quick-search: press the first letter of the name (using 2-9)(Refer to “Using the alphanumeric keyboard” on page 30).
3 Press to call the displayed person.
It is also possible to reach the PHONE BOOK MENU from the main menu.
33
4 Press MENU ( ) to exit the telephone book.
Note: Viewing and editing the telephone book can also be done while in conversation (off hook) by pressing > ( ) with a long key press.
See Figure 6 on page 50.
Changing numbers
1 While on hook, press > ( ) to enter the telephone book.
2 Use the < > -keys to find the number to be edited, press , press >, then press .
3 Edit the number, and then press to store the number.
Note: Viewing and editing the telephone book can also be done while in conversation (off hook) by pressing > ( ) with a long key press.
See Figure 6 on page 50.
Changing Redial number
1 While on hook, press < ( ), use the < > -keys to find the redial number to be edited, and press the digits you want to add to the number, e.g. prefix = O.
2 Press , followed by >, enter a name, and then press again to store the number.
34
Deleting numbers
1 While on hook, press > ( ) to enter the telephone book.
2 Use the < > -keys to find the number to be deleted, press twice.
See Figure 6 on page 50.
Deleting from Redial list• While on hook, press < ( ), then
use the < > -keys to find the name/number to be deleted, and press twice.
The name/number is now deleted. If number is stored, it is moved to the telephone book.
Using text messages (MSF)
It is possible to send text messages from handset to handset on the same system.
Note: Sending text messages is not supported. This feature will be supported in upcoming releases.
See Figure 4 on page 48.
At the reception of a text message the envelope display icon appears. The envelope display icon is indicating one or more unread messages or unanswered calls.
• The text message is shown in the display, and when the message is read the envelope display icon will disappear.

35
• If the message contains a callback number, this will be displayed on the bottom line of the display. As long as the callback number is in the display, it is possible to activate the number by pressing .
• 1st letter in the display, in front of the timestamp, shows the message status: read (R), unread (N) or locked (L).
• Mails include a maximum of 72 letters or digits. Call back no. is max 23 digits (or letters for E-mail).
• 14 messages can be ”stored” in the handset. When receiving a new message, the oldest unlocked will be deleted.
• Locked messages will not automatically be overwritten, but can manually be deleted. Maximum 7 messages can be locked.
Reading a MSF mail
1 While on hook, press R ( ) with a long key press, then press .
If the message includes more than 48 letters or digits, the message will run over 2 display screens.
2 Use the > -key to scroll.
3 To see the sender of the mail, press .
4 To leave the mail, press MENU ( ).
36
Replying a MSF mail
1 While on hook, press R ( ) to open the mail, then , press again and use the < > -keys to find the reply feature, press and you are now able to reply the mail.
2 After writing your reply, press to confirm.
Forwarding a MSF mail
1 While on hook, press R ( ) to open the mail, then , press again and use the < > -keys to find the forward feature, press twice and you are now able to dial the number on the receiver.
2 Press to confirm.
Deleting all MSF mails
1 While on hook, press R ( ) to open the mail stack, then , press
again and use the < > -keys to find the delete feature.
2 Press and all mails are deleted.
Deleting a MSF mail
1 While on hook, press R ( ) to open the mail, then , press again and use the < >-keys to find the delete feature.
2 Press and the mail is deleted.
37
Locking/unlocking a MSF mail
When locking a message, the mes-sage will not automatically be over-written when receiving a new message. If unlocked, the oldest mes-sage will be deleted when receiving a new message.
1 While on hook, press R ( ) to open the mail, then , press again and use the < > -keys to find the lock/unlock feature
2 Press and the mail is locked/unlocked.
Writing a MSF mail
1 While on hook, press R ( ) with a long key press to write a new mail, confirm with , and then write your message.
2 To send the mail press , dial the number of the receiver, and then confirm with .
3 If one or more mails are stored do as followed: • Press R ( ), then >, confirm
with , and then write your message.
• Press , dial the number of the receiver, and confirm with . The message is sent.
Note: In case a sent message is not received, the sender will get a message in the display.
38
Shortcuts
”SILENT”: Press: MENU ( ) followed by #. (No sounds) (Display shows SILENT)
”KEY LOCKED”: Press: MENU ( ) followed by . (Display shows KEY LOCKED)
“PHONE BOOK”: Press > ( ) (in on hook).
Name search in telephone book: Press the first letter in name.
Store a number: Press > ( ) after the number (in on hook).
“REDIAL”: Press < ( ) in on hook.
Check messages: Short Press R ( ) in on hook.
“MSF-MAIL”: Long Press R ( ) in on hook.
MUTE temporarily the ringer: Press ( ) when the telephone is ringing. Alternatively, you can also press one of the volume control buttons to mute the ringing signal.
MUTE the microphone: Press ( ) when the telephone is off hook.
RECALL: Press R ( ).
Pause(-): Hold for one second (only for on hook dialling/pre-dial).

39
General information
Troubleshooting
The telephone freezes.Remove and replace the battery pack. Press to turn on the telephone.
The telephone does not ring.Check whether the ringer is SILENT or RINGER VOL. is OFF.
Not possible to turn on the telephone. Check if battery is connected. If yes, charge the battery.
The telephone turn off when receiving a call and going off-hook.Charge the battery. If still a problem change the battery as it might be defective.
Information
Error informationImproper function of the handset might be related to the installation of the DMC system or failures related to the main system. Before declaring a handset for repair be sure that the main system is oper-ating properly.
Technical specificationSize and weightSize: 148 x 50 x 28 mmWeight: 130 g incl. battery ± 10 gCapacityActive talking time 16 hoursStand-by time 150 hours
40
Important Safety Instructions and Product Information
Before using your telephone equip-ment, you should always follow basic safety instruction to reduce the risk of fire, electrical shock and injury to per-sons, and damage to property.1. Read and understand all instruc-
tions2. Follow all warnings and instruc-
tions including those marked on the product
3. Unplug this product before clean-ing. Do not use liquid cleaners or aerosol cleaners. Use damp cloth for cleaning
4. Do not install the telephone equip-ment in the bathroom or near a wash bowl, kitchen sink, or laundry tub, in a wet basement, or near a swimming pool
5. Slots or openings in the equipment are provided for ventilation to pro-tect it from over-heating. These openings must not be blocked or covered.
6. The product should be operated only from the type of power source indicated on the instructions. If you are not sure of the type of power supply, consult your dealer or local power company.
7. Do not overload wall outlets and extension cords as this can result in fire or electrical shock.
8. Never push objects of any kind into this product through cabinet slots as they may touch dangerous voltage points or short out parts that could result in fire, electrical shock, or injury. Never spill liquid of any kind into this product.
9. To reduce the risk of electrical shock or burns, do not disassem-

41
ble this product. Opening or removing covers may expose you to dangerous voltages, dangerous electrical current, or other risks. Incorrect reassemble can cause electrical shock when the appli-ance is subsequently used. If the product need repair, consult your dealer.
10.Refer servicing to qualified service personnel.
11.Avoid using telephone during an electrical storm. There may be a risk of electrical shock from light-ning
12.Do not use the telephone to report a gas leak in the vicinity of the leak
13.Do not place the base or charger near microwave ovens, radio equipment, or non-ground con-nected televisions.
These appliances may cause electri-cal interference to the base or hand-set
14.The charger must be placed on a hard, flat surface and connected to a functional 120 volt AC power source depending on the country of use.
15.This telephone will not operate in the event of a blackout. Please keep a backup phone for emer-gencies
Intrinsic safetyDo not use the handset in conditions where there is a danger of electrically ignited explosions.Exposure to sunlight, heat and moistureDo not expose the cordless phone to direct sunlight for long periods. Keep the cordless phone away from exces-sive heat and moisture.Spare parts and accessoriesUse only approved spare parts and accessories. The operation of
42
non-approved parts cannot be guar-anteed and may even cause damage.Power failureIn the event of a power failure or flat battery, you cannot use the handset to make or receive callsBattery Precautions1. Periodically clean the charge con-
tacts on both the charger and handset.
2. Exercise care in handling batteries in order not to short the batteries with conducting materials such as rings, bracelets, and keys. The batteries or conducting material may overheat and cause burns or fire
3. Do not open or mutilate the batter-ies, released electrolyte is corro-sive and may cause damage to the eyes or skin. The electrolyte may be toxic of swallowed.
4. During charging batteries heat up. This is normal and not dangerous
5. Do not use non-Nortel charging devices. This could damage the batteries
NoticesBefore installing this equipment, users should ensure that it is permis-sible to be connected to the facilities of the local telecommunications com-pany. The equipment must also be installed using an acceptable method of connection. The customer should be aware that compliance with the above conditions may not prevent degradation of service in some situa-tions.Repairs to certified equipment should be coordinated by a representative designated by the supplier. Any repairs or alterations made by the user to this equipment, or equipment malfunctions, may give the telecom-munications company cause to request the user to disconnect the equipment.

43
Users should ensure for their own protection that the electrical ground connections of the power utility, tele-phone lines and internal metallic water pipe system, if present, are connected together. This precaution may be particularly important in rural areasCAUTIONS: Users should not attempt to make such connections themselves, but should contact the appropriate electric inspection author-ity, or electrician, as appropriate.If your telephone equipment causes harm to the telephone network, the telephone company may ask you to disconnect the system from the line until the problem has been corrected or they may discontinue your service temporarily. If possible, they will notify you in advance, But if advance notice is not practical, you should be notified as soon as possible. You will be informed of your right to file a com-plaint with the FCC.Your telephone company may make changes in its facilities, equipment, operations, or procedures that could affect the proper functioning of your telephone system, If they do and it is possible, you will be notified in advance to give you an opportunity to maintain uninterrupted telephone ser-vice. If you experience trouble with this telephone system, disconnect it from the network until the problem has been corrected or until you are sure that the equipment is not mal-functioning.Note: This equipment has been tested and found to comply with the limits for a class B digital device, pur-suant to local regulations. These lim-its are designed to provide reasonable protection against harmful interference in a residential installa-tion. This equipment generates, uses and can radiate radio frequency energy and, if not installed and used

44
in accordance with the instructions, may cause harmful interference to radio communications. However, there is no guarantee that interference will not occur in a particu-lar installation. If this equipment does cause harmful interference to radio or television reception, which can be determined by turning the equipment off and on, the user is encouraged to try to correct the interference by one or more of the following measures:— Reorient or relocate the receiving
antenna.— Increase the separation between
the equipment and receiver.— Connect the equipment into an
outlet on a circuit different from that to which the receiver is connected.
— Consult the dealer or an experienced radio/TV technician for help.
Power Outage: In the event of a power outage, your cordless tele-phone will not operate. The cordless telephone requires electricity for oper-ation. You should have a telephone which does not require electricity available for use during power out-ages.Information to user: The users man-ual or instruction manual for an inten-tional or unintentional radiator shall caution the user that changes or mod-ifications not expressly approved by the party responsible for compliance could void the user’s authority to oper-ate the equipment.

45
Fig
ure
1
Men
u la
ngua
ge

46
Fig
ure
2
Men
u pr
ofile
set
-up
47
Fig
ure
3
Men
u st
ruct
ure
48
Fig
ure
4
Men
u m
ail
49
Fig
ure
5
Men
u ph
one
book
- s
torin
g a
num
ber

50
Fig
ure
6
Men
u ph
one
book
- r
eadi
ng, d
elet
ing,
edi
ting
a nu
mbe
r

14125000-HD ED1
