nors user manual - apps.cpuc.ca.gov · pdf filefederal communications commission network...
TRANSCRIPT
Federal Communications Commission
Network Outage Reporting System User ManualVersion 1
March 6, 2017

i
Contents 1. Introduction ........................................................................................................................................... 1
1.1 Document Organization ................................................................................................................ 1
1.2 Overview of the NORS Application ............................................................................................... 1
2. Accessing NORS ..................................................................................................................................... 2
2.1 Logging In ...................................................................................................................................... 2
2.1.1 Reset Password ......................................................................................................................... 3
2.1.2 New Users ................................................................................................................................. 4
2.1.3 Assign Yourself to a Company ................................................................................................... 5
2.2 Logging Out ................................................................................................................................... 7
3. Reporting an Outage .............................................................................................................................. 8
3.1 Report Notification ....................................................................................................................... 8
3.2 Submit Initial Report ................................................................................................................... 10
3.3 Update Report (Initial, Final, Draft) ............................................................................................ 10
3.4 Reopen an Outage Report .......................................................................................................... 12
3.5 Withdraw an Outage Report ....................................................................................................... 13
4. NORS Homepage Administrative Actions ............................................................................................ 15
4.1 Create a File of NORS Reports ..................................................................................................... 15
4.2 Obtain List of Overdue Outage Reports ...................................................................................... 16
List of Figures
Figure 1, FCC Homepage ............................................................................................................................... 2 Figure 2, FCC Homepage > Licensing & Database Menu > NORS ................................................................. 2 Figure 3, FCC Log‐in Screen ........................................................................................................................... 3 Figure 4, Change Password Link .................................................................................................................... 3 Figure 5, Reset Password .............................................................................................................................. 4 Figure 6, Request New User Account ........................................................................................................... 5 Figure 7, NORS Records/Actions ................................................................................................................... 6 Figure 8, Assign Yourself to a Company ........................................................................................................ 6 Figure 9, Confirm Company Details .............................................................................................................. 6 Figure 10, Logging Out .................................................................................................................................. 7 Figure 11, Report Notification ...................................................................................................................... 8 Figure 12, NORS Outage Report Page Tabs .................................................................................................. 9 Figure 13, NORS Outage Report Mandatory Fields ...................................................................................... 9 Figure 14, Submit Notification ...................................................................................................................... 9 Figure 15, Confirm Submission of Notification Report ............................................................................... 10 Figure 16, NORS Outage Report Number ................................................................................................... 10 Figure 17, Update Report Action Tabs ........................................................................................................ 11 Figure 18, Save Draft Button ....................................................................................................................... 11

ii
Figure 19, Outage History ........................................................................................................................... 11 Figure 20, Confirm Submission of Final Report .......................................................................................... 12 Figure 21, Save Draft ................................................................................................................................... 12 Figure 22, Reopen Report ........................................................................................................................... 13 Figure 23, Request to Reopen Report ......................................................................................................... 13 Figure 24, Request to Reopen Notification ................................................................................................. 13 Figure 25, Withdraw Button ....................................................................................................................... 14 Figure 26, Withdraw Report Screen ............................................................................................................ 14 Figure 27, NORS Outage Report Criteria ..................................................................................................... 16 Figure 28, NORS Outage Report Formats ................................................................................................... 16 Figure 29, NORS Reports ............................................................................................................................. 16
List of Tables
Table 1, Inputter Administrative Privileges................................................................................................. 15 Table 2, Coordinator Administrative Privileges .......................................................................................... 15 Table 3, DHS User Administrative Privileges ............................................................................................... 15
1
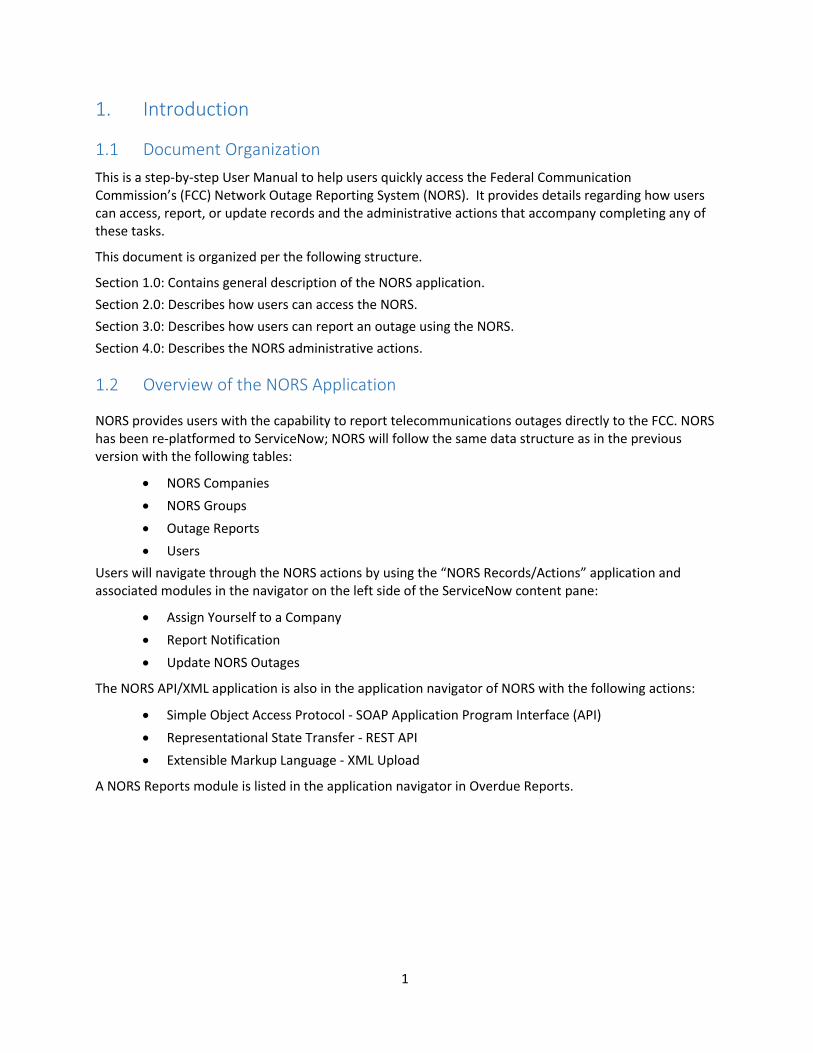
1. Introduction
1.1 Document Organization
This is a step‐by‐step User Manual to help users quickly access the Federal Communication Commission’s (FCC) Network Outage Reporting System (NORS). It provides details regarding how users can access, report, or update records and the administrative actions that accompany completing any of these tasks.
This document is organized per the following structure.
Section 1.0: Contains general description of the NORS application.
Section 2.0: Describes how users can access the NORS.
Section 3.0: Describes how users can report an outage using the NORS.
Section 4.0: Describes the NORS administrative actions.
1.2 Overview of the NORS Application
NORS provides users with the capability to report telecommunications outages directly to the FCC. NORS has been re‐platformed to ServiceNow; NORS will follow the same data structure as in the previous version with the following tables:
NORS Companies
NORS Groups
Outage Reports
Users
Users will navigate through the NORS actions by using the “NORS Records/Actions” application and associated modules in the navigator on the left side of the ServiceNow content pane:
Assign Yourself to a Company
Report Notification
Update NORS Outages
The NORS API/XML application is also in the application navigator of NORS with the following actions:
Simple Object Access Protocol ‐ SOAP Application Program Interface (API)
Representational State Transfer ‐ REST API
Extensible Markup Language ‐ XML Upload
A NORS Reports module is listed in the application navigator in Overdue Reports.

2
2. Accessing NORS
To access the NORS, visit the FCC homepage (https://www.fcc.gov/) and click the Browse by Category menu located at the top of the page (Figure 1). This menu allows users to view six separate drop down menus. The user should select the Licensing & Database; the NORS link is located in the fourth column (Figure 2). One can also access NORS by inserting the following URL into a browser: https://www.fcc.gov/network‐outage‐reporting‐system‐nors.
Figure 1, FCC Homepage
Figure 2, FCC Homepage > Licensing & Database Menu > NORS
2.1 Logging In
After selecting the FCC NORS link, the Okta sign‐in widget is available (Figure 3).

3
Figure 3, FCC Log‐in Screen
2.1.1 Reset Password
To change passwords in ServiceNow, access the user profile. At the top right of the screen in the header, select your name and then select “Profile”. Once your profile record launches, select “Change Password” under the Related Links section (Figure 4) or use https://apps2.fcc.gov/fccUserReg/pages/reset‐passwd‐identify.htm. This will take you to the FCC User Registration System in which you will log in and reset your password (Figure 5).
Figure 4, Change Password Link

4
Figure 5, Reset Password
2.1.2 New Users
An inputter account must be created prior to logging into NORS. To accomplish this, use FCC User Registration System link: https://apps2.fcc.gov/fccUserReg/pages/createAccount.htm.
Once the FCC User Registration System (User Reg) launches, enter all required information and select “Create Account” (Figure 6). If coordinator privileges are required, send a request to the NORS administrators: [email protected].

5
Figure 6, Request New User Account
2.1.3 Assign Yourself to a Company
A person must have an association with a company to access the NORS Records/Actions, most importantly to file an outage. Employees can gain access to their company’s database by using the “Assign Yourself to a Company” module under the NORS Records/Actions application menu in the application navigator. Click the NORS Records/Actions tab and select the Assign Yourself to a Company link (Figure 7). If the company is registered with the NORS, click the Register with an Existing Company link, and select, Yes, Choose from a list (Figure 8). Enter the Company’s name in the “Company” field and the Company Security Code in the “Company Security Code” field. If this information is unknown, contact your company’s NORS coordinator.

6
Figure 7, NORS Records/Actions
Figure 8, Assign Yourself to a Company
Once the Company information is entered, a dialogue box will appear, asking “Please confirm new company details” if you are creating a new company (Figure 9). If you are joining an existing company you will receive the following “Are you sure you want to join this company?” If you are sure of the company details and would like to proceed with the association select “Yes”.
Figure 9, Confirm Company Details
Once a company association is performed, the following on screen validation message is displayed, “The Company ‘Company Name’ has been created and you can now file outages under this company.” If joining an existing company, a message is sent that states that you are now an inputter under the company and you may file outages on behalf of the organization.

7
2.2 Logging Out
To log out of the ServiceNow system (i.e., end the session and log out), click the username located in the top right‐hand corner of the screen, and select the Log Out link (Figure 10).
Figure 10, Logging Out

8
3. Reporting an Outage
Once the user has registered as an Inputter and performed the company association the user will have the ability to file an outage, update their outages that were filed, and review or withdraw the report. The final report must be completed within 30 days.
3.1 Report Notification
To submit a notification report (Figure 11):
1. Click on NORS Records/Actions.
2. Click on Report Notification.
Figure 11, Report Notification
After selecting Report Notification, the NORS Outage Report form is available to record outage information.
3. The outage report contains three tabs with mandatory fields (Figure 12). If you are a member of only one company, the “Company” field will default to that company’s name. Populate the mandatory fields that are marked with a red asterisks (Figure 13).

9
Figure 12, NORS Outage Report Page Tabs
Figure 13, NORS Outage Report Mandatory Fields
4. After populating the mandatory fields, click on Submit Notification located in the upper right hand corner of the screen (Figure 14).
Figure 14, Submit Notification

10
5. Once Submit Notification is selected, NORS will display a confirmation page. Click on Yes to confirm submission (Figure 15).
Figure 15, Confirm Submission of Notification Report
6. When the submission of the notification report is confirmed, NORS will generate a report number that is displayed in the header of the outage report as well as in the “Outage Number” field on the report (Figure 16).
Figure 16, NORS Outage Report Number
3.2 Submit Initial Report
To Submit an Initial Report, navigate to the previous submitted Notification in the Update NORS Outages module under the NORS Records/Actions application:
1. Select the Notification from the list view in the “Notification” status that you want to update.
2. Select the icon on the list view to open the NORS Outage Report form.
3. Once the NORS Outage Report form is displayed, fill in the required information to file the “Initial Filing”. Once completed with the outage, select “Submit Initial Report”.
4. If there are any required fields for the initial filing, you will receive an on screen alert for these fields and which tabs/form areas where the fields are located.
3.3 Update Report (Initial, Final, Draft)
When Updating a Report, the user is able to perform the following actions for an outage report: Save Draft, Submit Initial Report, and Submit Final Report (Figure 17).

11
Figure 17, Update Report Action Tabs
1. Use the process outlined in Section 3.2, Submit Initial Notification, to access the report.
2. Once you have located the outage report to update in the “NORS Outages” module, select the
information icon, which will open the record to input any additional information for submitting a subsequent Initial Report or the Final Report.
3. If for any reason you are not ready to submit the Initial or Final Report, select the Save Draft button, which will allow you to save a draft of the outage record (Figure 18).
Figure 18, Save Draft Button
4. Once you save the record as a Draft, you will receive the following on screen notification “You are currently viewing the Submitted Report. There is an active draft version of this report, please scroll down to the Related Links to access this draft.”
5. The record that is saved as a Draft is still the official record. To edit the official filing or to navigate to the draft record, select “Access active draft version of report” in the related links section.
6. From the draft, the following actions can be performed: “Submit Initial Report” or “Submit Final Report”.
7. Once the record has changed from “Notification” to “Initial” or “Final”, the Outage History is listed in the “Outage History” related list section of the outage record (Figure 19).
Figure 19, Outage History
8. After each action, the user is redirected to the outage record. Once “Submit Initial Report” or “Submit Final Report” is selected, you are redirected to the outage report.
9. When you are ready to submit the Final Report, select Yes to agree to the statement on the Confirmation window (Figure 20).

12
Figure 20, Confirm Submission of Final Report
10. Once you have submitted the “Final Report”, the only action you can take on the report is to reopen the report.
11. To save as draft, click the Save Draft button (Figure 18). The User will be redirected to the saved as draft confirmation page; click OK (Figure 21).
Figure 21, Save Draft
12. To Submit Final Report, click Submit Final Report button.
13. Verify that action by selecting the check box and clicking Submit Final Report again.
14. The Confirmation window will be displayed; when you are ready to submit the Final Report, select Yes. (Figure 20).
Note: If the user selects “Cancel” they will be routed back to the outage report to make any necessary updates or withdraw the outage.
3.4 Reopen an Outage Report
After a final outage report has been submitted, users can only reopen the report. The entire record will be “read only”; no edits are allowed.

13
1. Click the Reopen Report button located in the upper right hand corner of the Records/Outages screen (Figure 22).
Figure 22, Reopen Report
2. The Request to Reopen Report dialogue user interface now opens; the user must enter the company passcode as well as the reason for reopening (Figure 23).
Figure 23, Request to Reopen Report
3. When the request is completed, select “OK” (Figure 23).
4. The request is sent to the NORS Admin for review (Figure 24).
Figure 24, Request to Reopen Notification
5. After the request is received and approved, NORS Admin will send an email notification with the approval.
6. Only one request to reopen a report is allowed. The header of the notification report will state, “A request to reopen this report is in progress”.
3.5 Withdraw an Outage Report
An outage report can be withdrawn after it is filed. Follow guidance outlined in Section 3.2, Submit

14
Initial Outage Report, to access the report that the user intends to withdraw. If the user is on an active record, follow these steps.
1. Click the Withdraw Report button located in the upper right of the screen (Figure 25).
Figure 25, Withdraw Button
2. Once the “Withdraw Report” action is selected, the withdraw user interface is displayed (Figure 26).
Figure 26, Withdraw Report Screen
3. When all required information is entered in the “Reason for Withdrawal”, click on Withdraw (Figure 26).
4. The user will be asked to confirm the withdrawal of report.
5. Click Yes in response to the “Are you sure you want to withdraw this report?”.
15
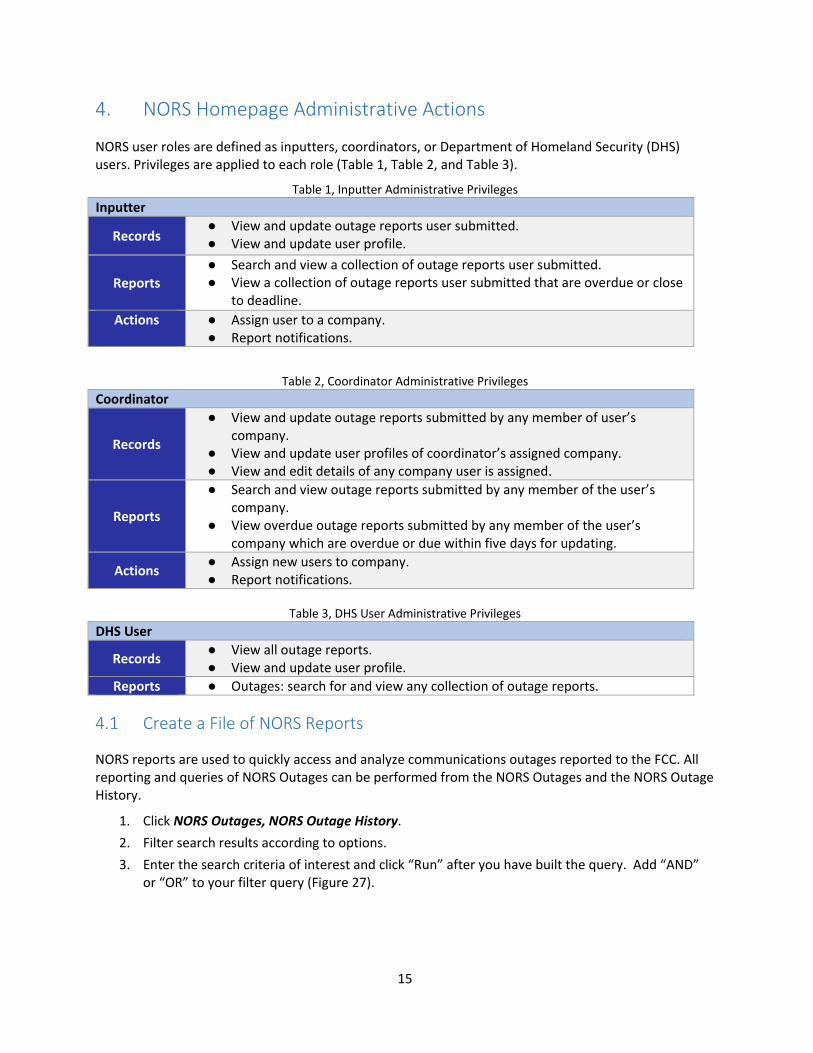
4. NORS Homepage Administrative Actions
NORS user roles are defined as inputters, coordinators, or Department of Homeland Security (DHS) users. Privileges are applied to each role (Table 1, Table 2, and Table 3).
Table 1, Inputter Administrative Privileges
Inputter
Records ● View and update outage reports user submitted. ● View and update user profile.
Reports
● Search and view a collection of outage reports user submitted. ● View a collection of outage reports user submitted that are overdue or close
to deadline.
Actions
● Assign user to a company. ● Report notifications.
Table 2, Coordinator Administrative Privileges
Coordinator
Records
● View and update outage reports submitted by any member of user’s company.
● View and update user profiles of coordinator’s assigned company. ● View and edit details of any company user is assigned.
Reports
● Search and view outage reports submitted by any member of the user’s company.
● View overdue outage reports submitted by any member of the user’s company which are overdue or due within five days for updating.
Actions ● Assign new users to company. ● Report notifications.
Table 3, DHS User Administrative Privileges
DHS User
Records ● View all outage reports. ● View and update user profile.
Reports ● Outages: search for and view any collection of outage reports.
4.1 Create a File of NORS Reports
NORS reports are used to quickly access and analyze communications outages reported to the FCC. All reporting and queries of NORS Outages can be performed from the NORS Outages and the NORS Outage History.
1. Click NORS Outages, NORS Outage History.
2. Filter search results according to options.
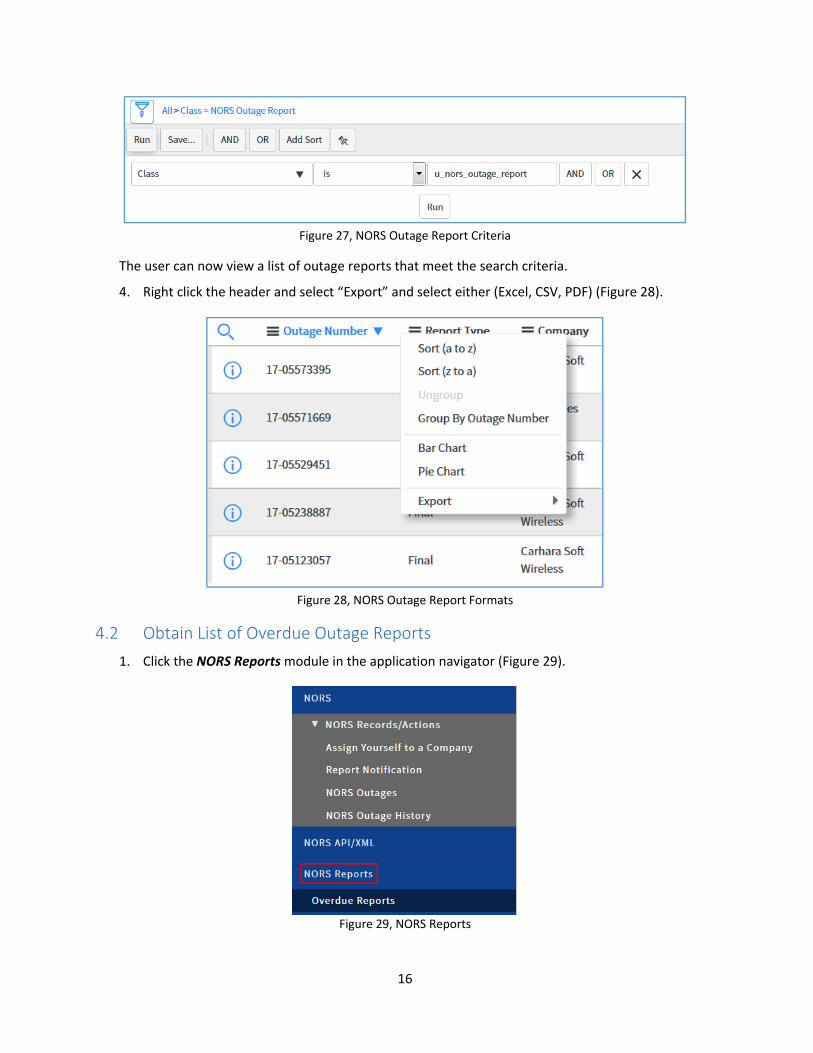
3. Enter the search criteria of interest and click “Run” after you have built the query. Add “AND” or “OR” to your filter query (Figure 27).
16
Figure 27, NORS Outage Report Criteria
The user can now view a list of outage reports that meet the search criteria.
4. Right click the header and select “Export” and select either (Excel, CSV, PDF) (Figure 28).
Figure 28, NORS Outage Report Formats
4.2 Obtain List of Overdue Outage Reports
1. Click the NORS Reports module in the application navigator (Figure 29).
Figure 29, NORS Reports

17
2. After selecting “Overdue Reports”, the Overdue Reports Homepage is displayed and the following reports are available:
Overdue Initial Reports
Overdue Final Reports
Final Reports Due in 5 Days