nine years rules1.3.indd 1 1/31/17 12:01 pm · for purposes of these rules, the powers of each side...
TRANSCRIPT
Nine Years_Rules1.3.indd 1 1/31/17 12:01 PM

© 2017 Compass Games, LLC.
NiNe Years: The War of the GraNd alliaNce 1688-1697
© 2017 Compass Games, LLC.
NINE YEARSThe War of the GraNd alliaNce
1688-1697GAME Design by Sean Chick and Kris Van Beurden
SERIES Design by Don Herndon
TABLE OF CONTENTS1. INTRODUCTION
1.1 The Game1.2 Scale1.3 Components
2. GAME MAP2.1 Spaces2.2 Capital Spaces2.3 Control of Spaces2.4 Empire/Subsidy and Austria
Home Spaces2.5 Sea Zones2.6 Ports2.7 Army Boxes2.8 Game Tracks
3. COUNTERS3.1 Leaders3.2 Corps3.3 Markers
4. STACKING4.1 Stacking Limits4.2 Controlling Corps and Stacking
with Friendly Powers4.3 Stacking with Enemy Units4.4 Fog of War
5. CARDS5.1 General5.2 Set Up
6. DETERMINING VICTORY6.1 Victory6.2 Automatic Victory6.3 End Game Victory on Points6.4 Peace Die Roll
7. POWERS7.1 General7.2 Special Rules
8. SEQUENCE OF PLAY9. EVENT CARD PHASE
9.1 General9.2 Resolving Events
10. NAVAL MATTERS11. SUPPLY
11.1 Lines of Communication11.2 Supply Sources
12. REINFORCEMENT PHASE12.1 General12.2 Reinforcements12.3 Resource Points12.4 Promote/Transfer Leaders
13. CAMPAIGN PHASE13.1 Dealing Action Cards13.2 First Action Rounds13.3 Subsequent Rounds13.4 Actions13.5 Types of Actions
14. MOVEMENT14.1 Land Movement14.2 Enemy-Controlled Spaces14.3 Enemy-Occupied SPaces14.4 ConvertingUnfortifiedSpaces14.5 Sea Movement14.6 Interception14.7 Avoiding Battle
15. FORTIFIED LINES15.1 General15.2 BuildingFortifiedLines15.3 EffectsofFortifiedLines15.4 BypassingFortifiedLines15.5 RemovalofFortifiedLines15.6 Attacking into a Friendly Line
16. BATTLE16.1 Definition:Attacker/Defender16.2 Battle Procedure16.3 Battle Outcome16.4 Retreat16.5 Famous Victory
17. SIEGE17.1 General17.2 Fortress Strength17.3 Garrisons17.4 Fortress Defense Value17.5 Resolving Sieges17.6 Lifting a Siege
18. KING WILLIAM’S WAR19. WINTER QUARTERS PHASE20. SCENARIOS
20.1 Scenario Options20.2 Nine Years20.3 Grand Campaign Game20.4 Optional Rules
21. EXTENDED EXAMPLE OF PLAY
22. DESIGN NOTES
Nine Years_Rules1.3.indd 2 1/31/17 12:01 PM

© 2017 Compass Games, LLC.
NiNe Years: The War of the GraNd alliaNce 1688-1697
© 2017 Compass Games, LLC.
3
1. INTRODUCTION1.1 THE GAME
1.1.1 Nine Years is a two player game depicting the War of the Grand Alliance and can be combined with No Peace Without Spain to also depict the War of the Spanish Succession. Both conflicts put Louis XIV’s France (and its allies) against a coalition of European dynasties. The first was a response to the Sun King’s attempt to extend his influence across the Rhine, pressuring the Holy Roman Empire to accept his territorial and dynastic claims. The latter was fought primarily to determine the fate of the Spanish throne and its dominions but also represented a continuing struggle between the Habsburg and Bourbon dynasties for the political, religious and economic dominance of Europe.
1.1.2 One player represents the interests of the French “Bourbons”, Louis XIV and his Catholic ally, James II of Britain, while the other player represents the interests of the Dutch stadtholder William III ( James II’s son-in-law) and the Austrian and Spanish Habsburgs.
Each “side” consists of a number of powers representing the military forces of various countries or duchies.
* In the Campaign Game, Spain may become a Bourbon Power during the Campaign Interphase, based on the VP situation at the end of the NY scenario.
** Savoy is initially a Neutral Power, only joining the Alliance in 1690. During the Winter Quarter’s Phase, it can be returned to Neutral status. In the Campaign Game, it may join the Bourbon side during the Campaign Interphase, in which case Event card play may cause it to switch sides once more.
*** In the Campaign Game, Bavaria will become Neutral during the Campaign Interphase and will switch to Bourbon during the 1702 or 1703 turn.
Bourbon Powers (blue counters) Color Band Example Capital
France (Fr) Blue Paris
Jacobite ( Ja) Bright RedLondon/Paris and Highlands
(2.2)
Catalan (Ca) Dark Yellow Paris
Alliance Powers (tan counters) Color Band Capital
British (Br) Red London
Dutch Republic (Du) Orange Amsterdam
Austria (Au) White Vienna
Empire (Em) Green Special (2.4)
Subsidy (Su) Gray Special (2.4)
Spain (Sp)* Dark Yellow Madrid
Savoy (Sa)** Dark Red Turin
Bavaria (Ba)*** Light Blue Munich
The Battle of La Hogue, 23 May 1692
Nine Years_Rules1.3.indd 3 1/31/17 12:01 PM
© 2017 Compass Games, LLC.
NiNe Years: The War of the GraNd alliaNce 1688-1697
© 2017 Compass Games, LLC.
4 NiNe Years: The War of the GraNd alliaNce 1688-1697
1.1.3 For purposes of these rules, the powers of each side are “friendly” to all other powers of that side, and “enemies” of the powers of the opposing side.
1.2 SCALEEach turn represents one year. Each combat unit, hereafter called a “corps”, represents approximately 10,000 men of all arms. Leaders represent the named personality and his staff.
1.3 COMPONENTSNine Years contains:
• One22”x34”map• Onerulebook• Twoidenticalplayeraidcards• OneMulti-turnEventsheet• Onedeckof55playingcards• Onecountersheetwith168countersat0.65”square• Ten6-sideddice
2. GAME MAPThe map depicts Western Europe at the end of the 17th century.
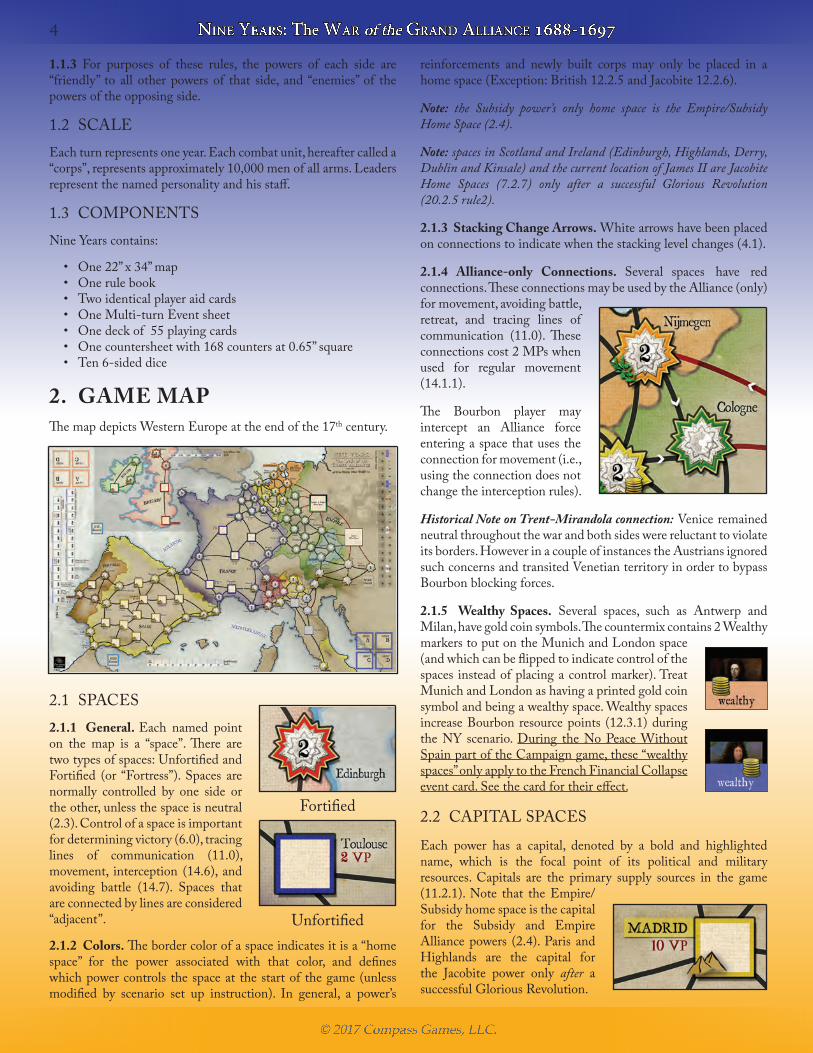
2.1 SPACES2.1.1 General. Each named point on the map is a “space”. There are two types of spaces: Unfortified and Fortified (or “Fortress”). Spaces are normally controlled by one side or the other, unless the space is neutral (2.3). Control of a space is important fordeterminingvictory(6.0),tracinglines of communication (11.0), movement, interception (14.6), andavoiding battle (14.7). Spaces thatare connected by lines are considered “adjacent”.
2.1.2 Colors. The border color of a space indicates it is a “home space” for the power associated with that color, and defines which power controls the space at the start of the game (unless modified by scenario set up instruction). In general, a power’s
reinforcements and newly built corps may only be placed in a homespace(Exception:British12.2.5andJacobite12.2.6).
Note: the Subsidy power’s only home space is the Empire/Subsidy Home Space (2.4).
Note: spaces in Scotland and Ireland (Edinburgh, Highlands, Derry, Dublin and Kinsale) and the current location of James II are Jacobite Home Spaces (7.2.7) only after a successful Glorious Revolution (20.2.5 rule2).
2.1.3 Stacking Change Arrows.Whitearrowshavebeenplacedonconnectionstoindicatewhenthestackinglevelchanges(4.1).
2.1.4 Alliance-only Connections. Several spaces have redconnections. These connections may be used by the Alliance (only) formovement,avoidingbattle,retreat, and tracing lines of communication (11.0). These connections cost 2 MPs when used for regular movement(14.1.1).
The Bourbon player may intercept an Alliance force entering a space that uses the connectionformovement(i.e.,using the connection does not change the interception rules).
Historical Note on Trent-Mirandola connection: Venice remained neutralthroughoutthewarandbothsideswerereluctanttoviolateitsborders.HoweverinacoupleofinstancestheAustriansignoredsuch concerns and transited Venetian territory in order to bypass Bourbonblockingforces.
2.1.5 Wealthy Spaces. Several spaces, such as Antwerp andMilan,havegoldcoinsymbols.Thecountermixcontains2WealthymarkerstoputontheMunichandLondonspace(and which can be flipped to indicate control of the spacesinsteadofplacingacontrolmarker).TreatMunichandLondonashavingaprintedgoldcoinsymbol and being a wealthy space. Wealthy spaces increase Bourbon resource points (12.3.1) during the NY scenario. During the No Peace Without Spain part of the Campaign game, these “wealthy spaces” only apply to the French Financial Collapse eventcard.Seethecardfortheireffect.
2.2 CAPITAL SPACES
Each power has a capital, denoted by a bold and highlighted name, which is the focal point of its political and military resources. Capitals are the primary supply sources in the game (11.2.1). Note that the Empire/Subsidy home space is the capital for the Subsidy and Empire Alliancepowers (2.4).Paris andHighlands are the capital for the Jacobite power only after a successfulGloriousRevolution.
Fortified
Unfortified
Nine Years_Rules1.3.indd 4 2/7/17 8:15 AM

© 2017 Compass Games, LLC.
NiNe Years: The War of the GraNd alliaNce 1688-1697
© 2017 Compass Games, LLC.
5NiNe Years: The War of the GraNd alliaNce 1688-1697
2.3 CONTROL OF SPACES
2.3.1 General. Most spaces begin the game under the control of onesideortheother.Afewspacesrequirefurtherclarification:
• Savoy is a neutral power at the start of the NY scenario,joining the war as per 7.2.
• Parma,Mantua,Mirandolaand thePapalStates representindependent (i.e. neutral) Italian duchies and church lands. The scenario set-up (20.1) specifies if a space begins the game under the control of a side. Unlike Bavaria and Portugal, however, these spaces may be entered and controlled by either side at any time
• Bavaria and Portugal are neutral powers at the start of the NPWS scenario of the Campaign Game, joining the war as per 7.2.
2.3.2 Fortress Spaces. Control of a fortress changes hands through siege (17.0) or a power’s shift of allegiance (7.2). Fortress spaces have an inherent Fortress Strength: 1, 2, or 3. Fortresses with a strength of 2 or 3 have the values printed on the map; all other fortresses have a strength of 1. Fortresses are always considered at full strength unless reduced by an active siege (as indicated by Fortress Strength markers) or by special scenario rules.
2.3.3 Unfortified Spaces. Unlike fortress spaces, unfortified spaces have no defensive strength and control may change during a Campaign action simply by an enemy force expending a movement point in the space (14.4).
2.3.4 Control Markers. Use control markers as needed to indicate ownership. For the duration of the Nine Years scenario, the Wealthy markers on London and Munich can be used to indicate ownership.
2.4 EMPIRE/SUBSIDY AND AUSTRIA HOME SPACES
ThelargesquareEmpire/SubsidyandAustriaHomeSpaceshavethe following special characteristics:
• Alliance-only: They may never be entered by Bourbon units.• Capital:The Empire/Subsidy home space is the capital for
both the Empire and Subsidy powers, acting as a normal capital in all respects (i.e. for LOC and reinforcement purposes). It is also the only home space for the Subsidy power; any newly arriving Subsidy corps must be placed in the space. The Austria home space is not the capital of Austria, however; Vienna is.
• No stacking limit and full Alliance use: Any Alliance powers may freely enter, exit, or remain in the two home spaces as desired, without regard to stacking. Note that the lines leading into and out of the two home spaces are red; it costs 2 MPs to move along them.
2.5 SEAZONES
Historical Note for Nine Years: Before the Glorious Revolution, Britain was allied to Bourbon France and their combined fleets were a threat to Allied dominance in the Atlantic, mostly based on the Dutch naval forces.
2.5.1 General. There are two sea zones on the map: the Atlantic and the Mediterranean. Sea zones are used to regulate sea-based linesofcommunication(11.1)andseamovement(14.5).Allportsare adjacent to a single sea zone except Gibraltar, which borders twoseazones(2.6).
2.5.2 Atlantic Sea Zone.
• TheAtlanticbeginsthegameuncontrolled.Onceasidegainscontrol over the Atlantic, control is retained until otherwise changed (exception: if the Alliance controls London and Beachy Head is not in effect, the Atlantic always changes to Alliance control during the Winter Quarters Phase). See 10.2 for the rules detailing how control of the Atlantic is determined. Control of the Atlantic affects lines of communication and sea movement through that zone.
• In the NPWS scenario, the Alliance always controls the Atlantic sea zone throughout the game; this cannot change. Bourbon units may never move or trace a line of communications through it.
2.5.3 Mediterranean Sea Zone.
• TheMediterraneanbeginsthegameunderBourboncontrol.Once a side gains control over the Mediterranean, control is retained until otherwise changed. See 10.2 for the rules detailing how control over the Mediterranean is determined. Control of the Mediterranean affects lines of communication and sea movement through that zone.
• In the NPWS scenario, control of the Mediterranean Sea (the “Med”) begins with the Bourbon player but changes during the game. See 10.2 for the rules detailing how control of the Med is determined. Control of the Med affects not only lines of communication and sea movement (11.1) through that zone, but also the current victory point level (6.1.1).
Play Note: Although Gibraltar was long recognized as a location of strategic importance, in the early 18th century it was not a major port and thus did not control the entrance to the Mediterranean.
2.6 PORTS
2.6.1 General. Spaces whose names are printed in the water are ports. Most ports are adjacent to a single sea zone.
2.6.2Dual-ZonePort. Gibraltar is adjacent to the Atlantic and Mediterranean zones.
2.6.3Purpose. A side may use a port for sea moves and tracing LOCs. LOCs can only be traced if a side controls the sea zone adjacent to that Port (exception: Jacobites in Ireland). Sea moves can only be used if a side controls the sea zone adjacent to that port.
Nine Years_Rules1.3.indd 5 1/31/17 12:01 PM

© 2017 Compass Games, LLC.
NiNe Years: The War of the GraNd alliaNce 1688-1697
© 2017 Compass Games, LLC.
6 NiNe Years: The War of the GraNd alliaNce 1688-1697
Play Note for NPWS: Since Gibraltar is adjacent to both the Atlantic and Mediterranean zones, the Bourbons may trace a sea line of communications or sea move to or from the space only if they control the Mediterranean.
2.7 ARMY BOXES
Each side has four army boxes (with associated counters) that can be used to help handle large stacks. There are no special rules regarding the army boxes or counters – they are simply used for convenience to help reduce map clutter. Each player has four Army markers to place on the map; the letters on the markers correspond to the letters of the army boxes.
2.8 GAMETRACKS
The map includes several tracks to hold game information markers.
3. COUNTERSTerminology:The term “force” is used in these rules to describe a single stack of leaders and/or corps.
3.1 LEADERS
There are three types of leaders in the game: named, minor and staff officer. Named leaders may be eliminated as a result of battle or siege; if this occurs the counter is flipped over to its replacement (minor leader) side for the remainder of the game.
Exception: The Marlborough leader belonging to the Jacobite Power does not have a replacement minor leader on his reverse side. On its reserve side is the Marlborough leader belonging to the British Power for use during the NY scenario. If eliminated, neither of these leaders is replaced by a minor leader.
Leaders have two numerical ratings:
• TacticalRating(TR)contributesdicetobattle(16.2)andis also used tomodify interception (14.6), avoiding battle(14.7),andbypassfortifiedlines(15.4)dierolls.Notethatnamed leaders suffer a reduced TR if they are not stacked with a home corps (3.1.1).
• CommandRating(CR)indicatesthenumberofcorpsthatleader may command (activate) during a Campaign action (13.5.1).AleadermayalsouseaRallyactiontorallyhimselfandanumberofcorpsequaltoone-half(roundedup)ofhisCR(13.5.4).
3.1.1 HomeCorps.Along the bottom of each named leader’s counter is a colored “band” indicating that leader’s “home power”.
Anamedleadersuffersa-1TRpenaltyifheisnotcommandingat leastonehomecorpswhenusinghisTRratingforanydieroll.CRisneveraffectedbythehomecorpsrequirement.
Example: Waldeck is part of a defending (i.e. inactive) stack in a battle that contains no Dutch corps. His TR for the battle is +0 instead of +1.
Play Note: The minor leader side for the following leaders: William III, Lorraine, Eugene, Lorges, Luxembourg, Noailles and James II has a home corps band, and these follow the same rules for home corps as named leaders.
3.1.2 Promotion. Max Emanuel, Lorraine, Lorges, Victor Amadeus, Luxembourg and Catinat begin the game on their minor leader sides. These leaders remain on their minor leader side and may not be eliminated in battle until promoted during the Reinforcement phase (see 12.4). After promotion, if eliminated they are flipped back to their minor leader side for the remainder of the game.
3.2 CORPSHistorical Note: During this period of warfare an army’s command structure was fairly ad hoc depending on the circumstances (the seniority and nationality of the general officers present, the composition and nationality of the troops, and so on). Each combat unit in the game represents roughly 10,000 infantry, cavalry and artillerymen. Although the concept of a permanent combined-arms organization had not yet been adapted, “corps” was a contemporary term to describe large bodies of troops and is used here to describe the combat units.
3.2.1 Each power has a number of corps counters which represents its field forces. Each corps has two sides:
• Fullstrength – worth 1 die in battle. A hit on a full strength corps causes it to be flipped.
• Reduced – worth ½ die in battle. A hit on a reduced corps causes it to be eliminated and returned to the Force Pool.
IMPORTANT: Unless the rules specifically state otherwise, the term “corps” applies to either a full or reduced-strength counter.
3.2.2 Corps are reduced as a result of combat, overstacking, or card events, and once reduced can only be restored to full strength during the Reinforcement phase (12.3) or during an Action round (13.5).Eliminatedcorpsareplacedoff-mapina“forcepool”(12.3).
3.2.3 Corps cannot be combined or split up.
Front Back
Front (Full Strength)
Tactical Rating
Command Rating
Home corps “band”(Austrian)
Back (Reduced Strength)
Nine Years_Rules1.3.indd 6 1/31/17 12:01 PM

© 2017 Compass Games, LLC.
NiNe Years: The War of the GraNd alliaNce 1688-1697
© 2017 Compass Games, LLC.
7NiNe Years: The War of the GraNd alliaNce 1688-1697
3.3 MARKERS 3.3.1 The game uses a variety of markers to keep track of game events and to record progress.
3.3.2 The counter mix should be sufficient, however all game markers may be duplicated if necessary.
4. STACKINGHistorical Note: Although each space represents a fairly large area, the logistical requirements of the period placed limits on the practical size of armies based on the land’s ability to support such forces (roads, rivers, forage, fodder for horses, etc.).
4.1 STACKING LIMITS4.1.1StackingLimits. Each space on the map has a stacking limit indicating the total number of corps each side may safely stack in the space (exception Empire/Subsidy and Austrian Home Space 2.4).
Type Icon Stacking Limit
Fertile Wheat 12
Normal none 8
Rugged Mountain 4
Play Note: Reduced corps counts the same as a full-strength corps for stacking purposes, while leaders and other game markers have no effect on stacking.
4.1.2 NoVoluntaryOverstacking. Stacking is enforced at the conclusion of a move or retreat. Stacking limits may be temporarily exceeded while a force moves through a space (i.e. the moving force and/or any inactive friendly corps in the space exceed the stacking limit), or when moving into a space for the purpose of lifting a siege (17.3.4 and 17.6.1).The only times a forcemayoverstackinaspaceisfollowingarequiredretreat(i.e.afterbattleor Winter Quarters phase withdrawal) or after a successful lifting of a siege. It is not permitted to overstack when intercepting into aspace(14.6.2).
4.1.3 Penalties for Overstacked Spaces. There are three penalties associated with overstacked spaces:
• Full Strength Corps Reduction. If the number of full strength corps in an overstacked space exceeds one-half (1/2) the stacking limit, then any full strength corps in excess of this number must be reduced (owning player’s choice) at the conclusion of the move or retreat.
• NoRestoresorReinforcementsAllowed. No reduced corps in an overstacked space may be restored, whether during theReinforcementphase(12.3.5)orduringaReplacementAction(13.5.3).Additionally,nonewcorpsmaybeplacedinan overstacked space as reinforcements.
• Activation Restrictions. Regardless of available leaders, a force in an overstacked space can never conduct a Campaign action, intercept, or avoid battle with more corps than the stacking limit. Note that all corps in an overstacked space will still defend as a combined force if attacked.
Example: Following a retreat there are 3 full strength and 2 reduced strength corps in a rugged space. 1 full strength corps must be reduced, leaving 2 full strength corps (1/2 safe stacking limit) and 3 reduced corps. The 3 reduced corps cannot be restored, and only 4 of the 5 corps can be activated in a single action so long as the space remains overstacked. If attacked, the force will contribute 4 dice towards the battle (3.5 rounded up).
4.2 CONTROLLING CORPS AND STACKING WITH FRIENDLY POWERS There are no restrictions against different powers of the same side stacking, moving or fighting together. A leader may command the corps of any friendly power without restriction (but remember the home corps rule 3.1.1).
4.3 STACKING WITH ENEMY UNITS There are three situations in which friendly and enemy forces may be in the same space:
1. During a Campaign action, a force may move into a space containing enemy forces. In this case, the enemy force mustacceptbattle(16.0)orattempttoavoidbattle(14.7).Unless the situation in #3 (below), one side will retreat or be completely eliminated, leaving the other side in sole occupation – but not necessarily in control – of the space.
2. During a Campaign action, an inactive force may intercept into a friendly space into which an active force has just entered. In this case, there is a battle (16.0), although see14.6.6.
3. One corps and any number of leaders may occupy a friendly fortress during a siege. This is known as a garrison (17.3) and is the only time that units of both sides can occupy the same space at the end of an Action.
4.4 FOG OF WAR There is no “fog of war” with regards to counters; you may inspect enemy stacks (including stacks in Army Boxes) at any time. Unplayed cards remain hidden from the other player at all times.
Historical Note: Security in an age with open borders and multi-national states was difficult to achieve. Both sides had effective intelligence systems, with commanders often obtaining surprisingly accurate enemy orders of battle.
Nine Years_Rules1.3.indd 7 1/31/17 12:01 PM

© 2017 Compass Games, LLC.
NiNe Years: The War of the GraNd alliaNce 1688-1697
© 2017 Compass Games, LLC.
8 NiNe Years: The War of the GraNd alliaNce 1688-1697
5. CARDS5.1 GENERAL
There are two separate types of cards:Eventcards and Action cards.
• EventcardsaredrawnduringtheEventCardphase(onebyeach player) to trigger random events.
• Action cards are dealt to each player at the start of theCampaign phase and are used to conduct actions.
Event Card Action Card
5.2 SETUP
5.2.1GameStart. At the beginning of the game and during the Campaign Interphase, separate the Event cards and Action cards into separate decks. Shuffle and place each deck near the map. Both players draw from a common event deck and a common Action deck.
5.2.2 1693 Card Adds Some Event cards are not in play at the start of the game. These are labeled “Add to the deck in 1693” and are added to the deck at the start of the (respective) card phase(s). Place these cards to the side until they are used, and shuffle the event deck when they are added.
6. DETERMINING VICTORY6.1 VICTORY
Victory conditions are checked during the Winter Quarters phase ofeachTurn(8.0,#5f ).AplayermaywinbyAutomaticVictoryorEnd-Game Victory on Points.
Play Note: In the extremely unlikely event both players achieve their automatic victory conditions in the same turn, the player currently controlling London (Madrid if during the NPWS scenario of the Campaign Game) wins the game.
6.1.1 Victory Points (VPs). The Game Record Track records the current number of Alliance VPs. At the start of the game, the VP markerisplacedonthe15space.TheVPmarkernevergoesbelow0orabove35, even if something (suchasa siege result)wouldotherwise demand it.
During theEvent Phase (8.0 #1), theVP total is increased ordecreased based on the position of the King William’s War (KWW) marker on the KWW track.
DuringtheCampaignphase (8.0#3), theVPtotal is increasedimmediately when the Alliance player does the following, and decreased immediately when the Bourbon player does the following:
• gainscontrolofafortressspacebysiege(17.5.7);• convertsanunfortifiedspace(14.4)thathasaVPnumber
printed on the map; • winsaFamousVictory(16.5.3).• winsaNavalBattleastheattacker(11)• experiences a dynastic upset (see below and 16, play note
below leader casualty table)
DuringtheWinterQuartersphase(8.0#5),theVPtotalis:
• decreasediftheBourbonscontrolLondon(19.0C);
SPACES: Unless indicated differently on the map, the VP value of a space is as follows. These values apply only if the space changes handsasaresultofActions(siegesormovement,butsee6.1.2);changes in possession from Event cards never changes the VP track.
Type of Space VP Value
Unfortified Space 0 or the # of VP printed beside the space
Level 1 Fortress 1 VP – the # is not printed on the map
Level 2 Fortress 2 VP – the # is printed on the map
Level 3 Fortress 3 VP – the # is printed on the map
KING WILLIAM’s WAR: After making the KWW die roll during the Event Phase, adjust the VP marker based on the position of the KWW marker on its track. If the relative VP amount remained the same (between the position of the KWW marker before and after the roll), do not adjust VPs. If the relative VP amount changed, adjust the VP marker accordingly.
Example: The KWW marker is at the first -1 VP spot and the Bourbon player wins the KWW roll. He adjusts the KWW marker to the second -1 VP spot. As the relative VP amount remained the same, the VP marker does not move. The next event phase, the Bourbon player wins the KWW roll again. This time, the KWW marker moves to the -2 VP spot and the VP marker moves down 1 VP.
FAMOUS VICTORIES: Alliance Famous Victories increase the VP count by 2, while Bourbon Famous Victories decrease the count by 2.
NAVAL BATTLES: Successful fleet sorties by an Alliance fleet increase the VP count by 1, while successful fleet sorties by a Bourbon fleet decrease the count by 1.
Nine Years_Rules1.3.indd 8 1/31/17 12:01 PM

© 2017 Compass Games, LLC.
NiNe Years: The War of the GraNd alliaNce 1688-1697
© 2017 Compass Games, LLC.
9NiNe Years: The War of the GraNd alliaNce 1688-1697
DYNASTIC UPSETS The following rules are associated with the named leaders James II, Max Emanuel, William III and Victor Amadeus (these leaders are marked with a * or have their name underlined on their marker):
(a) If eliminated in battle or siege (flipped to minor leader side), the opposing player receives 2 VP
(b) If their named leader side is underlined (i.e. Max Emanuel, William III and Victor Amadeus) and they are captured in battle or siege, they must be ransomed back (placed on turn trackforVPequaltoCRvalue)–theycannotbevoluntarilyeliminated. If their named leader side is starred (i.e. James II) and they are captured in battle or siege, they cannot be ransomed back and must be eliminated (flipped to minor leader side), triggering the gains from (a)
CONTROL OF LONDON: During the Winter Quarters phase the Alliance player loses 2 VPs if the Bourbon player has control of the London space.
6.1.2NoVPAdjustmentforCertainChangesofControl.There are several game events that cause control of spaces to change without resulting in a VP track adjustment:
• Savoyentersthewar-automatic.• DerryduringGloriousRevolution–specialscenariorule• ScotlandRises/Pacified–eventcard• Savoybecomesneutral-7.1.2.
In each of these cases, the VP total is not adjusted. However, if any of these spaces are captured by siege during a campaign round, VPs are adjusted normally.
Example: If the Alliance captures Derry through a regular siege, 1 VP is awarded. But if the Alliance gains control through the Glorious Revolution scenario rule, the VP marker is not adjusted.
6.2 AUTOMATICVICTORY
Either side may claim an Automatic Major Victory during the Winter Quarters phase by achieving the following conditions:
AllianceAutomaticVictory
1. Paris is Alliance-controlled with a land-based LOC to Amsterdam or Vienna; or
2.TheVPlevelisat35orhigheror (NPWS scenario) the VP level is at 30 or higher
BourbonAutomaticVictory
1. Vienna or Amsterdam is Bourbon-controlled with a land-based LOC to Paris; or
2. The VP level is at 0.
6.3 ENDGAMEVICTORYONPOINTSIf neither side achieves an automatic victory before the Winter Quarters phase of the final turn (or if the Bourbon player rolled a 6 or higher on the Peace Negotiations die roll 6.5), playersdetermine which player has achieved a major or minor victory based on the final VP count.
30+ MAJOR Alliance win
25-29 minor Alliance win
20-24 minor Bourbon win
19orless MAJOR Bourbon win
6.4 PEACEDIEROLL(NYONLY)Additionally, at the beginning of the winter quarters phase of1696 (and all following turns until 1699), the Bourbon playermust make a Peace Die Roll.
1. Non-initiative player, then initiative player may forfeit one future Action card draw and/or receive 2 fewer resource points during the next turn
2.TheBourbonplayerrolls1d6,addingthefollowingDRMs.Iftheresultis10orhigher,thegameends(see6.3forvictorydetermination).
The following modifiers are used:
• -1foreachplayerwhomadeaforfeitduringstep1(-2foreach player who made both forfeits) .
• +1ifatleastonefortifiedSpanishhomespaceoutsideSpainis Bourbon-controlled
• +1ifatleasttwofortifiedEmpirehomespacesareBourbon-controlled.
• +1ifatleastthreefortifiedSpanishhomespacesinSpainareBourbon-controlled
• +1ifLondonisBourboncontrolled• +1ifDublinisBourboncontrolled• +1ifEdinburghisBourboncontrolled• +1iftheKWWmarkeriscurrentlyina-1VPposition(+2
if in the -2 VP position instead)• +1ifSavoyisNeutral.• +1foreachturnafter1696
7. POWERS7.1 GENERAL 7.1.1 Most powers start the game under the control of one side or the other. Several powers have special rules as described below.
7.1.2 A controlled power never “surrenders”, even if its capital is captured by the enemy or all of its corps are eliminated. However, a power whose capital is enemy-controlled cannot provide a LOC, meaning the power cannot restore reduced corps or build new corps. In essence, existing forces will continue to fight but the power cannot build or restore corps until the capital has been recovered by its own side.
Nine Years_Rules1.3.indd 9 1/31/17 12:01 PM

© 2017 Compass Games, LLC.
NiNe Years: The War of the GraNd alliaNce 1688-1697
© 2017 Compass Games, LLC.
10 NiNe Years: The War of the GraNd alliaNce 1688-1697
7.2 SPECIAL RULES
7.2.1 Savoy. Savoy begins the game as a neutral power. While neutral, neither side’s forces may move into or through a Savoyard space.Atthestartofthe1690EventCardphaseSavoyjoinstheAlliance(noVPadjustment–6.1.2)andoperateslikeanyotherpower.
During theWinterQuarters phase of 1696 or later (or at themoment of capturing the Turin space), any player controlling at least one Savoyard fortress may (in initiative order) decide to turn Savoy neutral
• All fortresses in Savoy become neutral (without VPadjustment–6.1.2)
• The Savoy corps counters andVictorAmadeus leader areremoved from the game.
• AnyBourbonforcesinSavoyspacesaremovedtothenearestBourbon-controlled space with a LoC to Paris. If more than one space qualifies, the Bourbon player may choose thedestination space(s)
• AnyAllianceforcesinSavoyspacesaremovedtothenearestAlliance-controlled space with a LoC to Vienna. If more thanonespacequalifies,theAllianceplayermaychoosethedestination space(s)
• IfexecutedbytheBourbonplayer,hegains1VP(adjusttheVP marker by moving it 1 space towards 0).
7.2.2Portugal. Portugal is a neutral power for duration of the NY scenario.
7.2.3 Catalan Space. The Catalan Spanish Corps can be built in any Bourbon-controlled space in Spain but only if a LOC exists to Paris.
7.2.4Empire. The Empire represents the various circles, duchies and principalities of the Holy Roman Empire that joined the fight against the Bourbons early in the war. The Empire/Subsidy Home Space acts as the Empire’s capital (2.4).
7.2.5Subsidy. Numerous states and duchies (Denmark, Prussia, Saxony, Hanover, etc.) contributed large numbers of hired troops to the Alliance armies. The Empire/Subsidy Home Space acts as the Subsidy power’s capital and only home space (2.4).
7.2.6 Jacobites. The Jacobite Power represents the Catholic English, Scottish and Irish supporters of James II, the dominant Power in Britain prior to the Glorious Revolution. Jacobite Corps follow the following rules:
• Thereare5JacobiteCorpsinthegame.Fourareavailableatstart and the final one may arrive with Claverhouse through play of the Scotland Rises event card.
• BeforetheGloriousRevolutionspecialscenarioeventoccurs,the Jacobite power is treated as a regular power with only two Home Spaces: London, which doubles as its capital, and York.
• After theGloriousRevolution, all spaces inGreatBritainand Ireland count as Home Spaces for the Jacobite Power, which now has three capitals: London, Paris and Highlands. Jacobite corps can trace a LOC to Paris from spaces in Great
Britain and Ireland even if the Atlantic sea zone is not under control of the Bourbon power. Additionally, if James II in a French home space, a single Jacobite corps can be built in that space if it has a LOC to Paris and no other Jacobite corps are in play outside Great Britain and Ireland (see 20.2.5rule2bforanexceptiontothissecondrequirement).
8. SEQUENCE OF PLAYNine Years is played in Turns, each of which represents one year. Each Turn is divided into the following phases:
1. Event Card Phase (9.0) [initiative player chooses who goes first]
a. (NYonly)If1690,Savoyautomaticallyentersthewar.b. If1693(NY)or1708(NPWS), add new cards to the deck
and reshuffle. c. (NY) Increase King William’s War commitment (once per
game per player)d. (NY) Make a King William’s War rolle. (NY only) Marlborough Roll. Roll a die if Marlborough in
playonhisBritishside.Ona5-6:Removehimfromthegame.
f. Draw Event cards.
2.ReinforcementPhase (12.0) [initiative player chooseswhogoes first]
a. Use Resource Points to build and restore Corps, construct Fortified Lines, sent Colonial Support or commission any Fleet currently in play.
b. Place reinforcements.c. Promote/Transfer Leaders.
3.CampaignPhase(13.0)[variablefirstplayer]
a. Shuffle Action card deck if necessary and deal Action cards. b. Determine first player. c. Conduct Action Rounds
4.WinterQuartersPhase(19.0)[simultaneous]
a. Withdraw to friendly spaces; reduced strength fortresses recover.
b. Remove markers (Continued Siege, Fortress Strength, Famous Victory, Demoralized, and any Fleet).
c. Naval Control• (NYonly)Atlanticcontrolchanges(toAlliancecontrol
if London is Alliance controlled and Beachy Head not in effect or to Bourbon control if Beachy Head Event card in effect, no change of control otherwise).
• (NYonly)-2VPsifLondonisBourbonControlled.d. DeterminationofSavoyneutrality(1696orlater).IfLondon
is Bourbon controlled but the Atlantic is under Alliance control,executetheGloriousRevolutionasper20.2.5rule2b.
e. Peace negotiations • BourbonPeaceDieRoll(1696until1699)
f. Check for end of game and automatic victory, Advance Turn marker.
Nine Years_Rules1.3.indd 10 1/31/17 12:01 PM

© 2017 Compass Games, LLC.
NiNe Years: The War of the GraNd alliaNce 1688-1697
© 2017 Compass Games, LLC.
11NiNe Years: The War of the GraNd alliaNce 1688-1697
9. EVENT CARD PHASE9.1 GENERAL
Both players (Initiative player chooses) draw an Event card and resolve the event. Several Event cards are not in play until the 1693(1708) Event Card phase; they are added to the Event deck atthebeginningofthatturn(5.2.2).
9.2 RESOLVINGEVENTS
9.2.1 Drawing Event Cards. When an Event card is drawn from the deck, one of the following occurs:
• Ifthecardstates,“HoldUntilPlayed”(suchtextisinredandis immediately above the card description),the player retains it in his hand until he wishes to play it. He may retain it indefinitely.
• All other cardsmust be played and resolved immediatelyupon being drawn, regardless of which player drew the card, and no matter which player the Event benefits.
All Event cards are permanently removed from the game after their resolution.
9.2.2UnplayableEvents. Occasionally an Event card may not be playable due to necessary conditions not being met. In these cases the card is still removed from the game. The player who drew the unplayable event does not draw another Event card that turn.
9.2.3Multi-turnEvents. Four cards (Guerre de Course, Battle ofZenta,BeachyHeadandDeathofLouvois–eachwitharedborder to indicate their permanent status) have lasting effects. Each of these cards has a holding box (with a lighter version of the card printed on it) on the Multi-turn Event sheet to indicate that the event remains in effect.
10. NAVAL MATTERS10.1 DETERMINING CONTROL OF SEA ZONESINTHENYSCENARIO
The NY scenario begins with the Atlantic being uncontrolled and the Mediterranean under Bourbon control. Once a side gains control over the Atlantic or the Mediterranean, control is retained until otherwise changed.
• ControlovertheSeaZonecanchange in several ways:
• DuringtheEventPhase(AtlanticSeaZoneonly,through the Guerre de Course and Beachy Head events)
• DuringtheCampaignPhase(NavalBattles,see13.5.6)
DuringtheWinterPhase(AtlanticSeaZoneonly,througheitherBeachy Head event or Alliance control of London)
Indicate control over a sea zone by placing the controlling player’s associated fleet on that Sea Zone’s Control Box on the map(from the board or Force Pool). Fleets in control boxes cannot be commissioned.IfSeaZonecontrolchanges,returnanyfleetthereto the Force Pool (or remove it from the game if its Home Port has ever been besieged) and place the opposing player’s associated fleetinthatSeaZoneControlBox.
Example: At the start of the NY scenario, the Mediterranean begins Bourbon controlled. As such, the Toulon Fleet is in the “Med Control” box on the map. The Alliance Med fleet is in Barcelona. If, through a Fleet Deployment action or otherwise, the Alliance player gains control over the Mediterranean Sea Zone, the Toulon Fleet would return to the Force Pool and the Med Fleet would be placed in the “Med Control” box.
11. SUPPLY11.1 LINESOFCOMMUNICATION(LOC)
11.1.1 Definition. A space is defined as having a LOC if it can trace an uninterrupted line of connected, friendly-controlled spaces back to a friendly supply source (11.2).
11.1.2Purpose. LOCs must be checked during the following situations:
• Determiningautomaticvictory(6.2).• Placingreinforcementsandrestoringcorps(12.0,13.3.5).• Buildingfortifiedlines(15.0).• Conductingsieges(17.0).
11.1.3TracingLOCbySea. A LOC may also be traced by sea. The path of spaces must include (or start in) a port and then trace through a friendly controlled sea zone(s) to a friendly port. From that second port, the path is traced normally to the capital. If the path includes a land-based component to reach a port, that port must be friendly-controlled and not under siege.
Nine Years_Rules1.3.indd 11 1/31/17 12:01 PM

© 2017 Compass Games, LLC.
NiNe Years: The War of the GraNd alliaNce 1688-1697
© 2017 Compass Games, LLC.
12 NiNe Years: The War of the GraNd alliaNce 1688-1697
EXCEPTION: Ireland: After Glorious Revolution, Bourbon player can trace LOC from spaces in Ireland through an uncontrolled or enemy-controlled sea zone to a friendly port & capital.
Play Note: A force besieging an enemy port is supplied if it can trace through a friendly sea zone(s). Also, if the terminating port is the supply source itself (i.e. Amsterdam, Lisbon, or Barcelona) the LOC is still valid even if the port is under siege.
11.1.4 Threatened LOC. A friendly space under siege still qualifies as a valid path for a LOC; however it is considered“threatened”andaffectssiegeresolutionasper17.5.3.
11.1.5 Overstacked Spaces. Although overstacked spaces are subject to certain penalties (4.1.3), they do not block LOCs.
11.2 SUPPLY SOURCES 11.2.1 Definition. A supply source for a side is the capital of a friendly power that is not under enemy control. Note that for placing reinforcements and restoring reduced corps, the space in questionmusthaveaLOCtothecapitalofthecorpsbeingplacedor restored.
Play Note: A friendly capital may be used as a supply source for all friendly corps. An enemy-controlled capital may not be used as a supply source by either side.
12. REINFORCEMENT PHASEThere are three ways to raise troops during the game: scheduled reinforcements, event-card based reinforcements, and spending Resource Points to build new corps and/or restore reduced corps.
12.1 GENERAL Initiative Player chooses which side performs the following three steps in order first, then the other side performs all three in order:
1. Build and restore corps using Resource Points; 2. Place reinforcements; 3. Promote/transfer leaders.
12.2 REINFORCEMENTS 12.2.1TurnofArrival. The game setup information (20.2.4) lists the turn of arrival for any leaders or corps arriving as scheduled reinforcements for each side.
12.2.2 Placement of Leaders. Leaders may be placed in any friendly-controlled space regardless of LOC or distance.
12.2.3PlacementofCorps. Corps may only be placed in spaces that meet the following conditions:
• MustbeahomespaceofthecorpsbeingplacedandhaveaLOC to its capital; and
• Stackinglimitsmaynotbeexceeded.
Play Note: After the Glorious Revolution, all spaces in Great Britain and Ireland (and any French home space containing James II) are considered home spaces for Jacobite Power for this purpose, see 7.2.7.
12.2.4NoEligibleSpace. If no space meets the criteria then the reinforcements must be delayed until a future turn in which the conditions are met.
12.2.5BritishSpecialRule. Each turn the Alliance player can place one British scheduled reinforcement or newly built corps (not both) in Amsterdam if the space is friendly-controlled.
12.2.6 Jacobites. After the Glorious Revolution (20.2.5 rule2) one Jacobite Corps can be built in a French home space containing James II if no other Jacobite Corps is in play outside GreatBritainandIreland(see20.2.5rule2bforanexceptiontothisrequirement).
12.3 RESOURCE POINTS
12.3.1 General. Each side uses Resource Points (RPs) to build new corps, restore reduced corps, send colonial support to influence theKWWandbuildFortified lines (15.2), aswellas commission any availableFleets (12.3.6).TheAlliance startswith6RPs,theBourbonswith3;thesenumberscanchangewiththe play of certain Event cards (as noted on the cards). Markers have been provided to help players keep track of their current RP allotment; these markers are placed on the Game Record Track at the start of the game.
Wealthy Spaces. For the duration of the NY scenario, Bourbon Resource Points are increased by 1 for each Wealthy Space they control. For purpose of this rule and card play, Munich and London are Wealthy Spaces (as indicated by the Wealthy marker placed during setup).
Ireland. For the duration of the NY scenario, the Alliance player receives one additional Resource Point if he controls London and all spaces in Ireland.
IMPORTANT: Unlike reinforcements that are not placed (12.2.4), unused RPs are not carried over to the next turn.
12.3.2 Force Pool. Each side has a Force Pool to hold the corps available to be built. When a corps is eliminated it is placed back in the Force Pool. Some corps begin the game in the Force Pool.
12.3.3LOCRequirement. A corps may only be built or restored in a space that can trace a LOC (by land and/or sea) to the corps’ own capital ( Jacobites may be rebuilt across uncontrolled or enemy-controlled sea zones).
12.3.4BuildingNewCorps. France may build up to 2 new corps each, while all other Powers may build no more than 1 new corps each turn. New corps are selected from the Force Pool and placed on a Home space on the map at full strength for 2 RPs, or reduced strength for 1 RP.
12.3.5 RestoringReducedCorps. France may restore up to 4 corps each turn (NPWS: reduce this limit to 3), while all other Powers may restore up to 2 corps each turn. A reduced corps may be restored to full strength (i.e. flipped) at the cost of 1 RP. The corps does not have to occupy a home space to be restored.
Nine Years_Rules1.3.indd 12 1/31/17 12:01 PM

© 2017 Compass Games, LLC.
NiNe Years: The War of the GraNd alliaNce 1688-1697
© 2017 Compass Games, LLC.
13NiNe Years: The War of the GraNd alliaNce 1688-1697
12.3.6 FleetCommissioning.Either player has the option to spend RPs to prepare Fleet(s) in their Force pool if their associated SeaZoneisuncontrolledorenemy-controlled.
Play Note: If the Sea Zone is friendly-controlled, the Fleet marker is in that Sea Zone’s “Control box” and is unavailable to be built.
There are four fleets in total, two Bourbon (Brest fleet associated with the Atlantic Sea Zone andToulon Fleet associated withthe Mediterranean Sea Zone) and two Alliance (Atlantic fleetassociatedwiththeAtlanticSeaZoneandMediterraneanFleetassociatedwiththeMediterraneanSeaZone).
To commission a Fleet, 1RP can be spend to commission the Fleet as a 1-strength Fleet, or 2 RPs to commission it as a 2-Strength Fleet. A Fleet can only be commissioned if its home port (respectively Brest, Toulon, Amsterdam and Barcelona for the four Fleets listed in the previous paragraph) has a LOC to its powers capital (Paris for the Bourbon Fleets, Madrid for the Alliance Mediterranean fleet, Amsterdam for the Atlantic Fleet). Place the Fleet counter on its appropriate side in its home port space. No matter which strength of Fleet gets commissioned, it is removed during the Winter Quarters phase and must be paid for again if it is to be used in a future turn.
Play Note: If a sea zone is uncontrolled and both players built their fleet, neither player will probably sally forth, as the other player could “steal” the sea away again in a future action round.
IMPORTANT: If a side ever makes a siege roll against a Home Port of an opposing fleet (whether or not the roll has any effect), the matching Fleet marker is immediately and permanently removed from the game.
12.3.7BuildingFortifiedLines.See15.2.
12.3.8ColonialSupport.See18.
12.4 PROMOTE/TRANSFER LEADERS
During this step a player does the following to his leaders, both those on the map and those due to arrive that turn:
1. Flip leaders due to be promoted to their named leader side. 2. Move any or all friendly leaders (including leaders
scheduled to return this turn) to any friendly-controlled space, regardless of path or LOC to the destination space. It is not mandatory to place leaders with home corps, or any corps for that matter. Leaders may exist on their own in a space. If any Staff Officers are in play, they are removed to theForcePool(see16.3.2onhowStaffOfficersenterplay).
Example: Reinforcement Phase. It is the Reinforcement phase of the 1690 Game-Turn. The Bourbon player examines the Reinforcement Schedule (20.3) to see what he receives this turn. He has the standard 3 Replacement Points (RPs), increased by 2 to 5 as he controls 2 wealthy spaces (Tournai and Namur). First, he places his new corps. 1 French goes to Strasbourg and another to Paris. With two of his RPs, he
restores one French corps in Army C and one Jacobite corps in Dublin. With a third RP, he builds a Level-1 Fortified Line in Tournai (he has the required 5 corps there). With a fourth, he takes the Catalan corps from the Force Pool, at reduced strength, and places it in Gerona. With the fifth RP, he places a Bourbon control marker to the left of the King William’s War marker as Colonial Support. He now flips the Catinat and Luxembourg counters to their front sides (they are promoted this turn), and he moves each of his leaders to any Bourbon-controlled space he wishes.
13. CAMPAIGN PHASE13.1 DEALING ACTION CARDS
At the start of the Campaign phase, if there are not enough Action cards in the deck to deal cards to both players, the deck isreshuffled.Theneachplayerisdealt5Actioncards,exceptfor
• the1688turninwhichonly3actioncardsaredealttoeachplayer(20.2.5rule1),
• If a card draw was forfeited for the purpose of King William’s War(18.4),
• If a card draw was forfeited to influence the Bourbon Peace dieroll(6.5),
• or unless an event reduces the number of Action cards.
Players then conduct alternating action rounds until neither player has any Action cards left. The player conducting a round is called the “active” player; the other is the “inactive” player.
13.2 FIRST ACTION ROUND
13.2.1 Initiative andDeterminingFirstPlayer. Forfeiture of cards due to King William’s War or the Bourbon Peace die roll as well as (in the Full Game scenario) the French Financial Collapse event card and BritishWithdrawal from theAlliance (19.0,E) can cause one player to begin the Campaign phase with more Action cards than his opponent. Determination of the first player depends on whether or not the players have the same number of Action cards.
• IfbothplayershavethesamenumberofActioncards,theneach player selects one Action card from his hand and places it face down on the table. Both cards are then revealed and the owner of the higher value card goes first. In case of a tie, the player with the “Initiative” for that turn determines who goes first. As the Turn track indicates, the Bourbon player hastheinitiativefrom1688to1693,theAllianceplayerhastheInitiativeinturns1694to1707,while the Bourbon has theInitiativeagainfrom1708togameend. The player going second immediately returns his revealed card to his hand – he is not obligated to play that card during the first action round. The first player, however, must use the revealed card for the initial round.
• IfoneplayerhasmoreActioncardsthantheotherplayer,then the player with more Action cards automatically goes first.
Nine Years_Rules1.3.indd 13 1/31/17 12:01 PM

© 2017 Compass Games, LLC.
NiNe Years: The War of the GraNd alliaNce 1688-1697
© 2017 Compass Games, LLC.
14 NiNe Years: The War of the GraNd alliaNce 1688-1697
13.3 SUBSEQUENT ROUNDS
Players alternate playing Action cards and conducting actions until both players are out of cards. A player may not “pass” in a round – he must play a card if he has one, even if no action is taken.
13.4 ACTIONS
13.4.1 NumberofActions. The value of a played Action card indicates the number of “actions”(1 to 3) the player may take during the round.
8 in Deck 8 in Deck16 in Deck
13.4.2 Performing Actions. Actions do not need to be predesignated and are performed one at a time in any desired order; however each action must be completed (including battle and retreat) before the next one begins. When all of the actions for a round are finished, play switches to the other player.
13.4.3 Who Can Participate. Leaders and corps may not participate in more than one action per round. This means a corps that is restored during a replacement action cannot participate in another action that round (e.g., a siege). If necessary, counters can be rotated after an action as a reminder that they are not eligible to participate in another action in the current round.
13.5 TYPESOFACTIONS
The different types of actions are as follows:
13.5.1CampaignAction. A single force containing any number of leaders plus a number of corps no greater than the combined CR of up to TWO of the activating leader(s) may activate to do one (not both) of the following activities:
• Movebyland,spendingupto3MPs,or• Conductasiege(17.5).
Example: William III (CR 6), Marlborough (CR 4), and a minor leader (CR 3) are stacked with 12 Alliance corps in Antwerp. The Alliance player initiates a Campaign action to move the army. Even through the combined CR of the three leaders is 13, only two of the leaders may be used for the Campaign action, so only 10 of the 12 corps may be moved.
Play Note: Not all of the leaders and corps in a space are required to activate during a Campaign action: e.g., one action point could activate some corps in a space to conduct a siege, while a second action point in that same round could restore a reduced corps that does not participate in the siege.
13.5.2 Transfer Action. (One per force per round) Two leaders, two corps, or one of each, located in the same or different spaces, may move by land, also to the same or different spaces. Leaders maymove 6MPswhile corpsmaymove 4MPs. Leaders andcorps moving as part of a transfer action may never enter a enemy-controlled space (fortified or unfortified) or a space occupied by enemy corps, unless (in either case) the space already contains at least one unbesieged friendly corps (i.e. Transferring forces may never initiate a battle or siege).
13.5.3ReplacementAction (one per round per player). A single reduced corps not under siege may be restored to full strength (and rallied if demoralized) if it has a LOC to its home capital and is not in an overstacked space (4.1.3).
13.5.4 Rally Action (one per round per player). A leader may remove demoralization status from himself and/or a number of friendly corps inhis space equal tohalf (roundedup)ofhisCR. This counts as an action for the leader and rallied corps but does not affect any other corps in the space. Leaders may rally non-home corps and (unlike a Replacement action) may conduct the action even if the space is overstacked. If the space contains multiple leaders, only one may conduct a Rally action in any given round.
Example: Catinat (CR 5) and Boufflers (CR 4) and their combined army of 8 Bourbon corps have just lost a battle and are demoralized. The Bourbon player announces a Rally action and removes demoralization status from Catinat and 3 corps. The next round, he rallies Boufflers and 2 corps.
13.5.5 Sea Move Action. A single stack containing any number ofleadersanduptotwo(2)corpsmaymovebysea.See14.5.
13.5.6 Naval Matters. During the action phase, a prepared Fleet canattempttotakecontroloveritslinkedSeaZone.WhentheFleet is deployed by spending an action point, each player rolls one die. The side controlling the Fleet adds the strength of its fleet. The other side adds 1 if he controls the sea zone, 1 if he controlsLondon and theSeaZone is theAtlantic and1 if hecontrolsGibraltarandtheSeaZoneistheMediterranean. In the NPWS scenario, the Alliance player instead adds 1 if the British Capture Minorca event has been played. The higher roll wins (re-rollties).Iftheactiveplayerwins,hegainscontroloftheSeaZoneand 1 VP. Regardless of outcome the Fleet is removed from the map and returned to the Force Pool.
Example: Three Actions. The Alliance player plays a 3-Actions card. He has his main army, under William III, besieging Tournai. Tournai is garrisoned by a full strength corps, so its Fortress Strength is 4 (2 for the corps and 2 for the printed Fortress Value). William III and Waldeck command 11 corps, three of which are reduced. The Alliance player spends one Action to roll for the siege at Tournai. He assigns only 4 of William’s corps to the siege (he only needs to use 4 to match the Fortress Strength). After the roll, for his second action, he conducts a Replacement Action to restore one of the unused corps in William III’s army to full strength. For his third action, he leaves this army and sees that he has three corps plus a minor leader in London. He activates the minor leader and two of the corps for a Sea Move action (two corps being the maximum). He sails this stack to Cadiz and rolls on the Sea Move table. The Atlantic is currently Bourbon-controlled, so
Nine Years_Rules1.3.indd 14 1/31/17 12:01 PM

© 2017 Compass Games, LLC.
NiNe Years: The War of the GraNd alliaNce 1688-1697
© 2017 Compass Games, LLC.
15NiNe Years: The War of the GraNd alliaNce 1688-1697
he subtracts 2 from his roll for a total of 1. He flips one of the moving corps to its reduced side and then arrives at Cadiz. The Alliance player could have used one of his actions to rally Eugene instead, who is sitting Demoralized (having lost a battle at Trent) in Innsbruck. Had he done so, he would have removed the Demoralized marker from Eugene and 2 corps (i.e., half his Command Rating). But he doesn’t expect another battle from the Bourbon leader in Trent, so he decided to use his actions otherwise.
Example: Fleet Deployment: In the initial setup, the Bourbon player has control of the Mediterranean and the Alliance player has a 1-strength Med Fleet prepared in Barcelona. The Alliance player decides to challenge control over the Med. In the third and final action round of the 1688 turn, he plays the Fleet Deployment action – if he did not play it by that point, the Med Fleet would be automatically removed in the upcoming Winter Quarters Phase (19.0 b). The instant he announces the action the players resolve it, each rolling a die. The Alliance player adds 1 to his roll (the strength of the Med Fleet). The Bourbon player adds 1 to his roll for current control over the Sea Zone. If he also controlled Gibraltar, he would have received an additional +1. Both players roll a 3 for a modified roll of 4. The result is a tie, so they re-roll. The second time, the Alliance players rolls a 2 and the Bourbon player rolls a 5. The modified rolls are 3 vs 6 in favor of the Bourbon player, so the Bourbon player wins the naval battle. As the Alliance player initiated the action, there is no change in control over the Sea Zone and no Victory Point change.
14. MOVEMENT14.1 LAND MOVEMENT
14.1.1 General. Land movement allows forces to move between adjacent spaces, with each connection costing 1 MP to move across – except for the red Alliance-only connections, which cost 2 MPs. Forces may move by land during a Transfer or Campaign action, but only a Campaign action allows a move into enemy-controlled or enemy-occupied spaces.
14.1.2 Leader Requirement to Move Corps. Except when moving as part of a transfer or sea action or when retreating, corps can only move or intercept when commanded and accompanied by a leader.
14.1.3 (VERY IMPORTANT) PickingUpandDroppingOff. Leaders and corps may not be picked up during an action, but may be dropped off at any time during an action.
Play Note: Sometimes, a force denoted by an Army marker will start a round in a space with corps that have not been assigned to that Army. On activating the Army, the player may add the unassigned corps to the Army before moving it. This is allowable because Army markers are simply conveniences.
Movement Example:14.1 and 14.2Alliance Army D, in Mont-pellier, has 3 MPs. It could move to Briançon or Per-pignan and stop, or it could move to Toulouse, spend 1 MP to convert it to Alliance control, and proceed to Bay-onne or Bordeaux and stop. Alliance Army C, besieging Lyons, may NOT move to Clermont or Briançon, not even to intercept a Bourbon army moving into one of those spaces.
Nine Years_Rules1.3.indd 15 1/31/17 12:01 PM

© 2017 Compass Games, LLC.
NiNe Years: The War of the GraNd alliaNce 1688-1697
© 2017 Compass Games, LLC.
16 NiNe Years: The War of the GraNd alliaNce 1688-1697
14.2 ENEMY-CONTROLLED SPACES
14.2.1 (VERY IMPORTANT) A force may not enter an enemy controlled space (fortified or unfortified) unless it is leaving a friendly-controlled space.
14.2.2 A force must stop moving when entering an enemy-controlled fortified space (losing all remaining MPs), even if the enemy space is under siege by friendly forces. A force that moves into an enemy-controlled unfortified space does not lose its remaining MPs, but per 14.2.1 may not move to an adjacent enemy-controlled space until the unfortified space has been converted to friendly control (14.4). If a battle occurs in that space, see 14.3.2.
Play Note: These restrictions stress the importance of securing lines of communication threatened by enemy-controlled areas.
14.3 ENEMY-OCCUPIED SPACES
14.3.1 Inactive Player Reaction. Each time a force enters an enemy-occupied space (or enemy-controlled space), it must pause while the inactive player reacts. There are three possible reactions by the inactive player, and they take place in the following order:
•Interceptwithaforceinanadjacentspace(14.6);•Avoidbattle(14.7);or•Donothing(i.e.acceptbattle)(16.0).
14.3.2 ContinuingMovementAfterBattle. Fighting a battle does not cost MPs and does not necessarily end the action. If the active force has MPs remaining and wins a battle, it may continue moving, convert control of the space (if unfortified) to friendly control, or both, as long as it has the MPs to spend. If the space is an enemy-controlled fortress, the force must end its action and the fortress is now considered under siege. Note that a force may never conduct a siege (i.e. roll) in the same round in which it conducted any other action (including movement).
14.3.3 Losing Battle Ends Action. An active force that loses a battlemustretreat.ItlosesanyremainingMPs(16.4).
14.3.4EnemyLeaders. When a force enters a space containing only an enemy leader, the leader has the option to withdraw inside a fortress (14.7.4) or retreat (16.4). If he can do neither, he isconsideredcaptured(16.4.5).
14.4 CONVERTING UNFORTIFIED SPACES
A force activated during a Campaign action that has a LOC to a friendly capital may convert an unfortified space it currently occupies to friendly control at the cost of one MP. If the space is enemy occupied after the inactive player’s reaction (14.3.1), the active force must defeat the enemy force in battle (causing an enemy retreat), and must have at least 1 MP left, before it may convert the space.
14.5 SEAMOVEMENT
14.5.1SeaMovement. In a Sea Move action, one to two corps and/or any number of leaders may move from a single port to another single port (i.e. the moving units must begin and end the
move stacked together in a port). A sea move expends all of the moving units’ MPs.
Play Note: During the 1688 and 1689 turns, sea moves involving William III may include up to six corps. Sea moves involving more than 2 Corps cost 2 Action points (see 20.2.5).
14.5.2 Leader Requirement. A sea move into an enemy-controlled port that is not already under siege by friendly forces may only be made by a stack containing at least one leader and one corps.
14.5.3 Sea Move Procedure. Unlike land moves, sea moves requireadie roll tobe successful andmayentail some risk if acorps is part of the move. To make a sea move the active player declares which units are making the sea move and the destination port. He then rolls one die and determines the result. Subtract 1 fromthisrollforeachuncontrolledSeaZonethroughwhichthemoveismade,by2insteadiftheSeaZoneisenemy-controlled.Onarollof2–6,themoveiscompletedsuccessfully.Onarollof1,the player decides whether to cancel the move or apply one hit to one of the moving corps. On a roll of 0 or less, the player decides whether to apply two hits to the moving corps (both to the same corps if only one corps involved in the move) or to cancel the move, still applying one hit to one of the moving corps.
14.5.4Enemy-ControlledPorts. It is not necessary to control a port in order to begin or end a sea move in the port.
14.5.5 Sea Moves and Interception. Unlike land moves, sea moves may not be intercepted when arriving at the destination port.
14.6 INTERCEPTION
14.6.1 Who May Intercept. When an active force moves by land into an enemy-controlled space and the space does not already contain at least one corps friendly to the active side, any inactive unbesieged and undemoralized force in an adjacent space containing at least one leader may attempt to intercept the move. A leader by himself may attempt to intercept into a fortress space for the purpose of immediately withdrawing inside the fortress. To clarify: A force may only intercept an enemy force in a space if i) the space is controlled by the intercepting side, and ii) there is not already a corps friendly to the moving (i.e. active) side in the space.
14.6.2 Interception Restriction. No leaders or corps may take part in an interception attempt if they were part of a force which avoided battle or lost a battle during the current Action (not Round). Note that siege and space conversion actions may not themselves be intercepted, although a force may be intercepted after moving into an unfortified space before it has a chance to convert control. Intercepting forces may not overstack (but see 4.1.2).
14.6.3 MultipleAttempts. If more than one force is eligible to intercept, the inactive player may attempt with each force separately, until an interception attempt succeeds, at which time no other force may make an interception attempt. If all forces fail to intercept and the moving force then enters another enemy-
Nine Years_Rules1.3.indd 16 1/31/17 12:01 PM

© 2017 Compass Games, LLC.
NiNe Years: The War of the GraNd alliaNce 1688-1697
© 2017 Compass Games, LLC.
17NiNe Years: The War of the GraNd alliaNce 1688-1697
controlled space in the same round, any eligible forces (including those that just failed to intercept) may again attempt to intercept.
14.6.4 Intercepting While Besieging. A force that is besieging an enemy fortress may attempt to intercept an enemy force moving into a qualifying adjacent space. If successful the interceptingforce must either abandon the siege or leave at least one corps in the space to maintain the siege.
Play Note: Per 17.1.1 only one corps is needed to place a space under siege; however more besieging corps may be necessary in order to conduct a siege action.
14.6.5InterceptionProcedure:
1. As soon as an enemy force enters a space subject to interception, the inactive player announces the interception attempt.
2. The inactive player designates the force that will attempt to intercept. As with a Campaign action, it may contain any numberofleadersandanumberofcorpsequaltotheCRoftwo of the leaders. The player then rolls one die and adds the best leader’s TR (note potential Leader TR penalty – 3.1.1). Iftheresultis6ormoretheinterceptionissuccessful.
14.6.6 Successful Interception. If successful, the intercepting force is placed in the space with the moving force and a battle is immediately fought in which the intercepting (inactive) force is the defender. The active force may not avoid battle. All of the inactive force must fight unless it is a friendly-controlled fortress
space, without a garrison, in which case one corps (and/or multiple leaders) may withdraw inside the fortress, becoming the garrison, therefore avoiding battle (14.7.4).
14.7 AVOIDING BATTLE
14.7.1 General. The inactive player may choose to avoid battle with some or all of his forces when an enemy force enters a space. Avoiding battle results in the inactive force retreating to another space (14.7.3) and/or a single corps withdrawing into a friendly fortress (14.7.4).
14.7.2AvoidBattleProcedure:
• Iftheinactiveforceisinafriendlyfortifiedspacetheavoidbattle attempt automatically succeeds.
• Iftheinactiveforceisnotinafriendlyfortifiedspace,thedefending player must roll one die and add the TR of one leader present in the space (note potential Leader TR penalty – 3.1.1). Only one die roll may be made per space (i.e. you may not split up the stack to make multiple attempts). On a 5orhigher,theattemptissuccessful.
14.7.3 Retreating to Another Space. All leaders plus a number of corps equal to the combinedCRs of any two leaders in thespace may avoid battle by retreating to another space – any corps unable to move due to CR limits must remain in the space.
• Thespacebeingretreatedtomustbefriendly-controlledandnot enemy-occupied (e.g., it cannot be a friendly fortress currently under siege).
• Onlyonespacemaybeselected(i.e.theretreatingforcemaynot retreat to multiple spaces).
• Alldefendingcorpsdonothavetoretreat;somemaystaybehind if desired by the controlling player (this may be necessary to avoid stacking violations).
14.7.4 Withdrawing Into a Fortress. If a force is attacked in a friendly-controlled fortress space, then prior to the battle the inactive force may withdraw one corps and/or any number of leaders into the fortress as a garrison (17.3.1). This withdrawal may take place even if the inactive player intercepted into the space; however only a single corps and/or leader(s),including those having just arrived by interception, may withdraw into the fortress – all other corps must fight. Note: unlike a retreat toanotherspace,acorpsmaywithdrawintoafortressevenifnoleader is present.
Play Note: By allowing one corps already in the space to withdraw into a fortress before a battle is fought, a player may shield a corps from damage in order to bolster the garrison prior to a likely siege.
Interception Example: 14.6 Alliance Army A is in Antwerp. If it moves into Liege, where an Alliance force is already in place, Bourbon Army A (in Namur) cannot intercept. If it moves into Tournai, however, Bourbon Army A can intercept.
Nine Years_Rules1.3.indd 17 1/31/17 12:01 PM

© 2017 Compass Games, LLC.
NiNe Years: The War of the GraNd alliaNce 1688-1697
© 2017 Compass Games, LLC.
18 NiNe Years: The War of the GraNd alliaNce 1688-1697
15. FORTIFIED LINESHistorical Note: Fortified lines played a significant role in the war. More imposing than regular field works and constructed by both military forces and peasant labor, these lines represented major obstacles for advancing armies. However, talented generals could also find ways of bypassing them without a fight by using deceptive and rapid counter-marches.
15.1 GENERAL
There are two levels of Fortified Lines, which represent major field fortifications. These lines typically relied on other strong points and fortresses for support and thus may only be built in fortress spaces. Level-2 lines represent major works and use of water barriers, and may only be built in fertile spaces (they are in the Spanish Netherlands, Dutch Republic, and northern France). At the start of the game both sides already have some fortified lines in place. Fortified lines provide defensive benefits only to the owning player (i.e., the side whose color is on the marker) and are destroyed when the enemy takes control of the space.
15.2 BUILDINGFORTIFIEDLINES
15.2.1Construction. Fortified Lines may be built (or upgraded) in friendly fortified spaces during the Reinforcement phase by spendingRPs.Followingarethespacerequirementstobuildandupgrade lines:
• Mustcontainatleast5corps• Must have a LOC to a friendly capital • Cannot be a rugged space • Cannot contain another Fortified line (but Level-1 lines in
fertile spaces can be upgraded to Level-2 lines).
Level-1 Lines – may be built in normal or fertile spaces for 1 RP. Additionally, previously constructed Level 1 lines in fertile spaces may be upgraded to Level 2 lines for 1 RP.
Level-2 Lines – may be built in fertile spaces only, as an upgrade to previously constructed Level-1 lines at a cost of 1 RP, or from scratch at a cost of 2 RPs.
15.2.2 CounterLimit. The number of fortified lines that each side may have is not limited to the number of markers provided in the counter mix.
15.3 EFFECTSOFFORTIFIEDLINES
Fortified lines may be used only as a defensive benefit in battle, and only by the side that built it. They have the following effects:
Level-1 Fortified Line. Gives a –1 die roll modifier to each attacker battledieroll(i.e.theattackerhitsona6,anddemoralizedcorpsmay not attack at all).
Level-2 Fortified Line. Gives a –1 die roll modifier to the attacker (i.e.theattackerhitsona6,anddemoralizedcorpsmaynotattackat all) AND a +1 die roll modifier to each defender battle die roll
Bypassing Fortified Lines Example: 15.4 In the Reinforcement phase of the 1690 turn, Bourbon Army A (consisting of 7 Corps, Boufflers and Noailles, respectively 1-4 and 2-5 leaders), located in Tournai, spends 2 RPs to build a Level-2 Fortified line. This build is valid as Tournai is a fertile space, with 5 corps and a LOC to a friendly capital. In the third Action round of 1690, Alliance Army A under William III (a 2-6 leader) moves from Antwerp to Tournai to attack. Bourbon Army A is in Tournai with a Level-2 Fortified line. A Bourbon minor leader sits in Bouchain with 1 corps. When Alliance Army A reaches Tournai, the Bourbon player attempts to intercept with the minor leader and his corps; if he succeeds, the corps will be part of the defense in Tournai. The interception roll is a 5, which is modified by 0 (the minor leader’s TR), so it fails. The Alliance player now announces that he will attempt to bypass the Fortified line. He rolls a 5, modified by +2 because of William III’s TR and then by -2 because of Noailles’ TR and by -1 because of the Level 2 Fortified Line. The modified result is a 4, which is not enough to succeed; the Fortified line has not been bypassed. The Alliance player now has to decide whether to continue with the attack, taking into account the disadvantages of battle against a Fortified line, or cancel the attack and going back to Antwerp (but the Action is still expended). Furthermore, if the Alliance player did decide to cancel the attack, the Bourbon player could force it to take place anyway, but without the benefit of the Fortified line. Had William III succeeded in bypassing the Fortified Line, the attack would proceed and the Bourbon player would have to decide whether to avoid battle, fight or some combination of the two.
Nine Years_Rules1.3.indd 18 1/31/17 12:01 PM

© 2017 Compass Games, LLC.
NiNe Years: The War of the GraNd alliaNce 1688-1697
© 2017 Compass Games, LLC.
19NiNe Years: The War of the GraNd alliaNce 1688-1697
(i.e.thedefenderhitsona4orhigher,demoralizedcorpsona5or6).Alsocausesa-1dierollmodifiertobypassattempts.
15.4 BYPASSINGFORTIFIEDLINES
A force attacking a defender in a space with a Fortified Lines marker can attempt to negate the effect of the lines:
1. After any enemy interceptions attempts but before any enemy avoid battle attempts, the active player rolls one die. The active player adds the TR of one leader and must subtract the highest TR of any one inactive leader in the space. Also subtract 1 if attempting to bypass a Level-2 line.
2. Ifthenetdierollis5ormorethentheforcehassuccessfullybypassed the lines. If a battle takes place (depending on defender reaction) the defending force does not receive the benefit of the fortified lines marker. However, the marker is not removed unless the conditions for removal exist (see “Removal of Fortified Lines” below).
3. If the bypass attempt fails, the active player must decide whether to continue the attack (and give the defender the benefit of the fortified line), or cancel it. However, if the attacker cancels the attack, the defender can still force the battle to occur and will remain the defender in case of a tie, but he will NOT have the benefit of the lines. If the attacker cancels and the defender does not force battle, the attacker retreats to its original space and thereby ends the action.
15.5 REMOVALOFFORTIFIEDLINES
Fortified lines may be voluntarily removed by the owning player during the Winter Quarters phase. Fortified Lines are automatically destroyed (removed) if the space becomes enemy controlled. Otherwise, a fortified lines marker remains in the space, even if the space becomes vacant.
15.6 ATTACKINGINTOAFRIENDLYLINE
If a space with a Fortified line is under siege and a force friendly to that space attacks the besieging army, the line is considered not to exist for any purpose for that battle.
16. BATTLEUnless an inactive force successfully avoids battle and retreats to another space (14.7) or withdraws inside a fortress (14.7.4), a battle occurs when an active force enters a space containing enemy corps.
16.1 DEFINITION:ATTACKER/DEFENDER
16.1.1 The active player is the attacker; the inactive player is the defender.
16.1.2 Attacker. The attacker is an active force containing at least one leader and one corps. The maximum size of the attacking force is based on leader CRs and space stacking limits.
16.1.3 Defender. The defender includes ALL inactive corps and leaders in the space, unless any leaders and up to a single corps have withdrawn inside the fortress prior to the battle (as a result of the current Campaign action or previously), in which case the force inside the fortress does not participate and is immune to any battle results.
16.2 BATTLEPROCEDURE
Battlesareresolvedusingthefollowingsequence:
1. Each side totals the number of battle dice to roll: • Onedieforeachfull-strengthcorps.• One-half of a die for each reduced-strength corps;
round up if odd number of corps (e.g., 3 reduced corps = 2 dice).
• AnumberofdiceequaltotheTacticalRatingofuptotwo friendly leaders (note potential Leader TR penalty – 3.1.1). IMPORTANT: the number of dice provided by Leaders may not exceed the number of dice provided by corps.
• Ineachcaseabove,countdemoralizedleaderandcorpsseparately since they are rolled separately (see #2 below).
2. Both sides then simultaneously roll the appropriate number of dice. • Leaders/corpsthatarenotdemoralizedhitonarollof5
or6.• Demoralizedleaders/corpshitona6only.
Example: An Alliance army of 5 full-strength corps and 2 reduced-strength corps, plus 2 full-strength demoralized corps, under the 2-6 leader William III and a 0-3 minor leader, attacks a Bourbon army of 4 full-strength corps and 1 reduced-strength corps under the 1-4 leader Boufflers. The Alliance player has a total of 8 battle dice (5 full plus 2 reduced plus 2TR for William III) that score a hit on a roll of 5 or 6, and 2 battle dice that score a hit on a roll of 6. The Bourbon player has 6 battle dice (4 full plus 1 reduced rounded up plus 1TR for Boufflers), all of which score a hit on a 5 or 6.
16.3 BATTLEOUTCOME
16.3.1 Taking Hits. Each hit reduces a full-strength enemy corps or eliminates a reduced-strength corps and are applied in the following descending order of priority for each side:
A. No corps may be eliminated until all corps are at reduced strength.
B. The first full strength corps to take a hit must come from the power with the most corps present in the battle (owning player’s choice if tied).
C. The first reduced strength corps to be eliminated must come from the power with the most corps present in the battle (owning player’s choice if tied).
VERY IMPORTANT: Regardless of the number of hits rolled, a force can take no more hits than the number of corps it has in the battle(excludinghitstakeninretreat–16.4).
Nine Years_Rules1.3.indd 19 1/31/17 12:01 PM

© 2017 Compass Games, LLC.
NiNe Years: The War of the GraNd alliaNce 1688-1697
© 2017 Compass Games, LLC.
20 NiNe Years: The War of the GraNd alliaNce 1688-1697
16.3.2 Leader Casualties. After a battle has been resolved, both players roll two dice (adding the results together, with no modifications) for each of their own named leaders that contributed battle dice to that battle. Minor leaders are never subject to leader casualty rolls, nor are named leaders who were held out of the battle.
Roll Result
12 ELIMINATED – The leader counter is flipped to its Minor Leader side for the remainder of the game.
11*
CAPTURED – The owning player (not the capturing player) immediately chooses one of: (a) eliminating the leader (permanently flipping the counter over) or (b)givingtheopposingplayeranumberofVPsequalto the leader’s TR and placing the leader on the Turn track to re-enter as a reinforcement on the following turn.
10-11**
WOUNDED – The leader counter is placed on the Turn track to re-enter as a reinforcement on the following turn. Replace by your side’s Staff Officer (if available in Force Pool).
* Only the losing side is affected by a CAPTURED result of 11** Only the winning side is affected by a WOUNDED result of 11
Play Note: The leader’s printed TR is always used for the purposes of this rule; 3.1.1 and 3.1.2 do not apply here.
Play Note: Dynastic Upset: Monarchs (named leaders whose name is underlined) who are captured must be ransomed back by paying the VPs. James II (starred leader), if captured, must be eliminated. In either case, eliminating a Monarch (or James II) gives a 2VP penalty to the owning player.
Play Note: ELIMINATED means killed outright, held but not ransomed, or disgraced and removed from the war permanently. CAPTURED means, essentially, holding the leader while the sides negotiate his fate. Giving up VPs simulates the political and/or real capital expended to return the defeated general to command in such cases. WOUNDED means the leader is removed from the current campaign and is convalescing at the home front.
16.3.3 Winner/Loser. If only one side has corps remaining in the space after battle losses have been removed, that side is the winner. Otherwise, the side which rolls (not inflicts) the most hits wins the battle. If tied, the defender wins.
Example: A Bourbon force with 5 full and 3 reduced corps under the 1-TR leader Boufflers (5 + 1.5 rounded to 2 +1TR = 8) fights an Alliance force with 2 full corps, 2-TR leader William III and the 1-TR leader Waldeck (2 + 2TR = 4 dice total – recall that leader dice cannot exceed corps dice). The Bourbons roll 5 hits while the Alliance rolls 3 hits. The Bourbon force takes 3 hits by flipping 3 full corps to reduced strength. The Alliance force only has 2 corps so only takes 2 hits, flipping both corps to reduced strength. Although the Bourbon force applied more hits (3) than the Alliance force (2), the Bourbon force still wins the battle because it rolled more hits than the Alliance force (5 vs. 3). Note that per 16.5.1, this will NOT qualify as a Famous Victory
because the Alliance force did not actually take 5 hits. The players now roll 2 dice for each leader. The Bourbon player rolls a 7 for Boufflers and he is fine. The Alliance player rolls a 10 for William III and places William III on the next turn of the turn track, replacing him by the Staff Officer. He also rolls an 11 for Waldeck and must decide whether to eliminate him or give up 1 VP in order to keep him in the game. Note that if he had rolled the opposite, he would have to choose to give up 2 VPs to keep William III in the game, as he is a Monarch.
16.3.4Demoralization. If the losing side took at least one hit, all leaders and corps in the defeated force are demoralized. There is no further effect on previously demoralized leaders or corps. To indicate demoralization, place a “Demoralized” marker on the Army or on the stack of corps and leaders on the map, and another in the Army holding box for that army (if relevant). As leaders andcorps rally (13.5.4),useDemoralizedmarkersasneeded toindicate which corps are demoralized and which are not.
Demoralizedleadersandcorpsinbattlehitona6,nota5or6likeother leaders/corps.
Demoralization may be removed as part of a Replacement (13.5.3) or Rally action (13.5.4); otherwise Demoralizationmarkers are automatically removed during the Winter Quarters phase(19.0.,B).
16.4 RETREAT
16.4.1 General. All corps and leaders of the losing side must retreat, and all to the same space.
16.4.2 Attacker Retreats.
A. RETREATBYSEA: If the battle occurred in a port space (NPWS: and the adjacent sea zone is friendly controlled), up to two (2) corps and any number of leaders may retreat by sea to any other friendly port in the same sea zone that is not enemy-occupied. Such a retreat requires a regularSeaMovedieroll(14.5.4);howeveronaresultof1orlessthe owning player must apply the hit(s) to retreating corps (these hits do not contribute towards a defender Famous Victory).
EXCEPTION: The amount of Corps that may retreat by sea is increased to 6 during a 1688/1689 Sea move involving more than 2 Corps.
B. FRIENDLYADJACENTSPACE: Any corps or leaders not retreating by sea must retreat to an adjacent friendly-controlled space that is not enemy-occupied, even if this causesanoverstack.Theattackingforceisnotrequiredtoretreat to the space from which it entered the battle, but it cannot retreat to a space from which all or part of the defending force intercepted the attacker.
An attacking force may not drop off a garrison when leaving a friendly fortress space, including the space it just attacked.
Nine Years_Rules1.3.indd 20 1/31/17 12:01 PM

© 2017 Compass Games, LLC.
NiNe Years: The War of the GraNd alliaNce 1688-1697
© 2017 Compass Games, LLC.
21NiNe Years: The War of the GraNd alliaNce 1688-1697
16.4.3 Defender Retreats.
A. WITHDRAW INTO FORTRESS: Unless a corps previously avoided battle by withdrawing into the fortress, one corps and any number of leaders may retreat into a friendly fortress as a garrison (17.3.1) while the rest of the force retreats from the space. Leaders may always withdraw into a friendly fortress following a battle.
B. RETREAT BY SEA: If the battle occurred in a port space (NPWS: and the adjacent sea zone is friendly controlled), up to two (2) corps and any number of leaders may retreat by sea to any other friendly port in the same sea zone that is not enemy-occupied. Such a retreat requires a regularSeaMovedieroll(14.5.4);howeveronaresultof1orlessthe owning player must apply the hit(s) to retreating corps. These hits do not contribute towards an attacker Famous Victory.
C. FRIENDLYADJACENTSPACE: Any corps or leaders not retreating by sea or withdrawing into a fortress must retreat to an adjacent friendly-controlled space that is not enemy occupied, even if this causes an overstack.
D. THROUGH ENEMY SPACE: If no other option exists, the defending force may retreat through one enemy-occupied and/ or enemy-controlled space to reach a friendly-controlled space that is not enemy-occupied, even ifthiscausesanoverstack.Ifmorethanonespacequalifiesthe retreating player may choose the destination space but must shorten the distance to the nearest friendly supply source. Corps retreating through enemy-controlled fortress spaces and/or enemy occupied spaces are fired on by the enemy as they pass through:
• Normal battle dice from corps and leaders are rolled,plus one die per Fortress Strength; all dice have a +1 DRM.
• Hitsareassignedasperbattle,andthesehitsareaddedto the hits from that battle in determining an attacker Famous Victory.
• Retreating leaders do not undergo a second leadercasualty check.
16.4.4 Overstacking. It is legal to overstack as a result of a retreat (land or sea); however there are certain penalties (4.1).
16.4.5Unabletoretreat. Corps unable to retreat are eliminated and placed in the Force Pool, with all hits counting for Famous Victory purposes. Named leaders unable to retreat are captured asperbattle(16.3.2)andmustbeeliminatedunlesstheowningplayergivesupVPsequaltothenamedleader’sTR.Minorleadersare placed on the Turn track to return as a reinforcement the following turn.
16.5 FAMOUSVICTORYThey said it was a shocking sight
After the field was won;For many thousand bodies here
Lay rotting in the sun;But things like that, you know, must be
After a famous victory.”- Robert Southey, “The Battle of Blenheim”
16.5.1AFamousVictory is awarded to the winner of a battle whenever the losing side:
• Sufferedat least5actualhits inabattle (includingretreatlosses–16.4.3D,16.4.5),or
• Removed at least 2 corps from the map.
Play Note: The first case is based on how many hits were actually suffered, not how many were rolled (i.e. if the losing side only had 4 corps present and per 16.3.1 could only take 4 hits max, then even if 5 hits were rolled it would not count as a Famous Victory). The second case could happen with as few as 2 hits if the losing side had only two reduced corps in the battle and/or in the retreat through an enemy space.
16.5.2Placement. The winner places a Famous Victory marker in the battle space. Only one Famous Victory marker can be in a space at one time, and the most recent victory takes precedence (i.e. remove older markers).
16.5.3 Effect of Famous Victory. Friendly Famous Victory markers provide a +2 die roll modifier to siege rolls against enemy fortresses in or adjacent to the space containing the marker. A Famous Victory also adds 2 VPs if the Alliance player won the battle,orsubtracts2VPsiftheBourbonplayerwon(6.1.1).
IMPORTANT: The opposing side’s Famous Victory markers have no effect on friendly siege rolls. Furthermore, Famous Victory marker effects are NOT cumulative (e.g. two nearby markers do NOT give you a +4 siege die roll modifier).
16.5.4 Removal of Famous Victory Markers. All Famous Victory markers are removed during the Winter Quarters phase.
17. SIEGE17.1 GENERAL17.1.1 When a force containing at least one corps ends an action in an enemy fortified space, the fortress (and its garrison, if any – 17.3) is considered to be under siege. Place the garrison under the besieging force to indicate the fortress is under siege – no marker is needed. Note only one corps needs to be present for the fortress to be considered “under siege” regardless of the Fortress Defense Value (17.4).
17.1.2 Unlike battles, which are resolved in a single action, a siege mayrequiremultipleactionstocomplete.Ifasiegehasnotbeensuccessfully completed by the end of a turn, the siege has failed and the besieging force must withdraw from the space.
IMPORTANT: Only one siege roll may be made against a fortressperround(17.5.4).
Nine Years_Rules1.3.indd 21 1/31/17 12:01 PM

© 2017 Compass Games, LLC.
NiNe Years: The War of the GraNd alliaNce 1688-1697
© 2017 Compass Games, LLC.
22 NiNe Years: The War of the GraNd alliaNce 1688-1697
17.2 FORTRESSSTRENGTH(FS)
17.2.1 Fortress Strength. All fortresses have an inherent Fortress Strength (FS). Fortresses with an FS of 2 or 3 have the numbers printed on the fortress symbol on the map; all other fortresses have an FS of 1. The FS is an abstract representation of the fortress’s defensive capabilities.
17.2.2ReducingandReplenishingFortressStrength. Fortress strength can only be reduced or eliminated by siege (17.5.6).When a fortress is taken by siege, its strength is immediately replenished to its full printed value, regardless of the LOC situation. A fortress with reduced strength regains all its strength ifthesiegeislifted(17.6).Inbothcases,signifythereturntofullstrength by removing any FS markers associated with that space from the map.
17.3 GARRISONS
17.3.1 Garrison Creation. As part of an avoid battle attempt or retreat the inactive player may announce that one corps and any number of leaders are withdrawing into the fortress as a “garrison”. If the action ends with the active (enemy) force still in the space the garrison corps is placed under the enemy force to indicate it is inside the fortress.
17.3.2GarrisonStrength (GS): Each garrison step provides a Garrison Strength (GS) of 1 – therefore,the GS is 2 for a full corps and 1 for a reduced corps. During a siege, this number is added to the FS (17.2) of the fortress to produce the Fortress Defense Value (FDV ). See 17.4. Demoralization does not affect GS.
17.3.3 Garrisons No Longer Under Siege. If a besieging force withdraws from a space containing a garrison, any Continued Siege marker is removed and the garrison can operate normally.
17.3.4 Garrisons and Stacking. Once created, a garrison does not count against a space’s stacking limit. Thus a force at the maximum stacking limit may move into a friendly besieged fortress space containing a garrison in order to break the siege. In this case the relieving force is not considered overstacked. However, if the relief effort succeeds (i.e., the besieging force withdraws to avoid battle, or is defeated in battle and retreats), the garrison is immediately incorporated into the relieving force which may cause an overstack situation (4.1).
17.3.5 No Sorties. As long as a siege is in place, a garrison cannot conduct any action nor attack the besieging force, even if a relieving force attacks the besieging force.
17.3.6 Leaders Inside Fortresses. Any number of leaders may withdraw inside a friendly fortress even if no garrison corps is present.Leadersmayprovideadefensivesiegemodifier(17.5.3).All leaders inside a captured fortress are themselves captured (17.5.9).
17.4 FORTRESSDEFENSEVALUE(FDV)The Fortress Defense Value (FDV ) of a fortress space is the sum of its current Fortress Strength (17.2) and Garrison Strength (14.7.4, 17.3.2) values. A fortress without a garrison has an FDV equaltoitscurrentFS.ThereforetheFDVofabesiegedfortresswillalwaysbe1–5.
Example: a 3-FS fortress with a full (i.e., 2-GS) garrison corps has an FDV of 5. Similarly, a 1-FS fortress with a reduced (i.e., 1-GS) garrison corps has an FDV of 2. An ungarrisoned 2-FS fortress has an FDV of 2.
17.5RESOLVINGSIEGES17.5.1SiegeRequirements. To conduct a siege, the active player must use a Campaign action to activate at least one leader and anumberofcorpsequaltotheFDVofthefortress.Notalltheleaders and corps in the space need be activated, only enough to ensure sufficient corps to conduct the siege.
EXCEPTION:Leadersmayactivateanumberofcorpsequaltotheir CR + TR for purpose of conducting sieges.
Play Note: This means that if the FDV is 4 or 5, a leader may not be able to activate enough corps to conduct the siege action by himself (because of a low combination of Tactical Rating and Command Rating), even if enough friendly corps are present in the space.
17.5.2 Resolving Sieges. The besieging player rolls one die and compares the result to the Siege Table. The result will indicate the numberofFDV(defender)lossesandbesiegerlosses.17.5.3SiegeDie Roll Modifiers. The following die-roll modifiers (DRMs) apply to siege rolls:
• BesiegerhasnoLOC–Ifthebesiegingforcedoesnothavea LOC it suffers a –2 DRM.
• BesiegerhasthreatenedLOConly–Ifthebesiegingforcecan only trace a LOC through a threatened space (11.1.4) it suffers a –1 DRM.
• BesiegingaportthathasaSeaLOC–Ifthespacecantracea sea LOC (i.e. the sea zone is controlled by the defending player) the besieger suffers a –1 DRM.
• Bourbons Besieging Innsbruck or Trent – The Bourbonplayer suffers a –1 DRM when conducting a siege against these spaces.
• Leaderinsidefortress–Ifthereisat leastoneleaderwitha TR of 1 or more inside a fortress, a –1 siege DRM is applied. No matter how many leaders are in the fortress,the maximum DRM for this purpose is –1.
• ContinuedSiege–Unlessthefirstsiegeroll results inthecapture of the fortress, a “Continued Siege +1”marker is placed on top of the besieging force to indicate that the next siege roll will receive a +1 DRM. If the second siege roll does not result in the capture of the fortress, the marker is flipped over to its “Continued Siege +2”side to indicate that all future siege rolls will receive a +2 DRM. Continued Siege markers are removed immediately when a siege ends.
• Leader withTR of 2 or 3 Activated for Siege – If a forceactivated for a siege includes at least one leader with a TR of +2
Nine Years_Rules1.3.indd 22 1/31/17 12:01 PM

© 2017 Compass Games, LLC.
NiNe Years: The War of the GraNd alliaNce 1688-1697
© 2017 Compass Games, LLC.
23NiNe Years: The War of the GraNd alliaNce 1688-1697
or +3, and the besieging force has activated with at least one of that leader’s home corps,the besieging player gets a +1 DRM.
• Famous Victory Marker – Famous Victory markersprovide a +2 DRM to siege rolls against enemy fortresses in or adjacent to the space containing the marker. Only one Famous Victory can modify a given siege roll. Enemy Famous Victory markers have no effect on friendly siege rolls.
17.5.4OneSiegePerRound. A fortress may only be subjected to one siege die roll per round. This means the besieging player may not use separate activations to make multiple siege rolls in the same round even if there are enough leaders and corps in the besieging force to do so.
17.5.5 Attacker Losses. The Siege Table indicates the number of hits which must be taken among activated corps with the
samepriorityasbattlehits(16.3.1).Non-activatedcorpsarenotaffected.
17.5.6 Defender Losses. The fortress takes strength losses first, until it is reduced to zero (use markers as needed).Then the garrison corps (if any) takes hits: a hit against a full-strength corps reduces it to a reduced corps, while a hit against a reduced corps instead causes the fortress to fall and the corps to be given Honors of War.Agarrisoncorpsisnevereliminatedasaresultofasiegeroll (see Honors of War – 17.5.8).
17.5.7CapturingFortresses. When the FDV has been reduced to zero, the fortress is taken, the VP marker is adjusted in favor of the besiegingplayer(6.1.1),andthegarrisoncorps(ifany)isgrantedHonors of War. Use control markers as needed to indicate changes in control. The FS is immediately replenished to full value (17.2.2); remove FS markers and Continued Siege markers from the space.
Capturing Fortresses Example: 17.5.7 It is the beginning of the 1695 turn, and the Alliance has captured Strasbourg. The Bourbon player desperately wants to recapture it, because Strasbourg is a gateway to the French interior. On Action round 2 of the turn, he activates Lorges, Vauban and 5 corps (one reduced) and moves from Metz to Strasbourg, offering battle to the Empire leader, who has with him an Alliance minor leader an Empire corps and 2 Austrian corps. Outgunned by 7 battle dice to 4, the Alliance player avoids battle, with the minor leader taking the 2 Austrian corps to Landau while the Empire leader and corps hunker down inside Strasbourg. Vauban must stop, and Strasbourg is under siege.On Action round 2, the Bourbon player uses a Campaign action to activate Vauban and 4 corps for the Siege (remember that for the purpose of siege actions, a leader is allowed to activate corps equal to the sum of their CR and TR). The Fortress Defense Value is 4 (2 for Strasbourg’s FS plus 2 for the full-strength garrison corps), so 4 corps is all Vauban needs (after the siege roll, he plans to use a Replacement action to flip the reduced corps to full strength, which is legal as it didn’t participate in the siege action). On the siege, he rolls a 5; the roll is modified by +1 as Vauban has 2 TR or better, but also by -1 because a leader with TR 1 or better is inside the fortress. The modified roll is thus 4, with a 1/1 result. One of Vauban’s corps loses a step, and Strasbourg’s Fortress Strength is reduced to 1. A “Continued Siege +1” marker is placed beside Strasbourgh (+1 side up) as is a “Fortress Strength 1” marker. The Fortress Defense Value is now 3 (FS of 1 plus GS of 2).On Action round 3, the Bourbon player activates Vauban and rolls for siege once more. The roll is again a 4, modified by +1 (Vauban’s TR is 2), +1 (Continued Siege) and -1 (Empire leader) for a modified roll of 5 resulting in another 1/1. Vauban takes a step loss, the “Fortress Strength 1” marker is flipped to its “Fortress Strength 0” side, and the “Continued Siege +1” marker is flipped to “Continued Siege +2”. The FDV now stands at 2.On Action round 5, the Bourbon player prays for a good roll; he needs to inflict 2 losses on the defense for the fortress to fall prior to Winter Quarters phase. He rolls a 5, modified by +1 (Vauban), +2 (Continued Siege), and -1 (Empire leader). The modified roll is 7, a 1/3 result, and Strasbourg falls. The Empire corps is flipped to its reduced side and retreated to Landau (after receiving honors of war) and the Alliance control, Continued Siege and Fortress Strength markers are removed. The VP marker is moved 2 spaces towards zero. The Alliance player decides that he needs the Empire leader in the game, so surrenders a Victory Point and places the counter on the 1696 space on the Turn track. The VP marker is moved another space towards zero. Note that, if the leader had been an underlined leader, he would have had to ransom it back and that if the leader had been James II, he would not have had the choice to ransom it back (both refer to Dynastic Upsets rule, see 6.1.1).Had the Bourbon player rolled a 3 or less on the final siege roll, which would have meant a modified roll of 5 or less, he would not have inflicted enough losses to capture the fortress. With no Action rounds remaining, the siege would have been lifted, all markers removed and Vauban, Lorges and their corps moved back to a Bourbon-controlled space adjacent to Strasbourg. He would have had to wait until 1696 to try again.
Nine Years_Rules1.3.indd 23 1/31/17 12:01 PM

© 2017 Compass Games, LLC.
NiNe Years: The War of the GraNd alliaNce 1688-1697
© 2017 Compass Games, LLC.
24 NiNe Years: The War of the GraNd alliaNce 1688-1697
17.5.8 Honors of War. If a fortress has a garrison, then the fortress is taken when the siege die roll results in a hit that would normally eliminate the garrison. However, the garrison corps is not actually eliminated – instead, it is immediately placed by the defender at reduced strength in the nearest friendly unbesieged space within stacking limits (regardless of LOC or path; owning player chooses if more than one space eligible). Sometimes, however, a siege will begin with a reduced-strength corps as the garrison. In such cases, reducing the Fortress Strength to zero does not by itself capture the fortress; instead, a hit must be inflicted on the garrison, which will then be granted honors of war and retreat instead of taking a step loss.
Design Note: The vast majority of sieges were resolved by the defender being offered honorable terms of surrender, allowing them to evacuate in exchange for capitulation of the fortress.
Play Note: If the fortress is a port adjacent to a friendly sea zone, the garrison may be transferred by sea to an eligible port space within that sea zone at the owning player’s option.
17.5.9LeadersinCapturedFortresses. Named leaders in captured fortressesarecapturedasperbattle(16.3.2)andareimmediatelyeliminated unless the owning player gives upVPs equal to thenamed leader’s TR; move the VP marker in the direction that benefits the non-owning player. Captured minor leaders, and named leaders for whom the VP cost has been paid, are placed on the turn track to return as a reinforcement the following turn.
Note: Monarchs (both underlined and starred) rules apply here.
17.6 LIFTINGASIEGEA siege remains in effect as long as there is at least one besieging corps in the space. If the besieging force leaves the space for any reason(i.e.retreatsafterbattleorasrequiredduringwinterquarters)the siege is lifted. Any Continued Siege and Fortress Strength markers are immediately removed. If the besieging force retreats out of a space as a result of an active army attacking that force, it is possible for the active player to be overstacked (depending on whether or not an active corps is inside the fortress). See 4.1.2.
18. KING WILLIAM’S WAR18.1 KINGWILLIAM’SWARThe Nine Year’s War was one of the first global wars. The struggle between Canada and the British Colonies was called by the locals “King William’s War”.
During this part of the event card phase, the following actions are performed:
18.1.1IncreaseKINGWILLIAM’SWARCommitment
In order of initiative, each player may decide to forfeit a single action card draw for this turn’s campaign phase to flip the KING WILLIAM’S WAR counter to his side. This can only be done once per game per player and never twice in one turn (i.e. if neither player has yet executed this option and a player decides to flip the marker to his side, his opponent cannot undo this immediately but would have to wait a turn). As noted in the scenario setup, the KWW counter starts on the 0 space, with its Bourbon side up.
18.1.2 KING WILLIAM’S WAR Roll
During each event phase (skipping the first turn as normal), each player rolls a die. Current controller of the Atlantic adds 1 to his total. Ties are won by the side currently dominant in the Colonies (the last player to flip the KWW counter to his side, Bourbon player if neither player did this already). If Alliance wins the die roll, move the KING WILLIAM’S WAR counter 1 space to the right (more positive numbers; adjust VPs if necessary). If Bourbon player wins the die roll, move the KING WILLIAM’S WAR counter 1 space left (more negative numbers; adjusting VPs if necessary).
18.1.3ColonialSupport
During each reinforcement phase, each player can spend one Resource Point to place a control marker of his side on the KWW track (Bourbon player places the marker to the right of the KWW marker current position, Alliance player to the left). When moving the KWW marker while resolving a KWW roll, ignore any spaces occupied by a control marker, then remove all control markers from the KWW track.
Example: During the 1690 KWW phase, the KWW marker ended up in the center of the track. During the 1690 Reinforcement phase, the Bourbon player pays one Resource Point to send colonial support. He places a Bourbon Control marker on the KWW track on the rightmost -1 VP space. During the 1691 KWW phase, if the Bourbon player wins the KWW roll, the KWW marker will move to the leftmost -1 VP spot, skipping over the rightmost -1 VP spot. If the Alliance player wins the KWW roll, the marker will move to the leftmost +1 VP spot. In either case, the Bourbon control marker will be removed from the track after the die roll resolution.
Design Note: these control markers represent European support for the colonies in North America. Sending such troops could be a boon in exploiting success; however the chance of disaster is always present.
Nine Years_Rules1.3.indd 24 1/31/17 12:01 PM
© 2017 Compass Games, LLC.
NiNe Years: The War of the GraNd alliaNce 1688-1697
© 2017 Compass Games, LLC.
25NiNe Years: The War of the GraNd alliaNce 1688-1697
19. WINTER QUARTERS PHASEDuring the Winter Quarters phase the players simultaneously perform the following steps.
A. Withdraw to Friendly Spaces All forces in enemy-controlled spaces must retreat. Retreats areconductedper16.4andmayresultinoverstacking.Corpsthat cannot retreat are eliminated and returned to the force pool, while leaders are put on the Turn track as a reinforcement for next turn. Per 16.4, a force withdrawing during winter quarters mayretreat by sea if eligible.Play Note Regarding Timing of Withdrawals: A force may not withdraw into a friendly-controlled fortress space being vacated by the enemy unless there is no other eligible destination. However, if it is the only destination, the moves are considered simultaneous, and the move is allowed.
B. RemoveMarkersRemove all of the following marker types from the map: Famous Victory, Continued Siege, Reduced Fortress Strength, Demoralized,andFleetmarkersunlessinaSeaZonecontrolbox. Players may also voluntarily remove one or more of their Fortified Lines during this step.
C. Naval Control
• (NY only) Atlantic control changesa) to Alliance control if London is Alliance controlled and
Beachy Head not in effectb) to Bourbon control if Beachy Head Event card in effectc) no change of control otherwise
• (NY only) -2 VPs if London is Bourbon Controlled.
D. SavoyNeutrality&GloriousRevolution
• DeclarationofSavoyneutrality(1696orlater).
• If London is Bourbon controlled and the Atlantic is under Alliance control, execute the Glorious Revolution as per 20.2.5rule2b.
E. BourbonPeaceDieRoll(see6.5)
F. Check forEnd ofGame andAutomaticVictory, advanceTurnMarker
Determine if the game ends due to last turn or Automatic Victory:
1. Automatic Victory: The game ends immediately if the conditionsaremet(6.2).
2. Last Turn: If this is the last turn of the scenario the game ends and victory is determined. Note that in the Full Game scenario the games ends immediately following British withdrawal unless it would result in a minor victory and the losing player wishes to continue foronemoreturn(19.0,E).
If the game has not ended, move the Turn marker to the next year on the Turn track and proceed to the next turn.
CREDITSDesign: Sean Chick & Kris Van Beurden Development: Kris Van Beurden & Sean ChickMap, Card,Counterart: Mark MahaffeyBoxDesign:Mark Mahaffey and Brien MillerRulesandChartsLayout: Ken DingleyPlaytesting: Tâm Dang Vu, David Fels, Eddy Sterckx, Daniel ChickSpecial Thanks: Don Herndon, creator of No Peace Without Spain, on which Nine Years is basedSpecialThanks: Jim O’Neill, Charles Vasey, Edward PundykProduction: Ken Dingley and Bill Thomas for Compass Games, LLC.
Nine Years_Rules1.3.indd 25 1/31/17 12:01 PM

© 2017 Compass Games, LLC.
NiNe Years: The War of the GraNd alliaNce 1688-1697
© 2017 Compass Games, LLC.
26 NiNe Years: The War of the GraNd alliaNce 1688-1697
20. SCENARIOS20.1 SCENARIO OPTIONSPossession of the Nine Years game allows you to play the basic scenario,runningfrom1688to(atmost)1699(see20.2).
If you also possess No Peace Without Spain, you can play the Grand Campaign game (see 20.3).
20.2 NINE YEARSNotes on set up:
When“.5” is indicated for thenumberof corps ina space, thismeans a reduced strength corps (e.g. 1.5 Subsidy = one fullstrength and one reduced strength Subsidy corps).
20.2.1AllianceSetup
AmsterdamWilliam III, Minor Leader, Level 2 Fortified Line, 3 Dutch, 1 Subsidy, Atlantic Fleet (Strength 2)
Cologne Minor Leader, 1 Dutch, 1 Empire, 1 Subsidy
Ostend 0.5Spanish
Tournai 0.5Spanish
Antwerp Level 1 Fortified Line
Munich Max Emanuel (on minor leader side), 1 Bavarian
Madrid Villahermosa,1.5Spanish
Barcelona 0.5Spanish,MediterraneanFleet(Strength 1)
Philipsburg 0.5Empire,Level1Fortifiedline
Empire Home Space
2Empire,1.5Subsidy,Lorraine(onminor leader side)
Vienna 0.5Austrian
Trent 2 Austrian, Minor Leader
Austria Home Space 1 Austrian
Naples 0.5Spanish
Force Pool 1 Bavarian, 1 Spanish
20.2.2BourbonSetup
Paris 1 French
Brest Brest Fleet (Strength 1)
Landau Bourbon Control Marker
Strasbourg Vauban, Lorges (minor leader side), 4.5French
LilleBoufflers, Luxembourg (minor leaderside),5.5French,Level1Fortified Line
Bouchain Minor Leader, 3 French, Level 1 Fortified Line
Perpignan Noailles, 2 French
Briançon Catinat (minor leader side), 2 French
Mantua Bourbon Control Marker
Mirandola Bourbon Control Marker
Verrua Bourbon Control Marker
Parma Bourbon Control Marker
London James II, Marlborough (on Jacobite side),1.5Jacobite
Dublin 1 Jacobite
Force Pool 2 French, 1 Jacobite, 1 Catalan
20.2.3MarkerSetup
Location Marker
15spaceonGameRecordTrack VP
0 VP space on King William’s War track, Bourbon Side up King William’s War
MED Control Box Toulon Fleet
ATL Control Box empty
6spaceonGameRecordTrack Alliance Resource Points
4 space on Game Record Track Bourbon Resource Points
1688spaceonTurnTrack Turn
Nine Years_Rules1.3.indd 26 1/31/17 12:01 PM

© 2017 Compass Games, LLC.
NiNe Years: The War of the GraNd alliaNce 1688-1697
© 2017 Compass Games, LLC.
27NiNe Years: The War of the GraNd alliaNce 1688-1697
20.2.4ScheduledReinforcements
TurnAppearing During
Reinforcement Phase (Alliance)
Appearing During Reinforcement Phase
(Bourbon)
16891 Dutch, 1 Subsidy, 2 Austrian (1 to Force Pool), 1 Bavarian, Eugene, promote Max Emanuel
2 French, promote Lorges
16902 Subsidy, 2 Savoy (Savoy joins Alliance), 1 Austrian, Victor Amadeus, promote Lorraine
2 French, promote Luxembourg and Catinat
1691 Add 1 British if London Alliance controlled 1 French
1692 1 British if London Alliance controlled, Minor Leader
20.2.5SpecialScenarioRules
1. SuddenopeningofHostilities.The1688TurnbeginswiththeCampaign phase (skip the Event Card and Reinforcement phases). Only three (3) Action cards are dealt during this turn.
2. Glorious Revolution and London
(a)Duringthe1688and1689turnsonly,seamovementmayinvolveupto6corps(insteadofupto2)fromasingleportif William III is involved in the move, such a sea move costing TWO action points. If at the end of such a sea move (and any resulting battles) William III is in London, execute the following “Glorious Revolution” effects: • London and Derry are immediately Alliance controlled
(with no change in VP). • Place an Alliance British corps in London with
Marlborough (now flipped to British side even if he was wounded or captured)
• place Prince Waldeck in Amsterdam• add 2 British corps to the Force Pool. • Any surviving Jacobite forces can retreat to York or by
sea to Dunkirk or Dublin.
(b)During anyWinterQuarter’s Phase after 1688 inwhichLondon is Bourbon controlled and the Atlantic is under Alliance control, execute the Glorious Revolution as follows:• London is automatically Alliance controlled• place an Alliance British Corps in London with
Marlborough (now flipped to British side)• add 2 British Corps to the Force Pool. • Prince Waldeck is removed from the game. • Any force in London is moved to Dunkirk or any space
in Ireland. From now any number of Jacobite Corps can stack with James II and uses Paris as Capital while stacked with James II. This supersedes rule 7.2.7.
3. Mainz: If Philipsburg becomes Bourbon controlled during the 1688 or 1689 turns, the Mainz space automatically convertsto Bourbon control (but without a VP change), moving all Alliance forces there to the Empire/Subsidy home space. This action cannot be intercepted.
20.3 GRAND CAMPAIGN GAMEThe Grand Campaign Game links the scenario of Nine Years with the scenario of No Peace Without Spain for one all-encompassing, two-decades spanning game.
To play the Grand Campaign, use the setup of the NY scenario (20.2) and play that scenario until a winner is determined. Before beginning the NY scenario, determine which scenario options (Tournament, Historical British Withdrawal or Full Game) you will use for NPWS (see the NPWS rulebook).
If either player attained an Automatic Victory by controlling Vienna/Amsterdam/Paris or if at the time of victory the Bourbon player controls London, the grand campaign game ends and the winner of the NY scenario is also the winner of the Campaign Game.
Otherwise, once the winner is determined, take the following actions:
1. Create the NPWS event deck as per the NPWS rules. Any “held” cards from the NY scenario remain part of the player’s hand. Remove all other cards from the NY scenario from the game (including those remaining in the deck). Flip the “Multi-turn Event” sheet.
2. Remove all Wealthy markers; reset the Alliance and Bourbon resource points to the NPWS starting positions (6 and 4respectively)
3. Place the VP marker on 10, then the Bourbon player gains 1 VP if he won a major victory in NY and the Alliance player gains 1 VP if he just won a major victory. Current control of the Atlantic is also worth 1 VP for the Bourbon player, as is control of the Mediterranean for the Alliance player.
4. If Savoy is currently neutral, it joins the Bourbon player (place the Savoy Corps with the 1702 Reinforcements). Otherwise, it remains Alliance controlled, its Corps remain in play at their current location(s) and future play of the Savoy Switches Sides will give the Alliance 2VP instead of its normal effects.
5. TheSpanishpowerjoinsthesidewhowontheNYscenario.
• If Bourbon, setup the Spanish Loyalty Marker as normal and remove the Catalan Corps (and Power) from the game. All Spanish home spaces become Bourbon-controlled. Exchange all Alliance Corps of the Spain power by Bourbon Corps of the Spain power, then move all Alliance Corps on a Bourbon-controlled space to the nearest alliance-controlled space(s). If more than one space qualifies, theAlliance player may choose the destination space(s), but forces must move the least distance possible.
• If Alliance, remove the Habsburg Corps and Power from the game and ignore the Habsburg Uprising and Spanish Loyalty rules for remainder of the game; increase the Alliance Resource Points and decrease the Bourbon Resource Points by 1 each.
6. RemovetheKingWilliam’sWarmarker;ignorefurtherKingWilliam’sWarrollrequirements.
Nine Years_Rules1.3.indd 27 1/31/17 12:01 PM

© 2017 Compass Games, LLC.
NiNe Years: The War of the GraNd alliaNce 1688-1697
© 2017 Compass Games, LLC.
28 NiNe Years: The War of the GraNd alliaNce 1688-1697
7. Remove all Jacobite Corps outside of Ireland.
8. Bavariabecomesneutral.RemoveallAllianceBavarianCorpsfrom the game, then place 1 Bourbon Bavarian Corps in Munich.
9. Compareeachpower’sCorpsinplay(includingthoseintheForce Pool and on the turn track as reinforcements) with the following limits (the NPWS countermix):
• France: 24 Corps (26 instead if Spain is currently anAlliance power)
• Bavaria: 3 Corps• Spain:6Corps(regardlessofallegiance)• Savoy: 1 Corps (if Bourbon) or 2 Corps (if Alliance)• Austria:8Corps• Empire: 4 Corps• Subsidy: 10 Corps• British:5Corps• Dutch:6Corps
If a power has more Corps than this limit, its current controllers remove excess corps (first from the Force Pool, then from the turn track, then from any location in play).
If a power has fewer Corps than this limit, place Corps on the turn track to enter as reinforcements. Place the first such Corps per Power on the 1702 turn, the second on the 1703 turn etc.
10.Prepare all required reinforcements, event and force poolrequiredCorpsfortheNPWSscenario(Corpsplacedontheturn track due to the previous rule count!). Take these from the force pool but if not sufficient, take them from the game board (current controller player choosing).
11. Naval Matters
• Atlantic becomes permanently Alliance controlled (place the Atlantic Fleet in the control box).
• Mediterranean becomes Bourbon controlled (unless Cadiz Alliance controlled at this point, in which case it becomes uncontrolled until the Winter Quarters Phase of the 1702 turn).
• Remove the Brest Fleet from the game (if not already removed).
• Place the Med Fleet in the Alliance force pool. From now on, only the Toulon Fleet or the Med fleet can be commissioned, deployed and used to gain control over theMedSeaZone(inadditiontocontroloverCadizandLisbon).
12.RemoveallnamedleadersnotrequiredbytheNPWSscenario(even if flipped to their minor leader replacement side) from the game.
Then, for each turn remaining until the first turn of the NPWS scenario (1702), play a shortened turn, performing only the following steps:
• Each side receives 1 resource point for use in the reinforcement phase (with the initiative player being the winner of the NY scenario).
• During the Action phase, the player who lost the NY scenario may regain control over 1 fortified space adjacent to a space he already controls (2 fortified spaces may be chosen instead if both are worth only 1 VP). Only control changes. This does not change the current VP status. Only spaces may be chosen owned by powers currently controlled by his side. Move any forces in such spaces (or forces that would lose their siege line of supply due to this change of control) to the nearest space(s) controlled by their owning player. If more thanone spacequalifies, theplayermaychoose thedestination space(s), but forces must move the least distance possible.
13. Reinforcements:
• Bourbon: Tallard (minor leader), Villars (minor leader), Max Emanuel, minor leader x2
• Allied: NPWS version of Marlborough and Eugene (flipped to minor leader side if eliminated during the course of the NY scenario), Overkirk (minor leader), Baden, Starhemberg, minor leader x2
Ignore special rule 3 and 4 of the NPWS scenario. Except for rules & components mentioned above, use the NPWS rules instead of the NY rules for this part of the Campaign Game.
20.4 OPTIONAL RULES FOR NY AND NPWS20.4.1 Historic Economy. (NPWS only) While the Bank of England is not in effect, the Alliance player may receive -1 VP during the event phase to play it immediately from the event deck instead of drawing his allotted card. While the French Financial Collapseisnotyet ineffectandit is1708or later, theAllianceplayer may use the same procedure to play that card from the event deck.
20.4.2 Battle rerolls. After all dice are rolled, compare the Tactical Rating of the Overall Commander on each side (this is the leader with the highest Command Rating involved in the battle, owning player choosing in the case of ties. If no leader participating, treat as 0). The difference in Tactical Ratings is the amount of dice that can be re-rolled by the player controlling the Overall Commander with the higher Tactical Rating. Re-roll the entire allotted amount of dice at the same time.
20.4.3WoundedLeader.(NPWS only) Use wounded leader rules asmentionedin16.3.2ofthisrulebook.
20.4.4SpecialHistoricalLeaderAbilities. Each of these special abilities only refers to the Named leader side of the counter:
Nine Years_Rules1.3.indd 28 1/31/17 12:01 PM

© 2017 Compass Games, LLC.
NiNe Years: The War of the GraNd alliaNce 1688-1697
© 2017 Compass Games, LLC.
29NiNe Years: The War of the GraNd alliaNce 1688-1697
Nine Years leaders
LeaderName Ability
Alliance
Eugene TR 3 during battles involving no other friendly Named Leaders.
Lorraine If he successfully besieges Metz or Strasbourg, receive +1 VP.
Max Emanuel None.
Victor-Amadeus None.
Villahermosa None.
Waldeck If the only named leader in a force that is attempting to avoid battle, must make a successful roll even if space is friendly-controlled and fortified.
William III Unless besieged, adds 1 to the stacking limit of the area he occupies.
Marlborough (British) May use his CR only to control British units. Bourbon
Boufflers TR 2 for the purposes of siege combat.
Catinat None
Claverhouse None
James II RollaD6atthebeginningofeachbattle:if4-6hisTRis0forthatbattle.
Lorges None
Luxembourg Unless besieged, subtracts 1 from the stacking limit of the area he occupies.
Marlborough ( Jacobite) RollaD6atthebeginningofeachbattle:if4-6hisTRis0forthatbattle.
Noailles TR 1 against an army that is not made up of majority Spanish troops.
Vauban When activated to siege, make two siege rolls and choose one roll to use.
NoPeaceWithoutSpainleaders
LeaderName Ability
Alliance
Baden TR 2 for the purposes of siege combat.
Eugene TR 3 during battles involving no other friendly named leaders. If using optional rule 20.4.2, may reroll one additional die if Marlborough is also in this battle.
Galway Unless besieged, adds 1 to the stacking limit of the area he occupies.
Marlborough After an force attacked by Marlborough successfully avoids battle (even from a friendly-controlled fortified space), roll a die. On a 1, the avoid battle fails.
Overkirk TR 2 during battles involving at least one other friendly named leader.
Starhemberg If using optional rule 20.4.2, TR 2 for purpose of this re-roll rule.Bourbon
Berwick Attheendoftheeventphase,rollaD6.Ona5-6,replacebytheStaffOfficerandmoveBerwicktonextturn’s space on the reinforcement track.
Boufflers TR 2 for the purposes of siege combat.
Max Emanuel Counts as a starred leader for the purpose of the Dynastic Upsets rule.
Tallard While in a force that is attempting to avoid battle, must make a successful roll even if space is friendly-controlled and fortified. If using optional rule 20.4.2, TR 2 for purpose of this re-roll rule.
Vendome Afterallinterceptandavoidbattlerolls,rolladie.Onaresultof6reducehisTRto0fordurationofthebattle.
Villars CR4until1709(exceptforthepurposeofrallyaction).Hiscounternevercountsasdemoralized.
Nine Years_Rules1.3.indd 29 1/31/17 12:01 PM
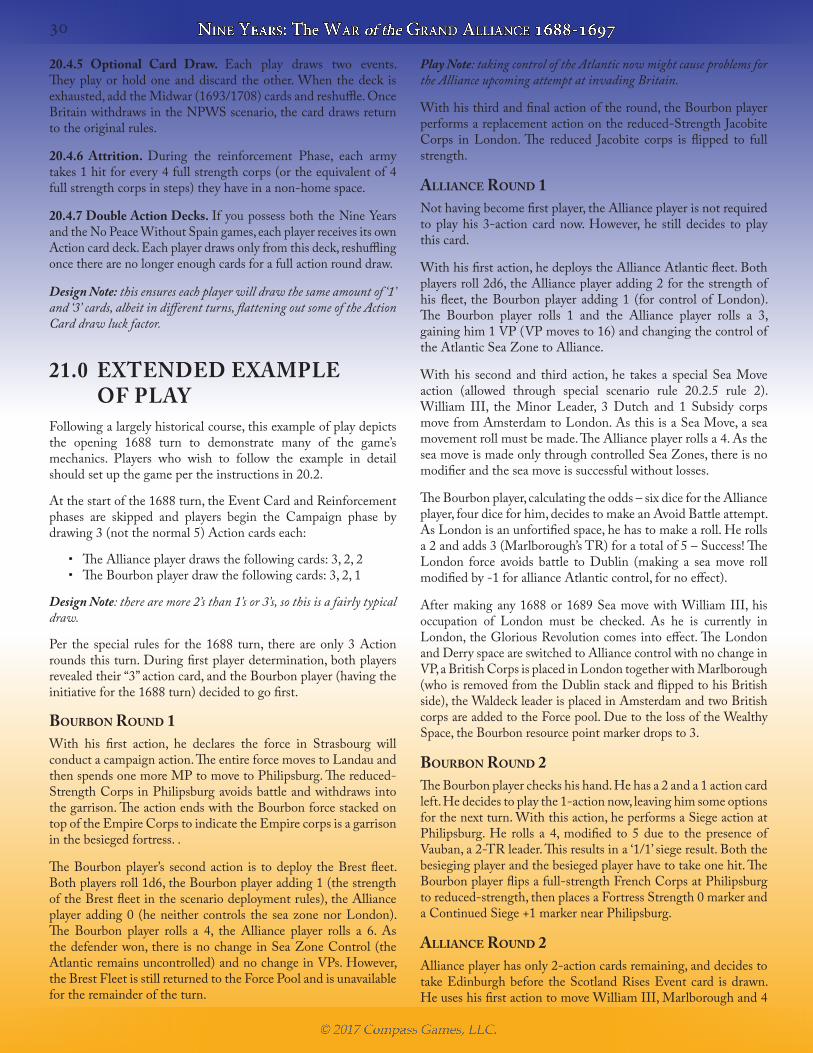
© 2017 Compass Games, LLC.
NiNe Years: The War of the GraNd alliaNce 1688-1697
© 2017 Compass Games, LLC.
30 NiNe Years: The War of the GraNd alliaNce 1688-1697
20.4.5 Optional Card Draw. Each play draws two events. They play or hold one and discard the other. When the deck is exhausted,addtheMidwar(1693/1708)cardsandreshuffle.OnceBritain withdraws in the NPWS scenario, the card draws return to the original rules.
20.4.6 Attrition. During the reinforcement Phase, each army takes1hitforevery4fullstrengthcorps(ortheequivalentof4full strength corps in steps) they have in a non-home space.
20.4.7DoubleActionDecks.If you possess both the Nine Years and the No Peace Without Spain games, each player receives its own Action card deck. Each player draws only from this deck, reshuffling once there are no longer enough cards for a full action round draw.
Design Note: this ensures each player will draw the same amount of ‘1’ and ‘3’ cards, albeit in different turns, flattening out some of the Action Card draw luck factor.
21.0 EXTENDED EXAMPLE OF PLAYFollowing a largely historical course, this example of play depicts the opening 1688 turn to demonstrate many of the game’smechanics. Players who wish to follow the example in detail should set up the game per the instructions in 20.2.
Atthestartofthe1688turn,theEventCardandReinforcementphases are skipped and players begin the Campaign phase by drawing3(notthenormal5)Actioncardseach:
• The Alliance player draws the following cards: 3, 2, 2• The Bourbon player draw the following cards: 3, 2, 1
Design Note: there are more 2’s than 1’s or 3’s, so this is a fairly typical draw.
Per the special rules for the1688 turn, thereareonly3Actionrounds this turn. During first player determination, both players revealed their “3” action card, and the Bourbon player (having the initiativeforthe1688turn)decidedtogofirst.
BourBon round 1With his first action, he declares the force in Strasbourg will conduct a campaign action. The entire force moves to Landau and then spends one more MP to move to Philipsburg. The reduced-Strength Corps in Philipsburg avoids battle and withdraws into the garrison. The action ends with the Bourbon force stacked on top of the Empire Corps to indicate the Empire corps is a garrison in the besieged fortress. .
The Bourbon player’s second action is to deploy the Brest fleet. Bothplayersroll1d6,theBourbonplayeradding1(thestrengthof the Brest fleet in the scenario deployment rules), the Alliance player adding 0 (he neither controls the sea zone nor London). The Bourbon player rolls a 4, the Alliance player rolls a 6. Asthedefenderwon,thereisnochangeinSeaZoneControl(theAtlantic remains uncontrolled) and no change in VPs. However, the Brest Fleet is still returned to the Force Pool and is unavailable for the remainder of the turn.
Play Note: taking control of the Atlantic now might cause problems for the Alliance upcoming attempt at invading Britain.
With his third and final action of the round, the Bourbon player performs a replacement action on the reduced-Strength Jacobite Corps in London. The reduced Jacobite corps is flipped to full strength.
AlliAnce round 1Nothavingbecomefirstplayer,theAllianceplayerisnotrequiredto play his 3-action card now. However, he still decides to play this card.
With his first action, he deploys the Alliance Atlantic fleet. Both playersroll2d6,theAllianceplayeradding2forthestrengthofhis fleet, the Bourbon player adding 1 (for control of London). The Bourbon player rolls 1 and the Alliance player rolls a 3, gaininghim1VP(VPmovesto16)andchangingthecontroloftheAtlanticSeaZonetoAlliance.
With his second and third action, he takes a special Sea Move action (allowed through special scenario rule 20.2.5 rule 2).William III, the Minor Leader, 3 Dutch and 1 Subsidy corps move from Amsterdam to London. As this is a Sea Move, a sea movement roll must be made. The Alliance player rolls a 4. As the seamoveismadeonlythroughcontrolledSeaZones,thereisnomodifier and the sea move is successful without losses.
The Bourbon player, calculating the odds – six dice for the Alliance player, four dice for him, decides to make an Avoid Battle attempt. As London is an unfortified space, he has to make a roll. He rolls a2andadds3(Marlborough’sTR)foratotalof5–Success!TheLondon force avoids battle to Dublin (making a sea move roll modified by -1 for alliance Atlantic control, for no effect).
Aftermakingany1688or1689SeamovewithWilliamIII,hisoccupation of London must be checked. As he is currently in London, the Glorious Revolution comes into effect. The London and Derry space are switched to Alliance control with no change in VP, a British Corps is placed in London together with Marlborough (who is removed from the Dublin stack and flipped to his British side), the Waldeck leader is placed in Amsterdam and two British corps are added to the Force pool. Due to the loss of the Wealthy Space, the Bourbon resource point marker drops to 3.
BourBon round 2The Bourbon player checks his hand. He has a 2 and a 1 action card left. He decides to play the 1-action now, leaving him some options for the next turn. With this action, he performs a Siege action at Philipsburg.He rolls a4,modified to5due to thepresenceofVauban, a 2-TR leader. This results in a ‘1/1’ siege result. Both the besieging player and the besieged player have to take one hit. The Bourbon player flips a full-strength French Corps at Philipsburg to reduced-strength, then places a Fortress Strength 0 marker and a Continued Siege +1 marker near Philipsburg.
AlliAnce round 2Alliance player has only 2-action cards remaining, and decides to take Edinburgh before the Scotland Rises Event card is drawn. He uses his first action to move William III, Marlborough and 4
Nine Years_Rules1.3.indd 30 1/31/17 12:01 PM

© 2017 Compass Games, LLC.
NiNe Years: The War of the GraNd alliaNce 1688-1697
© 2017 Compass Games, LLC.
31NiNe Years: The War of the GraNd alliaNce 1688-1697
of the five corps in London to York. Once there, he spends another MP to place a control marker in York. Finally the last MP is spend to move the force to Edinburgh.
ToendtheworryingsiegeatPhilipsburg,hesubsequentlyactivatesthe minor Empire leader in the Empire/Subsidy zone. Together with the four corps in the zone, he moves them (for 2 MP) to Mainz and from there to Philipsburg. The Bourbon player, not wanting to abandon his siege of Philipsburg, decides to fight. There is a Fortified Line in Philipsburg, but as it is an Allied line and the defender is the Bourbon player, it has no effect on this battle.The Alliance player rolls 5 dice (3 full-strength corps, 1reduced-strength corps plus the minor Empire leader’s TR of 1), scoring 3hits.TheBourbonplayer rolls 6 dice (3 full-strengthcorps, 2 reduced-strength corps plus Vauban’s TR of 2) and also scores 3 hits. A tie goes to the defender, so the Bourbon force wins thebattle (16.3.3).TheBourbonplayerflips threeFrench corpsto their reduced sides. The Alliance player flips both Empire and the one full-strength Subsidy corps to their reduced sides, places aDemoralizedmarker(16.3.4)atopthestackandretreatsbacktoMainz. Finally, the bourbon player rolls for named leader casualties – Vauban survives without incident. All other leaders involved in the battle were on their minor leader side and do not have to roll for casualties.
BourBon round 3Bourbon player has a 2-action card left. With his first action, he performs another Siege action at Philipsburg. He rolls a 3, modified by +1 for Vauban and +1 for the Continued Siege for another ‘1/1’ siege result. Both sides need to take a hit. As the Bourbon besieging Force has only reduced-strength Corps remaining, one of these is selected and returned to the Force pool. The defending garrison had only one hit left (the reduced-strength Empire garrison) and as such the fortress is taken. The Honors of War rules come into play and instead of being eliminated as the last hit, the garrison corps is allowed to withdraw to the nearest friendly space. In this case the Alliance player chooses Mainz and the corps is added to the Demoralized stack there (itself not being demoralized). The Fortress Strength and Continued Siege markers are removed, a Bourbon control marker is put in the Philipsburg space, the fortified line there is removed and the VP marker is moved from 16 to 15. Finally, the scenario special rule 3 givesthe Bourbon player control over Mainz if ungarrisoned when Philipsburg is taken. However, as Mainz is Alliance-occupied, this does not happen.
With his second action, the Bourbon player performs a Replacement action and flips one of the reduced-strength corps at Philipsburg to full strength.
Play Note: As corps can only participate in one action per round, it was not possible to first replace a corps to full-strength and then perform the siege action at Philipsburg using this full-strength corps.
AlliAnce round 3With his final 2-card, the Alliance player decides to first siege Edinburgh. He rolls a ‘4’ which is modified by +1 for Marlborough’s TR of 3 to a ‘1/1’ siege result. The Alliance player takes a hit on a Dutch corps, placed a Fortress strength 1 marker and a Continued
Siege +1 marker. With his second action, he takes a replacement action on one of the Subsidy Corps in Mainz, rallying it in the process.
Play Note: the Alliance player only had a 33% chance of taking Edinburgh in one siege action, having to roll a modified 6+ on the siege table to accrue the 3+ siege points needed to take Edinburgh.
Winter QuArters PhAse
The Winter Quarters phase has several steps that must be completed in order. First, any forces in enemy-controlled spaces must withdraw to friendly spaces. In our current example, the Allied force in Edinburgh must withdraw and moves to York. This immediately ends the siege and the “Continued Siege +1” marker is removed.
Second, all game information markers are removed, including all Fortress Strength markers, Demoralized markers, Famous Victory markers, and any prepared Fleet markers remaining on the board. In our case, this means the Fortress Strength 1 marker at Edinburgh is removed and the Demoralization from Mainz is also removed.
Third, the Alliance player loses -2 VPs if London is Bourbon Controlled. However, this is not the case. Beachy Head is not in effect and the Atlantic and London are both in Alliance control, so no change of Atlantic sea zone control occurs.
Fourthly and Fifthly, neither savoy Neutrality not automatic Glorious Revolution or Bourbon Peace Die Rolls are applicable.
Finally, player check to see if the game has ended due to turns or automatic victory conditions. If not, the turn marker is advanced tothe1689turnontheTurntrackandthegameproceedstoanew turn.
22.0 DESIGN NOTESThe origin of Nine Years was my enjoyment of Don Herndon’s No Peace Without Spain! I had followed the game since it was slated for publication with MMP and loved it once Compass published it. I thought the system was good at depicting eighteenth century warfare and toyed with adopting it to the War of the Austrian Succession, one of my favorite conflicts. Instead, I designed a game for the War of the Grand Alliance, an important but today obscure conflict. In December 2014 I was researching the transition from pike to musket in preparation for my planned series Horse & Musket, which starts with Vienna, Sedgemoor, and the War of the Grand Alliance. In reading about War of the Grand Alliance a few things struck me. There was no definitive one volume history. What I knew I knew from the work of John Lynn and my interest in Stuart England and the Jacobite rebellions. I hoped there was a strategic game on the topic. Wargames, the best of them at least, help you learn about the conflict being simulated. Wilderness War isawonderfulexample.SoarethedesignsofKevinZucker.Yet,the War of the Grand Alliance had no stand-alone coverage. The books I write and many of the games I design are often times a way to fill the holes in our library of knowledge. I am not interested in writing another book on Gettysburg, and only slightly interested in designing a game on it.
Nine Years_Rules1.3.indd 31 1/31/17 12:01 PM

© 2017 Compass Games, LLC.
32 NiNe Years: The War of the GraNd alliaNce 1688-1697
With that in mind I got to work on Nine Years, originally intended as an expansion.
I posted about the game on boardgamegeek and the response was good. Kris Van Beurden jumped in right away to help and gradually came on as a co-designer, doing a lot of the playtesting. At first it seemed easy enough to simply make an expansion. The base map was basically the same between wars, although we would need some way to simulate the Glorious Revolution. At first it was to be simply holding boxes but gradually we adopted maps with connecting spaces. We also decided to include King William’s War, although abstracted, and connect Nine Years to No Peace WithoutSpain!Earlyin2016,withDon’said,Compassdecidedto create the game you see here as a stand-alone title. Ken Dingley helped move things along, even when life intervened to stall Kris and I. Mark Mahaffey was brought in to do the art, assuring both highqualityandcomponentcontinuitywithNoPeaceWithoutSpain! Overall, this has been a particularly smooth design process, in large part because I had so much help.
Nine Years does not feature the usual things a gamer of this era would expect. It starts with the French dominating the ocean, the Dutch and Austrians fielding powerful and competent land armies, and the British pursing a pro-French policy. The war saw the bayonet come into its own. Soldiers started discarding pikes (already on the decline) and the mass bayonet charge was born at Marsaglia. This shift could not be simulated in this game though due to the scope. I will have to wait on Horse & Musket for that. It is a fascinating topic.
The War of the Grand Alliance was a transitional war in terms of technology and tactics but it was also a transitional war for France and the British isles. The war was the final moment of Bourbon supremacy. Before this conflict, the French army, navy, and economy were unrivaled in Europe. However, fighting a war basically alone drained the monarchy’s coffers, exposing the financial weaknesses that would destroy the Bourbon state nearly one-hundred years later. So long as the French only fought the Dutch, they could win on the waves. The combined weight of British and Dutch sea power caused the French to make the navy a secondary concern, which has been French policy ever since. The army though carried the nation, winning most of the battles and preventing a disaster. Yet, victorious armies are also the ones least likely to reform, and the seeds of tactical decline can be traced to the War of the Grand Alliance. To be sure, the war did not make the French Revolution inevitable, and France would prove, and still proves today, to be an amazingly resilient nation. Yet, their status as the greatest power in Europe ended shortly after this war. Much of the eighteenth century was France trying reclaim that central position, coming close on occasion, but failing all the same.
For England, Scotland, and Ireland, the Glorious Revolution was the pivotal event. It was the last time a foreign power invaded Britain, in this case the Netherlands. The invasion of Britain was practically bloodless, but the battles to bring Ireland and Scotland to heel were bitter, and included such notorious actions as the Massacre at Glencoe. James II’s motives as king are debated to this day, but the effects of the invasion are clear enough. Parliament would be supreme, Britain would be intolerant towards Catholics, and diplomacy went from being flexible to rigidly anti-French
(except for the odd War of the Quadruple Alliance) all the way until Waterloo and arguably even beyond. I would not say British (Scotland and England were united in 1707) dominance as the world’s economic and naval power was assured by the War of the Grand Alliance though. The British fleet had its share of defeats in this war; French admirals and corsairs were still a step above their foes. The Bank of England had not been founded. Most of all, the Jacobite Rebellions in Scotland would continue to fester and weaken Britain for many decades. Rather, the war saw a major shift in power and policy in Britain that, after decades of highs and lows, culminated at Waterloo.
After the War of the Grand Alliance and the War of the Spanish Succession everything was different, and the basic contours of European power relationships were set, at least until the Franco-Prussian War. Some of you may mention the French Revolution, but for all its importance, it’s worth noting the basics of diplomacy remained the same. It was a conflict between Britain, and whatever allies she could buy, versus France and whoever was willing to join her. The big difference was the ideological bend of the revolution and the rise of Napoleon.
At any rate, I am proud of this game. Kris and I have brought an unfairly obscure war back into the light a bit, adopting a proven system to the war’s unusual circumstances. I at least hope you enjoy it. Greater than that, I hope you read up on this dramatic and pivotal conflict.
Dedicated to Michael Kraemer and Derek Green, a pair of true gentlemen, scholars, and friends.
Sean Chick
When I first encountered No Peace Without Spain, I was immediately enamored. The game’s simple (but not simplistic!) rules, in combination with a well-thought-out map, allow a player to feel the equivalent of a Marlborough or a Villars, seekingadvantageous sieges by outmaneuvering the opponent’s forces.
As such, when Sean in December 2014 proposed to make a variant scenario for NPWS depicting the earlier but linked “War of the Grand Alliance” conflict, I was very interested to collaborate with him. Soon, the raw ideas started to coalesce into a viable scenario, helped immensely by Don’s mature rules, added to by the errata and variant rules previously proposed by BGG users and the efforts of our playtesters.
Even then, I had envisaged this project as a variant scenario. When Compass games decided to pick this up as a stand-alone game, I was very pleasantly surprised. Although we had all the opportunity for changes now, we decided to keep the map, counters and rules compatible with NPWS for the purpose of linking the scenarios into one big, all-encompassing Campaign game.
My thanks go out to the people at Compass Games, Mark Mahaffey for the art, Don for the series rules and Sean for coming up with the idea and getting the ball rolling.
Dedicated to my wife, who is always willing to listen to my historical reveries and to play my designs.
KrisVanBeurden
Nine Years_Rules1.3.indd 32 1/31/17 12:01 PM