moving pictures - d3ddkgxe55ca6c.cloudfront.net · moving pictures content and skills ... card, an...
TRANSCRIPT
READY RESOURCES D E S I G N A N D T E C H N O L O G Y34
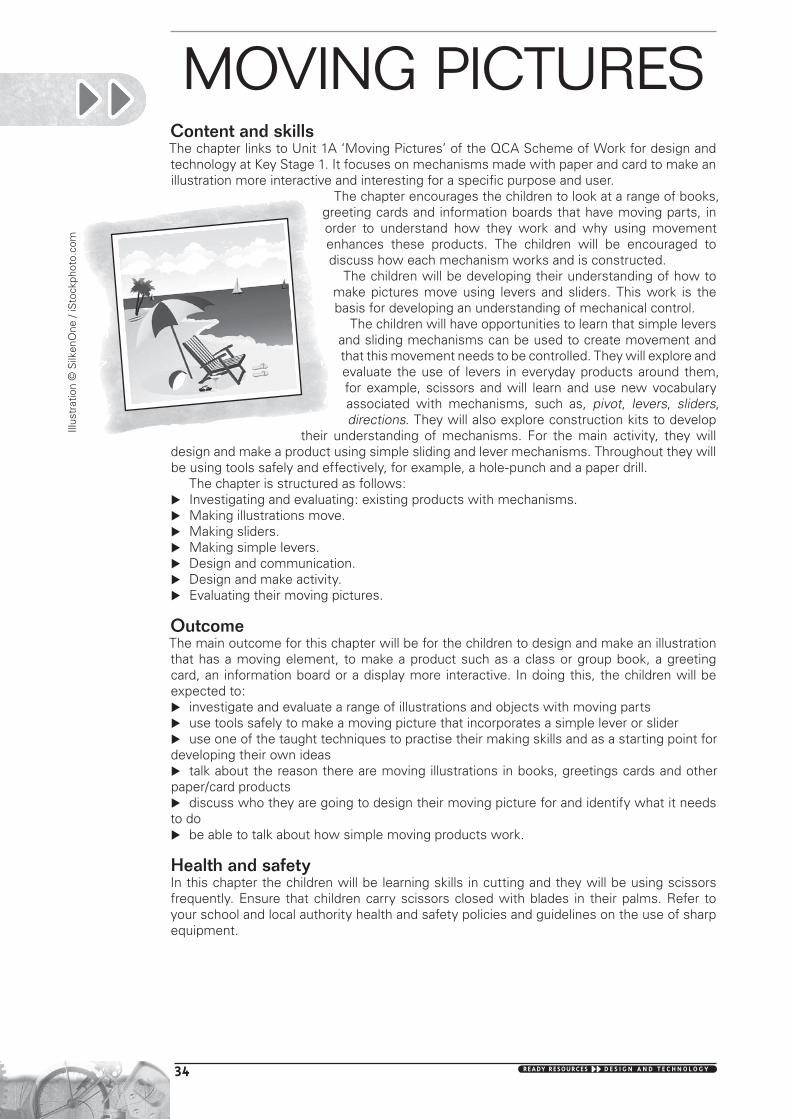
MOVING PICTURESContent and skillsThe chapter links to Unit 1A ‘Moving Pictures’ of the QCA Scheme of Work for design and technology at Key Stage 1. It focuses on mechanisms made with paper and card to make an illustration more interactive and interesting for a specifi c purpose and user.
The chapter encourages the children to look at a range of books, greeting cards and information boards that have moving parts, in order to understand how they work and why using movement enhances these products. The children will be encouraged to discuss how each mechanism works and is constructed. The children will be developing their understanding of how to make pictures move using levers and sliders. This work is the basis for developing an understanding of mechanical control. The children will have opportunities to learn that simple levers and sliding mechanisms can be used to create movement and that this movement needs to be controlled. They will explore and evaluate the use of levers in everyday products around them, for example, scissors and will learn and use new vocabulary associated with mechanisms, such as, pivot, levers, sliders, directions. They will also explore construction kits to develop
their understanding of mechanisms. For the main activity, they will design and make a product using simple sliding and lever mechanisms. Throughout they will be using tools safely and effectively, for example, a hole-punch and a paper drill. The chapter is structured as follows: Investigating and evaluating: existing products with mechanisms. Making illustrations move. Making sliders. Making simple levers. Design and communication. Design and make activity. Evaluating their moving pictures.
OutcomeThe main outcome for this chapter will be for the children to design and make an illustration that has a moving element, to make a product such as a class or group book, a greeting card, an information board or a display more interactive. In doing this, the children will be expected to: investigate and evaluate a range of illustrations and objects with moving parts use tools safely to make a moving picture that incorporates a simple lever or slider use one of the taught techniques to practise their making skills and as a starting point for
developing their own ideas talk about the reason there are moving illustrations in books, greetings cards and other
paper/card products discuss who they are going to design their moving picture for and identify what it needs
to do be able to talk about how simple moving products work.
Health and safetyIn this chapter the children will be learning skills in cutting and they will be using scissors frequently. Ensure that children carry scissors closed with blades in their palms. Refer to your school and local authority health and safety policies and guidelines on the use of sharp equipment.
Illus
trat
ion
© S
ilken
One
/ iS
tock
phot
o.co
m
TextNotes-MovingPictures-p34-40.indd 34TextNotes-MovingPictures-p34-40.indd 34 13/02/2008 09:12:1913/02/2008 09:12:19

READY RESOURCES D E S I G N A N D T E C H N O L O G Y 35
MOVING PICTURES
Links to other subjectsEnglish: Skills such as questioning, describing, speaking and listening are needed when carrying out the activities. The children will have opportunities to read words related to work on mechanisms, tools and equipment and should be encouraged to use the correct terminology at all times. There are opportunities for writing their own captions to go with their moving picture or to improvise or role play the intended movement of their design. The children could read one another’s stories or follow instructions to make a product.
Organising the unitAll elements of the unit should be covered but the order in which they are covered can be of your own choosing. For example, starting points could be: a focused practical task where the children are shown how to make a slider, and then
the investigation and evaluation activities can be used to help the children see where slider mechanisms are used in other products reading the same story from two different books – one with moving illustrations and one
without and then discussing with the children which book they liked the best and why investigating the class collection of products with moving parts.
The children can work in small groups to create one book, with each child producing a moving illustration. Alternatively, they can work individually to create a greeting card or an information board.
Resources on the CD-ROMVideos on the CD-ROM demonstrate the different products that use mechanisms to create movement, for example, a see-saw and a lever door handle. The products are shown working, so the children can see and understand the type of movement that is created. Encourage the children to note whether is it forwards, backwards, up, down, and so on.
Photocopiable pagesThe photocopiable sheets in the book and on the CD-ROM include: a worksheet showing everyday objects that have a lever mechanism for the children to
discuss and annotate design and planning sheets for the children to use to build up a process diary for the
chapter examples of moving pictures that use levers or sliders to create a pop-up movement
(these can be used in conjunction with the examples collected by the class). Photocopiable resources on the CD-ROM only include support sheets for teaching practical skills and advice on safe use of tools. Key vocabulary word cards are also provided.
TextNotes-MovingPictures-p34-40.indd 35TextNotes-MovingPictures-p34-40.indd 35 13/02/2008 09:12:2113/02/2008 09:12:21

PAGES 41–42
READY RESOURCES D E S I G N A N D T E C H N O L O G Y36
MOVING PICTURES
INVESTIGATING AND EVALUATING IDEASEXISTING PRODUCTS WITH MECHANISMSVideos: Lever door handle, See-saw
Photocopiable pages: Objects with moving parts, Moving pictures, Names of tools (CD-ROM only), Word cards: moving pictures (CD-ROM only)
Make sure that you give the children the opportunity to explore and evaluate existing products that demonstrate different types of movement. The children need to understand that it is mechanisms that create different types of movement. Ask the children to consider the users and purposes of each product. They should be encouraged to identify the type of movement in each example and to explain how they think it works. Then, give them the opportunity to look around the classroom and school to see if they can identify objects that use mechanisms to create movement.
Discussing the videos Use the videos to show the mechanisms in the see-saw and lever door handle. Ask the
children if they can tell which mechanism has been used and what movement it creates. Use the video clips and the ‘Objects with moving parts’ photocopiable on page 41 to
identify different types of movement. Ask questions about which part is moving, how it works, and what makes it move in that particular way. Do the children think it is effective? Talk about the fact that mechanisms make things move forwards, backwards, up, down, left
and right. Encourage the children to identify what needs to happen for the mechanism to work – for example, pull the slider (input) for the linear motion to happen (output), push a lever down (input) for the see-saw mechanism to go up in an arc or oscillating movement (output). See the ‘Moving pictures’ photocopiable page 42 for examples of different pop-up movements.
Activities Ask the children questions about some hands-on products in the classroom. Examples
of levers in everyday use might include scissors, a door handle, a stapler. Sliders in everyday use could include a draw, a box pencil case that slides to open, a hatch in the dinner hall or the offi ce. In each case, ask what the moving part does, how it works, what effect it has and whether it works well. Can they see how the parts are joined together? How could they use this to help with their own design ideas? Discuss the tools that the children will need, using the ‘Names of tools’ sheet from the
CD-ROM. Use the ‘Words cards: moving pictures’ sheet from CD-ROM to familiarise the children
with the key vocabulary. Use the collection of examples found in the classroom or those the children have brought
from home and investigate how they are made. Ask questions about what materials have been used to make each product and how the parts are joined together.
Type of motion Description of motion
Linear motion Linear motion is motion in a straight line.
Reciprocating motion
Reciprocating motion is linear motion going backwards and forwards
Rotary motion Rotary motion is motion that is circular
Oscillating motion
Oscillating motion is forward and backward motion in a circular arc
TextNotes-MovingPictures-p34-40.indd 36TextNotes-MovingPictures-p34-40.indd 36 13/02/2008 09:12:2413/02/2008 09:12:24

PAGES 42–43
READY RESOURCES D E S I G N A N D T E C H N O L O G Y 37
MOVING PICTURES
MAKING ILLUSTRATIONS MOVEIllustrations: Hey Diddle Diddle, Hansel and Gretel, Little Red Riding Hood, Car, Train, Beach, Crab
The illustrations on the CD-ROM include well-known characters from nursery rhymes, traditional tales and pictures that would link to other topics, for example, the seaside and vehicles. The children should consider how to make the illustrations more engaging by making them move, but they should be encouraged to consider carefully which is the most appropriate part to move: for example, making the jaws of the wolf move would emphasise how fi erce the wolf is, while making the basket swing would not support the ideas or characters of the story.
Discussing the photographs Discuss with the children why a moving picture is
used in a product. What do they think the purpose is – to make the book interactive and interesting for the reader, to help children to predict what comes next, and so on. What do they think the moving part brings to the illustration? Why do they think moving parts are used in books and greetings cards? Show ‘Hey Diddle Diddle’ and discuss how this illustration could be made more interesting
by adding moving parts. There is only one real option here, which is to use a lever to make the cow jump over the moon. Show ‘Hansel and Gretel’ and ‘Little Red Riding Hood’ and discuss how there are different
options for making these pictures move. Hansel and Gretel could move up the path or the cat could move along the side of the house; the wolf’s jaws could open and close or Red Riding Hood’s arm could move. Discuss various ideas and decide which are best. Encourage the children to think about what the most important part of the picture is, and what would move in reality (it would be more appropriate to move the cat than the chimney pot, for example).You may want to repeat the discussion for ‘Car’, ‘Train’, ‘Beach’ and ‘Crab’, particularly if these fi t in to topics the class is currently studying.
Activities Give the children a product and ask them to
draw it, showing how it moves. Show them how to label the parts on their design. Share a few examples of good drawings with
the class. Ask them if the design clearly shows how the mechanism works. How could the design be improved? How could they use this to help with their own design ideas?
FOCUSED PRACTICAL TASKSMAKING SLIDERSPhotocopiable pages: Moving pictures, My design ideas
During this section the children will learn how to make their own sliders using card and construction kits.
Discussion Using an existing product, ask the children to predict what will happen if a slider is pulled.
‘Hey diddle diddle’ illustration ©
Lee Daniels / iS
tockphoto.com; ‘H
ansel and Gretel’ illustration ©
Eneri / iS
tockphoto.com
TextNotes-MovingPictures-p34-40.indd 37TextNotes-MovingPictures-p34-40.indd 37 13/02/2008 09:12:2413/02/2008 09:12:24

PAGES 42–43
PAGES 42, 44, 45
READY RESOURCES D E S I G N A N D T E C H N O L O G Y38
MOVING PICTURES
For example, ask: What will happen if I slide this? How can I make the clown’s hat lift off? Ask the children to look at the diagrams of sliders at the top of the ‘Moving pictures’
photocopiable on page 42. Discuss and then demonstrate how to make sliding mechanisms using the hole-punch and double-sided sticky pads. They can use the ‘My design ideas’ photocopiable page 43 to record their ideas.
Activities Use a range of kits and other construction materials to allow the children to model their
ideas. The children could print a picture using clip art and stick it onto the moving part. Allow the children opportunities to design and make their own sliders and levers using
card. Make sure that sticky tape, masking tape, sticky pads, scissors and so on are available to the children so they can make their own choices. Have some card strips readily available for the children to use. Tell the children that they can print images off the computer or draw their own to use on
their models. Allow the children plenty of time to practise using the hole-punch or a paper drill over a
piece of wood (to make a hole in a larger piece of card.) Ensure that the children have plenty of practice at punching holes accurately. Ask the children to make a slider that goes up and down (for example, a hat on a clown)
and one that moves along (for example, a car on a road). Ask them to evaluate how well the sliders worked. Can the children suggest any improvements? Teach the children how to restrict the amount of movement made by sliders, using strips
of card.
MAKING SIMPLE LEVERSPhotocopiable pages: Moving pictures, My design ideas
Discussion Ask children to look at the bottom of the sheet ’Moving pictures’ on page 42. Discuss
how they might go about making a simple lever and what they would need to use. They can use the ‘My design ideas’ photocopiable on page 43 to record their ideas Discuss and then demonstrate how to make levers and explain what happens if the paper
fastener is too tight. Remind the children how to use the hole-punch safely.
Activities The children use paper fasteners to make a lever. Ask the children what happens if the
fasteners are too tight or too loose? Do they think the fasteners worked effectively? Why? How do they think it could be improved? Ask the children to share their work with the class. Talk about how they made their levers
and any problems they had to overcome. Evaluate as a class.
DESIGN AND COMMUNICATIONPhotocopiable pages: Make the aeroplane move, Moving pictures, Developing my design
Although much of the communication of design ideas will be through talking with the children, some drawing, sketching or modelling skills should be taught. The children could be given opportunity to communicate and clarify their ideas on paper, through the use of construction kits or through modelling with materials. It is important that these skills are developed progressively through their design and technology experiences.
Discussion Show the children the ‘Make the aeroplane move’ on page 44. Talk about the type of
motion that will be created. Point out the direction arrow. (This reinforces the Investigation and evaluation activity). Explain that this is a good way to indicate what movement they want on a drawing.
TextNotes-MovingPictures-p34-40.indd 38TextNotes-MovingPictures-p34-40.indd 38 13/02/2008 09:12:2613/02/2008 09:12:26
PAGES 43, 45, 46
READY RESOURCES D E S I G N A N D T E C H N O L O G Y 39
MOVING PICTURES
Activities Ask the children to think of all the possible ways they could make the aeroplane picture
move. They could respond by drawing onto the sheet or by cutting out and sticking the aeroplane (photocopied on card) onto recycled packaging to make mock-ups showing how the plane would move. Ask the children to show you how their aeroplane will move, and look at the ‘Moving pictures’ photocopiable page 42 for ideas. Ask the children to choose another image – a character from a story or a nursery rhyme.
They can draw the character using the ‘Developing my design’ photocopiable on page 45 (less confi dent learners could use a ready-made image for this activity). Ask them to show what part of the illustration they want to make move and how they think they could achieve this. Again, making mock-ups is a good way to allow children to practise making mechanisms.
DESIGN AND MAKE ACTIVITYDESIGN AND MAKE A MOVING PICTUREPhotocopiable pages: My design ideas, Developing my design, Word cards: moving pictures (CD-ROM only), My Plan
Explain to the children that they are now going to use the knowledge and skills learned in the previous activities to design and make a class book, book page, greeting card or information board that has a moving part, in order to make it more interesting and interactive. The product will be targeted at a specifi c user, such as visitors to the class for the information board, or perhaps another class for the storybook, or the whole school for an interactive display. The following are some of the contexts and outcomes that could be used as the design and make activity: Design and make a moving picture with a particular purpose and user in mind, for example,
a picture of a character from a class Big Book to be used by Year 1 pupils. Design and make a moving picture based on characters or scenes from a Big Book that
can be used to liven up the story for the listener. The children can chose their own story or the whole class could work on the same story; Design and make moving pictures that you can use when reading out your favourite
poem. Design and make an information board for hanging on the classroom door to inform visitors
where the class is, and what they are doing. Design and make an interactive display for the hall to tell all the other classes about a
particular subject. Design and make an information board about a special message, for example recycling of
paper, animal welfare, keeping safe, and so on.
Discussion Explain the design brief to the children. Decide whether the class will be designing and
making moving pictures as a whole class on a chosen theme, a Big Book, information board or creating their own special messages. Remind the children that they need to have a clear purpose and a clear user in mind when designing and making their products. Remind the children how to label their designs clearly. Look at and discuss existing products with moving parts (moving greeting cards, pop-
up books, simple levers and sliding mechanisms.) Focus on the purpose and user of each product displayed. Discuss what their moving picture is for and what it has to do – make a story more
interesting, liven up an information board, make a greeting card for a special occasion even more special. Discuss who will be reading the book or using the board so they can design with the user
in mind.
Activities Use ‘My design ideas’ photocopiable on page 43 to allow children to think about possible
designs and to annotate these clearly to show their intentions. Encourage the children to
TextNotes-MovingPictures-p34-40.indd 39TextNotes-MovingPictures-p34-40.indd 39 13/02/2008 09:12:2713/02/2008 09:12:27

PAGE 47
READY RESOURCES D E S I G N A N D T E C H N O L O G Y40
MOVING PICTURES
evaluate throughout the whole design process. The children then use ‘Developing my design’ photocopiable on page 45 to describe the fi nal design. They should decide how the illustration will move, draw this and add this to their process diary. Ask the children to reread their design brief/design specifi cation that clearly states the
purpose and user of their moving picture. Remind the children of the key vocabulary they have learned and encourage them to use
the correct terminology. Display the ‘Word cards: moving pictures’ sheet from the CD-ROM as a prompt. Ask the children to produce a plan of action, using words and/or pictures to show the
order in which they will make their moving picture. They can use the ‘My plan’ photocopiable on page 46 for this. Allow the children to make paper mock ups if they wish. Remind the children of the tools, equipment, materials and any constraints. It is advisable
to store resources centrally and ensure that they are well labelled. This will encourage independent learning. The children will need to plan the order in which they go about their work before they start making. This will encourage them to think about the tools and equipment they need and the order in which they will make their moving picture. They can use words or pictures to plan their work. Allow time for the children to complete their pictures. Remind them to work cooperatively.
They should be evaluating throughout the whole design process, and referring to their fi nal design and planning sheet. Their fi nal product should look like their design. Any changes or modifi cations should be noted. Ensure, however, that children realise that they can change their design as they develop their ideas. When the children have fi nished, they should draw the fi nal product and record how it
moves and add this to their process diaries. Ask the children to think about fi nishing techniques, such as collage, paint, felts, and so
on. Take photographs of the pictures in progress as this can support the children in their
evaluations and be used for display or evidence.
EVALUATIONPhotocopiable page: My Evaluation
The evaluation activity is an opportunity for the children to present their moving pictures to the rest of the class and to evaluate their own and others’ work.
Discussion Display all the moving pictures that the class has made. Ask children to share their work with the class, talking about who the product was made
for and how it works. Evaluate these as a class. Does the product fulfi l the design criteria?
Activities Encourage the children to evaluate their work and that of others using the ‘Evaluation’
photocopiable on page 47. Ask them to think about how the product works and whether it is effective? Did their illustration move in the right direction? Did it work the way they thought it would? Do they think it meets the design brief? Do they think it linked in well with the story? Is their fi nishing technique effective? What would they change to improve it? Do they think there is anything that could be added to make it better? How did they overcome diffi culties or problems? If their products were made for a class big book, read the book and allow the children to
test out the product as a whole. Do the moving pictures make the story more interesting? Which products work well? How do they move? Who used levers? Who used sliders? Did we design and make a product for a particular purpose? What? Did we design and make a product for a particular user? Who?
TextNotes-MovingPictures-p34-40.indd 40TextNotes-MovingPictures-p34-40.indd 40 13/02/2008 09:12:2813/02/2008 09:12:28