module 4 microsoft office suite microsoft powerpoint
TRANSCRIPT

Module 4
Microsoft Office SuiteMicrosoft PowerPoint

MODULE OVERVIEW
Part 1
Presentations Made Easy
Part 2
Slide Show Tools
Part 3
Creating your First PowerPoint Presentation
Part 4
PowerPoint and the Internet

Part 1
Presentations Made Easy

Objectives
• Intro to terms and concept related to a presentation tool MS PowerPoint
• Describe the common user interface• List the different views in PowerPoint;
describe the unique features of each view.
• Slide masters and templates• Describe the different ways to print a
presentation.
Overview
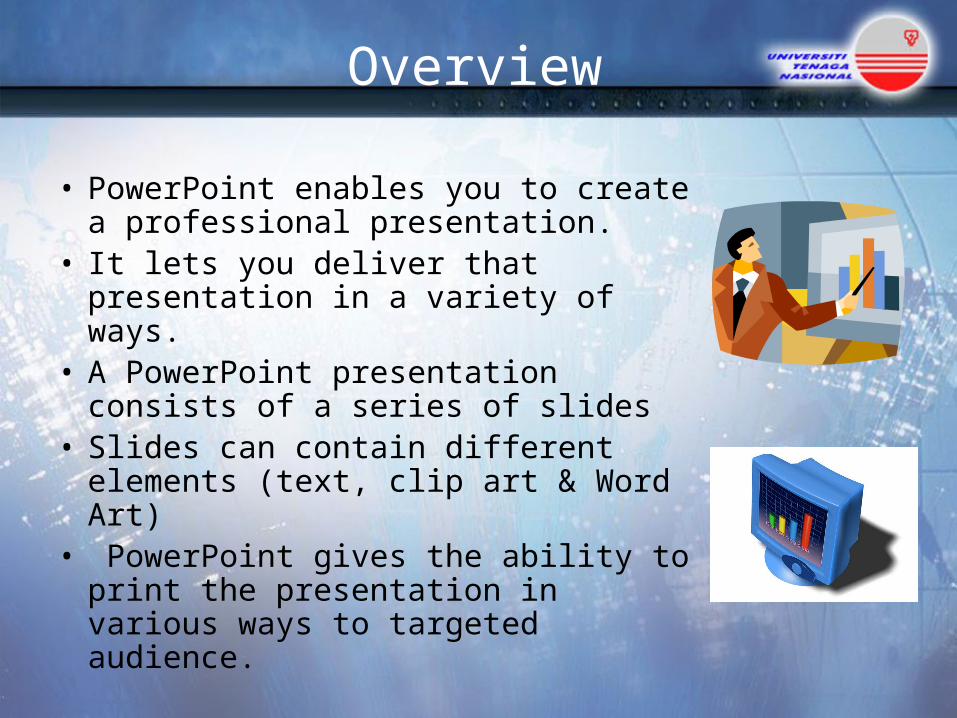
• PowerPoint enables you to create a professional presentation.
• It lets you deliver that presentation in a variety of ways.
• A PowerPoint presentation consists of a series of slides
• Slides can contain different elements (text, clip art & Word Art)
• PowerPoint gives the ability to print the presentation in various ways to targeted audience.

Overview
• Presentation
PowerPoint presentations typically have the file extension .ppt;
however, you can also save PowerPoint presentations as Adobe Acrobat documents with the file extension .pdf. Finally, you can save your presentation as a web page,
with the file extension .html or .htm.

Overview
• Think about how a speaker gives a presentation: – She might plan the presentation by first creating the
outline, then completing the "look" and contents of the slides, and, finally, by printing them.
– While she speaks, the speaker might refer to the printed copies of the slides that contain her own handwritten notes.
– She might also provide copies of her slides to the audience so that they can follow along or take notes.

Overview
• Slides, outline, speaker's notes, and audience handouts are components of a PowerPoint presentation.
• To create each of these components without proper tools could take a great deal of extra time.
• PowerPoint makes it easy for you by creating each one automatically.
• You can use just create one component or any combination of the four, depending on your particular requirements.

Overview
• Steps for an attractive presentation: 1. Develop Content2. Format Presentation
• Increase effectiveness through:– Internet Resources– Slide Navigation– The Slide Master
• Use the AutoContent Wizard• Style Check your presentation

The PowerPoint Window

PowerPoint Screen
• Title BarThe Title bar generally appears at the top of the screen. The Title bar displays the title of the current presentation.
• Menu BarThe Menu bar displays the menu. You use the menu to give instructions to PowerPoint.
• Standard and Formatting ToolbarsToolbars provide shortcuts to menu commands.

PowerPoint Screen
• RulersRulers are vertical and horizontal guides. You use them to determine where you want to place an object. They are marked in inches.
• PlaceholdersPlaceholders hold the objects in your slide. You use placeholders to hold text, clip art, and charts.
• Status BarThe Status bar generally appears at the bottom the screen. The Status bar displays the number of the slide that is currently displayed, the total number of slides, and the name of the design template in use or the name of the background.

PowerPoint Screen
• Slides TabThe Slides tab displays a thumbnail of all your slides. You click the thumbnail to view the slide in the Slide pane.
• View ButtonsThe View buttons appear near the bottom of the screen. You use the view buttons to change between Normal view, Slider Sorter view, and the Slide Show.
• Drawing ToolbarThe Drawing toolbar generally appears near the bottom of the screen. It contains tools for creating and editing graphics.
• Task PaneThe Task pane enables you to select the specific task you want to perform

PowerPoint Views
• You can view any of the components on-screen or print copies.
• PowerPoint displays slides by default.
• To change the view to slides, the outline, or note pages, choose the View Slides, View Outline, or View Notes Pages command from the View Menu

Slide View Slide Sorter View Outline View
Notes Page View
Slide Show View – F5
Normal View

Types of View
• normal view: the main editing view• slide sorter view: an exclusive view of
your slides in thumbnail form, helpful for rearranging the order of your slides
• slide show view: takes up the full computer screen, like an actual slide show presentation. In this full-screen view, you see your presentation the way your audience will view is.

PowerPoint Masters and Templates
• For every presentation created, PowerPoint creates a set of masters: a Slide Master, Outline Master, Notes Master, and Handout Master.
• Masters correspond directly to the slides, outline, speaker's notes, and handout components of a presentation.
• Masters contain the elements (text or pictures) that you want to appear on every component page.
• For instance, if you want your company logo to appear on each of your slides, it is not necessary to insert it on each individual slide.
• You add the logo to the Slide Master and it automatically appears on each slide.

PowerPoint Masters and Templates
Notes Master View
Slide Master View
Templates
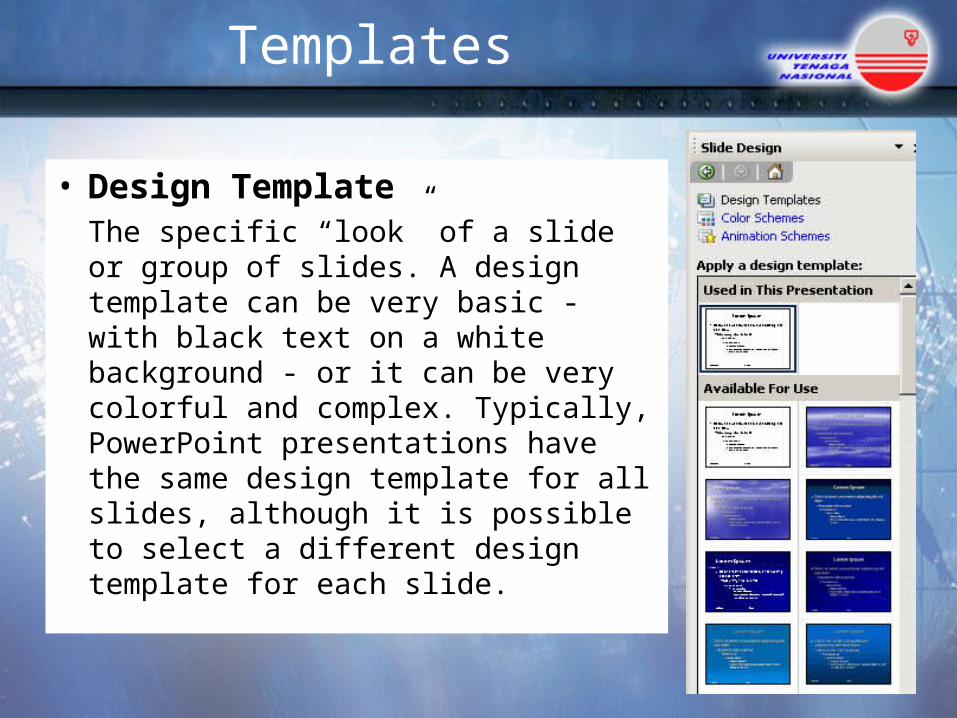
• Design TemplateThe specific “look” of a slide or group of slides. A design template can be very basic - with black text on a white background - or it can be very colorful and complex. Typically, PowerPoint presentations have the same design template for all slides, although it is possible to select a different design template for each slide.
Printing Slides
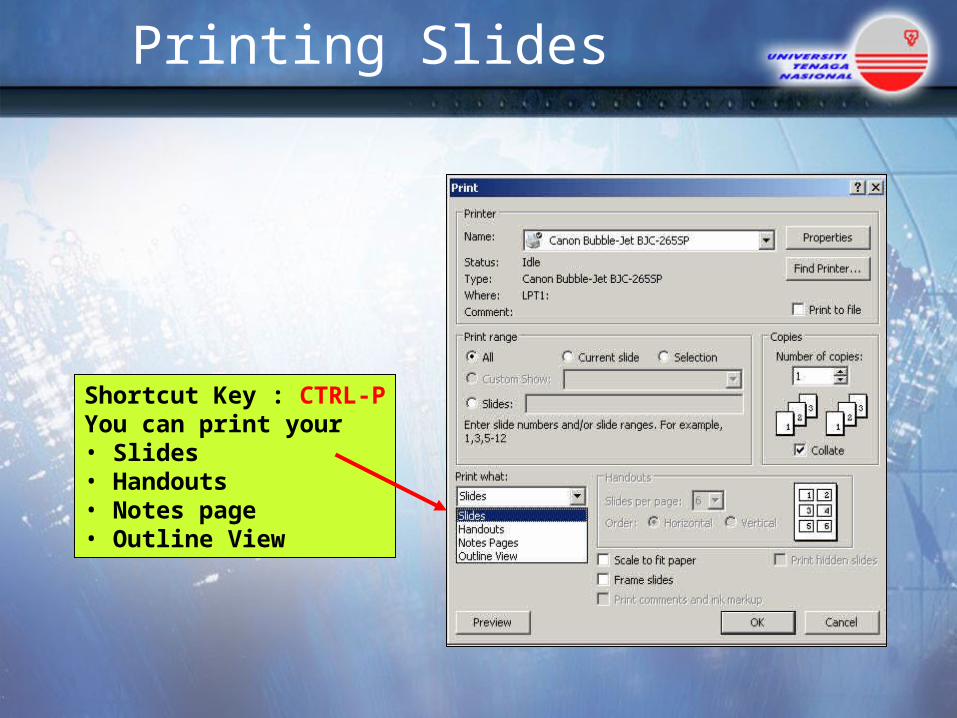
Shortcut Key : CTRL-PYou can print your • Slides• Handouts• Notes page• Outline View

Print Handouts Print Slides
Print Outlines Print Notes

Part 2
Slide Show Tools
Objectives
• Identify the type of tools available to format slides.
• explain how to change the layout of the objects on an existing slide.
• Use the Microsoft Clip Gallery to add and/or change the clip art on a slide.
• Apply a design template to a new presentation; • Add transition effects to the slides in a
presentation

Objectives
• Describe the Meeting Minder, Slide Navigator, and Pen;
• Add a table to a PowerPoint slide• Add headers and footers to slides and/or
audience handouts• Use the Rehearse Timings feature to time a
presentation• Create a presentation using the AutoContent
Wizard;
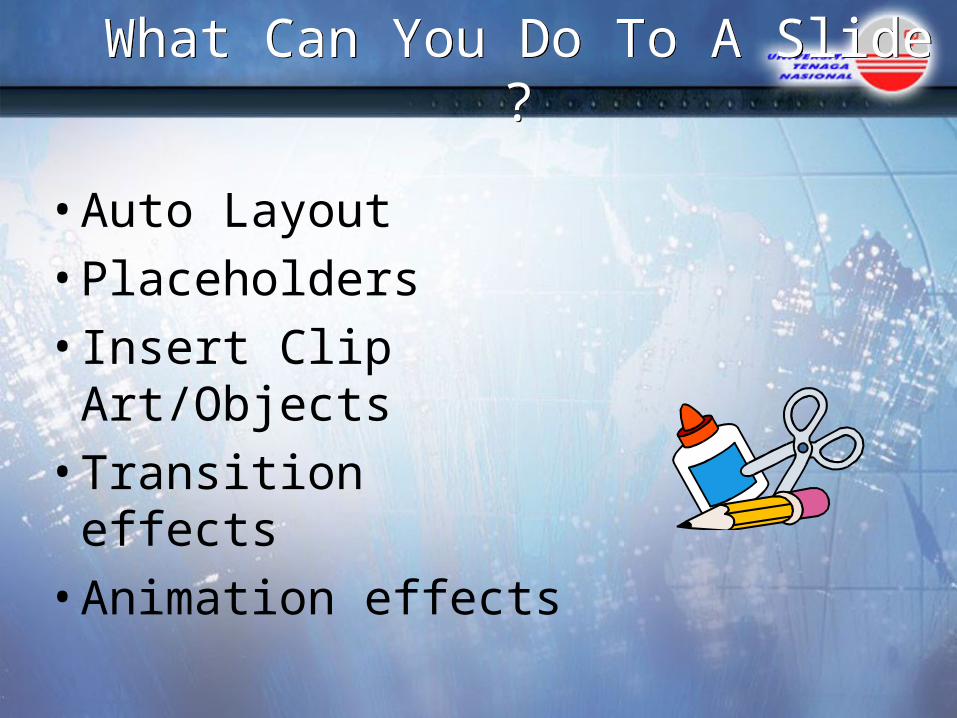
What Can You Do To A Slide ?What Can You Do To A Slide ?
• Auto Layout
• Placeholders
• Insert Clip Art/Objects
• Transition effects
• Animation effects

Layout & Placeholders
• Layout refers to the way things are arranged on a slide. • A layout contains placeholders (boxes that hold title and body text or objects such as charts, tables, and pictures), • These placeholders can hold text such as titles and bulleted lists and slide content such as tables, charts, pictures, shapes, and clip art

Choose an Auto Layout
Select Common Task Button + New Slide

Placeholders
Placeholders
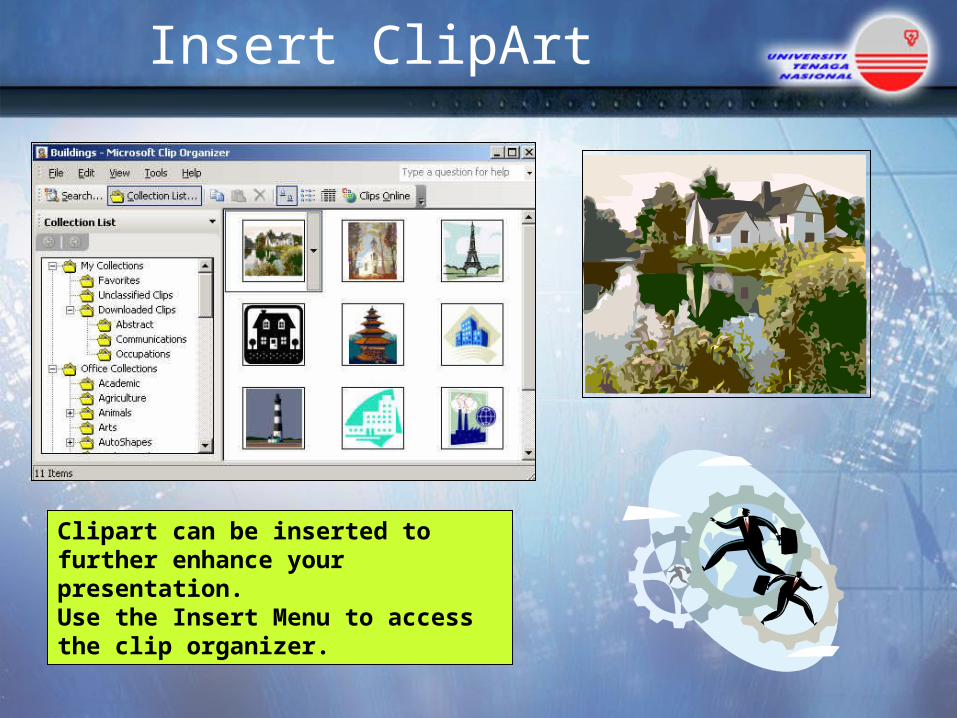
Insert ClipArt
Clipart can be inserted to further enhance your presentation. Use the Insert Menu to access the clip organizer.

Insert Word Art
Word Art can be inserted to further attract your presentation. Use the Insert Menu to access the word Art

Transitions Effects
Slide Show Menu &
Choose Slide Transition
Choose Transition
Apply Transition
Cancel Transition
The transition used in this slide is “Checkerboard Across”

Animation Effects
Slide Show Menu & Custom
Animation
Choose Animation or Sound
Apply Animation
Preview Animation

Template
A design specification that controls every element in a presentation
Two Different Templates

Template
Template Choices
Apply Choice
Preview
Choose a new template from File Menu & New, when creating a new presentation or
Choose a template for an existing presentation from Format Menu & Apply Design Template
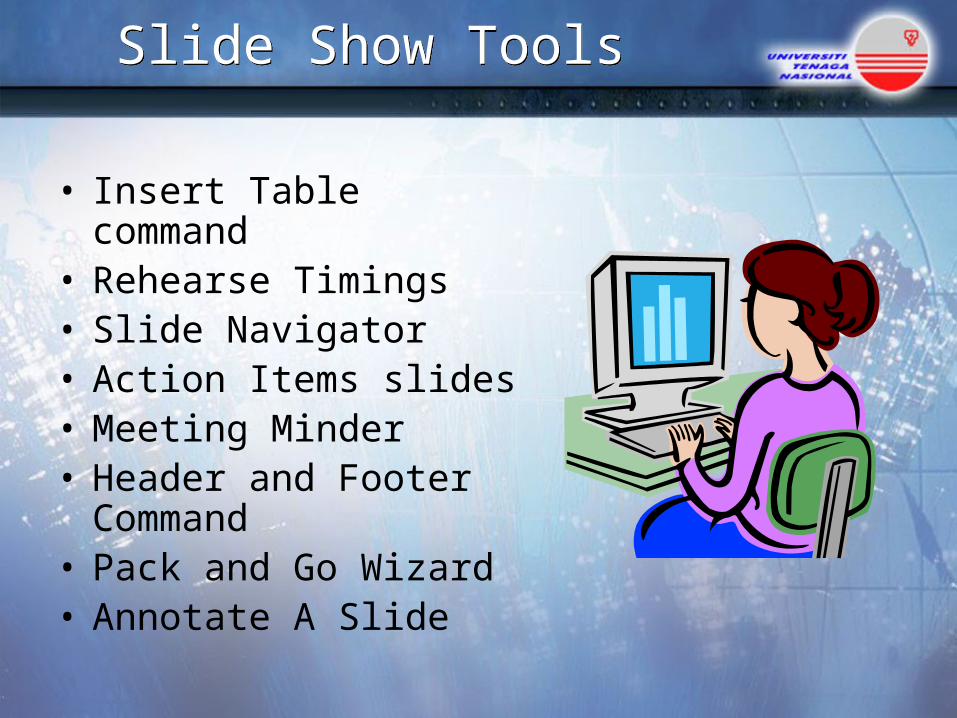
Slide Show ToolsSlide Show Tools
• Insert Table command• Rehearse Timings• Slide Navigator• Action Items slides• Meeting Minder• Header and Footer
Command• Pack and Go Wizard• Annotate A Slide
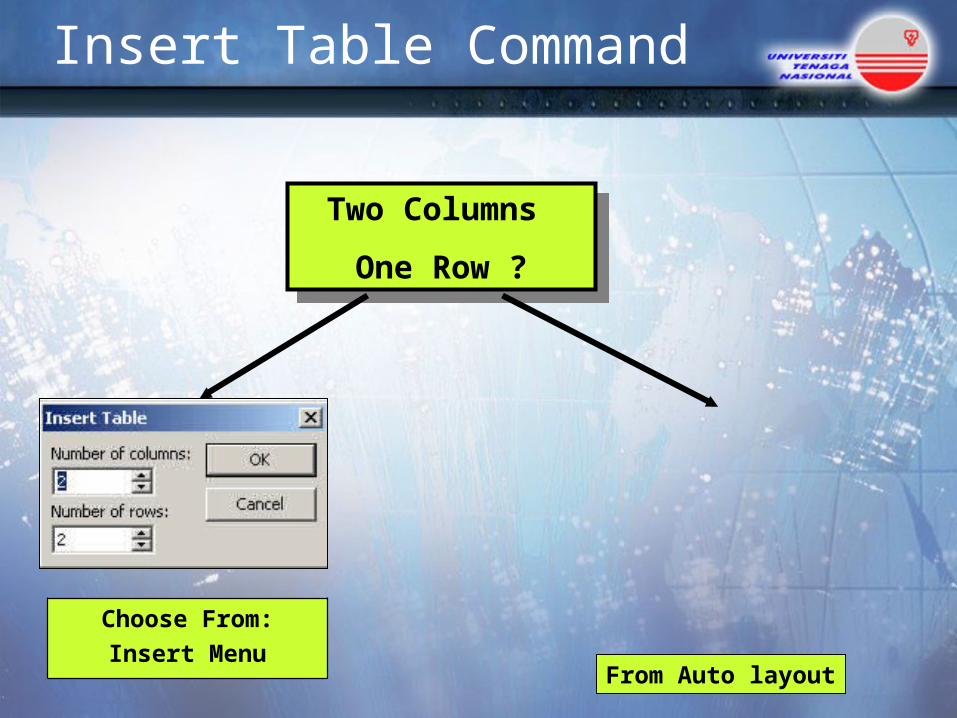
Insert Table Command
Choose From:
Insert Menu
Two Columns
One Row ?
Two Columns
One Row ?
From Auto layout

Rehearse Timings
Time Presentation
Automate Presentation
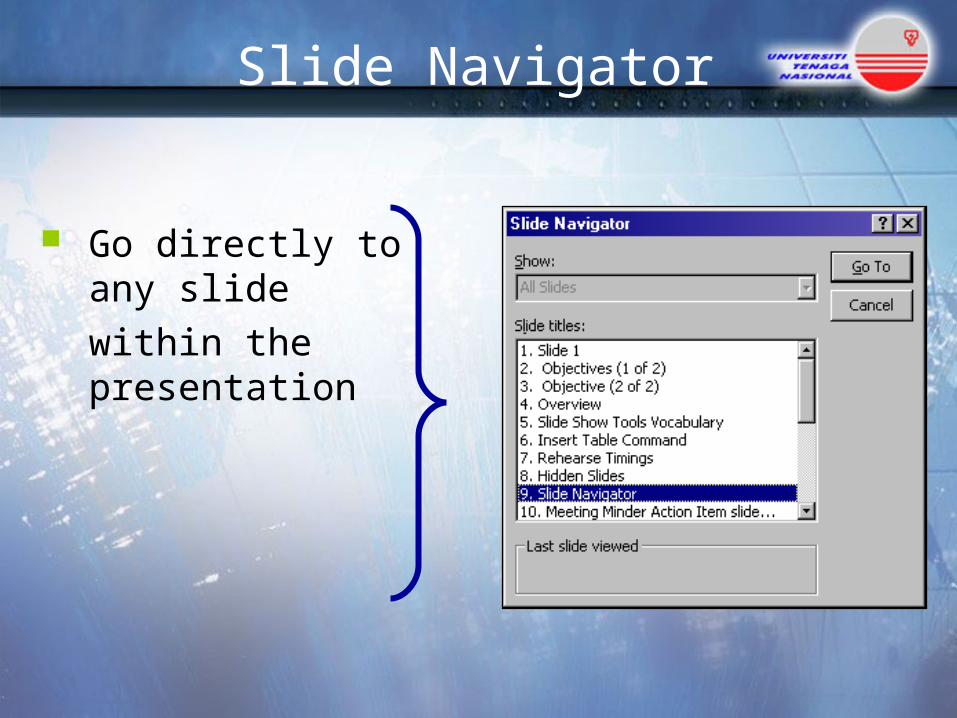
Slide Navigator
Go directly to any slide within the presentation

Meeting Minder Action Item slides
Keep track of actions or questions that occur during the presentation (MS PowerPoint 2000.)
No longer available in MS PowerPoint 2003/XP )

Header and Footer Command
• Place the same text at the bottom of every slide
• Include:– Date– Place of Presentation– Slide Number

Pack and Go Wizard
• This wizard helps you to pack your entire presentation slides so that you can open it in another computer that do not have MS PowerPoint installed.
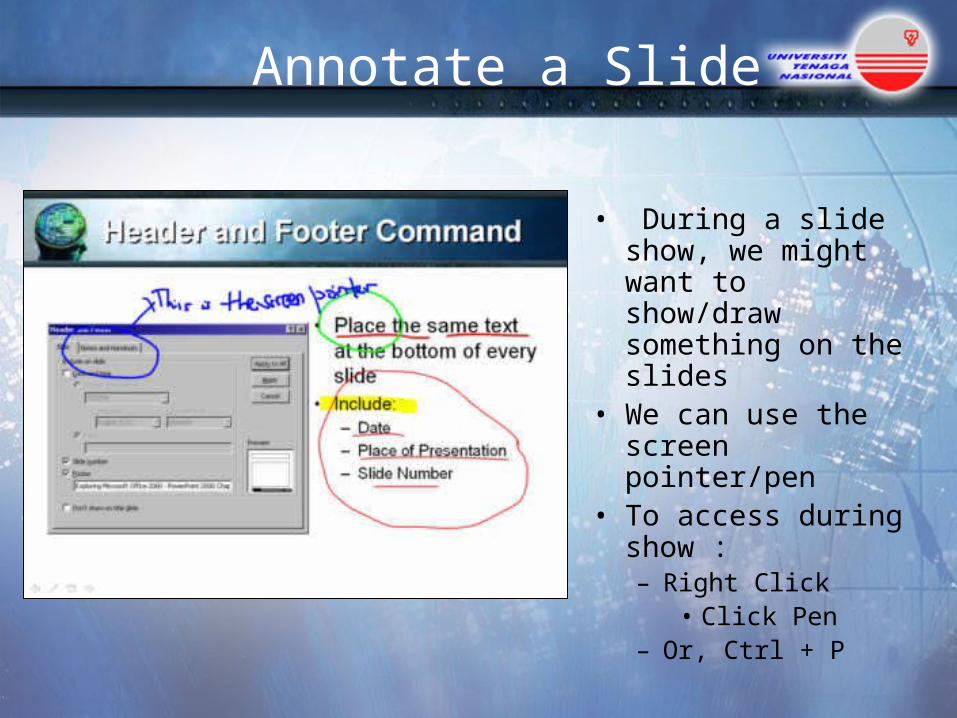
Annotate a Slide
• During a slide show, we might want to show/draw something on the slides
• We can use the screen pointer/pen
• To access during show :– Right Click
• Click Pen– Or, Ctrl + P

Part 3Creating your First PowerPoint
Presentation

Creating slide
• Note the Getting Started task pane on the right side of your screen.
• Click on the Create a new presentation link.
• From the New Presentation task pane select Blank presentation.– The initial slide that displays in the
center of the screen is a title slide.
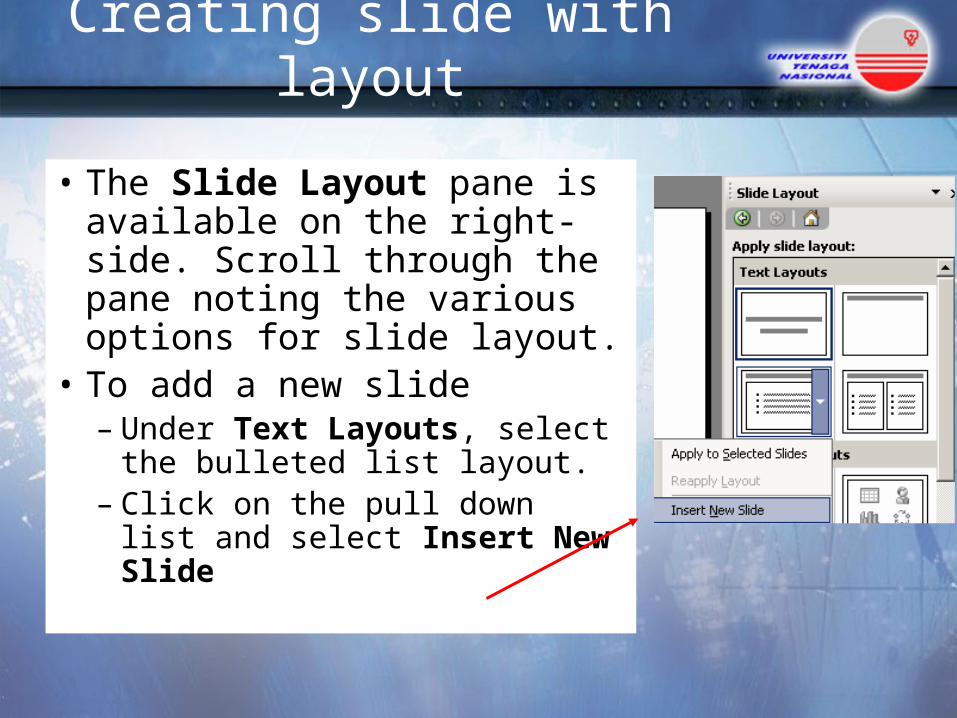
Creating slide with layout
• The Slide Layout pane is available on the right-side. Scroll through the pane noting the various options for slide layout.
• To add a new slide– Under Text Layouts, select
the bulleted list layout.– Click on the pull down list and
select Insert New Slide

Create new slide
• Create a new slide. From the Insert menu select New Slide.
• Or press CTRL-M (a short cut for creating a new slide.)
• Use the Slides or Outline view – your choice.

Saving your work
• Save presentation
• File > Save
• Name presentation and save to the Desktop

Using Template
• Start in Normal View. From the right task pane, click on the pull down menu and select Slide Design
• Scroll through the Apply a design template examples and select one.
• The design template can be altered using the Slide Master.– View > Master > Slide Master

Using Color Schemes
• File > New > Blank Presentation
• Format > Slide Design• From the Slide Design task
pane select Color Schemes• The color scheme can be
adjusted using the Slide Master.
• Add a graphic, line or other designs to the slide in the Master.

Part 4PowerPoint and the Internet

Objectives
• Describe how the Internet and World Wide Web are integrated into Office 2000;
• Download an image from the Web and include it in a presentation.
• Insert a hyperlink into a PowerPoint presentation;
• save a PowerPoint presentation as a Web document, then view that document in Internet Explorer.

PowerPoint 2000 and the Internet
• Insert Picture command• Picture as Background• Insert Hyperlink command• HTML• Save As Web Page command• Navigation controls• Color schemes and style check

Picture as Background
Right click picture on the web and choose Save Picture As…

Picture as Background
Insert Picture From File Find and Choose Picture Click Insert

Picture as Background
• Format Menu– Background command– Fill Effects– Picture Tab– Select Picture– Insert button– Apply/Apply All

HTML
• Hypertext Markup Language (HTML) is the language used to create a Web page
• HTML consists of codes that control the appearance of the document
• Use PowerPoint to create your slides and then Save as a Web page to convert to HTML format

Insert Hyperlink
• Choose object to create hyper link• Insert menu Hyperlink (Ctrl-k)• Example of hyperlink to web pages
http://www.uniten.edu.my

Navigation controls
Navigation Buttons
Hyperlinks
http://www.uniten.edu.myhttp://www.yahoo.comhttp://www.hotmail.com

PowerPoint To HTML
Slides that have been converted to web pages

AutoContent Wizard
• File + New command• Asks a series of
questions• Automatic Color
Scheme• General Outline• Helps you get started

Color Schemes
Standard Custom

Background Command
• Format menu + Background command– Automatic– Colors– More Colors– Fill Effects– Apply– Apply All

Style Check
• Automatically checks style while you create a presentation
• Customize style choices from Tools menu, Options, + Spelling and Style Tab