models 920 and 920m hand held pulse oximeters · pdf filemodels 920 and 920m hand held pulse...
TRANSCRIPT

En
glish
Instruction and Service Manual
Models 920 and 920M
Hand Held Pulse Oximeters
iii
En
glish
About the Manual Boxes draw attention to contraindications, warnings, and cautions.
The boxed messages are important. Be sure to read them.
The information in this manual has been carefully checked and is believed to be accurate. In the interest of continued product development, RESPIRONICS, INC. reserves the right to make changes and improvements in this manual and the products it describes at any time, without notice or obligation.
Caution: Federal Law (USA) restricts this device to sale by or on the order of a physician. Respironics Georgia 175 Chastain Meadows Court Kennesaw, Georgia 30144-3724 USA Customer Service Telephone: 1-800-345-6443 (USA and Canada) Customer Service Fax: 1-800-886-0245 (USA and Canada) www.respironics.com Respironics Deutschland Gewerbestrasse 17 82211 Herrsching Germany Telephone: 49 815 293 060 Fax: 49 815 293 0618 Respironics Asia Pacific 3/F, Microtron Building 38 Hung To Road Kwun Tong, Kowloon, Hong Kong Telephone: 852-2771-1886 Fax: 852-2770-7557 References to “920” in this manual shall imply Models 920 and 920M. References to “Respironics” in this manual shall imply Respironics, Inc.
is a registered trademark of Respironics, Inc.
Copyright © 1999 Respironics, Inc. All rights reserved.
v
En
glish
Table of Contents
I. Contraindications, Warnings, and Cautions ......... 1 II. Unpacking Your Pulse Oximeter ............................ 3 III. Introduction .............................................................. 4
A. Indications for Use.......................................................4 B. General........................................................................4
IV. Operating Instructions ............................................ 5 A. Batteries ......................................................................5 B. General........................................................................7
1. Connecting the Sensors .......................................7 2. Turning on the Pulse Oximeter.............................7 3. Verifying Operation...............................................9 4. Cleaning the Pulse Oximeter................................9
V. Features .................................................................. 10 A. Controls .....................................................................10
1. Power .................................................................10 2. Display Brightness..............................................10 3. Setup Mode ........................................................11
a. Printer Settings .............................................11 b. Calendar Settings .........................................13 c. Clock Settings ...............................................14
B. Displays .....................................................................15 1. SpO2 Display.......................................................15 2. ♥ (Pulse Rate) Display.......................................15 3. (Perfusion) Indicator..................................15 4. Flashing Display .................................................16 5. Dash in the SpO2 Display ...................................16
C. Printer/Serial Output ..................................................17 D. Memory Option (920M only) ......................................18
1. Recording Sessions ...........................................18 2. Memory Output Mode.........................................19
VI. Pulse Oximeter Sensors........................................ 21 A. General Sensor Description ......................................21 B. Finger Clip Sensors ...................................................24
1. Adult Articulated Finger Clip Sensor ..................24 2. Pediatric Finger Clip Sensor...............................24
C. Flex Sensors..............................................................25 1. Adult Flex Sensor ...............................................25 2. Infant Flex Sensor ..............................................26 3. Neonatal Flex Sensor .........................................26
D. Ear Clip and Reflectance Sensors.............................27 1. Ear Clip Sensor ..................................................27 2. Reflectance Sensor ............................................28
E. Adult and Pediatric Disposable Sensors ...................28

vi
F. Infant and Neonatal Disposable Sensors .................. 30 1. Infant Flexi-Form Sensor.................................... 30 2. Neonatal Flexi-Form Sensor .............................. 31
G. Cleaning the Sensors ................................................ 33 H. Sensor Compatibility ................................................. 33
VII. Theory of Operation ...............................................34 VIII. Specifications .........................................................36 IX. Service .....................................................................38 X. Warranty ..................................................................39 XI. Accessories.............................................................40 XII. Troubleshooting Guide ..........................................42
Tables
Table I: Printer, clock, and calendar mode parameters. ....................................................................11 Table II: 920P Printer modes. .......................................12 Table III: Printer/Sensor interface assignments. .................................................................17 Table IV: 920M memory data format............................20 Table V: Reusable sensor reference. ..........................22 Table VI: Disposable sensor reference. ......................23 Table VII: Sensor accessory reference. ......................23
Figures
Figure I: Replacing batteries in the 920. .................... 6 Figure II: Connecting sensors to the 920................... 7 Figure III: Front view of the 920. ................................. 8 Figure IV: Rear view of the 920. .................................. 8 Figure V: Flowchart for setting the printer mode. .. 12 Figure VI: Flowchart for setting the calendar.......... 13 Figure VII: Flowchart for setting the clock. ............. 14 Figure VIII: Adult Articulated Finger Clip Sensor.... 24 Figure IX: Pediatric Finger Clip Sensor. .................. 24 Figure X: Adult Flex Sensor. ..................................... 25 Figure XI: Flex Sensor with tape strain relief. ......... 25 Figure XII: Infant Flex Sensor on big toe. ................ 26 Figure XIII: Neonatal Flex Sensor on foot................ 27 Figure XIV: Ear Clip Sensor....................................... 27 Figure XV: Finger Flexi-Form Sensor....................... 29 Figure XVI: Infant Flexi-Form Sensor....................... 31 Figure XVII: Neonatal Flexi-Form Sensor. ............... 32

vii
En
glish
Glossary of Symbols
Symbol Definition of Symbol
ATTENTION Consult ACCOMPANYING DOCUMENTS
Type BF Applied Part: (Patient isolation from electrical shock).
Canadian Standards Association
UL Underwriters Laboratories
CE Marking indicating conformance to EC directive No. 93/42/EEC concerning medical devices.
1
En
glish
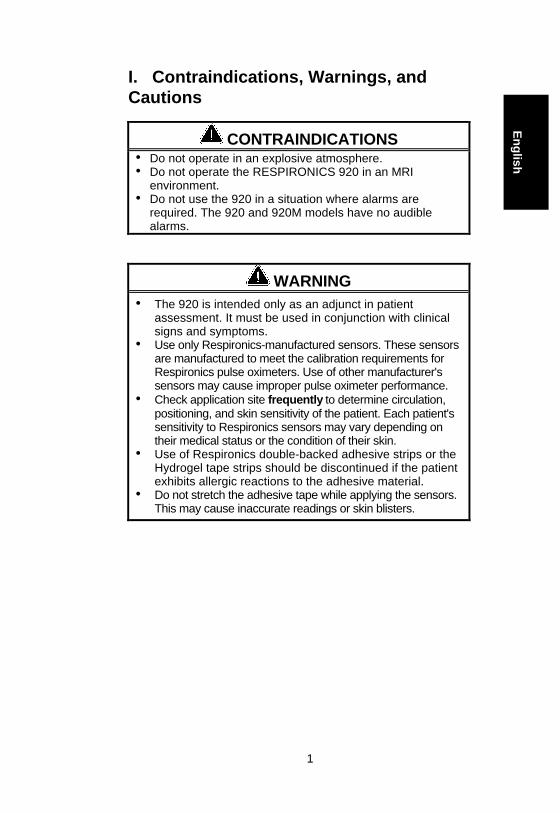
I. Contraindications, Warnings, and Cautions
CONTRAINDICATIONS • Do not operate in an explosive atmosphere. • Do not operate the RESPIRONICS 920 in an MRI
environment. • Do not use the 920 in a situation where alarms are
required. The 920 and 920M models have no audible alarms.
WARNING • The 920 is intended only as an adjunct in patient
assessment. It must be used in conjunction with clinical signs and symptoms.
• Use only Respironics-manufactured sensors. These sensors are manufactured to meet the calibration requirements for Respironics pulse oximeters. Use of other manufacturer's sensors may cause improper pulse oximeter performance.
• Check application site frequently to determine circulation, positioning, and skin sensitivity of the patient. Each patient's sensitivity to Respironics sensors may vary depending on their medical status or the condition of their skin.
• Use of Respironics double-backed adhesive strips or the Hydrogel tape strips should be discontinued if the patient exhibits allergic reactions to the adhesive material.
• Do not stretch the adhesive tape while applying the sensors. This may cause inaccurate readings or skin blisters.
2
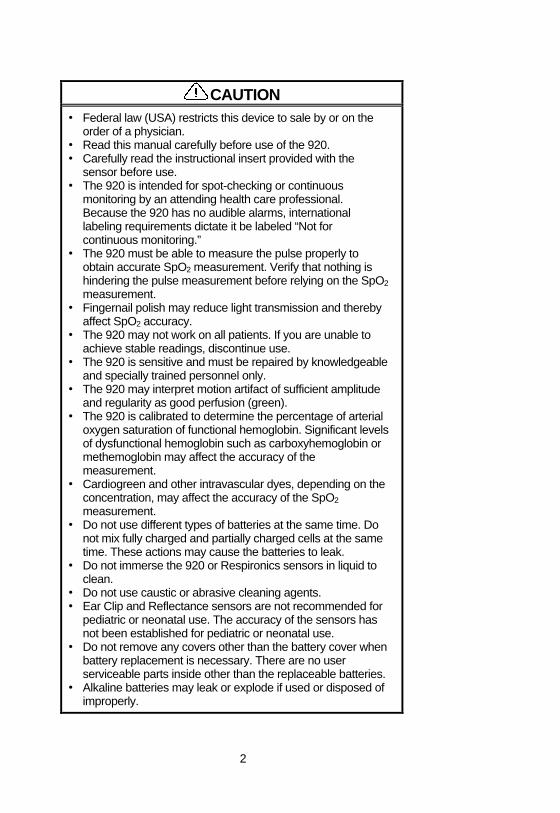
CAUTION • Federal law (USA) restricts this device to sale by or on the
order of a physician. • Read this manual carefully before use of the 920. • Carefully read the instructional insert provided with the
sensor before use. • The 920 is intended for spot-checking or continuous
monitoring by an attending health care professional. Because the 920 has no audible alarms, international labeling requirements dictate it be labeled “Not for continuous monitoring.”
• The 920 must be able to measure the pulse properly to obtain accurate SpO2 measurement. Verify that nothing is hindering the pulse measurement before relying on the SpO2 measurement.
• Fingernail polish may reduce light transmission and thereby affect SpO2 accuracy.
• The 920 may not work on all patients. If you are unable to achieve stable readings, discontinue use.
• The 920 is sensitive and must be repaired by knowledgeable and specially trained personnel only.
• The 920 may interpret motion artifact of sufficient amplitude and regularity as good perfusion (green).
• The 920 is calibrated to determine the percentage of arterial oxygen saturation of functional hemoglobin. Significant levels of dysfunctional hemoglobin such as carboxyhemoglobin or methemoglobin may affect the accuracy of the measurement.
• Cardiogreen and other intravascular dyes, depending on the concentration, may affect the accuracy of the SpO2 measurement.
• Do not use different types of batteries at the same time. Do not mix fully charged and partially charged cells at the same time. These actions may cause the batteries to leak.
• Do not immerse the 920 or Respironics sensors in liquid to clean.
• Do not use caustic or abrasive cleaning agents. • Ear Clip and Reflectance sensors are not recommended for
pediatric or neonatal use. The accuracy of the sensors has not been established for pediatric or neonatal use.
• Do not remove any covers other than the battery cover when battery replacement is necessary. There are no user serviceable parts inside other than the replaceable batteries.
• Alkaline batteries may leak or explode if used or disposed of improperly.

3
En
glish
II. Unpacking Your Pulse Oximeter Contact the carrier immediately if the shipping carton for the 920 is damaged. Carefully unpack the instrument and its accessories. Confirm that the items listed below are packed with the 920 Hand Held Pulse Oximeter. The 920/920M shipment includes: • Model 920 or 920M Hand Held Pulse Oximeter • Instruction and Service Manual for Models 920 and 920M • Six AA batteries • Model 936 Sensor (Adult Articulated Finger Clip) If any item on this list is missing or damaged, do not use the pulse oximeter. Contact your local distributor or, if you do not know your local distributor, contact Respironics.
4
III. Introduction A. Indications for Use The 920 Hand Held Pulse Oximeter is intended to be used for monitoring oxygen saturation and pulse rate for adult, pediatric, and neonatal patients in hospital, ambulatory, home, and EMS environments. The 920 may be used for spot checking and/or continuous monitoring when attended by a healthcare professional. The variety of individual sensors available must be checked frequently to ensure proper circulation and application. B. General
The 920 Hand Held Pulse Oximeter is small and lightweight. The 920 has visual alarms for tracking patient status. It typically will operate for 100 hours continuously between battery replacements. The 920 requires no routine calibration or maintenance.
The 920 determines arterial oxyhemoglobin saturation (%SpO2) by measuring the absorption of red and infrared light passed through tissue. Changes in absorption caused by pulsation of blood in the vascular bed are used to determine arterial saturation and pulse rate.
Oxygen saturation and pulse rate are displayed on light emitting diode (LED) digital displays. On each detected pulse, the perfusion LED flashes. Patient perfusion signals are graded as good, marginal or inadequate and are indicated as such by the LED flashing green, yellow, or red. This simple method gives the user a pulse-by-pulse visual indication of waveform signal quality without requiring the user to perform complex waveform analysis during critical patient care situations.
Sensor disconnect or malfunction is indicated by lack of good perfusion flashes and/or a dash to the left of the SpO2 value on the LED display. Ultimately, if adequate perfusion pulses are not received, the SpO2 and Pulse Rate (♥) numerical values will be replaced by dashes. When the batteries are low, the digital displays will blink.
The 920 Pulse Oximeter may be used with all Respironics pulse oximeter sensors (except fiber optic sensors) enabling proper operation for nearly every patient.
NOTE: Respironics sensors do not contain natural rubber latex.
5
En
glish
IV. Operating Instructions A. Batteries
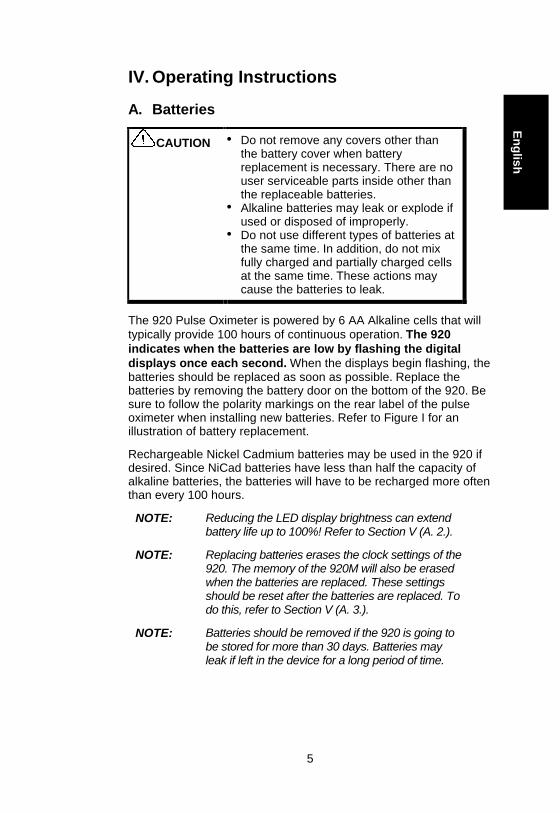
CAUTION • Do not remove any covers other than the battery cover when battery replacement is necessary. There are no user serviceable parts inside other than the replaceable batteries.
• Alkaline batteries may leak or explode if used or disposed of improperly.
• Do not use different types of batteries at the same time. In addition, do not mix fully charged and partially charged cells at the same time. These actions may cause the batteries to leak.
The 920 Pulse Oximeter is powered by 6 AA Alkaline cells that will typically provide 100 hours of continuous operation. The 920 indicates when the batteries are low by flashing the digital displays once each second. When the displays begin flashing, the batteries should be replaced as soon as possible. Replace the batteries by removing the battery door on the bottom of the 920. Be sure to follow the polarity markings on the rear label of the pulse oximeter when installing new batteries. Refer to Figure I for an illustration of battery replacement.
Rechargeable Nickel Cadmium batteries may be used in the 920 if desired. Since NiCad batteries have less than half the capacity of alkaline batteries, the batteries will have to be recharged more often than every 100 hours.
NOTE: Reducing the LED display brightness can extend battery life up to 100%! Refer to Section V (A. 2.).
NOTE: Replacing batteries erases the clock settings of the 920. The memory of the 920M will also be erased when the batteries are replaced. These settings should be reset after the batteries are replaced. To do this, refer to Section V (A. 3.).
NOTE: Batteries should be removed if the 920 is going to be stored for more than 30 days. Batteries may leak if left in the device for a long period of time.

6
Figure I: Replacing batteries in the 920.
IMPORTANT: Insert these two batteries first.
Battery Door
Battery Orientation

7
En
glish
B. General
The 920 Hand Held Pulse Oximeter is portable and is intended for attended patient monitoring by trained personnel. It displays numerical values for oxygen saturation and pulse rate. Because the 920 Pulse Oximeter has no patient alarms, the user must frequently observe the SpO2 and Pulse Rate displays. 1. Connecting the Sensors
Connect the sensor to its 9-pin mating jack on the top of the 920 as shown in Figure II. To select a sensor type, refer to Section VI (A). If additional cable length is necessary, connect the Model 927 Patient Cable between the sensor and the 920 Pulse Oximeter. Position the appropriate sensor on the patient. Refer to Section VI for sensor positioning information.
Figure II: Connecting sensors to the 920. 2. Turning on the Pulse Oximeter
Turn on the 920 Hand Held Pulse Oximeter by depressing the “” button on the front of the pulse oximeter. Refer to Figure III. When the 920 is powered on, the SpO2 and ♥ displays will cycle through the following sequence before displaying valid data values:
• “888 888” • time saved in memory in hours and minutes • software revision number • “- -”
8
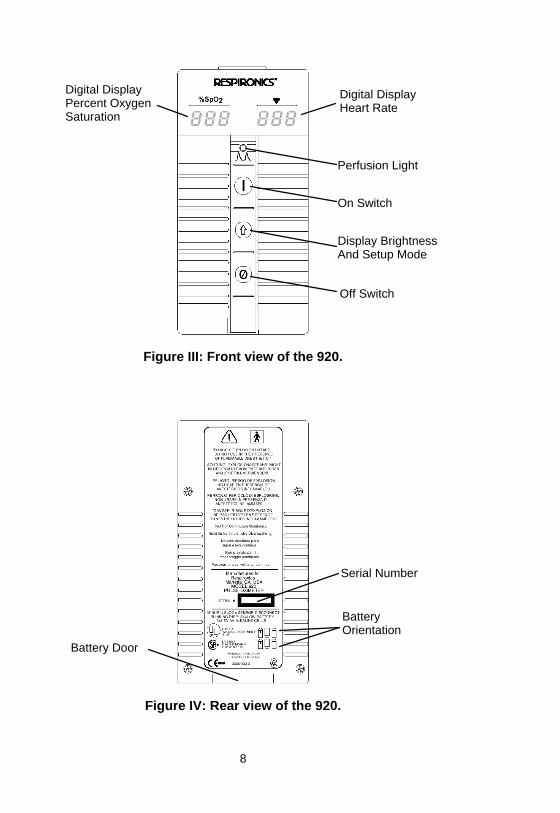
Figure III: Front view of the 920.
Figure IV: Rear view of the 920.
Digital Display Percent Oxygen Saturation
Digital Display Heart Rate
Perfusion Light
On Switch
Display Brightness And Setup Mode
Off Switch
Serial Number
Battery Orientation
Battery Door
9
En
glish
3. Verifying Operation
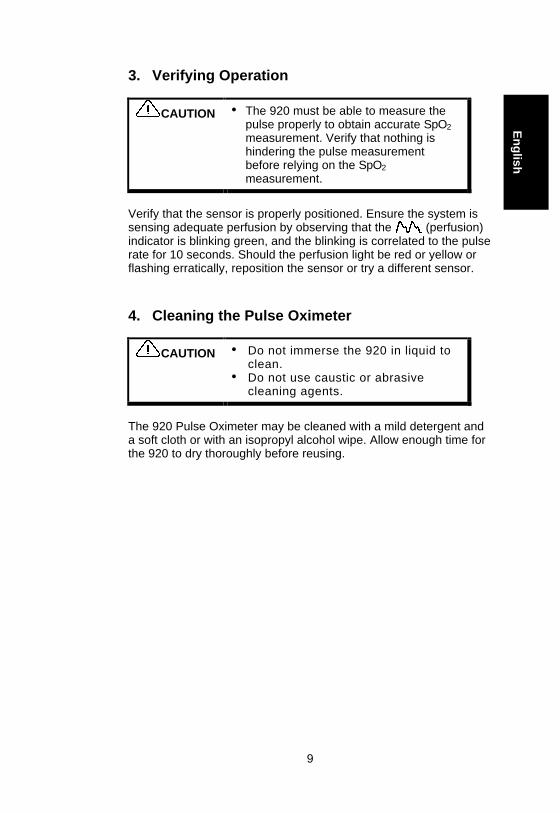
CAUTION • The 920 must be able to measure the pulse properly to obtain accurate SpO2 measurement. Verify that nothing is hindering the pulse measurement before relying on the SpO2 measurement.
Verify that the sensor is properly positioned. Ensure the system is sensing adequate perfusion by observing that the (perfusion) indicator is blinking green, and the blinking is correlated to the pulse rate for 10 seconds. Should the perfusion light be red or yellow or flashing erratically, reposition the sensor or try a different sensor. 4. Cleaning the Pulse Oximeter
CAUTION • Do not immerse the 920 in liquid to clean.
• Do not use caustic or abrasive cleaning agents.
The 920 Pulse Oximeter may be cleaned with a mild detergent and a soft cloth or with an isopropyl alcohol wipe. Allow enough time for the 920 to dry thoroughly before reusing.
10
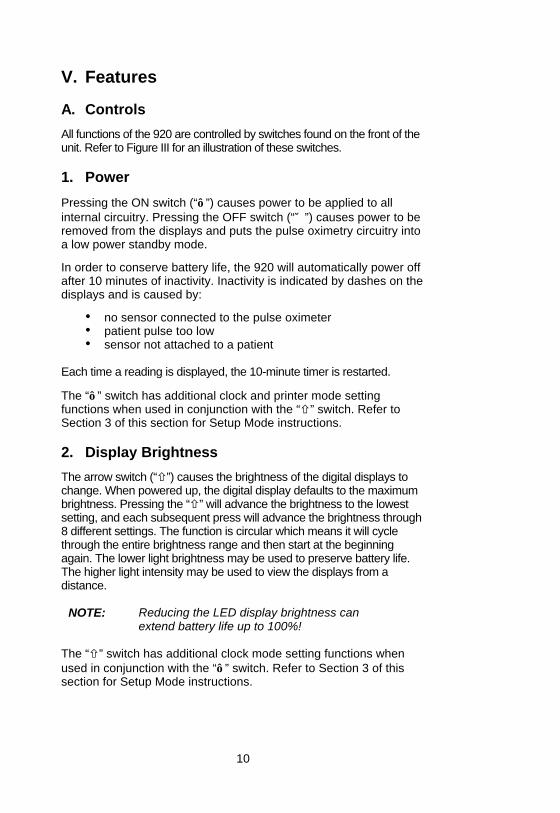
V. Features A. Controls
All functions of the 920 are controlled by switches found on the front of the unit. Refer to Figure III for an illustration of these switches. 1. Power
Pressing the ON switch (“”) causes power to be applied to all internal circuitry. Pressing the OFF switch (“∅”) causes power to be removed from the displays and puts the pulse oximetry circuitry into a low power standby mode.
In order to conserve battery life, the 920 will automatically power off after 10 minutes of inactivity. Inactivity is indicated by dashes on the displays and is caused by:
• no sensor connected to the pulse oximeter • patient pulse too low • sensor not attached to a patient
Each time a reading is displayed, the 10-minute timer is restarted.
The “” switch has additional clock and printer mode setting functions when used in conjunction with the “ñ” switch. Refer to Section 3 of this section for Setup Mode instructions. 2. Display Brightness
The arrow switch (“ñ”) causes the brightness of the digital displays to change. When powered up, the digital display defaults to the maximum brightness. Pressing the “ñ” will advance the brightness to the lowest setting, and each subsequent press will advance the brightness through 8 different settings. The function is circular which means it will cycle through the entire brightness range and then start at the beginning again. The lower light brightness may be used to preserve battery life. The higher light intensity may be used to view the displays from a distance.
NOTE: Reducing the LED display brightness can extend battery life up to 100%!
The “ñ” switch has additional clock mode setting functions when used in conjunction with the “” switch. Refer to Section 3 of this section for Setup Mode instructions.

11
En
glish
3. Setup Mode Setup mode is used to control the internal time-of-day clock and the external real-time printer (purchased separately). The setup mode is initiated by holding the “ñ” switch when the unit is turned on by pressing the “” switch. In setup mode, the “” switch and the “ñ” switch are used to make the selections. Advance to the next sequential mode by pressing the “” switch. Each time the “ñ” switch is pressed, the number on the ♥ display will increment. It starts with the current value stored in memory for the parameter designated in the SpO2 display. When the correct value appears in the ♥ display, pressing the “” switch will advance the SpO2 display to the next sequential parameter as listed in Table I. This process is continued until all parameters are set. The settings can be easily checked, since the first value displayed for each parameter represents the current setting. When the setting sequence has been completed, the 920 exits the setup mode and begins normal operation.
Range of Values Sequence Appears in SpO2 Display From: To:
Printer “Prn” 00 15 Year “y” 00 99
Month “nn” 00 12 Day “d” 01 31
Hours “h” 00 23 Minutes “nn” 00 59
Table I: Printer, clock, and calendar mode parameters. a. Printer Settings
NOTE: The 920P prints out real-time data only. Data stored in the 920M can not be downloaded to the 920P.
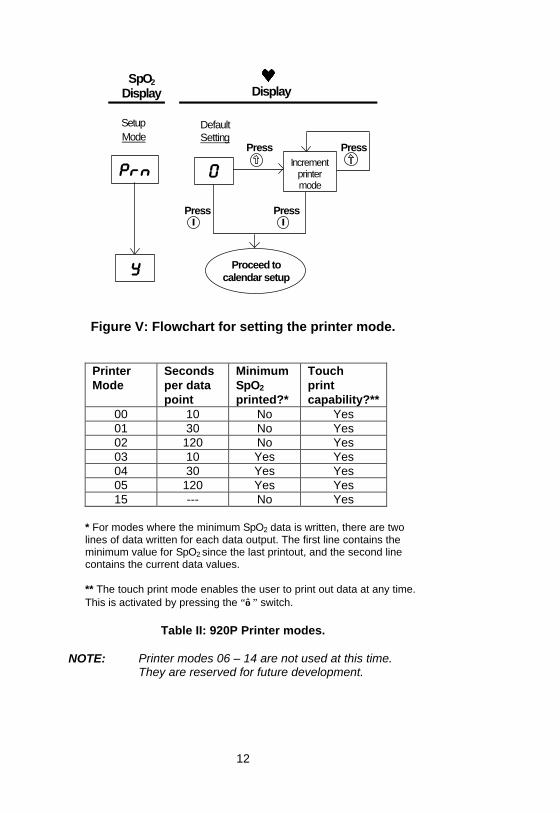
“Prn” will appear in the SpO2 display indicating print setup mode. There are 16 options for the printer mode: 00 through 15. Each printer mode is explained in Table II. The modes determine how often data is written out to the printer and the format of data written to the printer. Refer to Figure V for a flowchart of setting the printer mode. When the printer setting sequence has been completed, the 920 continues to the calendar settings (refer to section b of this section).
12
Display
Press Press
Proceed to calendar setup
Default Setting
Press Press
SpO2 Display
Setup Mode
Increment printer mode
Prn
0
y
Figure V: Flowchart for setting the printer mode.
Printer Mode
Seconds per data point
Minimum SpO2 printed?*
Touch print capability?**
00 10 No Yes 01 30 No Yes 02 120 No Yes 03 10 Yes Yes 04 30 Yes Yes 05 120 Yes Yes 15 --- No Yes
* For modes where the minimum SpO2 data is written, there are two lines of data written for each data output. The first line contains the minimum value for SpO2 since the last printout, and the second line contains the current data values. ** The touch print mode enables the user to print out data at any time. This is activated by pressing the “” switch.
Table II: 920P Printer modes.
NOTE: Printer modes 06 – 14 are not used at this time.
They are reserved for future development.
13
En
glish
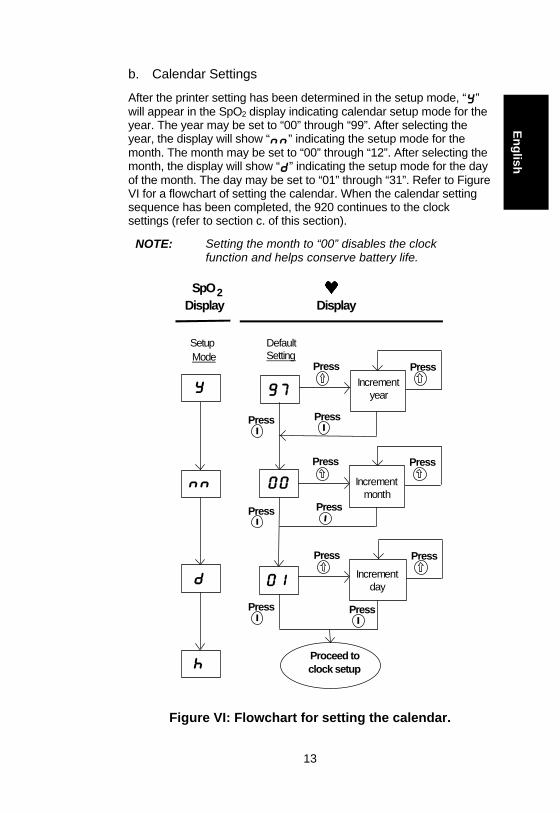
b. Calendar Settings
After the printer setting has been determined in the setup mode, “y” will appear in the SpO2 display indicating calendar setup mode for the year. The year may be set to “00” through “99”. After selecting the year, the display will show “nn” indicating the setup mode for the month. The month may be set to “00” through “12”. After selecting the month, the display will show “d” indicating the setup mode for the day of the month. The day may be set to “01” through “31”. Refer to Figure VI for a flowchart of setting the calendar. When the calendar setting sequence has been completed, the 920 continues to the clock settings (refer to section c. of this section).
NOTE: Setting the month to “00” disables the clock function and helps conserve battery life.
Display
Press
Default Setting
Press
Display
SpO 2
Setup Mode
Press
Press
Press
Press
Press
Press Increment
year
Press
Increment month
Press
Increment day
Proceed to clock setup
Press Press
Figure VI: Flowchart for setting the calendar.
y 97
nn 00
01 d
h
14
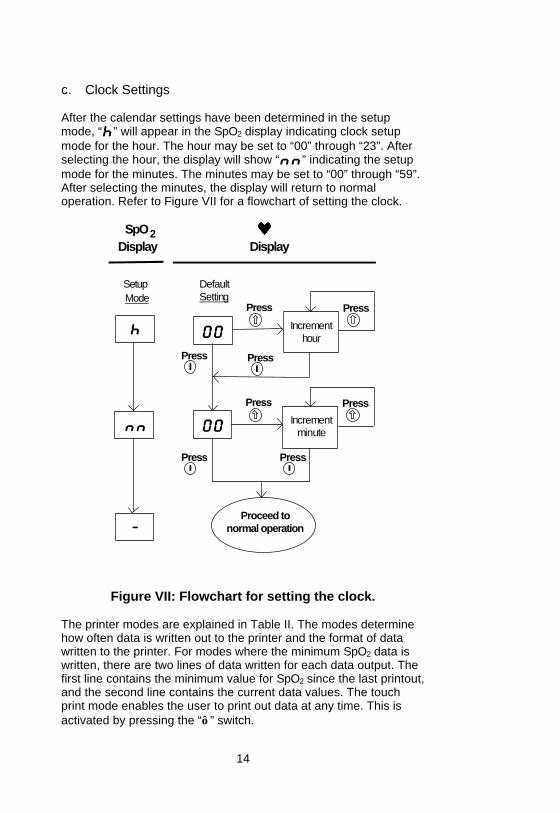
c. Clock Settings After the calendar settings have been determined in the setup mode, “h” will appear in the SpO2 display indicating clock setup mode for the hour. The hour may be set to “00” through “23”. After selecting the hour, the display will show “nn” indicating the setup mode for the minutes. The minutes may be set to “00” through “59”. After selecting the minutes, the display will return to normal operation. Refer to Figure VII for a flowchart of setting the clock.
Display
Press
Default Setting
Press
Display
SpO 2
Setup Mode
Press
Press
Press
Press
Press
Increment hour
Press
Increment minute
Proceed to normal operation
Figure VII: Flowchart for setting the clock.
The printer modes are explained in Table II. The modes determine how often data is written out to the printer and the format of data written to the printer. For modes where the minimum SpO2 data is written, there are two lines of data written for each data output. The first line contains the minimum value for SpO2 since the last printout, and the second line contains the current data values. The touch print mode enables the user to print out data at any time. This is activated by pressing the “” switch.
h 00
00 nn
-
15
En
glish
B. Displays 1. SpO2 Display
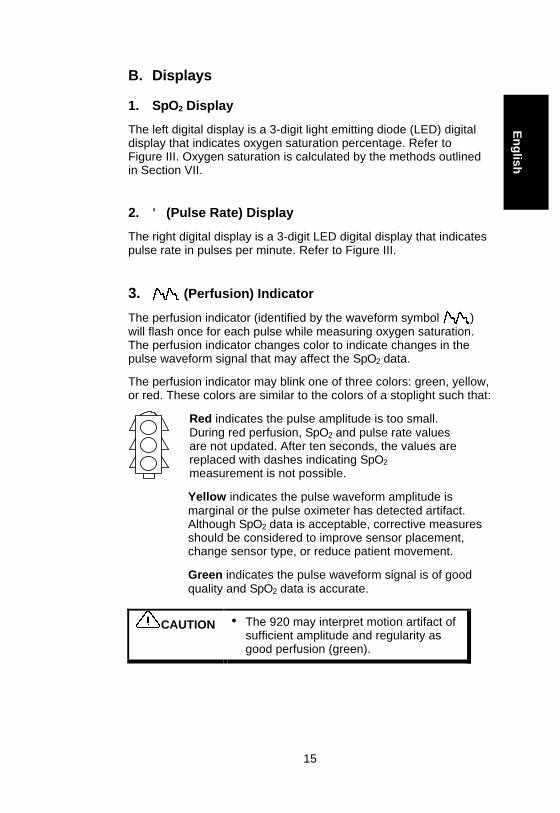
The left digital display is a 3-digit light emitting diode (LED) digital display that indicates oxygen saturation percentage. Refer to Figure III. Oxygen saturation is calculated by the methods outlined in Section VII. 2. ♥ (Pulse Rate) Display
The right digital display is a 3-digit LED digital display that indicates pulse rate in pulses per minute. Refer to Figure III. 3. (Perfusion) Indicator
The perfusion indicator (identified by the waveform symbol ) will flash once for each pulse while measuring oxygen saturation. The perfusion indicator changes color to indicate changes in the pulse waveform signal that may affect the SpO2 data.
The perfusion indicator may blink one of three colors: green, yellow, or red. These colors are similar to the colors of a stoplight such that:
Red indicates the pulse amplitude is too small. During red perfusion, SpO2 and pulse rate values are not updated. After ten seconds, the values are replaced with dashes indicating SpO2 measurement is not possible.
Yellow indicates the pulse waveform amplitude is marginal or the pulse oximeter has detected artifact. Although SpO2 data is acceptable, corrective measures should be considered to improve sensor placement, change sensor type, or reduce patient movement.
Green indicates the pulse waveform signal is of good quality and SpO2 data is accurate.
CAUTION • The 920 may interpret motion artifact of sufficient amplitude and regularity as good perfusion (green).
16
4. Flashing Display The numerical displays will flash once each second if the 920 determines that a battery low condition exists. Replace all six batteries immediately.
NOTE: Inaccurate SpO2 and/or pulse rate measurement may result if the 920 is operated in a low battery condition.
5. Dash in the SpO2 Display If the 920 determines that a sensor fault exists (sensor disconnect, sensor failure, or sensor dislodgment), a dash (-) appears in the left-most digit of the SpO2 display. The readings that are being displayed will remain unchanged while the sensor fault exists. If the sensor fault is not corrected, dashes will be displayed 10 seconds after the minus sign appears.
17
En
glish
C. Printer/Serial Output Both the 920 and 920M Hand Held Pulse Oximeters provide output capability to a custom printer via the 9-pin Sub-D connector. This connector serves as a sensor-input connector as well as a printer interconnect device. The 9-pin Sub-D connector pin assignments are listed in Table III.
Pin Number Assignment 1 Battery Voltage 2 Infrared Anode, Red Cathode 3 Infrared Cathode, Red Anode 4 Serial Data, TTL Levels 5 Detector Anode 6 Logic Level 7 Cable Shield 8 Coaxial Shield 9 Detector Cathode, +5 V
Table III: Printer/Sensor interface assignments.
The information from the 920 in the real-time mode is sent in an ASCII serial format at 9600 baud with 9 data bits, 1 start bit, and 1 stop bit, odd parity. The data is output at a rate of once per second.
NOTE: The 9th data bit is used for parity in memory playback mode. In real-time mode, it is always set to the mark condition. Therefore the real-time data may be read as 8 data bits, no parity.
The data printed by the 920P printer is in the following format:
HH:MM:SS SPO2=XXX HR=YYY
where “HH” represents the hour the real-time clock is set to, “MM” represents the minutes, “SS” represents the seconds, “XXX” represents the SpO2 value, and “YYY” represents the heart rate. The SpO2 and heart rate will be displayed as “---” if there is no data available for the data reading.
18
D. Memory Option (920M only) The memory option is identified by the “M” in the model number (i.e., 920M as opposed to the 920). This model number is located just above the serial number on the back of the unit. The 920M Pulse Oximeter can collect and store up to eighteen hours of SpO2 and pulse rate information. The solid-state memory in the 920M functions much like the “endless loop” tapes that are used in some telephone answering machines. When the memory fills up, the unit begins overwriting the oldest locations with the latest data. Each time the 920M is powered up, the current time/date information (if the clock is set properly) is stored in memory to allow quick differentiation of recording sessions. Patient SpO2 and pulse rate are sampled and stored every four seconds. The stored resolution of the oxygen saturation is in 1% increments in the range of 0 to 100 %. The stored pulse rate ranges from 18 to 300 BPM. The stored values have a resolution of 1 BPM from 18 to 200 and a resolution of 2 BPM from 201 to 300. During the printing of the data, the last data recorded is the first data printed. For example, the last four minutes of data recorded would be the first four minutes of printout. 1. Recording Sessions Each time the 920M is turned on (except while setting the clock) data is automatically collected.
NOTE: Only recording sessions greater than one minute in length are kept in memory for later printing.
19
En
glish
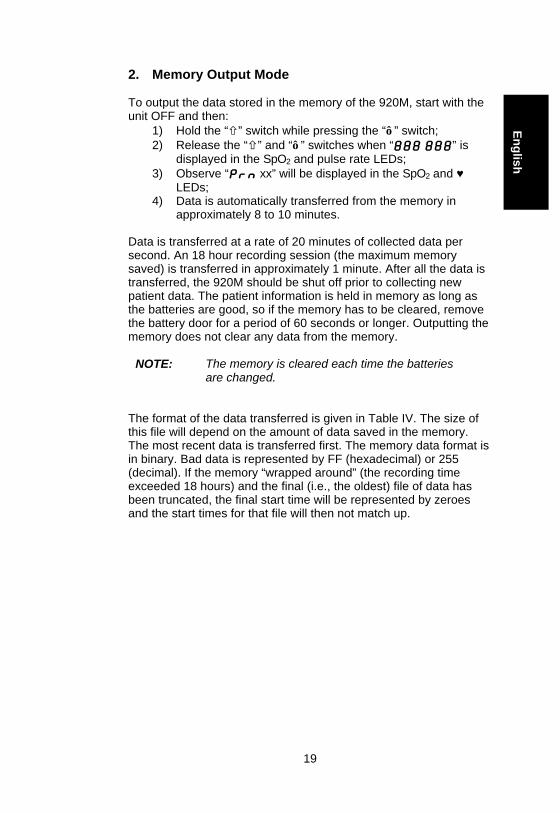
2. Memory Output Mode To output the data stored in the memory of the 920M, start with the unit OFF and then:
1) Hold the “ñ” switch while pressing the “” switch; 2) Release the “ñ” and “” switches when “888 888” is
displayed in the SpO2 and pulse rate LEDs; 3) Observe “Prn xx” will be displayed in the SpO2 and ♥
LEDs; 4) Data is automatically transferred from the memory in
approximately 8 to 10 minutes.
Data is transferred at a rate of 20 minutes of collected data per second. An 18 hour recording session (the maximum memory saved) is transferred in approximately 1 minute. After all the data is transferred, the 920M should be shut off prior to collecting new patient data. The patient information is held in memory as long as the batteries are good, so if the memory has to be cleared, remove the battery door for a period of 60 seconds or longer. Outputting the memory does not clear any data from the memory.
NOTE: The memory is cleared each time the batteries are changed.
The format of the data transferred is given in Table IV. The size of this file will depend on the amount of data saved in the memory. The most recent data is transferred first. The memory data format is in binary. Bad data is represented by FF (hexadecimal) or 255 (decimal). If the memory “wrapped around” (the recording time exceeded 18 hours) and the final (i.e., the oldest) file of data has been truncated, the final start time will be represented by zeroes and the start times for that file will then not match up.

20
920M Memory Data Format
DATA 1 DATA 2
CHECK SUM**
NOTE
$FE $FE $FC Header of first file month Day XX Current time year Minute XX second Hour XX month Day XX Stop time of first file saved year Minute XX in memory second Hour XX month Day XX Start time of first file saved year Minute XX in memory second Hour XX pulse rate SpO2 XX Data in first file pulse rate SpO2 XX pulse rate SpO2 XX
pulse rate SpO2 XX $FE $FE $FC Header of second file month Day XX Start time of first file saved year Minute XX in memory second Hour XX month Day XX Stop time of file N saved year Minute XX in memory second Hour XX month Day XX Start time of file N saved year Minute XX in memory second Hour XX pulse rate SpO2 XX Data in file N pulse rate SpO2 XX pulse rate SpO2 XX
pulse rate SpO2 XX $FE $FE $FC Header of file N+1 month Day XX Start time of file N saved year Minute XX in memory second Hour XX 0 0 0 End of data marker 0 0 0 (18 zeroes) 0 0 0 0 0 0 0 0 0 0 0 0
NOTE: ** CHECKSUM = DATA1 + DATA2
The data represented by the shaded area is repeated for additional data blocks that are saved in the 920M's memory. N represents the “next file” saved in the memory.
Table IV: 920M memory data format.
21
En
glish
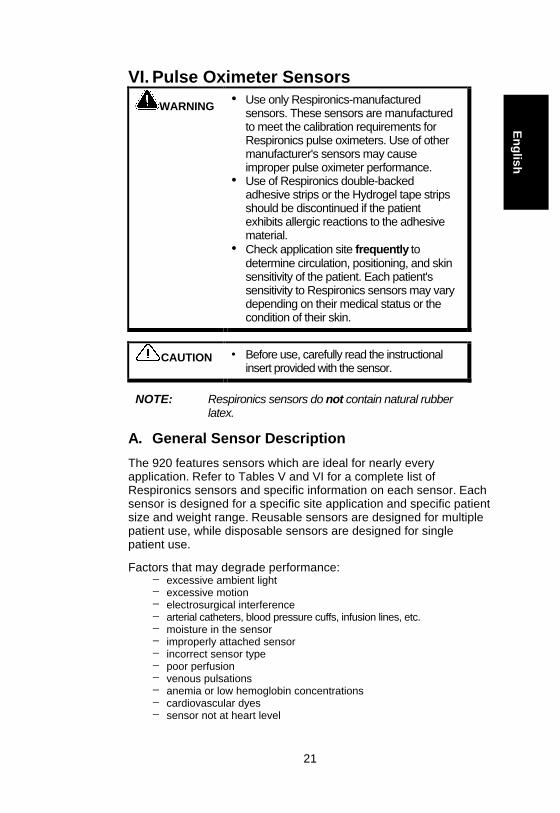
VI. Pulse Oximeter Sensors
WARNING • Use only Respironics-manufactured sensors. These sensors are manufactured to meet the calibration requirements for Respironics pulse oximeters. Use of other manufacturer's sensors may cause improper pulse oximeter performance.
• Use of Respironics double-backed adhesive strips or the Hydrogel tape strips should be discontinued if the patient exhibits allergic reactions to the adhesive material.
• Check application site frequently to determine circulation, positioning, and skin sensitivity of the patient. Each patient's sensitivity to Respironics sensors may vary depending on their medical status or the condition of their skin.
CAUTION • Before use, carefully read the instructional insert provided with the sensor.
NOTE: Respironics sensors do not contain natural rubber latex.
A. General Sensor Description
The 920 features sensors which are ideal for nearly every application. Refer to Tables V and VI for a complete list of Respironics sensors and specific information on each sensor. Each sensor is designed for a specific site application and specific patient size and weight range. Reusable sensors are designed for multiple patient use, while disposable sensors are designed for single patient use.
Factors that may degrade performance: − excessive ambient light − excessive motion − electrosurgical interference − arterial catheters, blood pressure cuffs, infusion lines, etc. − moisture in the sensor − improperly attached sensor − incorrect sensor type − poor perfusion − venous pulsations − anemia or low hemoglobin concentrations − cardiovascular dyes − sensor not at heart level
22
Respironics Reusable Sensor Reference
Sensor Description
Respironics Model
Number
Approximate Patient Weight
Range
Preferred Site Application
Adult Articulated Finger Clip
936 greater than 30 kg (greater than 66 lb.)
Index, middle, or ring finger
• spot checking • short-term continuous
use • for adults or
adolescents Pediatric Finger Clip
936P greater than 8 kg (greater than 18 lb.)
Index, middle, or ring finger
• spot checking • short-term continuous
use • for children or small
adults Ear Clip 1
948 greater than 40 kg (greater than 88 lb.)
Ear lobe • spot checking • short-term continuous
use • stress testing
Reflectance1
951 greater than 30 kg (greater than 66 lb.)
Middle of forehead
• continuous monitoring • stress testing
Adult Flex
953 greater than 20 kg (greater than 44 lb.)
Index, middle, or ring finger
• extended duration • motion situations • for adults
Infant Flex
934 2 to 20 kg (4 to 44 lb.)
Great toe • extended duration • motion situations • for infants
Neonatal Flex 935 less than 2 kg (less than 4 lb.)
Lateral aspect of foot
• extended duration • motion situations • for neonates
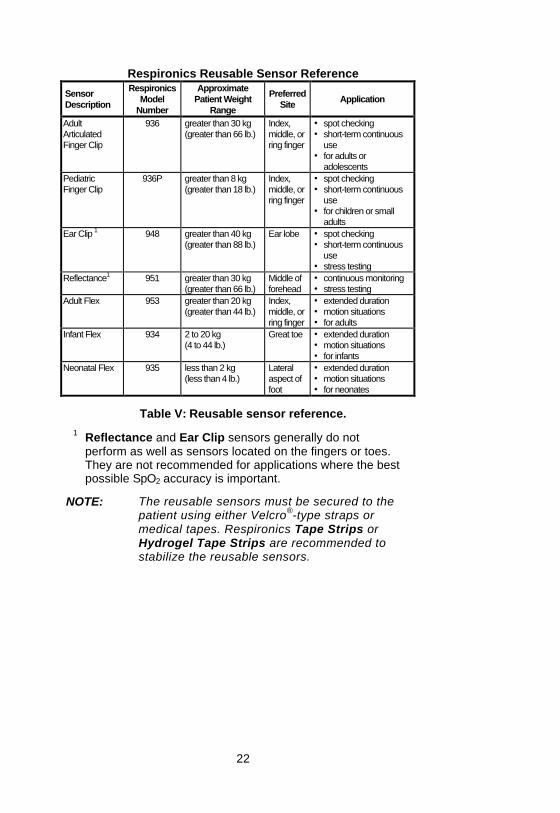
Table V: Reusable sensor reference.
1 Reflectance and Ear Clip sensors generally do not perform as well as sensors located on the fingers or toes. They are not recommended for applications where the best possible SpO2 accuracy is important.
NOTE: The reusable sensors must be secured to the patient using either Velcro®-type straps or medical tapes. Respironics Tape Strips or Hydrogel Tape Strips are recommended to stabilize the reusable sensors.
23
En
glish
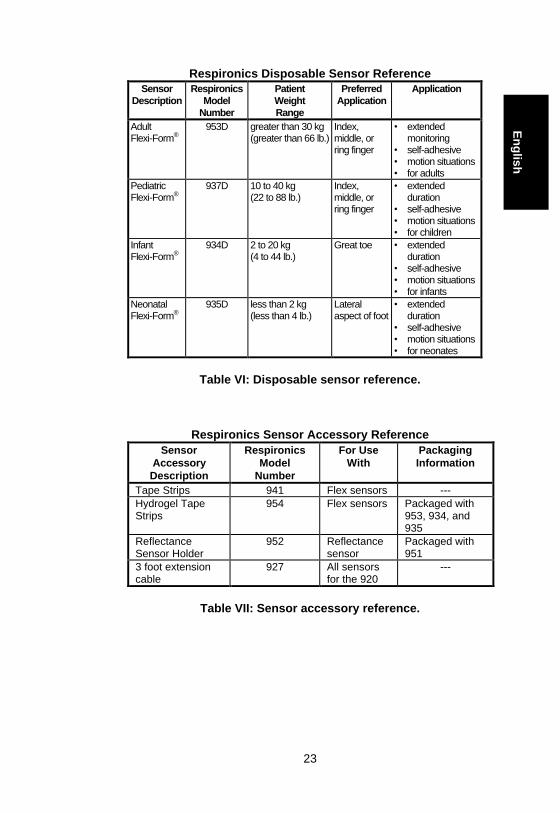
Respironics Disposable Sensor Reference Sensor
Description Respironics
Model Number
Patient Weight Range
Preferred Application
Application
Adult Flexi-Form®
953D greater than 30 kg (greater than 66 lb.)
Index, middle, or ring finger
• extended monitoring
• self-adhesive • motion situations • for adults
Pediatric Flexi-Form®
937D 10 to 40 kg (22 to 88 lb.)
Index, middle, or ring finger
• extended duration
• self-adhesive • motion situations • for children
Infant Flexi-Form®
934D 2 to 20 kg (4 to 44 lb.)
Great toe • extended duration
• self-adhesive • motion situations • for infants
Neonatal Flexi-Form®
935D less than 2 kg (less than 4 lb.)
Lateral aspect of foot
• extended duration
• self-adhesive • motion situations • for neonates
Table VI: Disposable sensor reference.
Respironics Sensor Accessory Reference Sensor
Accessory Description
Respironics Model
Number
For Use With
Packaging Information
Tape Strips 941 Flex sensors --- Hydrogel Tape Strips
954 Flex sensors Packaged with 953, 934, and 935
Reflectance Sensor Holder
952 Reflectance sensor
Packaged with 951
3 foot extension cable
927 All sensors for the 920
---
Table VII: Sensor accessory reference.
24
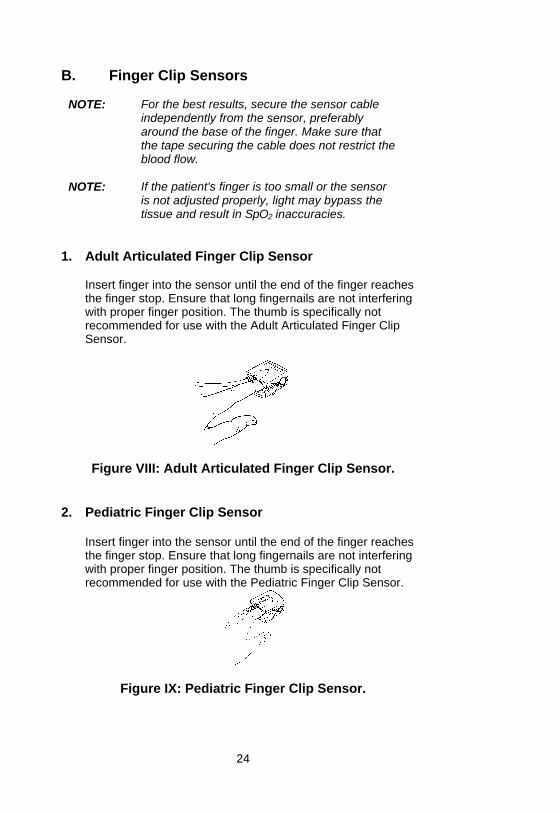
B. Finger Clip Sensors
NOTE: For the best results, secure the sensor cable independently from the sensor, preferably around the base of the finger. Make sure that the tape securing the cable does not restrict the blood flow.
NOTE: If the patient's finger is too small or the sensor is not adjusted properly, light may bypass the tissue and result in SpO2 inaccuracies.
1. Adult Articulated Finger Clip Sensor
Insert finger into the sensor until the end of the finger reaches the finger stop. Ensure that long fingernails are not interfering with proper finger position. The thumb is specifically not recommended for use with the Adult Articulated Finger Clip Sensor.
Figure VIII: Adult Articulated Finger Clip Sensor. 2. Pediatric Finger Clip Sensor
Insert finger into the sensor until the end of the finger reaches the finger stop. Ensure that long fingernails are not interfering with proper finger position. The thumb is specifically not recommended for use with the Pediatric Finger Clip Sensor.
Figure IX: Pediatric Finger Clip Sensor.
25
En
glish
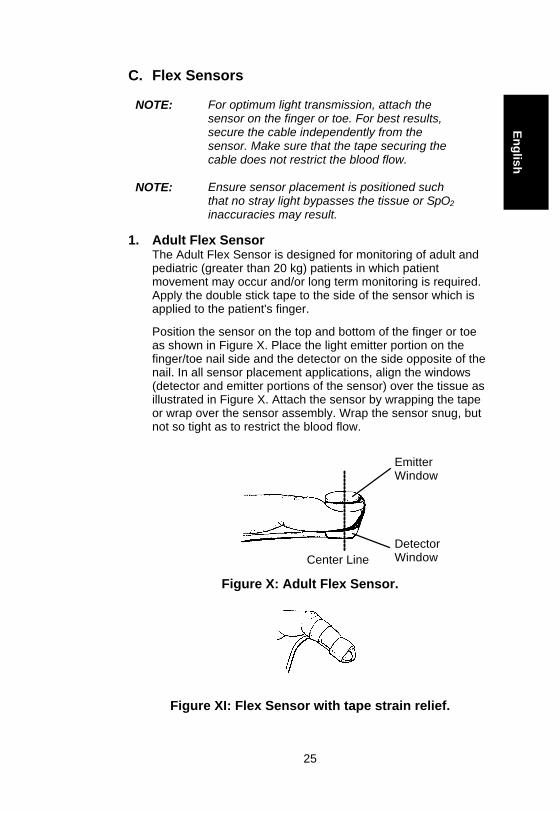
C. Flex Sensors
NOTE: For optimum light transmission, attach the sensor on the finger or toe. For best results, secure the cable independently from the sensor. Make sure that the tape securing the cable does not restrict the blood flow.
NOTE: Ensure sensor placement is positioned such that no stray light bypasses the tissue or SpO2 inaccuracies may result.
1. Adult Flex Sensor The Adult Flex Sensor is designed for monitoring of adult and pediatric (greater than 20 kg) patients in which patient movement may occur and/or long term monitoring is required. Apply the double stick tape to the side of the sensor which is applied to the patient's finger.
Position the sensor on the top and bottom of the finger or toe as shown in Figure X. Place the light emitter portion on the finger/toe nail side and the detector on the side opposite of the nail. In all sensor placement applications, align the windows (detector and emitter portions of the sensor) over the tissue as illustrated in Figure X. Attach the sensor by wrapping the tape or wrap over the sensor assembly. Wrap the sensor snug, but not so tight as to restrict the blood flow.
Figure X: Adult Flex Sensor.
Figure XI: Flex Sensor with tape strain relief.
Emitter Window
Detector Window Center Line
26
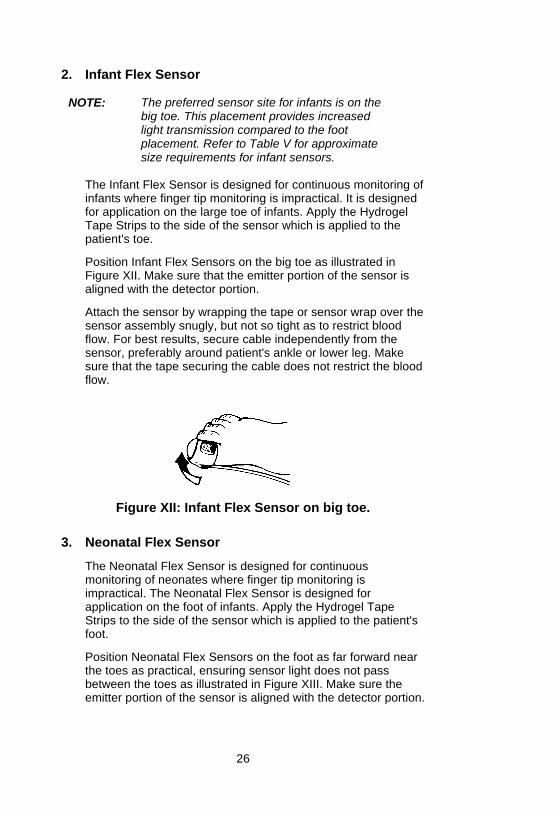
2. Infant Flex Sensor
NOTE: The preferred sensor site for infants is on the big toe. This placement provides increased light transmission compared to the foot placement. Refer to Table V for approximate size requirements for infant sensors.
The Infant Flex Sensor is designed for continuous monitoring of infants where finger tip monitoring is impractical. It is designed for application on the large toe of infants. Apply the Hydrogel Tape Strips to the side of the sensor which is applied to the patient's toe.
Position Infant Flex Sensors on the big toe as illustrated in Figure XII. Make sure that the emitter portion of the sensor is aligned with the detector portion.
Attach the sensor by wrapping the tape or sensor wrap over the sensor assembly snugly, but not so tight as to restrict blood flow. For best results, secure cable independently from the sensor, preferably around patient's ankle or lower leg. Make sure that the tape securing the cable does not restrict the blood flow.
Figure XII: Infant Flex Sensor on big toe.
3. Neonatal Flex Sensor
The Neonatal Flex Sensor is designed for continuous monitoring of neonates where finger tip monitoring is impractical. The Neonatal Flex Sensor is designed for application on the foot of infants. Apply the Hydrogel Tape Strips to the side of the sensor which is applied to the patient's foot.
Position Neonatal Flex Sensors on the foot as far forward near the toes as practical, ensuring sensor light does not pass between the toes as illustrated in Figure XIII. Make sure the emitter portion of the sensor is aligned with the detector portion.
27
En
glish
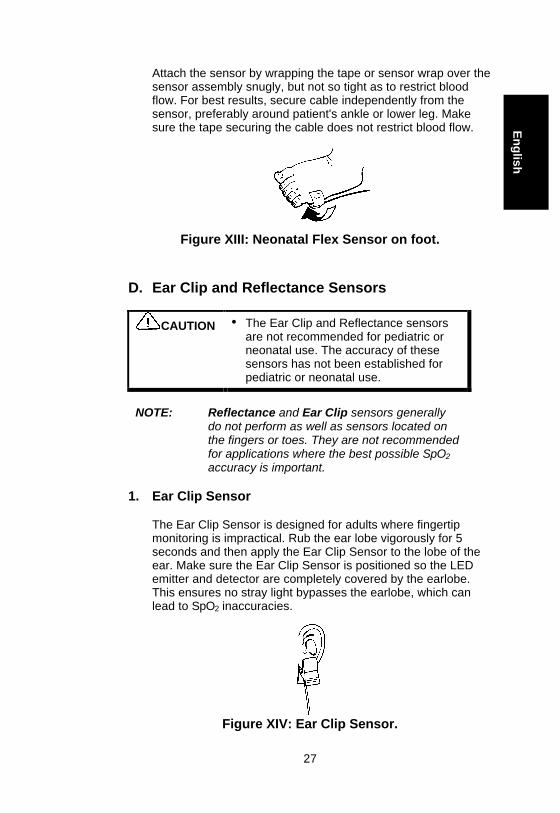
Attach the sensor by wrapping the tape or sensor wrap over the sensor assembly snugly, but not so tight as to restrict blood flow. For best results, secure cable independently from the sensor, preferably around patient's ankle or lower leg. Make sure the tape securing the cable does not restrict blood flow.
Figure XIII: Neonatal Flex Sensor on foot. D. Ear Clip and Reflectance Sensors
CAUTION • The Ear Clip and Reflectance sensors are not recommended for pediatric or neonatal use. The accuracy of these sensors has not been established for pediatric or neonatal use.
NOTE: Reflectance and Ear Clip sensors generally
do not perform as well as sensors located on the fingers or toes. They are not recommended for applications where the best possible SpO2 accuracy is important.
1. Ear Clip Sensor
The Ear Clip Sensor is designed for adults where fingertip monitoring is impractical. Rub the ear lobe vigorously for 5 seconds and then apply the Ear Clip Sensor to the lobe of the ear. Make sure the Ear Clip Sensor is positioned so the LED emitter and detector are completely covered by the earlobe. This ensures no stray light bypasses the earlobe, which can lead to SpO2 inaccuracies.
Figure XIV: Ear Clip Sensor.
28
2. Reflectance Sensor
The Reflectance Sensor is for use on well-vascularized skin surfaces. For adults, this will usually be the center of the forehead slightly above and between the eyebrows. The Sensor Holder provides the precise pressure this sensor needs against the skin.
Remove the backing from one side of the double-back tape and apply to the flange of the Sensor Holder. Then remove the back from the other side of the tape. Press the Reflectance Sensor into the foam with the sensor window out, and apply to the patient. Use additional tape to secure the sensor secondarily to the patient to avoid pulling or tipping the sensor.
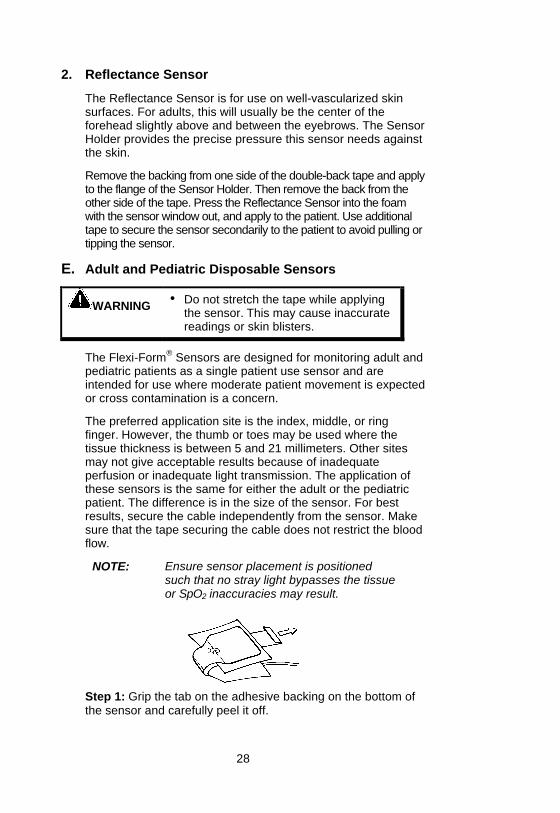
E. Adult and Pediatric Disposable Sensors
WARNING • Do not stretch the tape while applying the sensor. This may cause inaccurate readings or skin blisters.
The Flexi-Form® Sensors are designed for monitoring adult and pediatric patients as a single patient use sensor and are intended for use where moderate patient movement is expected or cross contamination is a concern.
The preferred application site is the index, middle, or ring finger. However, the thumb or toes may be used where the tissue thickness is between 5 and 21 millimeters. Other sites may not give acceptable results because of inadequate perfusion or inadequate light transmission. The application of these sensors is the same for either the adult or the pediatric patient. The difference is in the size of the sensor. For best results, secure the cable independently from the sensor. Make sure that the tape securing the cable does not restrict the blood flow.
NOTE: Ensure sensor placement is positioned such that no stray light bypasses the tissue or SpO2 inaccuracies may result.
Step 1: Grip the tab on the adhesive backing on the bottom of the sensor and carefully peel it off.

29
En
glish
Step 2: Place the patient's finger or toe in the sensor with the nail side up and the tip of the finger or toe centered against the center line marked on the sensor as illustrated. This will ensure vertical alignment between the emitter and detector. Wrap the sensor around the finger. The finger nail should not be covered with tape during this step.
Step 3: Grip the tab on the adhesive backing of the top of the sensor and carefully peel it off.
Step 4: Fold the sensor's top over the top of the finger. Ensure that the detector and emitter are vertically aligned as illustrated by the dotted axis line.
Figure XV: Finger Flexi-Form Sensor.
No tape over nail
30
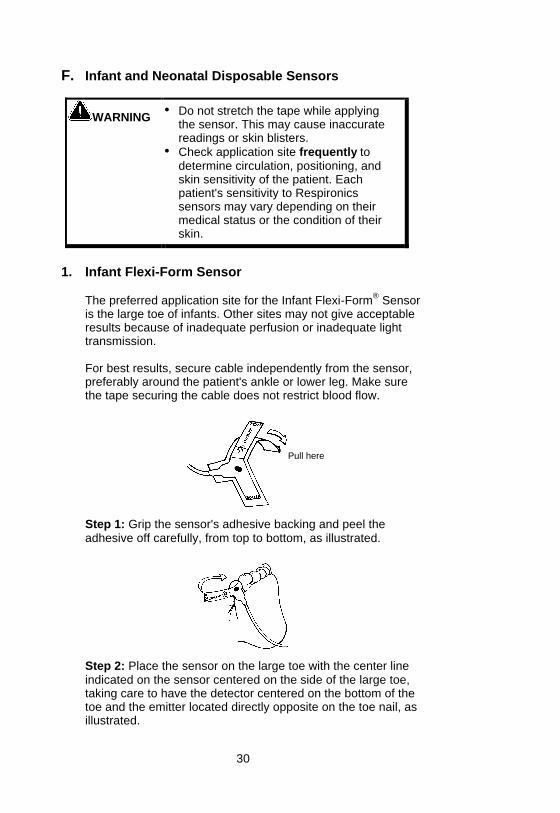
F. Infant and Neonatal Disposable Sensors
WARNING • Do not stretch the tape while applying the sensor. This may cause inaccurate readings or skin blisters.
• Check application site frequently to determine circulation, positioning, and skin sensitivity of the patient. Each patient's sensitivity to Respironics sensors may vary depending on their medical status or the condition of their skin.
1. Infant Flexi-Form Sensor
The preferred application site for the Infant Flexi-Form® Sensor is the large toe of infants. Other sites may not give acceptable results because of inadequate perfusion or inadequate light transmission. For best results, secure cable independently from the sensor, preferably around the patient's ankle or lower leg. Make sure the tape securing the cable does not restrict blood flow.
Step 1: Grip the sensor's adhesive backing and peel the adhesive off carefully, from top to bottom, as illustrated.
Step 2: Place the sensor on the large toe with the center line indicated on the sensor centered on the side of the large toe, taking care to have the detector centered on the bottom of the toe and the emitter located directly opposite on the toe nail, as illustrated.
Pull here
31
En
glish
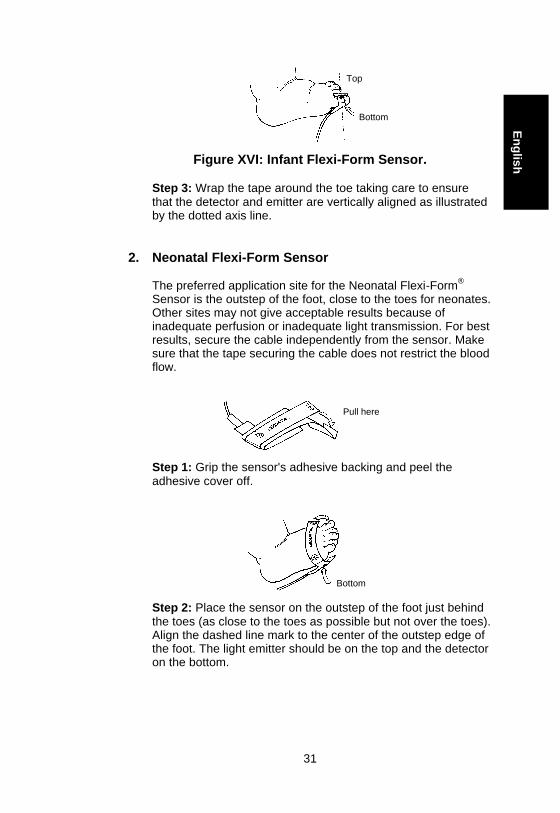
Figure XVI: Infant Flexi-Form Sensor.
Step 3: Wrap the tape around the toe taking care to ensure that the detector and emitter are vertically aligned as illustrated by the dotted axis line.
2. Neonatal Flexi-Form Sensor
The preferred application site for the Neonatal Flexi-Form® Sensor is the outstep of the foot, close to the toes for neonates. Other sites may not give acceptable results because of inadequate perfusion or inadequate light transmission. For best results, secure the cable independently from the sensor. Make sure that the tape securing the cable does not restrict the blood flow.
Step 1: Grip the sensor's adhesive backing and peel the adhesive cover off.
Step 2: Place the sensor on the outstep of the foot just behind the toes (as close to the toes as possible but not over the toes). Align the dashed line mark to the center of the outstep edge of the foot. The light emitter should be on the top and the detector on the bottom.
Pull here
Top
Bottom
Bottom
32
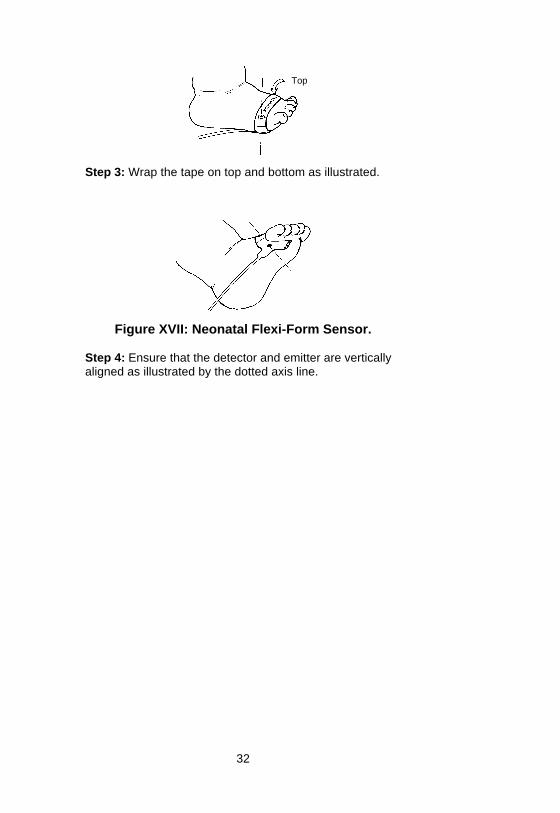
Step 3: Wrap the tape on top and bottom as illustrated.
Figure XVII: Neonatal Flexi-Form Sensor.
Step 4: Ensure that the detector and emitter are vertically aligned as illustrated by the dotted axis line.
Top
33
En
glish
G. Cleaning the Sensors
CAUTION • Do not immerse the sensors in liquid to clean.
• Do not use caustic or abrasive cleaning agents.
Carefully clean the Respironics reusable sensors with an isopropyl alcohol wipe and ensure that all tape residue is removed. Allow enough time for the sensor to dry thoroughly before reusing. The sensors may be sterilized using ethylene oxide (EtO) (cold cycle). H. Sensor Compatibility
WARNING • Use only Respironics-manufactured sensors. These sensors are manufactured to meet the calibration requirements for Respironics Pulse Oximeters.
The 920 is compatible with all Respironics-manufactured sensors (except the Fiber Optic sensors). Refer to Tables V, VI, and VII for a list of the sensors, available sensor accessories, and their model numbers.
34
VII. Theory of Operation
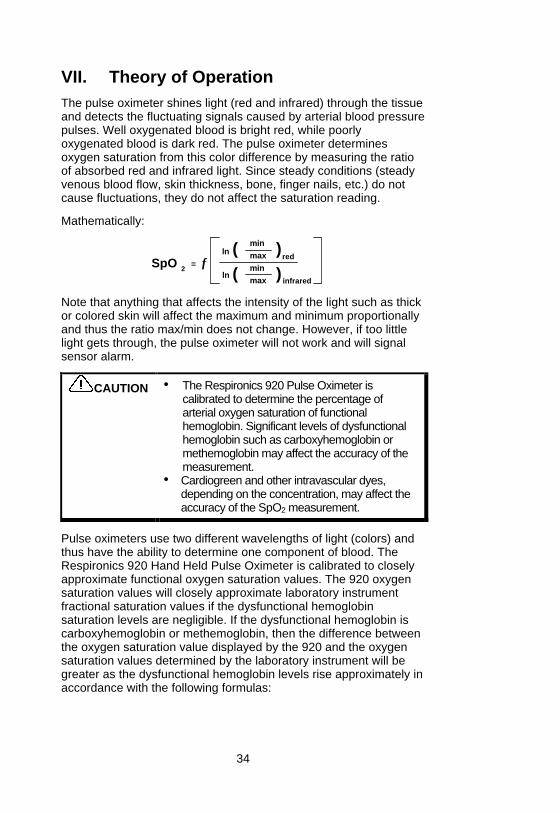
The pulse oximeter shines light (red and infrared) through the tissue and detects the fluctuating signals caused by arterial blood pressure pulses. Well oxygenated blood is bright red, while poorly oxygenated blood is dark red. The pulse oximeter determines oxygen saturation from this color difference by measuring the ratio of absorbed red and infrared light. Since steady conditions (steady venous blood flow, skin thickness, bone, finger nails, etc.) do not cause fluctuations, they do not affect the saturation reading.
Mathematically:
SpO 2=
infrared
fln
()min
max red(
)minmax
ln
Note that anything that affects the intensity of the light such as thick or colored skin will affect the maximum and minimum proportionally and thus the ratio max/min does not change. However, if too little light gets through, the pulse oximeter will not work and will signal sensor alarm.
CAUTION • The Respironics 920 Pulse Oximeter is calibrated to determine the percentage of arterial oxygen saturation of functional hemoglobin. Significant levels of dysfunctional hemoglobin such as carboxyhemoglobin or methemoglobin may affect the accuracy of the measurement.
• Cardiogreen and other intravascular dyes, depending on the concentration, may affect the accuracy of the SpO2 measurement.
Pulse oximeters use two different wavelengths of light (colors) and thus have the ability to determine one component of blood. The Respironics 920 Hand Held Pulse Oximeter is calibrated to closely approximate functional oxygen saturation values. The 920 oxygen saturation values will closely approximate laboratory instrument fractional saturation values if the dysfunctional hemoglobin saturation levels are negligible. If the dysfunctional hemoglobin is carboxyhemoglobin or methemoglobin, then the difference between the oxygen saturation value displayed by the 920 and the oxygen saturation values determined by the laboratory instrument will be greater as the dysfunctional hemoglobin levels rise approximately in accordance with the following formulas:
35
En
glish
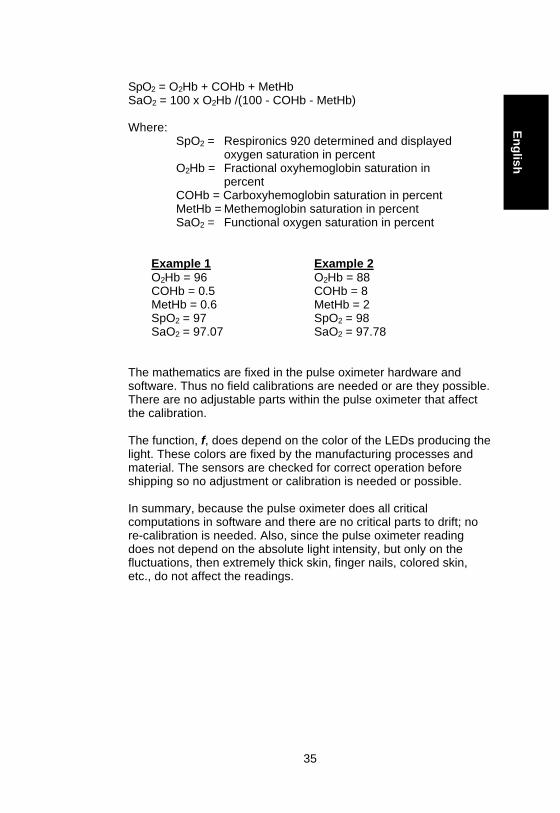
SpO2 = O2Hb + COHb + MetHb SaO2 = 100 x O2Hb /(100 - COHb - MetHb) Where:
SpO2 = Respironics 920 determined and displayed oxygen saturation in percent
O2Hb = Fractional oxyhemoglobin saturation in percent
COHb = Carboxyhemoglobin saturation in percent MetHb = Methemoglobin saturation in percent SaO2 = Functional oxygen saturation in percent
Example 1 Example 2 O2Hb = 96 O2Hb = 88 COHb = 0.5 COHb = 8 MetHb = 0.6 MetHb = 2 SpO2 = 97 SpO2 = 98 SaO2 = 97.07 SaO2 = 97.78
The mathematics are fixed in the pulse oximeter hardware and software. Thus no field calibrations are needed or are they possible. There are no adjustable parts within the pulse oximeter that affect the calibration. The function, f, does depend on the color of the LEDs producing the light. These colors are fixed by the manufacturing processes and material. The sensors are checked for correct operation before shipping so no adjustment or calibration is needed or possible. In summary, because the pulse oximeter does all critical computations in software and there are no critical parts to drift; no re-calibration is needed. Also, since the pulse oximeter reading does not depend on the absolute light intensity, but only on the fluctuations, then extremely thick skin, finger nails, colored skin, etc., do not affect the readings.
36
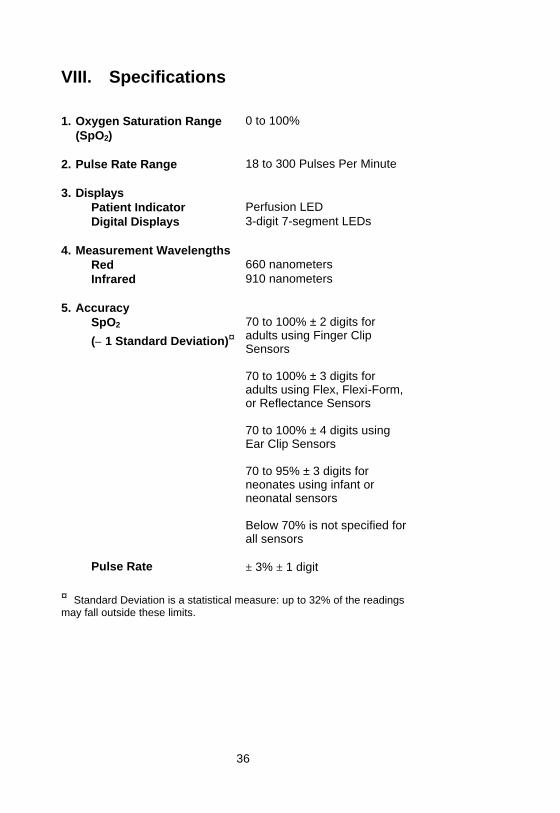
VIII. Specifications 1. Oxygen Saturation Range
(SpO2)
0 to 100%
2. Pulse Rate Range
18 to 300 Pulses Per Minute
3. Displays Patient Indicator Perfusion LED Digital Displays
3-digit 7-segment LEDs
4. Measurement Wavelengths Red 660 nanometers Infrared
910 nanometers
5. Accuracy SpO2
(± 1 Standard Deviation)♦
70 to 100% ± 2 digits for adults using Finger Clip Sensors
70 to 100% ± 3 digits for adults using Flex, Flexi-Form, or Reflectance Sensors
70 to 100% ± 4 digits using Ear Clip Sensors
70 to 95% ± 3 digits for neonates using infant or neonatal sensors
Below 70% is not specified for all sensors
Pulse Rate
± 3% ± 1 digit
♦ Standard Deviation is a statistical measure: up to 32% of the readings may fall outside these limits.

37
En
glish
6. Temperature
Operating -20 to +50 °C Non-operating
-30 to +50 °C
7. Humidity Operating 10 to 90% non-condensing Non-operating
10 to 95% non-condensing
8. Power Requirements 6 AA alkaline batteries 100 hours typical operation (maximum display brightness) 200 hours typical operation (minimum display brightness)
9. Patient Isolation > 12 MΩ
10. Leakage Current Not applicable
11. Dimensions 3” wide x 6” high x 1” deep 8 cm x 15 cm x 2 cm
12. Weight 10 oz. (280 g) with batteries
38
IX. Service
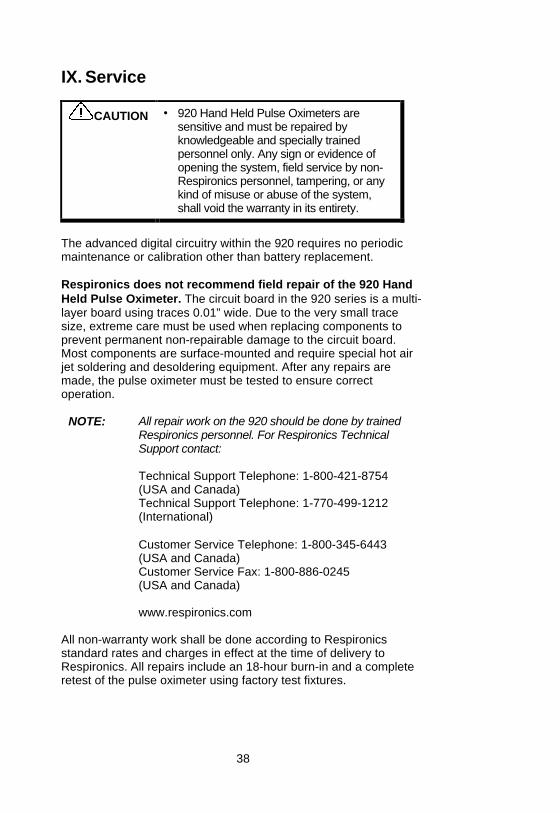
CAUTION • 920 Hand Held Pulse Oximeters are sensitive and must be repaired by knowledgeable and specially trained personnel only. Any sign or evidence of opening the system, field service by non- Respironics personnel, tampering, or any kind of misuse or abuse of the system, shall void the warranty in its entirety.
The advanced digital circuitry within the 920 requires no periodic maintenance or calibration other than battery replacement. Respironics does not recommend field repair of the 920 Hand Held Pulse Oximeter. The circuit board in the 920 series is a multi-layer board using traces 0.01” wide. Due to the very small trace size, extreme care must be used when replacing components to prevent permanent non-repairable damage to the circuit board. Most components are surface-mounted and require special hot air jet soldering and desoldering equipment. After any repairs are made, the pulse oximeter must be tested to ensure correct operation.
NOTE: All repair work on the 920 should be done by trained Respironics personnel. For Respironics Technical Support contact: Technical Support Telephone: 1-800-421-8754 (USA and Canada) Technical Support Telephone: 1-770-499-1212 (International) Customer Service Telephone: 1-800-345-6443 (USA and Canada) Customer Service Fax: 1-800-886-0245 (USA and Canada) www.respironics.com
All non-warranty work shall be done according to Respironics standard rates and charges in effect at the time of delivery to Respironics. All repairs include an 18-hour burn-in and a complete retest of the pulse oximeter using factory test fixtures.

39
En
glish
X. Warranty RESPIRONICS, INCORPORATED, (Respironics) warrants to the purchaser, for a period of three years from the date of delivery, each system exclusive of sensors, cables, and batteries. Respironics shall repair all systems found to be defective in accordance with this warranty, free of charge, for which Respironics has been notified by the purchaser by serial number that there is a defect, provided said notification occurs within the applicable warranty period. This warranty shall be the sole and exclusive remedy by the purchaser hereunder for any systems or accessories delivered to the purchaser which are found to be defective in any manner whether such remedies be in contract, tort or by law. This warranty excludes cost of delivery to and from Respironics. All repaired units shall be received by the purchaser at Respironics 's place of business. For any system or accessory sent to Respironics for warranty repair which is found to be within specification, the purchaser agrees to pay $100.00 (USD). These systems are sensitive and must be repaired by knowledgeable and specially trained personnel only. Accordingly, any sign or evidence of opening the system, field service by non- Respironics personnel, tampering, or any kind of misuse or abuse of the system, shall void the warranty in its entirety. All non-warranty work shall be done according to Respironics standard rates and charges in effect at the time of delivery to Respironics. DISCLAIMER/EXCLUSIVITY OF WARRANTY THE EXPRESS WARRANTIES SET FORTH IN THIS MANUAL (SECTION X) ARE EXCLUSIVE AND NO OTHER WARRANTIES OF ANY KIND, WHETHER STATUTORY, WRITTEN, ORAL, OR IMPLIED INCLUDING WARRANTIES OF FITNESS FOR A PARTICULAR PURPOSE OR MERCHANTABILITY SHALL APPLY.

40
XI. Accessories The following Respironics accessories function with the Model 920 Hand Held Pulse Oximeter:
Model Pulse Oximeters and Printer 920 One 920 Hand Held Pulse Oximeter; Adult Articulated Finger Clip
Sensor (Model 936); and Instruction and Service Manual (Model 924); Six AA Alkaline Batteries
920M One 920M Hand Held Pulse Oximeter with 18-Hour Memory; Adult Articulated Finger Clip Sensor (Model 936); and Instruction and Service Manual (Model 924); Six AA Alkaline Batteries
920P Spot-Check Printer for either the 920 or 920M
Model Reusable Sensors 936 Adult Articulated Finger Clip Sensor 936P Pediatric Finger Clip Sensor 953 Adult Flex Sensor, 38mm/ (finger/toe) straight cable with 954
Hydrogel Tape Strips (25) 934 Infant Flex Sensor, 30mm/ (toe), right angle cable, with 954
Hydrogel Tape Strips (25) 935 Neonatal Flex Sensor, 38mm/ (outstep), right angle cable, with
954 Hydrogel Tape Strips (25) 948 Ear Clip Sensor 951 Reflectance Sensor, adult, includes 10 holders (Model 952)
Model Disposable Sensors 953D Adult Finger Flexi-Form® Sensor1, 10 per box 937D Pediatric Finger Flexi-Form® Sensor, 10 per box 934D Infant Toe Flexi-Form® Sensor, 10 per box 935D Neonatal Foot Flexi-Form® Sensor, 10 per box 9000D Flexi-Form® Sensor Assortment Pack, 10 per box
Model Related Accessories 954 Hydrogel Tape Strips, 25 per bag 941 Tape Strips, double-stick, 100 per box 952 Reflectance Sensor Holders (10) for the 951 927 Patient Cable (3 foot extension) 956 Carrying Case for the pulse oximeter, printer, extra paper, and
batteries 957 Thermal Paper for the 920P (box of 20) 924 Instruction and Service Manual (Pulse Oximeter) 958 Instruction and Service Manual (Printer)
Model Profox Software and Accessories 920M-40 Profox Software for the 920M, includes Download Cable
(Model 920M-31) 920M-31 Profox Software Download Cable 920M-42 Profox Instruction Manual
41
En
glish
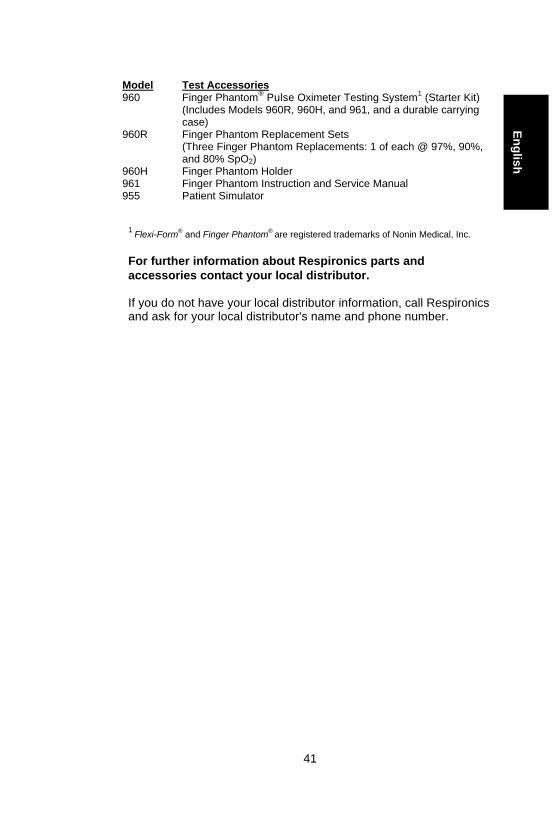
Model Test Accessories 960 Finger Phantom® Pulse Oximeter Testing System1 (Starter Kit) (Includes Models 960R, 960H, and 961, and a durable carrying
case) 960R Finger Phantom Replacement Sets (Three Finger Phantom Replacements: 1 of each @ 97%, 90%,
and 80% SpO2) 960H Finger Phantom Holder 961 Finger Phantom Instruction and Service Manual 955 Patient Simulator 1 Flexi-Form® and Finger Phantom® are registered trademarks of Nonin Medical, Inc. For further information about Respironics parts and accessories contact your local distributor. If you do not have your local distributor information, call Respironics and ask for your local distributor's name and phone number.
42
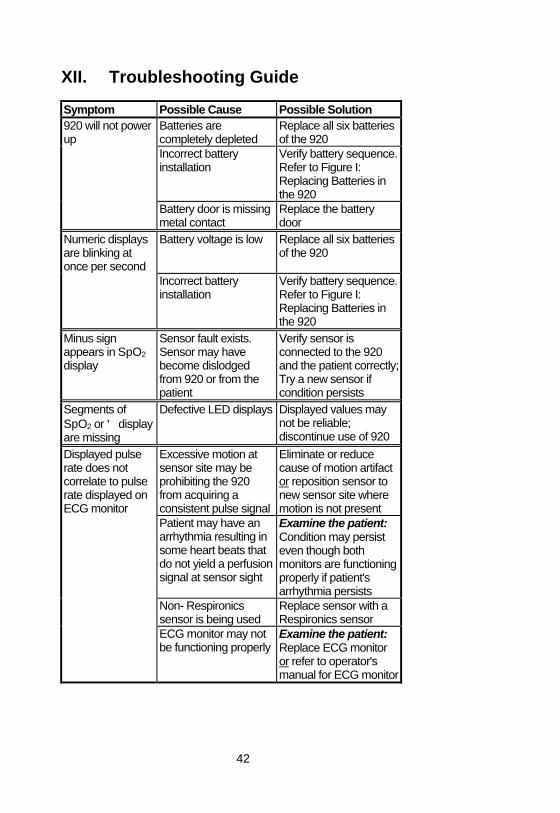
XII. Troubleshooting Guide Symptom Possible Cause Possible Solution 920 will not power up
Batteries are completely depleted
Replace all six batteries of the 920
Incorrect battery installation
Verify battery sequence. Refer to Figure I: Replacing Batteries in the 920
Battery door is missing metal contact
Replace the battery door
Numeric displays are blinking at once per second
Battery voltage is low Replace all six batteries of the 920
Incorrect battery installation
Verify battery sequence. Refer to Figure I: Replacing Batteries in the 920
Minus sign appears in SpO2 display
Sensor fault exists. Sensor may have become dislodged from 920 or from the patient
Verify sensor is connected to the 920 and the patient correctly; Try a new sensor if condition persists
Segments of SpO2 or ♥ display are missing
Defective LED displays Displayed values may not be reliable; discontinue use of 920
Displayed pulse rate does not correlate to pulse rate displayed on ECG monitor
Excessive motion at sensor site may be prohibiting the 920 from acquiring a consistent pulse signal
Eliminate or reduce cause of motion artifact or reposition sensor to new sensor site where motion is not present
Patient may have an arrhythmia resulting in some heart beats that do not yield a perfusion signal at sensor sight
Examine the patient: Condition may persist even though both monitors are functioning properly if patient's arrhythmia persists
Non- Respironics sensor is being used
Replace sensor with a Respironics sensor
ECG monitor may not be functioning properly
Examine the patient: Replace ECG monitor or refer to operator's manual for ECG monitor
43
En
glish
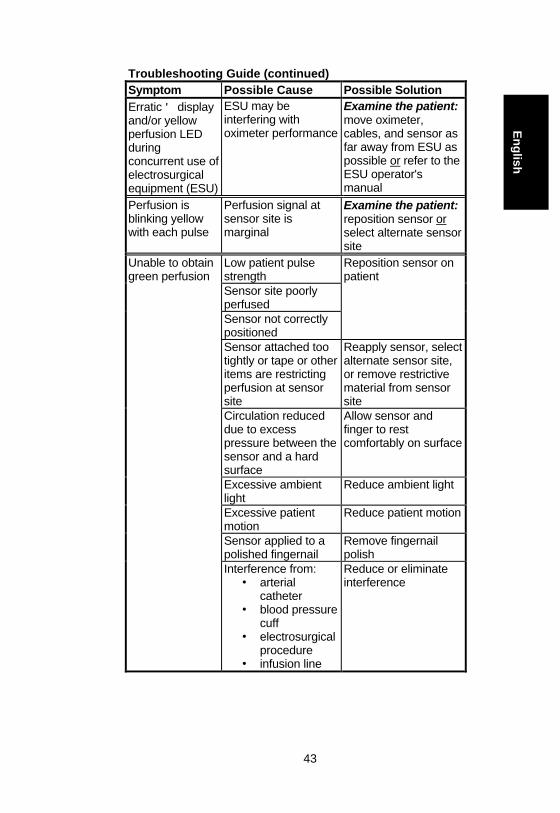
Troubleshooting Guide (continued) Symptom Possible Cause Possible Solution Erratic ♥ display and/or yellow perfusion LED during concurrent use of electrosurgical equipment (ESU)
ESU may be interfering with oximeter performance
Examine the patient: move oximeter, cables, and sensor as far away from ESU as possible or refer to the ESU operator's manual
Perfusion is blinking yellow with each pulse
Perfusion signal at sensor site is marginal
Examine the patient: reposition sensor or select alternate sensor site
Unable to obtain green perfusion
Low patient pulse strength
Reposition sensor on patient
Sensor site poorly perfused
Sensor not correctly positioned
Sensor attached too tightly or tape or other items are restricting perfusion at sensor site
Reapply sensor, select alternate sensor site, or remove restrictive material from sensor site
Circulation reduced due to excess pressure between the sensor and a hard surface
Allow sensor and finger to rest comfortably on surface
Excessive ambient light
Reduce ambient light
Excessive patient motion
Reduce patient motion
Sensor applied to a polished fingernail
Remove fingernail polish
Interference from: • arterial
catheter • blood pressure
cuff • electrosurgical
procedure • infusion line
Reduce or eliminate interference
44
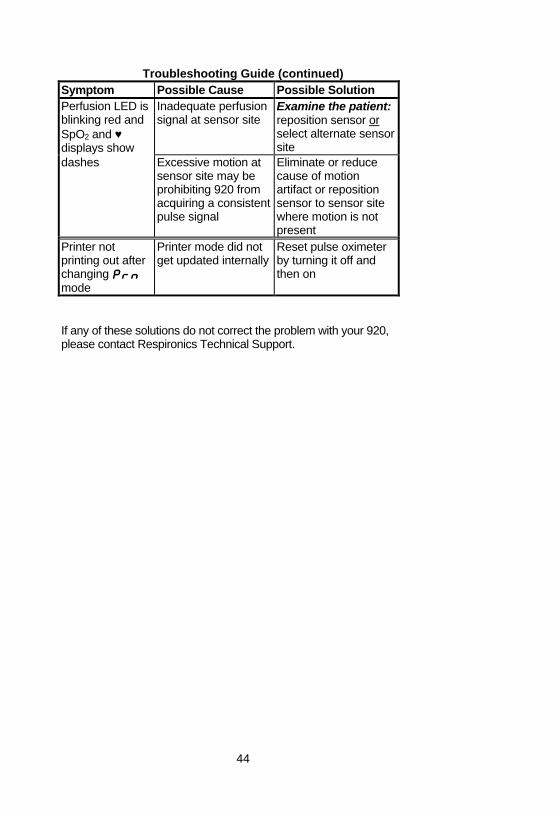
Troubleshooting Guide (continued) Symptom Possible Cause Possible Solution Perfusion LED is blinking red and SpO2 and ♥ displays show
Inadequate perfusion signal at sensor site
Examine the patient: reposition sensor or select alternate sensor site
dashes Excessive motion at sensor site may be prohibiting 920 from acquiring a consistent pulse signal
Eliminate or reduce cause of motion artifact or reposition sensor to sensor site where motion is not present
Printer not printing out after changing Prn mode
Printer mode did not get updated internally
Reset pulse oximeter by turning it off and then on
If any of these solutions do not correct the problem with your 920, please contact Respironics Technical Support.