mode number: figure 6model 535 6537 … stop logging new data points. enable/disable bluetooth 1....
TRANSCRIPT

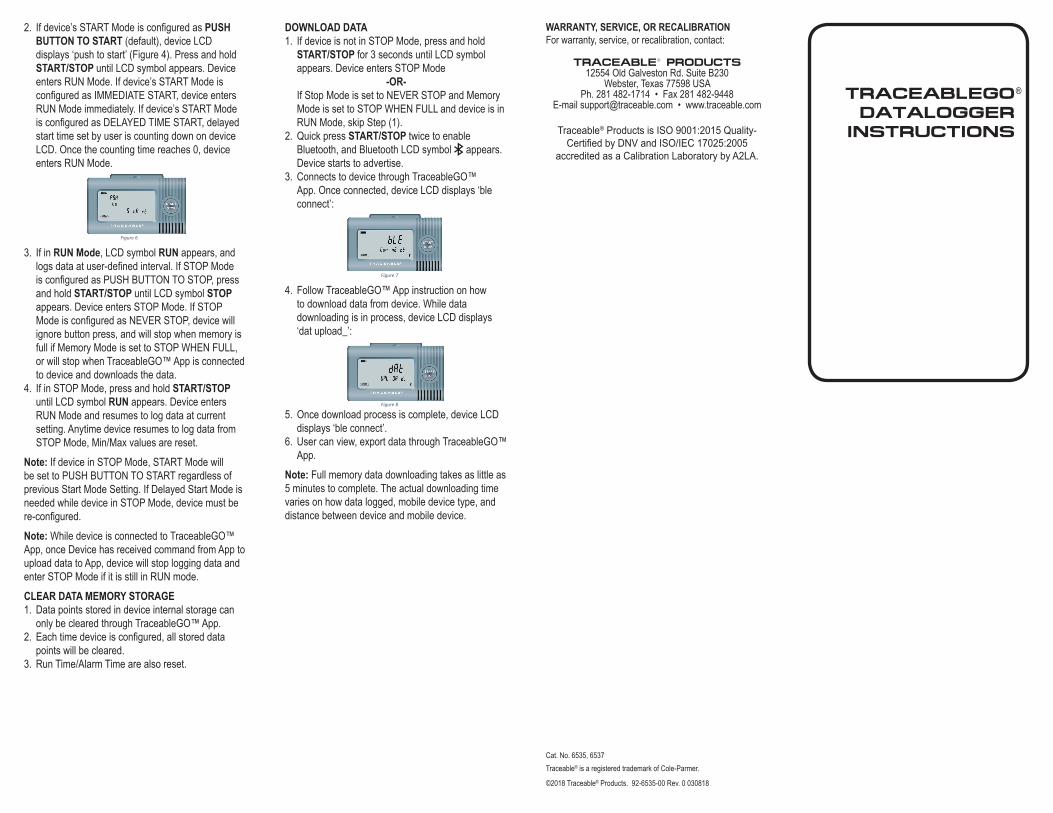
MODEL6535: TraceableGO™ Datalogging Thermometer6537: TraceableGO™ Datalogging Hygrometer
Figure 1: 6535 (left), 6537 (right)Dimension L x H x D: 3.5 x 2 x 0.79” (89x51x20mm)TEMPERATUREOperating Range: –20 to 70°CResolution: 0.1°CAccuracy:6535: ±0.4°C6537: ±0.4°C between –10 and 70°C, otherwise ±0.5°CRELATIVE HUMIDITY (6537 ONLY):Range: 0% to 95%RH, non-condensingResolution: 0.1% RHAccuracy: ±3% RH between 5 to 75%, otherwise ±5% RHBATTERY• 2 AAA Alkaline batteries (3.0V)Battery Level Indication:
Battery level LCD symbol
≥ 80% (2.78V)
≥ 60% (2.56V), < 80%
≥ 40% (2.34V), < 60%
≥ 20% (2.12V), < 40%
≥ 10% (2.01V), < 20%
< 10% Flashing
Note: Battery level is updated every 5 minutes.Note: Once battery level drops to below 10%, device may not work properly. Replace batteries immediately.Note: When replacing batteries, after removing the old batteries, wait 10 seconds before inserting new batteries. Otherwise, Bluetooth may not work properly.MEASUREMENT READING UPDATE FREQUENCYTemperature and humidity: 5 seconds;Note: If a reading is out of operating range, the corresponding location on LCD will display ‘--.-‘, and such out of range reading will not trigger alarm.
DATA LOGGING FREQUENCY:5 min by default, user-adjustable between 1 minute and 12 hours with 1 minute step.DATA STORAGE CAPACITYAlarm: most recent 90 Alarm eventsData: 64K (65536) data points, 7.5 months on 5-minute logging intervalNote: If maximum number of alarm events is reached, device will overwrite the oldest alarm events.
_____________________________________________________________________________________ Page 3 of 10
Figure 2 Device not initialized Figure 3 Device’s S/N not programmed
10.Device Operating Modes:• IDLE Mode: First time battery inserted, and device has not been configured;• STANDBY Mode: Device has been configured, but not started;• RUN Mode: Device starts to measure and log data.• STOP Mode: Device stops from RUN Mode. In STOP Mode, device does not update
measurements or log data, and the last measurements are displayed.• TEST Mode: For test and calibration in production.• DTM Mode: For Bluetooth radio test.
11.View Current Reading1) 6535: Current reading, minimum/maximum reading since last clearing, run
time/alarm time toggling, Memory mode are shown on LCD.2) 6537: Current temperature/humidity reading toggling every 5 seconds,
minimum/maximum reading since last clearing, run time/alarm time, Memory modeare shown on LCD.
12.View Current MIN/MAX6535: Current temperature Min/Max values are displayed on LCD 6537: Current temperature/humidity Min/Max values are toggled display.
Note: Every time device is configured, or resumes to run from STOP Mode, Min/Max values are reset.
13.Viewing RUN TIME/ALARM TIMERun Time/Alarm Time is toggled to display on LCD. If Run Time is displayed, LCD symbol
appears; if Alarm TIME is displayed, LCD symbol appears.
Note: Alarm Time is accumulated for both Low Alarm and Hi Alarm for each channel (temperature, humidity).
14.View Memory Usage, Current Date/Time, Device’s Serial Number
1) Short press and release ;
DEVICE OPERATING MODES• IDLE Mode: First time battery inserted, and device
has not been confi gured;• STANDBY Mode: Device has been confi gured, but
not started;• RUN Mode: Device starts to measure and log data.• STOP Mode: Device stops from RUN Mode.
In STOP Mode, device does not update measurements or log data, and the last measurements are displayed.
VIEW CURRENT READING1. Temperature ONLY unit: Current reading,
minimum/ maximum reading, run time/alarm time toggling, Memory mode are shown on LCD.
2. Humidity and Temperature unit: Current temperature/humidity reading toggling every 5 seconds, minimum/maximum reading since last clearing, run time/alarm time, Memory mode are shown on LCD.
VIEW CURRENT MIN/MAXTemperature ONLY unit: Current temperature Min/Max values are displayed on LCD.Humidity and Temperature unit: Current temperature/humidity Min/Max values are toggled display.Note: Every time device is confi gured, or resumes to run from STOP Mode, Min/Max values are reset.VIEWING RUN TIME/ALARM TIMERun Time/Alarm Time is toggled to display on LCD. If Run Time is displayed, LCD symbol RUN TIME appears; if Alarm Time is displayed, LCD symbol ALARM TIME appears.Note: Alarm Time is accumulated for both Low Alarm and Hi Alarm for each channel (temperature, humidity).VIEW MEMORY USAGE, CURRENT DATE/TIME, DEVICE’S SERIAL NUMBER1. Press and release START/STOP button
2. Memory usage in percentage is shown on LCD. The percentage indicates how much internal data memory storage has been used;
3. Number of days, hours, minutes left till memory is full are also displayed on the second line;
_____________________________________________________________________________________ Page 4 of 10
2) Memory usage in percentage is shown on LCD. The percentage indicates how muchinternal data memory storage has been used;
3) Number of days, hours, minutes left till memory is full are also displayed on thesecond line;
Figure 3
4) Within 10 seconds, short press again, current date/time is displayed on device LCD. The following figure shows 9/14/2017, 17:30
Figure 4
5) Within 10 seconds, short press again, device S/N will be displayed on LCD.
Figure 5
6) To go back to normal working status, press again, or wait for 10 seconds and device will automatically go back to normal working status.
Note: If Memory Mode is set to WRAP WHEN FULL: LCD symbol starts to flash on the display when the memory is full. Once memory is full, the oldest data points will be overwritten with new data points.
4. Within 10 seconds, press START/STOP again, current date/time is displayed on device LCD. The following fi gure shows 9/14/2017, 17:30
_____________________________________________________________________________________ Page 4 of 10
2) Memory usage in percentage is shown on LCD. The percentage indicates how muchinternal data memory storage has been used;
3) Number of days, hours, minutes left till memory is full are also displayed on thesecond line;
Figure 3
4) Within 10 seconds, short press again, current date/time is displayed on device LCD. The following figure shows 9/14/2017, 17:30
Figure 4
5) Within 10 seconds, short press again, device S/N will be displayed on LCD.
Figure 5
6) To go back to normal working status, press again, or wait for 10 seconds and device will automatically go back to normal working status.
Note: If Memory Mode is set to WRAP WHEN FULL: LCD symbol starts to flash on the display when the memory is full. Once memory is full, the oldest data points will be overwritten with new data points.
5. Within 10 seconds, press START/STOP again, device S/N will be displayed on LCD.
_____________________________________________________________________________________ Page 4 of 10
2) Memory usage in percentage is shown on LCD. The percentage indicates how muchinternal data memory storage has been used;
3) Number of days, hours, minutes left till memory is full are also displayed on thesecond line;
Figure 3
4) Within 10 seconds, short press again, current date/time is displayed on device LCD. The following figure shows 9/14/2017, 17:30
Figure 4
5) Within 10 seconds, short press again, device S/N will be displayed on LCD.
Figure 5
6) To go back to normal working status, press again, or wait for 10 seconds and device will automatically go back to normal working status.
Note: If Memory Mode is set to WRAP WHEN FULL: LCD symbol starts to flash on the display when the memory is full. Once memory is full, the oldest data points will be overwritten with new data points.
6. To return to normal working status, press START/STOP again, or wait for 10 seconds and device will automatically go back to normal working status.
Note: If Memory Mode is set to WRAP WHEN FULL: LCD symbol
_____________________________________________________________________________________ Page 4 of 10
2) Memory usage in percentage is shown on LCD. The percentage indicates how muchinternal data memory storage has been used;
3) Number of days, hours, minutes left till memory is full are also displayed on thesecond line;
Figure 3
4) Within 10 seconds, short press again, current date/time is displayed on device LCD. The following figure shows 9/14/2017, 17:30
Figure 4
5) Within 10 seconds, short press again, device S/N will be displayed on LCD.
Figure 5
6) To go back to normal working status, press again, or wait for 10 seconds and device will automatically go back to normal working status.
Note: If Memory Mode is set to WRAP WHEN FULL: LCD symbol starts to flash on the display when the memory is full. Once memory is full, the oldest data points will be overwritten with new data points.
starts to fl ash on the display when the memory is full. Once memory is full, the oldest data points will be overwritten with new data points.If Memory Mode is set to STOP WHEN FULL: LCD symbol MEM starts to fl ash on the display when the memory is 95% full. Once memory is full, the device will stop logging new data points.ENABLE/DISABLE BLUETOOTH1. Quick press twice START/STOP to enable
Bluetooth, and Bluetooth LCD symbol appears;2. Device starts to advertise to be found, and
to be connected. Device Name shown on TraceableGO™ App discovered list looks like CC6535-xxxx, or CC6537-xxxx, where xxxx is the last 4 digits of device serial number.
3. If no connection has been made for ONE MINUTE, Bluetooth will be disabled to save battery life, and Bluetooth LCD symbol disappears, or quick press twice again to disable Bluetooth. To enable again, go to Step (1).
HOW TO SETUP DEVICE Confi gure device before use1. Enable Bluetooth on device.2. Use TraceableGO™ App to connect to device.3. Follow TraceableGO™ App instruction to confi gure
device.4. The following parameters are confi gured through
TraceableGO™ App: START Mode, STOP Mode, ALARM Enable/Disable, Celsius/Fahrenheit, Memory Mode, Data Logging Interval, Alarm Setting.
5. Once device has been confi gured, device enters STANDBY Mode.
Note: While device is connected to our Traceable-GO™ App, if no action has been taken for 5 minutes, device will terminate the connection from our TraceableGO™ App.Note: If Memory Mode is set to WRAP WHEN FULL,
_____________________________________________________________________________________ Page 4 of 10
2) Memory usage in percentage is shown on LCD. The percentage indicates how muchinternal data memory storage has been used;
3) Number of days, hours, minutes left till memory is full are also displayed on thesecond line;
Figure 3
4) Within 10 seconds, short press again, current date/time is displayed on device LCD. The following figure shows 9/14/2017, 17:30
Figure 4
5) Within 10 seconds, short press again, device S/N will be displayed on LCD.
Figure 5
6) To go back to normal working status, press again, or wait for 10 seconds and device will automatically go back to normal working status.
Note: If Memory Mode is set to WRAP WHEN FULL: LCD symbol starts to flash on the display when the memory is full. Once memory is full, the oldest data points will be overwritten with new data points.
appears on LCD; If Memory Mode is set to STOP WHEN FULL, MEM appears on LCD.ALARM1. Once an alarm is triggered by any of temperature,
humidity out of set alarm range, LCD symbol LOW ALM and/or HI ALM starts to fl ash. An Alarm Event will be logged.
2. Pressing START/STOP once will clear the alarm, LCD symbol stops fl ashing. An Alarm Acknowledge Event will be logged.
3. If temperature, or humidity falls back to normal range, an Alarm Event will be logged. If any of temperature, humidity measurement goes back to out of alarm range, alarm will be triggered again.
HOW TO START, STOP, AND RESUME DATA LOGGING1. Devices are factory initialized with default setting:
• START Mode: Push Start• STOP Mode: Push Stop• Memory Mode: Wrap when Memory is Full• Temperature Unit: Celsius• Data Logging Interval: 5 minutes• Alarm Enable/Disable: Enabled• Alarm Setting High Alarm:
▪ Temperature: 8°C▪ Humidity: 75% RH (6537 only)
• Alarm Setting Alarm Low:▪ Temperature: 2°C▪ Humidity: 25% RH (6537 only)
• Date/Time is also set to current to central time.Note: Devices are shipped with battery, powered on, and ready to use if using default setting. Without powered on, device will lose track of date/time.Note: If a user intends to use device for different setting other than default, device must be re-initialized.
_____________________________________________________________________________________ Page 1 of 10
6535/6537 BLUETOOTH DATA LOGGER INSTRUCTION 11/01/2017
1. Mode Number:
6535: Bluetooth Data Logging Thermometer6537: Bluetooth Data Logging Hygrometer
2. Device Display:LCD View Angle: 6 O’clock
Figure 1: 6535 (left), 6537 (right)
Dimension L x H x D: 3.5” x 2” x 0.79” (89mm x 51mm x 20mm)
3. Temperature:Operating Range: -20°C to 70°CResolution: 0.1°CAccuracy:
6535: ±0.4°C 6537: ±0.4°C between -10°C and 70°C, otherwise ±0.5°C
4. Relative humidity (6537 Only):Range: 0% to 95%RH, non-condensingResolution: 0.1% RHAccuracy: ±3% RH between 5 to 75%, otherwise ±5% RH
Recommended Humidity Operating Range: 20% to 80% (non-condensing) over -10°C to 60°C.
5. Battery• 2 AAA Alkaline batteries (3.0V)• Battery Level Indication:
Battery Level LCD Symbol
≥ 80% (2.78V)
©2018 Traceable® Products. 92-6535-00 Rev. 0 030818
TRACEABLEGODATALOGGER
INSTRUCTIONS
®
Traceable® is a registered trademark of Cole-Parmer.Cat. No. 6535, 6537
2. If device’s START Mode is confi gured as PUSH BUTTON TO START (default), device LCD displays ‘push to start’ (Figure 4). Press and hold START/STOP until LCD symbol appears. Device enters RUN Mode. If device’s START Mode is confi gured as IMMEDIATE START, device enters RUN Mode immediately. If device’s START Mode is confi gured as DELAYED TIME START, delayed start time set by user is counting down on device LCD. Once the counting time reaches 0, device enters RUN Mode.
_____________________________________________________________________________________ Page 7 of 10
Figure 6
3) If device in RUN Mode, LCD symbol appears, and device logs data at user-defined interval. If device’s STOP Mode is configured as PUSH BUTTON TO STOP, press
and hold until LCD symbol appears. Device enters STOP Mode. If device’sSTOP Mode is configured as NEVER STOP, device will ignore the button press, anddevice will stop when memory is full if Memory Mode is set to STOP WHEN FULL, ordevice will stop when APP is connected to device and start to download data.
4) If device in STOP Mode, press and hold until LCD symbol appears. Deviceenters RUN Mode, and resumes to log data at current setting. Every time deviceresumes to log data from STOP Mode, Min/Max values are reset.
Note: The combination of Wrap When Full Memory Mode and NEVER STOP Stop Mode cannot happen because the device will never stop in this combination. APP prevents such combination to happen.
Note: If device in STOP Mode, START Mode will be set to PUSH BUTTON TO START regardless of previous Start Mode Setting. If Delayed Start Mode is needed while device in STOP Mode, device must be re-configured.
Note: While device is connected to APP, once Device has received command from APP to upload data to APP, device will stop logging data and enter STOP Mode if it is still in RUN mode.
Note: All data stored in %RH, Celsius
20.Clear Device Internal Data Memory Storage1) Data points stored in device internal storage can only be cleared through APP.2) Each time device is configured, all stored data points will be cleared.3) Run Time/Alarm Time are also reset.
21.Download Data
1) If device is not in STOP Mode, press and hold for 3 seconds until LCD symbol appears. Device enters STOP Mode;
Or
3. If in RUN Mode, LCD symbol RUN appears, and logs data at user-defi ned interval. If STOP Mode is confi gured as PUSH BUTTON TO STOP, press and hold START/STOP until LCD symbol STOP appears. Device enters STOP Mode. If STOP Mode is confi gured as NEVER STOP, device will ignore button press, and will stop when memory is full if Memory Mode is set to STOP WHEN FULL, or will stop when TraceableGO™ App is connected to device and downloads the data.
4. If in STOP Mode, press and hold START/STOP until LCD symbol RUN appears. Device enters RUN Mode and resumes to log data at current setting. Anytime device resumes to log data from STOP Mode, Min/Max values are reset.
Note: If device in STOP Mode, START Mode will be set to PUSH BUTTON TO START regardless of previous Start Mode Setting. If Delayed Start Mode is needed while device in STOP Mode, device must be re-confi gured.Note: While device is connected to TraceableGO™ App, once Device has received command from App to upload data to App, device will stop logging data and enter STOP Mode if it is still in RUN mode.CLEAR DATA MEMORY STORAGE1. Data points stored in device internal storage can
only be cleared through TraceableGO™ App.2. Each time device is confi gured, all stored data
points will be cleared.3. Run Time/Alarm Time are also reset.
DOWNLOAD DATA1. If device is not in STOP Mode, press and hold
START/STOP for 3 seconds until LCD symbol appears. Device enters STOP Mode
-OR-If Stop Mode is set to NEVER STOP and Memory Mode is set to STOP WHEN FULL and device is in RUN Mode, skip Step (1).
2. Quick press START/STOP twice to enable Bluetooth, and Bluetooth LCD symbol appears. Device starts to advertise.
3. Connects to device through TraceableGO™ App. Once connected, device LCD displays ‘ble connect’:
_____________________________________________________________________________________ Page 8 of 10
if Stop Mode is set to NEVER STOP, and Memory Mode is set to STOP WHEN FULL and device is in RUN Mode, skip Step (1);
2) Quick press twice to enable Bluetooth, and Bluetooth LCD symbol appears. Device starts to advertise;
3) Connects to device through APP. Once connected, device LCD displays ‘ble connect’(Figure 6);
Figure 7
4) Follow APP’s instruction on how to download data from device. While datadownloading is in process, device LCD displays ‘dat upload_’ (Figure 7);
Figure 8
5) Once download process is complete, device LCD displays ‘ble connect’.6) User can view, export data through APP.
Note: Full memory data downloading takes as less as 5 minutes to complete. The actual downloading time varies on how data logged, mobile device type, and distance between device and mobile device.
Bluetooth Connection Interval Full Memory Data Upload Duration 7.5 ms 4.9 min 15 ms 7.2 min 30 ms 10.5 min
22. Display firmware version:
1) Quick press 3 times; 2) Device displays Firmware Revision ❶, CPU Restart Cause ❷, Last Error Code ❸ (00
00 means no error).
4. Follow TraceableGO™ App instruction on how to download data from device. While data downloading is in process, device LCD displays ‘dat upload_’:
_____________________________________________________________________________________ Page 8 of 10
if Stop Mode is set to NEVER STOP, and Memory Mode is set to STOP WHEN FULL and device is in RUN Mode, skip Step (1);
2) Quick press twice to enable Bluetooth, and Bluetooth LCD symbol appears. Device starts to advertise;
3) Connects to device through APP. Once connected, device LCD displays ‘ble connect’(Figure 6);
Figure 7
4) Follow APP’s instruction on how to download data from device. While datadownloading is in process, device LCD displays ‘dat upload_’ (Figure 7);
Figure 8
5) Once download process is complete, device LCD displays ‘ble connect’.6) User can view, export data through APP.
Note: Full memory data downloading takes as less as 5 minutes to complete. The actual downloading time varies on how data logged, mobile device type, and distance between device and mobile device.
Bluetooth Connection Interval Full Memory Data Upload Duration 7.5 ms 4.9 min 15 ms 7.2 min 30 ms 10.5 min
22. Display firmware version:
1) Quick press 3 times; 2) Device displays Firmware Revision ❶, CPU Restart Cause ❷, Last Error Code ❸ (00
00 means no error).
5. Once download process is complete, device LCD displays ‘ble connect’.
6. User can view, export data through TraceableGO™ App.
Note: Full memory data downloading takes as little as 5 minutes to complete. The actual downloading time varies on how data logged, mobile device type, and distance between device and mobile device.
WARRANTY, SERVICE, OR RECALIBRATIONFor warranty, service, or recalibration, contact:
TRACEABLE® PRODUCTS12554 Old Galveston Rd. Suite B230
Webster, Texas 77598 USAPh. 281 482-1714 • Fax 281 482-9448
E-mail [email protected] • www.traceable.com
Traceable® Products is ISO 9001:2015 Quality-Certifi ed by DNV and ISO/IEC 17025:2005
accredited as a Calibration Laboratory by A2LA.