mini-books and manipulatives -...
TRANSCRIPT

N E W Y O R K • T O R O N T O • L O N D O N • A U C K L A N D • S Y D N E Y
M E X I C O C I T Y • N E W D E L H I • H O N G K O N G
B Y D O N A L D M . S I L V E R
A N D P A T R I C I A J . W Y N N E
Mini-Books and ManipulativesMini-Books and Manipulatives
Lift & Look Science Mini-Books and Manipulatives © Silver & Wynne, Scholastic Teaching Resources

Scholastic Inc. grants teachers permission to photocopy the pattern pages in this book for classroom use. No other part of this publication maybe reproduced in whole or in part, or stored in a retrieval system, or transmitted in any form or by any means, electronic, mechanical,
photocopying, recording, or otherwise, without written permission of the publisher. For information regarding permission, write to ScholasticProfessional Books, 555 Broadway, New York, NY 10012.
Cover and interior art by Patricia J. WynneCover and interior design by Kathy Massaro
ISBN: 0-590-68567-8
Copyright © 2000 by Donald M. Silver and Patricia J. Wynne.Published by Scholastic Inc.
All rights reserved.Printed in the U.S.A.
For Ronnie Levine,my mother’s friend and mine
—DS
To my mother,who was always lookin
g.
—PJW
Lift & Look Science Mini-Books and Manipulatives © Silver & Wynne, Scholastic Teaching Resources

INTRODUCTION .................................................................................................................................................. 4
AnimalsBUTTERFLY POP-UP ..........................................................................................................................................6THE SPIDER’S WEB ........................................................................................................................................ 11GLIDE, SQUIRREL, GLIDE! ........................................................................................................................ 15INSIDE A BEAVER LODGE ............................................................................................................................ 19
PlantsPLANT HELPERS ................................................................................................................................................ 23GROW AN OAK TREE .................................................................................................................................... 27
HabitatsTHE BACKYARD BOOK ................................................................................................................................ 31WHAT LIVES IN A POND? .......................................................................................................................... 35LIFE IN THE SEA .............................................................................................................................................. 39
The Human BodyWHAT’S INSIDE A TOOTH? ........................................................................................................................ 42THE BODY BOOK ............................................................................................................................................ 45
Earth and SkyWHAT WILL THE WEATHER BE? ........................................................................................................ 49EXPLODING VOLCANO ................................................................................................................................ 53HOW ARE THE SEASONS CHANGING? .............................................................................................. 56THE CHANGING MOON ............................................................................................................................ 61
CCoonntteennttssCCoonntteennttss
Lift & Look Science Mini-Books and Manipulatives © Silver & Wynne, Scholastic Teaching Resources
IInnttrroodduuccttiioonnIInnttrroodduuccttiioonn
4
Children are naturally curious. They want to find out what is happening inthe world around them. They start by using their senses of sight, touch,hearing, smell, and even taste to explore their surroundings and learn about
nature. Then come the questions that often start with “why” or “how.” By the timechildren enter preschool or kindergarten, they’re eager to learn by reading or by lookingat pictures. These lift-and-look flap books and manipulatives have been designed sothat they are easy to make and easy to read. Children get a sense of accomplishmentfrom creating and coloring their very own mini-books and manipulatives. Eachcontains simple language and engaging pictures that help children gain confidence asreaders. These activities also explain or reinforce discoveries children may already havemade on their own. From learning how a spider spins its web to how the moonchanges each month, children will be fascinated by this hands-on approach to learning.
What’s InsideThis book is divided into five sections that cover a range of science topics. The lift-and-look projects are independent and can be used in any order. Within each chapterare lessons that feature the following:
OBJECTIVE What students will learn and accomplish
MEETING THE SCIENCE STANDARDS Identifies correlations with the NationalScience Education Standards
SCIENCE CORNER Summary of the science background information you need toteach the lesson
MAKING THE BOOK Easy-to-follow instructions with diagrams for assembling themodels
TEACHING WITH THE BOOK Step-by-step lesson map (including discussionquestions) for using the book to teach science concepts
MORE TO DO Related activities to extend learning
REPRODUCIBLE PAGES Ready-to-photocopy patterns for each lift-and-look project,which can be distributed to students
RESOURCES Related books and other media for students and teachers
Lift & Look Science Mini-Books and Manipulatives © Silver & Wynne, Scholastic Teaching Resources
Helpful HintsAs with any new instructional material, it’s always a good idea to make the projects yourselfbefore introducing them to your class. That way you can anticipate any questions that may ariseand be ready to help your students as needed. When your students are ready to make theirs,you may want to model the steps for them and invite them to follow along. Or your finishedbook or manipulative can serve as a guide for students to study as they make their own books.
w The thickest black lines on the reproducible pages are CUT lines.Dotted lines on the reproducible pages are FOLD lines.
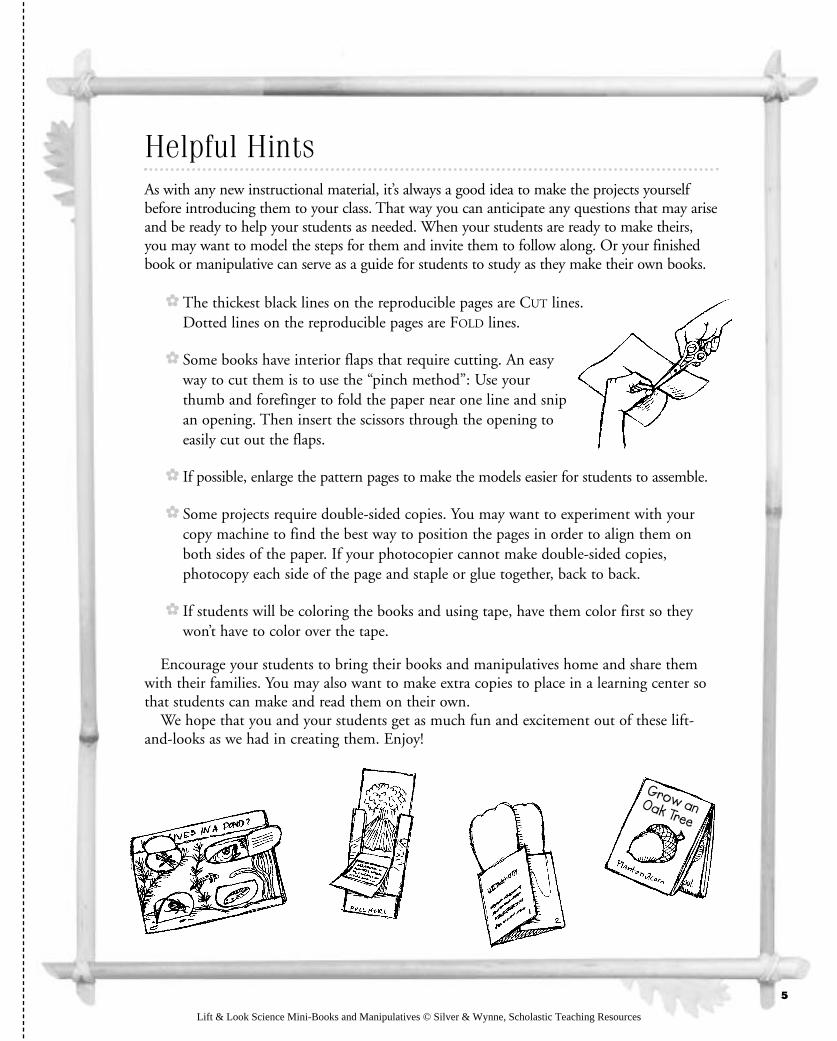
w Some books have interior flaps that require cutting. An easyway to cut them is to use the “pinch method”: Use yourthumb and forefinger to fold the paper near one line and snipan opening. Then insert the scissors through the opening toeasily cut out the flaps.
w If possible, enlarge the pattern pages to make the models easier for students to assemble.
w Some projects require double-sided copies. You may want to experiment with yourcopy machine to find the best way to position the pages in order to align them onboth sides of the paper. If your photocopier cannot make double-sided copies,photocopy each side of the page and staple or glue together, back to back.
w If students will be coloring the books and using tape, have them color first so theywon’t have to color over the tape.
Encourage your students to bring their books and manipulatives home and share themwith their families. You may also want to make extra copies to place in a learning center sothat students can make and read them on their own.
We hope that you and your students get as much fun and excitement out of these lift-and-looks as we had in creating them. Enjoy!
5
Grow anOak Tree
Grow anOak Tree
Lift & Look Science Mini-Books and Manipulatives © Silver & Wynne, Scholastic Teaching Resources

A N I M A L S
1 Photocopy pages 9 and 10. Color and cut out the threepieces with the solid black lines around them.
2 Fold pages 2 and 3 and pages 1 and 4 along the dottedlines so that the blank sides face each other inside.
Nestle pages 2 and 3 inside pages 1 and 4 so that page 1 ison the outside. Staple the pages together as shown.
6
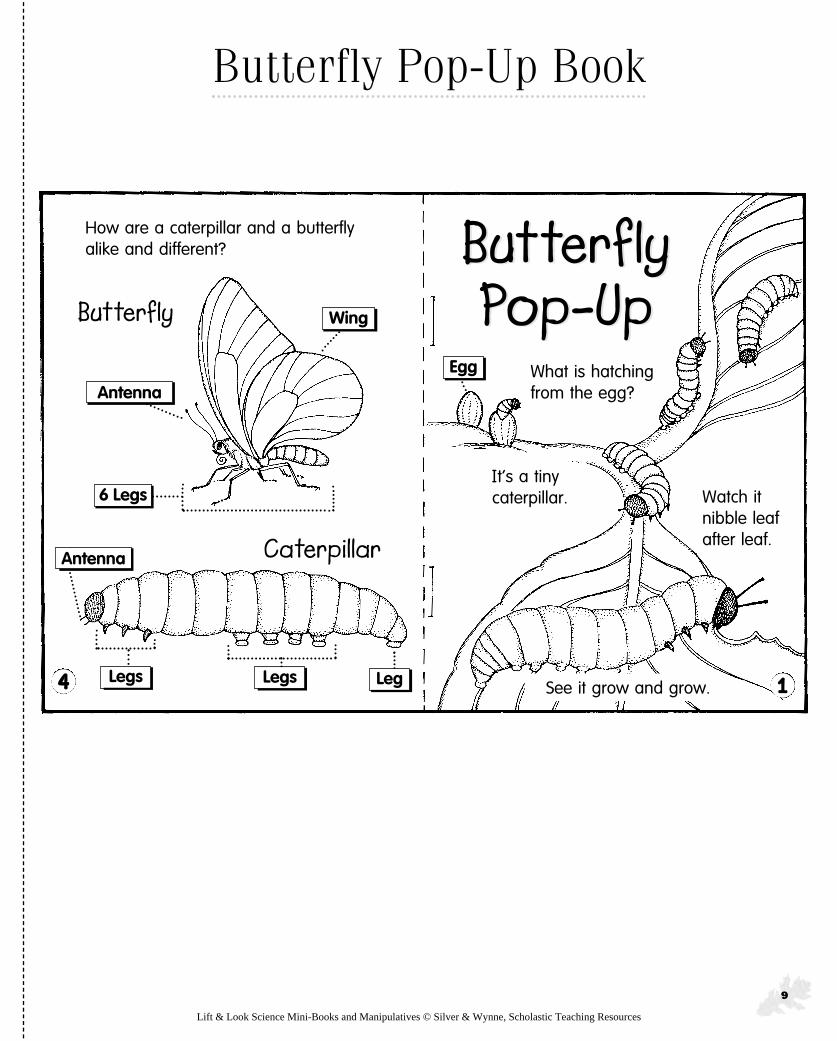
Butterfly Pop-UpStudents make a pop-up book and observe
the changes a caterpillar goes through as it metamorphoses into a butterfly.
Butterflies lay their eggs on plant leaves. When a caterpillarhatches out of an egg, it feeds almost continuously on leavesand plants. As the caterpillar gets bigger, it molts, or sheds,
its skin and grows a new one. This molting happens several times,until the caterpillar is fully grown. When a caterpillar sheds its skinfor the last time, a hard case called a chrysalis forms around itsbody. Inside the chrysalis, the caterpillar’s body breaks down andtransforms into an adult butterfly—with wings, scales, antennae,and six legs. After a few weeks, the butterfly emerges from its case.The new butterfly hangs upside down while its wings unfold anddry. The butterfly then takes off in search of sweet nectar for foodand to look for a mate. Many butterflies live only a couple ofweeks, while others may live several months.
{ reproducible pages 9 and 10
{ scissors{ tape{ stapler{ colored pencils,
crayons, or markers(optional)
{ pocket mirrors(optional)
M A T E R I A L S
Making the BookMaking the Book
{ Characteristics ofOrganisms
{ Life Cycles ofOrganisms
{ Organisms and TheirEnvironments
MEETING THE SCIENCE
STANDARDS
Lift & Look Science Mini-Books and Manipulatives © Silver & Wynne, Scholastic Teaching Resources
A N I M A L S
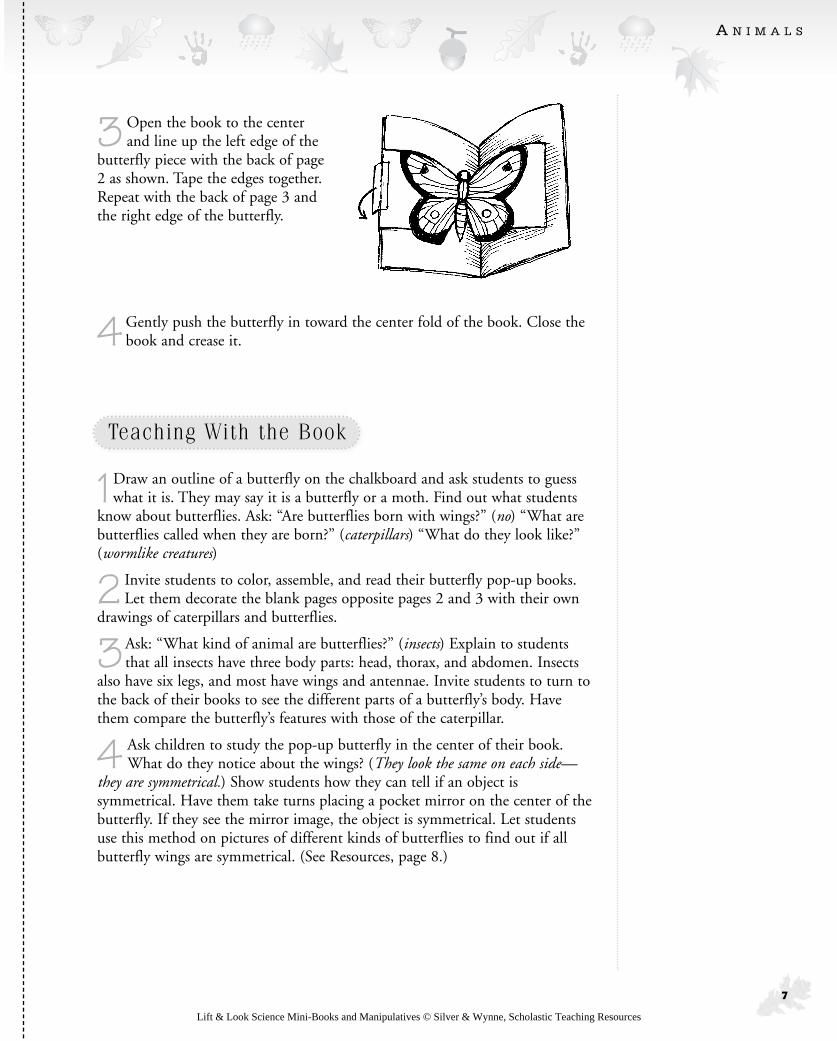
3Open the book to the centerand line up the left edge of the
butterfly piece with the back of page2 as shown. Tape the edges together.Repeat with the back of page 3 andthe right edge of the butterfly.
4 Gently push the butterfly in toward the center fold of the book. Close thebook and crease it.
1Draw an outline of a butterfly on the chalkboard and ask students to guesswhat it is. They may say it is a butterfly or a moth. Find out what students
know about butterflies. Ask: “Are butterflies born with wings?” (no) “What arebutterflies called when they are born?” (caterpillars) “What do they look like?”(wormlike creatures)
2 Invite students to color, assemble, and read their butterfly pop-up books.Let them decorate the blank pages opposite pages 2 and 3 with their own
drawings of caterpillars and butterflies.
3Ask: “What kind of animal are butterflies?” (insects) Explain to studentsthat all insects have three body parts: head, thorax, and abdomen. Insects
also have six legs, and most have wings and antennae. Invite students to turn tothe back of their books to see the different parts of a butterfly’s body. Havethem compare the butterfly’s features with those of the caterpillar.
4 Ask children to study the pop-up butterfly in the center of their book.What do they notice about the wings? (They look the same on each side—
they are symmetrical.) Show students how they can tell if an object issymmetrical. Have them take turns placing a pocket mirror on the center of thebutterfly. If they see the mirror image, the object is symmetrical. Let studentsuse this method on pictures of different kinds of butterflies to find out if allbutterfly wings are symmetrical. (See Resources, page 8.)
7
Teaching With the BookTeaching With the Book
Lift & Look Science Mini-Books and Manipulatives © Silver & Wynne, Scholastic Teaching Resources
A N I M A L S
Grow Your Own ButterflyStudents can witness firsthand the life cycle ofa butterfly right in your own classroom. Tobuild a butterfly habitat, use sharp scissors tocut off the top of an empty, clear, one-literplastic bottle. Place a piece of cheesecloth overthe open end. Use a rubber band to hold it inplace. Add twigs and leaves for the caterpillar.You can order caterpillars from science supplycatalogs. (See Resources, left, for moreinformation.) Have students monitor theircaterpillar every day and record theirobservations. When the butterfly emergesfrom its chrysalis, release the butterfly intoyour schoolyard or a nearby park.
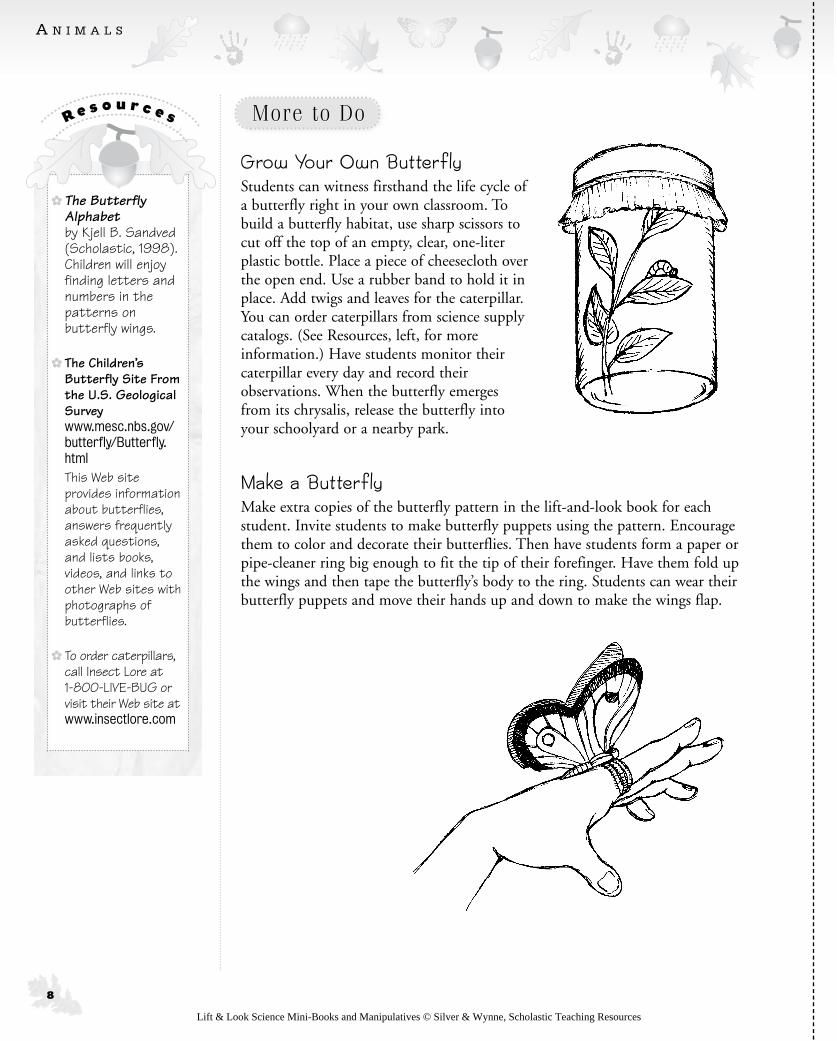
Make a ButterflyMake extra copies of the butterfly pattern in the lift-and-look book for eachstudent. Invite students to make butterfly puppets using the pattern. Encouragethem to color and decorate their butterflies. Then have students form a paper orpipe-cleaner ring big enough to fit the tip of their forefinger. Have them fold upthe wings and then tape the butterfly’s body to the ring. Students can wear theirbutterfly puppets and move their hands up and down to make the wings flap.
8
More to DoMore to Do
w The ButterflyAlphabet by Kjell B. Sandved(Scholastic, 1998).Children will enjoyfinding letters andnumbers in thepatterns onbutterfly wings.
w The Children’sButterfly Site Fromthe U.S. GeologicalSurveywww.mesc.nbs.gov/butterfly/Butterfly.htmlThis Web siteprovides informationabout butterflies,answers frequentlyasked questions,and lists books,videos, and links toother Web sites withphotographs ofbutterflies.
w To order caterpillars,call Insect Lore at1-800-LIVE-BUG orvisit their Web site atwww.insectlore.com
R e s o u r c e s
Lift & Look Science Mini-Books and Manipulatives © Silver & Wynne, Scholastic Teaching Resources
9
Butterfly Pop-Up Book
ButterflyPop-Up
4 1
What is hatchingfrom the egg?
It’s a tinycaterpillar. Watch it
nibble leafafter leaf.
See it grow and grow.
How are a caterpillar and a butterfly alike and different?
Egg
ButterflyPop-Up
Antenna
Antenna
Butterfly
Caterpillar
LegLegs
6 Legs
Wing
Legs
Lift & Look Science Mini-Books and Manipulatives © Silver & Wynne, Scholastic Teaching Resources

1 0
Butterfly Pop-Up Book
3 2
One day the caterpillar stops growing.A hard case, called a chrysalis, forms around it.
Inside, the caterpillar turns into a butterfly.Turn the page to let the butterfly out!
The butterflysips sweetflower juice,called nectar.
The butterfly finds a mate. Then it lays its eggs.What will hatch from the eggs?
Eggs
Chrysalis
Lift & Look Science Mini-Books and Manipulatives © Silver & Wynne, Scholastic Teaching Resources
A N I M A L S
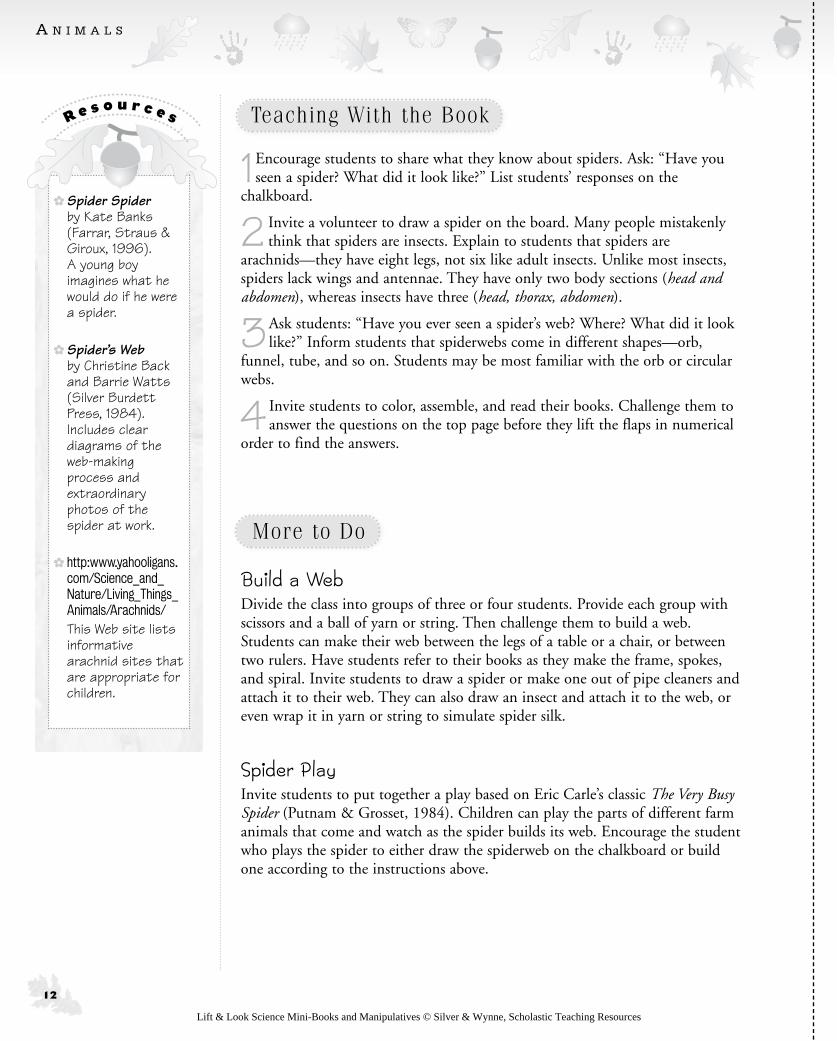
1Photocopy pages 13 and 14.
2 Cut out the center window on page 13along the solid black lines. Then cut the
flaps.
3 Place page 13 over page 14 so that thesides line up.
4 Tape the sheets together at the top,bottom, and sides.
1 1
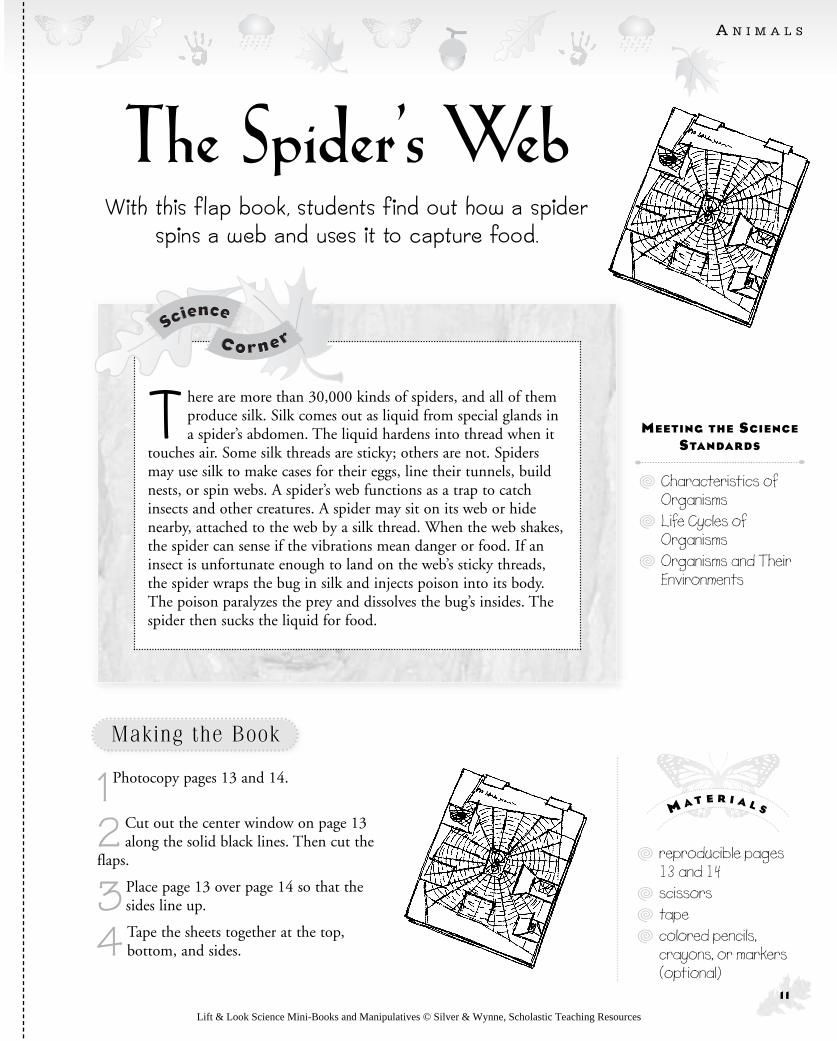
There are more than 30,000 kinds of spiders, and all of themproduce silk. Silk comes out as liquid from special glands ina spider’s abdomen. The liquid hardens into thread when it
touches air. Some silk threads are sticky; others are not. Spidersmay use silk to make cases for their eggs, line their tunnels, buildnests, or spin webs. A spider’s web functions as a trap to catchinsects and other creatures. A spider may sit on its web or hidenearby, attached to the web by a silk thread. When the web shakes,the spider can sense if the vibrations mean danger or food. If aninsect is unfortunate enough to land on the web’s sticky threads,the spider wraps the bug in silk and injects poison into its body.The poison paralyzes the prey and dissolves the bug’s insides. Thespider then sucks the liquid for food.
The Spider’s WebWith this flap book, students find out how a spider
spins a web and uses it to capture food.
{ reproducible pages13 and 14
{ scissors{ tape{ colored pencils,
crayons, or markers(optional)
M A T E R I A L S
Making the BookMaking the Book
{ Characteristics ofOrganisms
{ Life Cycles ofOrganisms
{ Organisms and TheirEnvironments
MEETING THE SCIENCE
STANDARDS
Lift & Look Science Mini-Books and Manipulatives © Silver & Wynne, Scholastic Teaching Resources
A N I M A L S
1Encourage students to share what they know about spiders. Ask: “Have youseen a spider? What did it look like?” List students’ responses on the
chalkboard.
2 Invite a volunteer to draw a spider on the board. Many people mistakenlythink that spiders are insects. Explain to students that spiders are
arachnids—they have eight legs, not six like adult insects. Unlike most insects,spiders lack wings and antennae. They have only two body sections (head andabdomen), whereas insects have three (head, thorax, abdomen).
3Ask students: “Have you ever seen a spider’s web? Where? What did it looklike?” Inform students that spiderwebs come in different shapes—orb,
funnel, tube, and so on. Students may be most familiar with the orb or circularwebs.
4 Invite students to color, assemble, and read their books. Challenge them toanswer the questions on the top page before they lift the flaps in numerical
order to find the answers.
Build a WebDivide the class into groups of three or four students. Provide each group withscissors and a ball of yarn or string. Then challenge them to build a web.Students can make their web between the legs of a table or a chair, or betweentwo rulers. Have students refer to their books as they make the frame, spokes,and spiral. Invite students to draw a spider or make one out of pipe cleaners andattach it to their web. They can also draw an insect and attach it to the web, oreven wrap it in yarn or string to simulate spider silk.
Spider PlayInvite students to put together a play based on Eric Carle’s classic The Very BusySpider (Putnam & Grosset, 1984). Children can play the parts of different farmanimals that come and watch as the spider builds its web. Encourage the studentwho plays the spider to either draw the spiderweb on the chalkboard or buildone according to the instructions above.
1 2
Teaching With the BookTeaching With the Book
More to DoMore to Do
wSpider Spiderby Kate Banks(Farrar, Straus &Giroux, 1996).A young boyimagines what hewould do if he werea spider.
wSpider’s Webby Christine Backand Barrie Watts(Silver BurdettPress, 1984).Includes cleardiagrams of theweb-makingprocess andextraordinaryphotos of thespider at work.
w http:www.yahooligans.com/Science_and_Nature/Living_Things_Animals/Arachnids/This Web site listsinformativearachnid sites thatare appropriate forchildren.
R e s o u r c e s
Lift & Look Science Mini-Books and Manipulatives © Silver & Wynne, Scholastic Teaching Resources

1 3
1
6
5
4
3
2
Cut out
What is hanging between the twigs?It’s a spiderweb made of silk.The spider sits in the web and waits.
The Spider’s WebThe Spider’s WebHow did the spider build its web?Lift flaps 1, 2, and 3 to find out.
The spider feels the web shake.Is it an enemy? Maybe it’s dinner.Lift flaps 4, 5, and 6 to see what thespider does.
Lift & Look Science Mini-Books and Manipulatives © Silver & Wynne, Scholastic Teaching Resources

1 4
The spider makes a frame of silk.
It fills in the frame with silk threads.
The spider spins silkcircles and adds stickythreads.
A grasshopper lands on the web. It gets stuck.
The spider wraps the grasshopper in silkand bites it.
The grasshopper’s insidesturn to liquid. The spiderdrinks it for dinner.
Lift & Look Science Mini-Books and Manipulatives © Silver & Wynne, Scholastic Teaching Resources
A N I M A L S
1 Photocopy pages 17 and 18.
2 Cut out the two squirrel tail andbookmark pieces along the solid
black outer lines. Tape each set togetherback to back.
3Tape the tail to the squirrel’s body.
4Hold the squirrel piece so that the eyes are on top.Poke a hole through the black dot as shown.
1 5
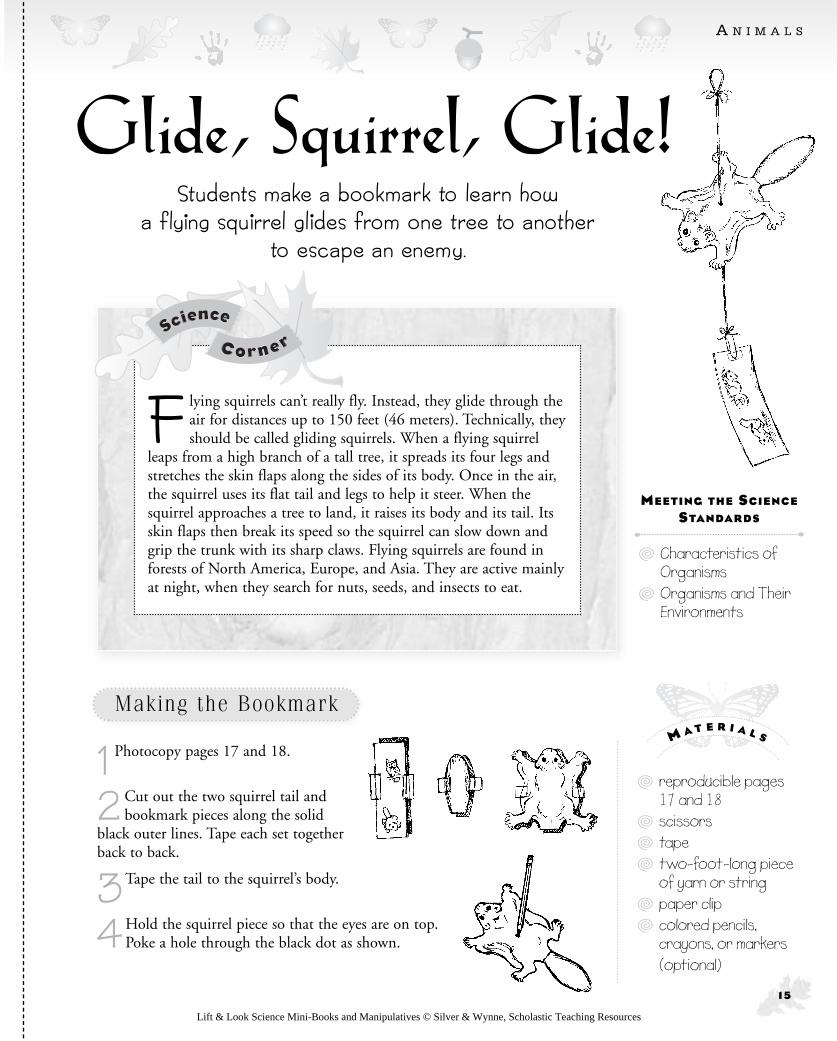
Flying squirrels can’t really fly. Instead, they glide through theair for distances up to 150 feet (46 meters). Technically, theyshould be called gliding squirrels. When a flying squirrel
leaps from a high branch of a tall tree, it spreads its four legs andstretches the skin flaps along the sides of its body. Once in the air,the squirrel uses its flat tail and legs to help it steer. When thesquirrel approaches a tree to land, it raises its body and its tail. Itsskin flaps then break its speed so the squirrel can slow down andgrip the trunk with its sharp claws. Flying squirrels are found inforests of North America, Europe, and Asia. They are active mainlyat night, when they search for nuts, seeds, and insects to eat.
Glide, Squirrel, Glide!Students make a bookmark to learn how
a flying squirrel glides from one tree to another to escape an enemy.
{ reproducible pages17 and 18
{ scissors{ tape{ two-foot-long piece
of yarn or string{ paper clip{ colored pencils,
crayons, or markers(optional)
M A T E R I A L S
{ Characteristics ofOrganisms
{ Organisms and TheirEnvironments
MEETING THE SCIENCE
STANDARDS
Making the BookmarkMaking the Bookmark
Lift & Look Science Mini-Books and Manipulatives © Silver & Wynne, Scholastic Teaching Resources

A N I M A L S
5 Slide the paper clip over the top of thebookmark, as shown, and tape it in place.
6 Tie a loop in one end of the string, as shown.Thread the other end of the string through
the hole in the squirrel. Tie a fat knot abouthalfway down from the loop on the other side ofthe squirrel. Tie the unlooped end to the paper clip.
1 Have students think about different ways they move from one place toanother. (walk, run, swim, hop, and so on) Make a list on the chalkboard.
Then challenge students to name animals that also move in these ways. Listtheir responses next to the movement words.
2 Explain to students that some animals can move in ways that people can’t. Forexample, people can’t fly. We need airplanes and other flying machines to help
us take to the air. Ask: “Which animals can fly?” (birds, bats, and many insects)
3 Inform students that some animals may look like they’re flying, but theydon’t have actual wings. Instead, these animals glide through the air. One of
these animals is the flying squirrel. Ask students: “How do squirrels get around?”(Many squirrels run on the ground, climb trees, and leap from tree to tree.) “Haveyou ever seen a squirrel leap from branch to branch or from tree to tree?”
4 Invite students to color, assemble, and read their bookmarks. Students canfold their squirrels along the dotted lines and then open them to show how
the skin flaps stretch when the squirrel glides.
Control That FallFlying squirrels use their skin flaps tocontrol how fast they fall. The flaps catchthe air and slow the animal’s descent. Aparachute works the same way. Havestudents make a parachute using an 8-inch square sheet of paper, four 8-inch pieces of string, tape, and two rolled-up balls of paper. Tape one end of each string to the paper as shown. Tape theother end to one paper ball. Have students hold the second paper ball in onehand and the parachute in the other. Tell students to lift their arms as high asthey can and drop the ball and parachute at the same time. Which takes longerto fall? (the parachute)
1 6
Teaching With the BookTeaching With the Book
More to DoMore to Do
w Flying Squirrel atAcorn Place byBarbara GainesWinkelman(Soundprints,1998). This bookand accompanyingaudiocassettefollow a night in thelife of a flyingsquirrel as itsearches for aplace to nest,hunts for food, andavoids enemies.
wNight Glidersby Joanne Ryder(BridgewaterBooks, 1996).Young readers geta close-up look atflying squirrels asthey glide from treeto tree in theirnightly search forfood.
R e s o u r c e s
Lift & Look Science Mini-Books and Manipulatives © Silver & Wynne, Scholastic Teaching Resources

1 7
Glide, Squirrel,
Glide!
Glid
e,Sq
uirre
l,G
lide!
Wat
ch o
ut, fly
ing
squi
rrel
. A
hun
gry
owl i
s ne
arby
.
Qui
ck!
Spre
ad y
our
legs
.St
retc
h yo
ur s
kin
flaps
. G
lide
to a
noth
er tre
e.
Glid
e,Sq
uirre
l,G
lide!
1Ü
Lift & Look Science Mini-Books and Manipulatives © Silver & Wynne, Scholastic Teaching Resources

1 8
Glide, Squirrel,
Glide!Th
ere’
s th
e tree
.N
ow, ra
ise
your
bod
y an
d ta
il.
Gra
b th
e trun
kw
ith y
our
shar
p cl
aws
and
land
.
The
owl
won
’t fin
d yo
u th
ere.
Yo
u’re
saf
e!
Hur
ry to
the
othe
r si
de o
fth
e trun
k.
2
Lift & Look Science Mini-Books and Manipulatives © Silver & Wynne, Scholastic Teaching Resources
A N I M A L S
1 9
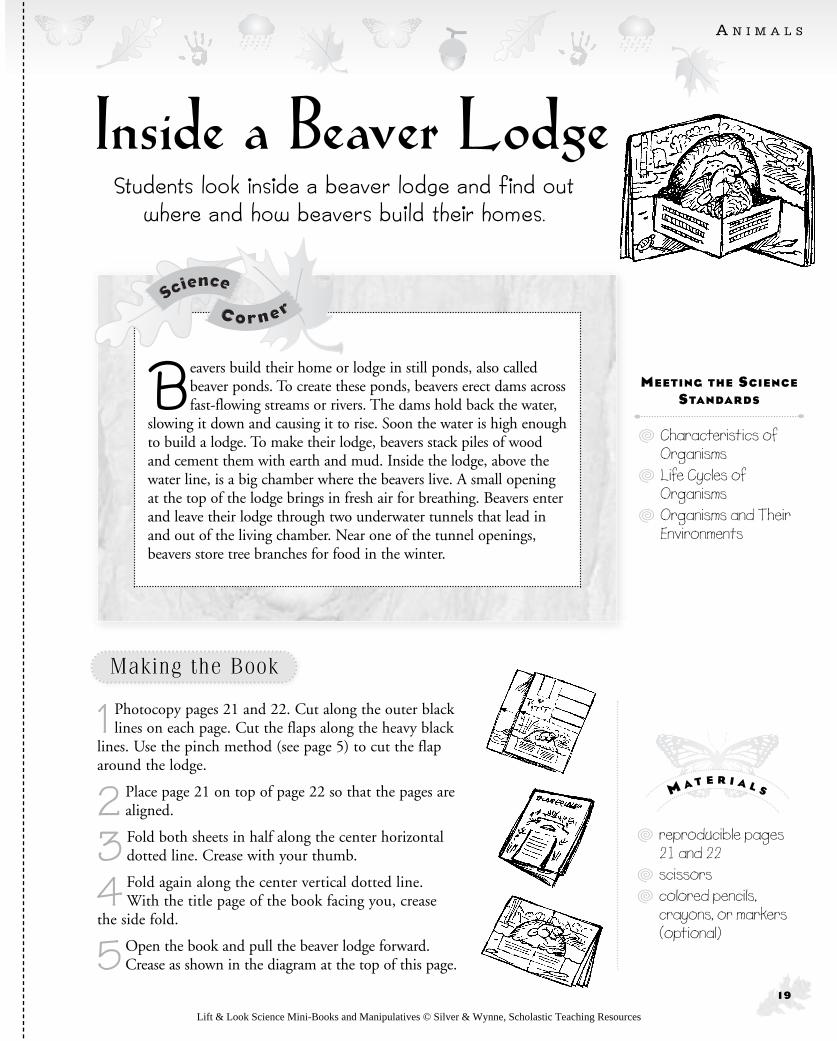
Beavers build their home or lodge in still ponds, also calledbeaver ponds. To create these ponds, beavers erect dams acrossfast-flowing streams or rivers. The dams hold back the water,
slowing it down and causing it to rise. Soon the water is high enoughto build a lodge. To make their lodge, beavers stack piles of woodand cement them with earth and mud. Inside the lodge, above thewater line, is a big chamber where the beavers live. A small openingat the top of the lodge brings in fresh air for breathing. Beavers enterand leave their lodge through two underwater tunnels that lead inand out of the living chamber. Near one of the tunnel openings,beavers store tree branches for food in the winter.
Inside a Beaver LodgeStudents look inside a beaver lodge and find out
where and how beavers build their homes.
{ reproducible pages21 and 22
{ scissors{ colored pencils,
crayons, or markers(optional)
M A T E R I A L S
Making the BookMaking the Book
1 Photocopy pages 21 and 22. Cut along the outer blacklines on each page. Cut the flaps along the heavy black
lines. Use the pinch method (see page 5) to cut the flaparound the lodge.
2 Place page 21 on top of page 22 so that the pages arealigned.
3 Fold both sheets in half along the center horizontaldotted line. Crease with your thumb.
4 Fold again along the center vertical dotted line. With the title page of the book facing you, crease
the side fold.
5Open the book and pull the beaver lodge forward.Crease as shown in the diagram at the top of this page.
{ Characteristics ofOrganisms
{ Life Cycles ofOrganisms
{ Organisms and TheirEnvironments
MEETING THE SCIENCE
STANDARDS
Lift & Look Science Mini-Books and Manipulatives © Silver & Wynne, Scholastic Teaching Resources

A N I M A L S
1 Bring in pictures of different animal homes—a bird’s nest, a beehive, or atermite mound. Have students think about animal homes—what they look like,
where they can be found, how animals build them, and so on. Share the pictureswith students to help them get a better sense of where different animals live.
2 Find out what students know about beavers’ homes. Ask: “What does abeaver’s home look like?” (a pile of sticks, usually in the middle of a pond)
Inform students that a beaver’s home is also called a lodge.
3 Invite students to color, assemble, and read their flap books.
4When students lift the flap on the cover page, they will see an underwatertunnel that leads to the beaver lodge. When they open their books, students
will see two tunnels that lead in and out of the lodge. Explain to students thatanimals larger than beavers cannot fit through the tunnels. Ask: “Why mightthis be important to beavers?” (Predators can’t enter the lodge.)
5On page 4, students will read about how a beaver uses other parts of its bodyto build a home. For example, a beaver uses its tail and webbed feet to swim
and to carry sticks to its lodge. Inform students that a beaver’s front teeth keepgrowing throughout its life. Munching through hard wood helps to wear downits teeth so they don’t grow too long.
Busy as BeaversStudents can’t really appreciate a beaver’s building expertise until they try to builda lodge themselves. Collect twigs and branches, and challenge your students tobuild a mini beaver lodge using the picture in their books as a guide. (If theyprefer, children can try their hand at building a beaver dam in a plastic dishpan.)When students are finished building, test the strength of their structure: Havestudents push a pencil through holes in their lodges. What happens? Informstudents that beavers fill the holes in their dams or lodges with mud to keep waterout. In winter, the mud covering a beaver lodge freezes solid and keeps out foxesand other predators that can reach the lodge by walking across the frozen pond.
In a “People House”Houses around the world look very different from each other. Have studentslook through old magazines and bring in pictures of different homes. Encouragestudents to compare their own homes with those in the pictures. Ask: “How arethey different? How are they alike?”
2 0
Teaching With the BookTeaching With the Book
More to DoMore to Do
wBeaver at LongPond by William T.George(Soundprints,1988). Throughdramatic, realisticillustrations andsimple text,readers follow abeaver’s nighttimeadventures.
w The Beaver FamilyBook by SybilleKalas and KlausKalas (North-South Books,1999). Large,close-up photos ofbaby beaverseating, playing, andsleeping will delightyoung readers.
wOne Very SmallSquare: BusyBeaver Pond byDonald M. Silverand Patricia J.Wynne (W. H.Freeman, 1995).Ingenious pop-ups,pull-outs, and flapshelp readers explorethe activity in abusy beaver pond.
R e s o u r c e s
Lift & Look Science Mini-Books and Manipulatives © Silver & Wynne, Scholastic Teaching Resources
2 1
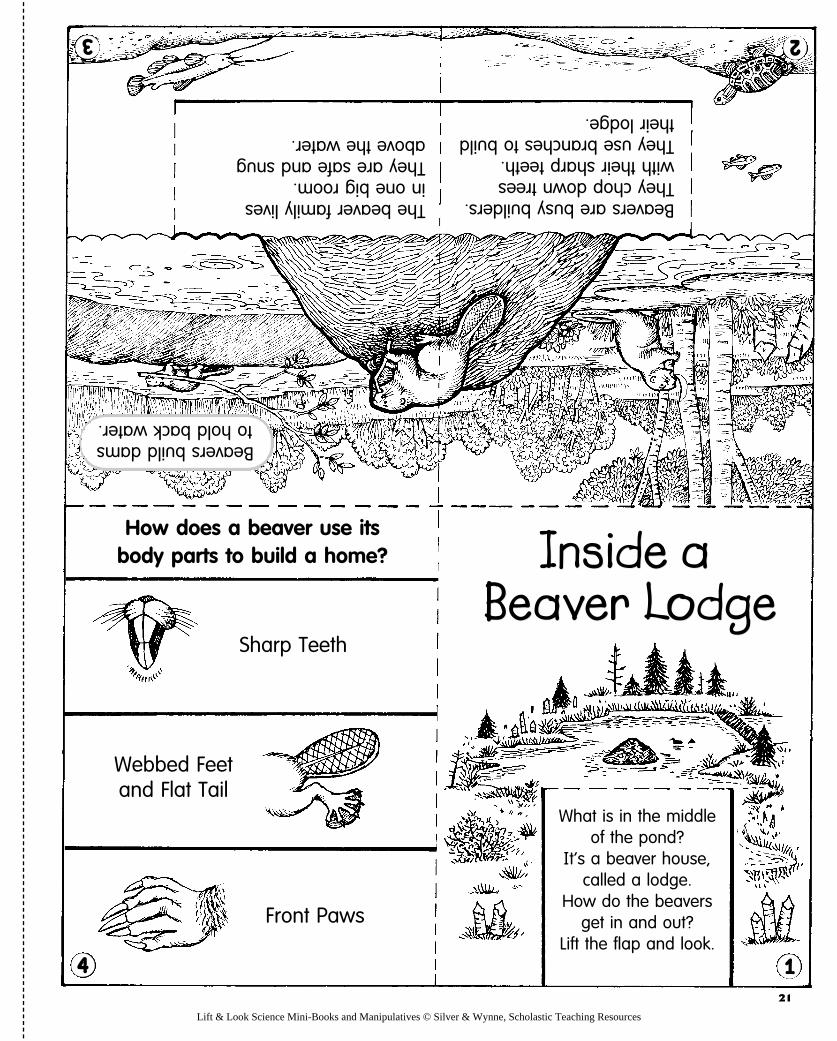
Inside aBeaver Lodge
Beavers are busy builders.They chop down trees with their sharp teeth.They use branches to buildtheir lodge.
The beaver family lives in one big room.They are safe and snugabove the water.
Beavers build damsto hold back water.
How does a beaver use its body parts to build a home?
Sharp Teeth
Webbed Feetand Flat Tail
Front Paws
What is in the middleof the pond?
It’s a beaver house,called a lodge.
How do the beaversget in and out?
Lift the flap and look.
Inside aBeaver Lodge
14
23Lift & Look Science Mini-Books and Manipulatives © Silver & Wynne, Scholastic Teaching Resources

2 2
Beavers enter and leave through an
underwater tunnel.
A beaver's webbedfeet and flat tail helpit swim as it carriessticks to its lodge.
A beaver's frontpaws help itpick up sticksto build with.
A beaver's front teethcan cut down trees.
Lift & Look Science Mini-Books and Manipulatives © Silver & Wynne, Scholastic Teaching Resources
P L A N T S
1 Make a double-sided photocopy of pages 25 and 26. Or use the arrows toalign single pages as exactly as possible and glue them back to back.
2 With the question side (outside) faceup, cut out the six-section piece alongthe solid black lines.
3Turn the piece over so you can see the animals. Fold the book’s six sections,or “petals,” toward the center along the dotted line. (The order does not
matter.)
4 Turn the book over so that the title, PLANT HELPERS, is on top.
2 3
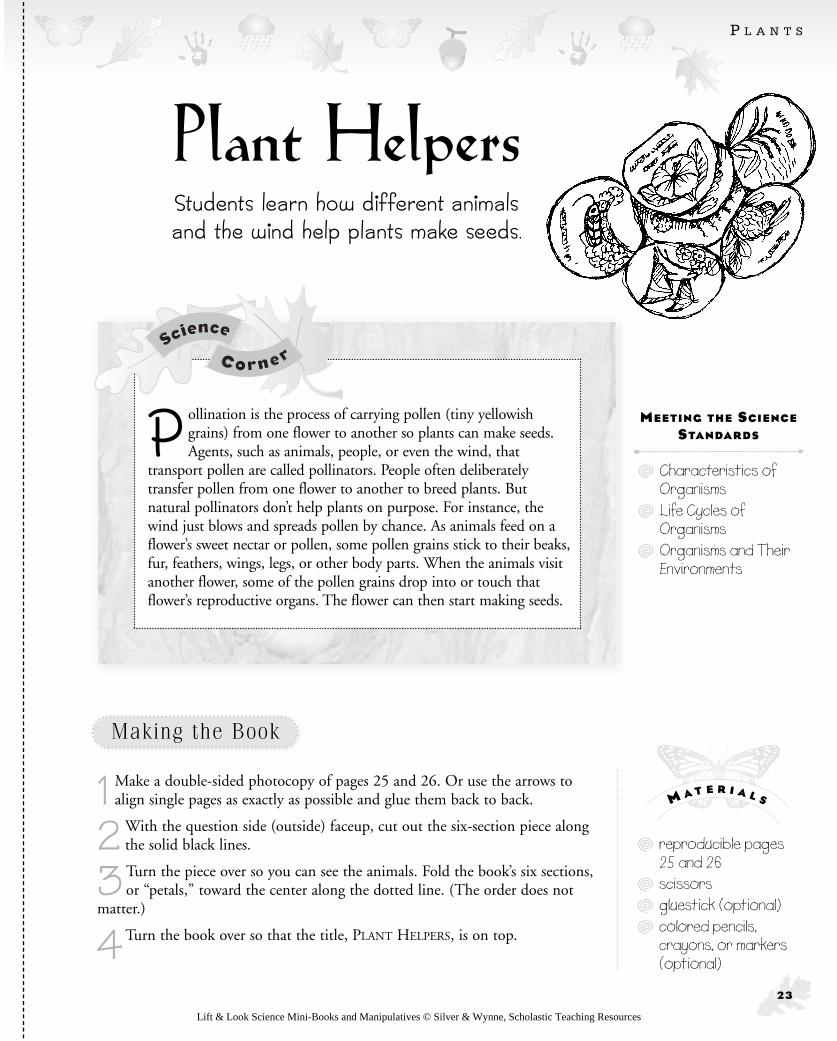
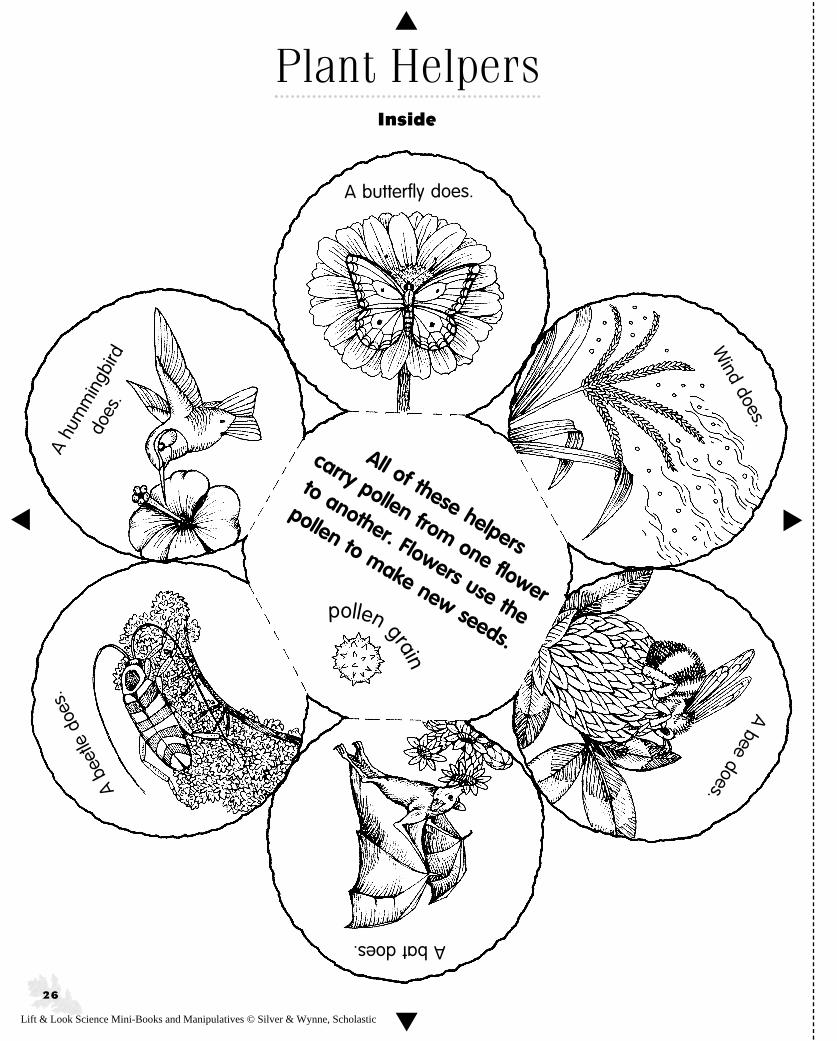
Pollination is the process of carrying pollen (tiny yellowishgrains) from one flower to another so plants can make seeds.Agents, such as animals, people, or even the wind, that
transport pollen are called pollinators. People often deliberatelytransfer pollen from one flower to another to breed plants. Butnatural pollinators don’t help plants on purpose. For instance, thewind just blows and spreads pollen by chance. As animals feed on aflower’s sweet nectar or pollen, some pollen grains stick to their beaks,fur, feathers, wings, legs, or other body parts. When the animals visitanother flower, some of the pollen grains drop into or touch thatflower’s reproductive organs. The flower can then start making seeds.
Plant HelpersStudents learn how different animals and the wind help plants make seeds.
{ reproducible pages25 and 26
{ scissors{ gluestick (optional){ colored pencils,
crayons, or markers(optional)
M A T E R I A L S
Making the BookMaking the Book
{ Characteristics ofOrganisms
{ Life Cycles ofOrganisms
{ Organisms and TheirEnvironments
MEETING THE SCIENCE
STANDARDS
Lift & Look Science Mini-Books and Manipulatives © Silver & Wynne, Scholastic Teaching Resources

P L A N T S
1 Bring in different kinds of seeds, such as apple, pumpkin, and orange, andshow them to students. Ask: “What do you think these are? Where do you
think seeds come from?” (fruits or cones) Explain to students that fruits comefrom flowers, and flowers make seeds that can grow into new plants.
2 Invite students to color and assemble their lift-and-look flap books. Whenreading their books, have students start on the title page and lift each flap.
3When students reach the book’s center, they will discover that plant helperscarry pollen grains from one plant to another. (The pollen grain shown is
greatly enlarged. In reality, most pollen grains can fit on the head of a pin.) Informstudents that flowers have male and female parts. Pollen grains are made in aflower’s male parts. The grains have to reach another flower’s female parts so theflower can form seeds. Explain that, for seeds to grow, pollen from one kind offlower must reach the same kind of flower. If pollen lands on a different kind offlower, nothing will happen.
4 Tell students that some plants don’t make their seeds in flowers. Pine treesand other conifers, for example, develop pollen and seeds inside cones. The
wind carries pollen from one pine tree to another.
What’s in a Flower?Bring in simple flowers, such astulips, apple blossoms, or lilies, andinvite students to take them apart.(Florists often provide slightly agedflowers for educational purposes atno charge.) Encourage students touse hand lenses to take a closerlook at a flower. Use the picture atright to point out a flower’s parts.
Take a cotton swab and touch the stamens to pick up some pollen. (NOTE:Some students may be allergic to pollen and should not get it on their fingers orbreathe it in.) Explain to students that most flowers do not self-pollinate. Theirstamens are separate from and often lower than the pistil.
Traveling SeedsLike pollen, seeds need help to reach good growing grounds. Some seeds mayhitch a ride on animals or people, while others may blow in the wind or float onwater. Give students each a popcorn kernel and tell them that this is their seed.Challenge students to create something that would help their seed travel at leastfive feet away. Provide materials such as paper, string, cotton balls, and glue.
2 4
Teaching With the BookTeaching With the Book
More to DoMore to Do
w The Reason for aFlower by RuthHeller (Grosset &Dunlap, 1983).Meet variouspollinators thathelp flowers makeseeds by spreadingtheir pollen.
w The Tiny Seed byEric Carle (Simon &Schuster, 1987).Several seeds arecarried by theautumn wind todifferent growinggrounds.
R e s o u r c e s
Stamensare stalksthat holdpollen.
The pistil isthe stalk onwhich pollenmust fall sothat a flowercan makeseeds.
Sepalsprotectthe flower.
Petals attractinsects and otherpollinators with theircolors and patterns.
Lift & Look Science Mini-Books and Manipulatives © Silver & Wynne, Scholastic Teaching Resources
2 5
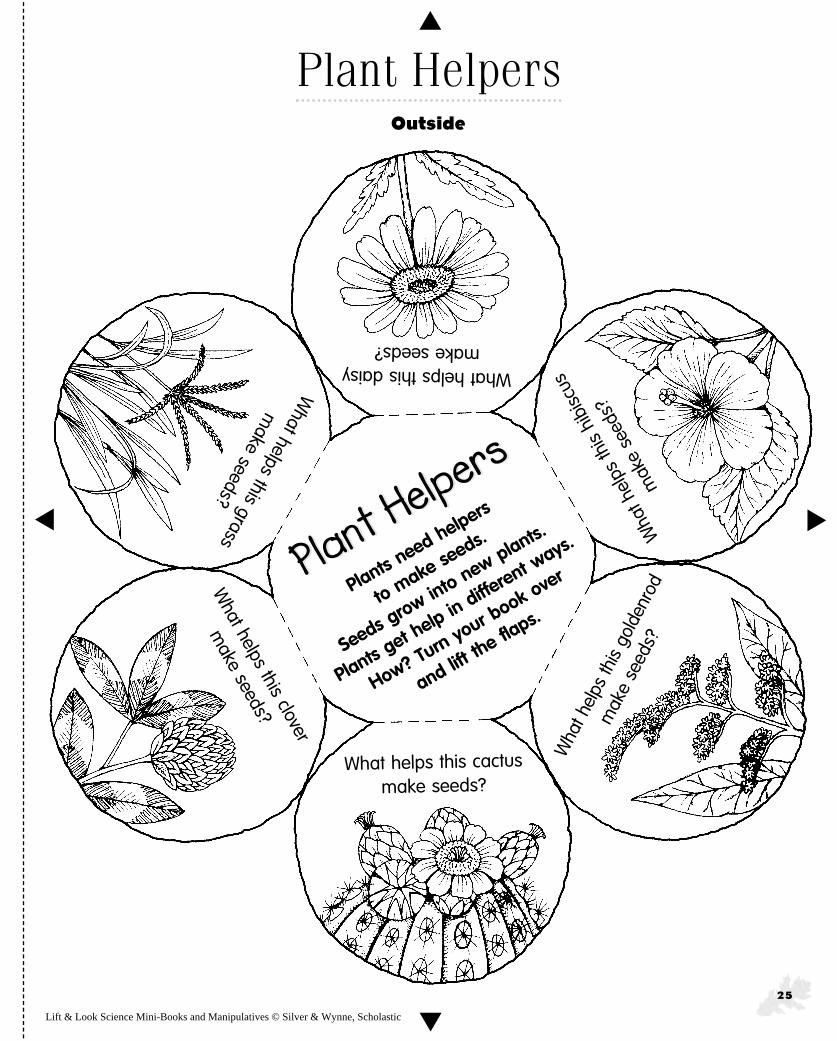
Plant HelpersOutside
Plants
need he
lpers
to make
seeds.
Seeds g
row int
o new
plants.
Plants
get hel
p in diffe
rent w
ays.
How? T
urn yo
ur book
over
and lift th
e flaps.
Plant Helpers
Plant HelpersW
hat helps this grass
make seeds?
What helps this clover
make seeds?
What helps this cactus
make seeds?
Wha
t hel
ps th
is go
lden
rod
mak
e se
eds?
W
hat h
elps
this
hibi
scus
mak
e se
eds?
What helps this daisy make seeds?
sss
s
Lift & Look Science Mini-Books and Manipulatives © Silver & Wynne, Scholastic
sss
s
2 6
Plant HelpersInside
All of these helpers
carry pollen from one flower
to another. Flowers use the
pollen to make new seeds.
A bat does.A bee does.
Wind does.
A butterfly does.
A hu
mm
ingb
ird
does
.A
beet
le d
oes.
pollen grain
Lift & Look Science Mini-Books and Manipulatives © Silver & Wynne, Scholastic

P L A N T S
1 Make a double-sided photocopy of pages 29and 30. Or use the arrows to align single
copies as exactly as possible and glue themtogether back to back.
2 Cut along the heavy black line on page 29.Place the grown oak tree (page 30) faceup
on a flat surface.
3 Fold page 30 in half along the dottedlines as shown. Then fold the leaf
sides together into the center.
4 Fold at the center so that the title,GROW AN OAK TREE, faces you.
2 7
Most people think of acorns as ordinary nuts. But acorns areactually fruits that contain seeds from which oak treesgrow. Acorns drop from oak trees before the leaves fall in
autumn. Those seeds that are not eaten by squirrels and otheranimals have a chance of sprouting. When a seed begins to sprout,a root splits open the acorn’s hard shell and pushes its way into theground. The root branches out and soaks up water from theground. Soon the plant’s stem and leaves grow toward the sun.Leaves make food for the plant using energy from the sun, carbondioxide from the air, and water from the soil. It takes many yearsfor an acorn to turn into a fullgrown oak tree.
Grow an Oak TreeAs students unfold this book, they discover how
a giant oak tree grows from a tiny acorn.
{ reproducible pages29 and 30
{ scissors{ gluestick (optional){ colored pencils,
crayons, or markers(optional)
M A T E R I A L S
Making the BookMaking the Book
{ Characteristics ofOrganisms
{ Life Cycles ofOrganisms
MEETING THE SCIENCE
STANDARDS
Grow anOak Tree
Grow anOak Tree
Lift & Look Science Mini-Books and Manipulatives © Silver & Wynne, Scholastic Teaching Resources

P L A N T S
5 Fold the two ends in along thedotted lines so that they meet at
the center crease as shown.
6 Press down firmly and fold at thecenter crease again so that the title
is on top of the lift-and-look book.
1 Ask students: “What’s the biggest tree you’ve ever seen? How big was it?”Explain that most trees, no matter how big, grow from small seeds. Although
most trees grow slowly, some can eventually reach heights of 50 to 100 feet.
2 Invite students to color and assemble their books. To read their book,students open the folds in stages, as shown.
3As students unfold their book, ask them to describe what they see on eachpage. Ask: “What has changed?” Have students identify and label the
different parts of the tree as they appear.
4 Inform students that acorns are also food for many animals, includingsquirrels. These animals gather the nuts that fall on the ground and store
them for winter. Some squirrels may bury the acorns, then retrieve them later.Ask students: “What do you think might happen if a squirrel forgets where itburied an acorn?” (The acorn might grow into a new oak tree.)
Home, Tree, HomeFind a tree on the school grounds or in the park. Invite students to search forsigns of animals that live in and around the tree. For example, do they see fallenleaves, acorns, or seeds on the ground that have been munched by squirrels,chipmunks, or other animals? Bring along hand lenses so that children cancheck the tree bark for crawling creatures or for holes in which beetles may live.Challenge them to search for scratches on bark left by animals in search ofseeds, fruits, and other food on the branches. Also encourage students to lie onthe ground and look up for bird nests, squirrels, or other tree life. Suggest thatthey listen for sounds, too, such as buzzing or chirping.
2 8
w The Gift of theTree by AlvinTresselt (Lothrop,Lee & Shepard,1992). Whathappens after atree dies?Students learnthat even after anoak tree dies, itcan still provideshelter to manyanimals.
w The Tree byGallimard Jeunesseand Pascale DeBourgoing(Scholastic, 1992).Transparent pagesadd to the charmof this book thatfollows a treethrough all itsstages of life andthrough thechanging seasons.
R e s o u r c e s
Teaching With the BookTeaching With the Book
More to DoMore to Do
Grow anOak Tree
Grow anOak TreeGrow anOak Tree
Grow anOak Tree
Lift & Look Science Mini-Books and Manipulatives © Silver & Wynne, Scholastic Teaching Resources

sss
s
2 9
34
Grow anOak Tree
Plant an acorn.
See it sprout.
(Open)
Give it water and watch it growinto an oak tree.
oak leaves fall.In autumn,
Grow anOak Tree
1
2Ü
Ü
Ü
Ü
Lift & Look Science Mini-Books and Manipulatives © Silver & Wynne, Scholastic

sss
s
3 0
When it is warm, flowers grow.They make seeds that can growinto new oak trees.
Flowers
Acorn
OakTree
5
Lift & Look Science Mini-Books and Manipulatives © Silver & Wynne, Scholastic

H A B I T A T S
1 Photocopy pages 33 and 34. Cut out the patterns along the outer solid blacklines. Then cut off the text strips at the edge of each sheet along the solid
black lines.
2 Fold the remaining parts of each patternalong the center dotted lines.
3Cut along the solid black lines on the DAY
and NIGHT pattern (page 33) to open thesix flaps.
3 1
Ahabitat is a place where a community of animals and plantslive together and depend on one another for survival. Somehabitats, such as backyards and parks, are small, whereas
others, such as rain forests and oceans, are huge. Regardless of itssize, a habitat contains all the essential things organisms need tosurvive. Plants make their own food using energy from the sun. Inturn, some animals eat plants to get energy, and some animals eatother animals. Rain provides water for both plants and animals.Breathable oxygen is everywhere. Rocks, trees, and even soilprovide homes and shelter for animals.
The Backyard BookStudents identify daytime and nighttime animals
that live in the backyard or park.
{ reproducible pages33 and 34
{ scissors{ tape{ colored pencils,
crayons, and markers(optional)
M A T E R I A L S
Making the BookMaking the Book
{ Characteristics ofOrganisms
{ Life Cycles ofOrganisms
{ Organisms and TheirEnvironments
MEETING THE SCIENCE
STANDARDS
Lift & Look Science Mini-Books and Manipulatives © Silver & Wynne, Scholastic Teaching Resources

H A B I T A T S
4 Tape the DAYTIME IN THE
BACKYARD text strip to the bottomof the INSIDE (DAY) pattern as shown.
5Repeat on the other side with theNIGHTTIME IN THE BACKYARD
text strip.
6 Place page 33 on top of page 34 so that thearrows on each page are aligned. Tuck each side
behind the taped text strips.
7 Tape the sheets together around the edges. Becareful not to tape down a flap.
1 Ask students to think about animals they’ve seen in their backyard or localpark. Ask: “What were the animals doing?” Make a list on the chalkboard.
2 Challenge students to think about what backyard animals need to stay alive.(Animals need food, water, air to breathe, and safe places to hide, sleep, and raise
their young.) List students’ responses on the board. Explain to students that a habitatis a place where animals and plants live and can find all the things they need tosurvive. Ask students: “What habitats can you think of ?” (forests, parks, lakes, and soon) Inform students that their own backyard or local park is a habitat, too.
3 Invite students to color, assemble, and read their lift-and-look flap books.Then ask: “What do you think the animals you see in the daytime do at
night?” (go to sleep) Explain to students that, like people, many animals are activeduring the day and rest at night. But other animals do just the opposite: Theysleep during the day and scurry about at night in search of food. When studentslift the flaps on the day scene, they will see where night creatures hide by day.Flaps on the night scene reveal where day creatures sleep.
Use Your SensesHow do nighttime animals find their way about in the dark? Turn off the lights inyour classroom or have children close their eyes. Ask: “When you can’t see verywell, which senses tell you what’s going on around you?” (hearing, smell, and touch)Inform students that bats emit high-frequency sounds to locate objects. Thesesounds bounce off different things and echo back to a bat’s ears. These echoes tell abat where it is safe to fly and where a moth or other tasty insect can be found. Havestudents research how other nighttime animals use their senses in the dark.
3 2
wOne Very SmallSquare: Nighttimein My Backyardby Donald M. Silverand Patricia J.Wynne (W. H.Freeman, 1994).Earthworms, bats,and other nocturnalanimals literally popoff the pages.Flaps, wheels, andpull-tabs add tothe fun and thelearning.
wOver in the Meadowby John Langstaff(Harcourt Brace,1985). Meetdifferent animalfamilies that maketheir home in ameadow.
wStep Into theNight by JoanneRyder (Macmillan,1988). A young girlobserves a fireflyflashing for a mate,a mouse in searchof food, and othercreatures in herbackyard thatcome out whendarkness falls.
R e s o u r c e s
Teaching With the BookTeaching With the Book
More to DoMore to Do
Lift & Look Science Mini-Books and Manipulatives © Silver & Wynne, Scholastic Teaching Resources

3 3
The butterfly sips sweet nectar
from a flower.
The little lizard sunsitself to keep warm.
A bat swoops down to catch a moth.
Firefliesblinktheir
lights onand off.
The earthworm lifts a leaf to eat.
The squirrel looks for a nut.
Day
Night
here are the creatures that com
e out at night?Lift the flaps and see.
WWThe backyard looks very busy.Lots of anim
als are hungry.
Daytime in the BackyardDaytime in the Backyard
Lift & Look Science Mini-Books and Manipulatives © Silver & Wynne, Scholastic Teaching Resources

3 4
here are the animals
that come out during the day?
Lift the flaps and find out.
WWThe sun has set. It is night.A
nimals hunt by the light of the m
oon.
Nighttime in the BackyardNighttime in the Backyard
The squirrel sleeps in its nest.
Inside (Night)
Inside (Day)
The lizard spendsthe night under a
pile of leaves.
The butterfly hideson a plant.
The bat sleepsin a tree hole.
The earthworm rests in itsunderground tunnel.
Fireflies hidein the grass.
Lift & Look Science Mini-Books and Manipulatives © Silver & Wynne, Scholastic Teaching Resources
H A B I T A T S
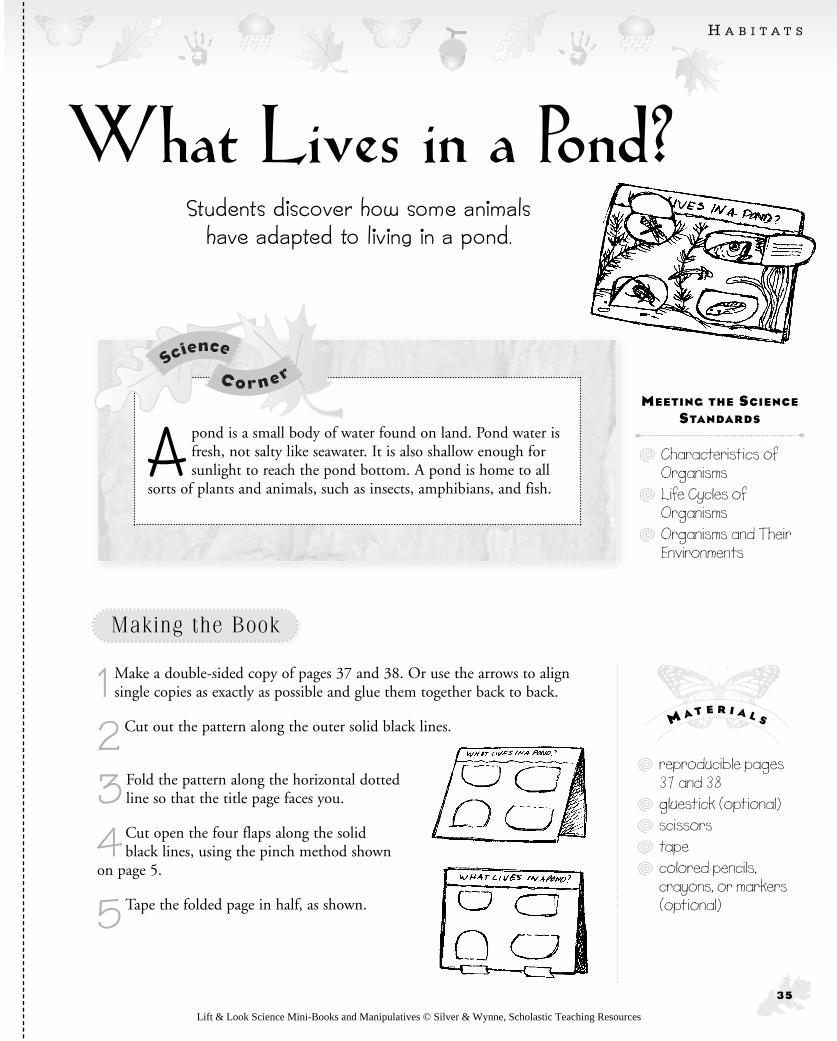
1 Make a double-sided copy of pages 37 and 38. Or use the arrows to alignsingle copies as exactly as possible and glue them together back to back.
2 Cut out the pattern along the outer solid black lines.
3 Fold the pattern along the horizontal dottedline so that the title page faces you.
4Cut open the four flaps along the solidblack lines, using the pinch method shown
on page 5.
5Tape the folded page in half, as shown.
3 5
Apond is a small body of water found on land. Pond water isfresh, not salty like seawater. It is also shallow enough forsunlight to reach the pond bottom. A pond is home to all
sorts of plants and animals, such as insects, amphibians, and fish.
What Lives in a Pond?Students discover how some animals
have adapted to living in a pond.
{ reproducible pages37 and 38
{ gluestick (optional){ scissors{ tape{ colored pencils,
crayons, or markers(optional)
M A T E R I A L S
Making the BookMaking the Book
{ Characteristics ofOrganisms
{ Life Cycles ofOrganisms
{ Organisms and TheirEnvironments
MEETING THE SCIENCE
STANDARDS
Lift & Look Science Mini-Books and Manipulatives © Silver & Wynne, Scholastic Teaching Resources
H A B I T A T S
1 Find out how many students have seen a pond. Ask: “Where have you seen apond? What did it look like? What lives in it?”
2 Invite students to color and assemble their lift-and-look flap book.
3Have students read the questions on the flaps one at a time. Encouragethem to lift the flap and try to figure out the answer by looking at the
picture first. Then have them read the text on the underside of the flap.
4Challenge students to think of other things that live in a pond, such asplants like water lilies and animals like salamanders.
Indoor PondIf you don’t have a nearby pond for the class to visit, make one right in your ownclassroom. Set up a small wading pool on top of a plastic tarp in one corner ofyour classroom. Fill the pool with about three inches of tap water and let it sit for24 hours. Collect two buckets of pond water, including the bottom muck, floatingplants, sticks, and rocks. Empty the buckets into the pool and let the water settlefor a couple of days. Invite children to look for aquatic life in your indoor pond.Help them use plastic spoons to turn over rocks and sticks. Have students keep ascience journal to record their observations. After about a week, return thecontents of the pool to an outdoor pond.
A Frog’s LifeDraw students’ attention to the tadpole picture in their books and then to thefrog under the flap. Challenge them to think about how a tadpole changes as itbecomes an adult frog—for example, a tadpole loses its tail, grows legs, and soon. Explain that a frog is an amphibian—a vertebrate (animal with a backbone)that has no hair, scales, feathers, or claws. It usually lives the first part of its lifein water and the rest on land. Frogs lay eggs in water. The eggs hatch intotadpoles that live underwater. Within a few weeks, tadpoles metamorphose, orchange, into adult frogs that live on land. Have students draw a picture of thethree stages in a frog’s life (egg, tadpole, adult). Invite them to find out how atadpole and a frog breathe.
3 6
w In the Small, Small Pondby Denise Fleming(Henry Holt, 1993).Brightly coloredillustrations andsimple textintroduce youngreaders to ponddwellers thatchange fromseason to season.
wOne Small Square:Pond by Donald M.Silver and PatriciaJ. Wynne (Freemanand Co., 1994).Readers take alook at a pond andits inhabitants, onesmall section at atime.
w Pond Seasonsby Sue A. Alderson(Publishers GroupWest, 1997).Through poems andevocative watercolorillustrations,readers explore theseasonal changesthat occur in apond.
R e s o u r c e s Teaching With the BookTeaching With the Book
More to DoMore to Do
Lift & Look Science Mini-Books and Manipulatives © Silver & Wynne, Scholastic Teaching Resources

sss
s
3 7
What Lives in a Pond?Tk
What will happen to the tadpole?
How does a diving beetle
breathe underwater?
What left this empty skin on the
plant?
What does a mudminnow hunt?
What Lives in a Pond?
Lift & Look Science Mini-Books and Manipulatives © Silver & Wynne, Scholastic

sss
s3 8
It will growinto a frog.
It hunts formosquitoes or
tadpoles to eat.
It’s a grown-updragonfly ready
to fly away.
It carries an air bubble when it dives.
Lift & Look Science Mini-Books and Manipulatives © Silver & Wynne, Scholastic
H A B I T A T S
3 9
If you could drain the water from the world’s oceans, you wouldsee towering mountains and deep canyons on the ocean floor.Extending hundreds of miles from the seashore is the continental
shelf, the shallowest part of the ocean. Even though it makes uponly 10 percent of the ocean floor, the continental shelf providesmost of the fish we eat. Tiny one-celled plants, calledphytoplankton, are the basis of the ocean’s food chain. These tinyplants make food using energy from sunlight. In turn, single-celledanimals eat phytoplankton. These animals are eaten by small fish,which are then eaten by larger fish, and so on.
About 300 feet below the surface, the ocean becomes very dim.Little sunlight can penetrate the water. Sharks and other large fishthat live here hunt in surface waters.
Sunlight cannot reach depths of 4,000 feet or more. Few animalscan live in the near-freezing waters above the deep-sea floor. Manyof the animals that live here produce their own light. There is littlefood available besides the bits and pieces of dead sea life that slowlydrift down from above.
Life in the SeaStudents find out how various animals
are adapted to living in different layers of the sea.
{ reproducible page 41{ scissors{ colored pencils,
crayons, or markers (optional)
{ blue cellophane orblue tissue paper andtape (optional)
M A T E R I A L S
Making the BookMaking the Book
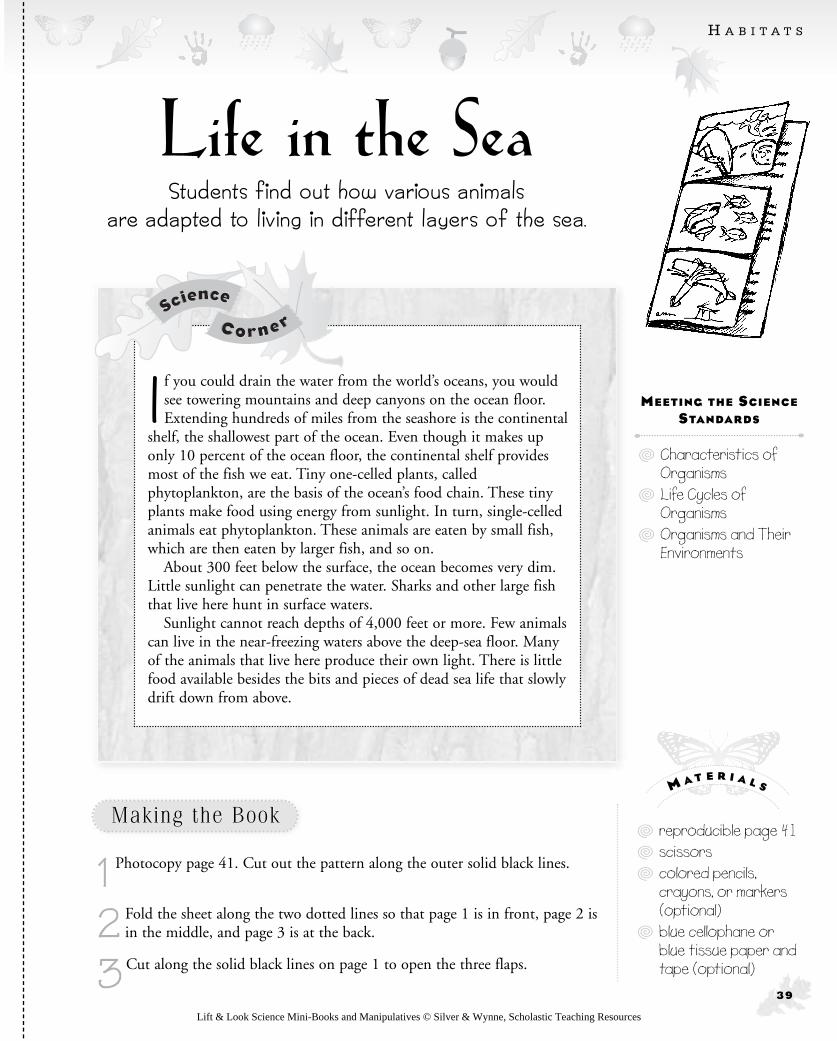
1 Photocopy page 41. Cut out the pattern along the outer solid black lines.
2 Fold the sheet along the two dotted lines so that page 1 is in front, page 2 isin the middle, and page 3 is at the back.
3Cut along the solid black lines on page 1 to open the three flaps.
{ Characteristics ofOrganisms
{ Life Cycles ofOrganisms
{ Organisms and TheirEnvironments
MEETING THE SCIENCE
STANDARDS
Lift & Look Science Mini-Books and Manipulatives © Silver & Wynne, Scholastic Teaching Resources
H A B I T A T S
4 OPTIONAL: Tape a piece of blue cellophane or blue tissue paper over theDARKNESS zone on page 1 to indicate that no sunlight reaches those depths.
1 Introduce the lesson by displaying a map of the world. Ask students: “Is theearth mostly land or water?” (Water covers more than two thirds of the earth.)
2Have students describe what they know about the ocean. List key words onthe chalkboard, such as waves, fish, saltwater, tides, and so on.
3Ask: “What kinds of animals live in the sea?” Make a list on the board.Explain that some sea animals live near the ocean’s surface, while others live
in the deepest, darkest parts of the ocean. The ocean gets deeper as the distancefrom land increases. In some places, the ocean is more than five miles (eightkilometers) deep.
4 Invite students to color, assemble, and read their lift-and-look flap books.
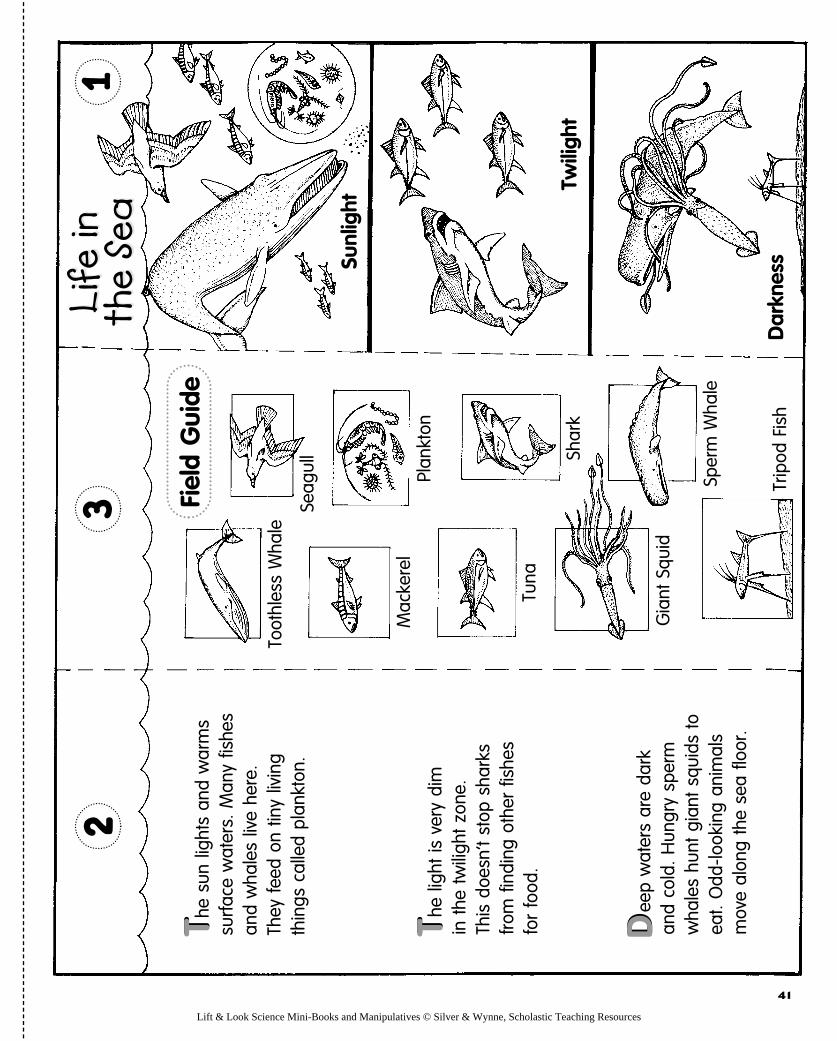
5As they read the first page, students will learn that the ocean has threelayers, or zones: sunlight, twilight, and darkness. Invite students to open each
flap to read about each zone. Then challenge them to identify and label thedifferent creatures they see in each zone, using the Field Guide on page 3.
What Is It?To classify means to put things into groups. One way to classify sea life isaccording to where in the ocean it lives. Challenge students to come up withother ways to classify sea life. For instance, big or small animals; floaters,swimmers, crawlers, or flyers; and so on. Help students research and report onan animal that lives in the sea. Students should try to find out what kind ofanimal it is (fish, mammal, mollusk, and so on), what it eats, how it moves, andso on. Based on students’ reports, encourage the class to brainstorm more waysto classify sea life. Draw a Venn diagram on the chalkboard, and invite studentsto group their animals in each circle.
Web of LifeWhether on land or at sea, plants and animals are part of a food chain—anarrangement of organisms according to the order in which each uses the next asa food source. Using the animals featured in their books, students can try toidentify the various food chains in the ocean. Students may draw arrows toindicate which animal eats which.
4 0
w Commotion in theOcean by GilesAndreae (LittleTiger Press, 1998).Colorful illustrationsintroduce variousanimals that live indifferent parts ofthe sea.
w I Wonder Why theSea Is Saltyby Anita Ganeri(Kingfisher, 1995).This vividlyillustrated bookgives simpleanswers tochildren’s questionsabout the bottomof the sea, waves,the fastest fish,and other oceanwonders.
w The Magic SchoolBus on the OceanFloor by JoannaCole (Scholastic,1992). The Friz andher class dive intothe ocean to learnabout animal andplant life, a coralreef, and much more.
R e s o u r c e s
Teaching With the BookTeaching With the Book
More to DoMore to Do
Lift & Look Science Mini-Books and Manipulatives © Silver & Wynne, Scholastic Teaching Resources
4 1
Life
in
the
Sea
Life
in
the
Sea
Sunl
ight
Twili
ght
Dar
knes
s
he s
un li
ghts
and
war
ms
surfac
e w
ater
s. M
any
fishe
san
d w
hale
s liv
e he
re.
They
fee
d on
tin
y liv
ing
thin
gs c
alle
d pl
ankt
on.
he li
ght is
ver
y di
m
in the
tw
iligh
t zo
ne.
This
doe
sn’t
stop
sha
rks
from
fin
ding
oth
er fis
hes
for
food
.
eep
wat
ers
are
dark
an
d co
ld. H
ungr
y sp
erm
wha
les
hunt
gia
nt s
quid
s to
eat.
Odd
-look
ing
anim
als
mov
e al
ong
the
sea
floor
.
Fiel
d G
uide
Toot
hles
s W
hale
Mac
kere
lPl
ankt
on
Shar
k
Tuna
Gia
nt S
quid
Sper
m W
hale
Trip
od F
ish
Seag
ull
TT TT DD
12
3
Lift & Look Science Mini-Books and Manipulatives © Silver & Wynne, Scholastic Teaching Resources

1 Photocopy page 44. Cut out the two patterns along the outer solid blacklines.
2 Turn the large piece over and fold down the two top flaps as shown. Next,fold in page 2. Then fold the title page over page 2.
4 2
What’s Inside a Tooth?Students explore the different parts of a tooth.
Teeth aid in digestion by crushing food into small pieces. Atooth’s outer layer, the enamel, is the hardest material in thehuman body. Dentin, the layer beneath the enamel, is hard
as bone and protects the soft pulp. Blood vessels and nerves threadthrough the pulp and extend to the tooth’s root. The root, whichlies under the gums, anchors the tooth in a socket in the jawbone.Natural cement and tough cords called ligaments also help hold thetooth in place.
{ reproducible page 44{ scissors{ tape{ colored pencils or
crayons (optional)
M A T E R I A L S
Making the BookMaking the Book
T H E H U M A N B O D Y
{ Characteristics ofOrganisms
{ Personal Health
MEETING THE SCIENCE
STANDARDS
Lift & Look Science Mini-Books and Manipulatives © Silver & Wynne, Scholastic Teaching Resources

3Open the book and tape the INSIDE ROOT pattern under the dentin.
1 Ask students: “Why do you think your teeth are important?” (Teeth chew andbreak down food into small pieces that can be swallowed and digested easily.)
2Have students describe their teeth. Ask: “Are all of your teeth the same?”(no) “How are they different?” (Some teeth are sharp, while others have a flat,
broad surface.) Encourage students to draw pictures of the different shapes ofteeth.
3 Invite students to color, assemble, and read their tooth books.
4 Turn students’ attention to the back of the book. Explain that the pictureshows 32 adult teeth. Young children start out with 20 temporary, or baby,
teeth. At about age six or seven, baby teeth start to fall out and permanent teethemerge. Permanent teeth include eight incisors—four upper and four lowerfront teeth—for biting, slicing, and cutting food. Four pointed canines orcuspids next to the incisors tear food. Eight premolars and eight molars at theback grind, crush, and chew food.
5Ask students: “Why is it so important to brush your teeth?” (Brushing helpsprevent cavities and keeps teeth healthy.) The extension activity below shows you
how to use the book to explain to students what a cavity is and how it develops.
Save Those TeethMake your own tooth book and hold it up in front of the class. Inform studentsthat everyone has bacteria—tiny living things made up of one cell—in his or hermouth. Some bacteria stick to teeth and form a film, called plaque, near the gumand between teeth. Bacteria need sugar to grow and multiply. As bacteria multiply,they produce acids that eat away at tooth enamel. Take a pair of scissors and cut alittle hole in the crown of the tooth in your book. Explain that the hole is a cavity,formed when acid wears down enamel. Cut the hole a little bigger, then a littlebigger, to show that bacteria are multiplying. Open your book and show how thecavity is making its way toward the dentin. If the cavity reaches the nerves, thetooth will ache. If bacteria get into the blood vessels, they may cause an infection.Inform students that regular brushing and flossing help keep cavity-formingbacteria away.
4 3
T H E H U M A N B O D Y
Teaching With the BookTeaching With the Book
More to DoMore to Do
wArthur’s Toothby Marc Brown(Little, Brown, 1987).All of Arthur’sclassmates havelost at least one oftheir baby teeth.So when is Arthur’scoming out?
wHow Many Teeth?by Paul Showers(HarperCollins,1991). Find out howmany teeth babies,toddlers, kids, andadults have, thensee how permanentteeth replace babyteeth.
R e s o u r c e s
Lift & Look Science Mini-Books and Manipulatives © Silver & Wynne, Scholastic Teaching Resources

4 4
Wha
t’s
Insi
de
a To
oth?
Your
mou
th is
ful
l of te
eth.
Each
too
th s
its in
you
r gu
ms.
You
can
see
a to
oth’
s cr
own
abov
e th
e gu
ms.
You
have
diff
eren
tki
nds
of tee
th.
Teet
h w
ith s
harp
edg
esbi
te a
nd c
ut foo
d.
Poin
ty tee
th tea
r fo
od.
Flat
tee
th in
the
bac
kch
ew a
nd g
rind
food
.
A too
th’s
out
er la
yer
is h
ard
enam
el.
A too
th’s
roo
t is
in y
our
jaw
bone
.Under the enam
el is hard dentin.
Below the dentin
is soft pulp.
Inside the pulp are a tooth’s bloodvessels and nerves.
Enam
el
Jaw
bone
Grin
der
Tear
erG
um
Cro
wn
Root
Cut
ter
Wha
t’s
Insi
de
a To
oth?
PulpD
entin
Blood Vessels
and Nerves
Inside Root
23
4Ü
Lift & Look Science Mini-Books and Manipulatives © Silver & Wynne, Scholastic Teaching Resources

1 Make a double-sided photocopy of pages 47 and 48, orglue single pages back to back. The heads of the figure
on both sides should be at the top of the page.
2 Cut along the solid black line at the top of the page.
3 Fold back and forth along the dotted lines so thatpage 1 is on top and page 5 is underneath.
1 Have students lift their arms out to their sides. Ask students: “What helpedyou raise your arms?” (muscles and bones) Have students flex their arms to feel
their muscles. Ask: “Can you feel your bones?”
4 5
The human body consists of several systems that work togetherto perform specific functions. The skeletal system consists ofbones that support the body and protect various organs. The
muscular system allows the body to move. The brain, spinal cord,and nerves make up the nervous system—the body’s control andcommunications center—which coordinates the different systems.
The Body BookStudents learn how the different systems
of the human body function.
{ reproducible pages47 and 48
{ gluestick (optional){ crayons, colored
pencils, or markers(optional)
M A T E R I A L S
Making the BookMaking the Book
T H E H U M A N B O D Y
Teaching With the BookTeaching With the Book
{ Characteristics ofOrganisms
{ Personal Health
MEETING THE SCIENCE
STANDARDS
Lift & Look Science Mini-Books and Manipulatives © Silver & Wynne, Scholastic Teaching Resources

2Now have students feel their ribs and watch their ribs as they breathe in andout. Ask: “What do you think is under your ribs?” (heart and lungs) Inform
students that the ribs protect important organs.
3 Invite students to color, assemble, and read their lift-and-look book.
4 As they read their books, encourage students to feel their own muscles andbones. When they get to page 3, ask: “What bone is between your ribs and
hipbone?” (backbone) Explain to students that while bones protect the brain,heart, and lungs, only layers of muscles protect the abdomen.
5Have students draw a line from each body part on page 5 to its correct place inthe body on page 4. Ask students: “What do you think each body part does?”
w BRAIN: thinks and remembers; controls the way the body works
w HEART: pumps blood to all parts of the body
w LUNGS: breathe air; take in fresh oxygen and get rid of carbon dioxide waste
w STOMACH: helps break down food
w LIVER: stores sugar; removes harmful materials from the blood
w INTESTINES: small intestine completes the breakdown of food and absorbsnutrients; large intestine absorbs water and gets rid of solid undigestedfood wastes
Working TogetherDivide the class into groups of three or four. Assign each group a different bodysystem (muscular, skeletal, brain and nervous, respiratory, heart and circulatory,and digestive). Help each group research and find out what each system doesand how it works. Ask: “Does the system work alone or does it need help fromother systems to do its job?” Encourage students to create a book or chart topresent their findings to the class. They may wish to draw or cut out picturesfrom newspapers and magazines. Invite each group to share their findings withthe class.
Hard HeadThe skull protects the most important organ in the body—the brain. Cut outenough cups from egg cartons so that each student gets one. This is their “skull.”Give each student two small balls of clay. Tell them that the clay represents theirbrain. Have students put one ball in a plastic sandwich bag, the other in the eggcup. Use a small piece of cardboard and tape to seal the cup. Have students carryboth their “brains” in their book bags for one day. The following day, have studentstake out their “brains.” What happened to each one? (Most likely, the clay in theplastic bag will be crushed, while the one in the egg cup will retain its original shape.)Discuss with students the importance of wearing a helmet when biking or skating.
4 6
T H E H U M A N B O D Y
wAmazing Pull-OutPop-Up Body in aBook by DavidHawcock (DorlingKindersley, 1997).Students will lovethis nine-pagefoldout that turnsinto a five-foot-tallskeleton completewith flaps thatreveal inner organs.
w The Magic SchoolBus Inside theHuman Bodyby Joanna Cole(Scholastic, 1989).Unpredictable Ms.Frizzle takes herstudents on a wildride throughdifferent parts of areal person’s body.
wScience Fact File:Inside the HumanBodywww.imcpl.lib.in.us/nov_ind.htmThis Web siteincludes basic factsand images aboutthe major bodysystems.
R e s o u r c e s
More to DoMore to Do
Lift & Look Science Mini-Books and Manipulatives © Silver & Wynne, Scholastic Teaching Resources

4 7
Wha
t is
und
er y
our
skin
? Yo
ur m
uscl
es.
They
hel
p yo
ur b
ody
mov
e.
Wha
t is
und
er y
our
mus
cles
? Yo
ur b
ones
. Th
ey h
old
you
up
and
give
you
r bo
dy s
hape
.
Wha
t is
und
er y
our
bone
s?
Your
bra
in, lu
ngs,
and
the
res
t of
you
r or
gans
. Th
ey h
elp
you
thin
k,br
eath
e, a
nd m
ore!
.
43
2
The Body Book
Lift & Look Science Mini-Books and Manipulatives © Silver & Wynne, Scholastic Teaching Resources

4 8
The Body BookW
hat covers your body? Your skin.
It protects the inside of your body.
Can you find
each of these body parts on page 4?
Bra
inLungs
Liver
Stomach
IntestinesH
eart
51
The Body Book
The Body Book
Lift & Look Science Mini-Books and Manipulatives © Silver & Wynne, Scholastic Teaching Resources

1 Photocopy pages 51 and 52. Cut out the patterns along the outer solid blacklines.
2 Cut along the solid black lines on the title page (page 51) to open the flaps.
3Fold both patterns alongthe center dotted lines.
Slide folded page 2 inside thefolded title page.
4 9
Clouds form when water vapor (water in its gaseous state)condenses around specks of dust and forms tiny waterdroplets. When the droplets come together and grow large
enough, they fall as rain or snow. Clouds are grouped according totheir shape and altitude. Puffy, white, fair-weather clouds are calledcumulus. Low, gray clouds are called stratus, or nimbostratus ifthey bring rain. (Nimbus means “rain” or “rain cloud.”) Toweringthunderclouds are called cumulonimbus. These clouds produceviolent storms with lightning, thunder, strong winds, heavy rain,and sometimes hail. Different cloud types signal weather conditionsfairly consistently. However, when making forecasts, meteorologistsalso consider wind direction, the presence of warm and cold fronts,temperature, barometric pressure, humidity, and how cloudschange over time.
What Will theWeather Be?Students learn about clouds and the weather they bring.
{ reproducible pages51 and 52
{ scissors{ tape{ cotton puffs
(optional){ paints and brushes{ glue (optional)
M A T E R I A L S
Making the BookMaking the Book
E A R T H A N D S K Y
{ Changes in the Earthand Sky
{ Objects in the Sky{ Properties of Earth
Materials
MEETING THE SCIENCE
STANDARDS
Lift & Look Science Mini-Books and Manipulatives © Silver & Wynne, Scholastic Teaching Resources

4 Tape all the sheets together in the middle asshown. Be careful not to tape down a flap.
5OPTIONAL: Glue cotton puffs over theclouds on the front side of the book. Paint
the clouds on the other side of the bookaccording to the description on the page.
1 Challenge students to think about how the weather affects their everydaylives. (The weather affects what they wear, what they do, and sometimes even
where they can go.) List students’ responses on the chalkboard.
2 Ask students: “How do you think people find out what the weather willbe?” (They look outside, listen to weather reports, read about the weather in
newspapers and on the Internet, and so on.) Explain to students that in the past,sailors and farmers have relied on cloud shapes and movements to tell themwhat the weather will be.
3 Invite students to color, assemble, and read their books.
4 Ask students: “Which of the clouds in your books have you seen recently?What was the weather like after you saw those clouds?”
5 Inform students that observing clouds is just one way to predict theweather. Meteorologists (weather scientists) use a variety of instruments,
such as barometers (which measure air pressure) and anemometers (whichmeasure wind speed), to predict the weather. But even with recent technologicaladvancements, including computers and high-tech radar, meteorologists stillcannot accurately predict the weather all the time.
Weather ReportHelp students create a cloud poster. On a large sheet of posterboard, create achart with five columns. Label the first column “DATE,” the second, “CLOUDS
WE SAW,” the third, “THE WEATHER RIGHT NOW,” the fourth, “OUR WEATHER
PREDICTION,” and the last column, “WHAT THE WEATHER WAS LIKE.” For thenext two weeks, take the class outdoors every morning to observe the sky. Whenthey return to the classroom, invite students to fill in the first four columns ofthe class chart. The next morning, have students fill in the fifth column. Howaccurate were students’ weather predictions, based on their cloud observations?
5 0
E A R T H A N D S K Y
w Cloudy With aChance ofMeatballsby Judith Barrett(Macmillan, 1982).This amusing taleof wacky weather issure to entertainchildren.
w Little Cloudby Eric Carle(Philomel, 1996).Follow theadventures of asmall cloud for aquick and easylesson on thewater cycle.
w The Weather Skyby Bruce McMillan(HarperCollins,1991). Though thetext is above level,fabulous close-upphotos of differenttypes of cloudsmake this book astandout.
R e s o u r c e s
Teaching With the BookTeaching With the Book
More to DoMore to Do
Lift & Look Science Mini-Books and Manipulatives © Silver & Wynne, Scholastic Teaching Resources

5 1
What W
ill theW
eather Be?Look for clouds. They can help you m
ake a prediction.
Pred
ictio
nPr
edic
tion
PredictionN
o clouds
Low
, gr
ay c
loud
s th
at c
over
the
sky
G
iant
, hi
gh, da
rkcl
ouds
with
thu
nder
and
light
ning
Patchy, fluffy w
hite clouds
Prediction
What W
ill theW
eather Be?3
Lift & Look Science Mini-Books and Manipulatives © Silver & Wynne, Scholastic Teaching Resources

5 2
SunnyCha
nce
of r
ain
or s
now
Cha
nce
of a
thun
ders
torm
Fair weather
42
Lift & Look Science Mini-Books and Manipulatives © Silver & Wynne, Scholastic Teaching Resources

5 3
Volcanoes erupt in different ways. The volcano in the lift-and-look book explodes violently and shoots a fountain oflava into the air. (Note: Inside a volcano, hot, melted rock
and gases are called magma. When magma flows out of a volcano itis called lava.) As lava cools in the air, it can solidify into powderyash, chunky stones, and bowling-ball-size rocks known as volcanicbombs. Lava flowing down the sides of the volcano also hardensinto rock, adding a new layer that can make the volcano grow intoa mountain over time. Some volcanoes erupt and then lie dormantfor hundreds of years. Other volcanoes continuously erupt andspew lava but don’t explode violently.
Exploding VolcanoStudents make a flap book and observe what happens when a volcano explodes.
{ reproducible page 55{ scissors{ tape{ colored pencils,
crayons, or markers(optional)
{ tiny pebbles(optional)
{ glue (optional)
M A T E R I A L S
Making the BookMaking the Book
E A R T H A N D S K Y
1 Photocopy page 55. Cut out the three pieces along the solid black lines. Cutopen the flap along the solid black lines on the title page, too.
2 Fold page 2 along thedotted line. Place the
PULL HERE piece faceupbehind page 2 as shown.
3Fold the title page overpage 2 and tape as
shown.
{ Changes in the Earthand Sky
{ Properties of EarthMaterials
MEETING THE SCIENCE
STANDARDS
Tapehere
Pull Here Pull Here
Ü
Lift & Look Science Mini-Books and Manipulatives © Silver & Wynne, Scholastic Teaching Resources

4Open the flap on the title page and tape theremaining piece on the back of the flap so that you
can read it.
5OPTIONAL: Glue tiny pebbles on top of the smallround circles under the ash cloud on the PULL HERE
piece and on page 2 above the exploding volcano.
1 Find out if students have ever seen an exploding volcano in a movie or onTV. Invite students to describe what they remember most about volcanoes.
2 Inform students that a volcano is an opening in the earth’s rocky outer layer,or crust, where hot, melted rock can escape from inside the earth. Volcano
is also the name given to mountains that build up around such openings.
3 Invite students to color and assemble their lift-and-look flap book. Ifstudents glued tiny pebbles to their book, point out that they represent the
lava that cooled and hardened into rock.
4 Students should read their books as follows: first, the text at the bottom ofthe PULL HERE piece, then the text on the inside of the flap.
5Have students compare the volcano before and after the explosion. Ask:“What do you notice about the volcano after the explosion?” (The cone-
shaped top of the mountain is gone.) Explain to students that when a volcano“blows its top,” the bowl-shaped pit that is left is called a crater.
6On the back of their book, invite students to draw a picture or write asentence that tells something they learned about volcanoes.
Magma on the MoveDemonstrate for students how magma under pressure pushes out of the groundthrough a volcano. Place a half-full tube of toothpaste (with the cap on) on adesk. Ask students to imagine that the tube is the surface of the earth. Thetoothpaste inside is the hot, melted magma underground. Distribute thetoothpaste evenly in the tube. Then use a pin to make a tiny hole near thebottom. Ask students what the hole might represent. (a volcano’s opening) Pressdown on the tube near the cap. Ask students what this action might represent.(magma under pressure) What happens? (The magma oozes out of the volcano.)
5 4
E A R T H A N D S K Y
Teaching With the BookTeaching With the Book
w The Magic SchoolBus Blows Its Topby Joanna Cole(Scholastic, 1996).Ms. Frizzle’sstudents witnessan eruptingunderwater volcano,which gives birth toa new island.
w Volcanoesby Seymour Simon(Mulberry Books,1995). Not allvolcanoes look likemountains—someare just plain holesin the ground.Includes pictures ofvolcanoes fromaround the world.
R e s o u r c e s
More to DoMore to Do
Lift & Look Science Mini-Books and Manipulatives © Silver & Wynne, Scholastic Teaching Resources

5 5
Exploding Volcano
This mountain is a volcano. Inside are hot, melted rock and gases, called magma. Magma can make a volcano explode.Pull this piece up, then lower the flap.
The volcano explodes.Hot, melted rock shoots up into the air.It is now called lava.When lava cools, it canharden into chunks of rockthat fall to the ground.
Exp
lod
ing
Volc
ano
Exp
lod
ing
Volc
ano
Pull Here
2
Cut
out
Lift & Look Science Mini-Books and Manipulatives © Silver & Wynne, Scholastic Teaching Resources

1 Make a double-sided photocopy of pages 59 and 60. Or use the arrows toalign single copies as exactly as possible and glue them together back to back.
2 Cut out the patterns along the outer solid black lines.
3 Cut the flaps along the solid black lines, using the pinch method shown onpage 5.
5 6
How Are the Seasons Changing?Students investigate what some animals do
during each season.
Earth is tilted about 23.5 degrees on its axis. As Earthrevolves around the sun, parts of the globe are tilted towardthe sun, while others are tilted away. This is why we
experience seasons. Places in Earth’s mid to high latitudesexperience four seasons because these are where the greatest changesin sunlight and temperature occur. To survive in these areas,animals need to be able to adapt to the changing seasons. Forexample, some animals migrate to warmer climates when wintercomes, while others hibernate. In the spring migrating animalsmove back to their feeding grounds, where the food supply isplentiful during the warm season.
{ reproducible pages59 and 60
{ scissors{ tape{ gluestick (optional){ colored pencils,
crayons, or markers(optional)
M A T E R I A L S
Making the BookMaking the Book
E A R T H A N D S K Y
{ Changes in the Earthand Sky
{ Objects in the Sky
MEETING THE SCIENCE
STANDARDS
How Arethe Seasons
Changing?
Lift & Look Science Mini-Books and Manipulatives © Silver & Wynne, Scholastic Teaching Resources
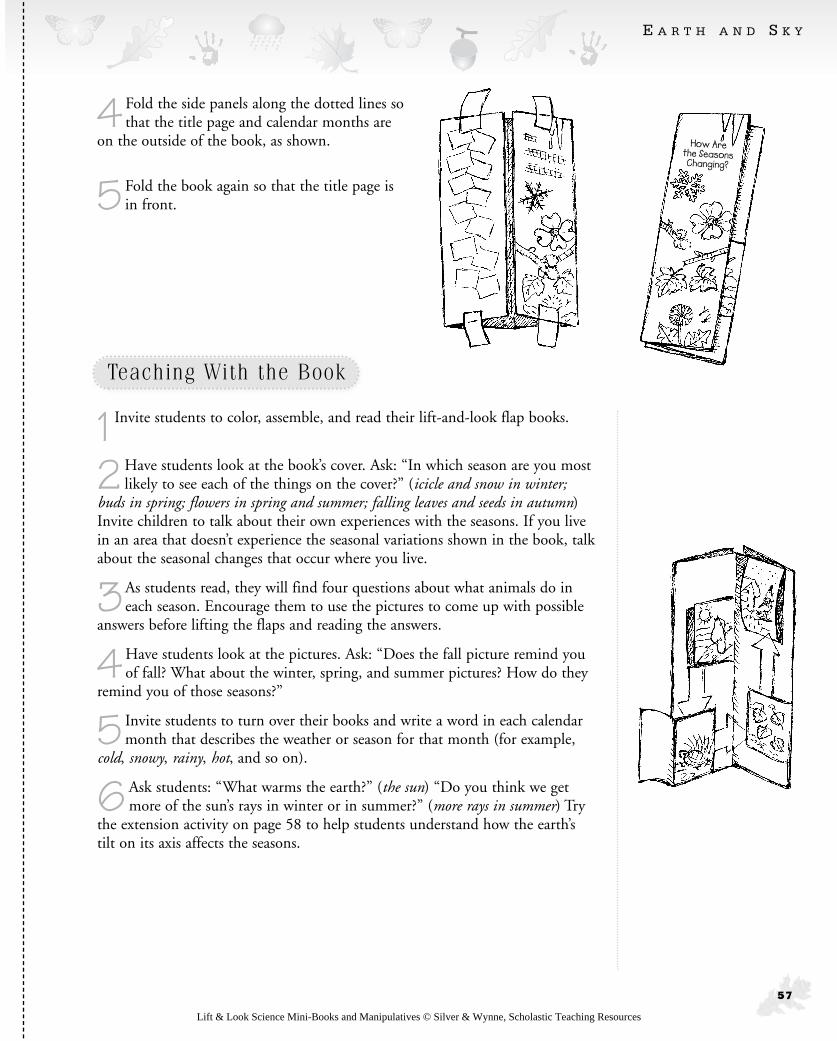
4 Fold the side panels along the dotted lines sothat the title page and calendar months are
on the outside of the book, as shown.
5 Fold the book again so that the title page isin front.
1 Invite students to color, assemble, and read their lift-and-look flap books.
2Have students look at the book’s cover. Ask: “In which season are you mostlikely to see each of the things on the cover?” (icicle and snow in winter;
buds in spring; flowers in spring and summer; falling leaves and seeds in autumn)Invite children to talk about their own experiences with the seasons. If you livein an area that doesn’t experience the seasonal variations shown in the book, talkabout the seasonal changes that occur where you live.
3As students read, they will find four questions about what animals do ineach season. Encourage them to use the pictures to come up with possible
answers before lifting the flaps and reading the answers.
4Have students look at the pictures. Ask: “Does the fall picture remind youof fall? What about the winter, spring, and summer pictures? How do they
remind you of those seasons?”
5 Invite students to turn over their books and write a word in each calendarmonth that describes the weather or season for that month (for example,
cold, snowy, rainy, hot, and so on).
6 Ask students: “What warms the earth?” (the sun) “Do you think we getmore of the sun’s rays in winter or in summer?” (more rays in summer) Try
the extension activity on page 58 to help students understand how the earth’stilt on its axis affects the seasons.
5 7
E A R T H A N D S K Y
Teaching With the BookTeaching With the Book
How Arethe SeasonsChanging?
Lift & Look Science Mini-Books and Manipulatives © Silver & Wynne, Scholastic Teaching Resources

The Tilt That CountsPush a pencil through the center of an orange. Place a lamp without a shade onyour desk. Inform students that the orange represents the earth, and the lamp,the sun. Turn on the lamp and darken the classroom. Hold the orange at anangle and slowly walk around the lamp. Explain that the earth travels oncearound the sun every year. Have students focus on the lit part of the orange.Point out that sometimes the top half of the orange is tilted toward the lampand sometimes it is tilted away. Then there are other times when the top half istilted neither toward nor away from the lamp. When the top half (or northernhemisphere) of the earth is tilted toward the sun, it is summer there. At thebottom half (or southern hemisphere), which is tilted away from the sun, it iswinter. When their positions are reversed, it is winter in the northernhemisphere and summer in the southern. When neither half is tilted toward oraway from the sun, it is either spring or autumn. Ask: “What season is it whenthe northern hemisphere of the earth is tilted away from the sun?” (winter)
Temperature, Anyone?Bring in a large outdoor thermometer to show your class. Inform students that athermometer is a tool that measures temperature. Temperature tells how warmor cold the air is. Teach students how to read temperature on a thermometerusing either the Fahrenheit or Celsius scale, or both. For a fun way to tracktemperature, use a zipper that is the same size as your thermometer. Glue thezipper onto a piece of oaktag, then write the degree numbers along the side.Invite children to zip or unzip the “thermometer” according to the temperaturereading that day. Explain to students that as seasons change, so does the outdoortemperature. When days become consistently warmer or cooler, it is anindication that the seasons are changing.
5 8
E A R T H A N D S K Y
More to DoMore to Do
w The Reason forSeasonsby Gail Gibbons(Holiday House,1995). Clear,colorful illustrationsand simple textexplain the sciencebehind the fourseasons.
wWhen It Starts to Snowby Phillis Gershator(Henry Holt, 1998).As winterapproaches,different animalsprepare for thecoming snow invarious ways.
wWhen Will It Be Spring?by CatherineWalters (Dutton, 1997).A little bear,reluctant to settledown for a longwinter’s nap, thinkshe sees signs ofspring.
R e s o u r c e s
Lift & Look Science Mini-Books and Manipulatives © Silver & Wynne, Scholastic Teaching Resources

sss
s 5 9
How
Are
the
Seas
ons
Chan
ging
?
t’s s
prin
g.
Day
s ar
e ge
tting
war
mer
.W
hat do
es the
rob
in d
o?
It’s
aut
umn.
Th
e da
ys a
re g
ettin
g co
oler
.W
hat do
es
the
squi
rrel
do?
It’s
win
ter.
Brrr
! It’s
col
d.W
here
is the
chip
mun
k?
It’s
sum
mer
and
it’s
hot
.W
here
is the
tur
tle?
IIHo
w A
reth
e Se
ason
sCh
angi
ng?
Lift & Look Science Mini-Books and Manipulatives © Silver & Wynne, Scholastic
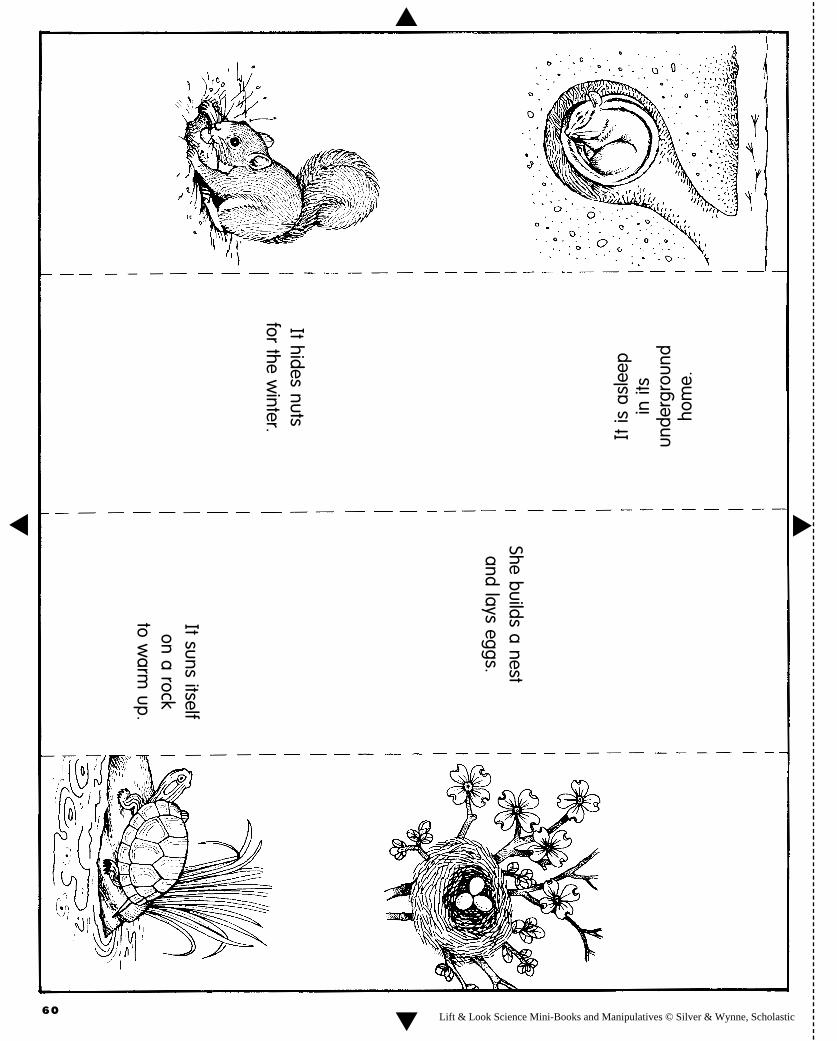
sss
s6 0
She builds a nestand lays eggs.
It hides nuts for the w
inter.
It is
asl
eep
in it
s un
derg
roun
dho
me.
It suns itself on a rock
to warm
up.
Lift & Look Science Mini-Books and Manipulatives © Silver & Wynne, Scholastic
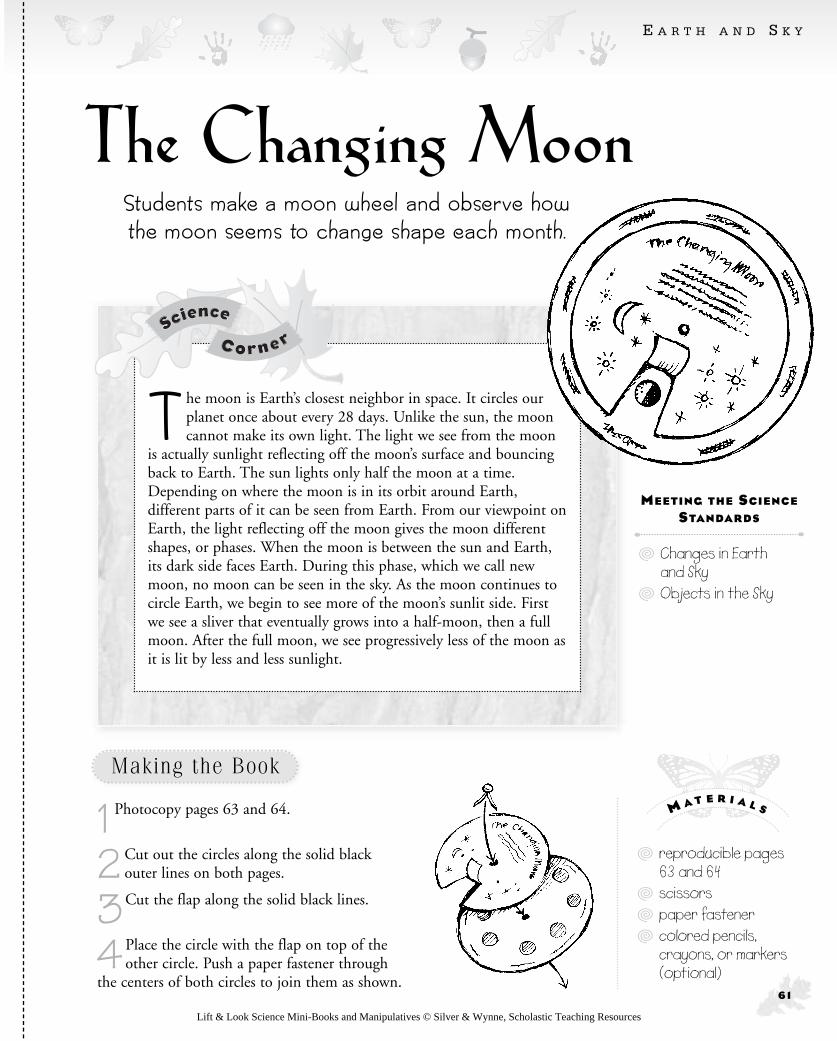
1 Photocopy pages 63 and 64.
2 Cut out the circles along the solid blackouter lines on both pages.
3Cut the flap along the solid black lines.
4 Place the circle with the flap on top of theother circle. Push a paper fastener through
the centers of both circles to join them as shown. 6 1
The moon is Earth’s closest neighbor in space. It circles ourplanet once about every 28 days. Unlike the sun, the mooncannot make its own light. The light we see from the moon
is actually sunlight reflecting off the moon’s surface and bouncingback to Earth. The sun lights only half the moon at a time.Depending on where the moon is in its orbit around Earth,different parts of it can be seen from Earth. From our viewpoint onEarth, the light reflecting off the moon gives the moon differentshapes, or phases. When the moon is between the sun and Earth,its dark side faces Earth. During this phase, which we call newmoon, no moon can be seen in the sky. As the moon continues tocircle Earth, we begin to see more of the moon’s sunlit side. Firstwe see a sliver that eventually grows into a half-moon, then a fullmoon. After the full moon, we see progressively less of the moon asit is lit by less and less sunlight.
The Changing MoonStudents make a moon wheel and observe how the moon seems to change shape each month.
{ reproducible pages63 and 64
{ scissors{ paper fastener{ colored pencils,
crayons, or markers(optional)
M A T E R I A L S
Making the BookMaking the Book
E A R T H A N D S K Y
{ Changes in Earth and Sky
{ Objects in the Sky
MEETING THE SCIENCE
STANDARDS
Lift & Look Science Mini-Books and Manipulatives © Silver & Wynne, Scholastic Teaching Resources

1 Invite students to draw what the moon looked like the last time they saw it.Have students hold up their drawings and compare them. If all students drew
only one phase of the moon (for example, full moon), draw other phases(crescent or quarter moon) on the chalkboard and ask if anyone has ever seen themoon look like those shapes. Ask students: “Why do you think the moon seemsto change shape?” (Answers will vary. Children may think that the moon actuallygrows and shrinks. The reason we see moon phases is a difficult concept for youngchildren to grasp. The goal of this activity is simply to have children observe how themoon changes. This will lay the foundation for a more complete understanding of thisconcept in later grades.)
2 Invite students to color and assemble their circle books.
3The book shows the moon’s phases over 28 days. Find out what phase themoon is in on the day your students make their books. (Check a calendar or
daily newspaper.) Then have students match the big arrow on the flap to the moon’spresent phase. Invite students to lift the flap to see what the moon looks like.
4 Let students study a calendar or daily newspaper that shows the phases ofthe moon. Have students compare the information in these sources with that
in their circle books. Challenge students to follow the moon cycle for the next 28days using their circle books.
Moon MatchPlace a ball on a desk and tell students that the ball represents the moon. Pretendto be the sun by shining a flashlight on the ball. Darken the classroom. Invitestudents to stand behind you and look at the ball. They will see that half of it islit. Have students slowly walk around the ball. The portion of the ball that is litwill change as they walk around it. Challenge them to match the lit shapes onthe ball to the changing shapes of the moon in their circle books.
Sizing Up the MoonWhen the full moon is low in the sky, it looks very big. Later, when it has movedhigher, the moon looks smaller. Does the moon change its size? Students can findout. On the next full moon, give each student a large paper clip. Help them openthe paper clip into a “V” shape. Tell students that soon after sunset, they shouldgo outside with an adult and find the moon. It should be low on the horizon.Have them hold the V up to the sky at arm’s length so that the moon is insidethe V. Bend the sides of the V so the moon fits inside. About two hours later,when the moon is higher in the sky, have students look at it again. Use the V tomeasure the moon again. Does it still fit inside?
6 2
E A R T H A N D S K Y
Teaching With the BookTeaching With the Book
More to DoMore to Do
w The Moon bySeymour Simon(Four Winds Press,1984). Clear,concise text anddramatic photosgive young readersa close-up look atthe moon and itsincredible features.
w The Moon Seemsto Changeby Franklyn M.Branley(HarperCollins,1987). Easy-to-readtext and simpleillustrations helpstudents explorethe science behindthe lunar cycle.
w The Nine Planetswww.seds.org/nineplanets/nineplanets/nineplanets.htmlInvite children to geta close-up look atthe moon, the sun,and the nineplanets.
w Papa, Please Getthe Moon for Meby Eric Carle(Simon & Schuster,1991). A young girlwho wants to playwith the moonmust wait for it toget smaller beforeher father can pluckit from the sky.
R e s o u r c e s
Lift & Look Science Mini-Books and Manipulatives © Silver & Wynne, Scholastic Teaching Resources

6 3
The Changing MoonTop Circle
The Changing MoonThe Changing MoonHave you seen the moon in the night sky?
Does it always look the same? Turn the circle and lift the flap.
The moon seems to change shape. It really doesn’t. You see only that part of the moon that is lit by the sun.
F LAP
Lift & Look Science Mini-Books and Manipulatives © Silver & Wynne, Scholastic Teaching Resources

6 4
The Changing MoonBottom Circle
New
Waxing
Crescent
First Quarter
Waxing
Gibbo
us
Full
Wan
ing
Gibbou
s
ThirdQuarter
Waning
Crescent
Lift & Look Science Mini-Books and Manipulatives © Silver & Wynne, Scholastic Teaching Resources