migrating course files from blackboard …. log into canvas and navigate to the course you wish to...
TRANSCRIPT

M I G RA TI N G COU RS E F I L ES FRO M B L A C KB O A RD TO C A N VA S
The steps presented in this document illustrate the recommended process for exporting course files
from Blackboard and importing course files into your Canvas course. This recommended process is not
for copying entire Blackboard courses into Canvas. Additionally, take note that storage and file upload
quotas for Canvas are as follows: (1) total course file storage is 500 MB and (2) maximum upload file
size is 50 MB. Here is a quick list of what the following steps will focus on in this process.
Steps 1 through 9 focus on exporting course files from Blackboard to your local desktop.
Step 10 simply recommends that you take an opportunity to create a logical folder structure to
reorganize your files for easy access.
Steps 11 through 20 focus on importing course files from the desktop to your Canvas course.
1. Log into Blackboard and navigate to the course you wish to export the course files for.
2. From the main course menu under the Course Management section, expand the Files option and
click on the link provided as illustrated below.
3. With your files displayed, scroll to the bottom of the page and click on the Show All button. If the
Show All button does not appear, then you are currently viewing all of your Blackboard course files.

4. Place a check mark in the “select all” box (A), then click on the Download Package button (B).
5. Choose the Save File option, then OK.

6. From the desktop, double-click on the Computer icon, click on the Downloads folder (A), and then
right-click on the imported zip file (B).

7. From the sub-menu select Extract All…

8. Click on the Extract button.
NOTE: You can also click on Browse to if you wish to select a specific location on your local
computer, such as the desktop or documents, to place your extracted files to.
9. As a result, you now have a folder on your local computer with the files exported from your
Blackboard course as shown below.
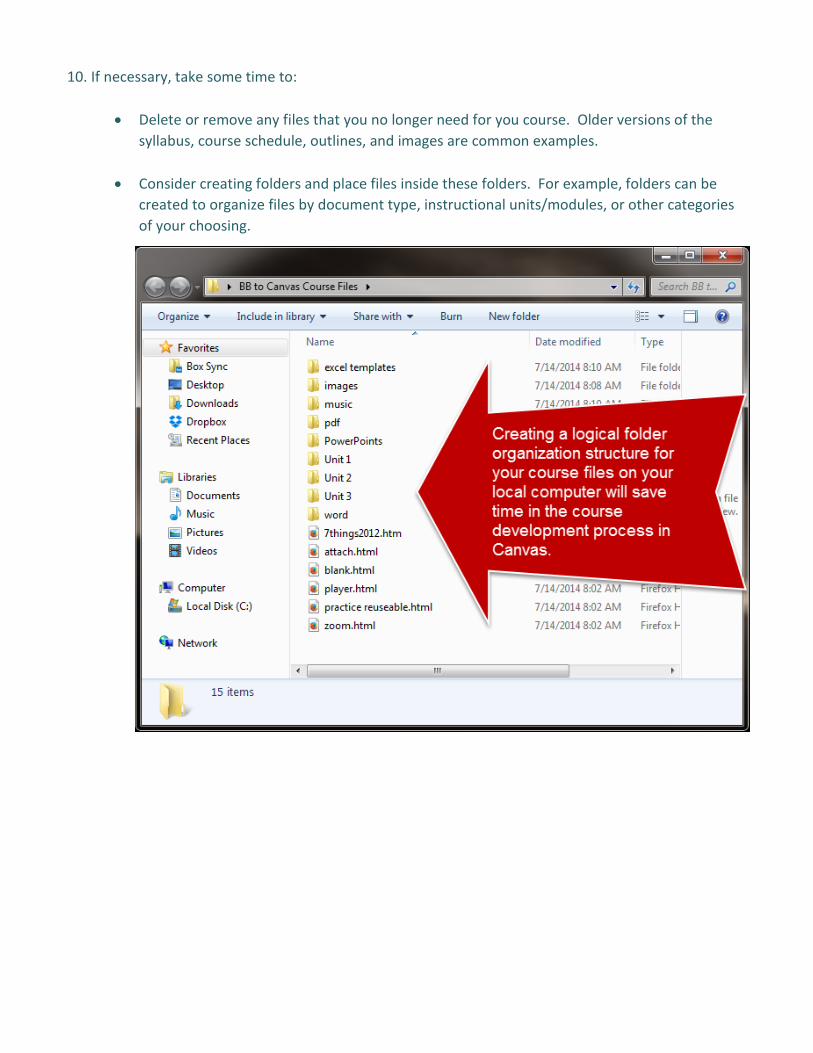
10. If necessary, take some time to:
Delete or remove any files that you no longer need for you course. Older versions of the
syllabus, course schedule, outlines, and images are common examples.
Consider creating folders and place files inside these folders. For example, folders can be
created to organize files by document type, instructional units/modules, or other categories
of your choosing.

11. Right-click on folder (A) containing your course files from Blackboard, select the Send to option (B),
and then click on the Compressed (zipped) folder option (C) as illustrated below.
12. As a result, a zip file has been created in the same location as the folder (i.e. on the desktop in this
example).

13. Log into Canvas and navigate to the course you wish to import the course files for.
14. From your main course navigation menu on the left side of the screen, click on Settings.
15. On the right side of the screen, click on Import Content into this Course.
16. Select the Unzip .zip file into folder option from the Content Type dropdown menu as shown below.
17. Click on the Browse button and navigate to your desktop and select the zip file created back in Step
#15.
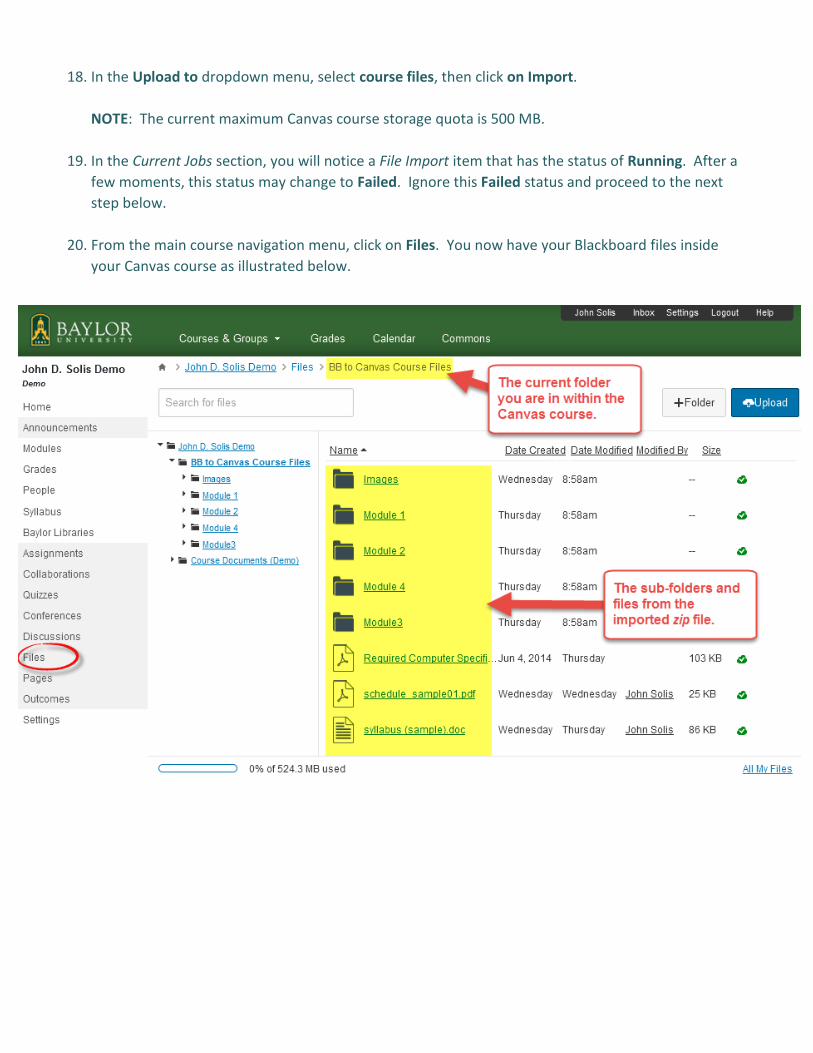
18. In the Upload to dropdown menu, select course files, then click on Import.
NOTE: The current maximum Canvas course storage quota is 500 MB.
19. In the Current Jobs section, you will notice a File Import item that has the status of Running. After a
few moments, this status may change to Failed. Ignore this Failed status and proceed to the next
step below.
20. From the main course navigation menu, click on Files. You now have your Blackboard files inside
your Canvas course as illustrated below.